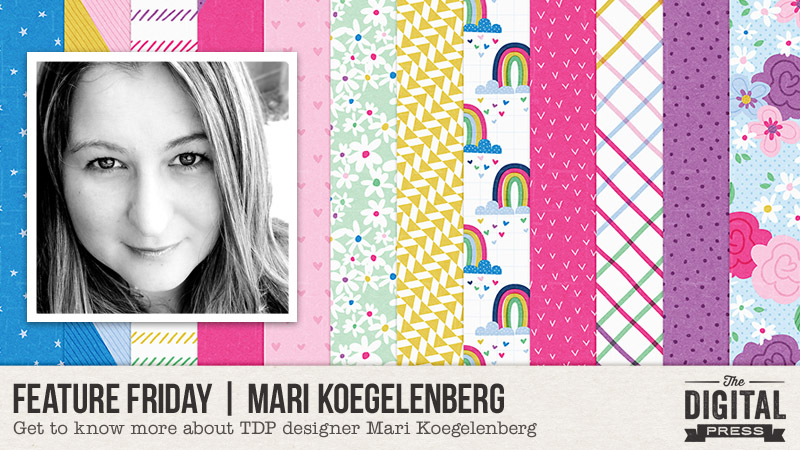
Feature Friday | Mari Koegelenberg

Happy Friday, everyone! It’s time for another edition of our Feature Friday series here on The Digital Press blog. This week, we’re excited to put the spotlight on the fantastically-talented Mari Koegelenberg! This is her fourth feature at TDP (you can find her first feature from October 2016 HERE, another from January 2017 HERE, and her Foodie Friday post from October 2017 HERE).

In order to learn a little bit more about Mari, we asked her to share 5 things about herself that we might not already know

  1. I am a Crazy Goat Lady* (or… replace goat with any of the following: duck/chicken/dog/cat or horse)! 🙂
  2. I am a Gamer — and a Huntmaster (my World of Warcraft Legion Main …although I might swap that title out with Deathlord since my pink-haired NELF is just as awesome).
  3. I am a Maker… a crafter, a baker, a designer, a gardener, a DIYer… creating keeps me sane and feeds my soul!
  4. I am a Collector (a.k.a. Hoarder? Embarrassing, yes… but true nonetheless… I do try, though, to keep organized and get rid of stuff!).
  5. I am a PRO-crastinator… emphasis on the PRO (I am really good at it!).

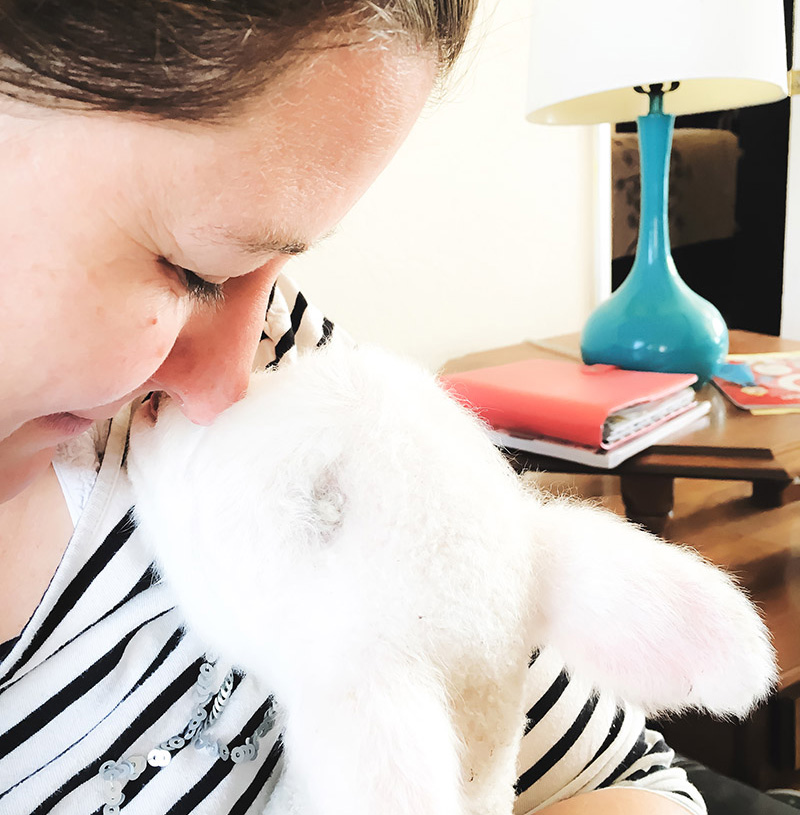
*here’s a look at Mari with one of her sweet animal friends from her family’s homestead farm…

When it comes to Mari’s design work… she loves color, and she says that it is what drives both the mood and themes of her collections. She also loves to sketch and draw, and you’ll find her amazing original illustrations in just about all of her products. Not only does Mari use this artwork to create fantastic digital scrapbooking kits, digital and hybrid planner supplies, and pocket-style scrapping items… she also has some really amazing cutting files in her shop, as well, which will help you make some stunning dimensional paper goodies!

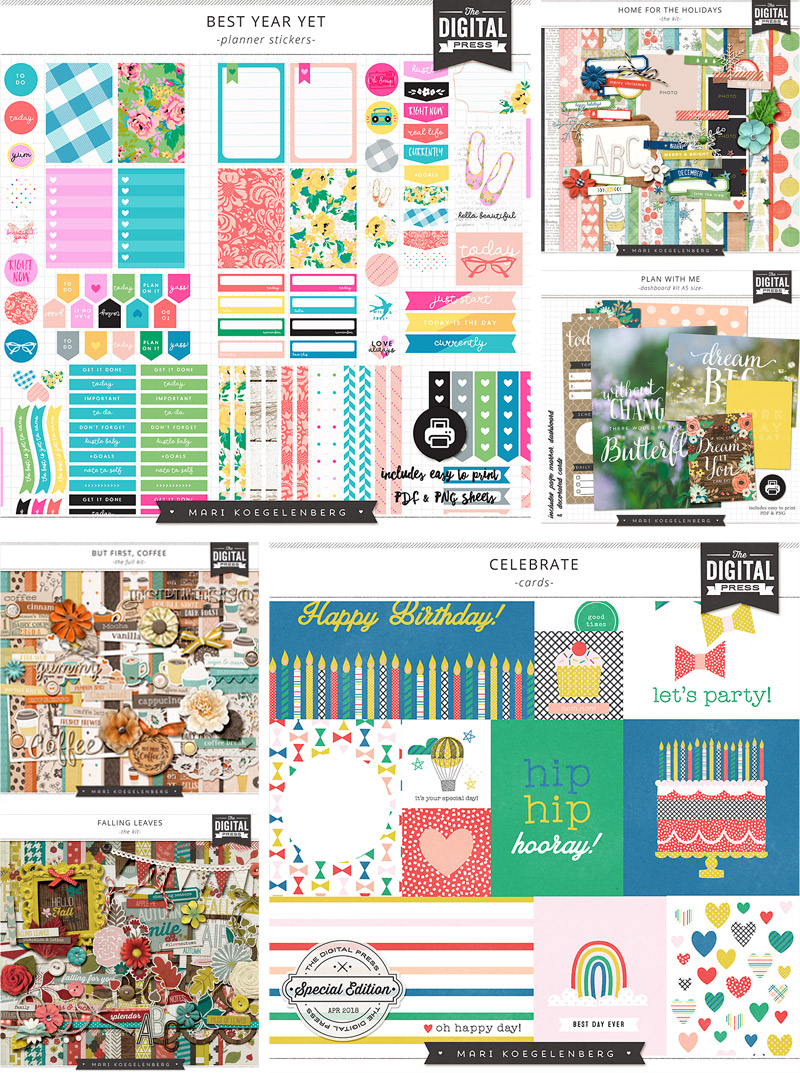
Here is a sampling of some of our favorite items from the Mari Koegelenberg Creations shop here at TDP

Aren’t her products just amazing? It’s pretty much a given that you can always turn to Mari’s shop and find just the right item for any project! And it’s all so adorable!

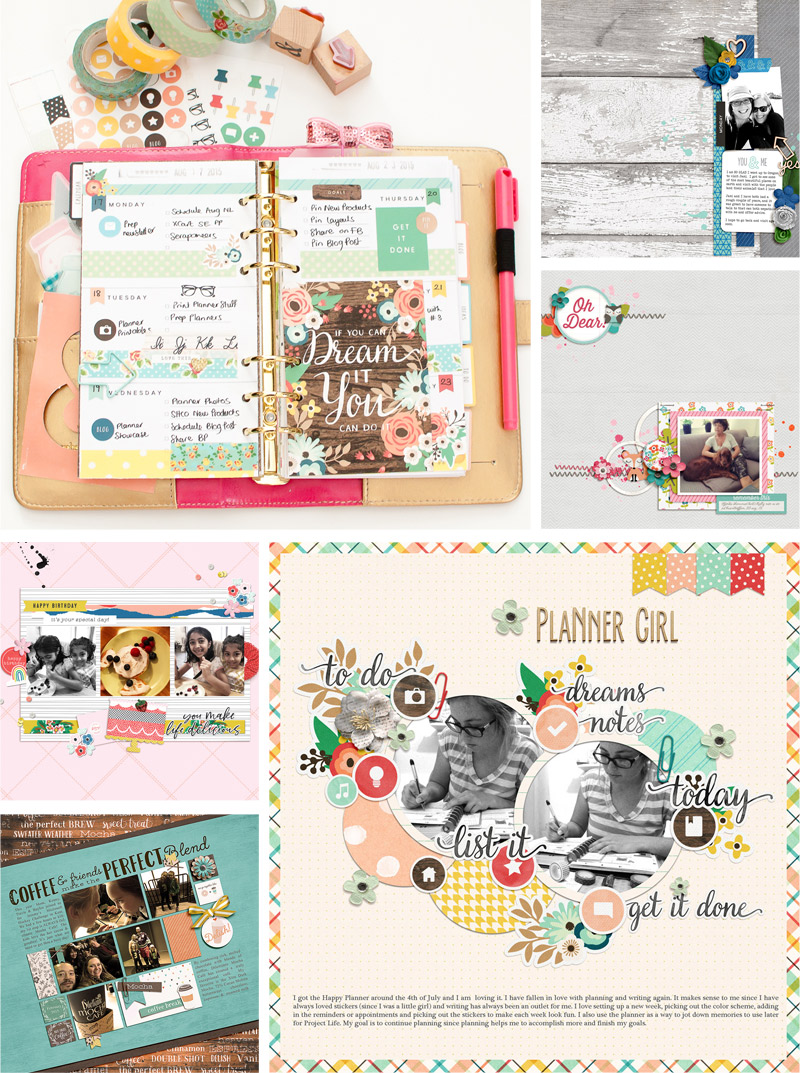
It’s also really fun to look at her products in action when browsing the gallery at The Digital Press. Here are some really fantastic projects that were all creating using her wonderful products…

Don’t those images inspire you to want to go make something pretty?! 🙂

We hope you’ve enjoyed learning more about Mari today! To celebrate her week as our Featured Designer at The Digital Press, the entire Mari Koegelenberg Creations storefront at TDP will be 30% OFF all week long (the sale will end at 11:59pm ET on Thursday 4/26).

Additionally, Mari has a special Free-with-Purchase offer for everyone this week! Don’t miss out on this opportunity to stock up on your favorite products from Mari Koegelenberg… and you can also get her brand-new kit — “Be A Unicorn”  — for FREE with any $10+ purchase in her shop! (again, the offer is valid through 11:59pm ET on Thurs 4/26).

Tutorial Tuesday | Realistic Ribbon Wrap Technique

Hey there scrappers, and welcome to another edition of our Tutorial Tuesday series here on The Digital Press blog! I don’t know if you’re like me, but I loooooove a realistic digital page… one that people will want to touch when it’s printed to find out whether it’s “real” or not. With that in mind… today I’m here to share a technique for realistically wrapping a digital ribbon around another item on your page!

Today’s tutorial will show you how to wrap a ribbon around a photo or paper using photo-editing tools such as masks and dodging/burning.

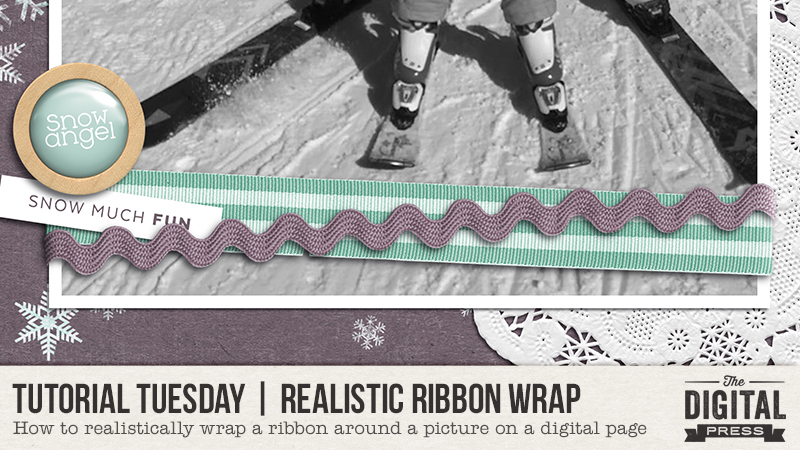
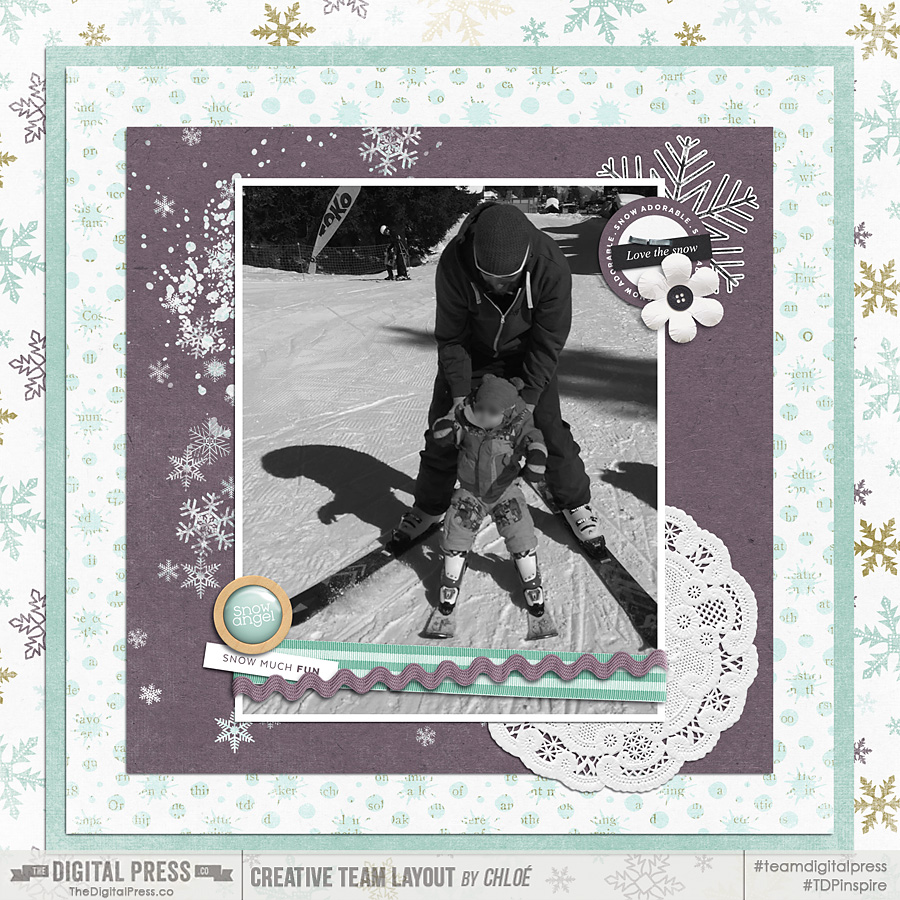
Here’s a peek at the end result…

[I used the beautiful kit “Make it count – January” by Anita Designs ]

See the ribbons that are wrapped around the bottom of the photo? To achieve this result, we have to do two things.

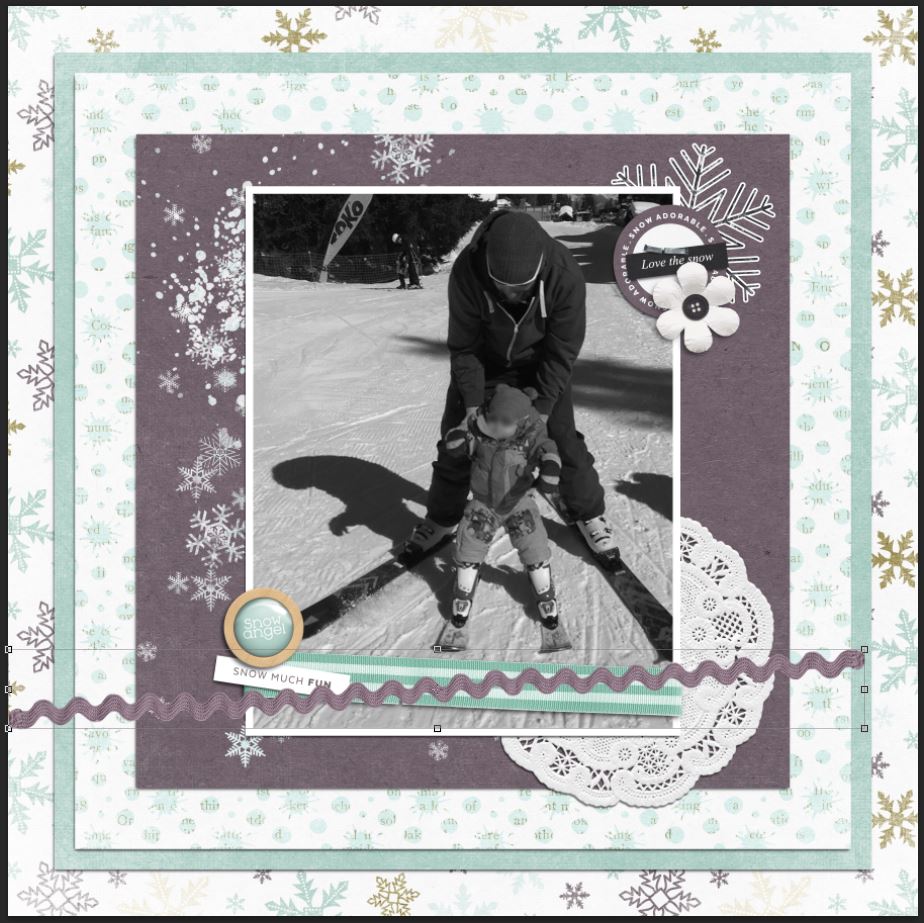
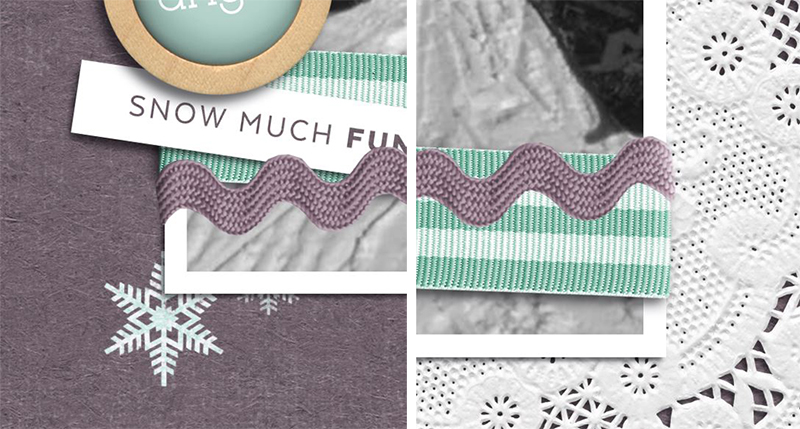
First, we need to delete the parts of the ribbon that are supposed to be stuck behind the photo. To do that, I like to use a mask so that all my modifications are reversible if need be (for example, I started my page above with only the ric-rac in a horizontal position, so I was happy to have more room to work when I decided to change things up, add the second ribbon and put them both at an angle).

Position your ribbon where you will want it (more or less) over the photo you’ll wrap it around, as shown here…

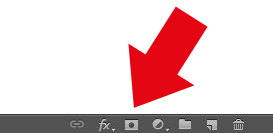
Select the layer, and then click on this icon (shown here, and found at the bottom of your layers panel) to add a mask…

tdp-tut-2

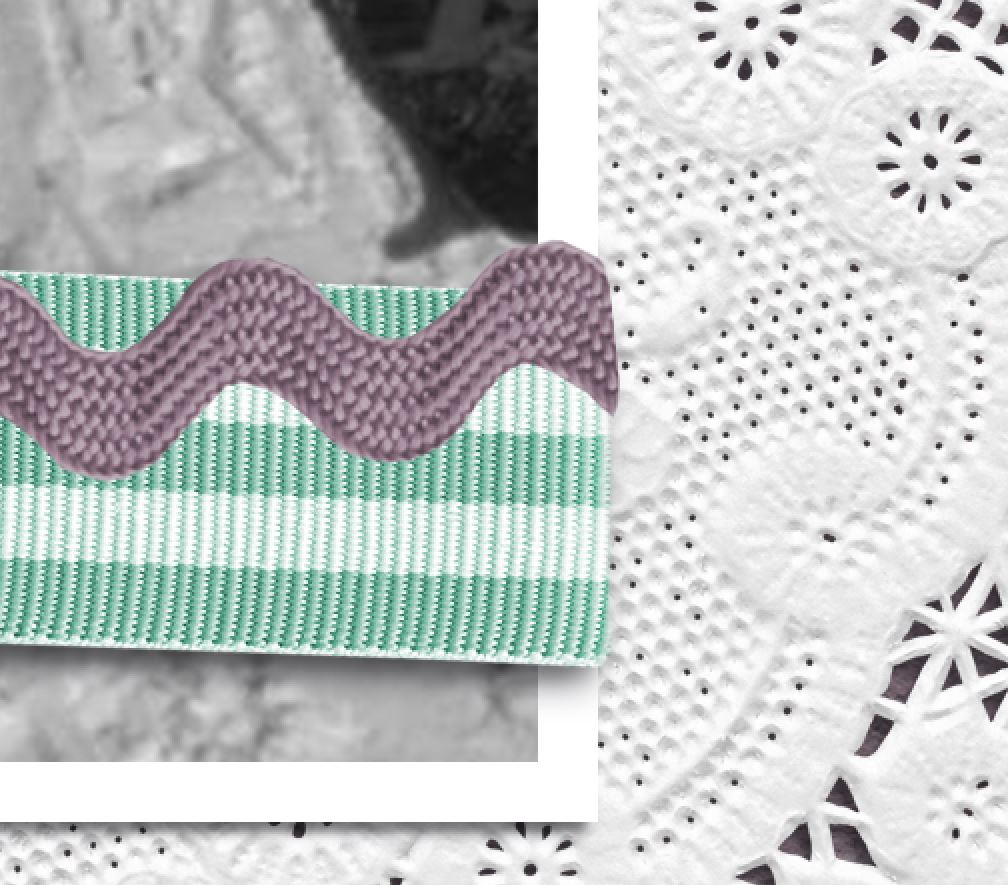
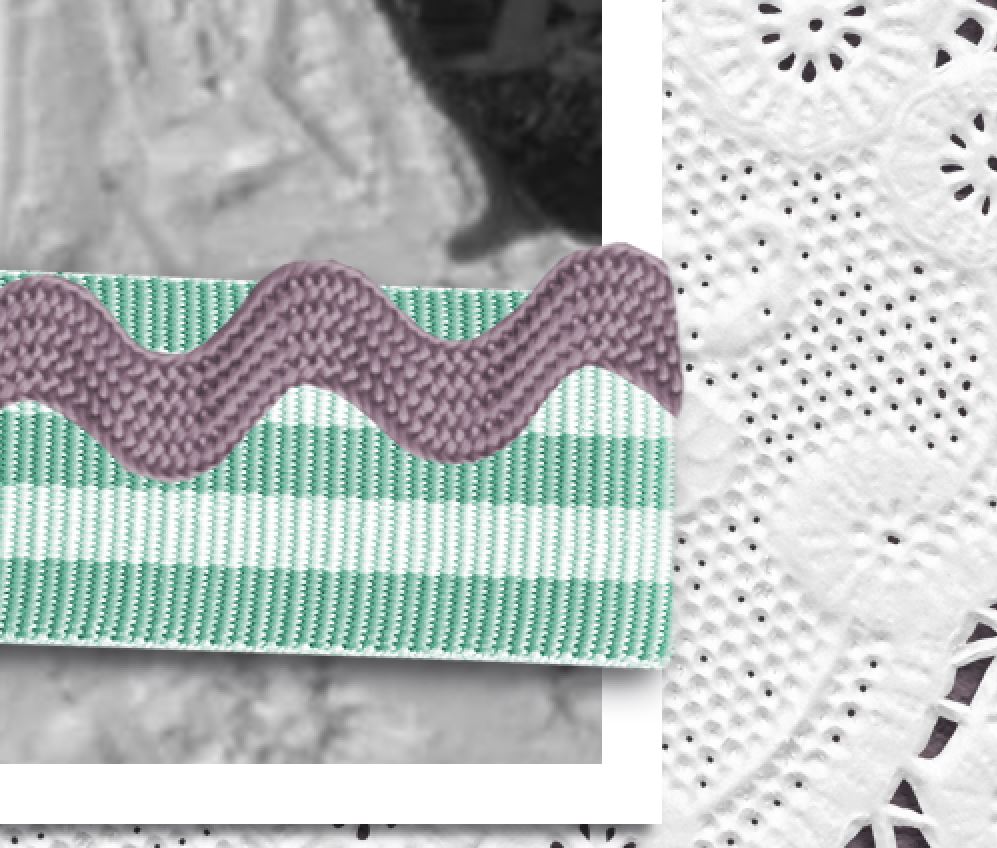
Then, you will color the mask in black on the parts of the ribbon you want to delete. Use a round brush at a level of hardness of 100%. Start with a rough mask first, then zoom it and refine the detail. For more realism, add a slight curve on the ribbon’s edge. Keep in mind that a “real” ribbon wouldn’t be completely flat where it bends, it has texture, thickness, stiffness, etc…

Finally, with your mask still selected, use the “soften” tool at a low intensity to soften the edge of your mask and make it more realistic. It’s a subtle change… but especially useful because you used a very hard brush to “cut” the ribbon, and now you need to make it a little more natural again, so to speak (and we all know that nature is never perfectly straight, right?)…

Now that your ribbon has the shape you want it to have, you will use the dodging and burning brushes to give it the final realistic touch. Start by looking at where your shadows are. Where does your light comes from? On this side of the ribbon (the side the light source comes from, that is — for mine, below, it’s the right side), you will use the dodging tool to mimic the light that will hit the ribbon and make it look brighter. Start at low intensity with a wide brush and slowly decrease the size of your brush and increase the intensity slightly each time you go over the ribbon…

Next, you will do the same thing on the other side of the ribbon, but this time — with the burning tool, to make it darker (for me, this will be the left side — opposite my “light source”). This is the side of the ribbon that is in the shadow. Always keep your edits as minimal and natural as possible. It’s better to build the effect up slowly and stop before it’s too much and it becomes unrealistic…

Finally, as one last step — you will add your shadows (if you hadn’t already) and… ta da! You’re finished, and your digital ribbon is now realistically wrapped around your photo. 🙂

I hope you will give this technique a try. It’s really fun, and adds some great realism to your digital pages! Let me know in the comments if you have any questions.


p.s. if you loved this technique for achieving a realistic-looking result on a digital page… you may also want to check out some of our site’s other tutorials for realistic-looking digital effects… for example, this one or that one about paper shadows, this one about stamping or that one about realistic text, but there are many mores. I found two tutorials that use similar techniques to the one I will show you today: this one about washi and this one about pins.


ChloéAbout the author  Chloé is in charge of PR and communication for her small town by day, is a digiscrapper “by night,” and a photographer whenever the light is beautiful. She lives with her man and fur-babies in a small town of Alsace (in the northeast of France), where she loves to read, watch good TV shows (TWD being her absolute favorite), and just hang out with her friends — no matter if they are close by, online, or away in her Swiss hometown. She recently became quite obsessed with Bullet Journaling, FLyLady and Zero Waste.

Feature Friday | Jen C Designs

Happy Friday, and welcome to another edition of our Feature Friday series here on The Digital Press blog! I’m excited today to help you get to know Jen of Jen C Designs a little better this week! This is Jen’s third feature article here on The Digital Press blog (you can find her first feature from February 2017 HERE, and her Foodie Friday post from October 2017 HERE).

In order to get to know her better this time around, Jen has shared with us 5 Things We Might Not Already Know About Her

  1. My feet haven’t grown since I was 13 — and my height has been the same since then, as well! 5’10” and size 10 shoes weren’t any fun at all when I was in grade 9!
  2. I think on-demand TV is amazing. Our family hardly ever watches anything live — and even if we watch it almost-live, we watch it on delay so we can fast forward through the commercial breaks!
  3. I’m insanely excited about Tim Horton’s opening in Belfast! Before I emigrated, I went as often as possible — 2 creams, no sugar, and as large as possible!
  4. My guilty pleasure is breakfast cereal, but not with milk. It’s a little insane because I can’t stand noisy eating/crunching (and dry cereal is always crunchy!).
  5. I can make almost anything in the kitchen — except for cake. It’s just one of those things. But my favourite thing to make is anything savory.

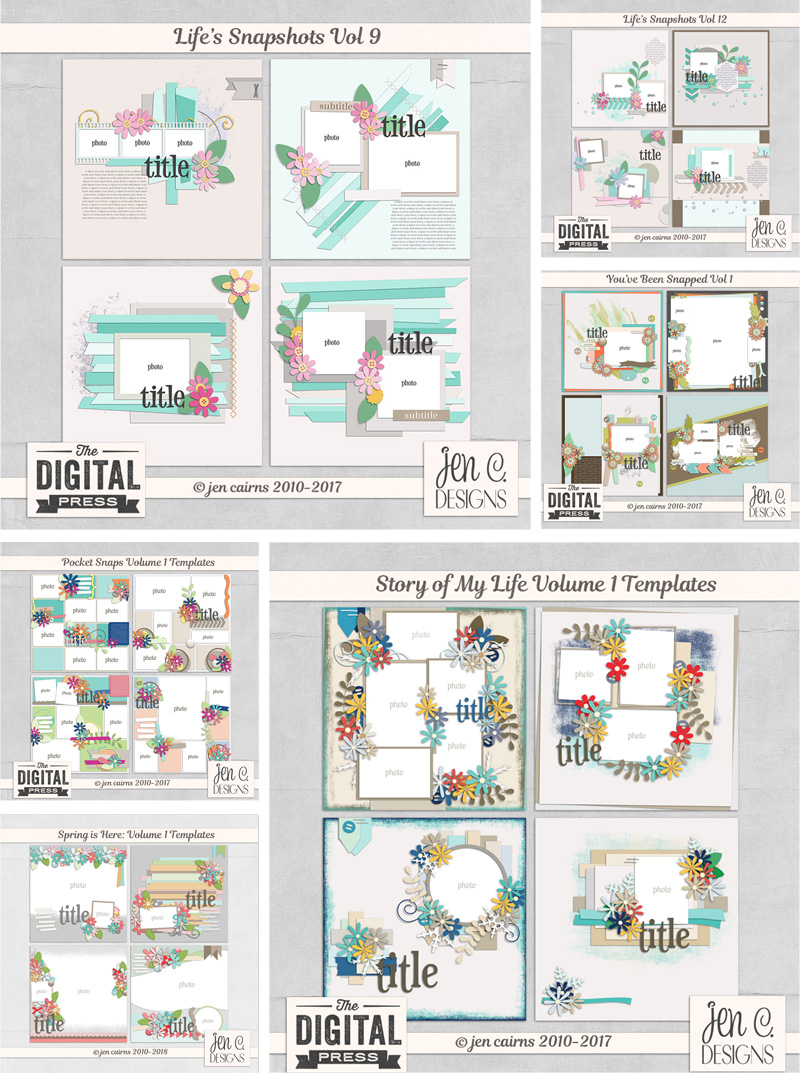
In terms of her product offerings… Jen is an amazing template designer who makes unique and interesting templates that are excellent for all kinds of scrappers. The assortment of layout designs she offers makes it easy for anyone to create pages in their own style, while also allowing them to step out of their comfort zone if they want to do so. Her templates are always a time-saver… but they also allow any scrapper to try new and interesting things with their memory-keeping. You can’t go wrong with her templates… they offer so many different options for capturing your memories!

You won’t believe the wonderful products you’ll find in Jen’s shop here at TDP …so here is a look at just a few things you’ll find, so as to give you a taste of her amazing template designs…

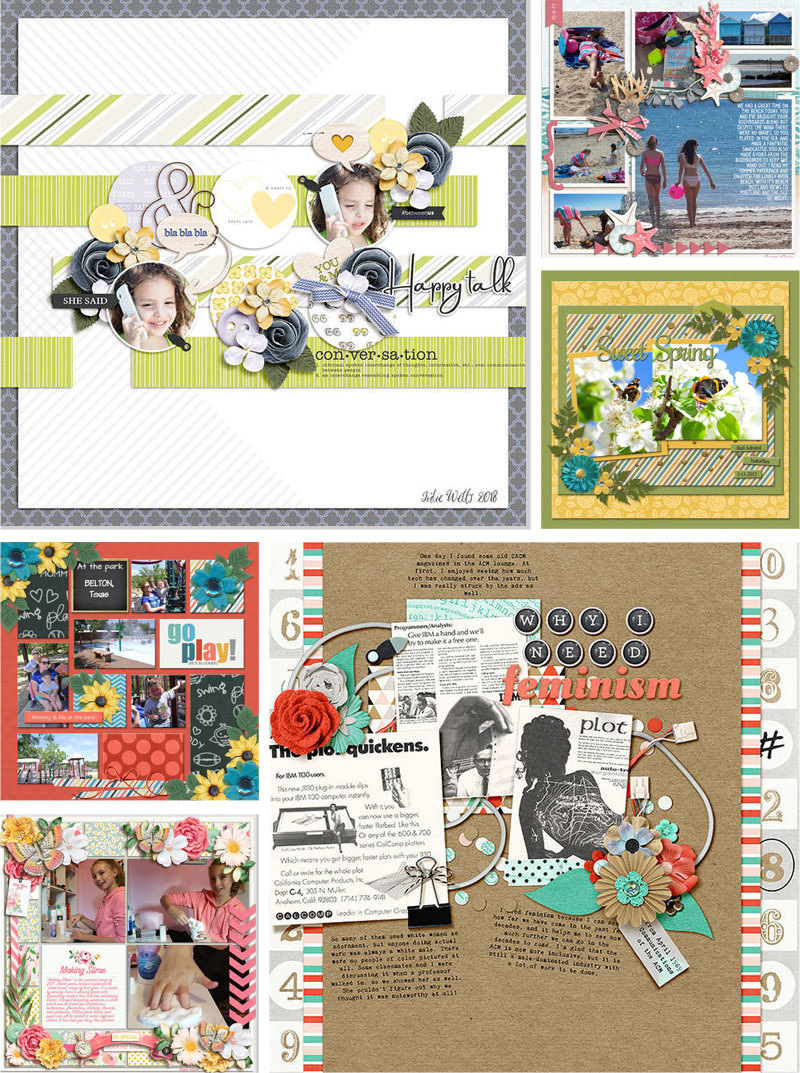
I love seeing her templates in action… so I pulled together this sampling of layouts that use her products, so you can see examples of what you can create using her templates…

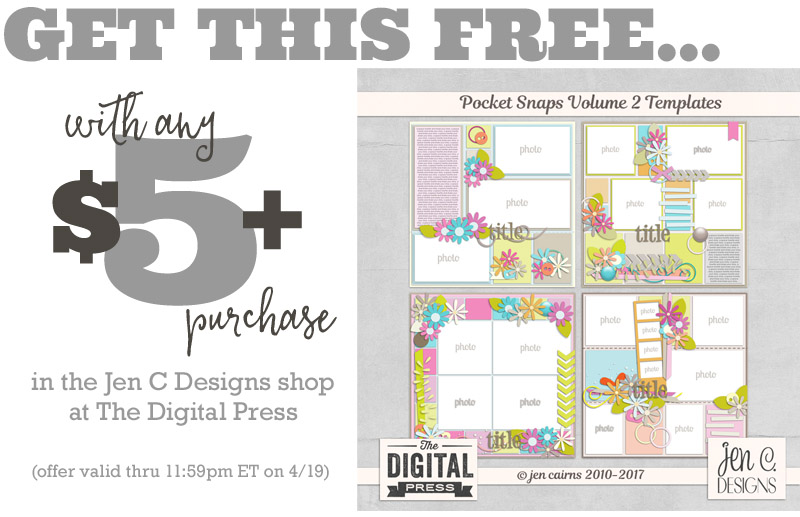
It wouldn’t be a designer feature week here at TDP without a fantastic sale to go along with it… so you’ll be happy to know that you will find the entire Jen C Designs shop at TDP on sale 30% OFF all week long (sale prices valid through 11:59pm ET on Thurs 4/19).

Additionally, Jen has a special Free-with-Purchase offer for everyone this week, as well! Don’t miss out on this opportunity to stock up on your favorite products from her shop at a discount, and you will also receive the following item — Pocket Snaps Vol 2 — for FREE with any $10+ purchase in her shop — this week only (this offer is available through 11:59 pm ET on Thurs 4/19).


Amy

About the Author  Amy lives in Richmond, Virginia, with her husband and their 13-year-old boy/girl twins. Their 22-year-old daughter is currently in graduate school at Clemson! She has been scrapbooking since the early 1990s, but discovered digital scrapbooking in 2005 when her twins were born… and has primarily scrapped digitally since that time. She is passionate about telling her family’s stories and documenting their life together. She is also a huge reader (mostly literary fiction), a pop culture junkie, and LOVES all things beauty & makeup!


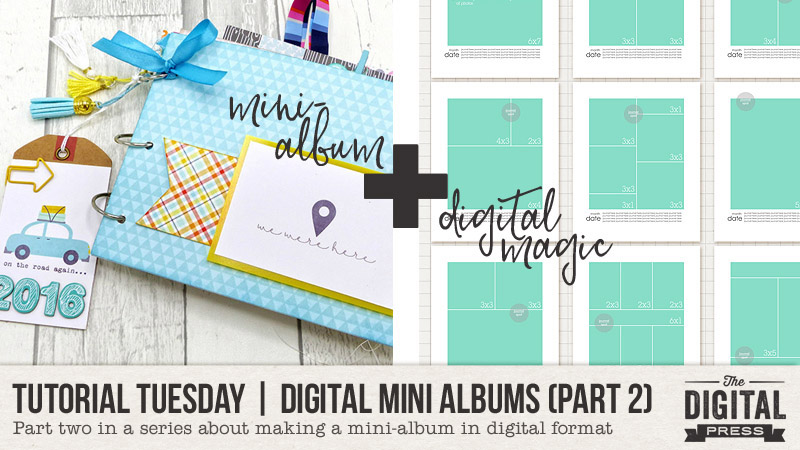
Tutorial Tuesday | Digital Mini Albums (Part 2)

It’s time for another edition of our Tutorial Tuesday series here on The Digital Press blog! Today’s post is Part 2 in a series on creating a digital mini album (you can find Part 1, from March 2018, HERE on the blog).

In that first part of the series, I shared that mini albums are handy for…

  • Scrapping a family vacation
  • Creating a special gift for someone
  • Marking a special holiday
  • Documenting a specific family tradition
  • Capturing a sports season
  • Life Events such as adoption, graduation, birthday, wedding, birth, or death

I also shared that I have found there to be four main steps in the process of creating a mini album…

  1. Planning
  2. Organizing
  3. Filling & Finishing
  4. Printing

Last time (in Part 1) we looked at the first step: PLANNING. Today, however, we will be getting busy working on…

Step 2: Organizing

Organizing is the stage where we pull everything together that we will need for creating our album and get them ready to be used in our layouts.

There are four areas that we need to focus on in this stage.

  1. The Photos
  2. The Canvas (or templates, if you are using them)
  3. The Papers and Elements
  4. The Journaling

So… lets do this!

THE PHOTOS

Most mini albums are going to be centered around photos from a particular event, or series of events, so getting your photos organized and ready to go is probably the most important part of step 2.

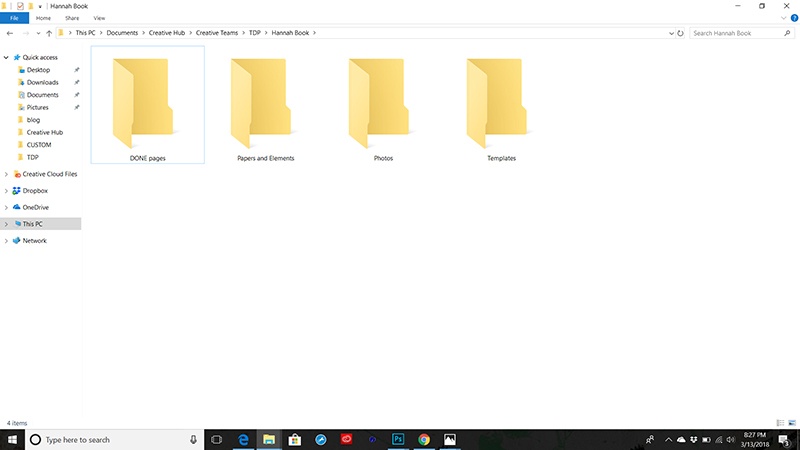
If you do not already have the photos you want to use all in the same place, I suggest you do that now.  This will streamline your workflow by giving you only ONE folder to search through when looking for photos.

My sister and I did this by creating a dropbox folder where we could all upload the photos we took during Hannah’s short life and the events that followed after.
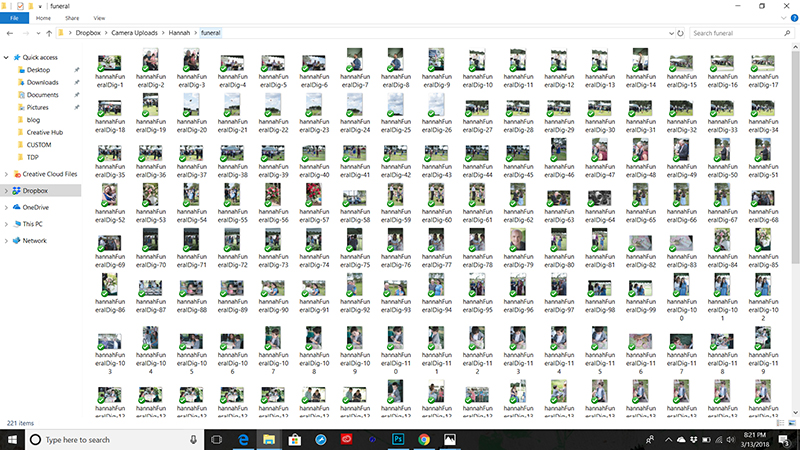
Once you have curated a collection of photos, look to see if you can divide them into pages. Some mini albums only have one photo per page, so that is pretty easy, others have an assortment of photos on one page all telling a story.  For mine, the album will go chronologically.  Some pages will have just one photo, but others, like the funeral pages, will have several.  I purposely organized the photos by creating separate folders for each page I planned on creating.  This will make it easier for me to find photos, and allow me to quickly navigate where I want to be while filling in my album in the next step.

When we finally got all our photos pulled, this folder was quite full of an assortment of photos taken by both of my sisters and myself.  I asked the sister I am making the book for to look through the photos and choose the ones she DEFINITELY wanted in the book.  We divided those into folders that coincided with pages she really wanted made. Then I added a few more photos here and there that I felt helped to flesh out the story for each folder.  I also went ahead and edited my photos, such as cropping and transfering a few to black and white.
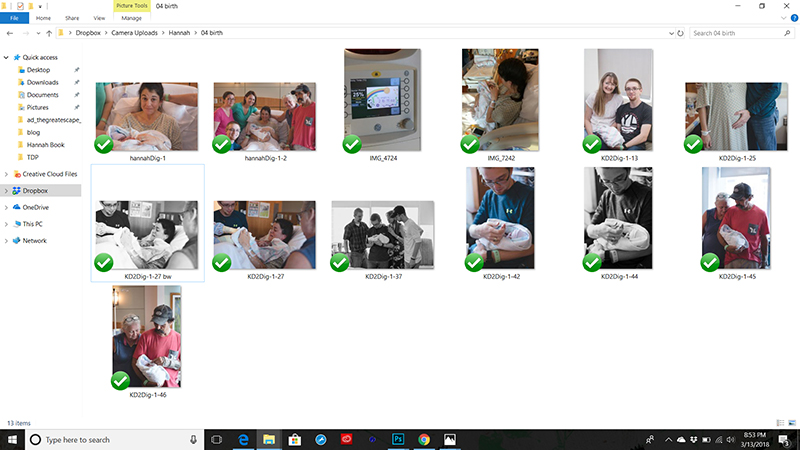
Now when I go to make a page for this mini, all the photos I need will be in the right place and ready to go on my page.
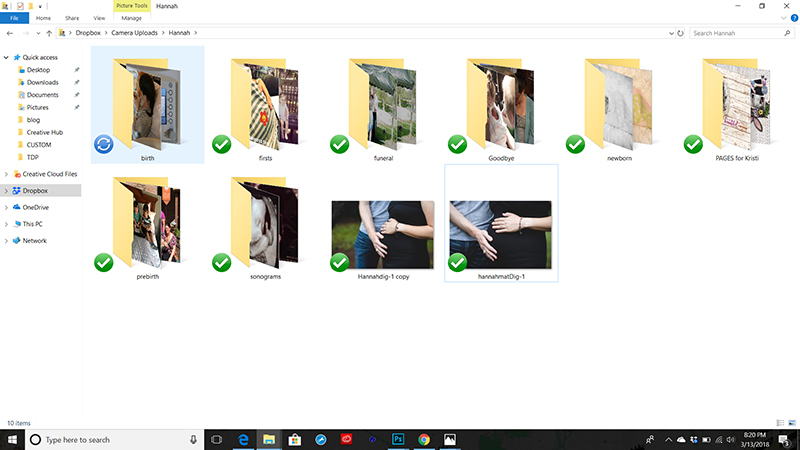
NOTE : I am NOT going to use ALL the photos that we curated.  The point of a mini album is to tell a story using choice photos, not showcase each and every photo taken.  Be choosy in this step, selecting photos that you love, that highlight the things you plan to journal about, and that lend themselves to the story you are telling. If you want all your photos in a book, look into a seperate photo album that can perform this function, or opt for a pocket style insert between your scrap pages.

THE CANVAS

If you are using templates this step is a little easier, but the goal here is to prep the book so that all we have to do is fill it up with our photos, elements and journaling.

If you are not using templates, you will want to create a master template that you can use to build all of your pages.  Do this in PS by going to File>New> and then creating a canvas that fits the size and orientation specifications you chose in Step 1 Planning.  Create your master template according to your scrapping style.  If you like to scrap on the fly, at least save a blank canvas in the right size and orientation so you don’t have to recreate your canvas each time you start a new page.

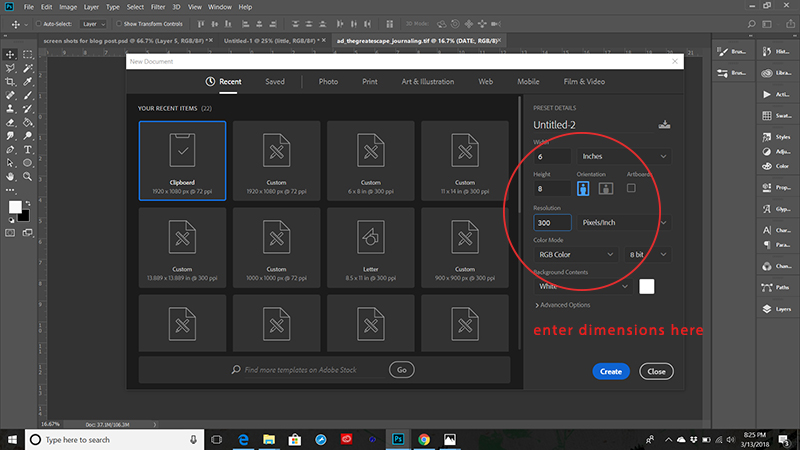
I mentioned that I am going to be printing 6×8, but I am using 12×12 templates.  In order to organize my canvas, I need to convert the templates I want to use to the right format and size. Here is how I did that.

  • Create a new canvas in the already decided size and orientation (File>New) then insert correct dimensions.
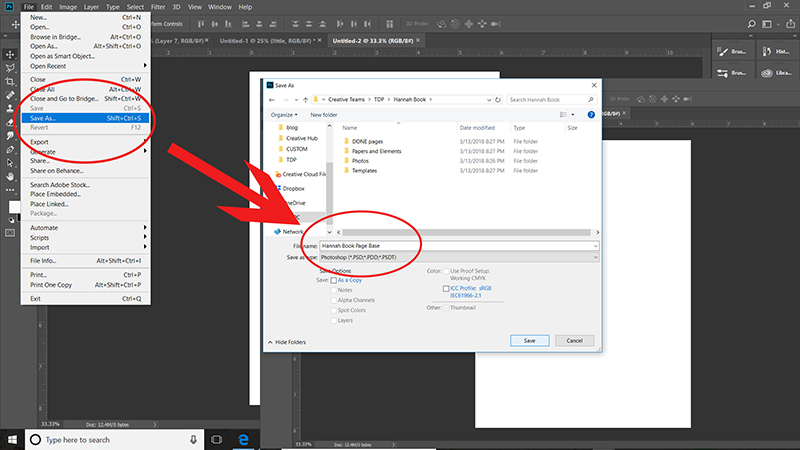
  • Save it as my page base template (File>Save As) navigate to correct place, select file type and give name
  • Open the template you wish to convert (File>Open) then select template
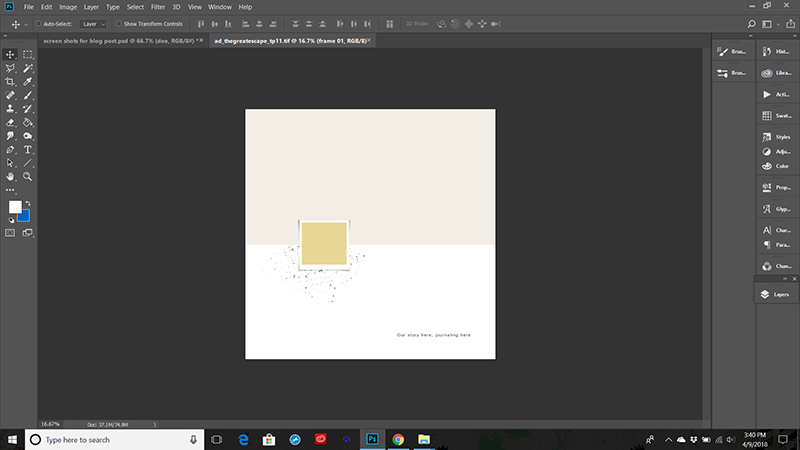
  • Create side by side panels by selecting and pulling down on the tabs of your canvases
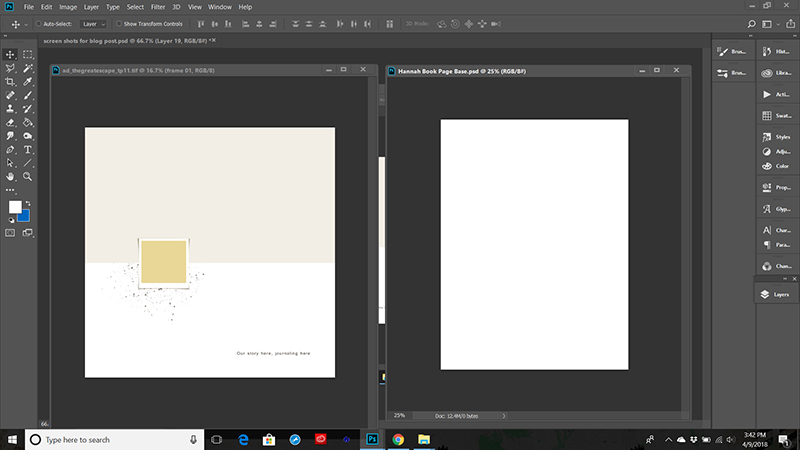
  •  In your chosen template LAYERS palette, select ALL layers by clicking to select the top layer, then holding down shift while you scroll down and select the bottom layer.
  • Drag ALL LAYERS to the new canvas by holding down shift again, clicking on your selected canvas and dragging over to your new canvas.
  • Let go of the shift key and your layers will drop into place.
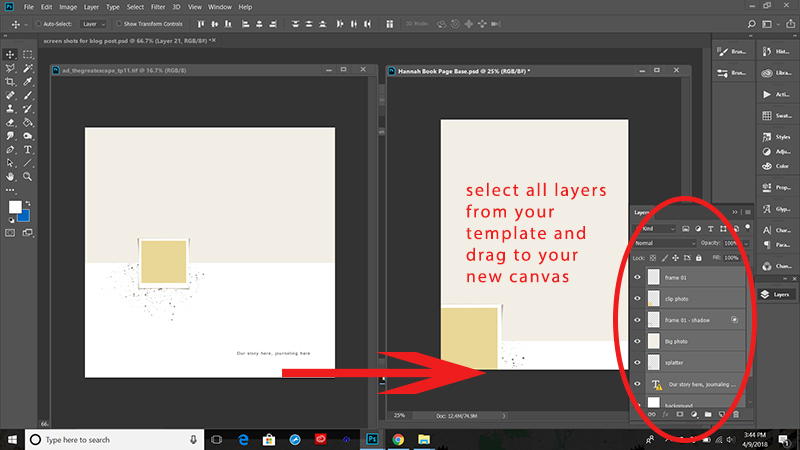
  • Resize layers by hitting CTRL>T or CMMD>T or if you would rather EDIT>Free Transform
  • Pull the little squares at the corners in until the layers are the right size.  You can also reposition them by clicking in the center of your canvas and moving the cursor around.
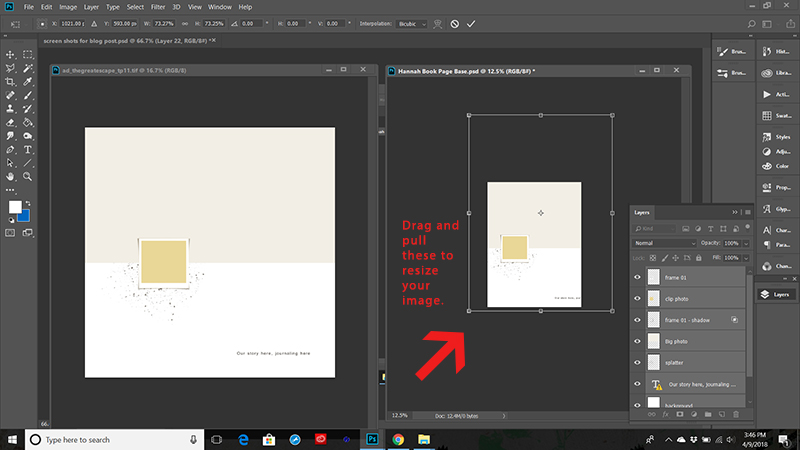
  • Now you should have a newly formatted template that is ready to be used in your mini album.
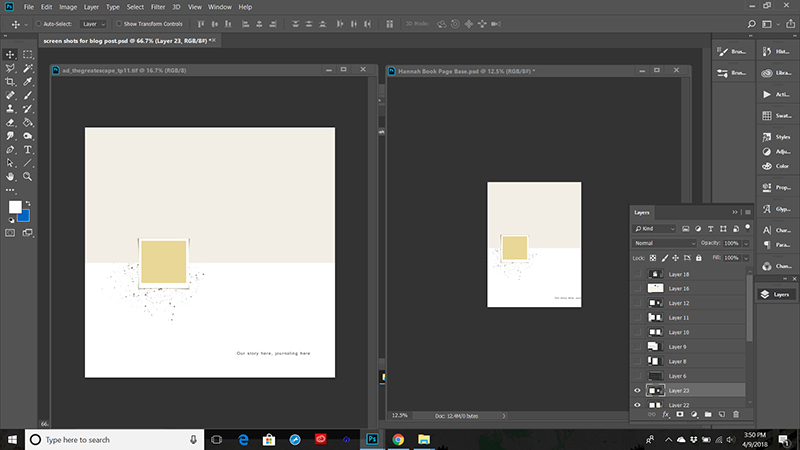
You can also play around with layers, turning them on, off, or duplicating them, to get the templates just the way you want them.

NOTE: Since I already have my photos chosen and edited, I can already see exactly how many photos I will have on each page spread.  This allows me to go ahead and utilize these gorgeous template of Anita’s to the fullest.  I can decide exactly which ones I want to use and resize or rearrange them accordingly.

For example, we have two sonograms we are going to use, one photo on each side of a 2 page spread.  So I altered some of the templates with one photo spot just for these 1 photo pages.  Here are the two I chose, leaving plenty of room for my sister to journal.
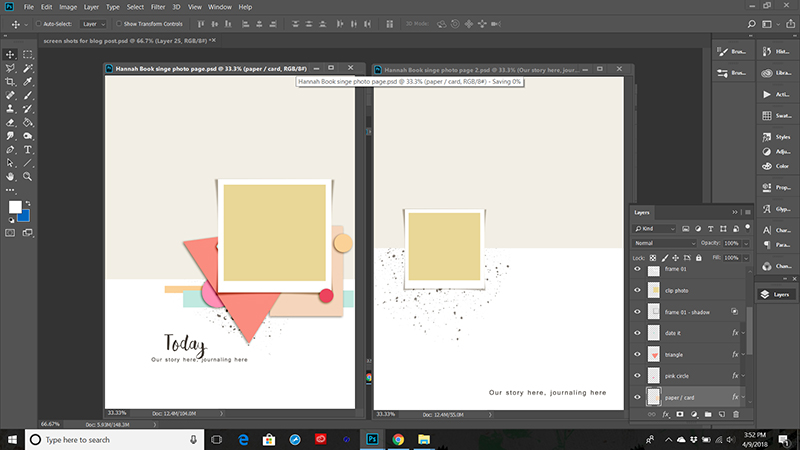
During this step you are also going to want to consider working up an order to your pages.  This is best done when taking both your photos and your journaling into consideration.  For my purposes, this is really easy – since we are going chronologically, but if you are doing a different type of book it is something you might want to consider!

THE PAPER AND ELEMENTS

In the planning stage I went ahead and chose a base kit to use, as well as a color scheme.  What I want to do now is prep my papers and Elements to be used in my album.  To do this I am going to go ahead and alter the colors of some items just a bit to fit my color scheme, that way everything is ready when I go to use it.

There are several ways to alter colors in photoshop.  We have some blog posts about that HERE so I won’t go over it again, but do look into it if you have not ever done this – it makes your goodies so much more versatile!!
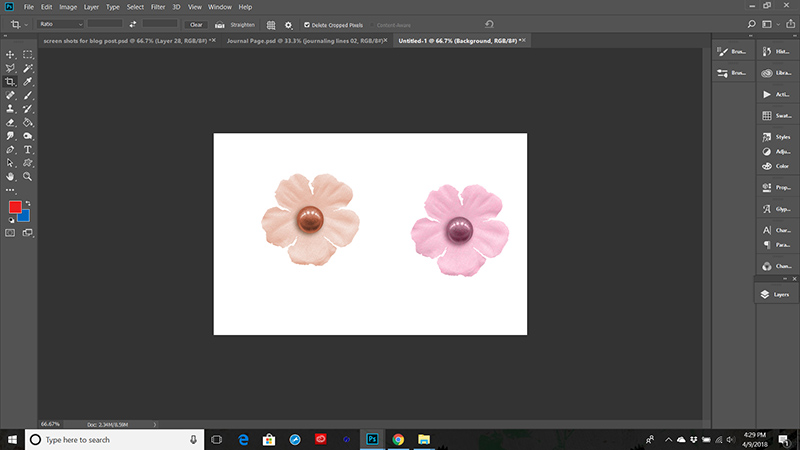
This is the part where I will also go ahead and pull in some additional elements as well.  For example, I think I will use some staples here and there, but I don’t have them in this kit, so I will go and find a staple element and copy it into my folder so that it is right there when I need it.  I can do the same for paper patterns, alphas, fonts I like, whatever I think I might use.  Just like you might pull out all your supplies to look through for creating a paper album, curate a little collection to be used digitally in the creation of your digi mini.
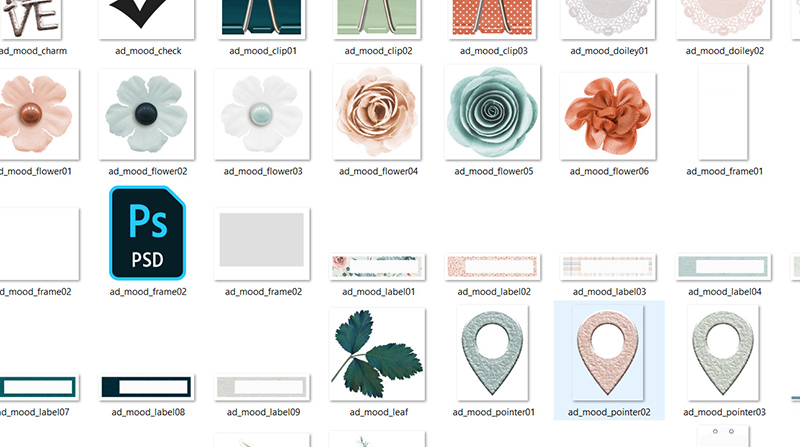
One note on this: for consistency it is best to limit yourself to a small number of the same type of elements.  For example, I plan to use flowers. However, instead of using different flowers on each page, I will use the same 5-7 flowers scattered and repeated throughout the album.  This creates a consistent “background” from page to page that will allow my photos, and the story to really stand out.  This also allows me to finish the project more quickly, since I will not have to keep looking for additional elements. Thankfully – this awesome kit by Anita has a good assortment of flowers that all go well together!!

THE JOURNALING

This is maybe the hardest part of organizing.  Some people prefer to go back and do journaling after they have made a page, but I have found that to be troublesome because sometimes what I have to say is far more than I created room for.  A middle ground is to look through your photos and consider which ones will have more journaling, then make sure to leave enough room for it on those pages, or go ahead and journal first, that way you know exactly what room is needed.

Since I am making a book for someone else, this part is actually pretty easy for me.  My sister has been filling a word file with her journaling for me, so I know exactly what she wants to add as I make each page.  You might consider doing this yourself.  Go ahead and take some time to write out the parts that are most important to you.  You can do this while sorting through your photos and putting them in folder.

OR, you can make yourself some extra little journal insert pages, like I did – just in case things come up later 🙂
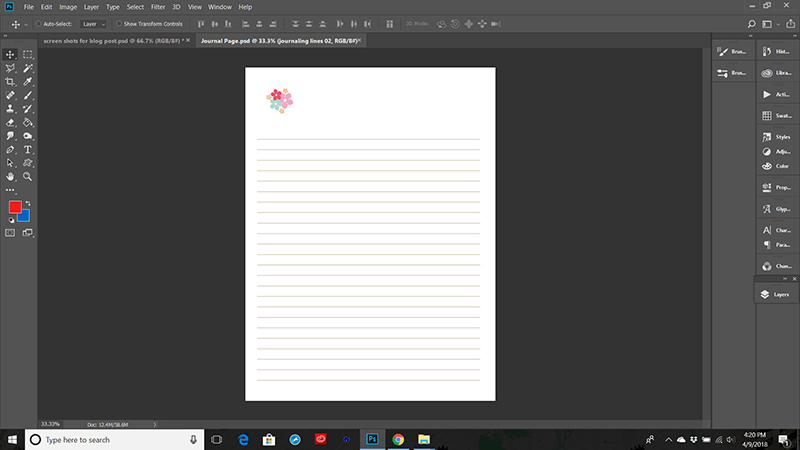
 

Alrighty, we have worked hard and everything should be organized and ready to pull this mini album together  in its final stages.
The next installment will focus on the Filling and Finishing – and that is where all the fun is right!!

See you next time!


ErinErin is an artsy crafty kind of girl who is currently dabbling in far too many things, but is working hard to enjoy every moment of it, while avoiding the rain, which is difficult due to living in the land of many rains. She is slowly learning to use her smart phone to capture all the fun little bits of life that would otherwise go unremembered in the busy craziness that is raising a family!
Hybrid How-To | Memory Flip Calendars

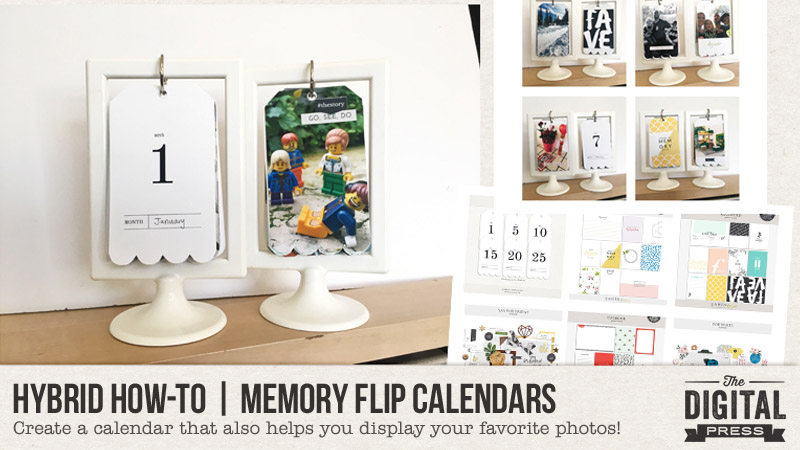
Hi everyone! This is Sabrina from the hybrid creative team at The Digital Press, and I’m here on the blog with you today to share a really fun and easy hybrid project that you can create in order to showcase some of your favorite photos — a memory flip calendar!

I think you’ll really love this project. Let’s get started!

To begin this project, I first gathered my favorite photos from 2017. I went with “weekly favorites” in order to correspond with the numbers on each of my date tags.

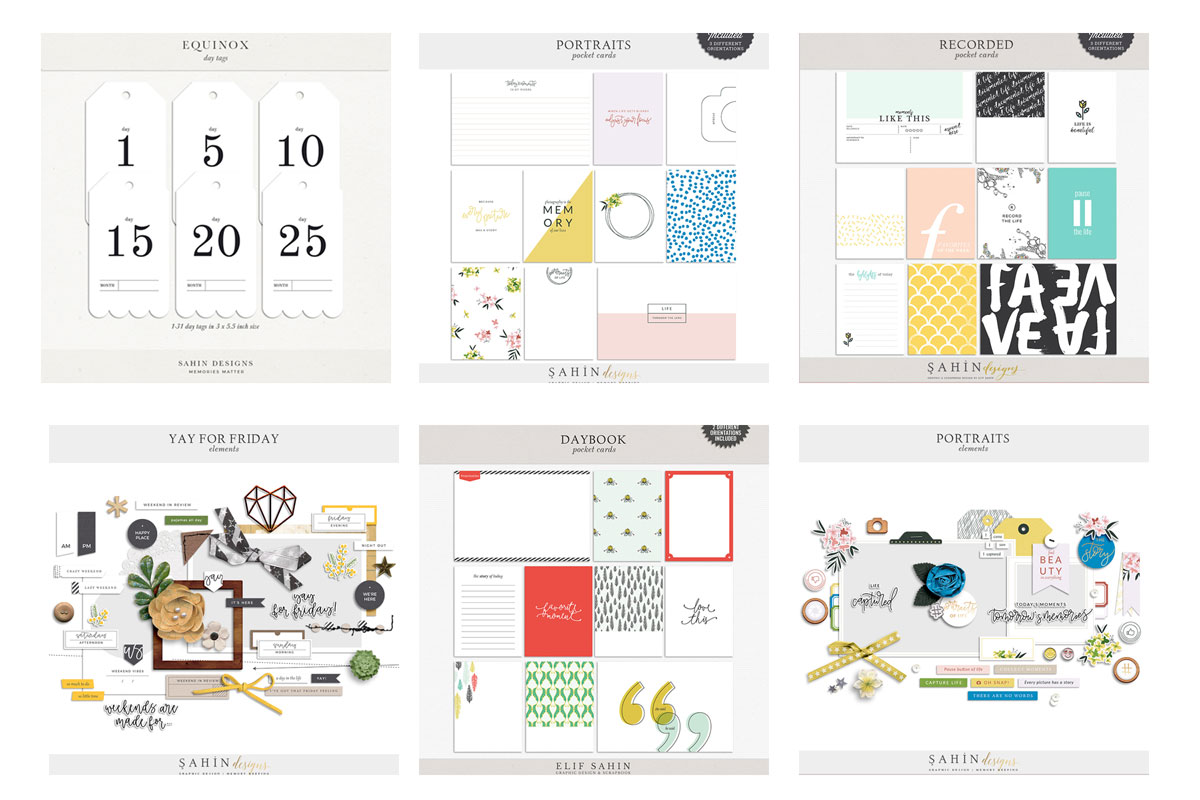
Once I had my digital photos collected and ready… I selected some digital products to use. Here’s a look at just a few of the products I chose to use (all of them came from the Sahin Designs shop at TDP)…

The main product I used, which became the foundation for my entire project, was the Equinox Tags (see above, upper left image).

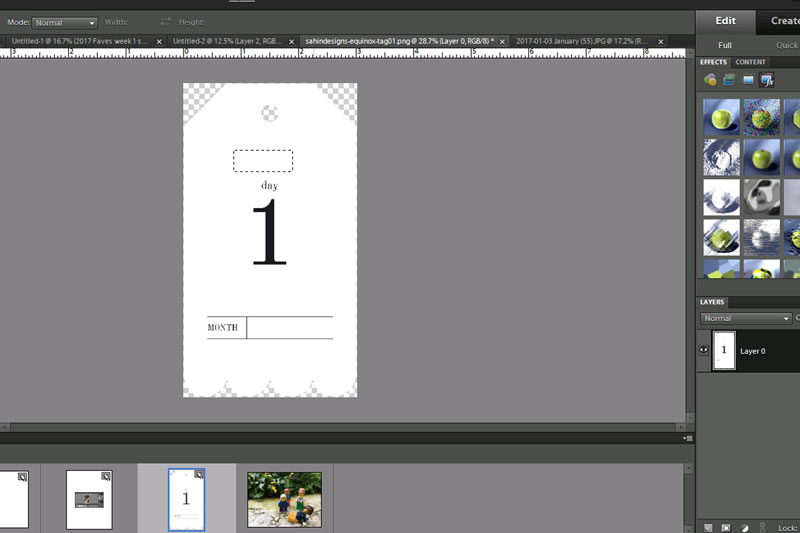
After compiling my photos and digital products, I was ready to begin! The first step was to open the Equinox Tags in my photo-editing software; I use Photoshop Elements (PSE).

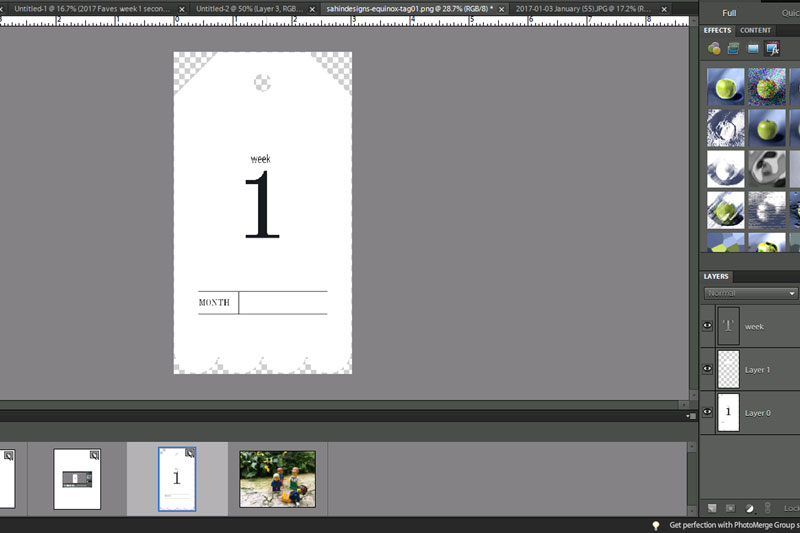
I decided to change the text on the tag from “day” to “week” (because my calendar was going to be a weekly calendar, instead of a daily calendar). I did this by covering the word “day” with a white piece of the tag to cover it up and then typing in the word “week” above it.

Here’s a look at the “before” tag (with the word “day” …and I’m in the process of getting ready to cover it with a rectangle of white tag)…

…and here’s where I covered it with the new word, “week”…

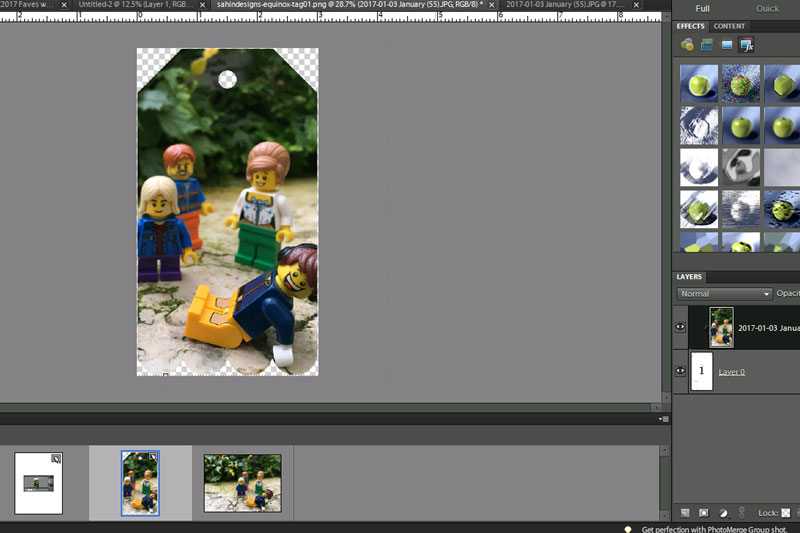
After getting the calendar date tags ready, as shown above… I began using the same tag shape as a clipping mask to shape my photos (in PSE, you place the photo in the layer above the tag… and use Ctrl-G to clip it; in Photoshop (PS) you do the same thing but the keystroke command is Ctrl-Alt-G).

As you see in this screenshot, my photo took on the same shape as the tag I clipped it to… 

Next came the fun part! …printing and putting everything together. 🙂

You can either use the print-&-cut feature of a paper cutting machine like a Silhouette… or… you can print and then fussy-cut by hand with scissors or a paper trimmer. Whatever works best for you!

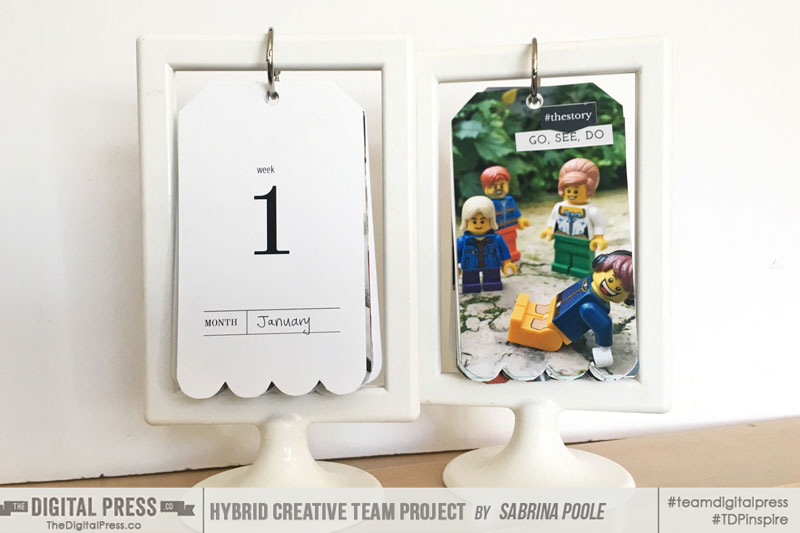
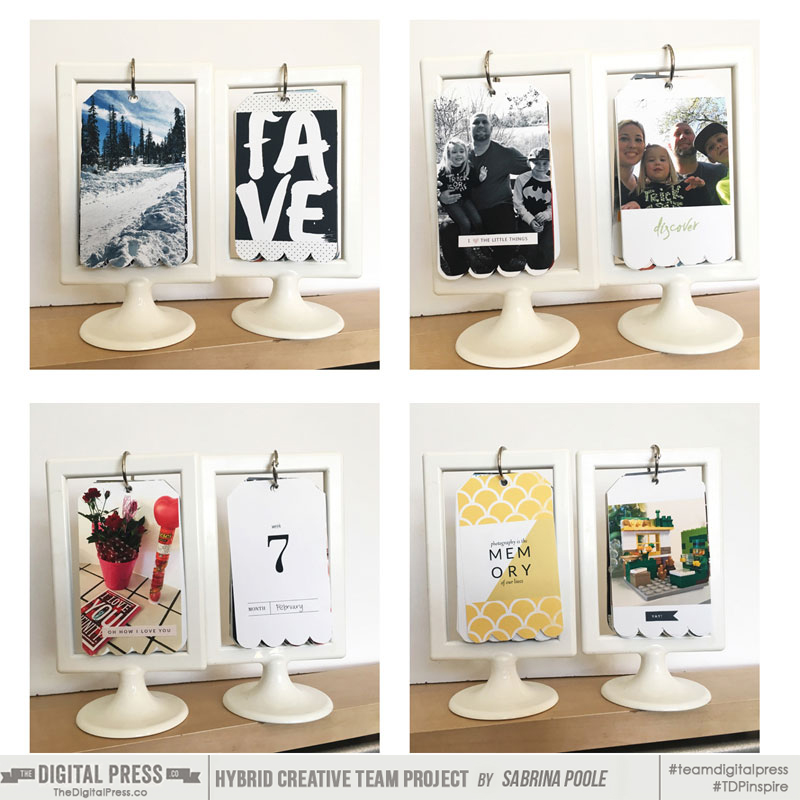
Once I had everything printed & cut out, I attached my tags to single binder rings hanging from empty frames, as shown here…


Once I had it assembled, I found that it actually worked better if I trimmed off an additional 1/4-inch from each tag — to make the flipping of the pages easier once they were on the frame.

Here are a few more shots of the calendar and its different pages…

Isn’t that fun? A flip calendar to remember the best moments of the year!

I loved how this project came out… and I hope you’ll try making a fun memory flip calendar of your own, using your digital supplies! If you do… please share your projects with me — I’d love to see what you come up with! If you’re participating in The Digital Press’s challenge system for April 2018, don’t forget to visit the CROSSWORD SECTION in TDP’s forum to get the details about this month’s Hybrid Challenge — because you can earn challenge points if you give this project a try (earning you points toward discounts & FREEBIES)!


00 HeadshotAbout the Author  Sabrina is an avid documenter of life — herself, her children, her hubby, and her everyday life. There is beauty in the ordinary moments, and they are what she loves to scrap. She is also always on the hunt for a quiet, peaceful moment… and she usually spends it reading or playing at her crafty desk.
Feature Friday | Little Lamm Paper Co.

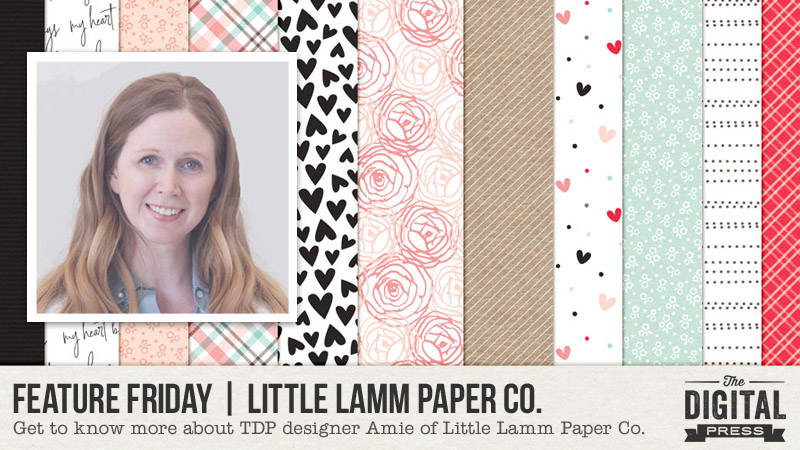
Happy Friday, everyone! It’s time for another edition of our Feature Friday series here on The Digital Press blog… and this week, I’m thrilled to put the spotlight on Amie Lamm of Little Lamm Paper Co.! This is Amie’s fourth feature at TDP (you can find her first feature from June 2016 HERE, another from June 2017 HERE, and her Foodie Friday post from October 2017 HERE).

In order to learn a little more about Amie, I asked her to share 5 things we might not already know about her…

  1. I’m a stay-at-home mom to one 6 year old boy, 2 cats, and a bulldog. Being a boy mom, I end up playing a lot of video games and building with Legos.
  2. I’ve had psoriatic arthritis for almost 20 years, but it’s only been 10 years since I found medication that helped. I still have huge issues with flare-ups that make it impossible to work for weeks at a time.
  3. I spend my days mostly in the kitchen. My husband has diabetes and hasn’t had to take medication since I began preparing meals 3 times a day for him. Thank goodness I love to cook! I don’t mind doing dishes either.
  4. I also have a sleep disorder. It’s called… “I love to read.” My favorite books right now are historical mysteries (especially stories that take place during the first and second world wars).
  5. I grew up in Minnesota on a dairy farm and love to be out in the country. Our farm was right in the middle of lakes country, and I loved riding around on 4-wheelers or snowmobiles or just hiking around the woods. I still want to move back there and build a house some day. Sans cows.

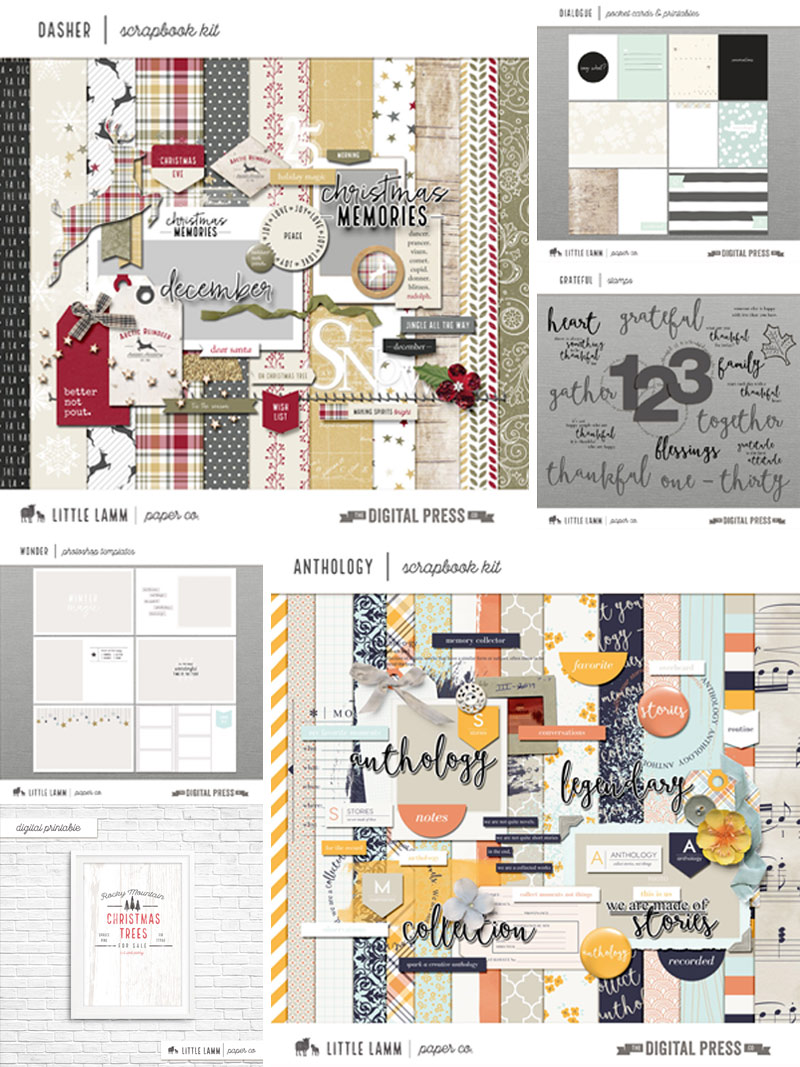
As for Amie’s digital designs… have you taken a peek at her Little Lamm Paper Co. shop here at TDP? It’s full of some really fantastic stuff! You’ll find delicate patterns, fun word art, photo templates, and home decor printables. Amie describes her design style as “pretty simple” and says, “I’m a minimalist who likes her photos to be the star of the pages. But I also love pretty patterns and love to find ways to incorporate them.”

She says that she draws a lot of inspiration from home decorating magazines, patterns, and especially fabrics. Ideas for her collections can come from anywhere — from something she sees on a television show to something her little guy says. And sometimes, it might just be an image from a magazine that will start the ideas flowing in her head!

Here is just a small sampling of the products you’ll find in the Little Lamm Paper Co. shop here at The Digital Press…

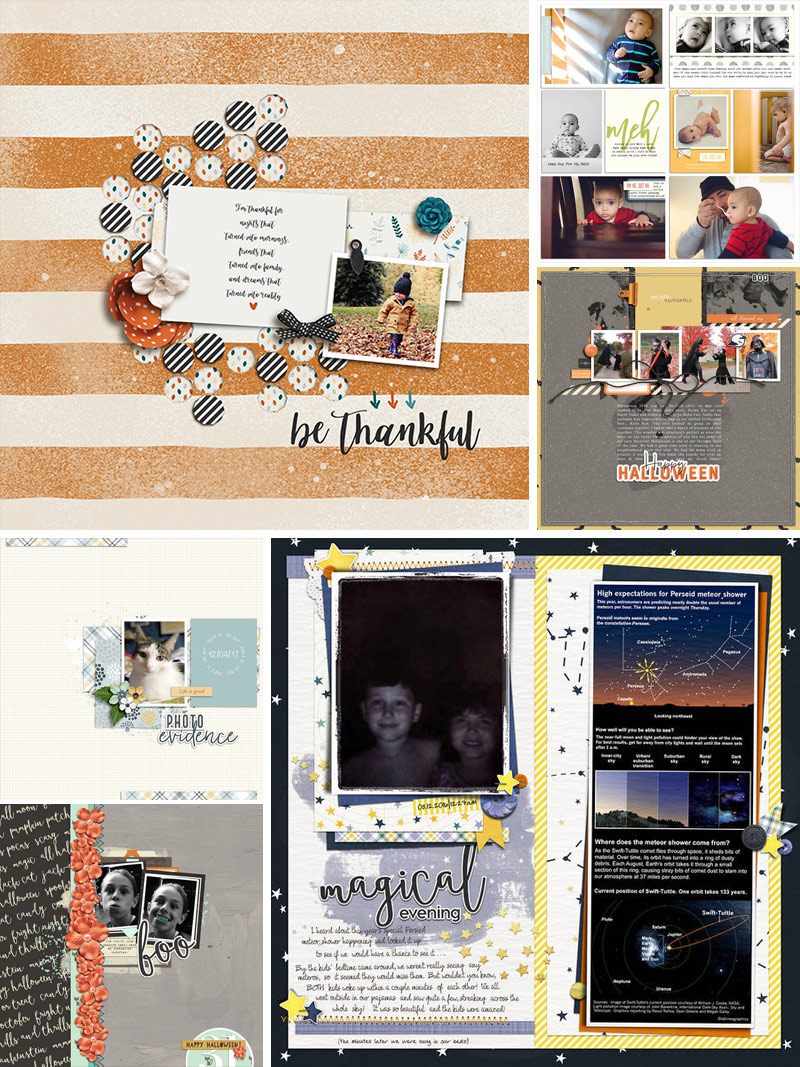
And just to provide a little bit more inspiration, here are a handful of really fun sample projects that use Amie’s products…

I hope that you’ve enjoyed learning a little more about Amie of Little Lamm Paper Co. today! To celebrate her week as our Featured Designer at The Digital Press, the entire Little Lamm Paper Co. store will be 30% OFF all week long (the sale will end at 11:59pm ET on Thursday 4/12).

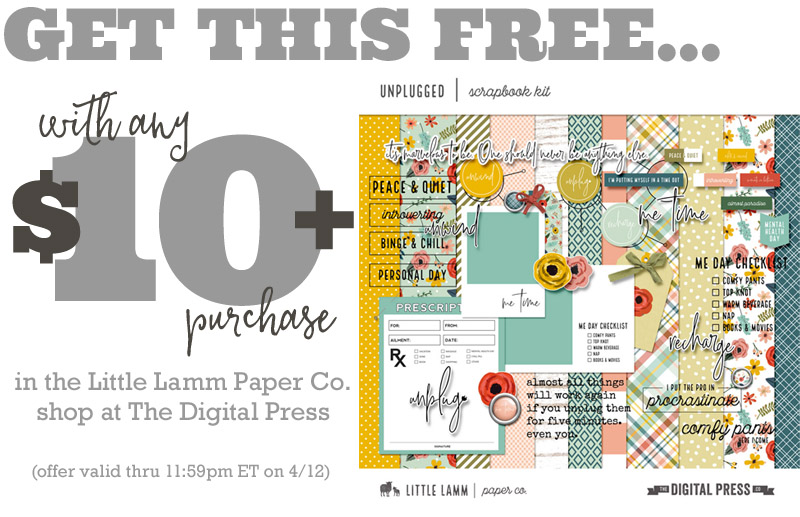
Additionally, Amie has a special Free-with-Purchase offer for everyone this week! Don’t miss out on this opportunity to stock up on your favorite products from Little Lamm Paper Co. …and you can also snag this gorgeous kit — Unplugged — for FREE with any $10+ purchase in her shop! (again, the offer is valid through 11:59pm ET on Thurs 4/12).


caliten About the Author  Carrie is a creative team member here at The Digital Press. She and her family enjoy spending time outdoors year-round near their home in Colorado. In addition to scrapbooking and the occasional hybrid home decor project, Carrie also reads voraciously, accumulates fabric, makes soap, brews beer, grows hops, and tries to keep indoor plants alive.