Tutorial Tuesday | Fake a Plaid Paper

Hello, and welcome to another edition of our always-popular Tutorial Tuesday series here on The Digital Press blog!

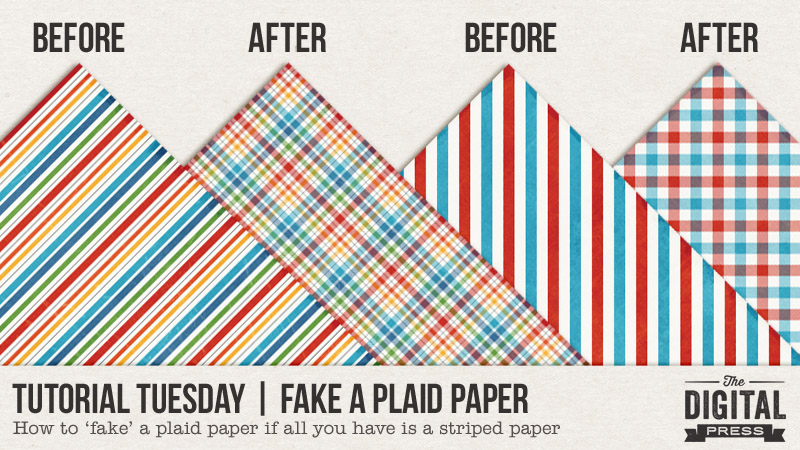
Today I am here to share with you a quick and easy way to fake a plaid paper if you’re working with a digital kit that doesn’t have one, but does have a striped paper included.

You may think to yourself, “well, I’m not a designer… I have no idea how to do anything like that!” — and I’m here to show you this quick workaround trick that you can do in less than a minute or two! It’s a really fun trick to have in your arsenal of photo-editing skills… because sometimes, frankly, you just need a plaid! Trust me, I get that.

Supplies Needed

  • any striped digital paper
  • photo editing software (such as, but not limited to: Photoshop (PS), Photoshop Elements (PSE), photopea.com (free online photo editor), etc.)

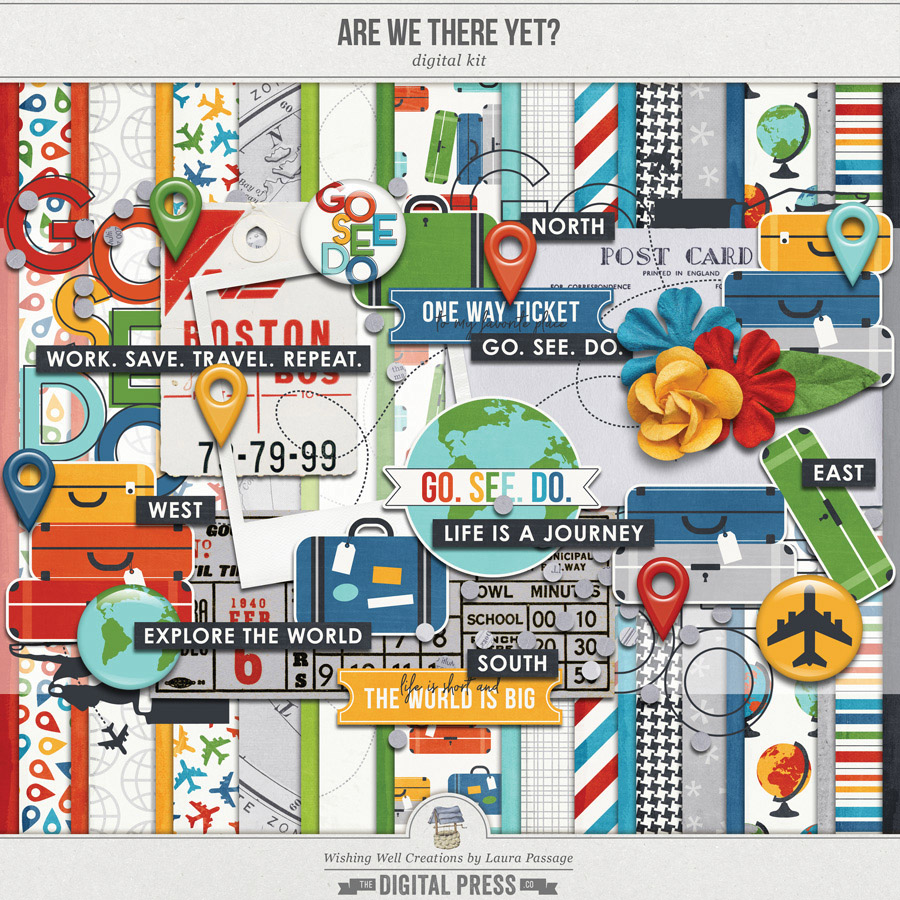
For this tutorial, I’m going to be working with two of the patterned papers found in my Are We There Yet? kit, because it is one of the few kits I’ve ever designed that doesn’t have a plaid paper in it *gasp* (seriously, though, most of my kits always do… because who doesn’t love a good plaid paper?! *swoon*).

I’ll also be using Photoshop Elements (PSE) for this tutorial, because it’s probably the most universally-popular/used program in the digital scrapbooking world… but… don’t worry! The processes I will show you should easily translate into other programs (like the full version of Photoshop (PS), photopea.com, and others). They all have pretty universal features.

Instructions

This process is about as simple as it gets, when it comes to the “how-to” of it all!

First, you’ll want to select a striped paper and open it up in your photo-editing software. I’ve selected 2 different papers to work with, as shown here…
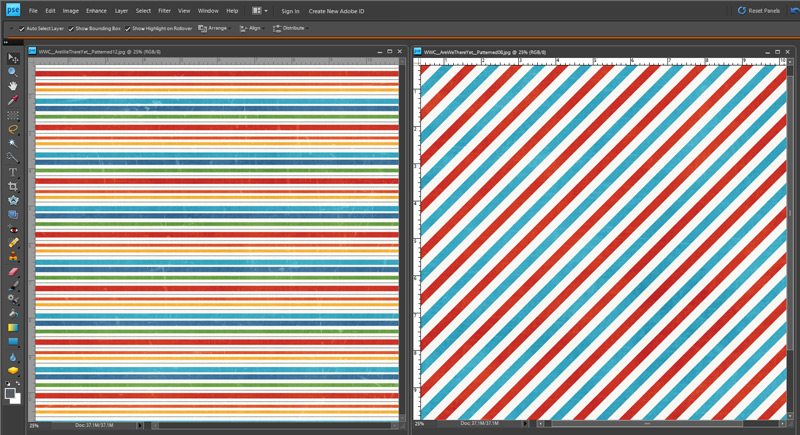
First, I’ll work with the multi-colored stripe.

My very first step will be to duplicate the paper so I have 2 copies (layers) of the paper in the layers palette on the right…
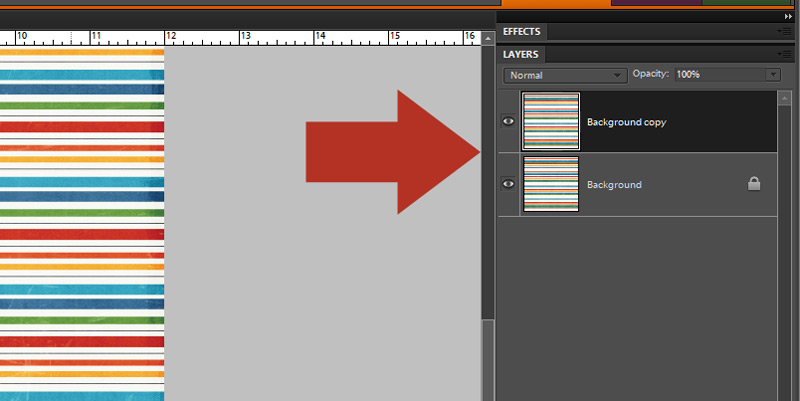
To duplicate an item in Photoshop Elements (PSE), there are a few different methods you can use to achieve that end-goal:

  1. You can select the item in the layers palette on the right by clicking on it… and then use the “Layer” menu at the top of the screen and select “Duplicate Layer”
    OR
  2. You can left-click with your mouse on the item in the layers palette on the right… and a pop-up menu will appear, where you can select “Duplicate Layer”

Once you have 2 copies of the paper, you’re going to rotate the top layer 90-degrees in either direction (it doesn’t matter whether you rotate to the left or the right; the only part that matters is that you rotate exactly 90-degrees). You’ll see the direction of the stripes change by 90 degrees in the layers palette, as shown below, after you complete this step…
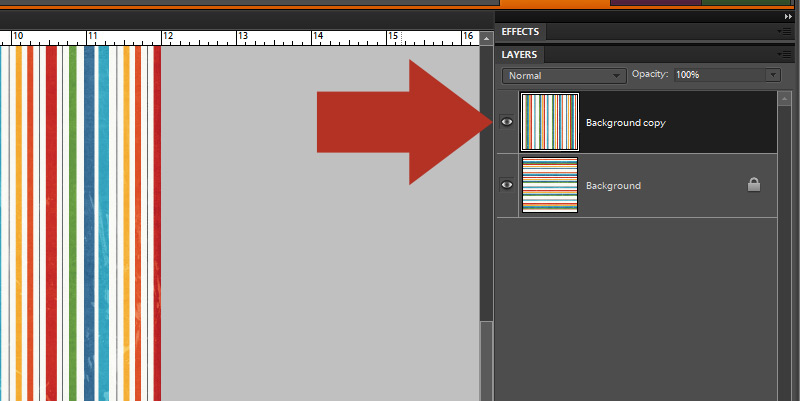
To rotate one single layer, select it in the layers palette on the right… and then use the Image menu at the top of your screen, following this sequence… Image > Rotate > Layer 90 degrees (make sure you’re just rotating the one layer — not the entire document).

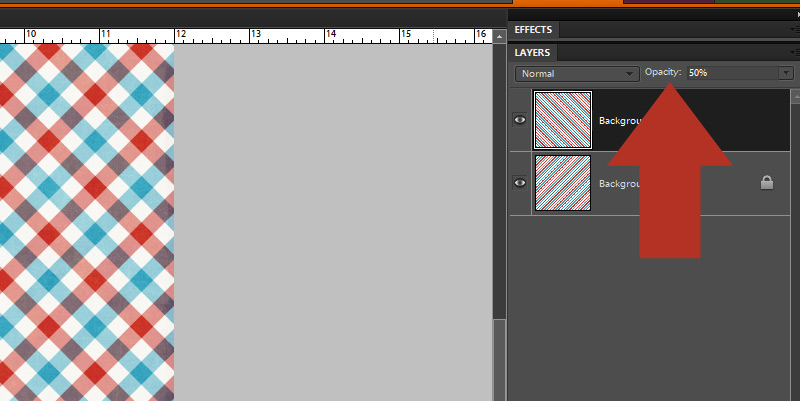
Now you’re going to change the opacity of that top layer, in order to allow the bottom layer to show through (thus creating the illusion of a plaid). To do this, select that top layer (the one you just rotated) and then change the opacity to 50%, as shown here…
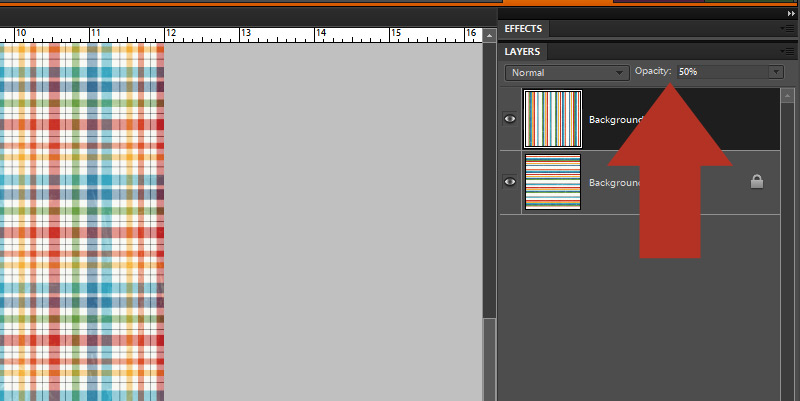
See the delicious plaid paper that appears on the left, in the screenshot above this?! YES, IT WAS JUST THAT EASY!

The last thing you’ll want to do, to be able to use your new creation, is to select both of the layers on the right and merge them together (in PSE, that’s CTRL-E).

Bingo! Now you have one single layer that you can drag as a paper onto a layout… or you can print it to use for a hybrid project… etc.

Possibilities = endless!

Now, it’s worth noting that if you’re working with a diagonal stripe instead of a horizontal or vertical stripe… you can also flip the top layer horizontally (instead of rotating it 90-degrees). It will work either way, giving you a gorgeous diagonal plaid…
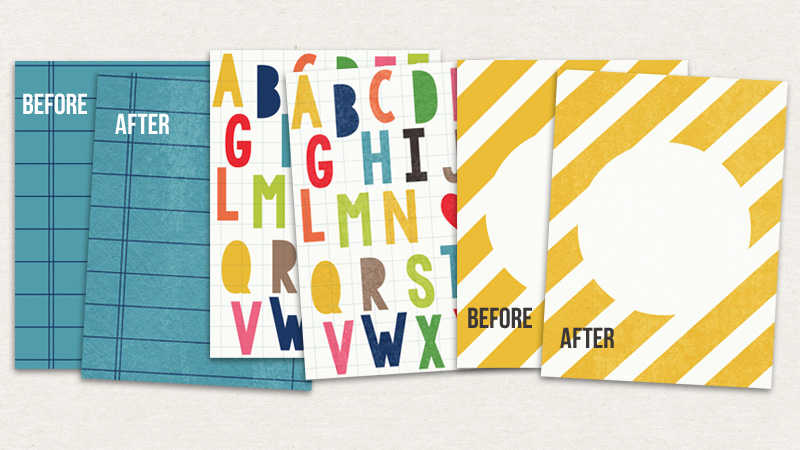
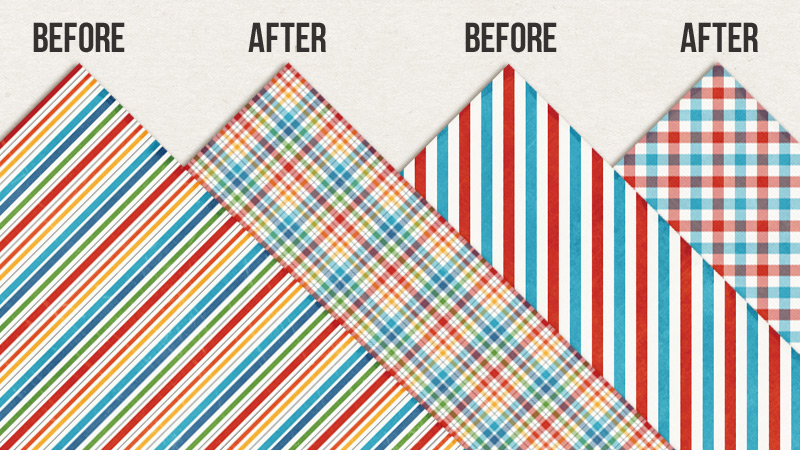
Here’s a look at the finished product(s)…
**ONE THING TO NOTE**
The reason this tutorial is called “fake a plaid” instead of “make a plaid” is because it’s truly not the best* way to create a plaid paper in all situations. What do I mean by that? Well, this process works best with papers that are lightly textured (or not textured at all). If you attempt this process with a paper that is heavily textured (think: crumpled/creased… or very obvious texture patterns like cardboard or ribbed cardstock, etc.) — you’ll find that the texture will show through when you duplicate and change the opacity of the top layer. Essentially, this means it will potentially look very weird/undesirable if the texture is obvious. So definitely keep that in mind, because you won’t want to use this trick with all striped papers.

*the best way would be to create a plaid before any texture is applied to the paper — which is what digital designers will do when creating a kit; for this tutorial, you’re using papers after that process has taken place, so you’ll want to be conscious of that when you select a paper


Here’s hoping this simple little trick opens up all sorts of new possibilities for you to to be able to stretch your digital stash and “fake” a pattern that might not be in a kit when you want/need it! It’s just so quick and easy, and helps make your digital supplies more versatile. Win-win!


Laura Passage

About the Author  Laura Passage is the owner of The Digital Press, and also the designer behind Wishing Well Creations by Laura Passage (WWC). She works now as a graphic designer in both the digital and paper scrapbooking industries, but previously spent over a decade working as a college soccer coach. She lives in the Pacific Northwest with her husband and two sons (previously affectionately referred to as The Tiny Terrorists, but nowadays they’ve entered the pre-teen phase — so it’s even worse than that!)… and she will rationalize eating coffee ice cream for breakfast to anyone who questions it.

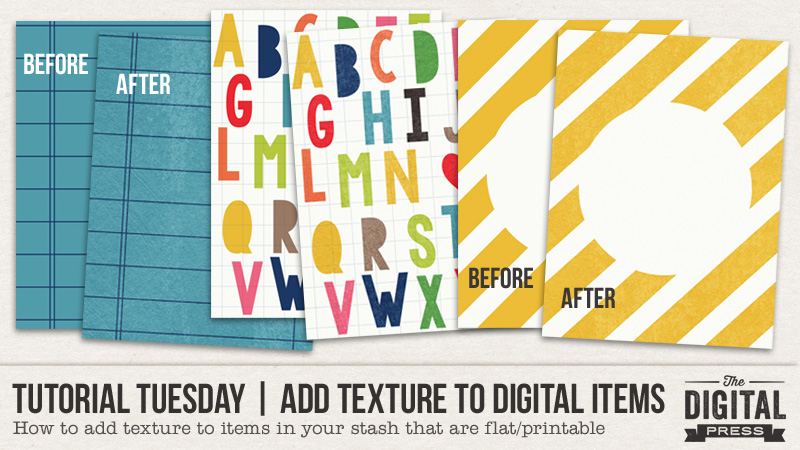
Tutorial Tuesday | Adding Texture to Digital Items

Hello, and welcome to another edition of our always-popular Tutorial Tuesday series here on The Digital Press blog!

Today I am here to share with you a reaaaalllly quick and easy way to add some texture to the digital items in your stash (such as those meant to be printable, etc.) that are flat and don’t have any texture.

You may think to yourself, “well, I’m not a designer… I have no idea how to do anything like that!” — and I’m here to show you this quick workaround trick that you can do in less than a minute or two! It’s a really handy trick to have up your sleeve, too, because if you’re anything like me, you sometimes like to mix-&-match different kits/products when you’re working on a project… and it’s often frustrating to be working with digital supplies that are all “texturized” already, and then find something you’d like to incorporate into your project, only to find that it’s flat/textureless, and just doesn’t “look right” when paired with the other items. This tutorial should solve that problem!

Supplies Needed

  • any digital item you want to add texture to (pocket card, sticker, tag, etc.)
  • one 12″ x 12″ digital paper that has a texture you like
  • photo editing software (such as, but not limited to: Photoshop (PS), Photoshop Elements (PSE), photopea.com (free online photo editor), etc.)

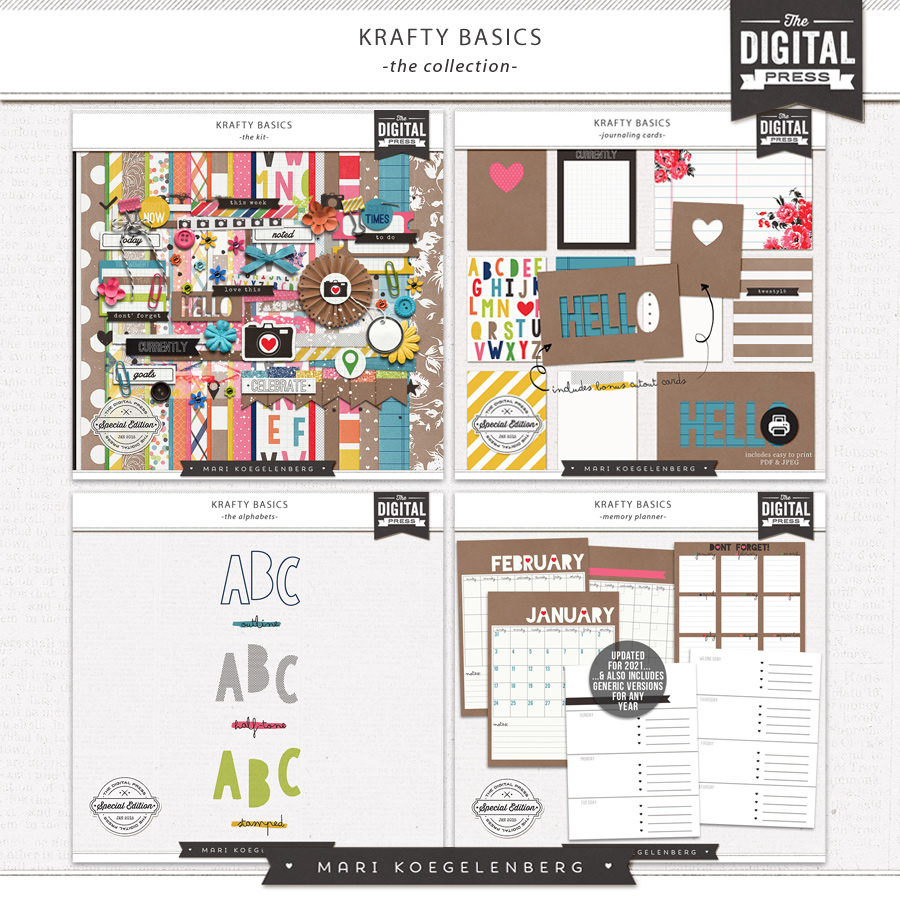
For this tutorial, I’m going to be working with a few of the pocket cards and solid papers found in Mari Koegelenberg’s newly-revamped and re-released Kraft Basics | The Collection (which, coincidentally, is in this week’s Publisher’s Picks sale and is 50% OFF!)…

I’ll also be using Photoshop Elements (PSE) for this tutorial, because it’s probably the most universally-popular/used program in the digital scrapbooking world… but… don’t worry! The processes I will show you should easily translate into other programs (like the full version of Photoshop (PS), photopea.com, and others). They all have pretty universal features.

Instructions

This process is about as simple as it gets, when it comes to the “how-to” of it all!

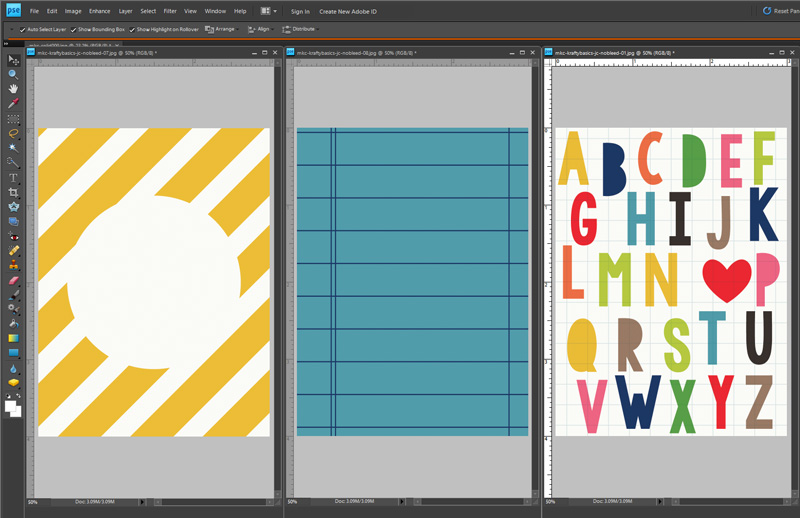
First, you’ll want to select the item(s) you want to add texture to… and open them up in your photo-editing software. I’ve selected 3 different pocket cards, as shown here…

See how each of those cards is created “flat” in order to be print-friendly (i.e. no digital texture applied)?

Well, that’s perfect if we plan on printing the cards and using them on hybrid/physical projects… but if we’re actually going to be using them on a digital page alongside papers and elements that do already have digital texture applied… it becomes a bit strange and mish-mashy (technical term, LOL).

So… we’ll fix that here by adding our own texture!

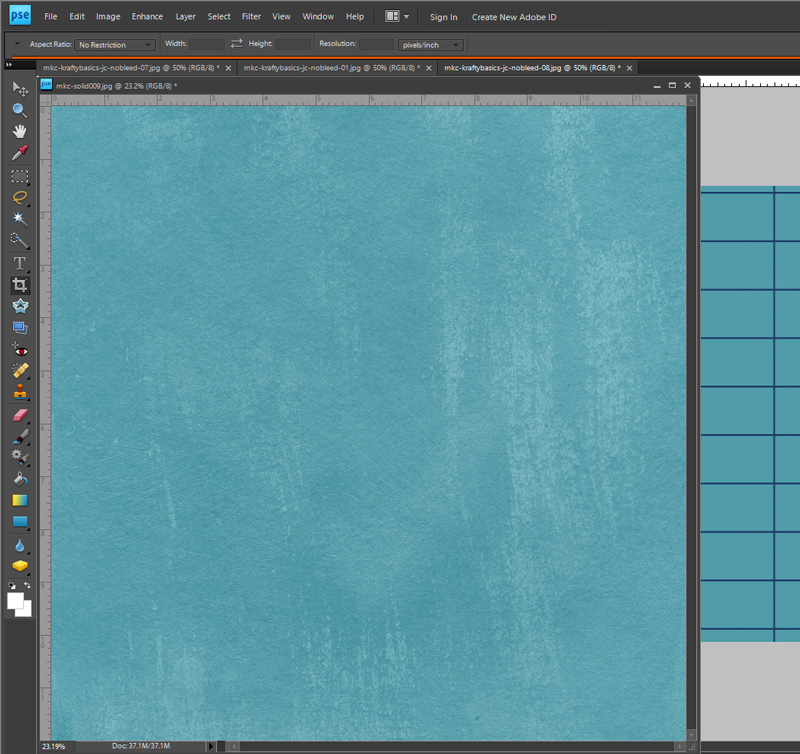
Next, find a solid digital paper that has a texture you like, and open it up in your photo-editing software, as well. I’ve selected this blue-colored solid from Mari’s kit…

See the awesome weathered “canvass-y” texture on that particular paper? It’s going to be perfect for adding some texture and realism to the pocket cards!

To be able to use it for this purpose, you’ll want to remove the color from the solid paper (i.e. if your solid paper is red… or orange… or blue, like mine — no matter! we’ll fix that here!).

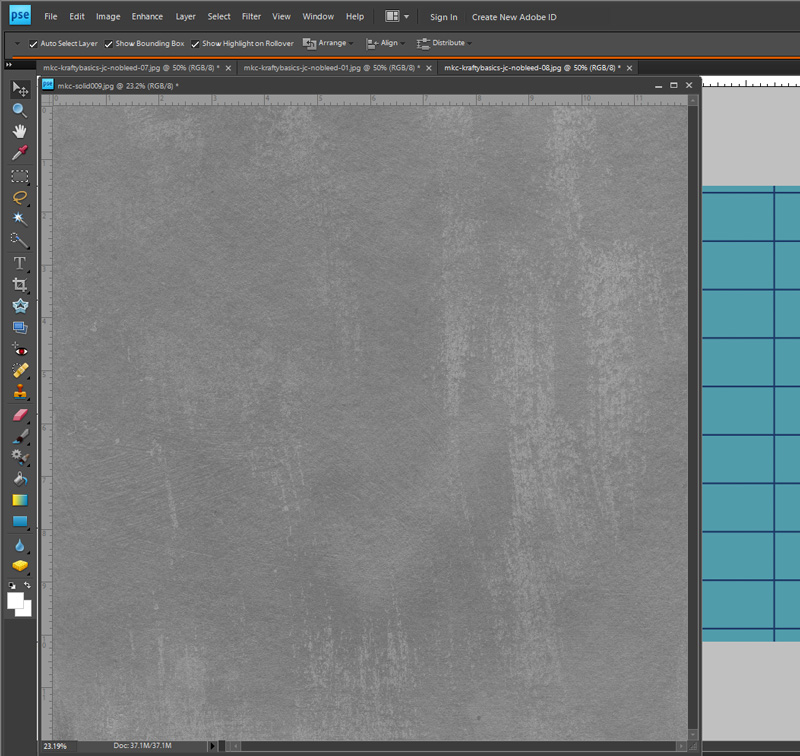
To remove the color, I’m going to use the following menu path (again, I’m working in PSE here for this tutorial… but the commands should be pretty similar in most other programs)… Enhance –> Adjust Color –> Remove Color

…and in doing so, I’m left with the following (the same exact paper — but now it’s in greyscale color):

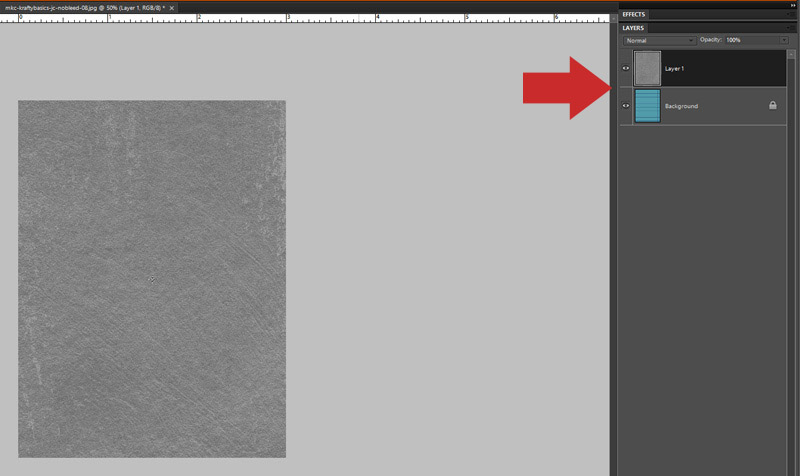
Next, we’ll drag the paper into the window that contains your item, placing it on top of that item. You’ll be able to see the layer order in your layers palette (see right, in the image below, which shows the paper layer on top of the blue lined pocket card layer)…

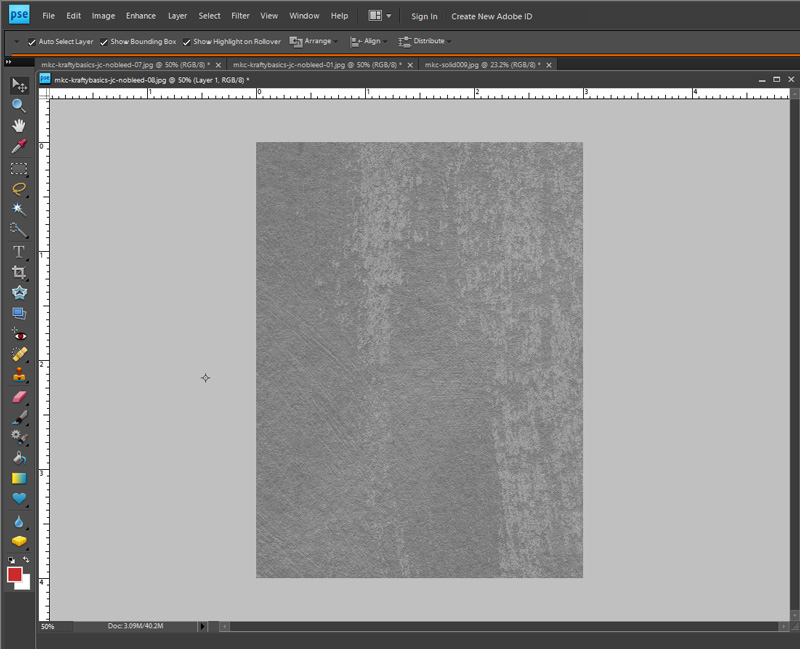
See how the paper has taken the “shape” of the pocket card (3″ x 4″ — instead of its original 12″ x 12″)? Well, the entire paper (all 12″ x 12″ of it) is still there. If you click and drag, you’ll find that you can move the paper around on top of the card.

Drag it around until you find texture you really like. I’ve moved it around until I found some of the gorgeous painty brushmarks that will add some character to this card…

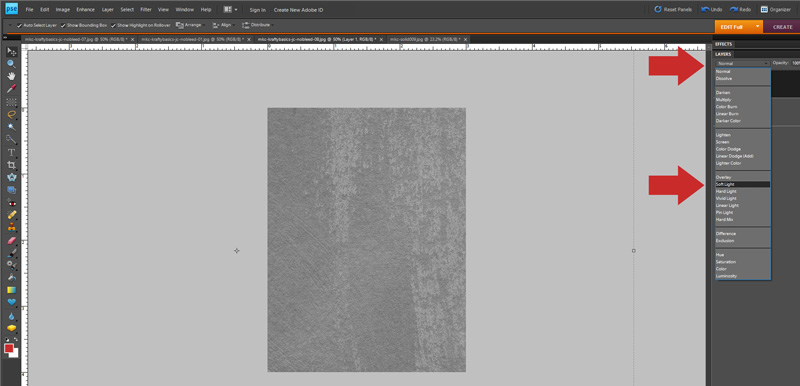
Now we’re going to do the final step… which is to use the blending modes in the layers palette to change the greyscale paper into a texture overlay. In PSE, you’ll find this function here (see the arrows)…

I like the “soft light” overlay mode for this purpose (but you can play around with all of the different options and find one that suits your needs!).

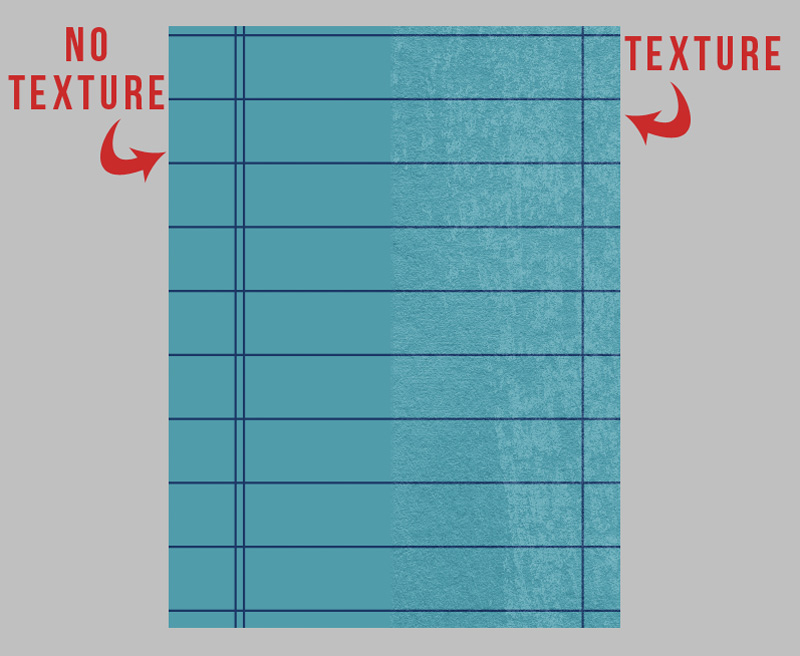
Here’s what happened when I chose “soft light” (note that you can now see the card “through” the paper, which has become a transparent texture overlay; the LEFT side of the card is the “before” and the RIGHT side of the card has some awesome weathered digital texture now)…

And… that’s it! Wasn’t that easy?! Here’s a look at my 3 newly-textured cards…

Here’s hoping this simple little trick opens up all sorts of new possibilities for you to use some of the items in your digital stash that you might have been avoiding because they didn’t have any texture… and/or allows you to mix-&-match products in your stash that do have texture with the ones that do not (without it looking like a mish-mash of different styles!). It’s just so quick and easy, and helps make your digital supplies more versatile!


Laura Passage

About the Author  Laura Passage is the owner of The Digital Press, and also the designer behind Wishing Well Creations by Laura Passage (WWC). She works now as a graphic designer in both the digital and paper scrapbooking industries, but previously spent over a decade working as a college soccer coach. She lives in the Pacific Northwest with her husband and two sons (previously affectionately referred to as The Tiny Terrorists, but nowadays they’ve entered the pre-teen phase — so it’s even worse than that!)… and she will rationalize eating coffee ice cream for breakfast to anyone who questions it.
Tutorial Tuesday | Using Templates to Create Hybrid Layouts

Hello, and Happy New Year! As you may know, the blog took a nice long break in 2020–because, well, 2020–but we’re back, baby! I get the honor of kicking off the first Tutorial Tuesday of the year. I have a fun and easy hybrid project (using a digital template) to share with you today!

I am mainly a pocket page scrapbooker. Once I discovered that style of scrapping, I fell head-over-heels in love with it. Creating 12 x 12 layouts always intimidated me, and pocket pages were the solution to that problem!

And while I do love pocket scrapbooking, I’ve also been working on creating a personal album for each of my kids. For that, I’ve been working on 8 1/2 x 11 pages for these albums. My four kiddos were each born in a different state (and we aren’t even in the military!). With that in mind, one of the stories that I want to tell in each of their albums is a story about where they were each born.

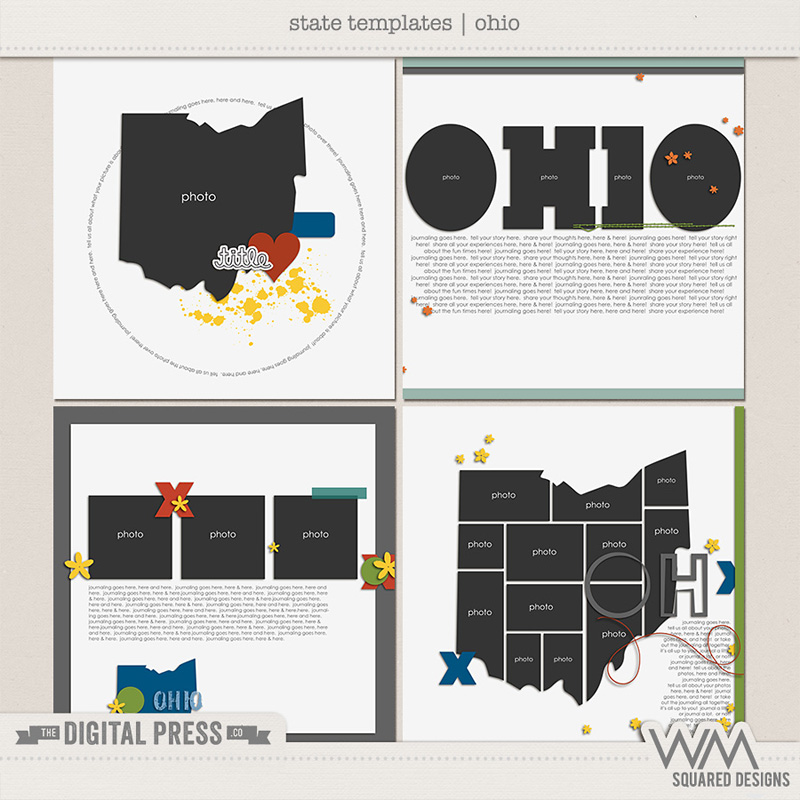
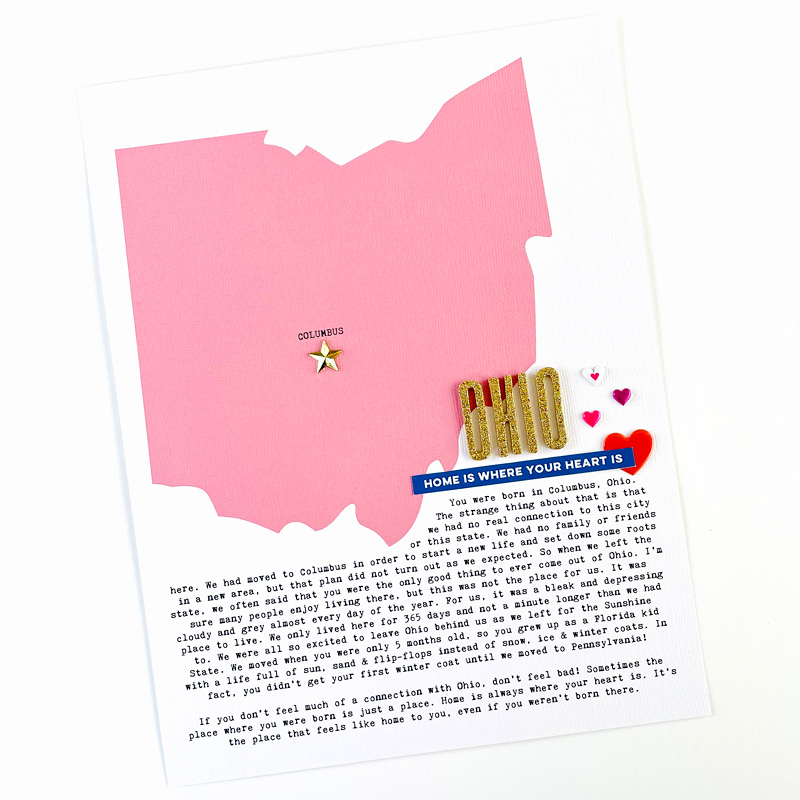
I found these State Templates by WM[squared] Designs in the shop and instantly I had my vision for what I wanted to do…

I picked the first template (upper-left on the preview) as the one I wanted to turn into a page for my daughter. I’ve used digital templates as the inspiration for hybrid layouts before, but I don’t think I’ve ever done it in this way — where I actually printed part of the template on to my page!

Opening up the file in Photoshop, the changes I made were pretty basic.

[ side note: please don’t laugh at my old version of Photoshop; I will probably be “CS5 forever!” because, darn it, I already paid for it and it works great. LOL! ]

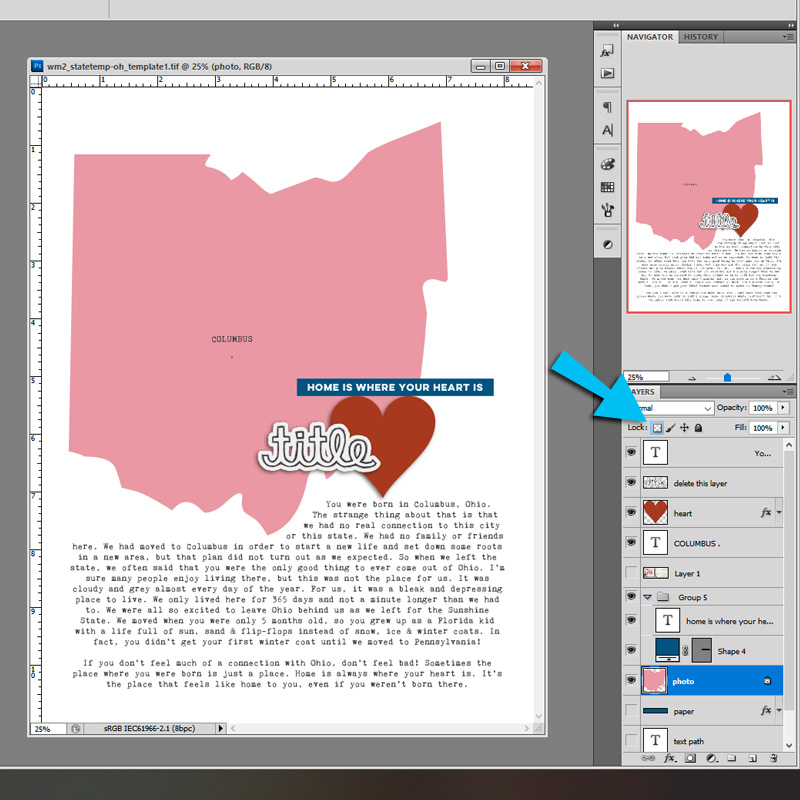
First, I turned the label into a little word art strip and added my journaling. I also changed the silhouette of Ohio to pink.

Here’s one of my FAVORITE tips of all time. I like to lock the pixels on a layer to easily change the color of an item without creating weird jagged edges! The option to lock pixels is usually found in the Layers window here (see blue arrow on the right side):

There are a few different ways you can change the color of a shape, a stamp, or a piece of word art. Here are few that I use often:

  1. Lock the pixels.
  2. Fill a new layer with color. Clip it to the shape.
  3. In the “FX” tab in the Layers window, choose Color Overlay.

All of these methods will color the shape AND its transparent edges — that’s the important part.

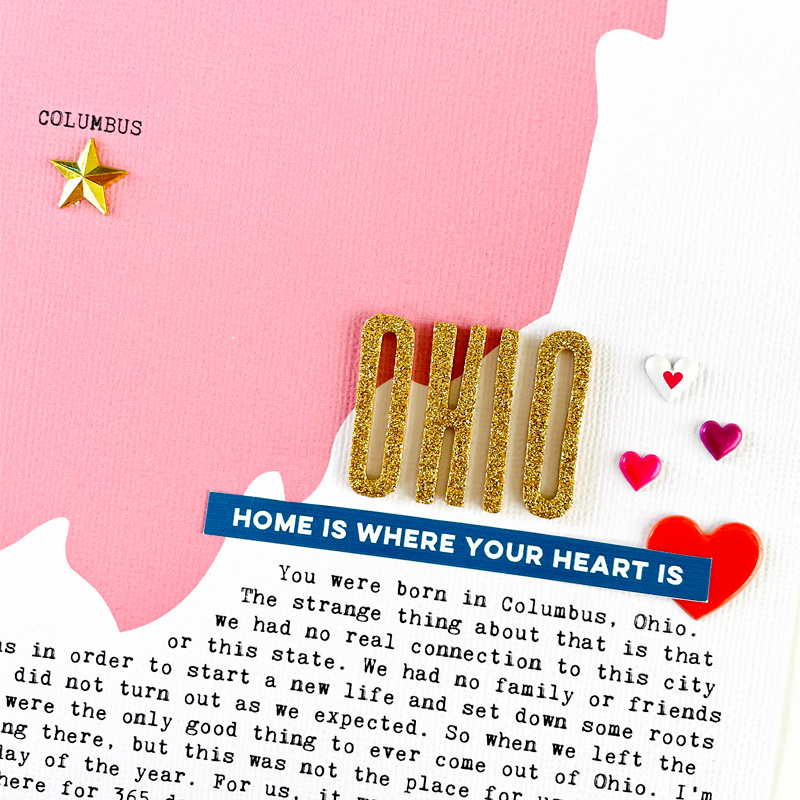
Once I was ready, I printed out my page on some white textured cardstock, along with the word art strip (on a separate sheet of paper). Then I simply added letter stickers, hearts and a star for the capital, using the template as the inspiration for my layout.


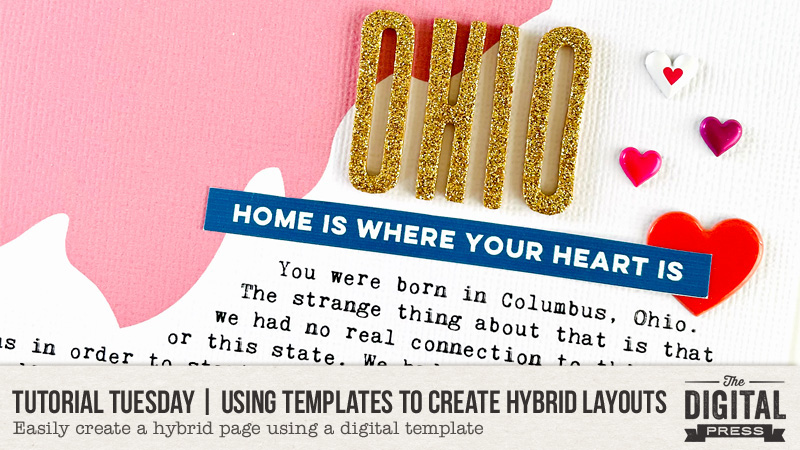
The textured cardstock adds a lot of interest! Here’s a close up look…


I felt like the page didn’t need much embellishment. The shape of the state is the real star of the show!

This layout was pretty simple, which is good, because now I have to make three more versions for my other kids, LOL!

I hope you enjoyed this little tutorial and you find this to be an easy hybrid project to create for yourself.


About the Author Nicole Seitler is a hybrid creative team member here at The Digital Press. She’s a homeschooling momma to four fantastic kids (one of whom will graduate this year!). Once upon a time, Nicole was a designer here at TDP… but now she uses her Photoshop skills to scrapbook for herself. Nicole and her husband, Travis, sometimes dabble in web design or comic book lettering together. Most recently, Nicole has been working in the world of the Social Media Management (before 2020 hit and caused her to get laid off… meaning she has even more time for scrapping!).
Blog Break

This is just a quick note to let everyone know that The Digital Press will be taking a short blogging break, beginning in January 2020!

In the meantime, if you find yourself missing our Tutorial Tuesday series… come take a peek at our archived tutorial posts, and give one of the techniques a try!

If you love learning about our designers and getting a peek into their lives… you can check out the archived designer feature posts.

If you love printing our products and making pretty physical projects, but need a little extra mojo… delve into our archived Hybrid How-To posts and get your creative juices flowing!

And finally, if you are looking for something non-scrapbooking-related and you love food… come take a look at our archived Foodie Friday posts (including our previous Summer Camp Mess Hall features!).

We’ll see you again soon…

Friday Favorites | November 29th, 2019

Hello and happy Friday! Welcome to the latest edition of our Friday Favorites series on The Digital Press blog.  While I love the excitement of new releases in The Digital Press Shop each week, I find it equally thrilling to scroll through the gallery and see the unique ways with which our fellow scrappers put digi scrap goodies to use.  Browsing the gallery is one of my favorite things to do when I find myself with a bit of scrappers block!  I’m so excited to share with you some of my favorite layouts from our amazing community of scrappers this past week.

(each image is linked up to the original post in the TDP gallery, which means you can click on the layout artist’s name or the image and check them out yourself, leave some love, etc.)

First I’ve selected this crazy fun page by southernmother. The main photo is big and bold and I love the added motion from the tilt of the image. Flowers and butterflies and so many other pretty details finish this layout off perfectly.

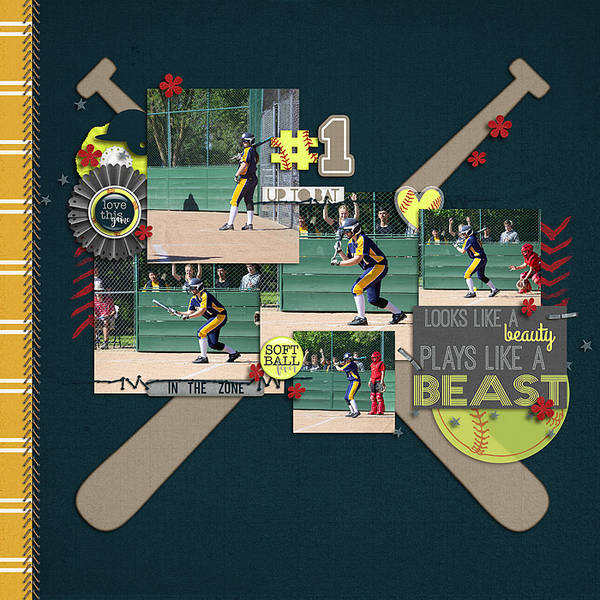
Next is this sporty layout by heidi.  The dark background paper contrasts nicely with the lighter colors of the photos, and I love how the series of images tell the story of the at-bat! Can you believe there’s only one little sliver of patterned paper on this layout? the elements and the photos speak for themselves!

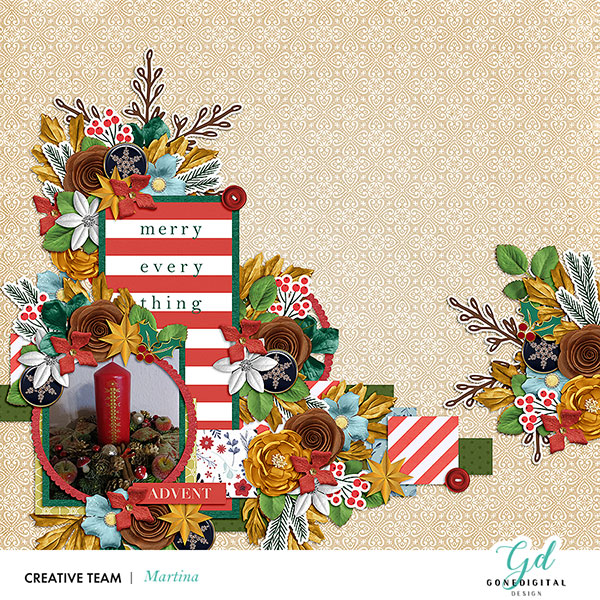
And now this gorgeous and festive layout by MartinaL. So many beautiful details layered and stacked! The main rectangular elements are broken up by the circle frame over the photo (and peeking out of the corner), the epoxy snowflakes, and the circular flowers. Lovely design!

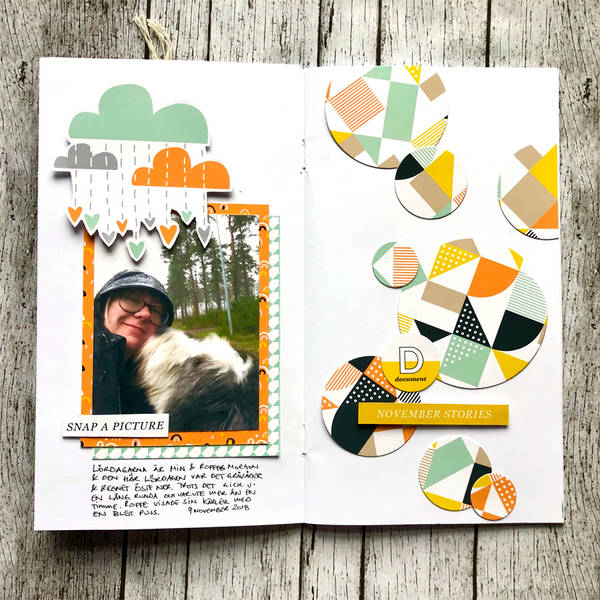
And next is a really fun and sweet hybrid layout by Ann-Sofie.  The rainshower hearts over the photo of a rainy dog-walk is too cute! And I absolutely adore the random scattering of circles on the right page.

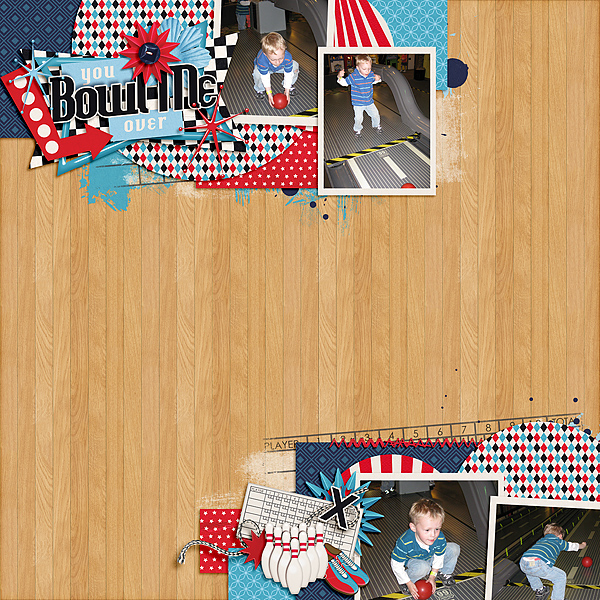
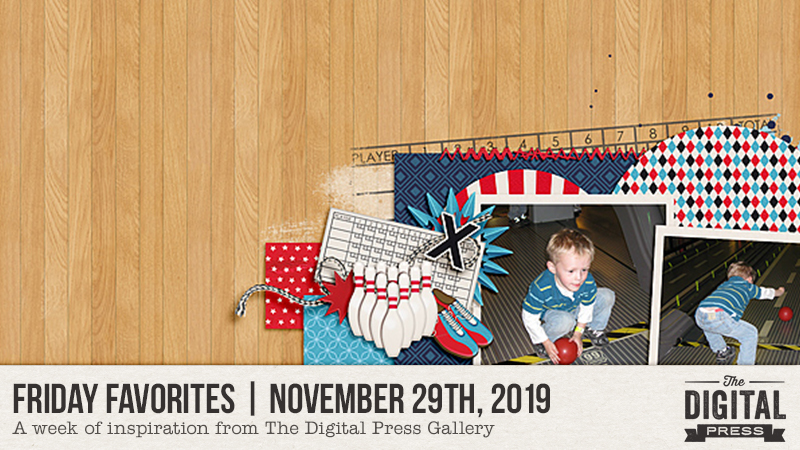
And last but certainly not least, is this wonderful layout by helptheold is so sweet! I love the paint splatters and scorecard grid under the papers and the split design that makes amazing use of white space in the middle – just like a bowling alley!

Be sure to head on over to our gallery to check out all the amazing creations shared by our incredibly talented community members! And if you haven’t shared your layouts before, this is the perfect time to start! We’d love to see what you’ve been working on!


About the Author  Beckie is a creative team member at The Digital Press who lives near Austin, Texas. In addition to scrapping and photography, she enjoys spending time with her family, reading, and ignoring household chores. 
Tutorial Tuesday | PART 5: Use Products from TDP to Scrap on Your Phone

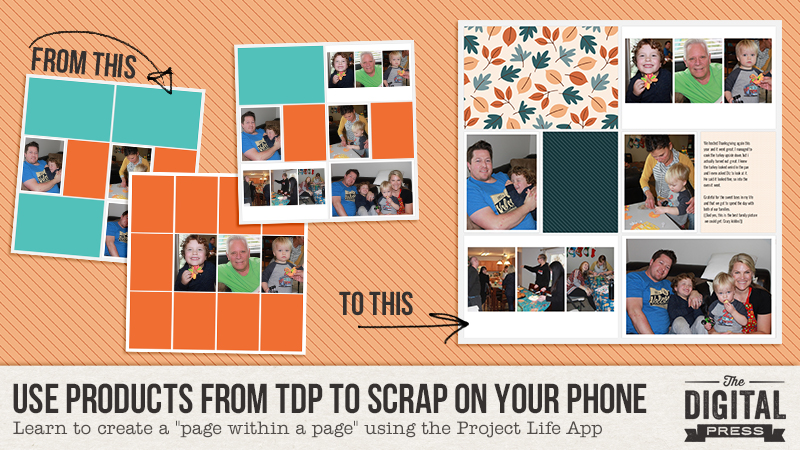
Hello, and welcome to another edition of our Tutorial Tuesday series here on The Digital Press blog! Today I’m going to show you a creative hack for using the Project Life App, something I like to call the “page within a page” technique. This technique is fairly simple and it’s a fun way to make your app-scrapped pages a little more creative. It’s also a great way to add more photos to your layouts without making them seem overly photo-heavy.

Before we get started today with my “page within a page” process… a quick recap, for anyone new to this series! You may recall that in my last Tutorial Tuesday blog post, I talked about some of the newer features of the Project Life App — like ‘Freeform Text’ and adding your own fonts. Additionally, be sure to read the entire “phone scrapping” series here on The Digital Press blog if you’ve never used your phone or tablet to scrapbook, and/or if you need a refresher on some of the things you can do.

And now, let’s get started with today’s project! Here’s a look at a page that I was working on in the Project Life app…

I use a light grey background from the ‘Project 52 2016’ kit and the white frame photo overlay is from the ‘Project 12 2019 May Overlays’ in the Project Life App. I really like the way the photos pop with the white frame on the neutral gray background.

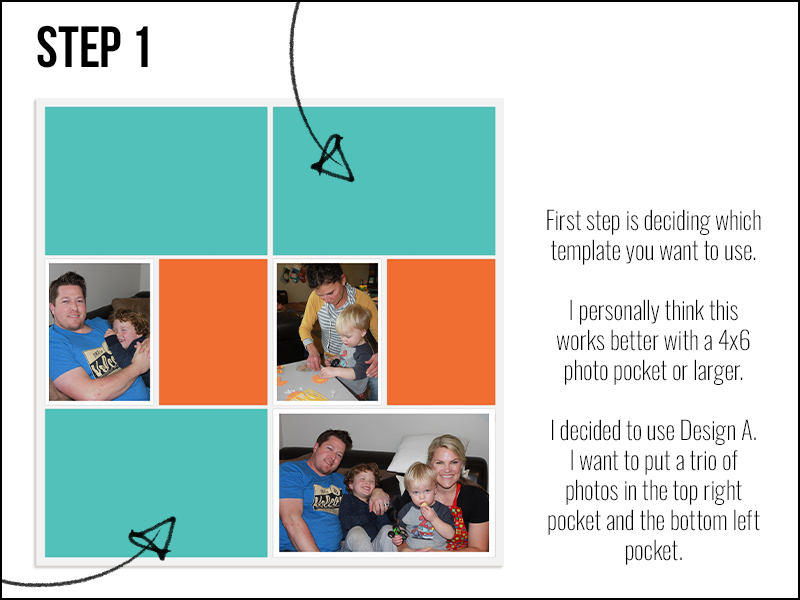
Don’t worry about exiting out of the first layout, it will save in your library in the app. You could use any layout for this trick, I’m partial to the trio of 3×4 pockets into a 4×6 pocket, but the possibilities are endless. Get creative! Also, I leave the background white on this layout. I think It helps to coordinate with the frame overlay.

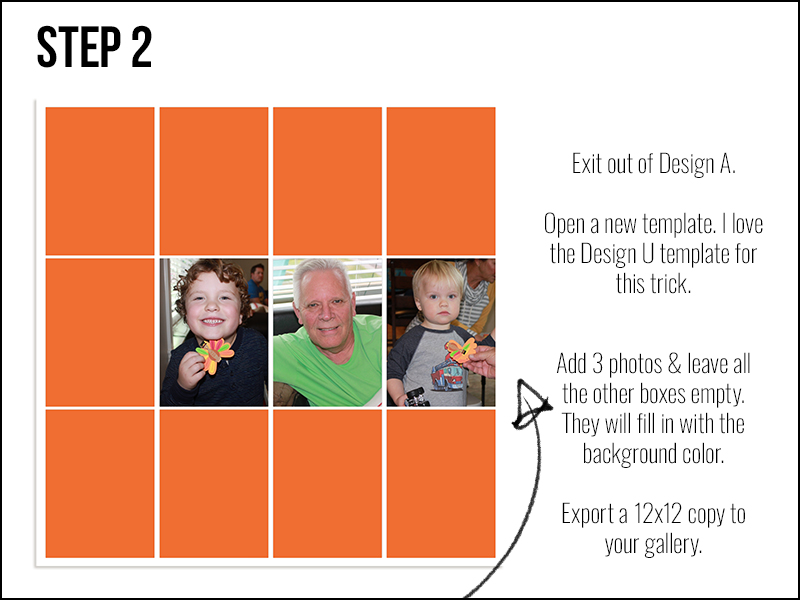
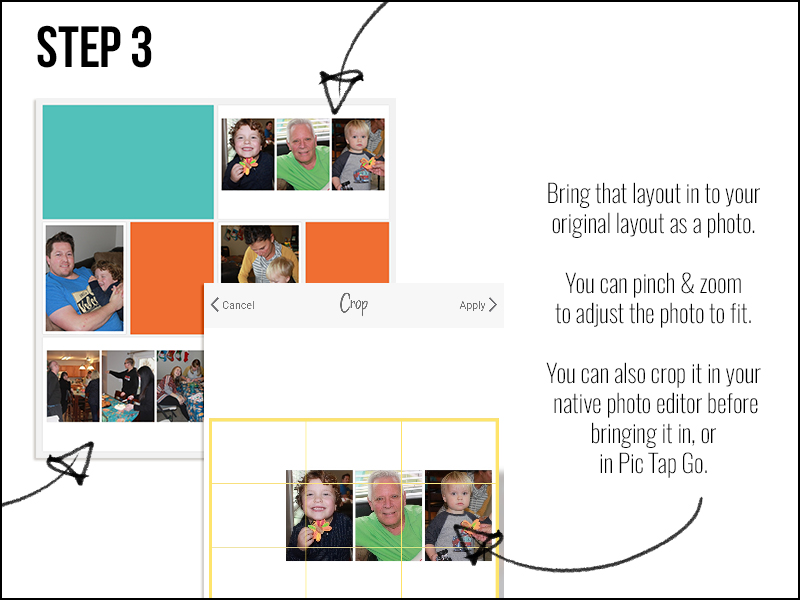
This step can get a little tricky. When you pinch and zoom in the app, it can be difficult to get it *exactly* centered. I think it’s easier to crop the photo before you bring it in to the app, either in your native photo editor, or even in Pic Tap Go (which is integrated right into the Project Life App). You can see I repeated Step 2 for the bottom left pocket.

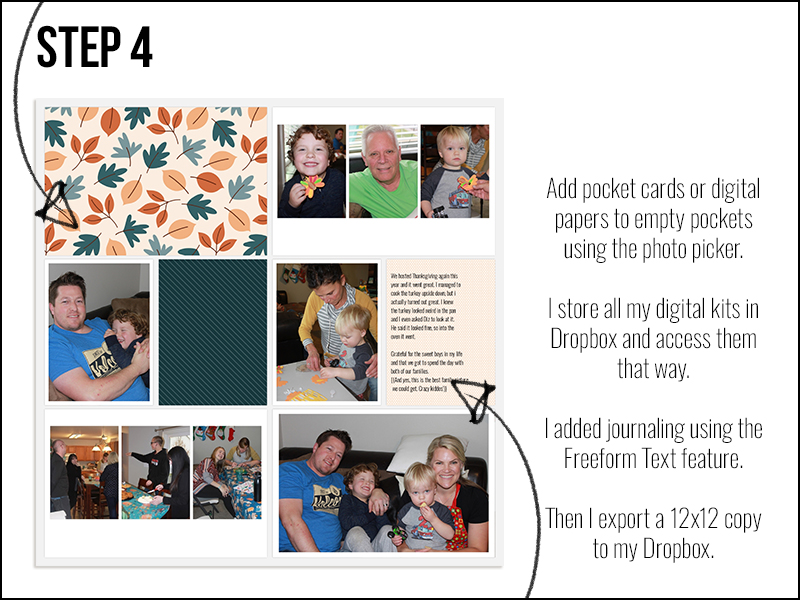
I used k.becca’s Autumn Leaves & Pumpkins papers as pocket cards for this layout. She’s one of our favorite TDP Designer Alumni, visiting the site again this month for our 5th Birthday Reunion! Be sure to hurry and check out her shop while it’s open again during TDP’s birthday celebration (through 12/2).

Then I download the layout to my computer and open it in Photoshop to add embellishments, as well as any journaling or titles, if I didn’t add it in the app prior.

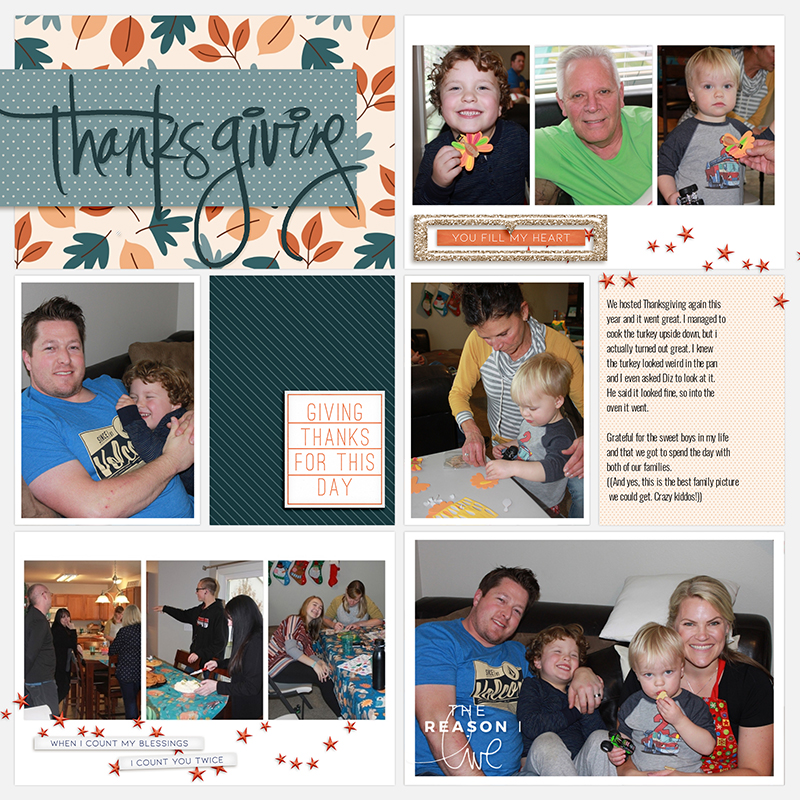
Here’s a look at the finished layout…

I love Karla Noel’s photo stamps! This one is from her Love Life – Sentiment Bits. The Thanksgiving title (recolored) is from Thanks – The Elements by Karla Noel too. I added other embellishments to fill in the white space on the trio of photos from Cornelia Designs – With a Grateful Heart kit.

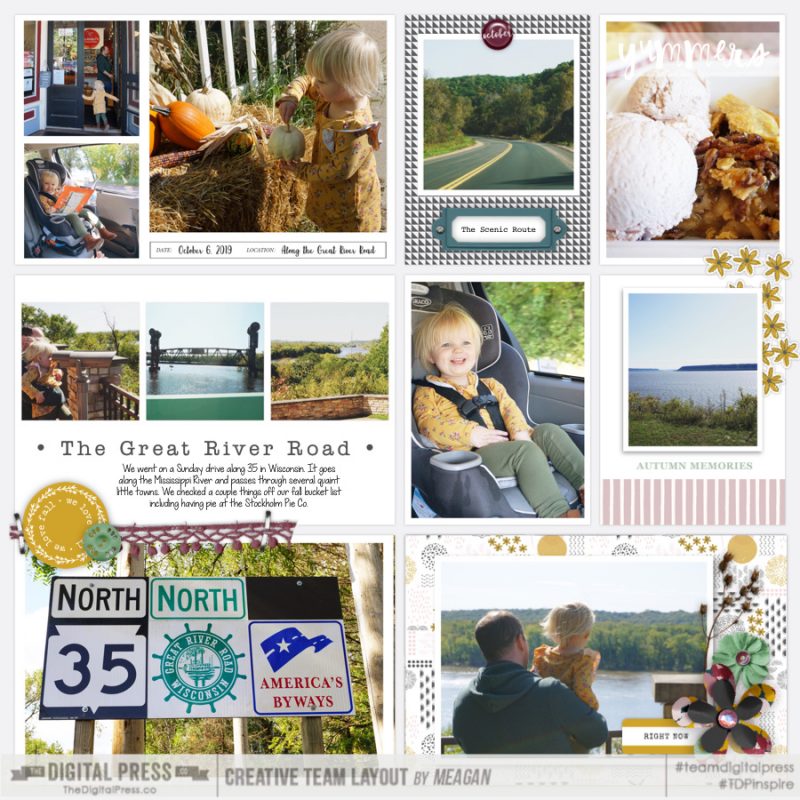
I found some great layouts by our very own Meagan & Jenna from the Creative Team, in the gallery that used this technique.
Look at Meagan’s gorgeous layout. Now she used the Over app as well, but you can see how the middle photo pocket on the left side has the 3 square photos with the white space, that was done in the Project Life App. She used Rachel Etrog’s October Stuff kit. 

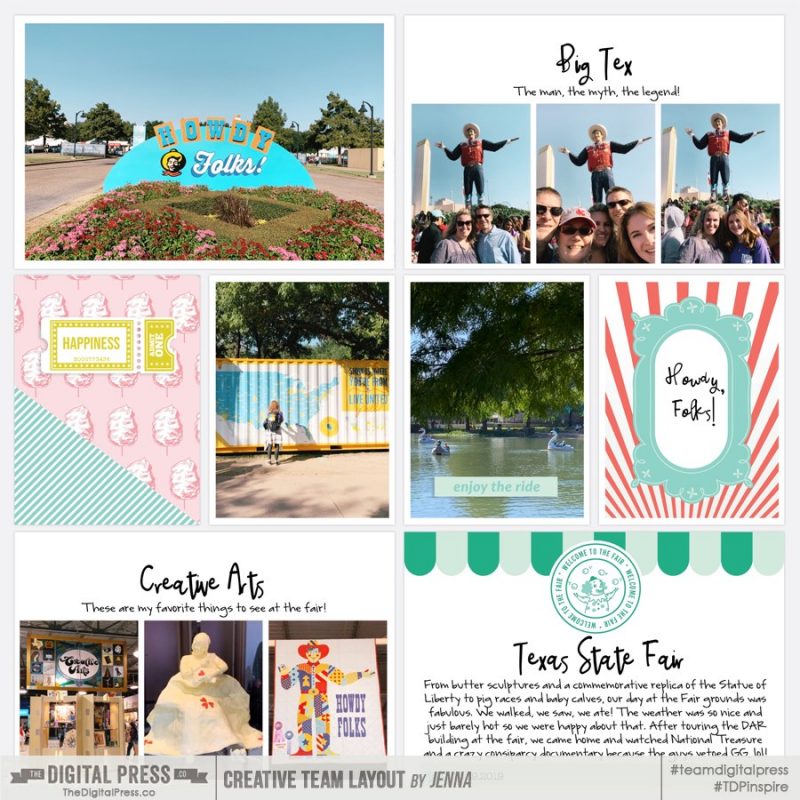
And this one by Jenna. She used Rachel Etrog’s At The Fair collection.

Can you tell we all love the neutral gray background with the white frame overlay on our photos? Great minds think alike.

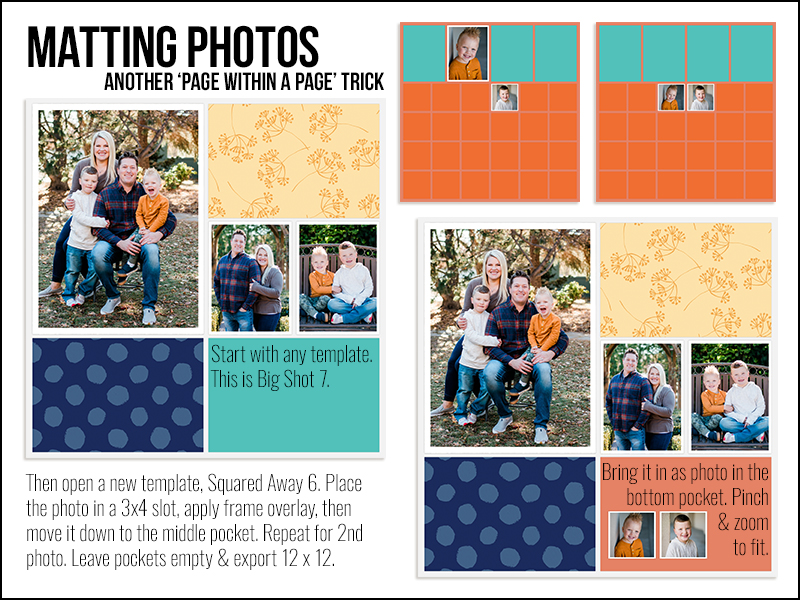
Another fun trick is to “mat” your photos with a colored background using the ‘page within a page’ technique.

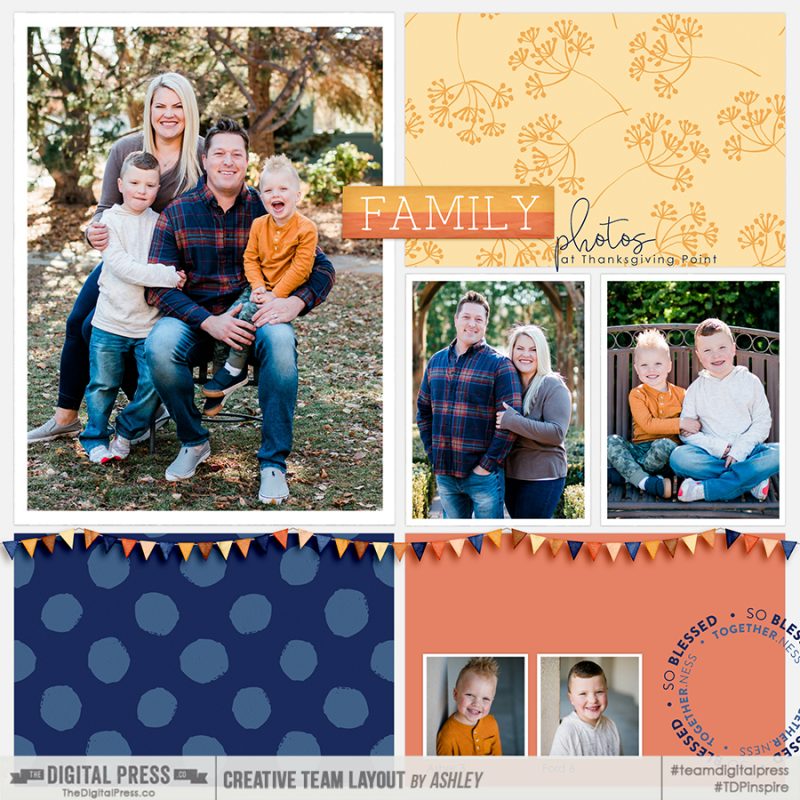
And here’s the finished layout after it got some embellishing in Photoshop.

Similar to my first page, I used Cornelia Designs – With a Grateful Heart kit, Karla Noel’s KN Touch font (for the title) and her Thanks – The Elements (the circle stamps). The coral colored background is from an app kit called ‘Brave Patient’

It’s a fun trick and a great way to add some color to your app layouts, but also what I’d consider white space, to allow for some embellishments.

Now are you asking yourself “Why doesn’t she just do ALL of it in Photoshop?” I know… I know. It’s a great question. Here’s my answer. I take the majority of my pictures on my phone and I love the ease of scrapbooking on the go with my phone. I can complete a layout while I’m on lunch break at work, while waiting in the doctor’s office, or even in bed! I used the Project Life App to get current after being perpetually 7-ish years behind. My love for the app runs DEEP. That being said, now that I’m caught up, I have the luxury of being able to spruce up my app layouts in Photoshop when I want to. However, if you want to do this all in Photoshop, here at The Digital Press, there is NO shortage of amazing pocket templates by our designers. Cornelia Designs has designed some stunning pocket templates in her Pocket Basics Template series, Anita Designs has quite a few template packs in her ‘A Story Captured’ series that lean toward pocket-style with an artistic flair, and Little Lamm Paper Co has a bunch of ‘Add-On Photoshop Templates’ that are great for adding multiple photos to one pocket.

Let me know if you have any questions about the Project Life App – I’d love to get you scrapping on the go! Be sure to post your layouts that use TDP products along with the Project Life app in the gallery! We’d love to see what you come up with!

Happy Scrapping!


About the Author  Ashley is a member of The Digital Press creative team. She lives in Utah with her husband, 2 young boys, and 1 lazy (but lovable) pup. She works full-time at a busy medical clinic. She has been scrapbooking since childhood… scrapbooking digitally for 10 years… and most recently (& obsessively) app-scrapping on her phone.