Category: Holiday Tips & Tricks

10 Holiday Tips & Tricks | Day Ten

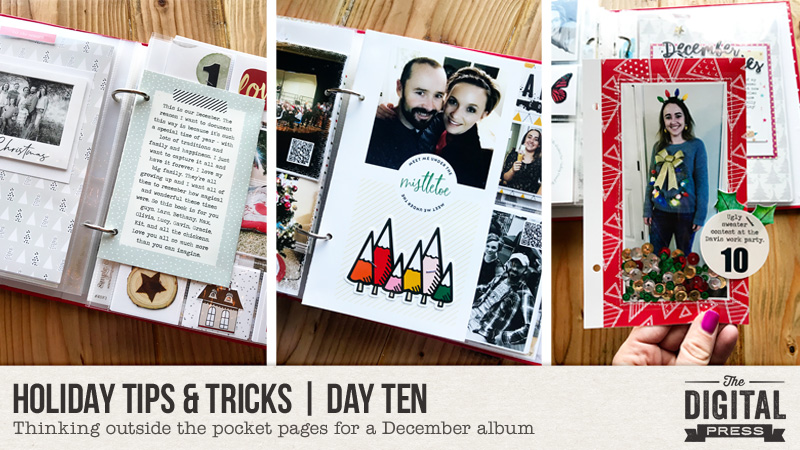
Hello! Welcome to Day Ten of our annual Holiday Tips & Tricks series here on The Digital Press blog!  I’m here to share a little bit of my family’s December album and show you how I went outside the pocket pages to add interactive elements or tell a special story.

Pocket pages can be such a helpful tool to get things organized and finished up quickly, and I love them, but this year I wanted to try adding some texture and bulk to my album.  It’s always fun flipping though an album with different size pages! And it makes the reader slow down a little and see things they might otherwise have missed.

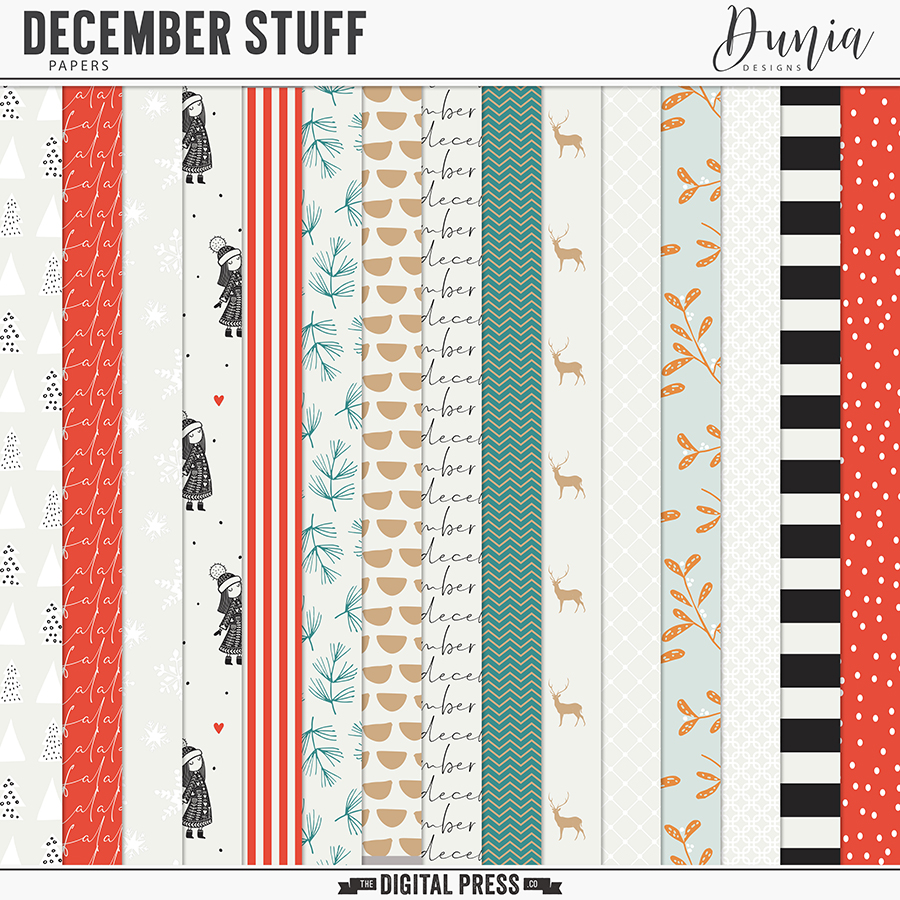
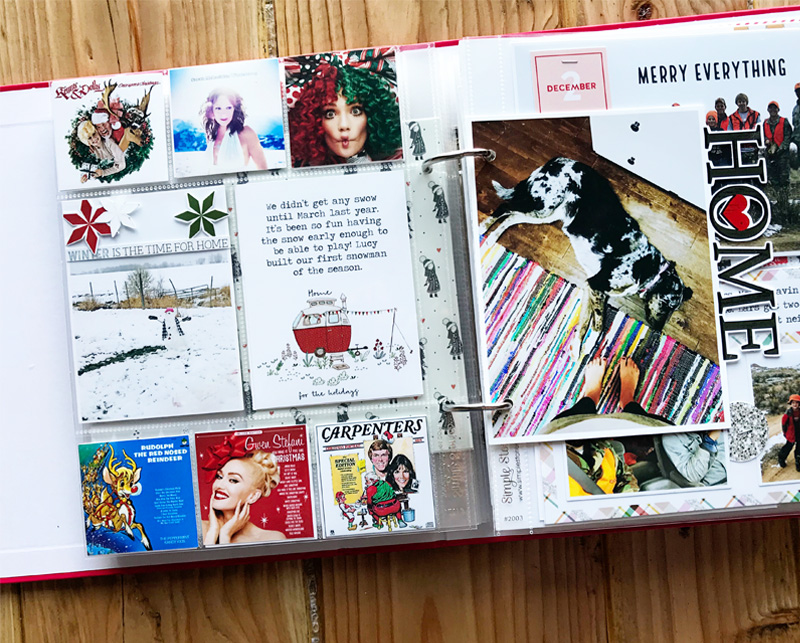
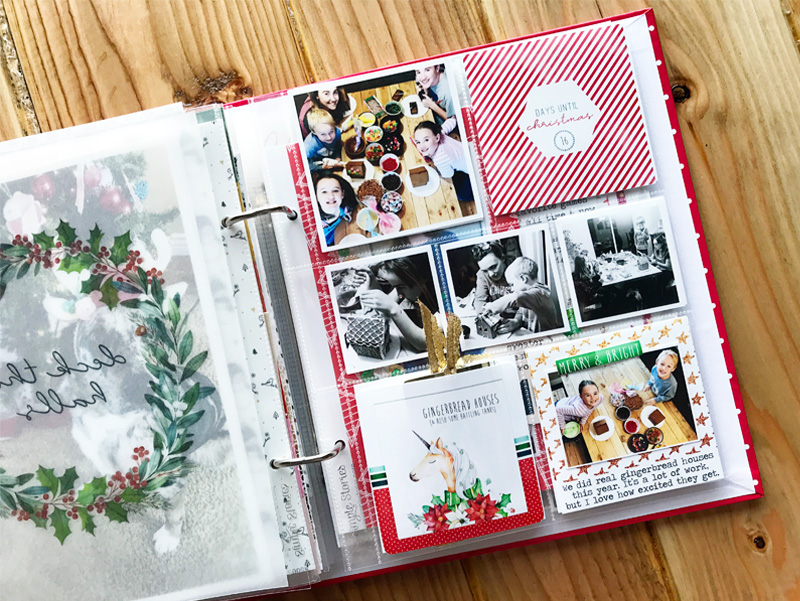
Here is my intro for 2018.

(December Stuff by Dunia Designs)

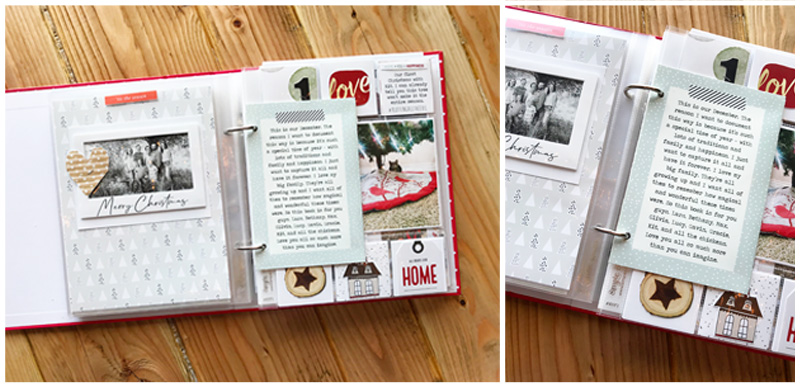
This is a letter to my family telling them why I make this album. I used a printed pocket card for the journaling and a patterned paper from the same kit for the back.

Here I used Photoshop Elements to merge word art onto a photo.

The back is a journaling card merged with the striped paper to cover the word art on that side. I added a photo and a little flower.

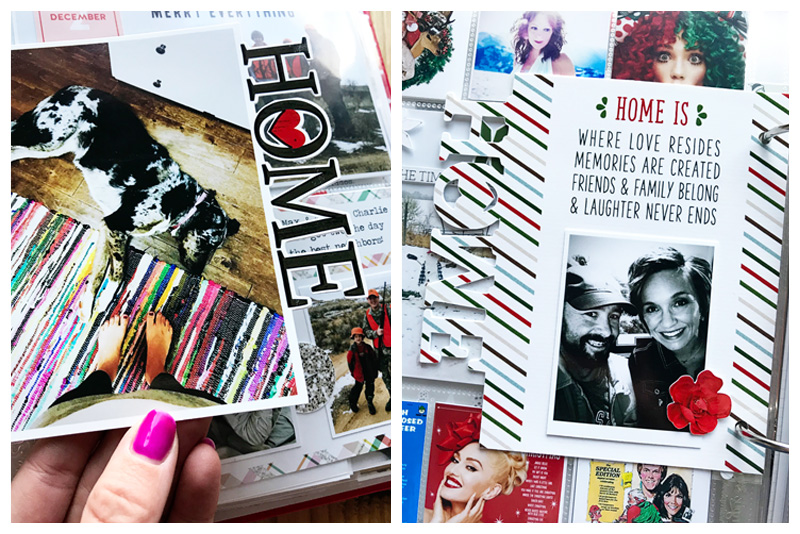
(Home for the Holidays Collab)

These next pages surprised me. Amie of Little Lamm Paper Co. makes the most amazing travel notebook and photo templates. I usually pass them up because I’ve never made a travel notebook in my life, but I grabbed them for my December album this year. They were so perfect! I love love love how these pages turned out. These templates are so easy to work with and so versatile.

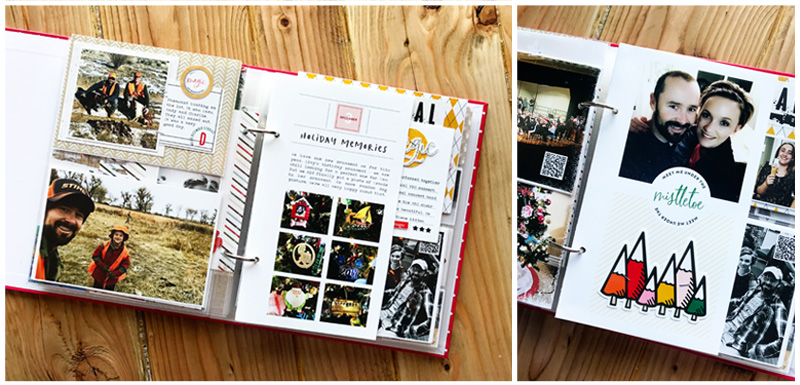
(Sparkle by Little Lamm Paper Co.)

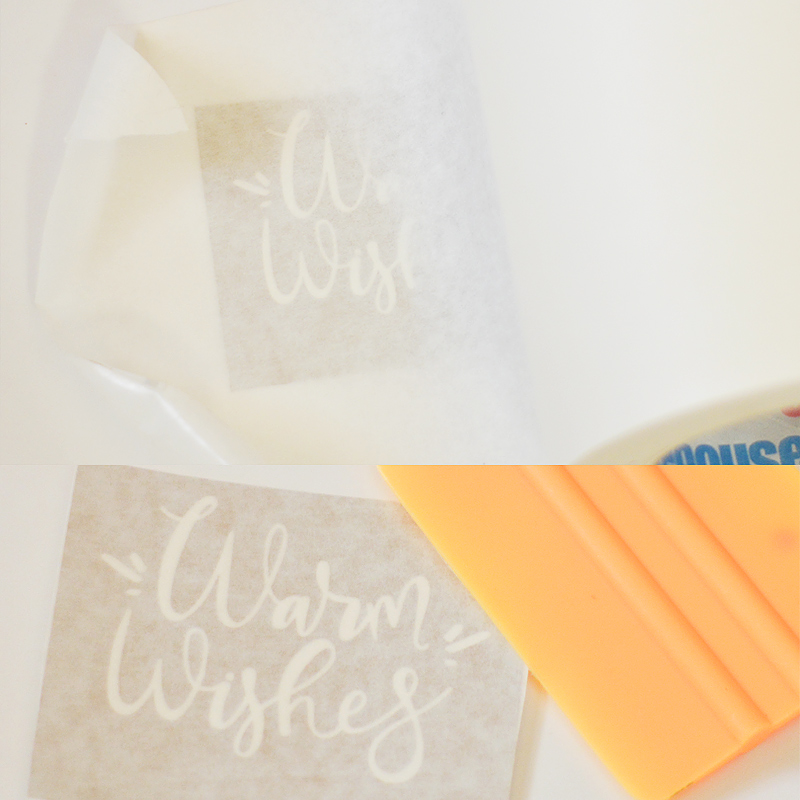
This page was a new experience for me. I enlarged a journaling card to fit my album, printed it on vellum, and then used self seal to make my own transparency.

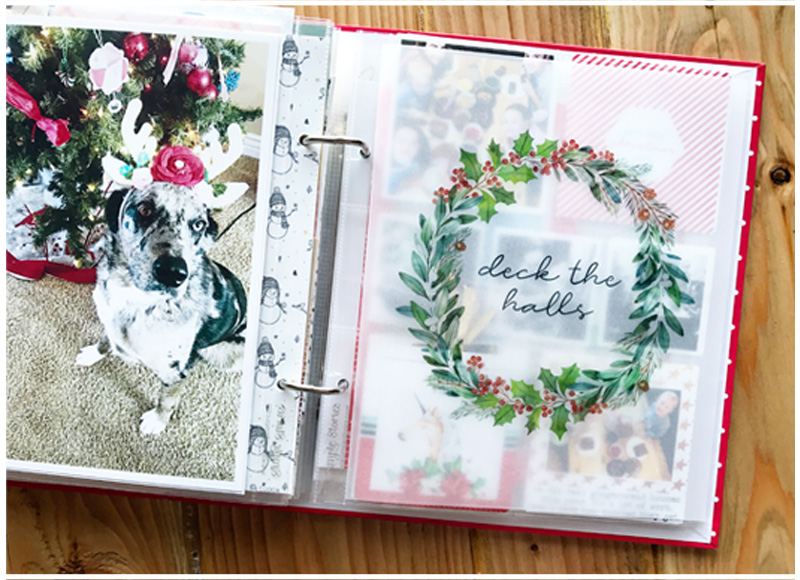
(Christmas Magic Journaling Cards by Cornelia Designs)

Here I took the photos of all the gingerbread creations from my kids and turned them into tags that you can pull out of the pocket card.

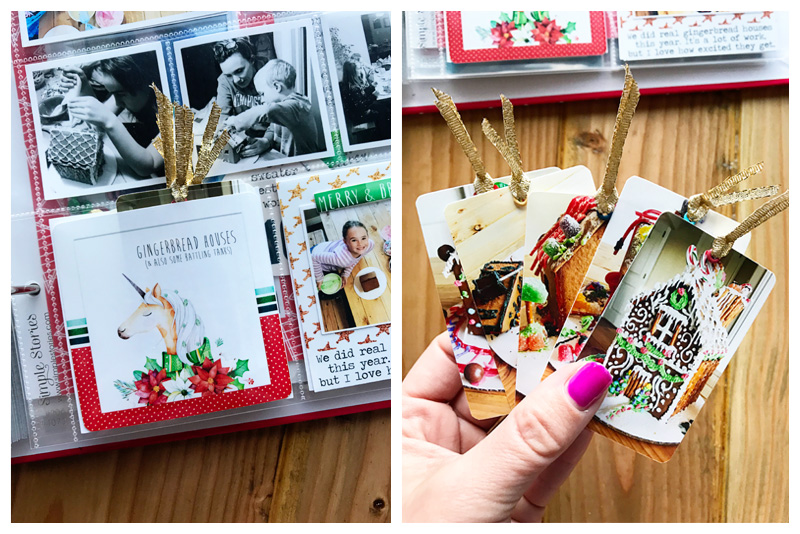
(Christmas Magic by Cornelia Designs)

This last page I want to share includes a shaker card.

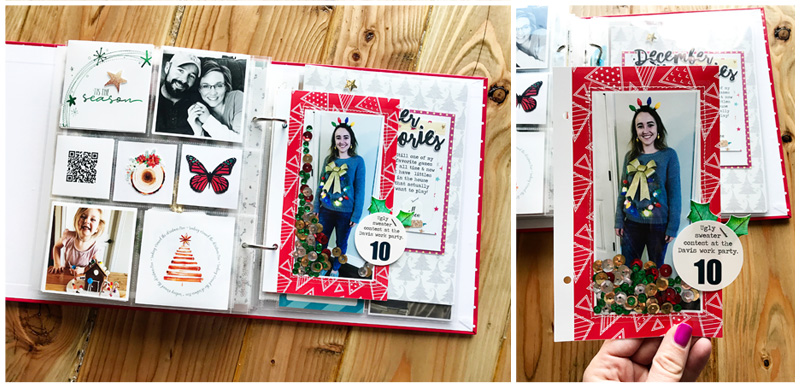
Vellum is usually the go-to for shaker cards, but since I’m using a photo, I wanted to be able to actually see it clearly. I cut down a pocket page just a little bigger than the photo and sewed along three edges, dropped some sequins in and sewed it the rest of the way up. Ta-da! My daughter is now a shaker card. She thought it was hilarious.

I hope you liked these ideas for adding some “extras” to your pocket pages. In the past I’ve done an all digital December album and was thinking that it would have been awesome to add some hybrid pages.

If you’re thinking of giving this project a try… head over to The Digital Press’s challenge forum and get the details about how you can earn challenge points for December 2018 at TDP if you try any of our “Holiday Tips & Tricks” throughout the month as they appear here in this blog series! Also, we’d love to see any photos of your holiday projects using TDP goodies in the gallery this month, so link us up after you’re finished creating and uploading!


Kate About the Author  Kate is on the hybrid team here at The Digital Press. She lives on the Utah/Colorado border with her husband, 5 kids, 10 chickens, a dog named Gracie, and a cat named Kit. She’s a city-born girl who found she’s really a country girl at heart. She can be found outside, barefoot, and probably in her garden.

10 Holiday Tips & Tricks | Day Nine

Hi everyone! Welcome to Day Nine of our annual 10 Holiday Tips & Tricks series here on The Digital Press blog! I’m here today to show you a really easy way to use some of your digital scrapbooking supplies to create a fantastic, artsy, customized mug!

If you’re like me, you always have a few last minute Christmas gifts to pull together, and you need something quick and inexpensive. You can use some of that fabulous word art you have in your digital stash to make some great personalized coffee mugs! If you admire those beautiful mugs you’ve seen on Pinterest and know you just can’t freehand something that looks so perfect, then why not take advantage of the gorgeous word art you have in your stash?! This will seem a little long, but once you try it and get the hang of it, it’s super simple!

Let’s start with what you will need:

  1. Sharpie markers – specifically the Sharpie Paint Marks because they will last longer
  2. Rubbing alcohol to clean the mug before painting
  3. White coffee mugs – I get them at the dollar store or you might find them at a thrift store cheaper. I have heard, the cheaper the better because the Sharpie holds better on a cheaper glaze.
  4. Vinyl for the stencil and transfer tape – You could use paper or even sticker paper, but it’s a bit trickier
  5. Cutting machine

The first thing you will need to do once you have your supplies together is to choose the word art you want to use on your mug. Keep in mind that for this technique the fancier the word art, the more difficult it will be to position and work with. I chose these two word art sets from the shop at TDP…

Next, you will wash your mug and wipe it down with the rubbing alcohol to get any dirt or fingerprints off the surface. Measure the size of the area where you want the word art to go.

Next open the word art in your cutting machine software and scale it to the size that you measured on your mug. Select the trace area and trace all of it.

You can delete the word art so that you are just left with the outlines and you are ready to send it to be cut.

If you are using the vinyl/transfer tape method, once it is cut, you’ll want to trim the vinyl fairly close to the word art. Then weed out the letters of the word art.

Now you’ll apply transfer tape to the stencil. You’ll want to use a squeegee or plastic card to really stick it down. Then peel off the backing. If you are not using mask, you can still peel it carefully off the backing, not letting it get stuck together.

If you don’t have any vinyl on hand and you are using sticker paper: Gently peel the background from around the lettering to create a stencil. You may have to hand place the insides of any of the letters, or free hand them, which is not too difficult.

If you are using paper, you will need to tape it or glue it down to the mug. This is a bit trickier, but it works in a pinch. I used the knife tool in my Silhouette to make cuts through the letters that had inside pieces. This makes sure they stay intact when you lift the stencil.

Apply your stencil to your mug, smoothing it out. I am really bad at getting things straight, but it doesn’t have to be absolutely perfect. I find it easier to lay the middle first and then go out. If you do get a little bubble or wrinkle, don’t worry too much about it, it won’t be noticeable. If you’ve used masking tape, peel that off now.

Now it’s time to paint! Simply fill in the areas inside the word art. The nice thing about vinyl is that it lays perfectly flat against the mug, so  you don’t have to worry about accidentally getting it underneath.

Let the marker dry completely before you try to lift the vinyl or paper. I will admit that the sticker paper was a little more difficult to remove and I did have to do a little scrubbing and touch up on that one. It didn’t turn out as neat, but I could have worked on it a little more.


Continue to let it dry for about 24 hours. Put your mug in a cold oven and then turn the temperature up to 425 degrees and bake for 30 minutes. Turn off the oven and leave the mugs for 15 more minutes. Crack the door, but leave the mugs in there for awhile longer, preferably overnight.

And there you have it! A beautiful gift idea… and you can top it off with hot chocolate ingredients and a cute tag to make it even better.

Tips:

  • Hand washing the mug is best. It may hold up in the dishwasher, but it may not. You could note that on the card, if it’s a gift.
  • Make sure you let the mug heat up and cool down with the oven to avoid breaking it.
  • Allowing 24 hours before baking will help the colors hold better.


Using word art for making personalized gifts is a lot of fun. Some other tricks I’ve tried are:

  1. Placing the cut word art on a glass mason jar, spray painting the whole thing, and then peeling the vinyl.
  2. Placing the vinyl word art on a water tumbler like a Yeti or similar and leaving it as is. It holds up better than you would think.

There are so many uses for vinyl stencils and vinyl word art in crafting. If you haven’t played with vinyl and your cutting machine, you really should. It’s a lot of fun!

If you’re thinking of giving this project a try… head over to The Digital Press’s challenge forum and get the details about how you can earn challenge points for December 2018 at TDP if you try any of our “Holiday Tips & Tricks” throughout the month as they appear here in this blog series! Also, we’d love to see any photos of your holiday projects using TDP goodies in the gallery this month, so link us up after you’re finished creating and uploading!


JanAbout the Author  Jan is a high school teacher, wife, mom, and grandma who spends most every little bit of free time she gets documenting her family’s memories through digital scrapbooking. She is a summertime sunshine and beach lover who gets her energy from being outdoors. She is currently looking forward to retirement and a beach chair with her name on it and someone bringing her fruity drinks on command!

10 Holiday Tips & Tricks | Day Eight

Hello, and welcome to Day Eight of our annual 10 Holiday Tips & Tricks series here on The Digital Press blog! I’m here today to share the recipe for a festive, tasty, & easy holiday cocktail!

I’m in charge of our Christmas drinks bar for our family celebrations… so I thought I would share with you one of my favorite cocktails that I’ve found! The recipe is adapted from Half Baked Harvest; she named this drink The North Pole, and I love it! I imagine this is what Santa drinks up in the North Pole on those Fall days to get geared up for the season! 🙂

Ingredients

  • 4 ounces vodka (I used whipped cream flavored vodka, because it’s what I had in the cupboard)
  • 2 ounces Kahlua (or more, to taste)
  • 1/4 cup chocolate syrup
  • 1 tablespoon molasses
  • 1 teaspoon vanilla extract
  • 1/4 teaspoon ginger (I love ginger & thought using more was actually better than the original recipe)
  • 1/2 cup cream or milk (I used 2% because it was already in my fridge)

Instructions

In a cocktail shaker, combine all ingredients (except the milk) & shake until combined.

Add some ice to the shaker & mix again.

Strain into 4 glasses (I used 2, but had some left over… so 4 is definitely doable!).

Top each glass with milk or cream. Garnish as you wish; I added some chocolate drizzle to my glasses & then topped with a little bit of whipped cream.

*Alternatively… you could take leftover coffee & freeze into ice cubes, and then pour this drink over your coffee cubes! I didn’t have any to use because I never have left over coffee these days! 😉

Cheers!

Now I have the perfect drink to sip on while wrapping presents!

If you’re thinking of giving this one a try… head over to The Digital Press’s challenge forum and get the details about how you can earn challenge points for December 2018 at TDP if you try any of our “Holiday Tips & Tricks” throughout the month as they appear here in this blog series! Also, we’d love to see any photos of your holiday projects using TDP goodies in the gallery this month, so link us up after you’re finished creating and uploading! 🙂

Happy holidays!


AmieAbout the Author  Amie is a craft-loving dental hygienist who lives in Washington state. She loves her husband, her two crazy kids, and her English Bulldog… as well as coffee, baking cupcakes, daffodils, glitter & sprinkles, reading a good book, and lip gloss — not necessarily in that order.

10 Holiday Tips & Tricks | Day Seven

Happy December, everyone, and welcome to Day Seven of our annual 10 Holiday Tips & Tricks series here on The Digital Press blog! Today I’m here to share a recipe for Peppermint Brownies – with a twist. The twist is that they’re lower in sugar content… and the secret is in the pop! For some reason, a carbonated beverage takes the place of the oil and eggs. I’m not sure why, but since it works, I’m happy!  We bake brownies for every occasion and since there are so few ingredients needed,  all I have to do is keep the brownie mix in the pantry and I’m good to go!

Peppermint Brownies

INGREDIENTS

— 1 box of sugar free brownie mix
— 1 – 12 ounce can of diet pop (any flavor will do)
— 1 can of frosting (any kind will do)
— 3 candy canes (more or less to taste)

INSTRUCTIONS

— Mix together the brownie mix and pop in a bowl until there aren’t any more clumps.
— Spray an 8×8 pan with nonstick cooking spray (I use Pam), and add the batter (note: it will be very runny & it sort of doesn’t look like it will work… but it does for some reason!).
— Bake at 350 degrees for 25-30 minutes or until toothpick comes out clean when checked.
— Let the brownies cool completely before frosting them.
— Carefully smash the candy canes in a ziplock bag with a hammer until you have crumbles.
— Add the crumbles on top of the icing and ENJOY!

That’s it! See how easy it is? My children could make this all by themselves when they were younger! And even better yet, this recipe is VERSATILE! You can use any diet pop you’d like; for instance, my family loves it with Diet Dr. Pepper, too! Or, if you don’t like sugar-free ingredients, you can use regular brownie mix and any regular pop you like, as well, and it still tastes great in the end. Feel free to change the icing and toppings, too (we also love M&M’s on ours). This recipe is just plain easy and fun to make.

Speaking of which… if you’re thinking of trying this, head over to The Digital Press’s challenge forum and get the details about how you can earn challenge points for December 2018 at TDP if you try any of our “Holiday Tips & Tricks” throughout the month as they appear here in this blog series! Additionally, we’d love to see any photos of your December/holiday projects using TDP goodies in the gallery this month, so link us up after you’re finished creating and uploading!


Robin

About the author  Robin is a member of the creative team here at The Digital Press. A wife of 26 years and a mom of 4 crazy children (3 in college and 1 still at home), she says that her life occurs mostly in the car as she transports said crazy kids to their many, many homeschool activities. When not driving, Robin loves to make her family cringe by pulling out her camera again (and again, and again…).

10 Holiday Tips & Tricks | Day Six

Happy holidays, everyone, and welcome to Day Six of our annual 10 Holiday Tips & Tricks series here on The Digital Press blog! I hope you are having a great time this festive season with all the preparations you need to make, all the films you want to see, the friends and loved ones you want to spend time with, the gifts you want to make or buy, and especially all the food you love to eat!

Today I’m here to share a fun holiday project — making cute little ornaments out of buttons! It’s an idea I saw a while ago, and have been wanting to try… and I found that it is really a quick little project (took me about 10 minutes at most?)… and it could be a fun craft project to do with children or grandchildren, as well as just for yourself.

When I saw this idea last year, I even bought a big bag of buttons in all different shades of green in last year’s New Years sale (with this project in mind)… and then… when it became time to use them for this, well — that big bag of buttons could not be found! Argh! Don’t you hate it when that happens?! Instead, I found a bag of various buttons in a craft shop, and all was well in the world again. 🙂

Supplies needed to make your button trees:

  1. Buttons, of course! (*NOTE* each tree is made of three sections, so you will need 3 or 4 brown buttons for the tree trunk, and about 10 buttons of different sizes and ideally differing shades of whatever color you would like your tree to be, and finally a star button or “tree topper” button. I found a pack of buttons that included some yellow stars, in our local £1 shop… but you can get them at many craft stores)
  2. String (I used embroidery silks, but any kind of string or thread would be fine)
  3. Either a needle or some nail varnish (make sure that the needle will fit through the smallest hole, which I discovered may not be on the smallest button!)

How to assemble your trees:

1. Thread your needle, but do not knot the end of the string (OR… if you are not planning to use a needle, paint a little nail varnish on the tip of your string, which will make the fibers of the string stick together, stiffening the end so it doesn’t fray, and making it easier for you to pass it through the button holes).
2. Start with the smallest button and work your way down to the largest, running the string through one hole of each button. I laid my buttons out in order (as shown here) before beginning to put them onto the string…

3. Once you have strung all the green buttons, add the brown tree trunk buttons onto the string.
4. After all the buttons have been strung through one hole, go through the opposite hole and start to pass the string back up to the top of the tree.
5. At the top of the tree, make sure that you have a good couple of inches on both ends of the string, and then make a tight knot to hold all the brown and green buttons together.
6. Now add your yellow star or tree topper button.
7. Finally make loop with the string, so that you can hang this button tree onto your Christmas tree. I tried to be clever and make the loop so that the know would sit behind the star button, and not be seen. One last tip –  if you are planning to hang these ornaments on your Christmas tree, you might want to make your loops a little larger than mine (they are on my tree, but we had to carefully select nice slim branches to hang them on!).

And with that, you are done! As you can see, I tried making a green tree, and rainbow-colored tree, and a frosty blue & white tree — and I love them all! I think they make sweet little tree decorations, or they would also look cute attached to gift tags on gifts. I hope you might have a little fun with this idea too!

If you’re thinking of giving this project a try… head over to The Digital Press’s challenge forum and get the details about how you can earn challenge points for December 2018 at TDP if you try any of our “Holiday Tips & Tricks” throughout the month as they appear here in this blog series! Also, we’d love to see any photos of your holiday projects using TDP goodies in the gallery this month, so link us up after you’re finished creating and uploading! 🙂

Happy crafting and Merry Christmas!


CorrinAbout the Author Corrin is a member of the creative team here at The Digital Press. She is a fan of the Big Bang Theory and a lover of cozy pajamas or flip flops when the sun finally shines! She lives in the breezy South of England with her husband and 4 crazy kids, who regularly discover & plunder her secret chocolate stashes, and hopes that maybe this will be the year she reaches the bottom of the laundry pile!

10 Holiday Tips & Tricks | Day Five

Hello there! Dunia here (of Dunia Designs)… excited to be bringing you Day Five of the 2018 edition of our always-popular 10 Holiday Tips & Tricks series here on The Digital Press blog!

I hope you’ve been having an amazing December so far! I’m here today to show you a really fun project I just completed in the past week or two — how to use your digital scrapbooking papers to create your own custom wrapping paper! This is just way too cool. 🙂

SUPPLIES NEEDED:

  • digital paper(s) of your choice
  • photo editing software (I used Photoshop CC; most photo-editing programs will work, however)
  • computer with internet access (to enable you to upload your image to a printing company; I used Overnight Prints)

Here’s a look at the digital papers I chose to use, from one of my most recently-designed collections — December Stuff

First, you’ll want to choose the paper/pattern you want to use… and then open it up in your photo editing software in order to prepare your digital image.

Based on the specifications of the wrapping paper printing company I worked with (Overnight Prints), I created a custom-sized canvas that was 27.125″w x 19.125″h.

Then, I dragged my 12″ x 12″ paper onto the canvas area I’d just created. As you can see below, a 12″ x 12″ paper won’t fill the entire 27.125″ x 19.125″ space. So I duplicated it, and lined the 2 copies up with each other, side by side…

I continued duplicating the papers, arranging them so they lined up with each other (appearing to be seamless), until I had filled the entire space…

*NOTE* You’ll find that some digital papers are “cleaner” (i.e. less distressing or texture… especially around the edges), and others are more distressed/textured. Pay attention to the edges where the duplicated paper copies meet, and you may find that you need to crop or erase the heavily-distressed edges so the pattern you create ends up appearing to be more seamless.

Once I had my entire canvas area filled, and the papers arranged in a way that looked good to me… I saved the image as a JPEG (.jpg file). Then I followed the instructions on the web site of the printing company (again, I used Overnight Prints) and uploaded my image / placed my order.

The wrapping paper was shipped to me in single sheets that were sized at 28″ x 20″ with a small border. As of the date of this post, the finished wrapping paper sheets from Overnight Prints were available for less than $2.00 a sheet (anywhere from $1.36-$1.74/sheet)… making it a relatively cost-efficient way to add a tiny bit of customization to your holiday wrapping!

Here’s a look at the finished product that I received in the mail, rolled into individual rolls…

And here’s a look at a few packages I wrapped in these fun & unique custom wrapping papers…

Isn’t that so cool?! Just think of the possibilities; I already have so many fun ideas for papers in the future, for all sorts of events… from Christmas, to birthdays, and more!

If you’re thinking of trying this project… head over to The Digital Press’s challenge forum and get the details about how you can earn challenge points for December 2018 at TDP if you try any of our “Holiday Tips & Tricks” throughout the month as they appear here in this blog series! Additionally, we’d love to see any photos of your December/holiday projects using TDP goodies in the gallery this month, so link us up after you’re finished creating and uploading! 🙂


Dunia Acauan

About the Author  Dunia Acauan is the designer behind Dunia Designs at The Digital Press. Originally from Brazil, she currently lives in Ann Arbor, Michigan with her husband and three children… and is a talented and accomplished photographer, in addition to running her own graphic design business.