Category: Foodie Friday

Summer Camp 2018 | Mess Hall | WEEK #4

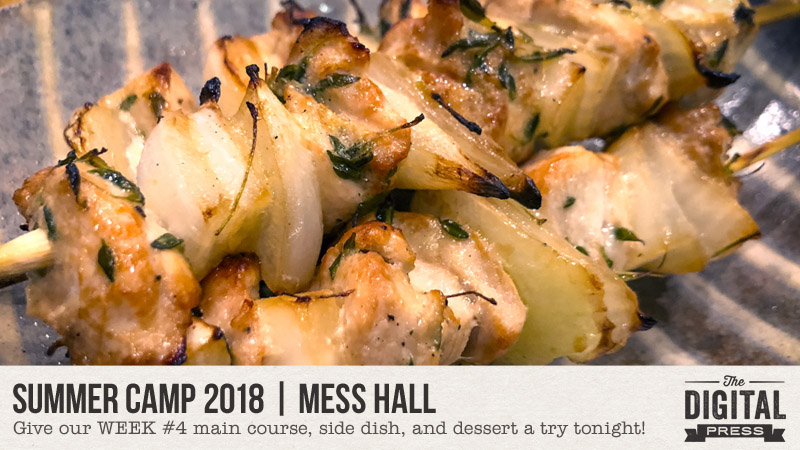
Hello, and welcome to the fourth and final edition of this summer’s weekly “Mess Hall” feature — part of The Digital Press’s big SUMMER CAMP 2018 event that has been running throughout July!

If you haven’t already checked out our lineup of activities for SUMMER CAMP 2018… definitely swing through the forum, grab yourself a badge tracking card and join the fun (there’s still a week left, and you can earn discounts and prizes even if you haven’t yet jumped in during WEEKS #1-3!). We’ve got even more events, challenges, tutorials, and more lined up throughout the final week of July!

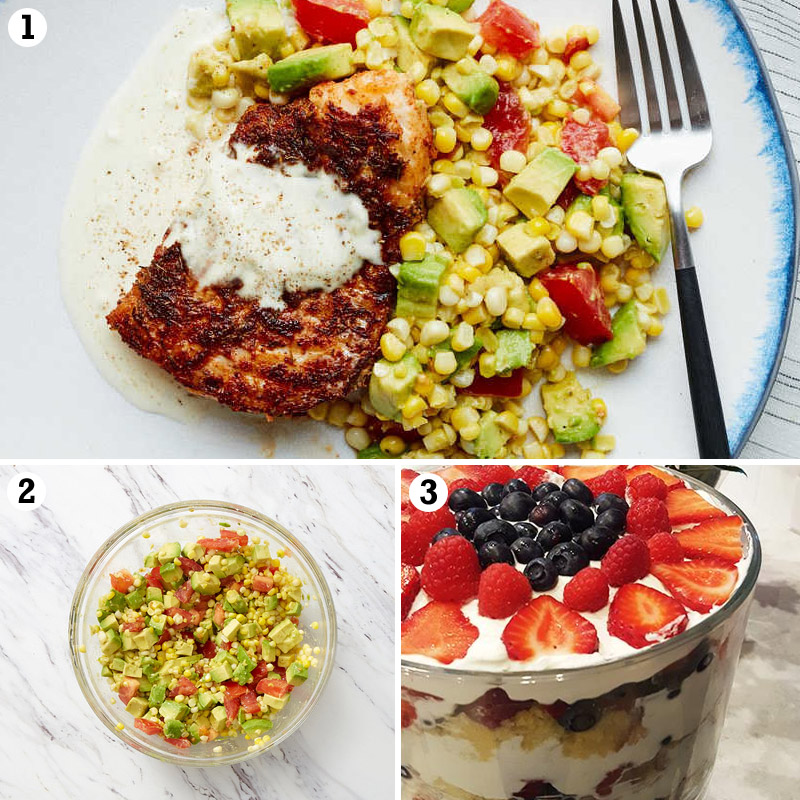
Today, I’m here to share with you some delicious recipes for WEEK #4 that we got from the always-amazing Nini Lee of ninigoesdigi. Here’s a quick look at Nini’s dishes…

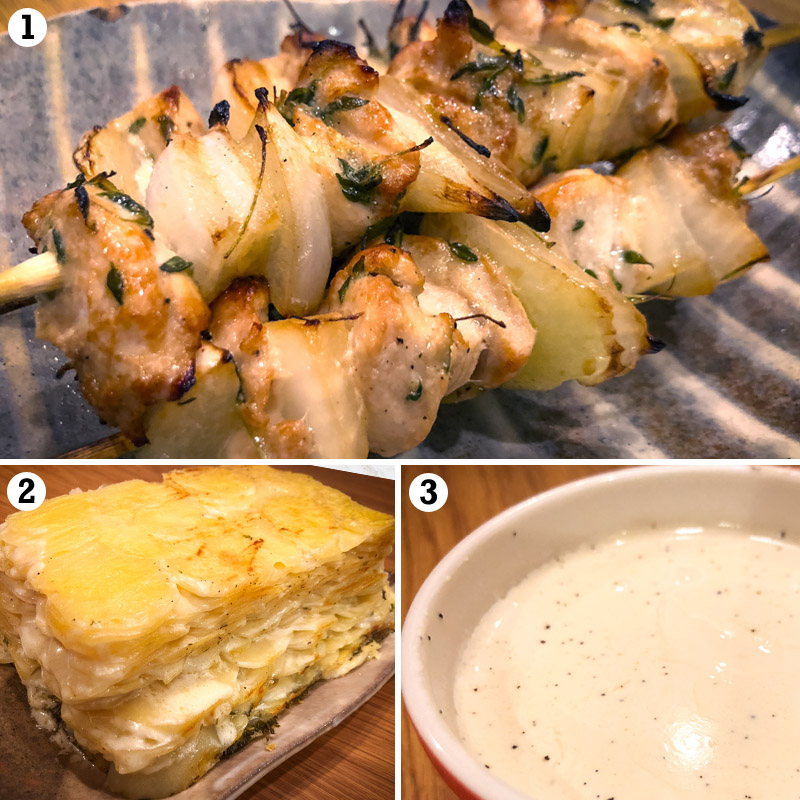
photo credits to TDP design team member Nini Lee

What’s that yumminess you see up above?

  • Lemon Chicken Skewers
  • Potato and Herbs Cake
  • Vanilla Panna Cotta

LEMON CHICKEN SKEWERS

INGRIEDIENTS NEEDED

  • 2-3 cups chicken fillet to make skewers (chicken legs are possible, too; I used about 300 g of fillets for this but I think you could use up to 500 g with this recipe?)
  • 1-2 onions (depends on how many skewers you’d like to make; I was able to make 5 skewers with half of one big onion)
  • 3 tablespoons lemon juice
  • 2 tablespoons olive oil
  • 3 tablespoons Maggi seasoning (soy sauce or Worcester sauce also work)
  • 1 tablespoon thyme (if possible, fresh)
  • 1 tablespoon rosemary (if possible, fresh)
  • salt
  • pepper

INSTRUCTIONS

  1. Cut the chicken fillet in big diced pieces. Set aside (***NOTE*** if you use legs, of course, there’s no need to cut them)
  2. Also cut the onions in big diced pieces (if you make skewers).
  3. Mix the lemon juice and the oil with the following: the Maggi Seasoning (Maggi Arome) or soy sauce (that’s what I used) or Worcester sauce, as well as with the thyme and the rosemary.
  4. Mix the sauce with the chicken (or if using chicken legs, baste them with sauce).
  5. Let it marinate in the fridge for about 12 hours. If you prepare the day before, it will be perfect for your lunch.
  6. Make your skewers by alternating chicken bits and onions.
  7. Cook with a grill or in a fry pan without adding oil or butter.
  8. You can serve with some ratatouille or some semolina (or of course with the potato gratin showed below) 😉


POTATO AND HERBS CAKE

INGRIEDIENTS NEEDED

  • approx. 3 cups (750 g) potatoes (peeled)
  • 1/2 cup mixed herbs (parsley, chives, chervil, thyme)
  • 3/4 cup to 1 cup (200 ml) cream
  • 1/3 cup to 1/2 cup (100 ml) skim milk (I use almond milk)
  • 1/4 cup (50 g) grated Gruyere cheese
  • 1 pound cake mold

INSTRUCTIONS

  1. Pre-heat your oven to 350 °F (180 °C).
  2. Grease a pound cake mold.
  3. Slice the potatoes thinly and dry the moist with some kitchen paper.
  4. Layer those slices in the mold.
  5. Heat the cream and the milk in a pan up until it boils. Take off the heat and add the minced herbs and mix.
  6. Pour this mixture on the potatoes. I followed the recipe and did that but maybe you could make layers and pour the mixture in 2 steps. Once you have layered half of the potatoes you can pour half of the mixture and then finish layering the rest of the potatoes and pour the rest of the mixture. I think it would allow to have herbs also a little more in the middle of your cake. Up to you! 😉
  7. Cover with aluminum foil and let cook for 30 minutes in the oven.
  8. Take out the foil and continue cooking for 15 minutes.
  9. Spread the cheese over the top and cook again for 15 minutes until the potatoes are tender.
  10. Let rest for 10 minutes before you serve.

***NOTE*** you can also add minced ham to this recipe (I use about 75g).


VANILLA PANNA COTTA

INGRIEDIENTS NEEDED

  • 2-3/4 teaspoons gelatin
  • 2 tablespoons (30 ml) cold water
  • 8.5 oz (250 ml) heavy cream
  • 8.5 oz (250 ml) milk
  • 1/2 cup (100 g) sugar (you could also reduce this to 75 g if you don’t like things too sweet)
  • 1/2 a vanilla bean (cracked open and grated)

INSTRUCTIONS

  1. In a little bowl, add the water and spread the gelatin. Let it swell for 5 minutes. Set aside.
  2. In a small saucepan over medium heat, gently heat the cream, milk, and sugar along with the vanilla grains and bean. Mix until the sugar has melted in.
  3. Remove from the heat.
  4. Add the gelatin and mix with a whisk until it has completely dissolved.
  5. Strain it.
  6. Pour the mixture into 6 separate serving cups. Let them cool.
  7. Cover with a plastic wrap and put in the fridge for at least 6 hours until the panna cotta has taken form.
  8. If you want to, you can garnish with candied prunes or white wine poached peaches, etc.

***FOOTNOTE FROM NINI*** “I would like to say a special thank you to Amie of Little Lam Paper Co. for her help. I had issues with the recipe of Panna Cotta I found on the internet, and she helped me with the measurements. I wanted to use this Summer Camp opportunity to try out new recipes… but when you go to some unknown places there might be a few bumps, right? Well, I am glad Amie was there to lift me up LOL! Thanks a bunch Amie!”


Don’t these recipes from Nini look fantastic? If you want to give one of these recipes a try and earn your WEEK #4 MESS HALL BADGE for TDP’s SUMMER CAMP 2018… come get the details in the forum —> HERE.!


Laura Passage

About the Author  Laura Passage is the owner of The Digital Press, and also the designer behind Wishing Well Creations by Laura Passage (WWC). She works now as a graphic designer in both the digital and paper scrapbooking industries, but previously spent over a decade working as a college soccer coach. She lives in the Pacific Northwest with her husband and two young sons (affectionately referred to as The Tiny Terrorists), and will rationalize eating coffee ice cream for breakfast to anyone who questions it.

Summer Camp 2018 | Mess Hall | WEEK #3

Hi y’all! Can you believe it’s already Week #3 of our Summer Camp here at TDP? July is just flying by! If you haven’t already checked out our lineup of activities for SUMMER CAMP 2018… definitely swing through the forum, grab yourself a badge tracking card and join the fun! We’ve got events, challenges, tutorials, and more lined up throughout the month of July!

With a new week comes an all-new edition of our Mess Hall series… and I’m here to share with you some delicious recipes from Amie of Little Lamm Paper Co.

When I asked Amie, who lives in Fargo, North Dakota, about her three favorite summer recipes… she replied, “It’s hot and yucky in Fargo in July, and I am all about meals that don’t heat up the house!” As such. she has a great (summer-friendly) main dish, side dish, and dessert to share with us this week!

Here is a look at Amie’s dishes…

What’s that yumminess you see up there?

  • Slow-Cooker Pork Carnitas
  • Mexican Grilled Corn
  • Lemon Berry Trifle

 SLOW-COOKER PORK CARNITAS

Amie says she loves these carnitas because you can freeze batches to use for future meals. And since her family doesn’t have taco trucks on every corner here, she needs to make her own. Luckily, it’s super easy!

INGRIEDIENTS NEEDED

  • 1 (3- to 3 1/2-pound) boneless pork butt roast, lightly trimmed and cut into 2-inch chunks
  • 1 small onion, peeled and halved
  • 3 (2-inch) strips orange zest plus 1/2 cup juice
  • 3 (2-inch) strips lime zest plus 2 tablespoons juice
  • 5 garlic cloves, minced
  • 1 Tbsp ground cumin
  • 1 Tbsp dried oregano
  • Salt and pepper
  • 2 bay leaves
  • 2 Tbsp vegetable oil

INSTRUCTIONS

  1. Combine pork, onion, orange zest and juice, lime zest and juice, garlic, cumin, oregano, 2 1/2 teaspoons salt, 1 1/2 teaspoons pepper, and bay leaves in slow cooker. Cover and cook until fork slips easily in and out of pork, 5 to 7 hours on high or 8 to 10 hours on low
  2. Using slotted spoon, transfer pork from slow cooker to large bowl. Using potato masher, smash pork until coarsely shredded. Strain cooking liquid from slow cooker through fine-mesh strainer set over separate bowl and discard solid.
  3. Heat oil in 12-inch nonstick skillet over medium-high heat until shimmering. Add pork to skillet. Whisk cooking liquid to recombine, then add 1 cup to skillet with pork. Cook, stirring occasionally, until liquid has evaporated and pork is evenly browned and crispy in spots, 10 to 15 minutes.
  4. Season with salt and pepper to taste. Transfer pork to serving platter and moisten with 1/4 cup remaining cooking liquid, or more as needed. Serve.

She likes to serve with lime wedges, sliced radishes, avocado, black beans, pickled red onions and her favorite tomatillo salsa.


MEXICAN GRILLED CORN

When describing this recipe, Amie stated, “I take advantage of the grill as much as possible in the summer months. Especially to get a char on vegetables. My 6 year old loves almost any veggie if it’s roasted. But it’s too hot outside to use the oven, so onto the grill it goes!”

INGRIEDIENTS NEEDED

  • Vegetable oil for cooking grate
  • 1/4c. mayonnaise
  • 3 Tbsp chopped cilantro or parsley
  • 3 Tbsp sour cream
  • 1 medium garlic glove minced or pressed
  • 3/4 tsp chili powder
  • 1/4 tsp ground black pepper
  • 1/4 tsp caynnne pepper
  • 4 tsp fresh lime juice
  • 1 oz grated pecorino Romano
  • 4 tsp vegetable oil
  • 1/2 tsp kosher salt
  • 6 large ears of corn

INSTRUCTIONS

  1. Turn all grill burners to high and heat grill with lid down until very hot, about 15 minutes. Scrape grate clean with grill brush. Dip wad of paper towels in vegetable oil; holding wad with tongs, wipe cooking grate.
  2. While grill is heating, combine mayonnaise, sour cream, cilantro, garlic, ¼ teaspoon chili powder, black pepper, cayenne (if using), lime juice, and cheese in large bowl; set aside. In second large bowl, combine oil, salt, and remaining ½ teaspoon chili powder; add corn and toss until coated evenly.
  3. Leave burners on high and cook corn with lid down, turning corn occasionally, until lightly charred on all sides, 7 to 12 minutes total. Remove from grill and place in bowl with mayonnaise mixture; toss to coat evenly. Serve immediately.

LEMON BERRY TRIFLE

Of course we need a no-bake dessert… and this one is so simple! If you don’t have a trifle dish, you can just use a large bowl. Amie has even seen it done in a lasagna pan before (just with less layers).

INGRIEDIENTS NEEDED

  • 1 – 9×5 inch pound cake (lemon, if available)
  • 2 – 16oz containers of cool whip (or you can use real whipped cream)
  • 1 – 8 oz block cream cheese (softened)
  • 1/2 tsp vanilla extract
  • 1 cup lemon curd
  • 5-6 cups fresh berries, blueberries, raspberries, blackberries, etc.

INSTRUCTIONS

  1. Slice the pound cake into 9 different 1-inch slices. Cut into bite-sized cubes. Set aside.
  2. Make the lemon cheesecake layer: In a large bowl using a hand mixer or stand mixer fitted with a paddle or whisk attachment, beat the cream cheese on medium-high speed until creamy. Add the vanilla extract and lemon curd and beat on medium-high speed until combined. Lastly, beat in half of whipped cream (about 2 cups). Cover and store the remaining whipped cream in the refrigerator.
  3. Assemble: This trifle has 3 layers of pound cake, 3 layers of berries, and 2 layers of the lemon cheesecake mixture. Begin with a base of lemon pound cake cubes. Top with an even layer of fresh berries, then half of the lemon cheesecake mixture. Repeat. Finish with final layer of lemon pound cake cubes followed by a final layer of berries. Spread or pipe remaining whipped cream on top of the trifle.
  4. Refrigerate for at least 2 hours and up to 6 hours. You can refrigerate uncovered for 2-4 hours, but I recommend loosely covering if storing longer than that. The time in the refrigerator gives the flavors a chance to settle and allows the pound cake to soak up some of the lemon cheesecake mixture.
  5. Garnish with extra berries and/or lemon slices and serve cold. Cover and store any leftovers in the refrigerator for up to 2-3 days.


My stomach is growling just reading these recipes! So go give these tasty looking recipes a try and earn your WEEK #3 MESS HALL BADGE for the 2018 TDP Summer Camp! Your stomach will thank you!


Robin

About the author  Robin is a member of the creative team here at The Digital Press. A wife of 25 years and a mom of 4 crazy children (3 in college and 1 still at home), she says that her life occurs mostly in the car as she transports said crazy kids to their many, many homeschool activities. When not driving, Robin loves to make her family cringe by pulling out her camera again (and again, and again…).

Summer Camp 2018 | Mess Hall | WEEK #2

Hey gang! It’s week #2 of Summer Camp –how’s everyone doing?! Having fun?! I know I am! Well, I’d like to welcome you to Week #2 of Summer Camp’s Mess Hall, where we check out a couple of recipes that our team is loving right now. Make sure you check out Week #1 and all of the other challenges going on for TDP’s Summer Camp. You can check them all out in THIS FORUM, and be sure to grab a badge tracking card and join in the fun yourself! We’ve got fun events, challenges, tutorials… and best of all… prizes!

I’m actually really excited to try these. I live in Phoenix, Arizona in the U.S. and Mexican food is super common around here. My husband and I have discovered several restaurants that we like to hit up for some Mexican eats, but now I can try making some myself! TDP’s very own Hillary has a couple of recipes that look amazing… and our wonderful designer Kim B is following up with a cool and refreshing beverage to accompany! Try any of these recipes (and show us!) to get your week #2 Mess Hall badge. Take a look at the full details HERE.

Ok ok… let’s get to it… my tummy is starting to growl.

For our tasty treats, Hillary has for us authentic Mexican Rice as the side dish and some awesome looking Baked Chicken Taquitos with salsa as the main course. Take a look at these, people… can we say YUM?! I can’t wait to try them out. And for a bit of adult fun to top if off, try the cool Cucumber Martini that Kim’s got on deck for us. Sounds like summer fun to me!

photo credits to [1] TDP Creative Team member Hillary [2] TDP Designer Kim B [3] tastesbetterfromscratch.com

  • Baked Chicken Taquitos with Salsa
  • Authentic Mexican Rice
  • Cucumber Martini

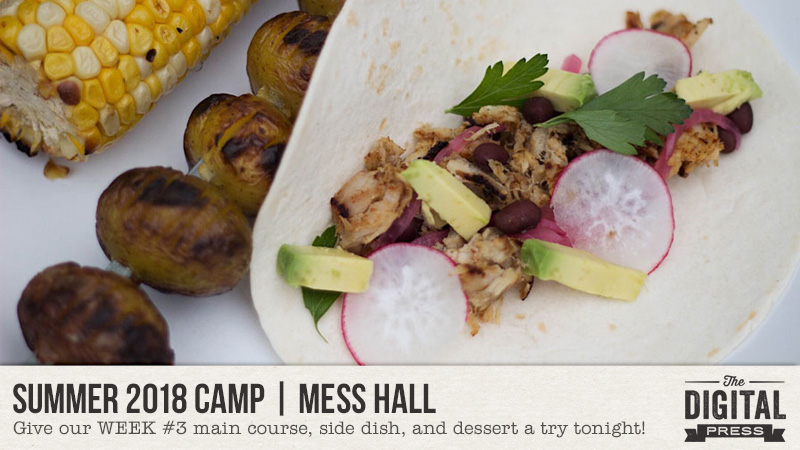
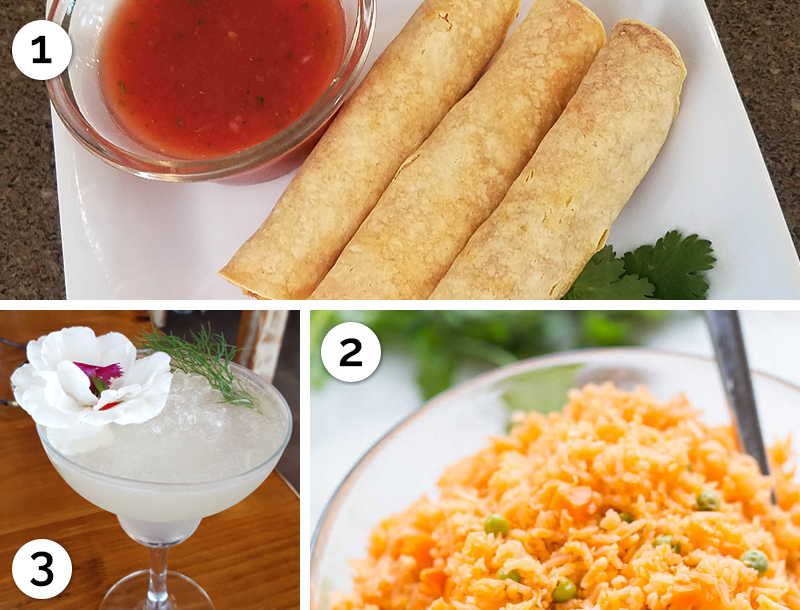
BAKED CHICKEN TAQUITOS with SALSA

FOR THE TAQUITOS:

  • 2 cups shredded chicken (we use rotisserie chicken)
  • 1/2 teaspoon ground cumin
  • 1/2 teaspoon ground chili powder
  • 1/2 teaspoon kosher salt
  • 1/4 teaspoon garlic powder
  • 1/4 teaspoon paprika
  • 2 teaspoons fresh lime juice
  • 1 cup shredded cheddar or Mexican blend cheese
  • 20 corn tortillas

FOR THE TOPPINGS:

  • Shredded lettuce
  • Diced tomatoes
  • Guacamole
  • Sour Cream
  • Chopped Green Onion
  • Crumbled Queso Fresco
  • Salsa (recipe below!)

DIRECTIONS:

  1. Preheat the oven to 425 degrees F. Spray a large baking sheet with nonstick cooking spray and set aside.
  2. In a medium bowl, combine the shredded chicken with the cumin, chili powder, salt, garlic powder, paprika, and fresh lime juice. Stir until chicken is well coated with the seasonings. Stir in the shredded cheese.
  3. Get two paper towels damp and place two tortillas at a time in between the paper towels. Place in the microwave for 20-30 seconds. Remove from the microwave and roll up the taquitos.
  4. Place a heaping tablespoon of the chicken and cheese mixture in the center of the tortilla and roll it up tightly. Place the taquito, seam side down on the prepared baking sheet. Continue rolling taquitos until the tortillas and filling are gone. You should have about 20 taquitos.
  5. Spray the taquitos generously with nonstick cooking spray. Bake for 15-20 minutes or until taquitos are golden brown and crispy. Remove from the oven and serve warm with desired toppings.


FOR THE SALSA:

  • 2 cans (14.5 oz each) whole or diced tomatoes, drained
  • 1 TBSP (to taste) canned diced jalapeños (not pickled)
  • 1/4 – 1/2 yellow onion (to taste)
  • 1 teaspoon garlic salt
  • 1/2 teaspoon salt
  • 1/2 teaspoon cumin
  • 1/2 teaspoon sugar
  • 2 teaspoons lime juice (to taste)

DIRECTIONS:

  1. Place all of the ingredients together into a food processor or blender and puree until smooth. Serve with tortilla chips.


TIP: Hillary told me that while the original recipe calls for all of those colorful toppings (guac, sour cream, etc.) that she thinks all of that covered up the yummy flavor of the taquitos too much, so she prefers them without.

Recipe photo credits to tastesbetterfromscratch.com


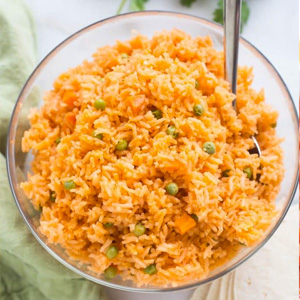
AUTHENTIC MEXICAN RICE
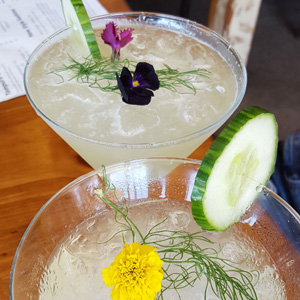
INGREDIENTS:

  • 1 1/2 cups long grain white rice
  • 1/4 cup oil
  • 1 teaspoon garlic , minced
  • 1/4 medium onion , finely diced
  • 1/4 cup tomato sauce , or 2 pureed tomatoes
  • 2 tomato bouillon cubes , chopped (these can be found in the Mexican food aisle at Walmart or your local grocery store)
  • 1/4 teaspoon salt
  • 1 carrot , diced (optional)
  • 1/2 cup peas (optional)
  • 3 1/4 cup water
  • 3-4 whole serrano peppers (optional, but do add flavor, not heat)

DIRECTIONS:

  1. Rinse and drain the rice in a fine mesh strainer.
  2. In a large saucepan over medium-high heat, add the oil. Add the rice and stir to combine. Cook over medium heat, stirring frequently, until the rice is lightly golden brown all over (about 10 minutes).
  3. Add tomato sauce, garlic, and diced onion to the pan. Stir. Add the tomato bullion cubes, salt, carrots, peas, and water (and serrano peppers, if using. They add a little flavor, but not spice.).
  4. Cook, stirring, until bullion cubes are completely dissolved. Bring to a boil, then cover, reduce heat to low and cook for about 20 minutes or until the water is completely absorbed. Remove from heat and allow to rest for 5 minutes before fluffing with a fork.

Recipe photo credits to tastesbetterfromscratch.com


CUCUMBER MARTINI

INGREDIENTS:

  • 4 thick slices of cucumber(about 1/4 English Cucumber) + 1 thin slice for garnish
  • 3 oz Vodka (+/- 90ml)
  • 1 oz triple sec (+/- 30ml)
  • 1/2 Lime freshly squeezed
  • 1 Cup Ice

VARIATIONS:

  • Add a splash of simple sugar syrup if you like it sweeter
  • Add 4 Basil or 4 Mint leaves to shaker for a tasty twist.
  • Replace Vodka with Gin

DIRECTIONS:

  1. In a martini shaker, add the cucumber chunks. Muddle with a wooden spoon or muddler (or crush as you wish) to bring out their flavor and juices, then add in the vodka, triple sec, lime juice and ice.
  2. Put the top on the cocktail shaker. Shake and shake(and I mean shake- lol). Shake for at least 30 seconds – you want to ‘BLEND’ the ingredients and flavors together and melt some of that ice.
  3. Strain the mixture into a martini glass(usually lid has strainer). Add the remaining 1 thin slice of fresh cucumber(un-muddled) to the glass or cocktail, and serve immediately.
  4. Decorate with mint leaves, edible flowers, sprig of dill or as you want.


Recipe photo credits to Kim B.

So there it is people — give these tasty looking recipes a try and earn your WEEK #2 MESS HALL BADGE for the 2018 TDP Summer Camp!  I’m off to the kitchen!


About the Author  Shannon has been completely addicted to digiscrapping since she began in early 2016 (though she’s been a scrapper since 2000). Her early morning ritual of a few quiet hours of scrapping while sipping a chai tea is her favorite part of each day. She is also the owner of a web design company, and when she’s not at the computer designing websites or digiscrap layouts, she’s probably hiking one of the local mountains in her hometown of Phoenix, Arizona. She is an avid reader and loves to travel to foreign countries.

Summer Camp 2018 | Mess Hall | WEEK #1

Hello, and welcome to the first edition of this summer’s weekly “Mess Hall” feature — part of The Digital Press’s big SUMMER CAMP 2018 event this July!

If you haven’t already checked out our lineup of activities for SUMMER CAMP 2017… definitely swing through the forum, grab yourself a badge tracking card, and join the fun! We’ve got events, challenges, tutorials, and more lined up throughout the month of July… including a weekly FOOD article!

Each Sunday throughout the first 4 weeks of July, members of our team will be here on the blog sharing a meal with you — a main course, a side dish, and a dessert (or a drink!) that are each tried-and-true (tested personally by members of our team!). Give any of the meal items a try, and you could earn a SUMMER CAMP 2018 badge! Get the full details HERE.

The WEEK #1 meal is very, very worth a little time in the kitchen, folks. Trust us on this (and it’s actually really quick & easy!).

photo credits to [1] [2] Plated and [3] TDP creative team member Amie Wheeler

What is that up there, you ask?

  • Blackened Cod with Garlic Aioli
  • Avocado and Corn Salsa
  • Triple Berry Trifle

Seriously, just YUM to all of it. You won’t be disappointed if you give any of these recipes a try.


BLACKENED COD WITH GARLIC AIOLI

This blackened fish recipe comes to us from TDP designer Laura Passage (and she adapted it from a recipe she found on Plated), and it’s become a go-to in her family’s meal rotation. It is the perfect summer meal… light and yet flavorful, and with a kick of spice that comes from the blackening process! For those who don’t love seafood… you can also substitute a chicken breast in for this dish, if desired.

INGREDIENTS NEEDED

—10-12 oz cod
—juice of 1/2 fresh lemon
—1-2 cloves of fresh garlic
—2 oz mayonnaise
—spice mix: equal parts (1 tsp each) of paprika, cayenne pepper*, onion powder, garlic powder, & dried thyme

*use more or less cayenne pepper depending on how spicy you wish this dish to be

INSTRUCTIONS

—Mince the garlic (use as much or little as you prefer) and set aside.
—Make the spice mix by mixing all 5 dry spice items together in a small bowl.
—Dry cod filets, season both sides with salt and pepper, and rub the spice mix on both sides of each filet; set aside to allow flavor to marinate.
—Heat about 1 Tbsp of olive oil in a pan (preferably non-stick) over medium-high heat; once oil is hot/shimmering, add spice-coated cod filets to pan.
—Sear the fish about 2-4 min per side, until the spices are blackened and a fork inserted gently into the filet meets very little resistance.
—Meanwhile, make the garlic aioli in a small bowl by mixing the mayonnaise, garlic, and juice of 1/2 lemon. Season with salt and pepper (to taste).
—Serve fish with garlic aioli spooned over the top of it (or you can also use small dipping bowls for the aioli, if you prefer).

[recipe adapted slightly from an original recipe found on Plated]

AVOCADO AND CORN SALSA

This dish is also a favorite of Laura’s family… they eat it year-round (but especially in the summertime when fresh corn and avocados are easy to find in the store, and when home-grown tomato is easy to come by!). Super easy to make, and truly delicious.

INGREDIENTS NEEDED

—1-2 ears fresh corn
—1-2 ripe tomatoes (or small pint container of grape tomatoes)
—1 fresh ripe avocado
—juice of 1/2 fresh lemon
—olive oil
—salt & pepper

INSTRUCTIONS

—Heat about 1 Tbsp olive oil in a pan (preferably non-stick) over medium-high heat; cook corn about 5 min, stirring often, until corn begins to char/brown.
—Remove corn from heat and place in medium bowl; set-aside.
—Meanwhile, as corn cooks… medium-dice tomatoes (or cut each grape tomato in 1/2 or 1/3) & medium-dice the avocado; add both items to bowl with corn.
—Add juice of 1/2 fresh lemon and about 1/2 Tbsp olive oil to bowl; stir gently.
—Season with salt and pepper (to taste).

[recipe adapted slightly from an original recipe found on Plated]

TRIPLE BERRY TRIFLE

This Triple Berry Trifle is a favorite of mine (Amie), and it is not only beautiful… but it’s also soooo good! It’s super easy to put together & perfect for a busy holiday party or event (such as the upcoming 4th of July here in the States)!

INGREDIENTS NEEDED

—1 angel food cake (you could make your own, but often the bakery at the grocery store has pre-baked, naked angel food cake)
—1 lemon pound cake (again –grocery store pre-made works perfectly!)
—1 pint fresh strawberries (sliced)
—2 pints fresh raspberries
—1 pint fresh blueberries
—1 – 16oz container heavy whipping cream
—1/2-1 cup powdered/confectioner’s sugar (to taste)
—1/4 teaspoon cinnamon
—1 teaspoon vanilla extract

INSTRUCTIONS

—Whip the heavy whipping cream, the sugar, the cinnamon, and the vanilla in a mixer until soft peaks form.
—Slice the angel food & lemon pound cakes; slice strawberries while cream comes together.
—Assemble the trifle as follows:
First, layer the angel food & pound cake, breaking the slices into pieces that fit into your bowl/container; then, add a layer of berries. Next, spoon a layer of the cream on top of the berries. Keep going to make 3 or 4 more layers, depending on the size of your bowl, finishing at the end with a layer of cream. Decorate the top with remaining berries. Cover and refrigerate until ready to serve.

.

Want to give one of these recipes a try and earn your WEEK #1 MESS HALL BADGE for TDP’s SUMMER CAMP 2018? Come get the details in the forum —> HERE.


Amie

About the Author  Amie is a craft-loving dental hygienist who lives in Washington state. She loves her husband, her two crazy kids, and her English Bulldog… as well as coffee, baking cupcakes, daffodils, glitter & sprinkles, reading a good book, and lip gloss — not necessarily in that order.

Foodie Friday | Calista’s Stuff

Thank goodness it’s Friday! Not only is the weekend almost here… but it’s time for another edition of our Foodie Friday series here on The Digital Press blog! This week we are featuring TDP designer Meta Wulandari — the name behind Calista’s Stuff.

Meta has already been featured once before on The Digital Press blog; if you would like to learn more about her, you can check out her first feature from May of 2017 HEREYou can also learn more about her design style by checking out her gorgeous store at TDP.

For our Foodie Friday series, though, it’s all about the food! Here is a glimpse of the yummy stuff Meta & I have for you this week…

[ photo credits: (1) Meta Wulandari, (2) Meta Wulandari, and (3) TDP creative team member Amie ]

What’s all of that deliciousness you see pictured above?

  1. Beef Semur (Beef Stew)
  2. Kolak Bola Ubi Ungu dan Pisang (Stewed Purple Sweet Potato Balls and Banana in Coconut Milk)
  3. Chocolate Chip Cookie Dough Buttercream (on dark chocolate cupcakes)

Beef Semur

Meta says… “This is a recipe my family loves to eat and I really enjoy cooking, because it’s super easy to make!”

INGREDIENTS

  • 250 gram minced beef (about half a pound)
  • 1 large potato, cut into big chunks and fried
  • 1 tomato, quartered
  • 1 clove garlic, chopped
  • 1 large onion, chopped
  • 1 spoon unsalted butter
  • 3 bay leaves
  • 300 ml water (1 1/4 cups)
  • 4 tablespoons of sweet ketchup (sweet soy sauce)
  • 1 tablespoon salty ketchup (salt, nutmeg, pepper, sugar & 1 spoon tomato sauce)

INSTRUCTIONS

  • Melt unsalted butter in a pot and add in onion, garlic, pepper, nutmeg and bay leaves.
  • Stir fry until fragrant.
  • Add the beef, and sweet soy sauce to the pot and let them brown a little bit for about 10 minutes. Pour in the water and bring to a boil and lower the heat and slowly simmer for about 1 hour until the meat is tender.
  • Add in the tomatoes after 30 minutes of cooking and add the fried potatoes in 10 minutes before the end of cooking. Gently stir everything to mix.
  • Have a taste and season with salt. It should be slightly sweet from the sweet soy sauce

Kolak Bola Ubi Ungu dan Pisang

Meta explains… “Kolak is an Indonesian common dessert which is made from pisang (banana), ubi (sweet potato), and often labu (jackfruit). It has sweet and creamy flavor from coconut milk. My family loves to eat kolak during Ramadhan (fasting month for mosleem). In this recipe I used Purple sweet potato and banana.”

INGREDIENTS

  • 4 pieces Banana, cut small pieces
  • 200 grams boiled purple sweet potato (1 cup)
  • 50 grams Javanese palm sugar/brown sugar (1/2 cup)
  • 1 can coconut milk, add 2 cups of water
  • 2 pandan leaves (screwpine leaf)
  • 4 tablespoons tapioca flour
  • 2 tablespoons rice flour, mix with 4 tablespoons of water
  • pinch salt
  • 1 Pandan leaf

INSTRUCTIONS

  • Mash boiled purple sweet potato, add salt, tapioca flour and water. Make a small balls
  • Heat the coconut milk in a boiling pan, add palm sugar and stir until the sugar completely dissolved. You can adjust the sweetness according your taste.
  • Keep stirring the coconut milk to prevent from lumpiness. Then add the banana and purple sweet potato balls, bring to boil.
  • Add the pandan leaf and pinch of salt, stir again.
  • Taste the soup to make sure it’s sweet enough for you.
  • Serve it warm or with rice.

Chocolate Chip Cookie Dough Buttercream

Amie says… “This frosting tastes like the real thing, but without the raw eggs! You can use it on any flavor of cake, or even between graham crackers for a yummy treat!”

INGREDIENTS

  • 2 cubes (1 cup) unsalted butter at room temperature
  • 1/2 cup brown sugar packed
  • 2 2/3 cups confectioners (powdered) sugar
  • 1/3 cup all-purpose flour (if worried about raw flour, omit & add additional 1/3 cup of powdered sugar)
  • 1/2 teaspoon salt
  • 2-3 tablespoons heavy cream
  • 2 teaspoons vanilla extract
  • 1/2 cup mini chocolate chips

INSTRUCTIONS

  • Beat the butter with a mixer for at least 5 minutes (it’s what makes the buttercream light & fluffy!)
  • Add the brown sugar & mix until combined.
  • Slowly add in the powdered sugar until smooth
  • Mix in the flour, salt & vanilla
  • Add in the cream 1 tbsp at a time until the desired consistency (smooth & creamy, thick enough to hold it’s shape, but not thin & runny)
  • Frost as you desire on your cooled cupcake (I baked Dark Chocolate Cupcakes, but you can use ANY cake mix or flavor with this frosting!)
  • Sprinkle Mini Chocolate chips on top to decorate & Enjoy!

Oh my… don’t those recipes all look amazing!? I’m totally adding to my shopping list this week — I’ll have to hunt down some of Meta’s ingredients! We hope you’ll give them a try, as well (and please feel free to leave us any questions or comments!). Happy Cooking!

Last but definitely not least — Meta is having a fantastic sale and is offering a special Free-With-Purchase offer! Not only is the entire Calista’s Stuff shop marked down 30% OFF throughout her entire feature week (sale prices will be valid through 11:59pm ET on Thurs 3/8)… but she also has the following Free-With-Purchase offer available in her shop all week long, as well — spend $10+ in the Calista’s Stuff shop at The Digital Press and get her entire Real Life Bundle completely FREE!


Amie

About the Author  Amie is a craft-loving dental hygienist who lives in Washington state. She loves her husband, her two crazy kids, and her English Bulldog… as well as coffee, baking cupcakes, daffodils, glitter & sprinkles, reading a good book, and lip gloss — not necessarily in that order.


Foodie Friday | Laura Passage

Hello, and welcome to another edition of our Foodie Friday series here on The Digital Press Blog! This week we are lucky to be featuring TDP Designer Laura Passage (formerly known and loved by many as the designer behind the Wishing Well Creations brand).

Laura has already been featured twice before, here on The Digital Press blog… so if you would like to learn a little more about her, check out her first feature from July 2016 HERE and her second feature article from July 2017 HERE. You can also learn a lot about her, and her design style, by having a browse around her fun and fabulous store at TDP,

But if you are really here at the blog for the food today — and keen to get to the delicious recipes — we won’t keep you waiting any longer! Here is a quick peek at the deliciousness we have each whipped up in the kitchen for you this week…

[ photo credits: (1) Hello Fresh, (2) A Sweet Pea Chef, and (3) TDP creative team member Corrin ]

What is all of that deliciousness you see pictured above, you ask?

  • Tomato and Zucchini Ragu
  • Faux Banana Chocolate Ice Cream
  • Luscious Lemon Cake

Tomato Zucchini Ragu

Says Laura… “This is one of our family’s favorites… and it’s awesome because it appeals to just about everyone (even the pickiest of eaters, like kids!), and it’s loaded with veggies! The secret to this recipe is the surprise ingredient — soy sauce — which turns a regular ho-hum tomato sauce into the most flavorful, perfect concoction ever. No joke… I don’t know why I never thought of adding soy sauce to something like pasta sauce before, but it’s AH-MAZE-ING.”

INGREDIENTS

  • 1 lb ground turkey or beef
  • 1/2 lb spaghetti (or noodles of choice)
  • 2 small zucchini (each about 8″ long-ish?)
  • 1 medium yellow onion
  • 1 large can (28 oz) diced tomatoes (or crushed, or whatever type you prefer)
  • 1/2 oz fresh thyme (can use 1 Tbsp-ish of dried thyme, if desired — but fresh is better, if you have it!)
  • 3 Tbsp soy sauce
  • 3 cloves garlic
  • 1 tsp chili flakes (red pepper flakes)
  • olive oil
  • parmesan cheese for garnish (optional)

INSTRUCTIONS

  • Wash and dry all fresh produce. Bring a large pot of salted water to a boil.
  • Cut zucchini lengthwise into quarters, and then slice into 1/4 or 1/3-inch pieces.
  • Halve, peel, and small-dice the onion.
  • Strip the fresh thyme leaves off the stems (skip this step if using dried thyme).
  • Peel the garlic and then finely mince… or put the peeled cloves into a garlic press and set aside for use later in recipe.
  • In a large (12+ inch) skillet or high-sided frying pan, cook the ground meat in about 1/2 Tbsp olive oil… breaking it up into smaller pieces while it cooks.
  • When meat is browned but not fully cooked, season with salt and pepper and then add onions and zucchini and cook it (stirring often) for about 5 more minutes, until vegetables begin to soften.
  • Add the soy sauce, the thyme, and the minced garlic (or use garlic press, pressing straight into the pan).
  • Add the pasta to the pot of boiling water and stir occasionally to keep it from sticking to itself. Cook for about 10 minutes (until al dente), and then reserve 1/2 cup of pasta water before draining the pasta in a colander.
  • While the pasta boils, add the can of tomatoes to the pan of meat/vegetables, and then add the chili flakes (to taste! they’re hot… only add as much as you like, with regard to the spiciness). Stir constantly for a minute or so, until everything is coated in the tomatoes.
  • Add the pasta water to the sauce mixture until sauce is the desired thickness.
  • After draining pasta, add it to the sauce and toss to coat pasta completely in the ragu.
  • Serve the pasta topped with parmesan cheese, if desired. Enjoy!
[recipe tweaked and adapted from Hello Fresh by Laura Passage]

Faux Banana Chocolate Ice Cream

Says Laura… “OK, so… usually on Foodie Fridays, we offer up recipes for a main dish, a side dish, and a dessert. But you know what? Our family views that pasta sauce, up above, as a main dish AND a side dish because it’s so chock full of everything — protein, carbs, veggies, all of it! And so… clearly the only option here is to double up on dessert recipes, because it’s what we all want anyway. And this one? This one is so fun, because it’s sorta healthy! It’s free of added sugars, and it’s also dairy-free! And soooooo yummy (and even customizable).”

INGREDIENTS

  • 6 large ripe bananas
  • 4 Tbsp unsweetened cocoa powder
  • OPTIONAL: other variations could include a tablespoon or two of peanut butter (= chocolate peanut butter ice cream!)… or a cup of frozen strawberries (banana split ice cream!)… or you could skip the cocoa powder and instead mix in dark chocolate chips/chunks (= Chunky Monkey ice cream!)… or really, anything else your brain can dream up to go with banana ice cream!

INSTRUCTIONS

  • Cut the bananas into approximately 1/4-inch slices, and throw them onto a parchment paper-lined baking sheet that will also fit into your freezer (IMPORTANT! haha). The slices don’t have to be lined up all neat and tidy or anything… you just want to be able to freeze them and have them remain in basically separate pieces.
  • Freeze the banana slices for a couple of hours… just long enough for them to harden so they’re not sticky when you run them through a food processor / blender.
  • Add the frozen banana slices into a food processor or blender, and process until the mixture has a thick, creamy consistency.
  • Add the cocoa powder and process again until totally blended together.
  • The mixture will be pretty soft at this point… so it’s usually best to re-freeze in an air-tight container for an hour or so, just to make the consistency more ice cream-like, before serving.
  • OPTIONAL: if, however, you were planning on adding another ingredient (see variations, above, at bottom of ingredients list)… add it after you’ve added/blended the cocoa powder, and process once again until well-blended.
[recipe tweaked and adapted from A Sweet Pea Chef by Laura Passage; makes about 6-8 servings ]

Luscious Lemon Cake

Says Corrin… “This is one of my own recipes… and it is something of an antique, having been given to me by my lovely neighbour not long after we moved into our current home. It has been a family favourite ever since!”

INGREDIENTS

  • 4oz/115g soft butter
  • 6oz/170g caster sugar (superfine sugar)
  • 6oz/170g SR flour (sifted)
  • 4 Tbsp/60ml milk
  • 2 large eggs
  • the grated rind of 1 lemon

FOR THE SYRUP

  • 3 rounded Tbsp icing sugar (powdered/confectioner’s sugar)
  • 3 Tbsp/45ml of lemon juice

INSTRUCTIONS

  • Grease and line a 2lb loaf tin, or a 7″ round tin.
  • Warm the oven to 350F (180C/gas mark 4).
  • Cream the buttter and sugar together in a bowl.
  • Add the eggs, grated lemon rind sifted flour and milk, and mix well to a soft dropping consistency.
  • Place into your baking tin smooth the top.
  • Bake for 40-45 min (until firm).
  • While the cake bakes, mix the sifted icing sugar with the lemon juice to make the syrup.
  • Pour the syrup over the cake as soon as it comes out of the oven.
  • Leave in the tin until completely cooled… and then, enjoy!

Doesn’t that all look so yummy?! I hope you have a chance to try out some of these dishes soon (you won’t be disappointed)! If you have any questions don’t hesitate to ask in the comments, below… and if you try something and love it, we’d love to hear about that too! 🙂

Meanwhile, it wouldn’t be a designer feature week without a fantastic sale and a special Free-With-Purchase offer! Not only is Laura’s entire shop marked down 30% OFF throughout her entire feature week (sale prices will be valid through 11:59pm ET on Thurs 3/1)… but she also has the following Free-With-Purchase offer available in her shop all week long, as well — spend $10+ in the Laura Passage shop at The Digital Press and get her Flip Flop Season | Kit completely FREE!


Corrin
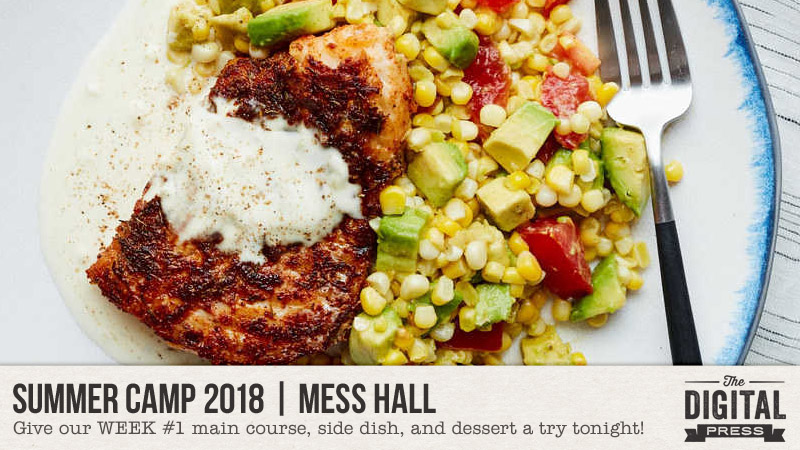
About the Author  Corrin is a member of the creative team here at The Digital Press. She is a fan of the Big Bang Theory and a lover of cozy pajamas. She lives in the breezy South of England with her husband and 4 crazy kids, who regularly discover & plunder her secret chocolate stashes! She is still trying to get the house straight after moving nearly 4 years ago. Who knows… maybe this will be the year she reaches the bottom of the laundry pile!