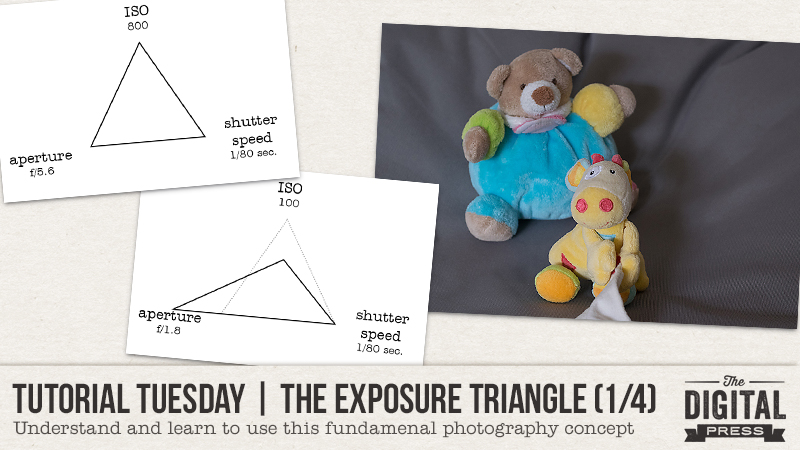
Hello and welcome to another edition of our designer feature series on The Digital Press blog in 2019 — Friday Favorites! This year, as you know, we’ve been learning a bit more about each of our amazingly-talented designers by having them share some of their favorite things with us each week.
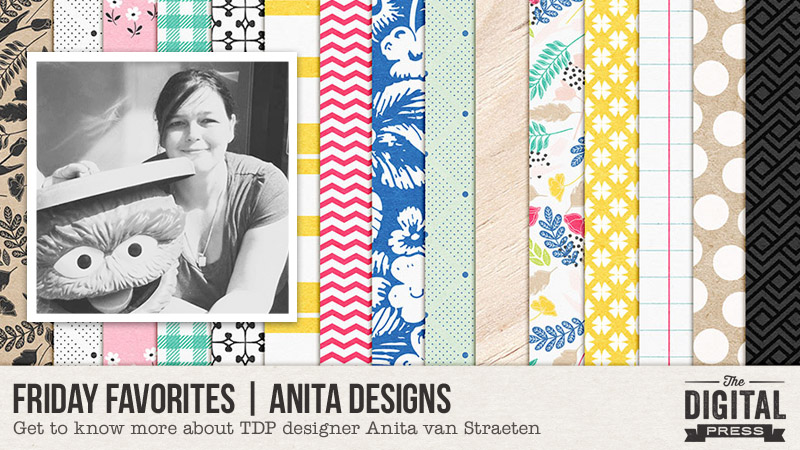
This week, the spotlight is on Anita vanStraeten of Anita Designs. This is Anita’s sixth feature here on The Digital Press blog (you can find her first feature from December 2014 HERE, another from November 2016 HERE, and another from June 2017 HERE, her Foodie Friday post from September 2017 HERE, and her most recent feature from March 2018 HERE).
We asked Anita, who’s had a store at The Digital Press since it opened in 2014, to share some of her favorite things with us, and here’s what she had to say…
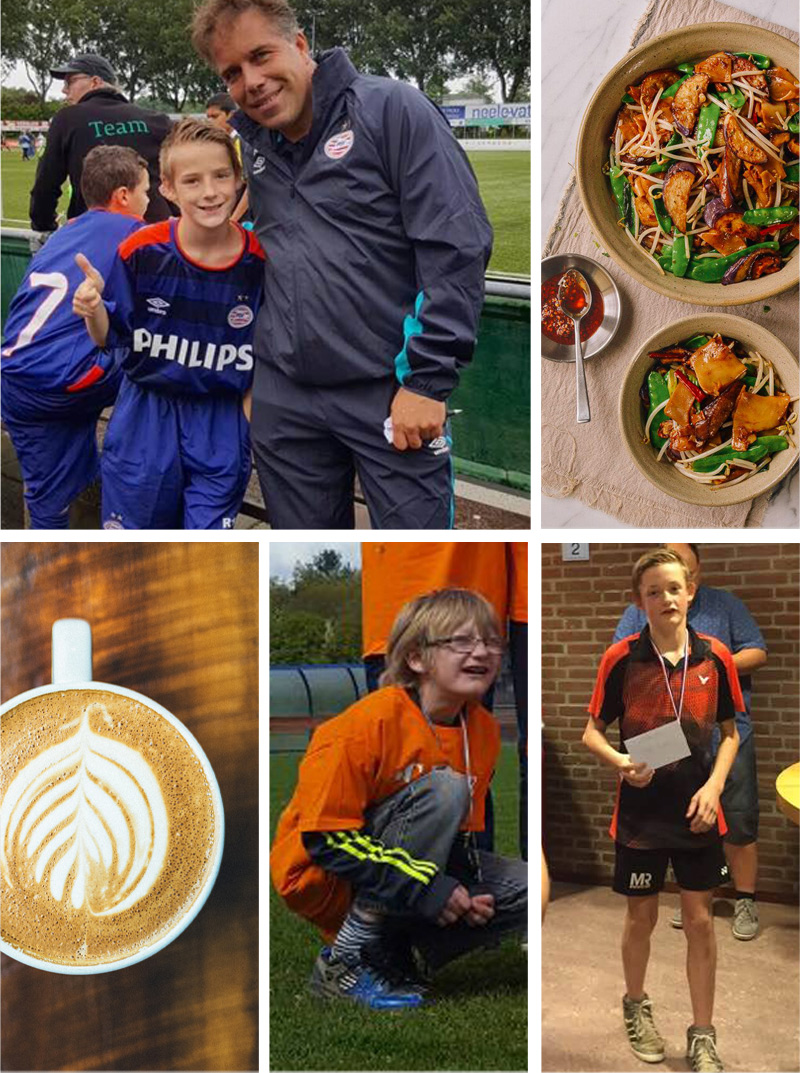
“I have a lot of things that I classify or call one of my fave things, but my number one fave is absolutely my kids, husband, and family.
I am a family person and I love hanging out with them. We have lost so many precious loved ones lately, and that really makes it important to enjoy and love the people that are still among us. My husband’s father died 3 years ago, and since then, my second mom comes to eat with us every Sunday, and sometimes through the week also. On Monday evenings we have game night for the ladies. We mostly play card games, while my husband, his brother, and both our sons watch Game of Thrones or some other show or movie they like. On Wednesday evenings we usually go visit our daughter who lives on her own; she is 23 years old. And Friday evenings my mom-in-law and I go shopping. And I love it all!
My second fave thing is cooking, as most people probably know. I love to cook and experiment with all kinds of foods and dishes, making each one taste and look perfect. But I also love going out for dinner, like a good stir fry with Irma (of Designed by Irma, another TDP designer!), or my daughter and mom-in-law. And I am also a fan of the Hard Rock Cafe. They have really great food, and I enjoy their side menu mac and cheese or one of their ”Legendary Burgers” like the Barbecue Bacon Cheeseburger with parmesan-romano fries and chipotle aioli. My absolute fave cocktail to drink at the Hard Rock Cafe is… Electric Blues. So far I have visited Hard Rock Cafe in Poland and Tenerife!
Another fave thing that I just love to do is going to Kelly Family concerts. I love their music, and I listen to it while designing. Next to that I love musicals. Recently for Mother’s Day my daughter took me to see Mamma Mia, which was amazing and such a lovely gift from her. I love the movie and music as well!”
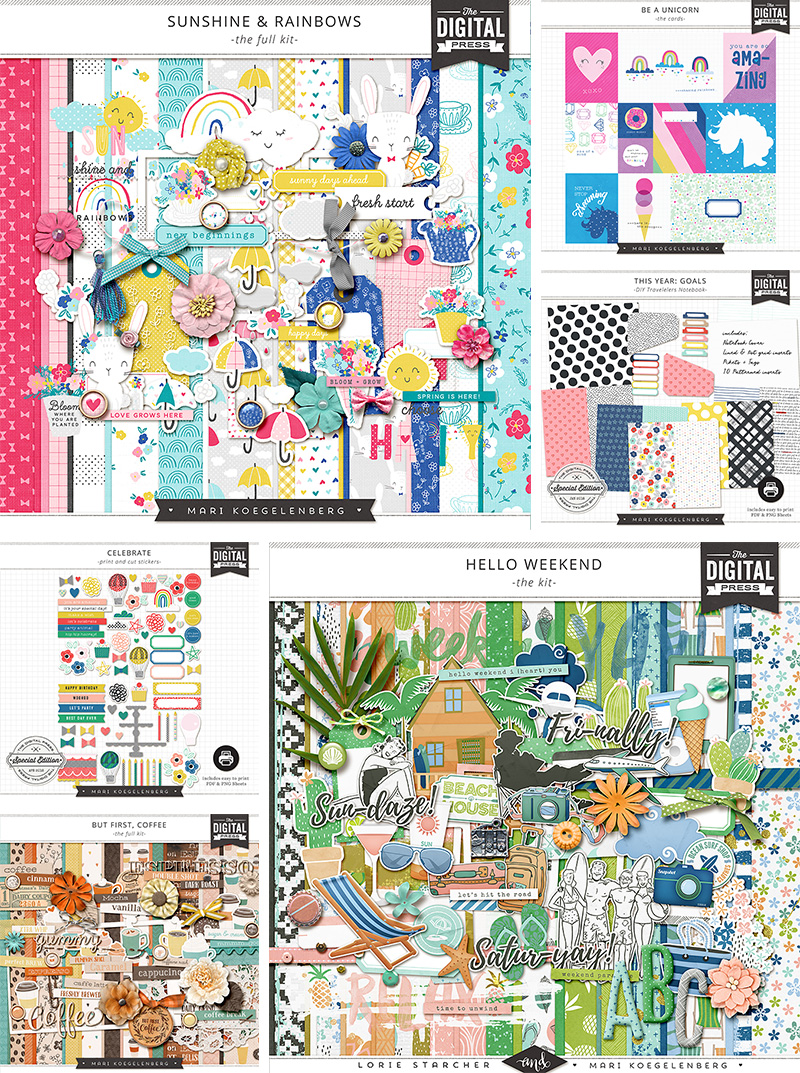
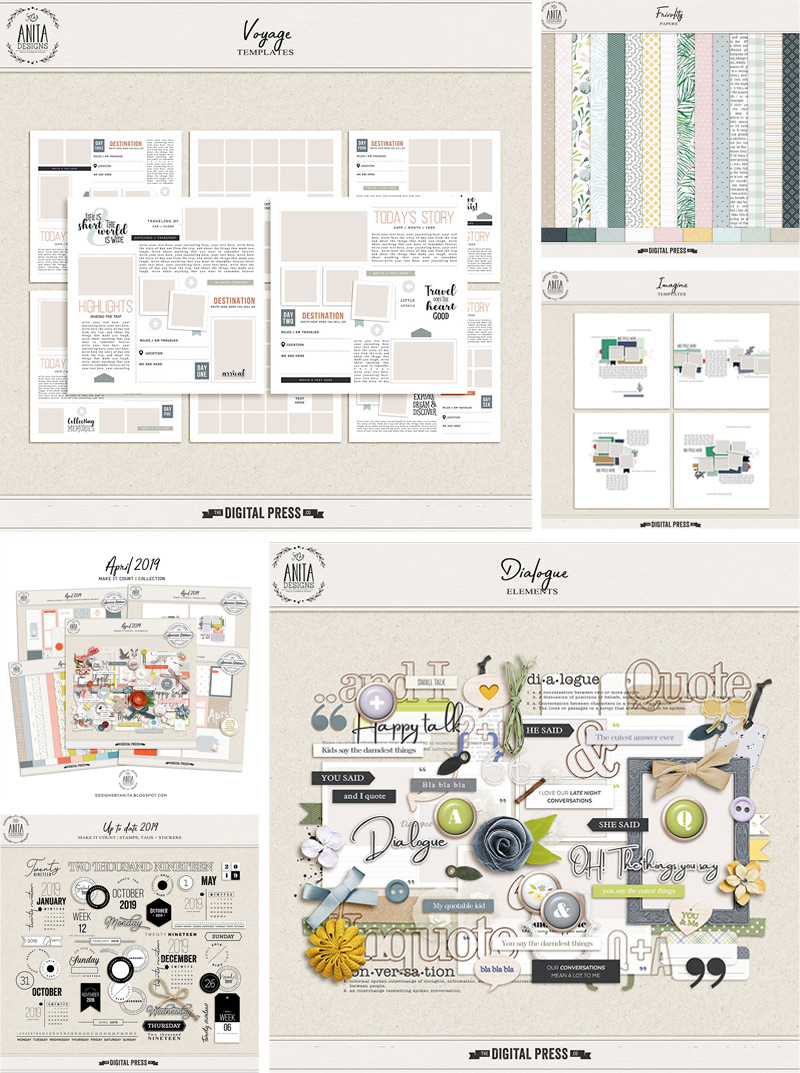
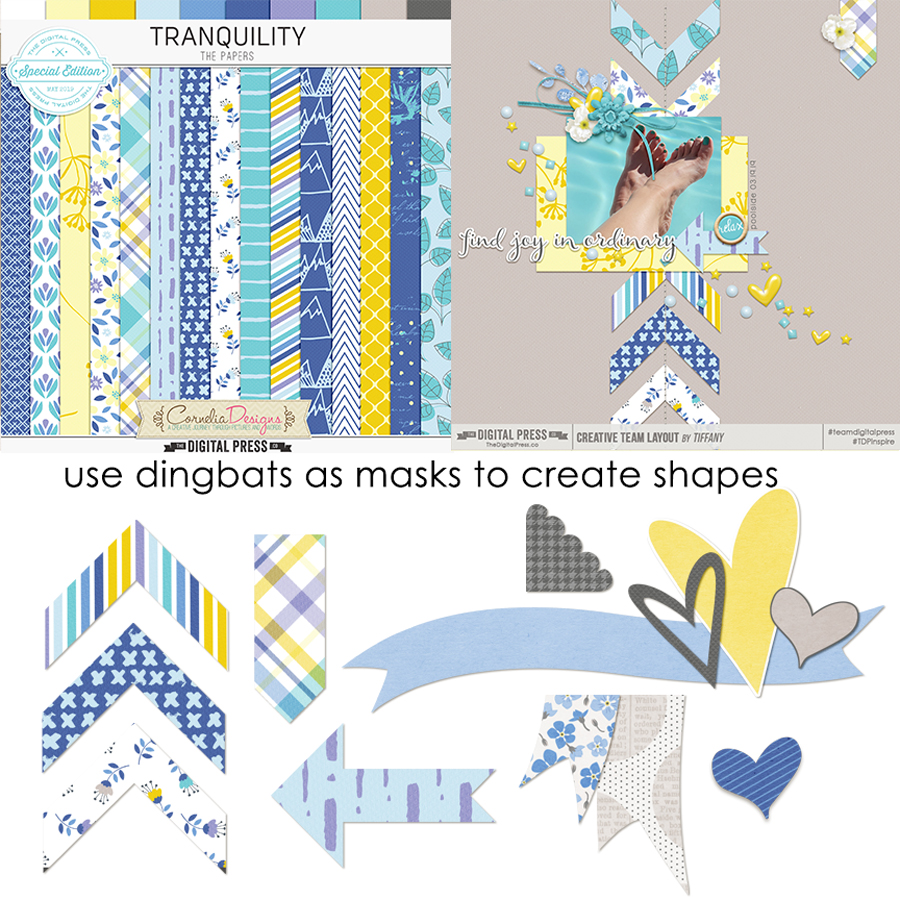
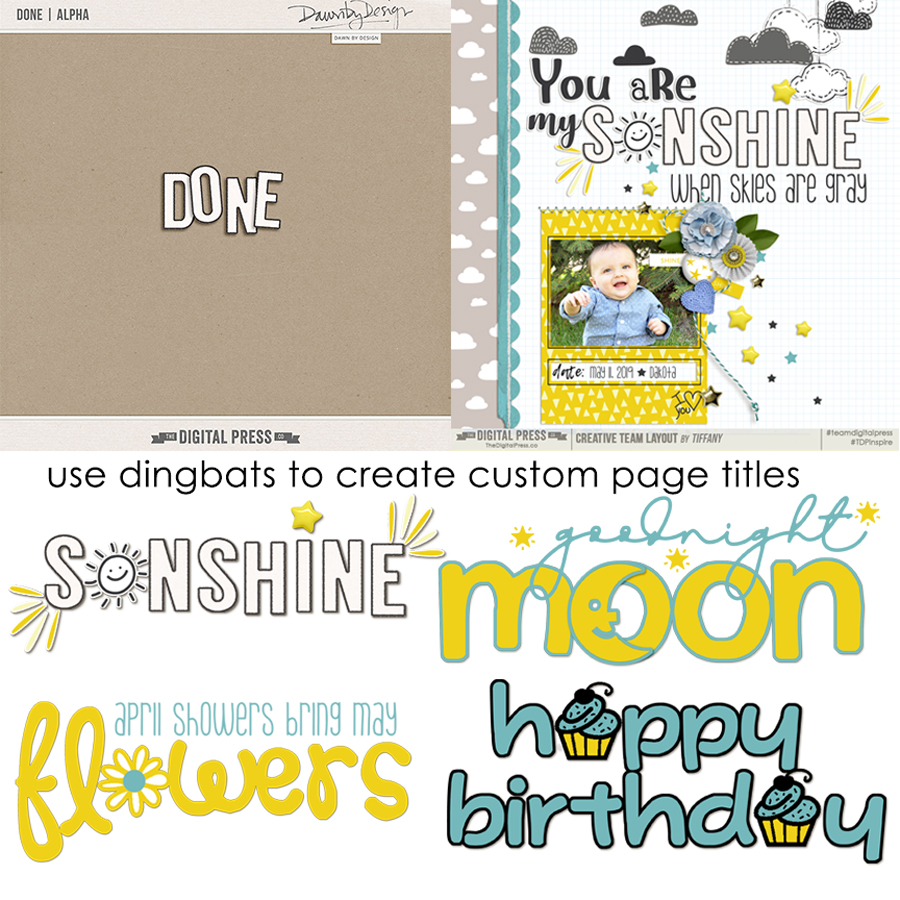
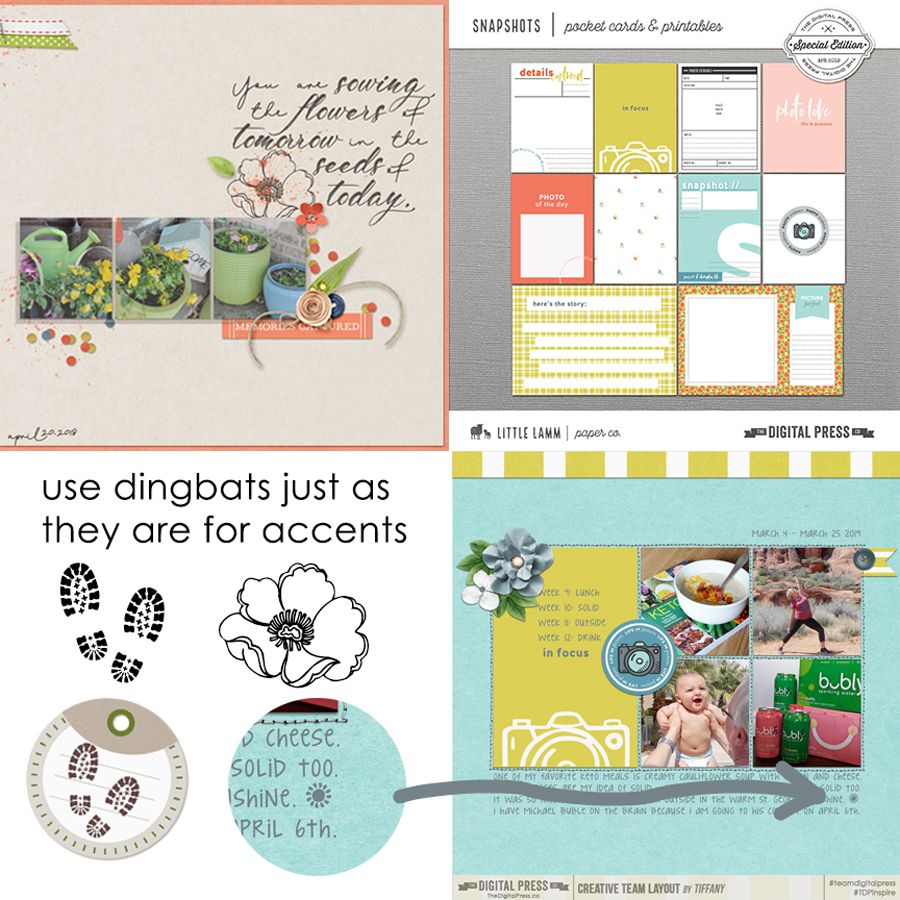
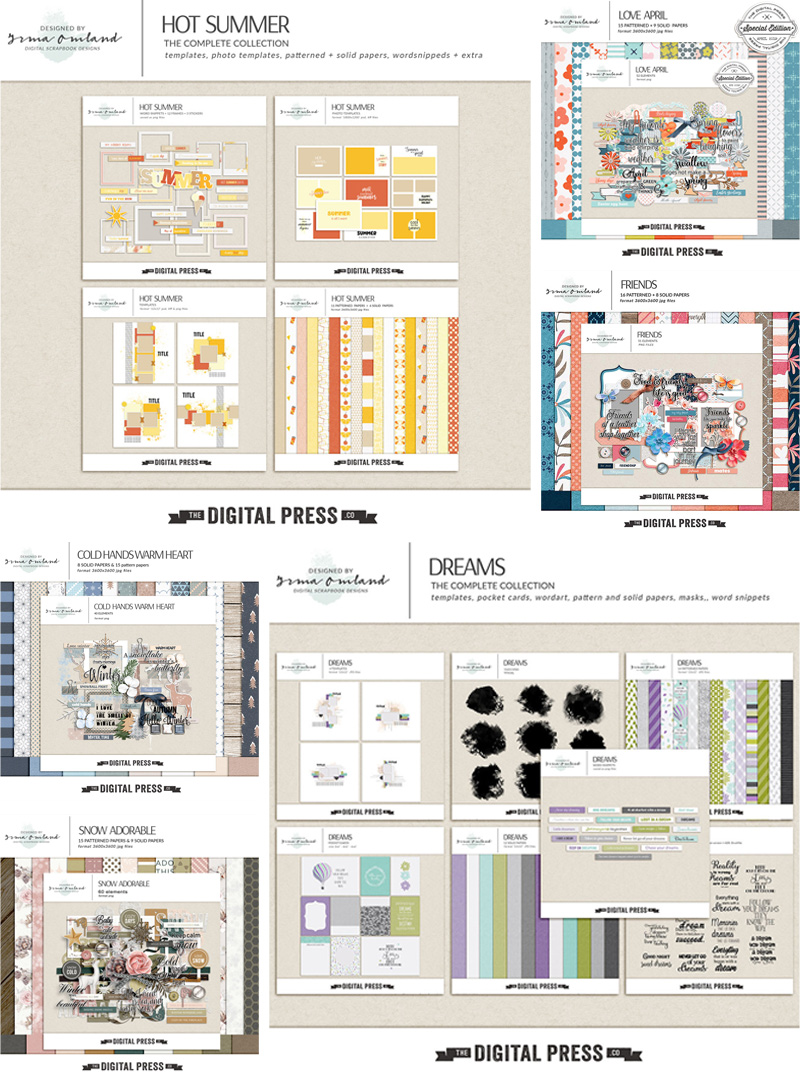
If you’re not already familiar with Anita’s product offerings at The Digital Press, she has nearly 700 products in her shop at TDP — including everything from paper and element packs, layered templates, album sets, journaling cards, alphas, and traveler’s notebook inserts and templates. Anita’s designs have a delicate feel, and often include gorgeous floral papers and handy elements such as flowers, buttons, bows, labels, and word art bits that come in paper, stamp and sticker formats. Her album template sets make quick work of finishing a cohesive album, and can also be used for stand-alone scrapbook pages.
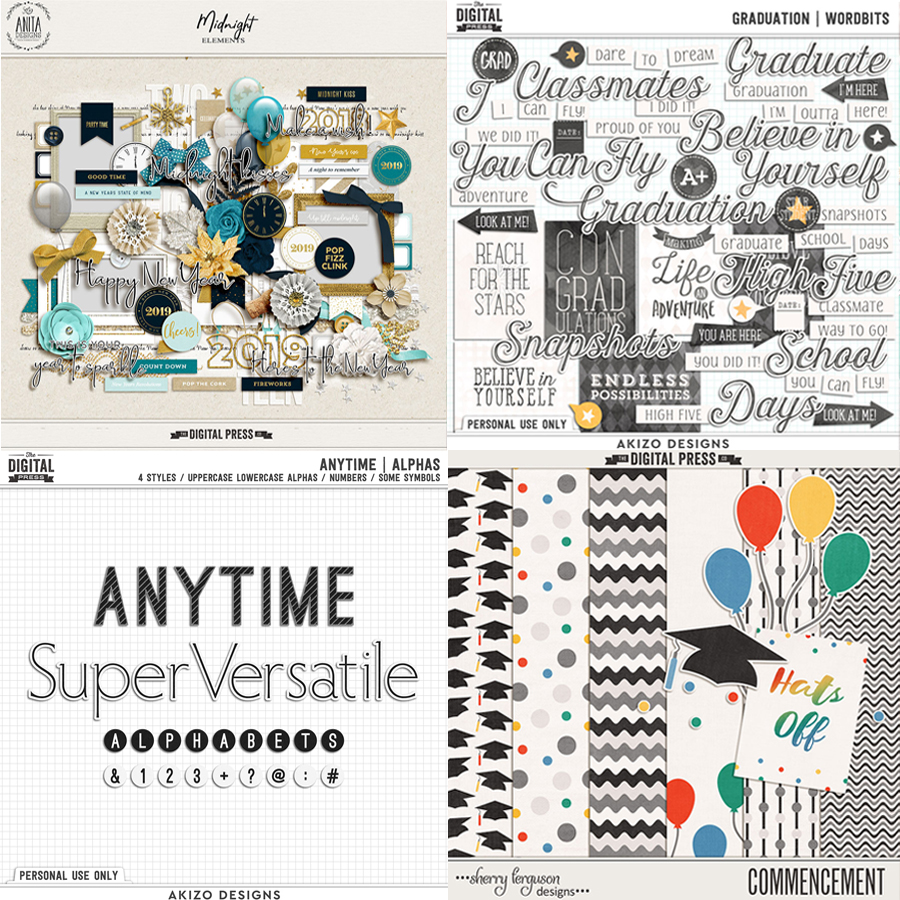
Here’s a look at some of my favorite products from the Anita Designs store at TDP:
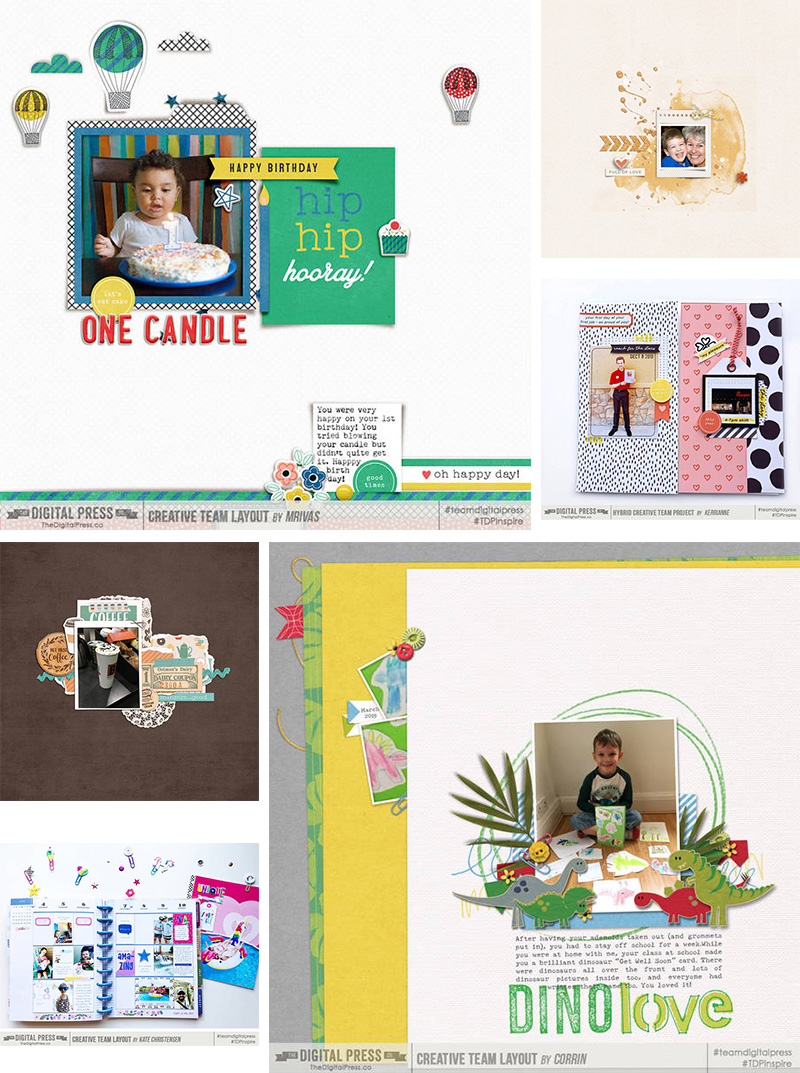
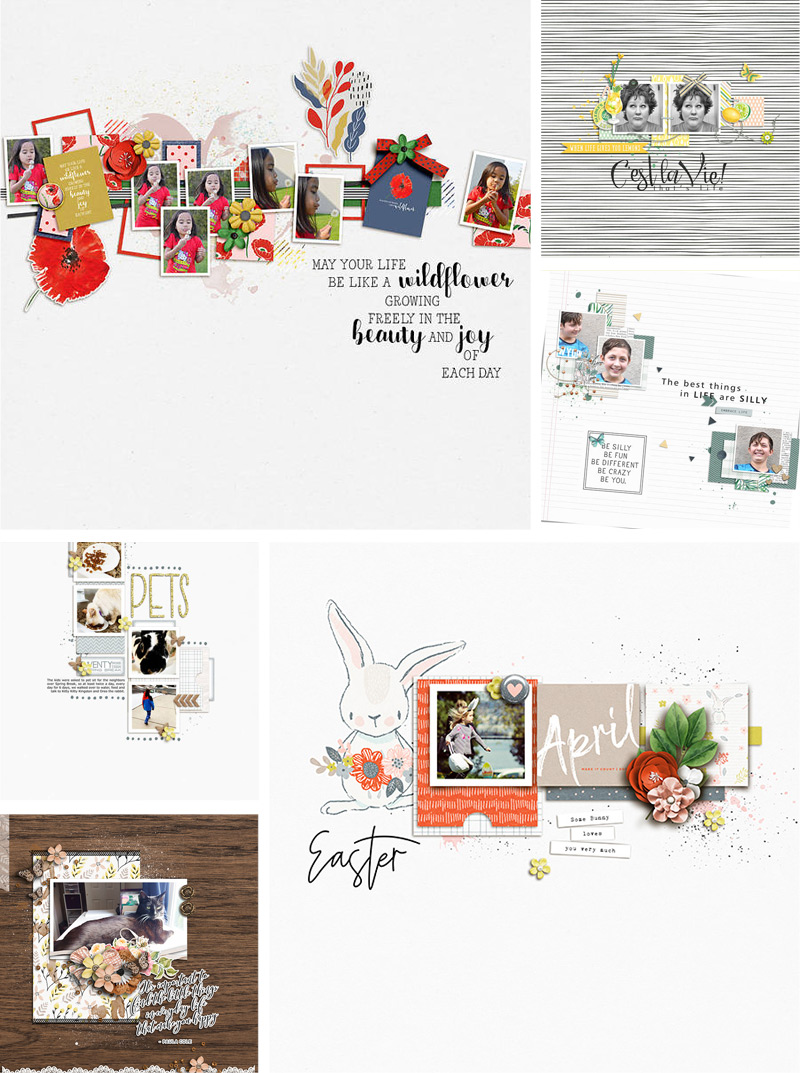
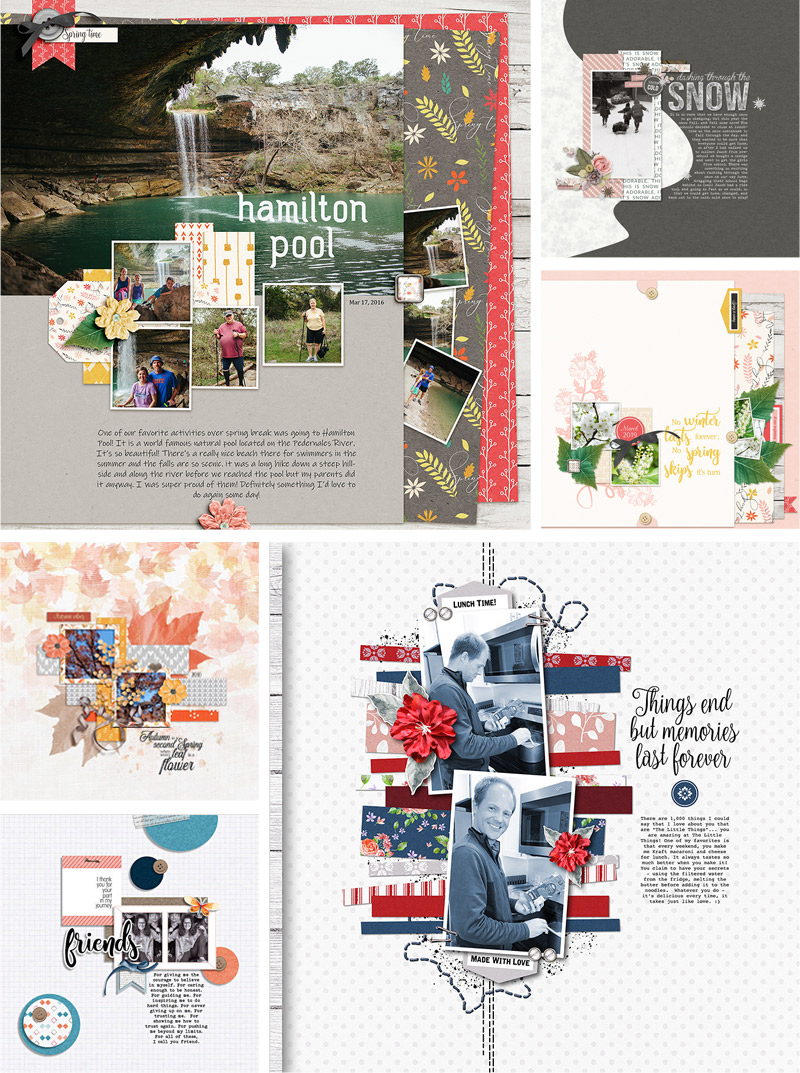
And here’s a handful of examples of projects that use Anita’s products, so you can see how lovely and versatile her designs are…
Hopefully, today’s edition of Friday Favorites has revealed a little more about Anita, while also introducing you to some new products that you might not have seen in her store before.
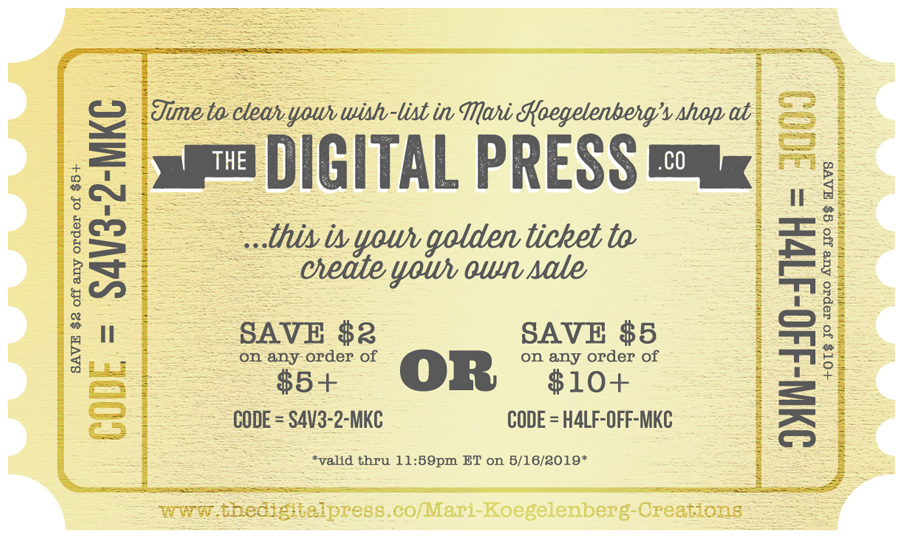
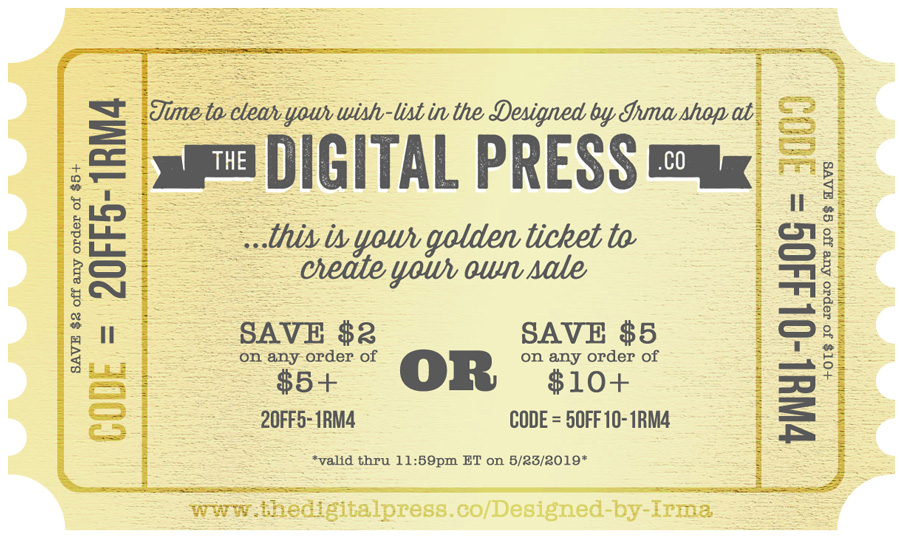
Additionally, we’ve saved some exciting news for last… because during Anita’s upcoming feature week here at The Digital Press, you can enjoy the chance to score an amazing deal in her shop if you use the following coupon code(s) when purchasing her digital goodies (this code/sale will be valid through 11:59pm ET on Thursday 5/30). Don’t miss it!
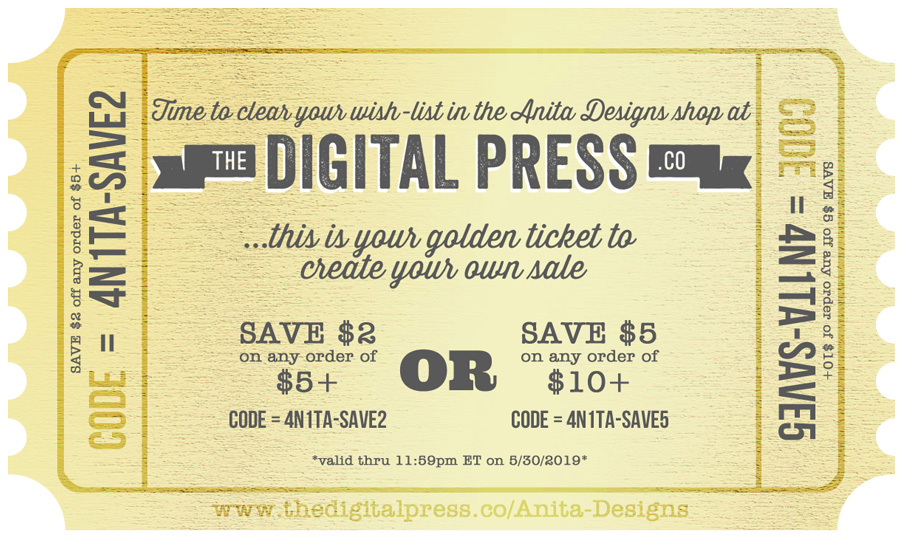
[ if you have trouble seeing the coupon image, above, the codes are as follows: “save $2 off any purchase of $5+” by using code = 4N1TA-SAVE2 . . . or “save $5 off any purchase of $10+” by using code = 4N1TA-SAVE5 ]
 About the Author Carrie is a creative team member here at The Digital Press. She and her family enjoy spending time outdoors, year-round, near their home in Colorado. In addition to scrapbooking and the occasional hybrid home decor project, Carrie also reads voraciously, accumulates fabric, makes soap, brews beer, grows hops, and tries to keep indoor plants alive.

 About the Author Corrin is a member of the creative team here at The Digital Press. She is a fan of the Big Bang Theory and a lover of cozy pajamas or flip flops when the sun finally shines! She lives in the breezy South of England with her husband and 4 crazy kids, who regularly discover & plunder her secret chocolate stashes, and hopes that maybe this will be the year she reaches the bottom of the laundry pile!