Hybrid How-To | Paper Lanterns

Hello, everyone! Kate here with another edition of our Hybrid How-To series here on The Digital Press blog! Today I’m here to show you how to make these cute paper lanterns that are perfect for your next backyard gathering.

Supplies Needed:

  • digital kit of your choice
  • lighter-weight cardstock (I found a package of 65 lb that worked great)
  • plastic or paper cups
  • x-acto knife
  • scissors
  • eyelet punch (not a plier kind, since you need to reach into the middle of the papers)
  • glue stick
  • LED tea lights

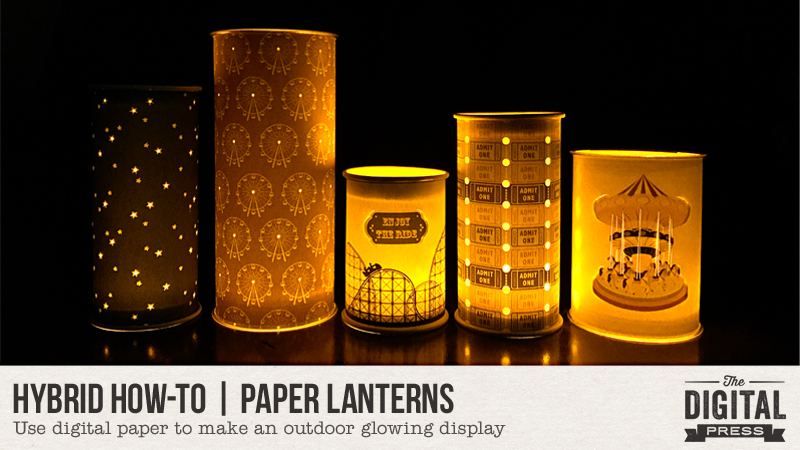
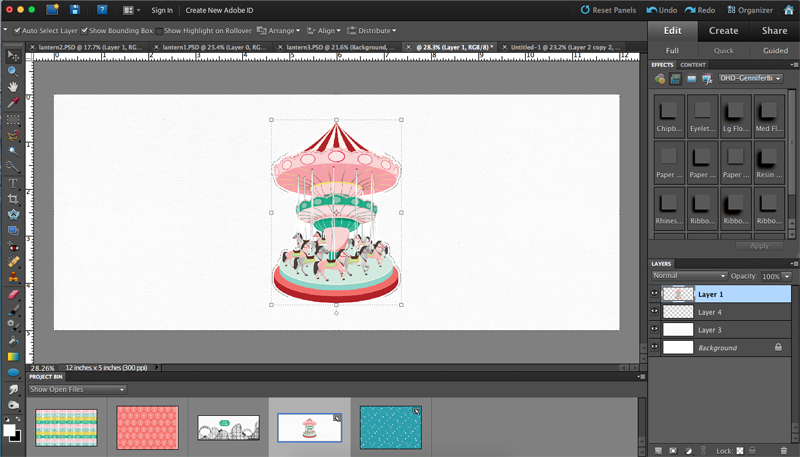
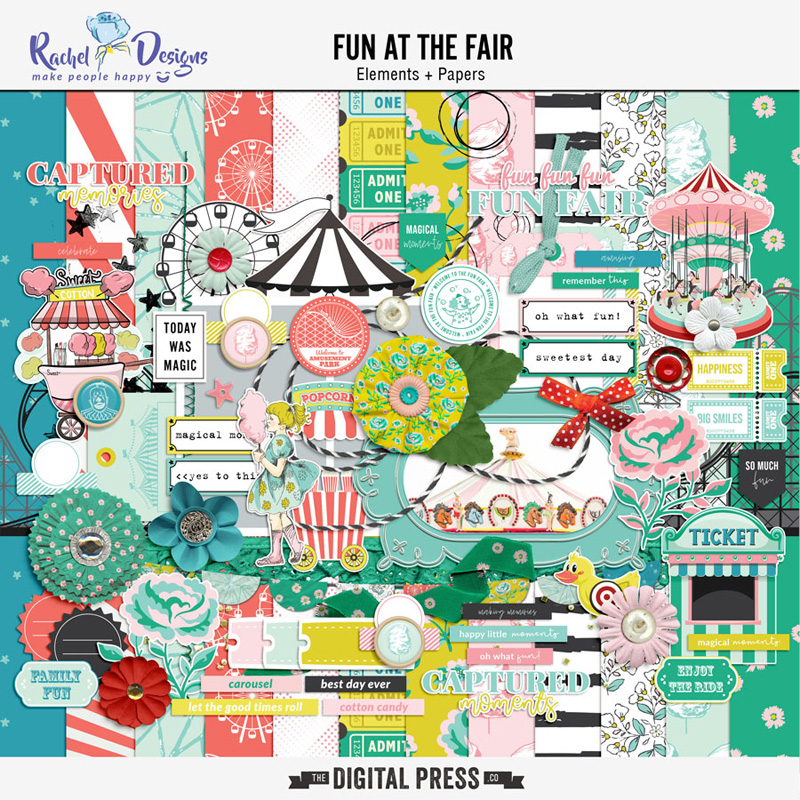
First, choose a digital kit with a theme that suits you. I chose Fun at the Fair by Rachel Etrog Designs for my lanterns, as shown here…

We have a concession stand we built for when we host movies on the back of our house; I thought this kit theme was perfect!

Next, measure around the thickest part of one of your cups. Add 1/2” to that (for overlap so you can glue it together). I chose two different-sized cups for my lanterns; thus, I had one that measured 10” and the other measured 12” after adding the 1/2” overlap.

I created a canvas to those specific sizes in Photoshop because I knew I wanted to design the lanterns using both the paper AND elements from the kit, but a photo-editing program isn’t necessary to do this project. You can also just keep it simple by printing off the papers and cutting them down to size.
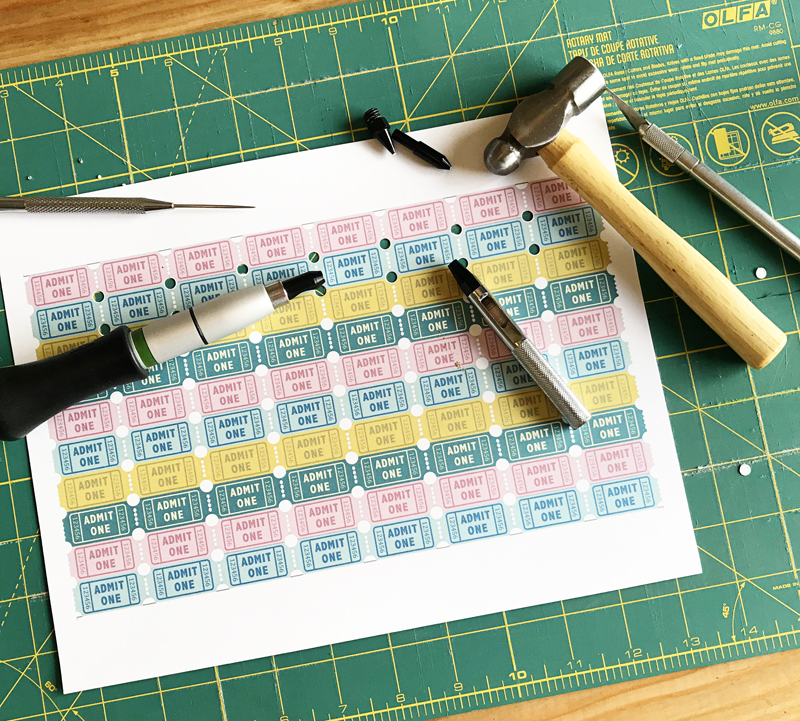
After everything is printed, take your punch or x-acto knife (or both!) and make holes or lines in the paper, depending on the pattern.  I have two different sizes available with my punch. I used the bigger one on the ticket paper I printed out, and I used the smaller one for the star paper and ferris wheel paper.

I also followed one of the roller coaster lines with my knife so light would shine through. I cut around either side of the carousel so it would pop out a little when I rolled it and then used the knife to cut the carousal poles.
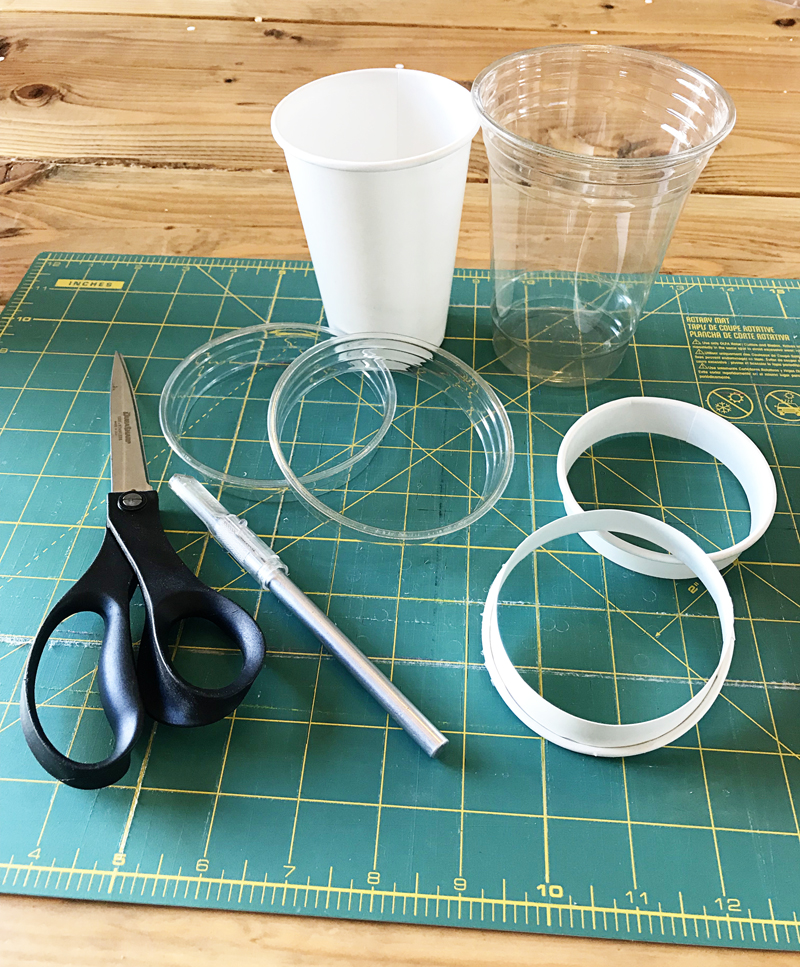
Next is to cut the rims off the cups. You need two per lantern to stabilize them and to help keep their shape. I punched through the cups with my knife and then used the scissors to finish cutting around the rim, leaving about 3/4” of the cup intact.
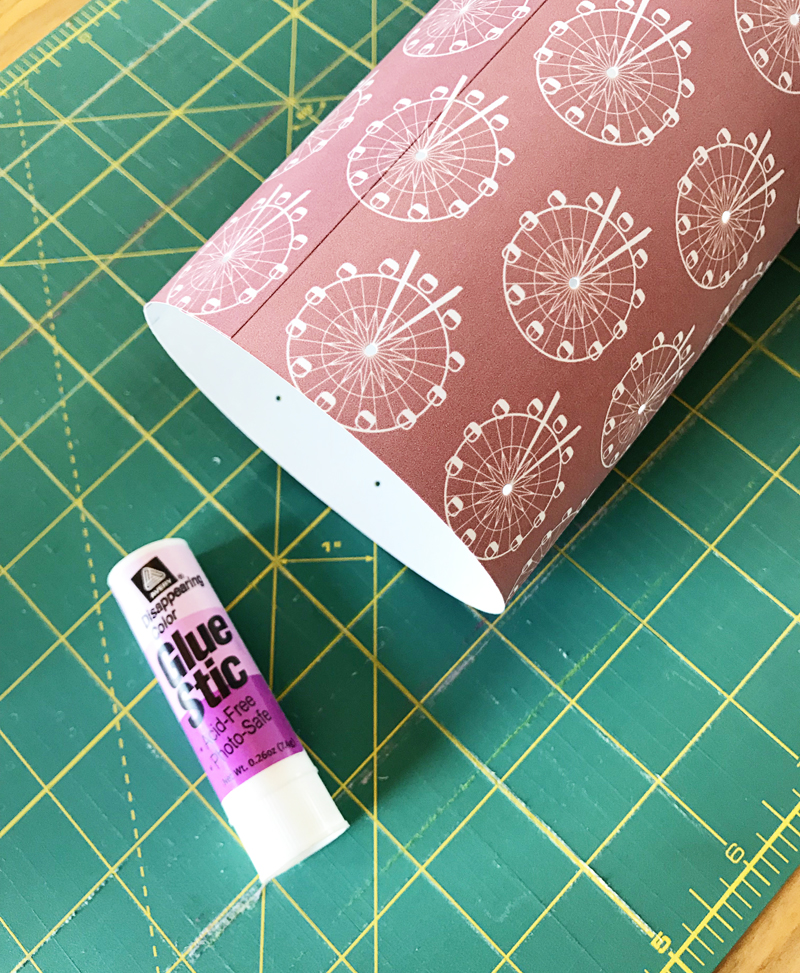
Make a tube with the paper and glue the seam together. I had two seams for my larger lanterns.
Insert the cup rims on the top and bottom. I was going to to glue them in, but they ended up tight enough that I didn’t have to do that.
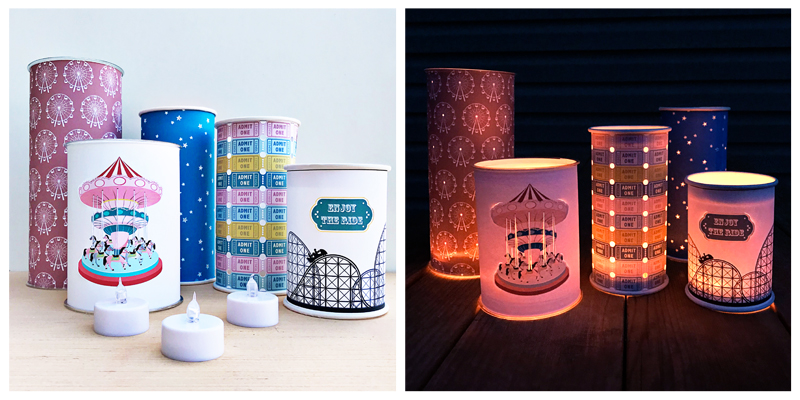
Now all you do is place them over the LED tea lights. I really love how easy these were and how impressive they looked once it got dark! It was such a fun project and I hope you’ll give it a try.


Kate About the Author  Kate is on the hybrid team here at The Digital Press. She lives on the Utah/Colorado border with her husband, 5 kids, 10 chickens, a dog named Gracie, and a cat named Kit. She’s a city-born girl who found she’s really a country girl at heart. She can be found outside, barefoot, and probably in her garden.

Friday Favorites | Rachel Etrog Designs

Hello everyone, and welcome to another edition of our designer feature series on The Digital Press blog in 2019 — Friday Favorites! This year, as you know, we’ve been learning a bit more about each of our amazingly talented designers by having them share some of their favorite things with us each week.

This week, the spotlight is on Rachel Etrog Designs. This is Rachel’s second feature here on the blog (you can find her first feature from September 2018 HERE)

This time, to learn even more about Rachel, we asked her to share some of her favorite things with us, and here’s what she had to say…


“My favorites things? Well it’s hard for me to point on a few because i have a long list, but here are few of them:

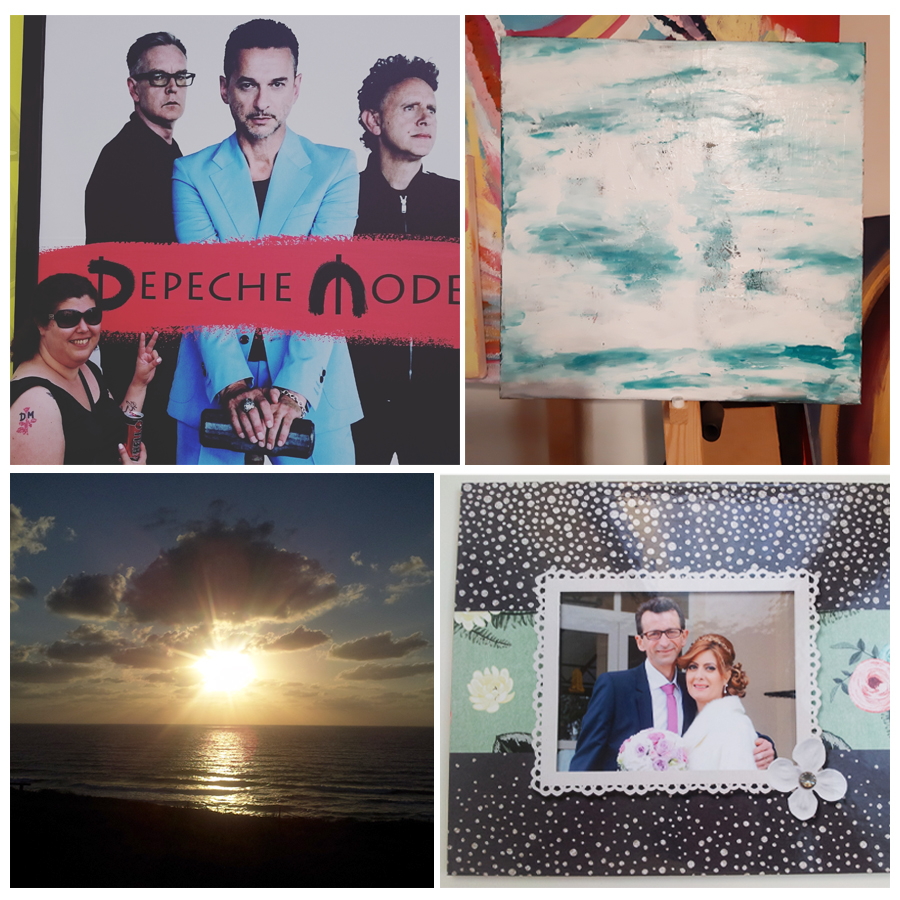
1. Music Music Music! I can’t imagine my life without music, all the time music is playing in my apartment.  I love all kinds of music from classic music to gothic music and, as you know from my previous designer feature, I’m a huge fan of Depeche Mode — they are my number 1 band. I also love Placebo and a Norwegian band Apoptygma Berzerk. Every summer I love to travel to Germany with my friends to see concerts of Apoptygma Berzerk and other fabulous bands at gothic music festivals, like Cologne (Amphi festival) and Hildesheim (Mera Luna festival).  Every festival is full of great music, vibes, costumes, food & drinks. (It’s been a while since my last time but still remain my favourite). When Depeche Mode and Placebo go on tour, I love to see their concerts abroad so I travel a lot. I’ve seen them in Amsterdam, Barcelona, Madrid, Paris, Romania and the list goes on!

2. I love to scrap digital and hybrid layouts especially for special occasions. After I’m finished, I print them in an album and give it as a part of the gift.

3. Besides loving to design digital papers and stuff I also love painting on canvas. I never know what i’m going to draw — I just go with the flow of the paint and my emotions.

4. I love to going to the beach like every Israeli person. The summer is already here in Israel and most of the year we have hot and sunny days (we just had a few days of 40 degrees). I love to walk near the water or just sitting on the sand and meditating to the sound of the waves. But most of all I love sitting (alone or with friends) on the sand with glass of wine or a beer and watching the sunset.”


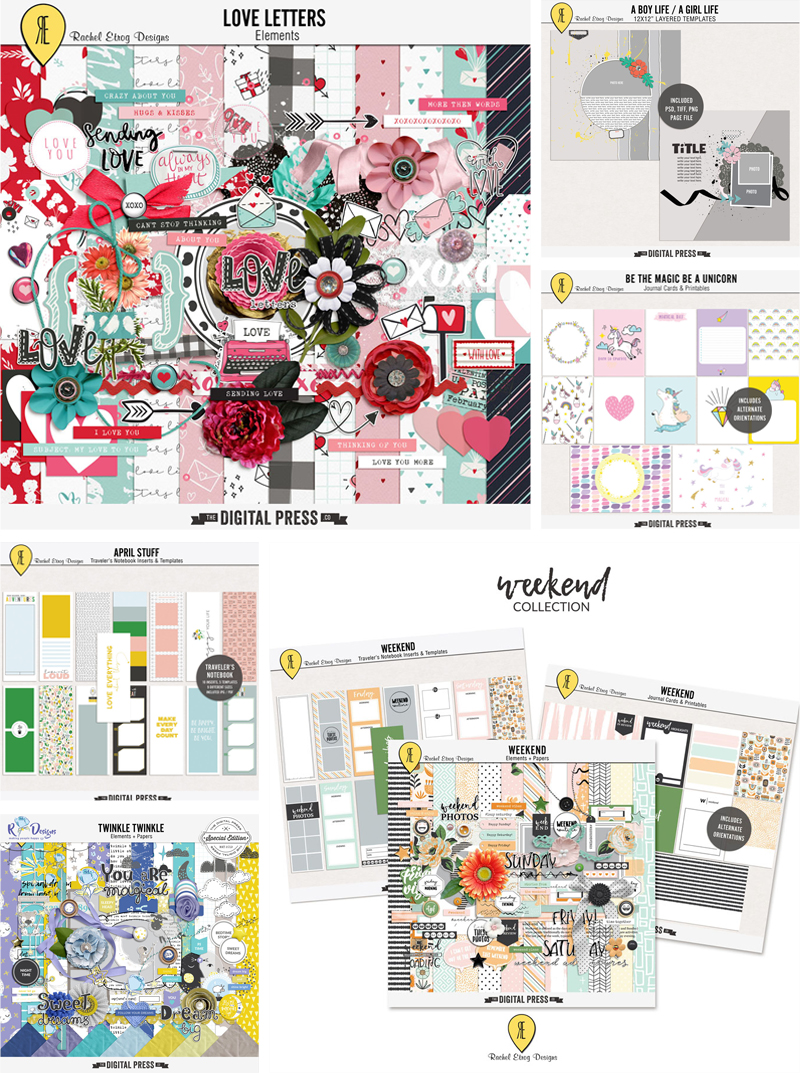
Rachel’s shop is filled with the most gorgeous goodies. She regularly designs monthly collections in stunning colour schemes, and she doesn’t forget about the scrappers who prefer pocket or travel journal style pages, as well (you’ll find heaps of cards especially for them in her shop). Her products always include unique elements and stunning papers — any scrapper’s dream!

Here is just a small selection of what you’ll find in her shop…


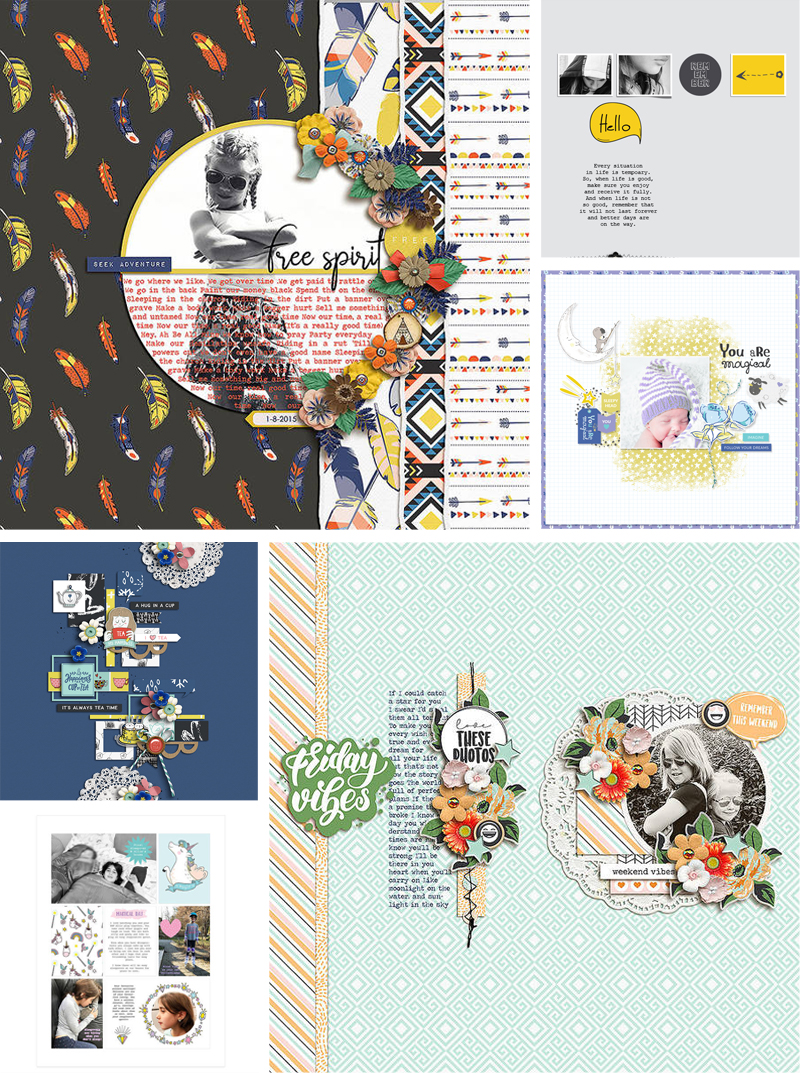
And here’s a look at just a few projects that showcase Rachel’s lovely products…

I hope you all enjoyed getting to know Rachel a bit better! I think a person’s favorite things say a lot about them! Remember to have a look through Rachel’s store and see what other gems you find…

…and don’t forget that during Rachel’s upcoming feature week here at The Digital Press, you can enjoy the chance to score an amazing deal in her shop if you use the following coupon code(s) when purchasing her digital products (this code/sale will be valid through 11:59pm ET on Thursday 6/13). Don’t miss it!

[ if you have trouble seeing the coupon image, above, the codes are as follows: “save $2 off any purchase of $5+” by using code = S4V3-2-R4CH3L   . . . or “save $5 off any purchase of $10+” by using code = S4V3-5-R4CH3L ]


ABOUT THE AUTHOR  Christelle is a creative team member at The Digital Press, happily creating for all of the talented designers. She’s originally from South Africa, and has recently relocated to the UK with her husband. She loves scrapping her 3 lovely step-children and 4 beautiful nieces and all of their (mis)adventures. If she could, she’d travel all the time, but for now she makes do with traveling as often as possible. Her other hobbies include machine embroidery and sewing, as well as reading soppy romance!


Tutorial Tuesday | Tips for Choosing Color Schemes

Hello, and welcome to another edition of our Tutorial Tuesday series here on The Digital Press blog! Today I will be sharing some tips for using color schemes more effectively in your scrapbooking projects!

The importance of color in scrapbooking relates to how significant color is to the human mind. Color plays a vital role in how we respond to the things we encounter every day. As such, using color effectively can make a huge difference in your creative projects. There are four main ways that using color can help you create more eye-pleasing scrapbook projects:

  1. Color conveys emotions and can set the mood for your project
  2. Color establishes a focal point on your page by telling someone where their eyes should focus first
  3. Color defines space and can help you provide differentiation on your pages
  4. Color can create harmony on your project by balancing out the different components of your page

Color schemes are simply associations of colors that can be used to create a particular style and appeal. These sets of colors that work well together can create a unified aesthetic for your project. Understanding these color schemes will give you more flexibility when creating pages that will stand out to the viewer. There are seven types of color schemes that you can use to make your pages the best that they can be.

  1. Monochromatic Color Schemes — use varying shades of one color such as various shades of blue
  2. Analogous Color Schemes — use colors that are next to one another on the color wheel such as green/blue, yellow/orange, blue/purple
  3. Complementary Color Schemes — are sets of colors that are opposite of one another on the color wheel such as yellow/purple, blue/orange, red/green
  4. Triatic Color Schemes — are a combination of colors that are equally spaced from each other on the color wheel such as yellow/red/blue and purple/green/orange
  5. Neutral Color Schemes — are those colors that contain equal parts of the three primary colors (red, blue, yellow) and include black, white, gray and brown
  6. Cool Color Schemes — are colors that give the impression of calm and soothing such as blue, green and violet
  7. Warm Color Schemes — are the colors that are vivid and energetic such as red, yellow, and orange

Each of these color schemes offers different ways for you to create pages that are compelling and eye-catching! Here are 4 easy ways to choose a color scheme that will help guide you when creating scrapbook projects…

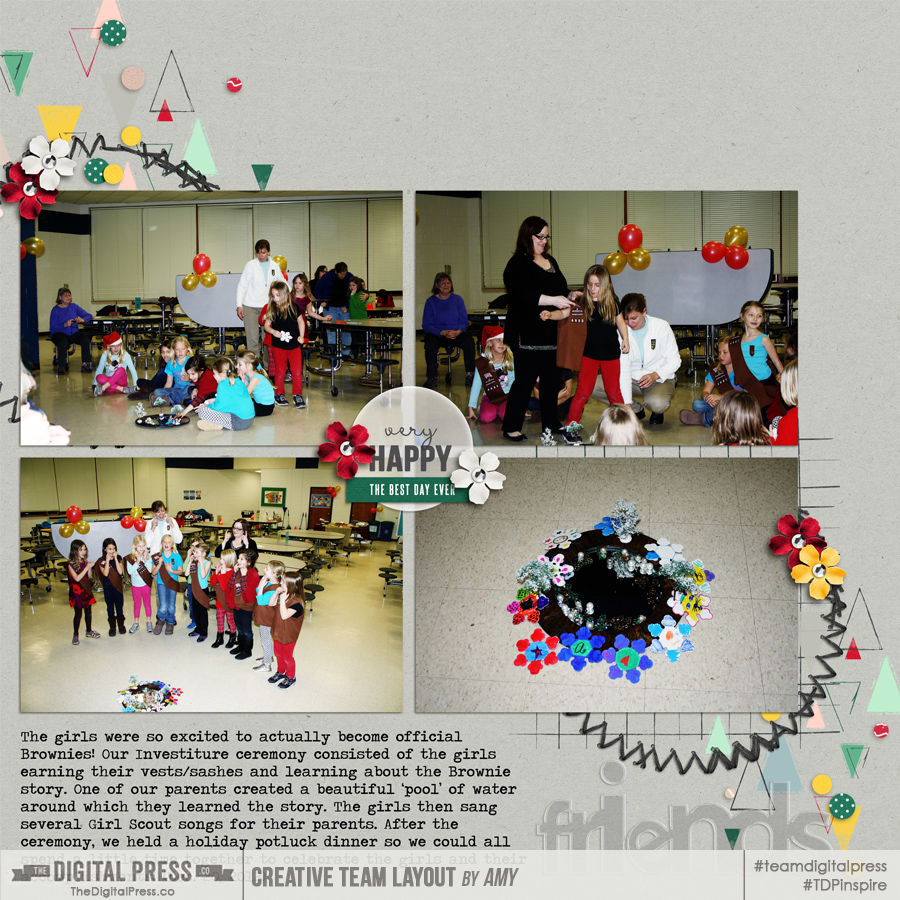
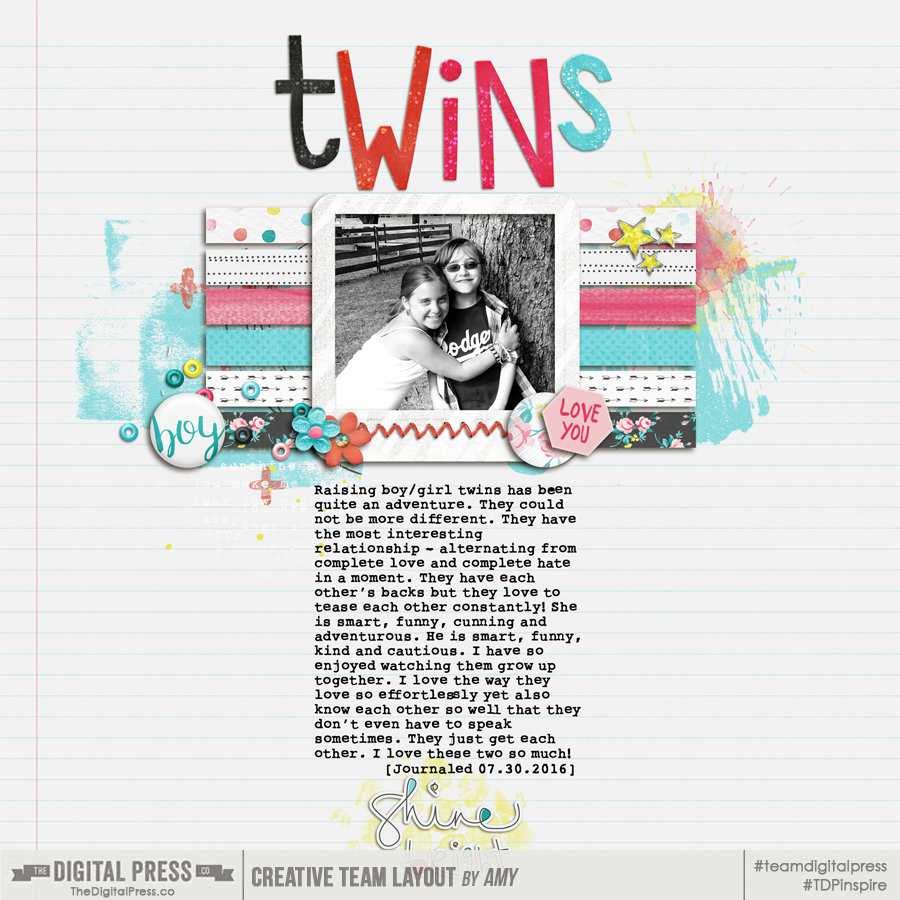
  1. Choose a dominant color from your photo(s) for a starting point to guide your color scheme choice. In the following page, there was a lot of red in all of the photos so it seemed like a good place to start. I decided to use a neutral background and used two complementary colors (red and green) to bring it all together…

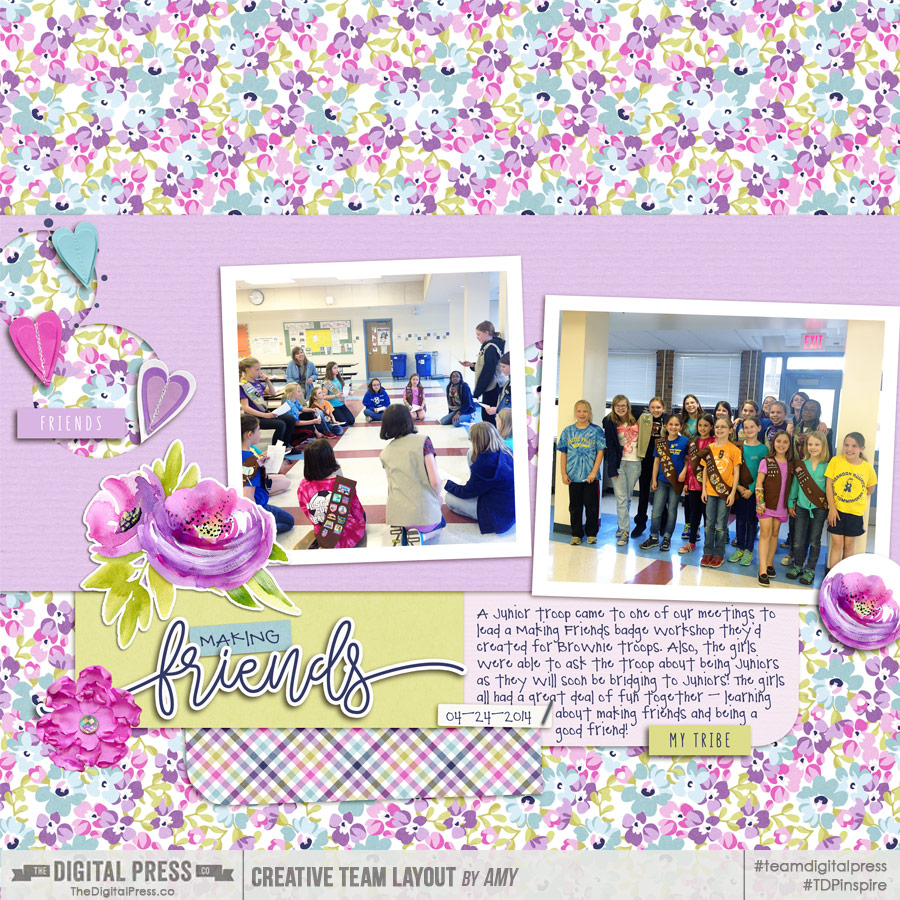
2. Choose a color that will support the emotion you’d like to convey with your project. In this case, I chose a cool color scheme of violet, blue, and green… in order to help convey the feelings of calm and harmony. I think the color scheme I chose helps reinforce the theme of friendship and togetherness.

3. Consider making a photo black & white in order to allow you more flexibility in your color choices. The colors in this photograph were not cohesive in any way, but it was the perfect photo for this page. Therefore, I edited the photo to make it black and white, which opened up my color scheme options considerably!

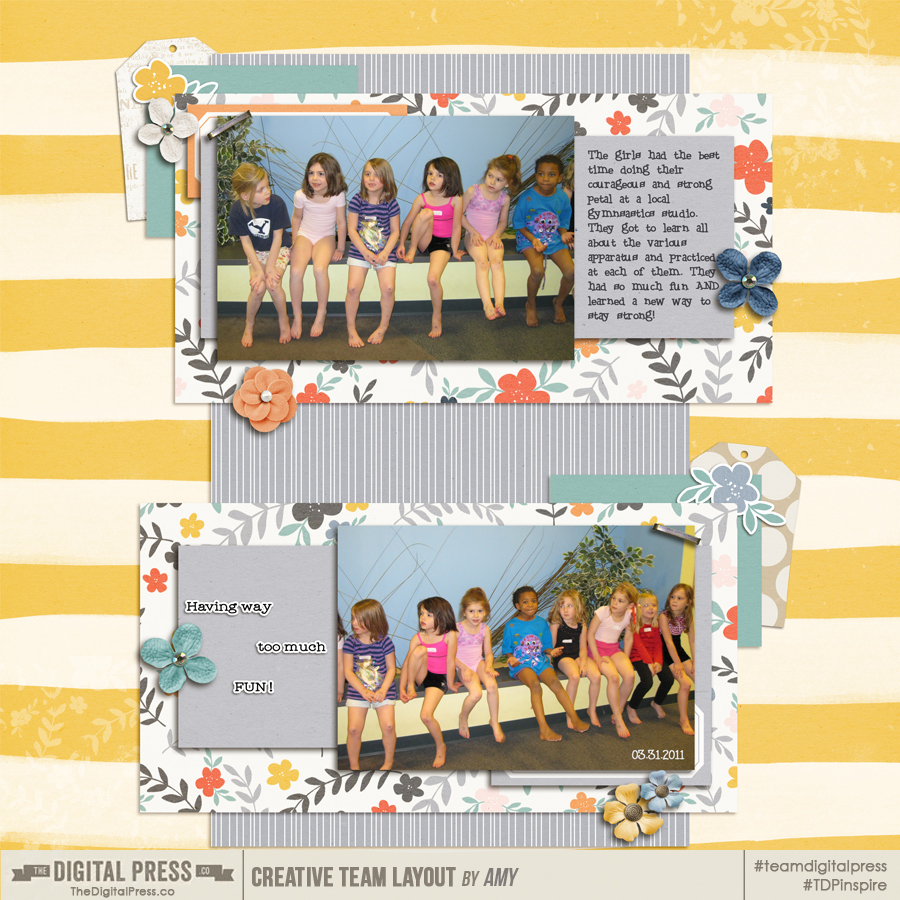
4. Another tip is to use the rule of three technique and choose one primary color and two complementary colors as accents. With this next page, I wanted the page to be bold and convey action (since the page is about gymnastics and being strong)… but I also wanted there to be a serenity to the page, as it also focuses on friendship and working together. As a result, I decided to use yellow as my primary color… but I chose blue and grey as my complementary colors in order to find that balance that I wanted the page to convey.

It’s important to work toward finding colors that enhance and coordinate with your photos to make the most memorable pages possible.

I hope these tips and techniques can help you feel more comfortable using color in a variety of ways, to help you create more eye-catching scrapbook projects!


Amy

About the Author  Amy lives in Richmond, Virginia, with her husband and their 14-year-old boy/girl twins. Their 23-year-old daughter has recently finished up graduate school at Clemson and has started her first full-time job! She has been scrapbooking since the early 1990s, but discovered digital scrapbooking in 2005 when her twins were born… and has primarily scrapped digitally since that time. She is passionate about telling her family’s stories and documenting their life together. She is also a huge reader, a pop culture junkie, and LOVES all things beauty & makeup!

Friday Favorites | Humble & Create

Hello, and welcome to another edition of our designer feature series on The Digital Press blog in 2019 — Friday Favorites! This year, we have been learning about each of our amazingly-talented designers by having them share some of their favorite things with us each week.

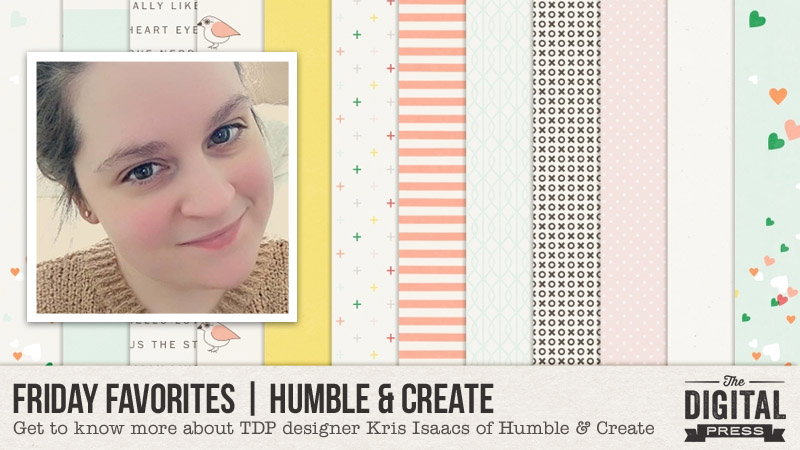
This week, I am beyond excited to introduce you to Kris — the fabulous face behind Humble & Create. She is our newest designer here at The Digital Press, and so this is her first feature on The Digital Press blog.

We asked Kris to share some of her favorite things with us, and here’s what she had to say…


“When I was young, and just starting off in scrapbooking, I loved doing mini albums. Does anyone remember paper bag books?! I know I do, and mini albums were a thing too. Long before pocket scrapping and travelers notebooks came along, there was traditional scrapbooking and creatives looooved “making up” anything to do with documenting their photos in creative ways. Not unlike today. 🙂

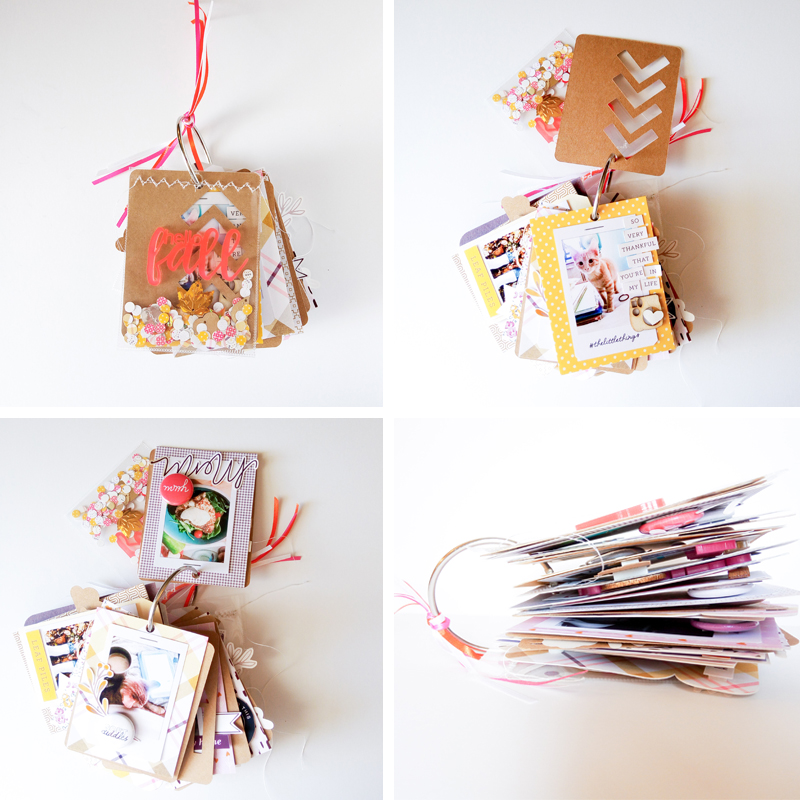
After all these years, I’m still in love with mini tag books! They are so fun for documenting quick day trips, favorite seasonal photos, summer beach trips, and more! You can make them as plain, chunky, small, big, and/or colorful as you want! You can even challenge yourself to use all your leftover supplies that might be collecting dust… or that special coordinated kit you’ve been keeping around… etc. Tag books are not just fun, they’re versatile too! I love making 3×4 tag books with journal cards and papers from my kits cut to the same size (and as you may have guessed from the photos shown here, I love making them chunky!). There are tons of ideas on Pinterest, as well, but here are a few shots of a tag book that I made for fall a few years back and it’s still my favorite…


Isn’t that so great?! 🙂

Meanwhile, when it comes to Kris’s designs… if you haven’t checked out the Humble & Create shop at TDP, go there now! Kris creates gorgeous collections of elements, papers, journal cards, and great word art. Her designs are perfect for just about anyone — from the simplistic scrapper, to the pocket scrapper, to the ‘kitchen sink’ scrapper (like myself!) with her eclectic elements and bold patterns! No matter the type of scrapper, you’re sure to fall in love with her designs!

Here are a few of my favorites from the Humble & Create shop here at TDP

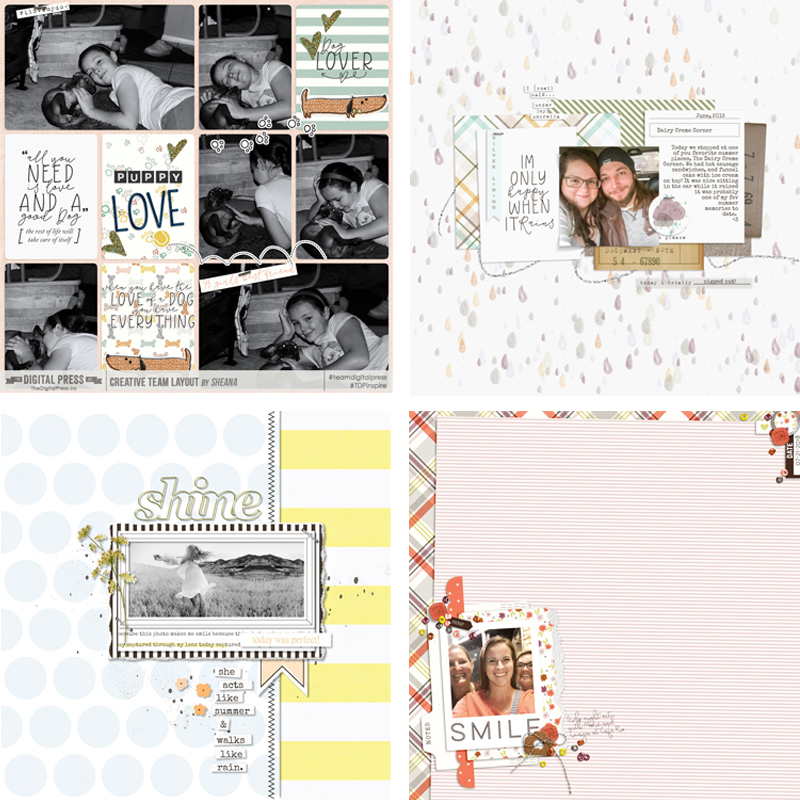
Additionally, here’s a look at a sampling of fun projects that have been created using Kris’s fantastic designs…

Awesome and inspiring, right?

It was great to learn a bit more about our newest resident designer here at TDP… but the fun doesn’t stop there! During Kris’s feature week here at The Digital Press, you’ll not only find her entire shop 30% OFF… but you’ll also get an amazing deal in her shop if you use the following coupon code(s) when purchasing her digital goodies (this code and/or her sale will be valid through 11:59pm ET on 6/6).

[ if you have trouble seeing the coupon image, above, the codes are as follows: “save $2 off any purchase of $5+” by using code = HUMBL3-2OFF5 . . . or “save $5 off any purchase of $10+” by using code = HUMBL3-5OFF10 ]


About the Author  Amie is a craft-loving dental hygienist who lives in Washington state. She loves her husband, her two crazy kids, and her English Bulldog… as well as coffee, baking cupcakes, daffodils, glitter & sprinkles, reading a good book, and lip gloss — not necessarily in that order.
Tutorial Tuesday | PART 2: The Exposure Triangle

Welcome another edition of our Tutorial Tuesday series here on The Digital Press blog! This is Part 2 of our 4-part photography series all about the exposure triangle. If you happened to miss it a couple of weeks ago and need a recap, you can find Part 1 HERE. To refresh your memory, in that first post we introduced the idea that photography exposure depends on three settings: ISO, aperture, and shutter speed.

Today we’ll be focusing on that first variable — the ISO setting in the exposure triangle.

ISO is the sensitivity of the sensor. A high ISO means that the sensor of the camera is more sensitive to light, that it will “capture” every bit of light available, so to speak. More light is let in when you choose a high ISO number; conversely, less light is allowed in whenever you choose a lower ISO number.

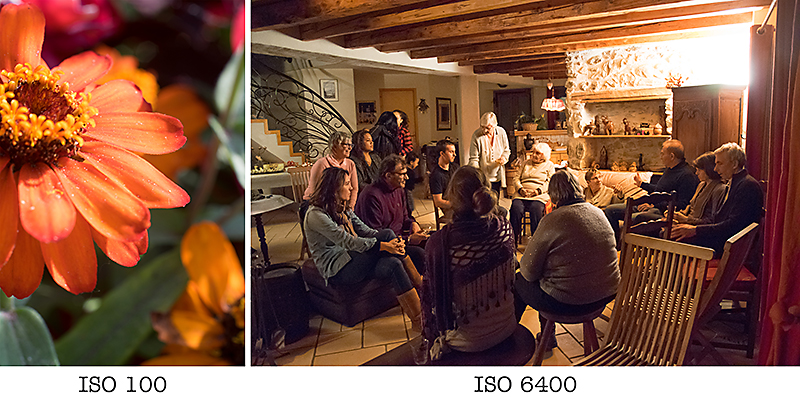
What does this mean when you’re taking photographs? Well, for example… on a bright, sunny day outside you can choose a lower ISO (usually 100; sometimes 50) on most cameras. The opposite is true when you are indoors taking a photo in a room with very little light (at night, for example… or in a room with a tiny window and no lamp on). In that scenario, you would need to choose a much higher ISO (6400 or higher, etc.).

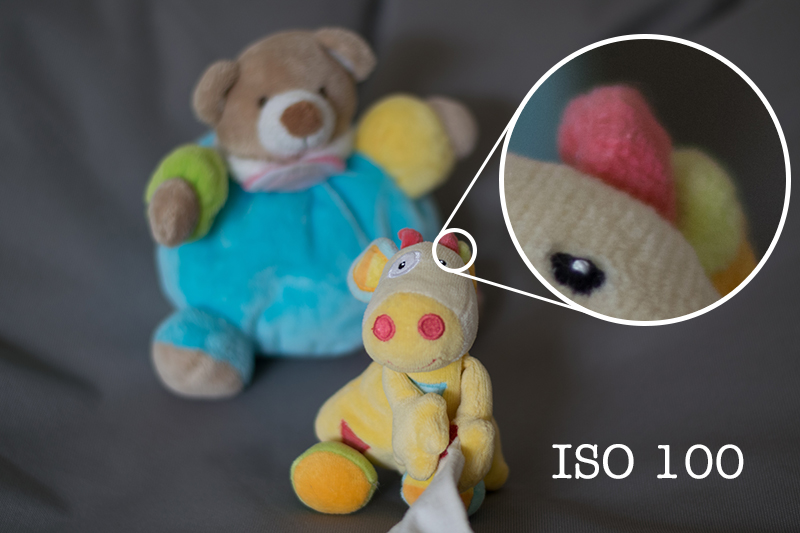
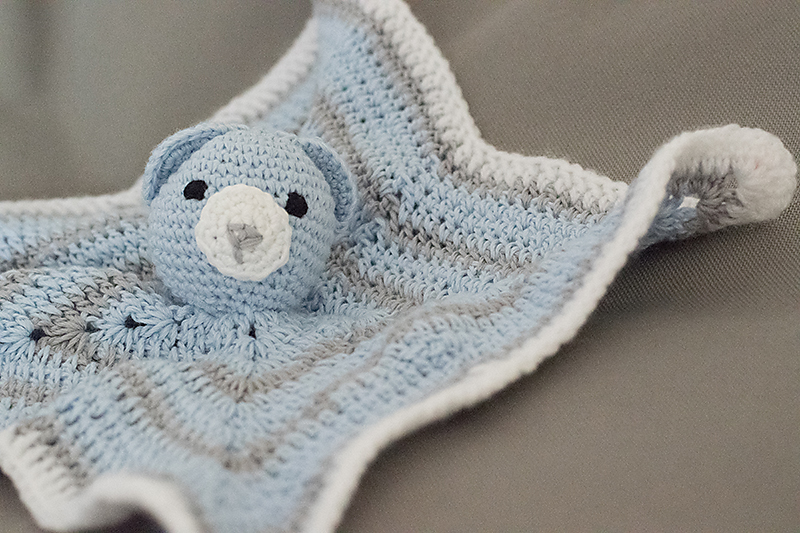
Here’s a look at a couple of outdoor/indoor photos, and the corresponding ISO used to capture the image…

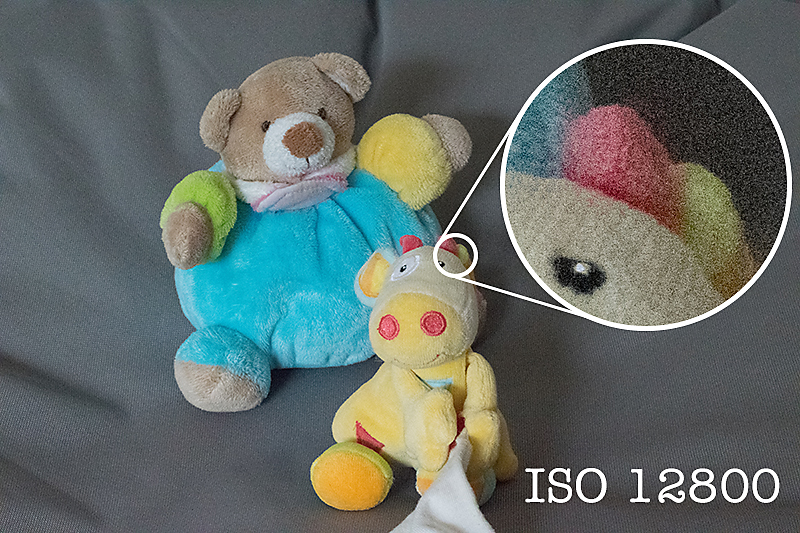
As I mentioned in Part 1 of this series, every setting of the exposure triangle has a “side effect.” In other words, each setting has consequences on the exposure but also on something else in the picture. The side effect of ISO is noise. In the film days, it was called “grain” because the sensitivity of the film corresponded to the size of the grains of salt (the less sensitive the film, the smaller the grains and the cleaner and smoother the image appeared). With digital cameras we use the word noise to express the same thing as the film-age term “grain.”

Here are two examples of the noise that appears on images with a very low ISO and a very high ISO. As you can see, high ISO = more light allowed in but more noise; low ISO equals less light allowed in (so I had to adjust the other settings of the triangle), but less noise…

See the difference?

Even if grain was part of the charms of film photography, oftentimes digital noise is considered to be a bad thing. It can be distracting when it’s too strong, and it can create color artifacts. One way to avoid “bad” noise is to correctly expose the image in the first place, even if that means upping the ISO (noise will be better on an image correctly exposed with an ISO of 12800 than on an image with an ISO of 3200 that needs to be brightened in post-processing.

Here is another example that illustrates this idea…

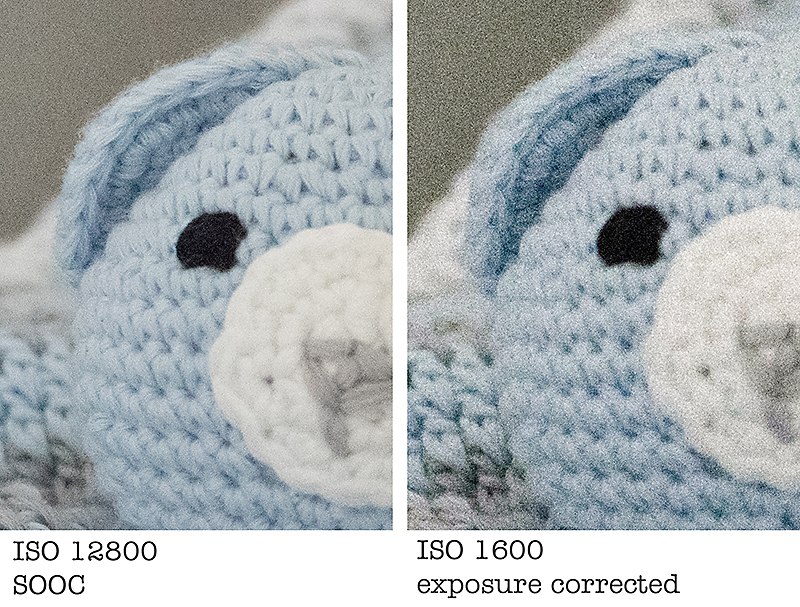
First, the SOOC (straight out of camera, no post-processing) image at ISO 12800:

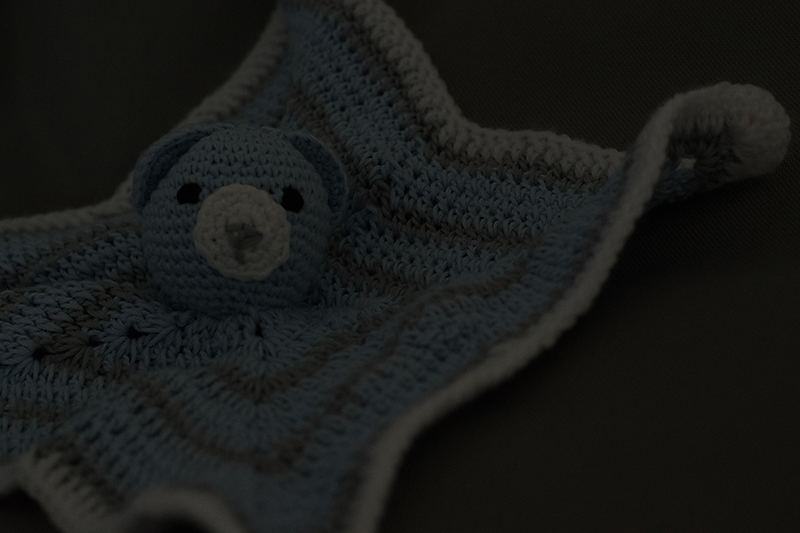
And next, the SOOC image at a much lower ISO of 1600, with all other settings remaining the same (hence the severe underexposure):

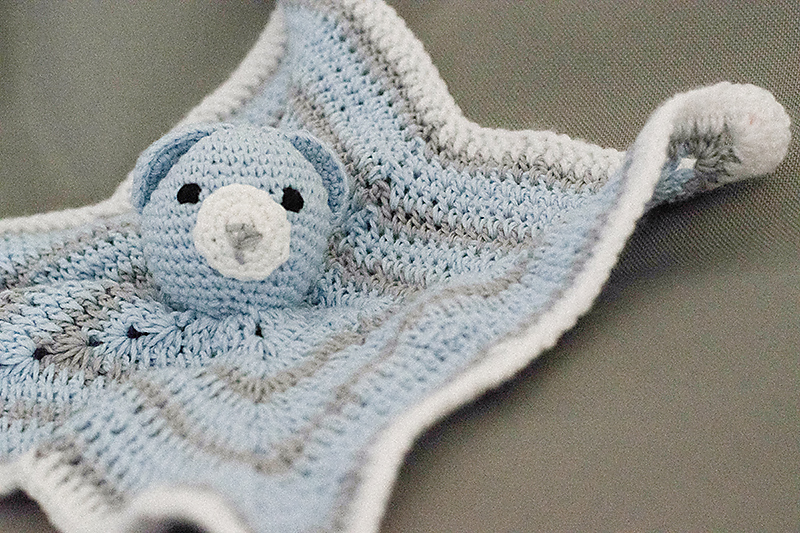
And finally, the second image… but with its exposure corrected in post-processing:

You can already see in the full image that the noise is much worse in the last picture (corrected) than it was in the first of the series, up above… even though the ISO is much lower. It’s even worse if you zoom in:

Moral of the story: it’s typically much better, in order to avoid bad noise, to take a picture with a high ISO but a good exposure… than it is to take an underexposed picture with a low ISO that requires brightening it in post-processing.

There are so many different cameras on which you can choose the ISO (even some smartphones!) that I will advise you to read the manual or do an online search on how to change the ISO on your own gear.

*TIP* If you are just starting to learn to shoot manually (where you, rather than than the camera, pick the settings)… ISO is a setting you can set on “auto” and let your camera take care of,,, so that you can focus on aperture and shutter speed. Once you get the hang of those, you can then start adjusting the ISO yourself.

We will explore those other two variables (aperture and shutter speed) in the next two parts of this series (coming in June, every other week). See you soon!


ChloéAbout the author  Chloé is in charge of PR and communication for her small town by day, a digiscrapper “by night,” and a photographer whenever the light is beautiful. She recently became a very happy mom to an adorable little boy and is enjoying the last days of her maternity leave.

Hybrid How-To | Happiness Jar

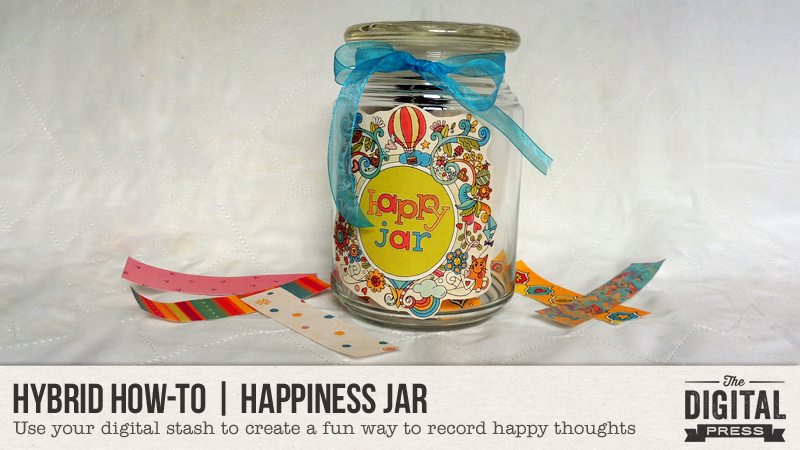
Hello everyone! It’s Donna here, and I’m excited to share another edition of our Hybrid How-To series with you here on The Digital Press blog! Today, I have a fun project for you that will allow you to capture and document your happy moments throughout the year… a Happiness Jar!

The idea behind the Happiness Jar is quite simple: on a daily, weekly, or monthly basis (your choice!), every family member writes down what they are happy about or thankful for… and places their written thoughts into the Happiness Jar. At the end of the year, it’s really fun and meaningful to empty out the jar together as a family and have fun reading/reminiscing about all those moments that brought you joy.

It’s a really easy project, too… so let’s get started!

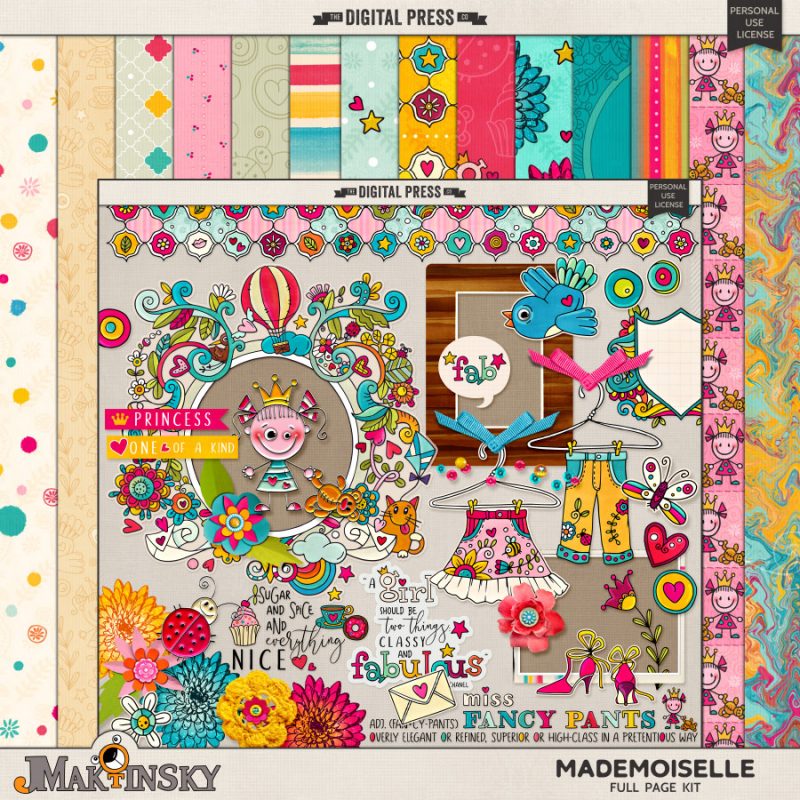
For my example, I will be using the digital kit Mademoiselle by Julia Makotinsky, shown here…

.

I love the fun, whimsical feel and the bright colors of this kit (and doesn’t that little bluebird element just scream “Bluebird of Happiness” to you?!).

SUPPLIES NEEDED:

  • digital scrapbooking kit(s) of your choice
  • photo editing software (I am using Photoshop Elements)
  • empty jar
  • printer/copy paper
  • label paper (could use Printer/copy paper & double-sided tape instead)
  • scissors or paper cutter
  • binder clip
  • ribbon (optional)

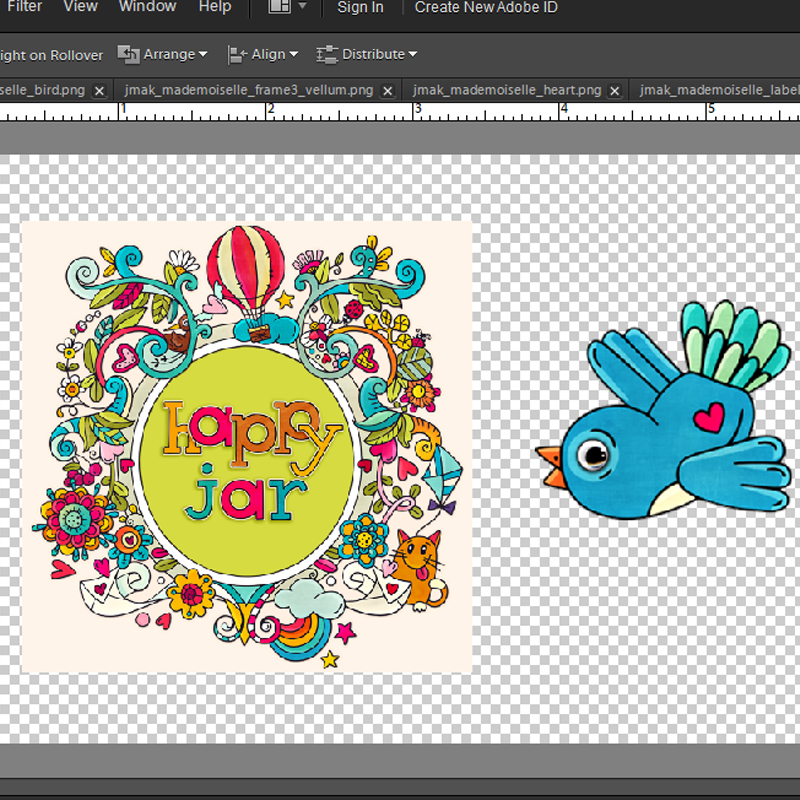
The first step is design the jar labels. I used an empty candle jar, but any style of jar will do. In my photo editing software, I designed labels for the front of the jar, as well as for the lid…

The next step is to create the strips of paper that you’ll use to write down your happy thoughts. You’ll need to do a little calculating here to determine how many strips of paper you’ll need. Since it’s just hubby and I, and we will do this weekly… I’ll need 104 strips of paper (52 weeks X 2 people = 104). The size of my paper strips are 1″ x 4.25″, meaning I can get 22 strips from one piece of 8.5″ x 11″ printer paper. This means I will need 5 sheets of printer paper (22 strips x 5 = 110)… so I chose 5 papers from the kit I am using and printed those papers out to add a decorative touch to the back side of each strip.

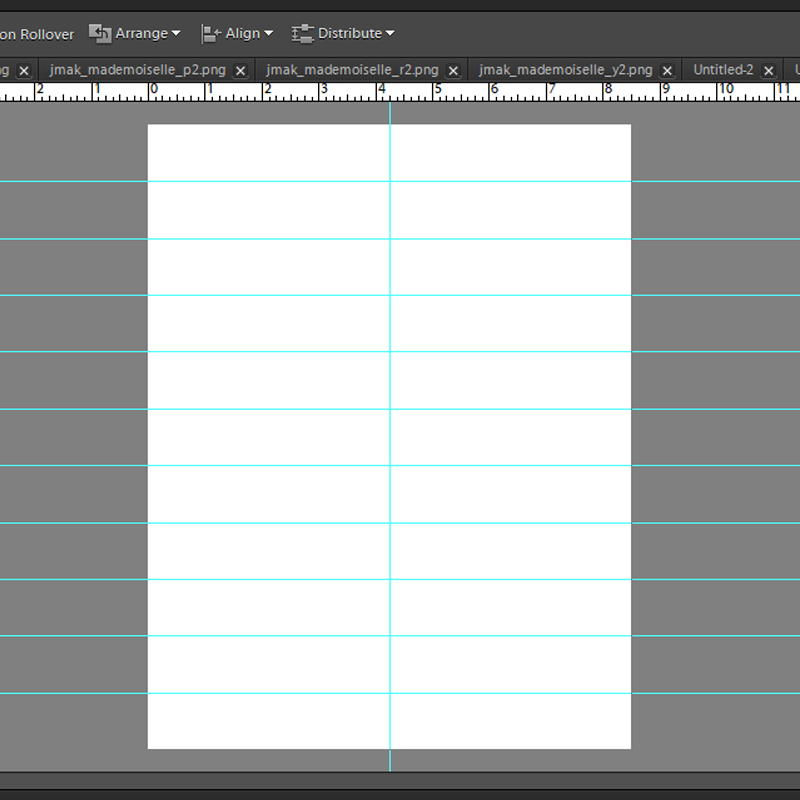
The image below shows where the strips should be cut on an 8.5″ x 11″ piece of paper…

If you are cutting with a scissors, you may want to include the lines on your papers before you print them out so you will have a cutting guide (optional). If you are using a paper cutter or cutting machine, having the printed cut lines isn’t necessary.

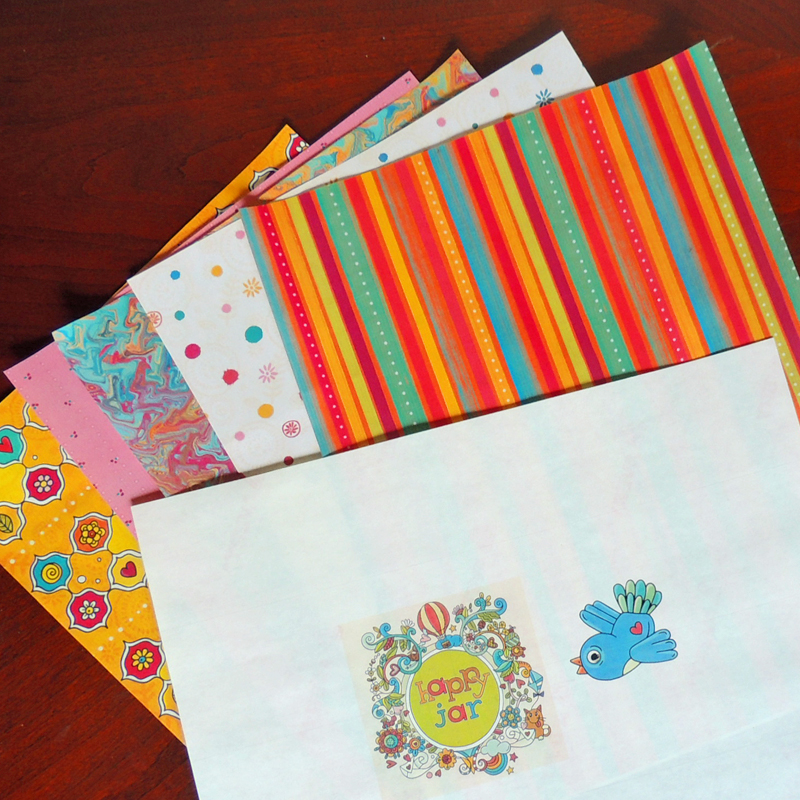
Here’s a look at my labels and papers printed out…

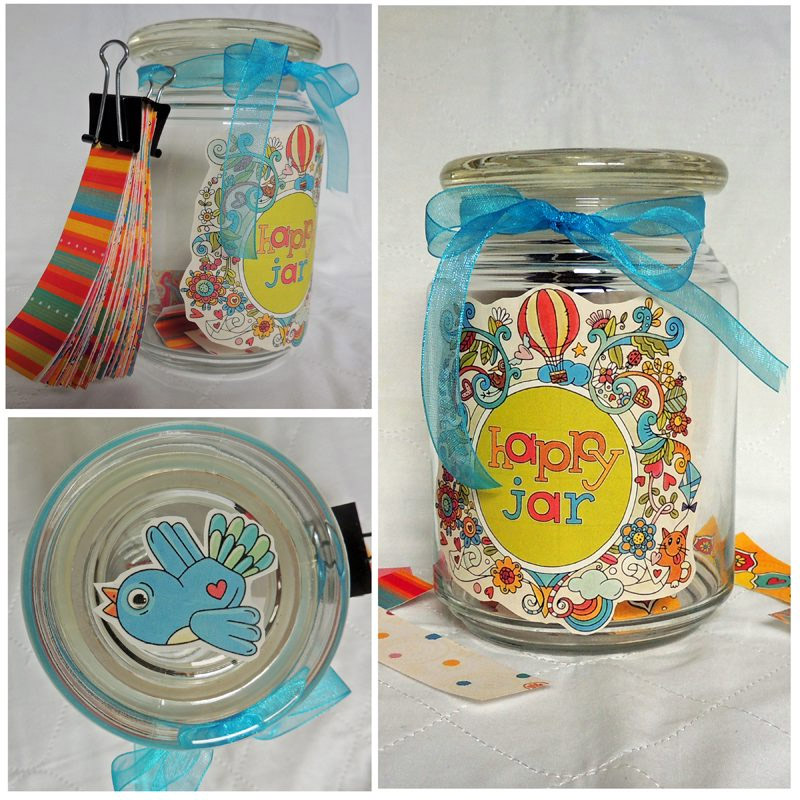
The final step is to assemble everything, as follows…

  • Cut out the jar labels and adhere them to the jar (if you used printer/copy paper, you can use double sided tape to adhere them)
  • Cut out the small paper strips (I used a paper cutter)
  • This last step is optional… but for myself, I didn’t want the little paper strips to get lost (which they certainly would, laying loose on my countertop all year!), so I used a binder clip and tied them to the neck of the jar with a ribbon. You could also keep your strips in a drawer or a little box, etc. and skip this last step… it’s up to you!

And that’s it! Your Happiness Jar is now ready to collect all your joyful moments. The entire project, from start to finish, took less than 2 hours.

I wanted to also share with you a few variations of this idea that could easily be adapted from this tutorial…

  • A “Mom, I’m Bored” Jar — start out with the jar full of fun ideas, and when the kiddos are bored let them pick from the jar to find inspiring ways to combat their boredom
  • A “Date Night” Jar — start out with the jar full of fun date ideas, and let date night be determined by the luck of the draw (this would also work for the “What do you want for dinner?” dilemma that occurs frequently at our house)
  • A “Journal Prompt” Jar — start out with the jar full of journaling prompts, so when the urge to write surfaces you’ll have something to write about
  • A “Scripture or Positive Thoughts” Jar — start out with the jar full of scriptures or positive thoughts, and pull one out when you need a little uplifting

I hope these ideas will inspire you to create your own jar! If you decide to make a happiness jar (or any variation, like those listed above), please let us see it! You can load your project into the gallery at TDP and leave a comment below with a link to your project… etc. I would love to see what you come up with!


DonnaAbout the Author Donna is a member of the hybrid team here at The Digital Press. She has been a digital scrapper and hybrid crafter for over 10 years, and loves the flexibility digital products provide. When she’s not scrapping you’ll find her in front of the TV, at the computer, or in the kitchen  cooking up something scrumptious. She has been married for 40 years to her husband, Sonny, and they live in South Florida with their sweet little dog, Roxy, and kitty siblings Cashmere and Velcro. She also enjoys swimming, gardening, traveling, and chocolate (of course!).