Feature Friday | Laura Passage

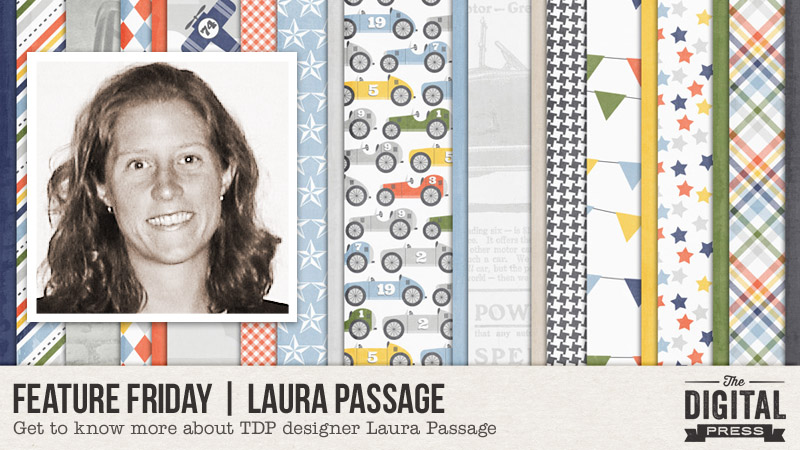
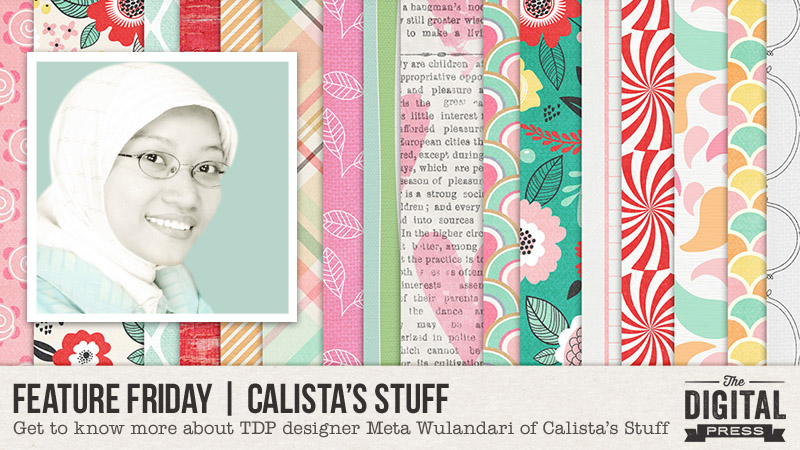
Hello everyone, and welcome to another Friday… and another edition of our Feature Friday series! This week, the spotlight is on the super-talented and creative designer (and our very own TDP chief) Laura Passage! This is actually Laura’s fourth feature here on the blog (you can find her previous features from July 2016 HERE… from July 2017 HERE (including a look at her crafty workspace!)… and her Foodie Friday article from February 2018 HERE w/ yummy food ideas/recipes!).

This time around, in order to learn even more about Laura, we asked her to share 5 Things We Might Not Already Know About Her

  1. I’m in my mid-40s and I still drive around (nowadays, in a mini-van, haha!) listening to old-school rap and “classics” like the Beastie Boys. Every once in a while, I’ll suddenly have one of those weird epiphany moments during which I suddenly realize that I’m not in my 20s anymore… and then I think about my own parents (back when I was a kid, driving around listening to music from the 50s)… and I realize how old I am now… and the whole thing is disorienting and shocking. HA!
  2. I’m married to my very best friend in the world, and we’ve known each other for over 25 years. When we first met (at which time I was a freshman in college, and he was a senior)… the very first thing he ever said to me was, “oh, great… we have a freshman with an attitude.” #TrueStory #SoRomantic
  3. I have a super duper big-time coffee addiction …one which has only recently developed (like, literally in the past 5 years or less)… after I spent the first 35-40 years of my life never drinking coffee or caring about it at all). Now, however, in my mid-40s? MUST. HAVE. COFFEE. Every day. Favorite? A mocha.
  4. People are usually surprised to learn that I formerly played women’s semi-professional soccer back in the late-1990s, after graduating from college and completing my college soccer “career.” This was in the days before a true professional women’s league existed in the United States (the WUSA was established a few years later, in 2000).
  5. Along those same lines… most people are surprised to learn that I have no formal training in graphic design. Instead, I first earned my college undergrad degree in psychology… later earned a master’s degree in sports administration… and then went on to work as a college soccer coach for about a decade. During that time, I became a self-taught web designer… a skill which I later transitioned into designing graphics for the scrapbooking industry (both digital, here at The Digital Press… and paper/physical products, through numerous companies such as Echo Park Paper and Carta Bella Paper, etc.).

Fun trivia tidbits, right?

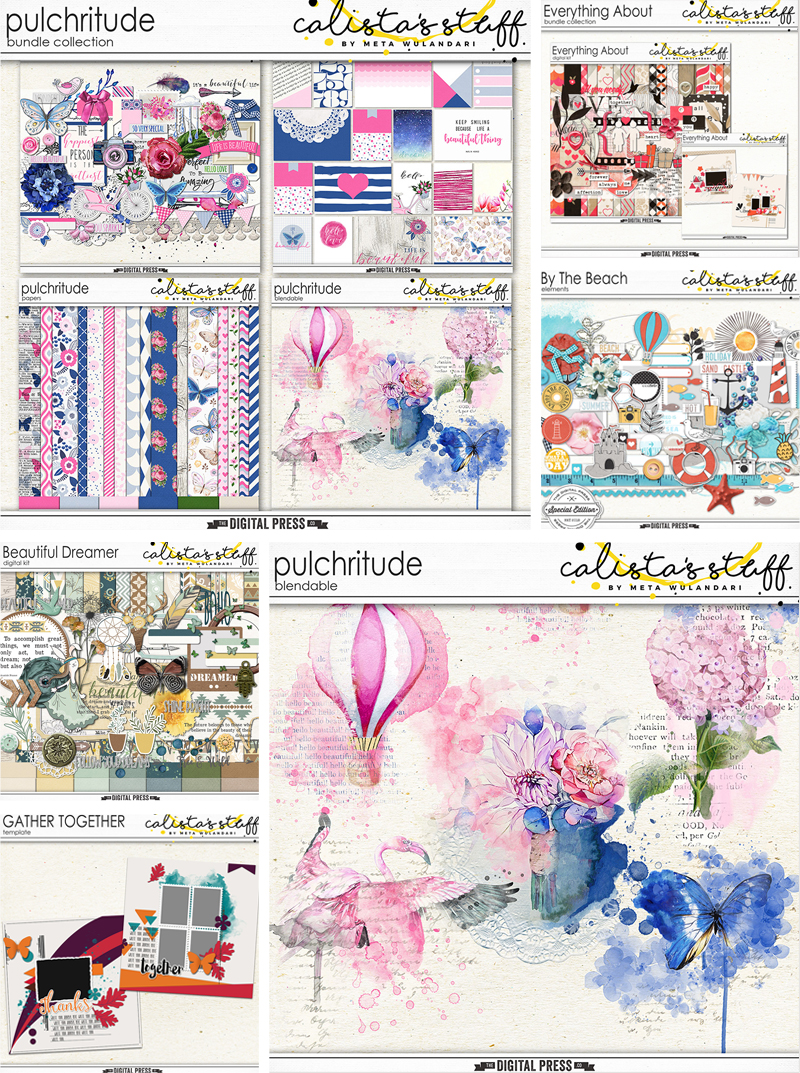
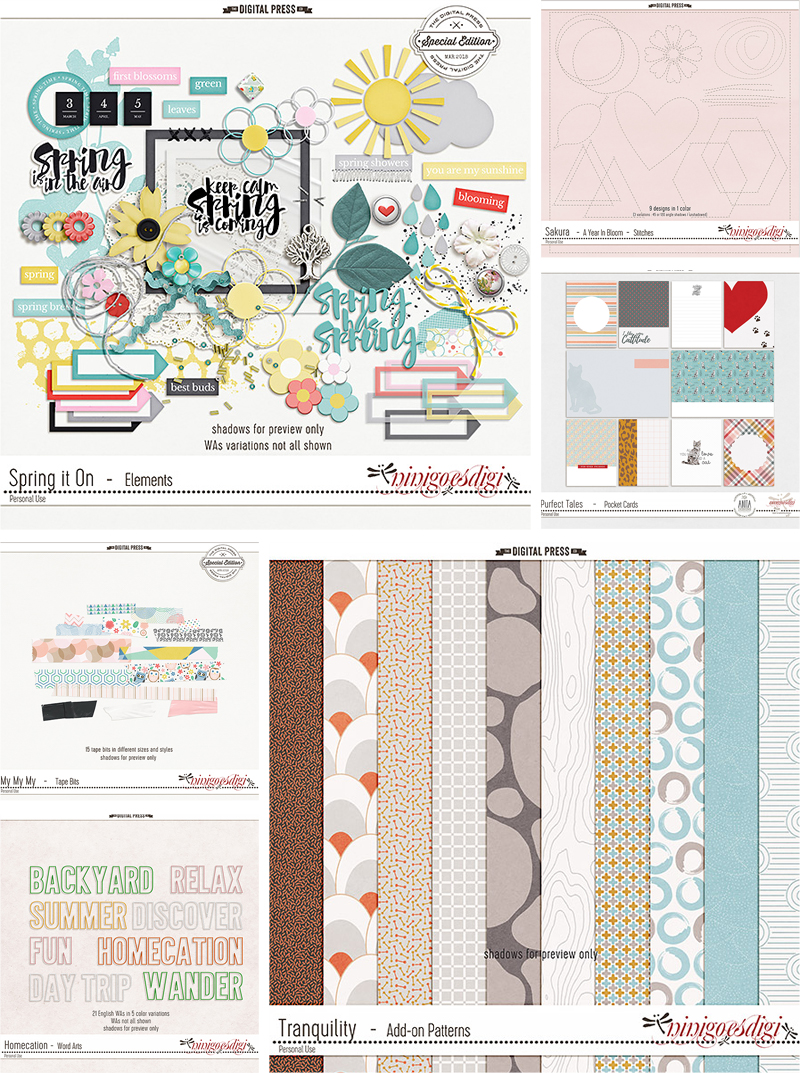
Well, when it comes to Laura’s design work… you likely already know, if you have ever had a chance to work with some of her products, that they have a distinctly paper-ish style and feel, mimicking traditional paper scrapbooking products. I always love the cool stickers that can be found in her kits… the distinctive word art bits… the colorful papers and elements… and her clean-cut, geometric layout templates. Laura also has a giant range of amazing pocket-style cards and templates that are perfect for pocket scrapping, planners, journals, and hybrid projects! Whatever the theme, her kits are always full of surprises and fun to work with.

Here is a sampling of some of my personal favorites from Laura’s shop here at The Digital Press. Believe me, it was really hard to narrow it down to just these few…

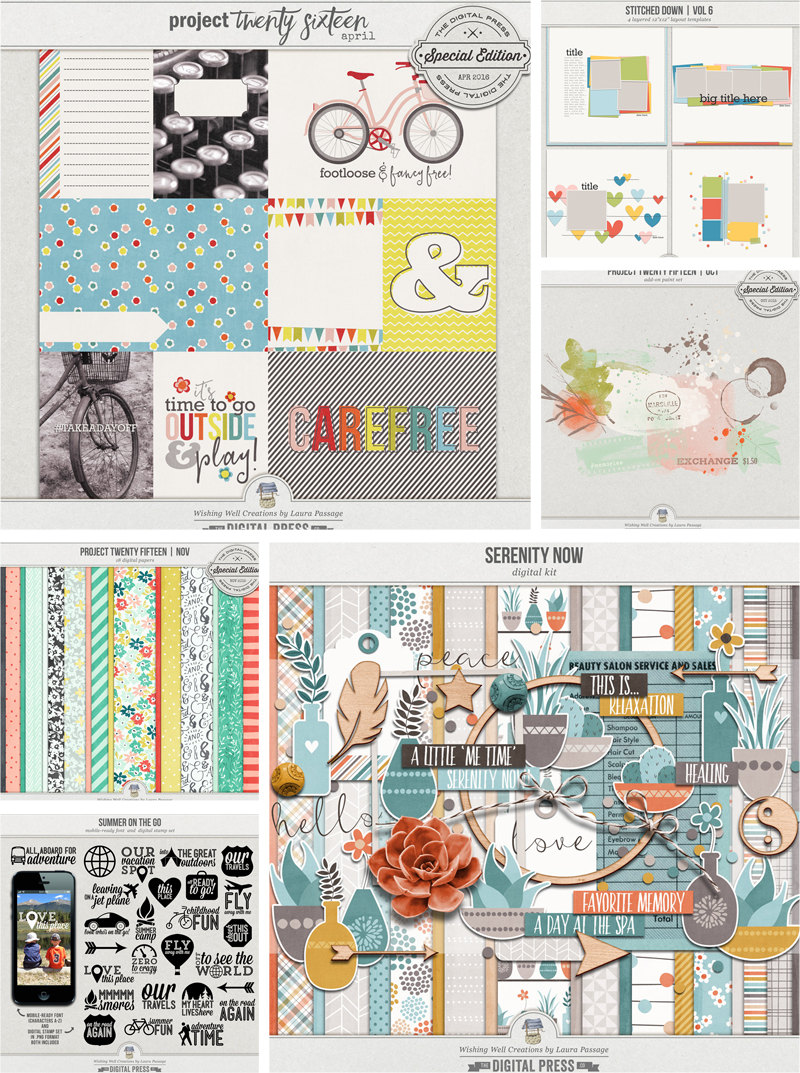
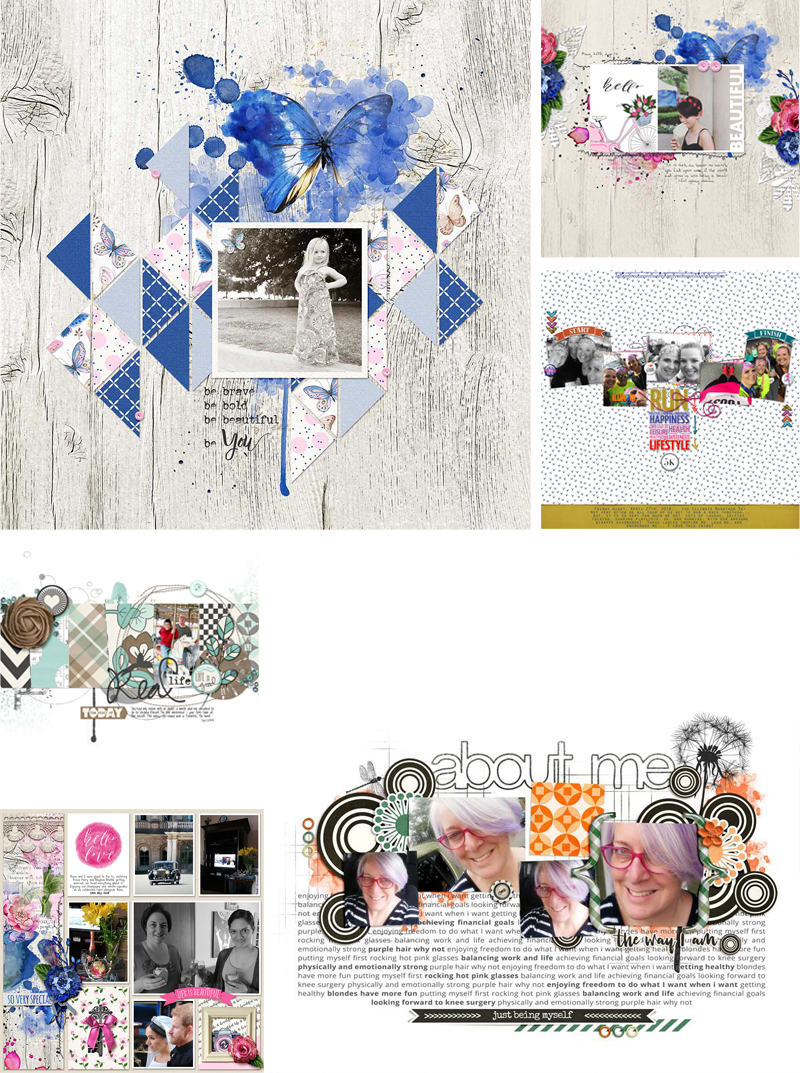
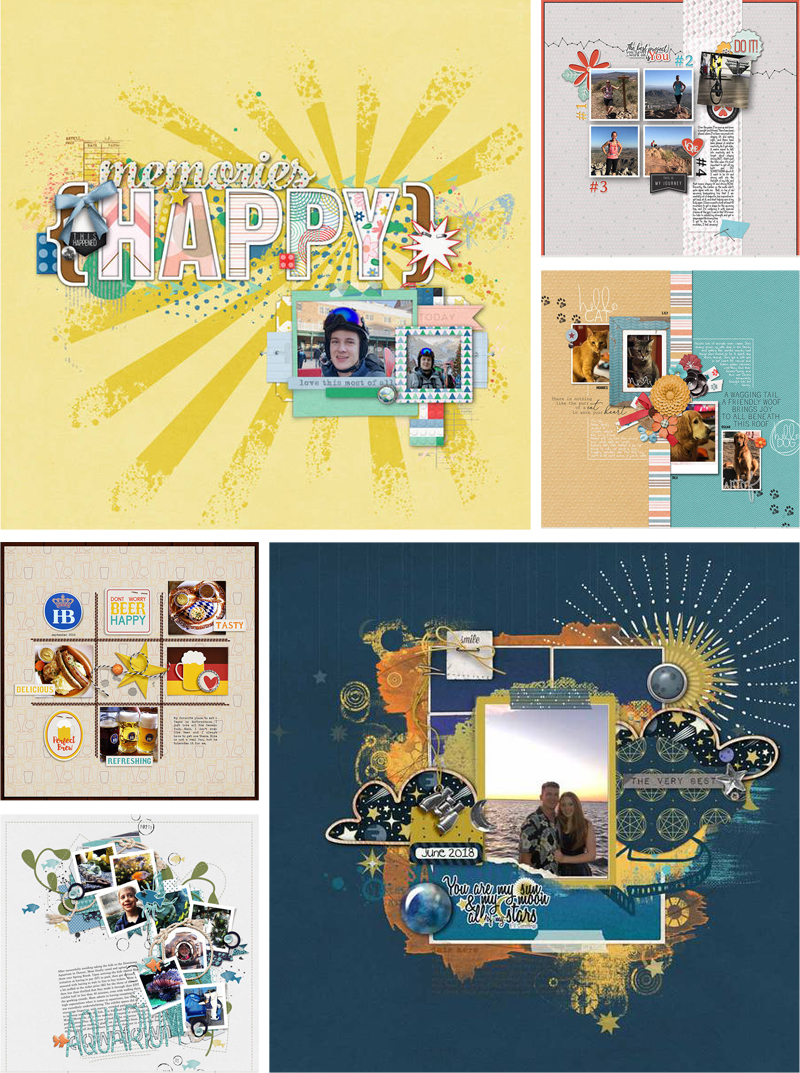
And to give you just a glimpse of how versatile these products are, and all the fun ways they can be used… here’s a look at just a few of my favorite projects from the gallery at TDP, which is always full of beauties from Laura’s shop (and you can check out all the different layouts using Laura’s products here in her designer gallery)…

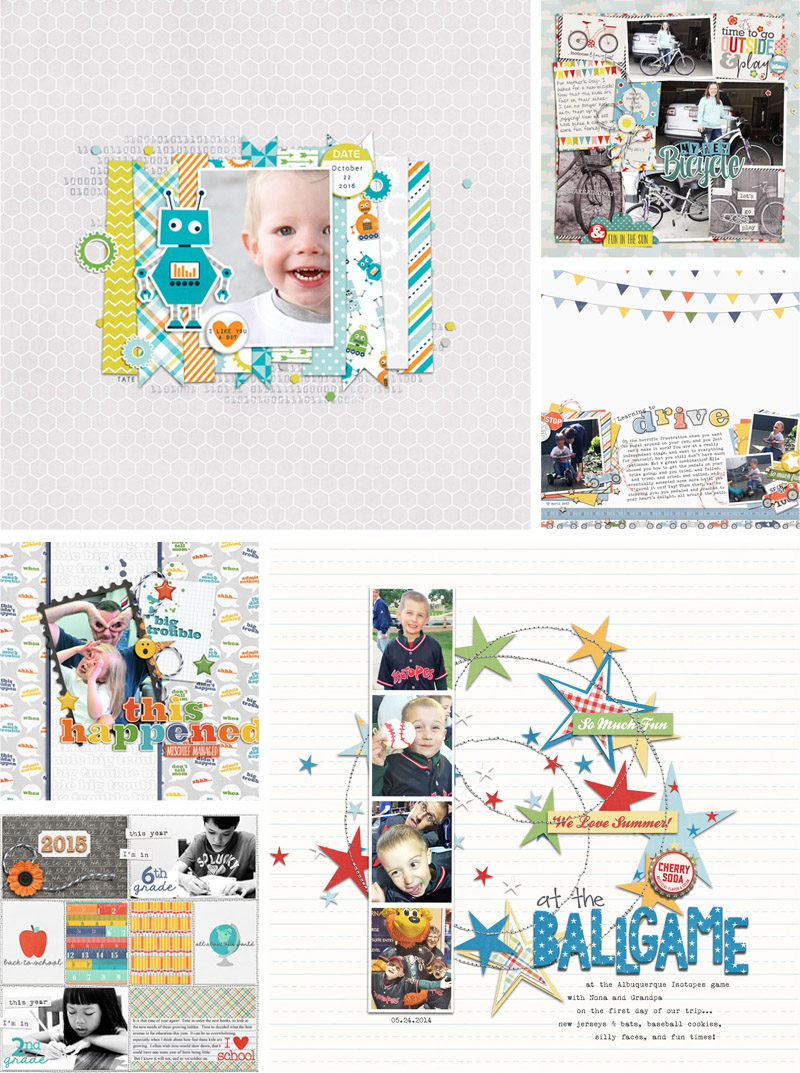
Aren’t those all so great?!

Hopefully, today’s feature article has given you even more insight into Laura’s creative style and her persona. Aren’t you excited about her amazing digital artwork? If so, I have good news — because during her upcoming Feature Week here at The Digital Press, Laura’s entire shop will be marked down 30% OFF all week long (the sale will end at 11:59pm ET on Thurs 7/26). Don’t miss it!

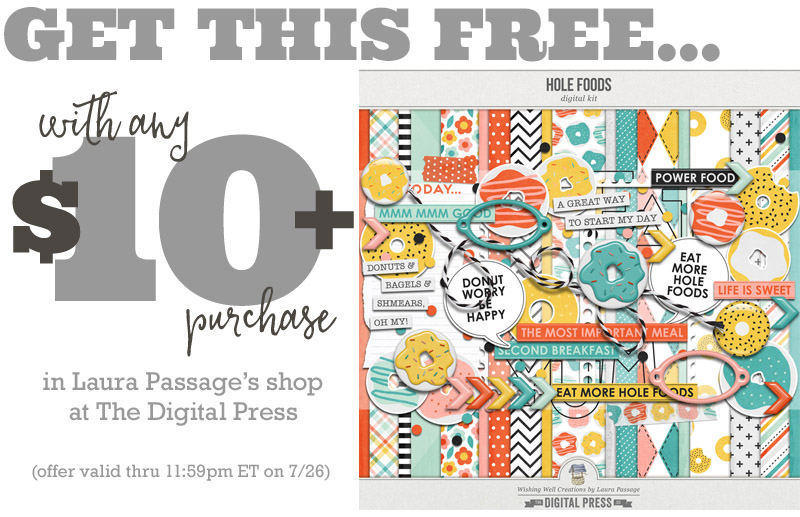
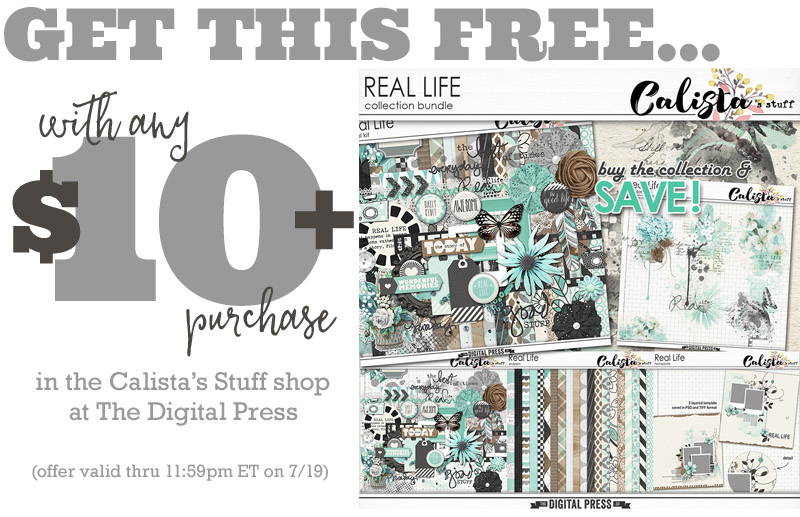
And that’s not all! Laura also has a special Free-with-Purchase offer for you this week, as well! Don’t miss out on this opportunity to stock up on your favorite products from Laura’s shop, and you will get this brand-new (just released today!) full kit — Hole Foods — for FREE with any $10+ purchase in her shop (this week only, though… because again, this offer ends at 11:59pm ET on 7/26).


And even better news… guess what’s on the way to Laura’s shop at TDP early next week? It only happens once a year, and you will NOT want to miss it…


CLICK HERE if you’d like to receive a one-time e-mail to let you know when the big event begins!


Profile pic avatar small

About the Author  Shivani Sohal is a donner of many alter-egos. A finance professional by day in busy London, she morphs into a seemingly normal mum of two in the evenings and weekends. She is constantly found with her fingers in too many pies and juggling the metaphorical balls. That is living on the edge for her; aided by the two ankle biters and a darling hubby who define the warm and mushy for her. She is ferociously dedicated to memory keeping — almost immune to any nay-sayers (or equally-disruptive crying children or annoying house fires!); keeping her head down and forging ahead at all times.

Summer Camp 2018 | Mess Hall | WEEK #3

Hi y’all! Can you believe it’s already Week #3 of our Summer Camp here at TDP? July is just flying by! If you haven’t already checked out our lineup of activities for SUMMER CAMP 2018… definitely swing through the forum, grab yourself a badge tracking card and join the fun! We’ve got events, challenges, tutorials, and more lined up throughout the month of July!

With a new week comes an all-new edition of our Mess Hall series… and I’m here to share with you some delicious recipes from Amie of Little Lamm Paper Co.

When I asked Amie, who lives in Fargo, North Dakota, about her three favorite summer recipes… she replied, “It’s hot and yucky in Fargo in July, and I am all about meals that don’t heat up the house!” As such. she has a great (summer-friendly) main dish, side dish, and dessert to share with us this week!

Here is a look at Amie’s dishes…

What’s that yumminess you see up there?

  • Slow-Cooker Pork Carnitas
  • Mexican Grilled Corn
  • Lemon Berry Trifle

 SLOW-COOKER PORK CARNITAS

Amie says she loves these carnitas because you can freeze batches to use for future meals. And since her family doesn’t have taco trucks on every corner here, she needs to make her own. Luckily, it’s super easy!

INGRIEDIENTS NEEDED

  • 1 (3- to 3 1/2-pound) boneless pork butt roast, lightly trimmed and cut into 2-inch chunks
  • 1 small onion, peeled and halved
  • 3 (2-inch) strips orange zest plus 1/2 cup juice
  • 3 (2-inch) strips lime zest plus 2 tablespoons juice
  • 5 garlic cloves, minced
  • 1 Tbsp ground cumin
  • 1 Tbsp dried oregano
  • Salt and pepper
  • 2 bay leaves
  • 2 Tbsp vegetable oil

INSTRUCTIONS

  1. Combine pork, onion, orange zest and juice, lime zest and juice, garlic, cumin, oregano, 2 1/2 teaspoons salt, 1 1/2 teaspoons pepper, and bay leaves in slow cooker. Cover and cook until fork slips easily in and out of pork, 5 to 7 hours on high or 8 to 10 hours on low
  2. Using slotted spoon, transfer pork from slow cooker to large bowl. Using potato masher, smash pork until coarsely shredded. Strain cooking liquid from slow cooker through fine-mesh strainer set over separate bowl and discard solid.
  3. Heat oil in 12-inch nonstick skillet over medium-high heat until shimmering. Add pork to skillet. Whisk cooking liquid to recombine, then add 1 cup to skillet with pork. Cook, stirring occasionally, until liquid has evaporated and pork is evenly browned and crispy in spots, 10 to 15 minutes.
  4. Season with salt and pepper to taste. Transfer pork to serving platter and moisten with 1/4 cup remaining cooking liquid, or more as needed. Serve.

She likes to serve with lime wedges, sliced radishes, avocado, black beans, pickled red onions and her favorite tomatillo salsa.


MEXICAN GRILLED CORN

When describing this recipe, Amie stated, “I take advantage of the grill as much as possible in the summer months. Especially to get a char on vegetables. My 6 year old loves almost any veggie if it’s roasted. But it’s too hot outside to use the oven, so onto the grill it goes!”

INGRIEDIENTS NEEDED

  • Vegetable oil for cooking grate
  • 1/4c. mayonnaise
  • 3 Tbsp chopped cilantro or parsley
  • 3 Tbsp sour cream
  • 1 medium garlic glove minced or pressed
  • 3/4 tsp chili powder
  • 1/4 tsp ground black pepper
  • 1/4 tsp caynnne pepper
  • 4 tsp fresh lime juice
  • 1 oz grated pecorino Romano
  • 4 tsp vegetable oil
  • 1/2 tsp kosher salt
  • 6 large ears of corn

INSTRUCTIONS

  1. Turn all grill burners to high and heat grill with lid down until very hot, about 15 minutes. Scrape grate clean with grill brush. Dip wad of paper towels in vegetable oil; holding wad with tongs, wipe cooking grate.
  2. While grill is heating, combine mayonnaise, sour cream, cilantro, garlic, ¼ teaspoon chili powder, black pepper, cayenne (if using), lime juice, and cheese in large bowl; set aside. In second large bowl, combine oil, salt, and remaining ½ teaspoon chili powder; add corn and toss until coated evenly.
  3. Leave burners on high and cook corn with lid down, turning corn occasionally, until lightly charred on all sides, 7 to 12 minutes total. Remove from grill and place in bowl with mayonnaise mixture; toss to coat evenly. Serve immediately.

LEMON BERRY TRIFLE

Of course we need a no-bake dessert… and this one is so simple! If you don’t have a trifle dish, you can just use a large bowl. Amie has even seen it done in a lasagna pan before (just with less layers).

INGRIEDIENTS NEEDED

  • 1 – 9×5 inch pound cake (lemon, if available)
  • 2 – 16oz containers of cool whip (or you can use real whipped cream)
  • 1 – 8 oz block cream cheese (softened)
  • 1/2 tsp vanilla extract
  • 1 cup lemon curd
  • 5-6 cups fresh berries, blueberries, raspberries, blackberries, etc.

INSTRUCTIONS

  1. Slice the pound cake into 9 different 1-inch slices. Cut into bite-sized cubes. Set aside.
  2. Make the lemon cheesecake layer: In a large bowl using a hand mixer or stand mixer fitted with a paddle or whisk attachment, beat the cream cheese on medium-high speed until creamy. Add the vanilla extract and lemon curd and beat on medium-high speed until combined. Lastly, beat in half of whipped cream (about 2 cups). Cover and store the remaining whipped cream in the refrigerator.
  3. Assemble: This trifle has 3 layers of pound cake, 3 layers of berries, and 2 layers of the lemon cheesecake mixture. Begin with a base of lemon pound cake cubes. Top with an even layer of fresh berries, then half of the lemon cheesecake mixture. Repeat. Finish with final layer of lemon pound cake cubes followed by a final layer of berries. Spread or pipe remaining whipped cream on top of the trifle.
  4. Refrigerate for at least 2 hours and up to 6 hours. You can refrigerate uncovered for 2-4 hours, but I recommend loosely covering if storing longer than that. The time in the refrigerator gives the flavors a chance to settle and allows the pound cake to soak up some of the lemon cheesecake mixture.
  5. Garnish with extra berries and/or lemon slices and serve cold. Cover and store any leftovers in the refrigerator for up to 2-3 days.


My stomach is growling just reading these recipes! So go give these tasty looking recipes a try and earn your WEEK #3 MESS HALL BADGE for the 2018 TDP Summer Camp! Your stomach will thank you!


Robin

About the author  Robin is a member of the creative team here at The Digital Press. A wife of 25 years and a mom of 4 crazy children (3 in college and 1 still at home), she says that her life occurs mostly in the car as she transports said crazy kids to their many, many homeschool activities. When not driving, Robin loves to make her family cringe by pulling out her camera again (and again, and again…).

Feature Friday | Calista’s Stuff

Happy Friday, everyone! It’s time for another edition of our Feature Friday series here on The Digital Press blog. This week, I’m happy to put the spotlight on Meta of Calista’s Stuff! This is Meta’s third feature at TDP (you can find her first feature from May 2017 HERE, and her Foodie Friday post from March 2018 HERE).

In order to learn a little more about Meta, I asked her to share 5 things we might not already know about her…

  1. I super love playing with balloons and bubbles. It’s always great to play with my baby girl with those two things!
  2. I was a French language teacher, a mathematics teacher, and a science teacher, but now I am a proud and happy stay at home mom.
  3. My kitchen is my kingdom, but I think my baby girl will take over it soon. She is always busy in the kitchen and likes to taste every spice and herb.
  4. I am not fashionable at all.
  5. When I started learning Photoshop for the first time it was only to make my photos look pretty 😛 – to brighten the skin, make up touch effects, whiten the teeth, remove acne, etc. Now Photoshop is my tool to work as designer. 

As for Meta’s digital designs… have you taken a peek at the Calista’s Stuff shop here at TDP? It’s full of some really amazing things! Her designs are so versatile, and she puts colors together beautifully. She’s got a great mix of dimensional elements, gorgeous artsy add-on paints, pocket cards, paper packs with unique patterns, and layered design templates, too. Whatever you’re looking for, I’m sure you can find it in her shop.

Here is just a small sampling of the products you’ll find in the Calista’s Stuff shop here at The Digital Press…

And to give you just a bit more inspiration, here are a few fantastic sample projects using Meta’s products…

I hope that you’ve enjoyed learning a little more about Meta of Calista’s Stuff today. To celebrate her week as our Featured Designer at The Digital Press, the entire Calista’s Stuff store will be 30% OFF all week long (sale will end at 11:59pm ET on Thursday 7/19).

In addition, Meta has a special Free-with-Purchase offer for everyone this week! Don’t miss out on this opportunity to stock up on your favorite products from Calista’s Stuff… and you can also snag this fantastic bundle — Real Life — for FREE with any $10+ purchase in her shop (offer will be valid through 11:59pm ET on Thursday 7/19).


BarbaraAbout the Author  Barbara is a member of the creative team here at The Digital Press. She’s married, has two awesome kids (a 21 year old son and an 18 year old daughter) as well as a 10 year old adorable Soft Coated Wheaton Terrier pup. You’d think with all these ages posted here about her family she’d tell you her age but NOPE … not gonna happen! 😉 With her “baby” off to college in a couple months and her son already in college, she and her husband are soon to be empty nesters. It is just so weird how quickly time flies! Wasn’t it just yesterday she was scrapping pictures of babies and toddlers?! Time flies and each stage of life is good!

Summer Camp 2018 | Mess Hall | WEEK #2

Hey gang! It’s week #2 of Summer Camp –how’s everyone doing?! Having fun?! I know I am! Well, I’d like to welcome you to Week #2 of Summer Camp’s Mess Hall, where we check out a couple of recipes that our team is loving right now. Make sure you check out Week #1 and all of the other challenges going on for TDP’s Summer Camp. You can check them all out in THIS FORUM, and be sure to grab a badge tracking card and join in the fun yourself! We’ve got fun events, challenges, tutorials… and best of all… prizes!

I’m actually really excited to try these. I live in Phoenix, Arizona in the U.S. and Mexican food is super common around here. My husband and I have discovered several restaurants that we like to hit up for some Mexican eats, but now I can try making some myself! TDP’s very own Hillary has a couple of recipes that look amazing… and our wonderful designer Kim B is following up with a cool and refreshing beverage to accompany! Try any of these recipes (and show us!) to get your week #2 Mess Hall badge. Take a look at the full details HERE.

Ok ok… let’s get to it… my tummy is starting to growl.

For our tasty treats, Hillary has for us authentic Mexican Rice as the side dish and some awesome looking Baked Chicken Taquitos with salsa as the main course. Take a look at these, people… can we say YUM?! I can’t wait to try them out. And for a bit of adult fun to top if off, try the cool Cucumber Martini that Kim’s got on deck for us. Sounds like summer fun to me!

photo credits to [1] TDP Creative Team member Hillary [2] TDP Designer Kim B [3] tastesbetterfromscratch.com

  • Baked Chicken Taquitos with Salsa
  • Authentic Mexican Rice
  • Cucumber Martini

BAKED CHICKEN TAQUITOS with SALSA

FOR THE TAQUITOS:

  • 2 cups shredded chicken (we use rotisserie chicken)
  • 1/2 teaspoon ground cumin
  • 1/2 teaspoon ground chili powder
  • 1/2 teaspoon kosher salt
  • 1/4 teaspoon garlic powder
  • 1/4 teaspoon paprika
  • 2 teaspoons fresh lime juice
  • 1 cup shredded cheddar or Mexican blend cheese
  • 20 corn tortillas

FOR THE TOPPINGS:

  • Shredded lettuce
  • Diced tomatoes
  • Guacamole
  • Sour Cream
  • Chopped Green Onion
  • Crumbled Queso Fresco
  • Salsa (recipe below!)

DIRECTIONS:

  1. Preheat the oven to 425 degrees F. Spray a large baking sheet with nonstick cooking spray and set aside.
  2. In a medium bowl, combine the shredded chicken with the cumin, chili powder, salt, garlic powder, paprika, and fresh lime juice. Stir until chicken is well coated with the seasonings. Stir in the shredded cheese.
  3. Get two paper towels damp and place two tortillas at a time in between the paper towels. Place in the microwave for 20-30 seconds. Remove from the microwave and roll up the taquitos.
  4. Place a heaping tablespoon of the chicken and cheese mixture in the center of the tortilla and roll it up tightly. Place the taquito, seam side down on the prepared baking sheet. Continue rolling taquitos until the tortillas and filling are gone. You should have about 20 taquitos.
  5. Spray the taquitos generously with nonstick cooking spray. Bake for 15-20 minutes or until taquitos are golden brown and crispy. Remove from the oven and serve warm with desired toppings.


FOR THE SALSA:

  • 2 cans (14.5 oz each) whole or diced tomatoes, drained
  • 1 TBSP (to taste) canned diced jalapeños (not pickled)
  • 1/4 – 1/2 yellow onion (to taste)
  • 1 teaspoon garlic salt
  • 1/2 teaspoon salt
  • 1/2 teaspoon cumin
  • 1/2 teaspoon sugar
  • 2 teaspoons lime juice (to taste)

DIRECTIONS:

  1. Place all of the ingredients together into a food processor or blender and puree until smooth. Serve with tortilla chips.


TIP: Hillary told me that while the original recipe calls for all of those colorful toppings (guac, sour cream, etc.) that she thinks all of that covered up the yummy flavor of the taquitos too much, so she prefers them without.

Recipe photo credits to tastesbetterfromscratch.com


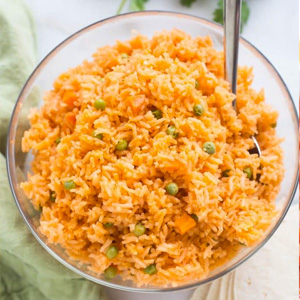
AUTHENTIC MEXICAN RICE

INGREDIENTS:

  • 1 1/2 cups long grain white rice
  • 1/4 cup oil
  • 1 teaspoon garlic , minced
  • 1/4 medium onion , finely diced
  • 1/4 cup tomato sauce , or 2 pureed tomatoes
  • 2 tomato bouillon cubes , chopped (these can be found in the Mexican food aisle at Walmart or your local grocery store)
  • 1/4 teaspoon salt
  • 1 carrot , diced (optional)
  • 1/2 cup peas (optional)
  • 3 1/4 cup water
  • 3-4 whole serrano peppers (optional, but do add flavor, not heat)

DIRECTIONS:

  1. Rinse and drain the rice in a fine mesh strainer.
  2. In a large saucepan over medium-high heat, add the oil. Add the rice and stir to combine. Cook over medium heat, stirring frequently, until the rice is lightly golden brown all over (about 10 minutes).
  3. Add tomato sauce, garlic, and diced onion to the pan. Stir. Add the tomato bullion cubes, salt, carrots, peas, and water (and serrano peppers, if using. They add a little flavor, but not spice.).
  4. Cook, stirring, until bullion cubes are completely dissolved. Bring to a boil, then cover, reduce heat to low and cook for about 20 minutes or until the water is completely absorbed. Remove from heat and allow to rest for 5 minutes before fluffing with a fork.

Recipe photo credits to tastesbetterfromscratch.com


CUCUMBER MARTINI

INGREDIENTS:

  • 4 thick slices of cucumber(about 1/4 English Cucumber) + 1 thin slice for garnish
  • 3 oz Vodka (+/- 90ml)
  • 1 oz triple sec (+/- 30ml)
  • 1/2 Lime freshly squeezed
  • 1 Cup Ice

VARIATIONS:

  • Add a splash of simple sugar syrup if you like it sweeter
  • Add 4 Basil or 4 Mint leaves to shaker for a tasty twist.
  • Replace Vodka with Gin

DIRECTIONS:

  1. In a martini shaker, add the cucumber chunks. Muddle with a wooden spoon or muddler (or crush as you wish) to bring out their flavor and juices, then add in the vodka, triple sec, lime juice and ice.
  2. Put the top on the cocktail shaker. Shake and shake(and I mean shake- lol). Shake for at least 30 seconds – you want to ‘BLEND’ the ingredients and flavors together and melt some of that ice.
  3. Strain the mixture into a martini glass(usually lid has strainer). Add the remaining 1 thin slice of fresh cucumber(un-muddled) to the glass or cocktail, and serve immediately.
  4. Decorate with mint leaves, edible flowers, sprig of dill or as you want.


Recipe photo credits to Kim B.

So there it is people — give these tasty looking recipes a try and earn your WEEK #2 MESS HALL BADGE for the 2018 TDP Summer Camp!  I’m off to the kitchen!


About the Author  Shannon has been completely addicted to digiscrapping since she began in early 2016 (though she’s been a scrapper since 2000). Her early morning ritual of a few quiet hours of scrapping while sipping a chai tea is her favorite part of each day. She is also the owner of a web design company, and when she’s not at the computer designing websites or digiscrap layouts, she’s probably hiking one of the local mountains in her hometown of Phoenix, Arizona. She is an avid reader and loves to travel to foreign countries.

Feature Friday | ninigoesdigi

Happy Friday, everyone, and welcome to another edition of our Feature Friday series here on The Digital Press blog! This week, I’m thrilled to put the spotlight on the amazingly-talented Nini Lee of ninigoesdigi. This is actually Nini’s second feature here on the blog (you can find her Foodie Friday post from February 2018 HERE).

In order to learn more about Nini, personally, this time around… I asked her to share 5 things we might not already know about her…

  1. Some of you might have read that I have been dieting since February 11th, but what you don’t know yet is that since last scrap “check up” (May 11th) where I was at -10kg is that now I have reached -15kgs!! Yay! That was about 2 weeks ago and now the pace is going much slower than it used to be but I keep walking and I try my best to not get back my bad eating habits! Let’s hope 2018 will be the year I loose what I gain in 20 years in Japan.
  2. I am a big Pokemon Go player. It has been my “carrot” and pushed me to walk more. I actually enjoy walking alone but I don’t think I would have walked that much if I hadn’t that game to play to. I don’t feel the kilometers when I play Pokemon Go. I have a few scrap friends who are also big players so it’s nice to share our stories.
  3. I am French but I don’t like wine 😉
  4. As I was saying above I have lived in Japan for 20+ years now and I still badly hate summers here. Hot, humid. I could do with hot if I have some shade maybe but the humidity now makes it yucky all the time!! I wish I could spend summers in France instead. 😞
  5. I am a TV series addict. You name it, I probably have watched it. But I shouldn’t brag about it because if you think of the time spent watching those series… wow… moving along… lol. Anything suspense, action, adventure, thriller, medical, supernatural related is good for me.

Have you had a chance get to take a look at the ninigoesdigi shop here at The Digital Press? It’s full of fun, bright colorful kits that make you want to pull out your photos and scrapbook! I’ve got to tell you, it was really hard to pick out just 6 of my favorite products. I really love all of the vibrant colors and simple designs she uses to create her kits. Here’s a peek at a few faves…

To give you a look at her products in action, I’ve also compiled this sampling of digital layouts that were created with her designs…

I am so glad to have had the opportunity to help you get to know Nini a little better today!

Now that I have you excited about her amazing digital artwork… you’ve got to go check out her shop here at The Digital Press during her feature week and take advantage of this week’s 30% OFF sale throughout her feature week (the sale will end at 11:59pm ET on Thursday 7/12).

Additionally, Nini has a special Free-with-Purchase offer for everyone this week! Don’t miss out on this opportunity to stock up on your favorite products from ninigoesdigi… and you will get this awesome full kit — Find the Extra in the Ordinary — for FREE with any $10+ purchase in her shop — this week only (again, this offer ends at 11:59pm ET on Thursday 7/12).


JenniferHigniteJennifer Hignite is a mom of three boys and new homeowner with her fiance in the mitten state of Michigan. When she is not scrapbooking, she enjoys photography, decorating, and shopping at Target.

Summer Camp 2018 | Mess Hall | WEEK #1

Hello, and welcome to the first edition of this summer’s weekly “Mess Hall” feature — part of The Digital Press’s big SUMMER CAMP 2018 event this July!

If you haven’t already checked out our lineup of activities for SUMMER CAMP 2017… definitely swing through the forum, grab yourself a badge tracking card, and join the fun! We’ve got events, challenges, tutorials, and more lined up throughout the month of July… including a weekly FOOD article!

Each Sunday throughout the first 4 weeks of July, members of our team will be here on the blog sharing a meal with you — a main course, a side dish, and a dessert (or a drink!) that are each tried-and-true (tested personally by members of our team!). Give any of the meal items a try, and you could earn a SUMMER CAMP 2018 badge! Get the full details HERE.

The WEEK #1 meal is very, very worth a little time in the kitchen, folks. Trust us on this (and it’s actually really quick & easy!).

photo credits to [1] [2] Plated and [3] TDP creative team member Amie Wheeler

What is that up there, you ask?

  • Blackened Cod with Garlic Aioli
  • Avocado and Corn Salsa
  • Triple Berry Trifle

Seriously, just YUM to all of it. You won’t be disappointed if you give any of these recipes a try.


BLACKENED COD WITH GARLIC AIOLI

This blackened fish recipe comes to us from TDP designer Laura Passage (and she adapted it from a recipe she found on Plated), and it’s become a go-to in her family’s meal rotation. It is the perfect summer meal… light and yet flavorful, and with a kick of spice that comes from the blackening process! For those who don’t love seafood… you can also substitute a chicken breast in for this dish, if desired.

INGREDIENTS NEEDED

—10-12 oz cod
—juice of 1/2 fresh lemon
—1-2 cloves of fresh garlic
—2 oz mayonnaise
—spice mix: equal parts (1 tsp each) of paprika, cayenne pepper*, onion powder, garlic powder, & dried thyme

*use more or less cayenne pepper depending on how spicy you wish this dish to be

INSTRUCTIONS

—Mince the garlic (use as much or little as you prefer) and set aside.
—Make the spice mix by mixing all 5 dry spice items together in a small bowl.
—Dry cod filets, season both sides with salt and pepper, and rub the spice mix on both sides of each filet; set aside to allow flavor to marinate.
—Heat about 1 Tbsp of olive oil in a pan (preferably non-stick) over medium-high heat; once oil is hot/shimmering, add spice-coated cod filets to pan.
—Sear the fish about 2-4 min per side, until the spices are blackened and a fork inserted gently into the filet meets very little resistance.
—Meanwhile, make the garlic aioli in a small bowl by mixing the mayonnaise, garlic, and juice of 1/2 lemon. Season with salt and pepper (to taste).
—Serve fish with garlic aioli spooned over the top of it (or you can also use small dipping bowls for the aioli, if you prefer).

[recipe adapted slightly from an original recipe found on Plated]

AVOCADO AND CORN SALSA

This dish is also a favorite of Laura’s family… they eat it year-round (but especially in the summertime when fresh corn and avocados are easy to find in the store, and when home-grown tomato is easy to come by!). Super easy to make, and truly delicious.

INGREDIENTS NEEDED

—1-2 ears fresh corn
—1-2 ripe tomatoes (or small pint container of grape tomatoes)
—1 fresh ripe avocado
—juice of 1/2 fresh lemon
—olive oil
—salt & pepper

INSTRUCTIONS

—Heat about 1 Tbsp olive oil in a pan (preferably non-stick) over medium-high heat; cook corn about 5 min, stirring often, until corn begins to char/brown.
—Remove corn from heat and place in medium bowl; set-aside.
—Meanwhile, as corn cooks… medium-dice tomatoes (or cut each grape tomato in 1/2 or 1/3) & medium-dice the avocado; add both items to bowl with corn.
—Add juice of 1/2 fresh lemon and about 1/2 Tbsp olive oil to bowl; stir gently.
—Season with salt and pepper (to taste).

[recipe adapted slightly from an original recipe found on Plated]

TRIPLE BERRY TRIFLE

This Triple Berry Trifle is a favorite of mine (Amie), and it is not only beautiful… but it’s also soooo good! It’s super easy to put together & perfect for a busy holiday party or event (such as the upcoming 4th of July here in the States)!

INGREDIENTS NEEDED

—1 angel food cake (you could make your own, but often the bakery at the grocery store has pre-baked, naked angel food cake)
—1 lemon pound cake (again –grocery store pre-made works perfectly!)
—1 pint fresh strawberries (sliced)
—2 pints fresh raspberries
—1 pint fresh blueberries
—1 – 16oz container heavy whipping cream
—1/2-1 cup powdered/confectioner’s sugar (to taste)
—1/4 teaspoon cinnamon
—1 teaspoon vanilla extract

INSTRUCTIONS

—Whip the heavy whipping cream, the sugar, the cinnamon, and the vanilla in a mixer until soft peaks form.
—Slice the angel food & lemon pound cakes; slice strawberries while cream comes together.
—Assemble the trifle as follows:
First, layer the angel food & pound cake, breaking the slices into pieces that fit into your bowl/container; then, add a layer of berries. Next, spoon a layer of the cream on top of the berries. Keep going to make 3 or 4 more layers, depending on the size of your bowl, finishing at the end with a layer of cream. Decorate the top with remaining berries. Cover and refrigerate until ready to serve.

.

Want to give one of these recipes a try and earn your WEEK #1 MESS HALL BADGE for TDP’s SUMMER CAMP 2018? Come get the details in the forum —> HERE.


Amie

About the Author  Amie is a craft-loving dental hygienist who lives in Washington state. She loves her husband, her two crazy kids, and her English Bulldog… as well as coffee, baking cupcakes, daffodils, glitter & sprinkles, reading a good book, and lip gloss — not necessarily in that order.