Hello everyone, and welcome to another edition of our always-popular Foodie Friday series here on The Digital Press blog! This week, we are excited to be featuring Nini of ninigoesdigi. Nini joined The Digital Press as a permanent designer this past year, and therefore this is her first feature on the blog. We are so excited to have her sharing her recipes with us, as she loves to cook and has whipped up some really unique things in her kitchen this week!
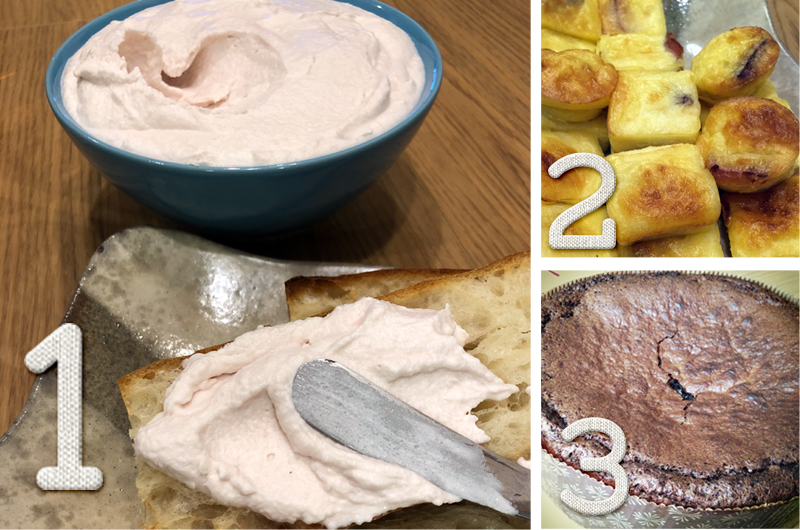
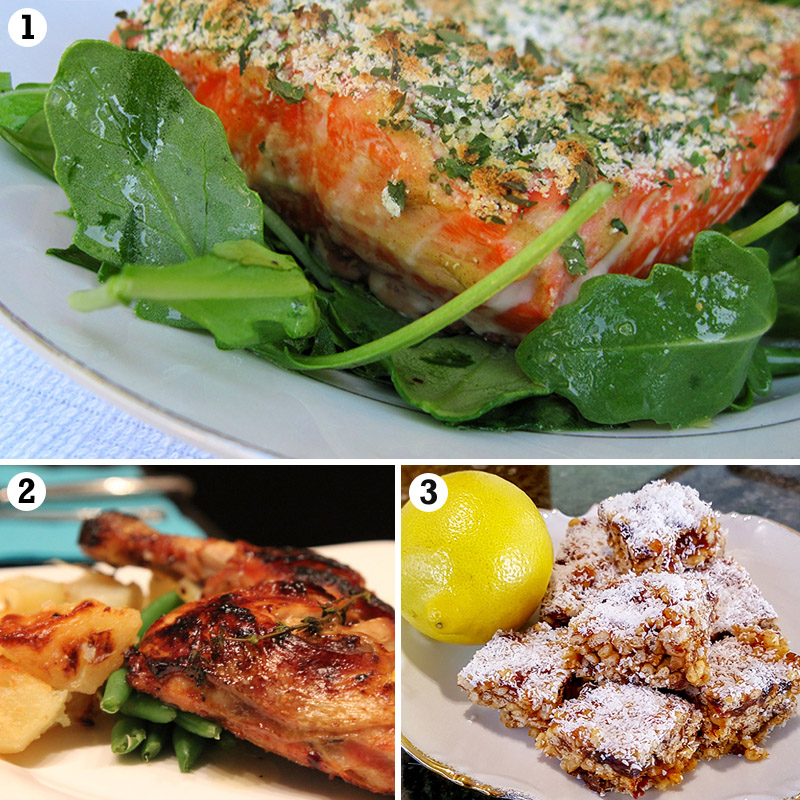
What are those yummy things you see, above?
- Ham Mousse
- Quiche (without pastry)
- Gateau au Chocolat
Ham Mousse
INGREDIENTS
- 250 g of white ham
- 400 ml (2 cups) of fresh cream (divided in 250 ml + 150 ml to be used separately)
- 6 g of gelatin (soak it in a little bit of cold water – this time I tried with only about 2 g to see if it was less hard and I prefer that texture. You will need to test and see what you prefer)
- salt and pepper to your taste (depending on the saltiness of the ham too)
INSTRUCTIONS
- Cut away the hard bits (hard gristle) the white ham might have. I take out the white soft greasy parts too. I only keep the pink meat of my ham 😉
- Put 250ml of liquid fresh cream in a saucepan with the ham cut into small pieces on medium heat. Don’t let it boil. Take off the heat once it starts make bubbles.
- Place that mixture in your blender, or like me, mix with a hand mixer until smooth. Add the gelatin. I am not patient so when the recipe said “blend 10 minutes until smooth” I totally didn’t follow through lol. Just blend as desired until you think it is smooth enough for you. Scrape the mix from the sides too so that everything gets well blended.
- Cool the mixture by placing your bowl or saucepan on an icy bain-marie (water bath). Slowly mix with a spatula to cool it down evenly.
- Whip the rest of the fresh cream so it gets to be the same consistency of the ham mixture (about 80% of normal whipped cream).
- Add the cream and ham mixture to the cooled mixture in the bain marie and mix gently together. If it is not seasoned enough for you, you can add salt and pepper to your taste.
- Pour into a bowl and refrigerate for at least 20 minutes before serving.
Special note: this amount makes quite a bowl of ham mousse so maybe you could try half of it first, if you are concerned it will be too much.
I love to spread it on a slightly toasted baguette pieces, or fresh baguette. One suggestion: if you have a French baguette that is 1 day or 2 days old, spray a bit of water on your slice before you toast it. It will help bring back the good crunchy outside/soft inside taste, like a fresh baguette.
Quiche (without pastry)
INGREDIENTS
- 200 g of diced bacon
- 3 eggs
- 500 ml of milk
- 100 g of flour
- 140 g of grated Gruyère / but for the one on the picture I used grated Parmesan
- salt (to your taste but depends also on the bacon) + pepper
INSTRUCTIONS
- Brown the bacon bits in a pan.
- Spread them in a cake pan/mold (about 24cm, and buttered).
- In a pitcher/bowl, mix the flour, the eggs one by one, the milk, 140 g of grated cheese, or Parmesan like I did. Pour the mix on top of the bacon.
- Bake for about 40 minutes at 180°C or 200°C (350°F/390°F) depending on your oven you might need more or less time. Take a look sometimes to see if it’s not too burnt! lol
Special note: I usually make this when I have guests, for a party and I use silicon mold with many divisions. That’s why in my picture I have serving sized bits of quiche (some round, some square). Perfect for an appetizer, no? Since there is no pastry/pie at the bottom you can make as many shapes as you like. But don’t forget to adjust the cooking time if they are smaller than a whole pie. I loved using the Parmesan instead of some other grated cheese. The cheese taste was delightfully stronger.
Gâteau au Chocolat
INGREDIENTS
- 200 g of black chocolate (70%)
- 125 g of butter
- 100 g of flour
- 8 to 10g of baking powder (I usually put 10g)
- 4 eggs (separate yolks and whites)
- 200 g of sugar
- 1 pinch of salt
INSTRUCTIONS (20 mins preparation time)
- In a saucepan melt the chocolate with the butter. Remove from the heat and pour in the flour and the baking powder. Mix well.
- Pre-heat your oven to 180°C (350°F)
- In a bowl beat the yolks with the sugar until they whiten. Mix with the chocolate.
- Beat the whites with a pinch of salt. Add them to the chocolate, mix slowly so that the meringue doesn’t break too much.
- Pour the mix in a mold that has been buttered and floured.
- Put in the oven for 30 minutes. Check around the end of the cooking time by sticking the cake with a knife to see if it comes out dry. I actually don’t mind it to be a little humid as it means the outside is cooked but the middle is still a little moist. Yum! Be careful that the top of the cake doesn’t burn too much. If you think it’s too cooked but need to add a few more minutes because the inside is not yet cooked, add a layer of foil on top.
- Let it cool before you turn it out.
Special note: This is my all-time favorite. I use French cooking chocolate that I bring back from France or that my mum kindly sends me to Japan. It is a 70% cacao chocolate bar. I tried with the cooking chocolate selling in common Japanese supermarkets but it got super greasy… I don’t know why. Maybe there was too much fat in that chocolate? But I won’t make that mistake twice.
These recipes all sound fabulous, and definitely easy enough to pull off! Please share in the comments if you try the recipes, and let us know what you think of them!
Meanwhile, as is always the case with our designer feature weeks — they come with a fantastic week-long sale and a special Free-With-Purchase offer. You’ll be excited to know that the entire ninigoesdigi shop at The Digital Press will be marked down 30% throughout her feature week (sale prices will be valid through 11:59pm ET on Thursday 2/15)… and if that weren’t good enough news, she will also have the following Free-With-Purchase offer available in her shop all week long as well — spend $10 in the ninigoesdigi shop at The Digital Press and get the following brand-new FULL KIT completely FREE!


About the author Stefanie is a member of The Digital Press creative team and a stay at home mother of three older children living in Cape Town, South Africa with her hubby of 29 years, two of their three children and 4 Siamese cats. She loves photography, traveling and digital scrapbooking, documenting the good and the ordinary everyday.


 About the Author Shannon has been completely addicted to digiscrapping since she began in early 2016 (though she’s been a scrapper since 2000). Her early morning ritual of a few quiet hours of scrapping while sipping a chai tea is her favorite part of each day. She is also the owner of a web design company, and when she’s not at the computer designing websites or digiscrap layouts, she’s probably hiking one of the local mountains in her hometown of Phoenix, Arizona.