Author: The Digital Press

Feature Friday | Laura Passage

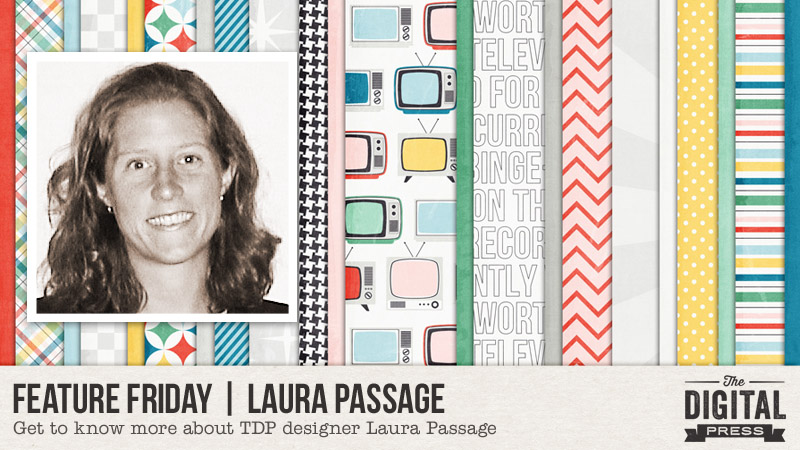
Hello everyone, and welcome to another edition of our Feature Friday series here on The Digital Press blog! Today, I am super excited to be showcasing the very talented Laura Passage (known to many of us as Wishing Well Creations by Laura Passage, or just WWC)! This is Laura’s second feature here on the blog (you can find her first feature article from July 2016 HERE)… and whereas last time we used our feature series to help you get to know some fun trivia about your favorite designers — this time, we’re giving you a little peek into the designers’ creative spaces, as well as more insight into their creative processes.

With that in mind, here’s a look at Laura’s creative work space…

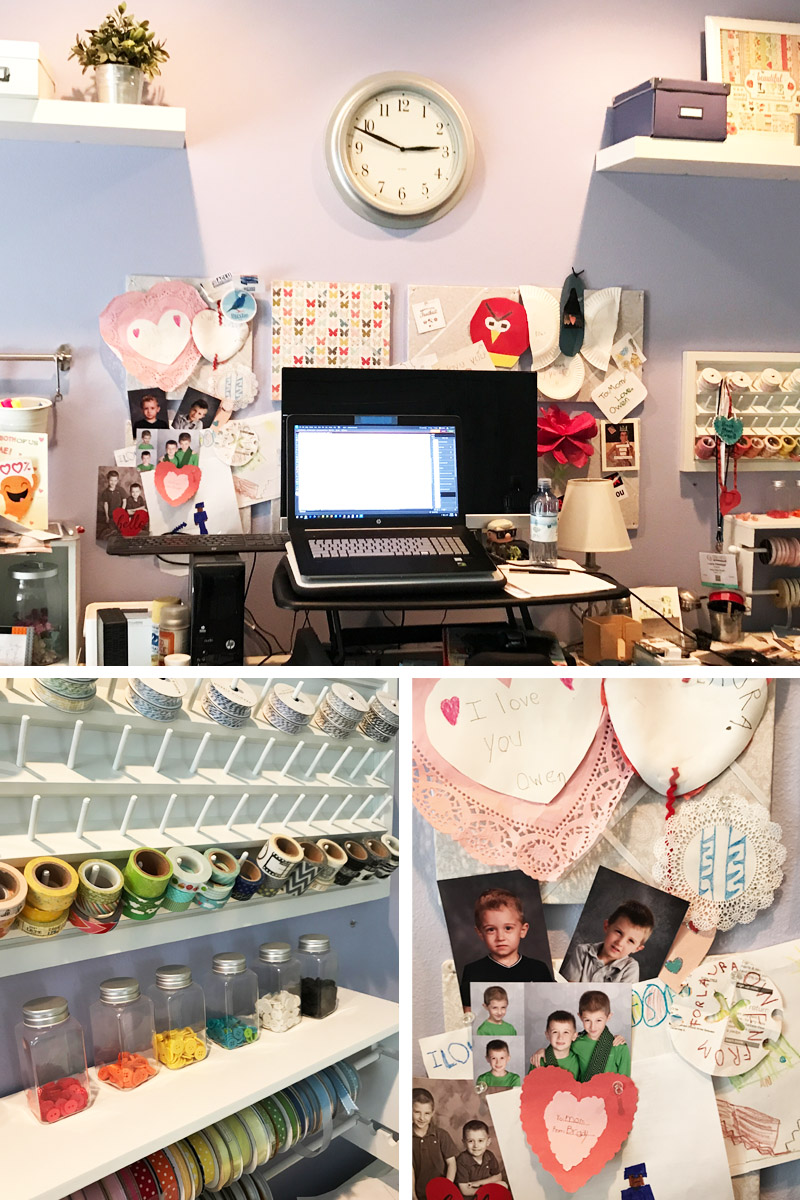
Here’s what Laura had to say about her space: “My “office” is a long counter/desk that runs along one wall of our guest bedroom. It’s a complete disaster zone. I didn’t even bother cleaning it up in order to take this photo (ha! ha! I just creatively cropped out the piles of paperwork and scrapbooking supplies (LOL!) that are stacked on either side of my main desk area, which is a Vari-Desk variable-height standing/sitting workstation desk that my husband bought me after I had emergency back surgery a few years ago). You can also see close-ups of two areas of my work space that speak to my personality… (a) my rainbow-addiction in tangible form (a.k.a. All the Rainbow Ribbons, and All the Rainbow Washi, and All the Rainbow Baker’s Twine, and All the Rainbow Buttons)… and (b) the area of my bulletin board that houses all of the cute notes/etc. that I get from my kids.”

We also asked Laura to give us a Top 5 list that is representative of herself at this point in her life… and she shared with us her Top 5 TV & Movie Quotes She Most Often Uses in Her Daily Life

  1. How was your day? Did you have a good day today or a bad day today? Well what kind of day was it?!” ~Michael Richards, from Seinfeld (used by my husband and I when we come home at the end of our day, as a joke, based on Kramer’s monologue about marriage)
  2. I’ll stuff you all in the crust!” ~Steve Carell as Gru, from Despicable Me (used anytime my kids are making me crazy and I need them to settle down and go away and stop pestering me)
  3. Change approved!” ~just about any character, from Cougartown (used anytime I decide, on a whim, to redefine something… or any time that I decide, for instance, to eat dessert for breakfast… etc.) 😉
  4. Is your house on fire, Clark? Don’t throw me down, Clark!” ~Aunt Bethany, from National Lampoon’s Christmas Vacation (used anytime I’m offering up “be careful”-type advice to someone that is unnecessary or over-protective or silly, etc.)
  5. Stop trying to make ‘fetch’ happen! It’s not going to happen.” ~Regina George, from Mean Girls (used anytime someone — usually one of my kids — is trying to get me to agree to something and they’re pestering me with no end in sight)
[ click on any of the quotations, above, to see the original video clip that relates to each 😉 ]

.

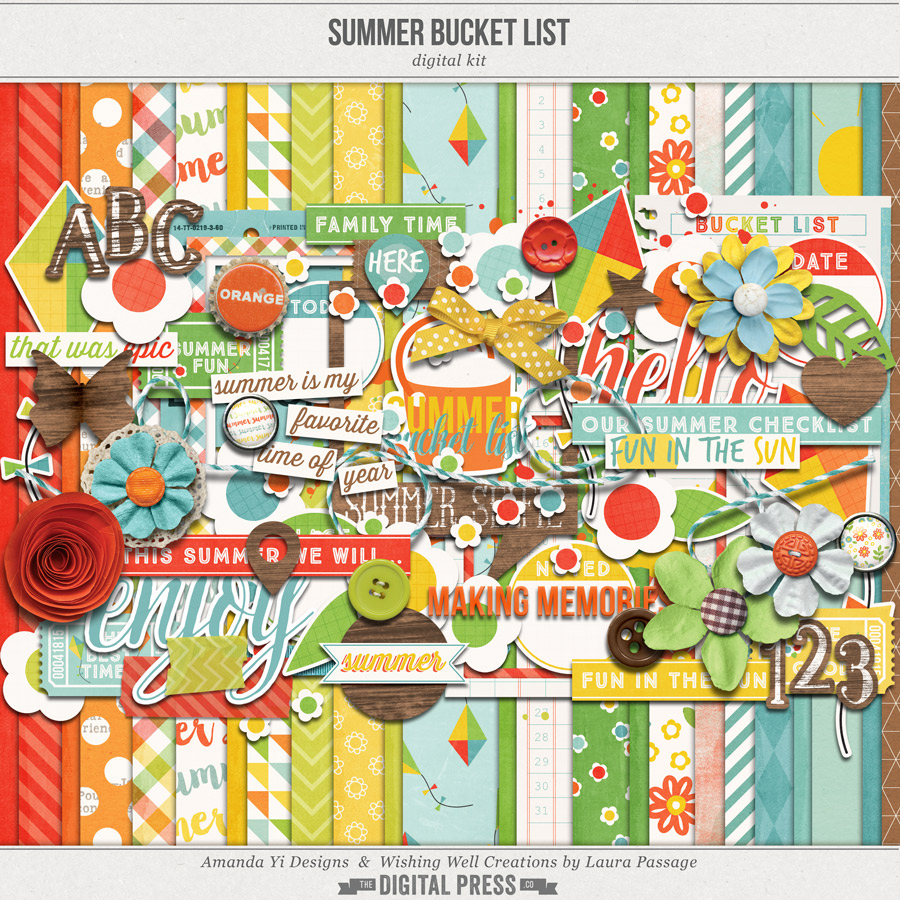
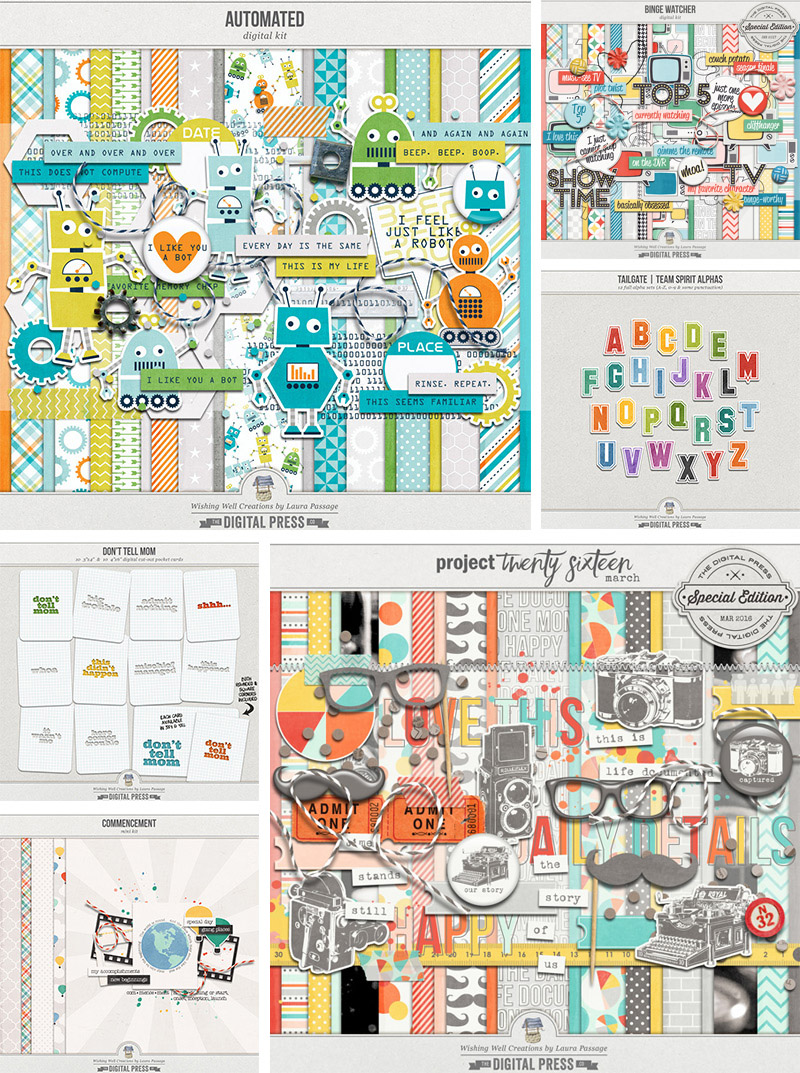
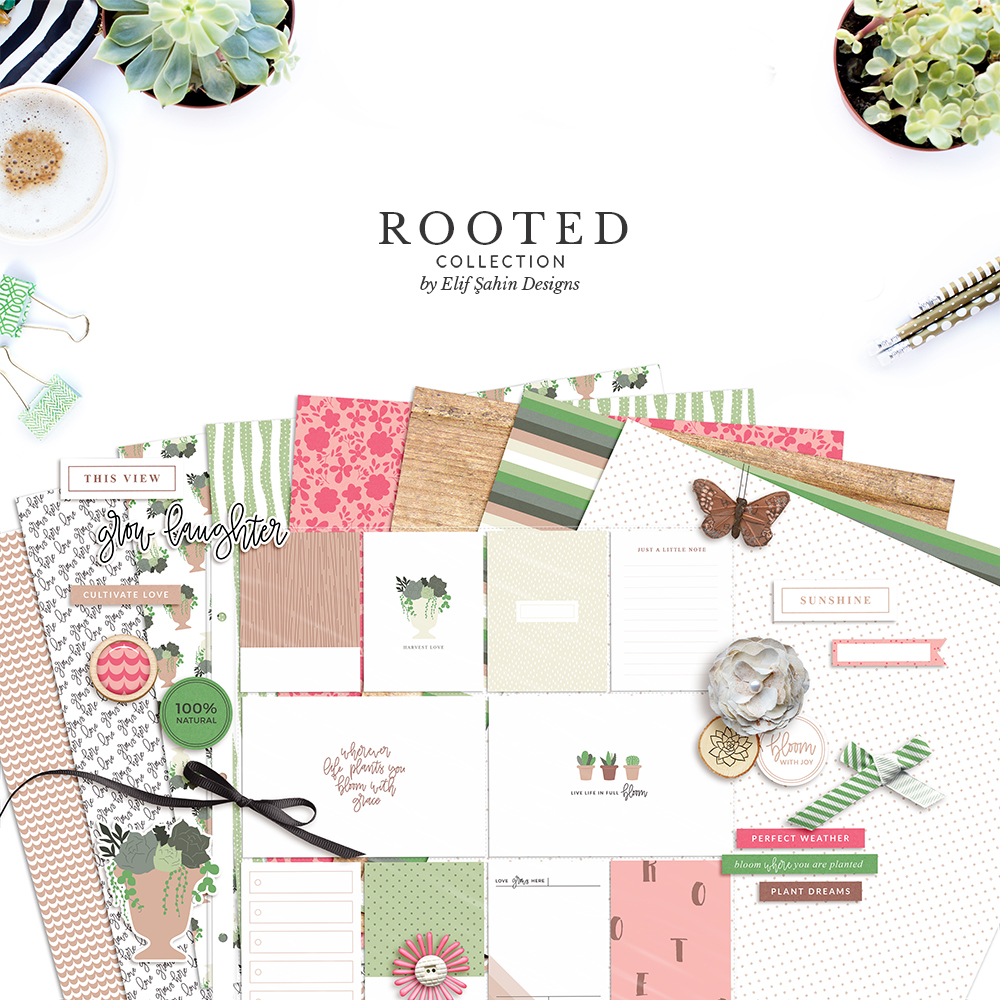
As for her designs… Laura creates digital scrapbooking products that also have a distinctly paper-ish style and feel. You’ll find lots of flat stickers and icons in her kits, mixed with the types of dimensional items you tend to find used on traditional paper scrapbook layouts — stuff like wood veneer, string, staples, paper flowers, etc. Her kits are always bright and colorful and fun to work with.

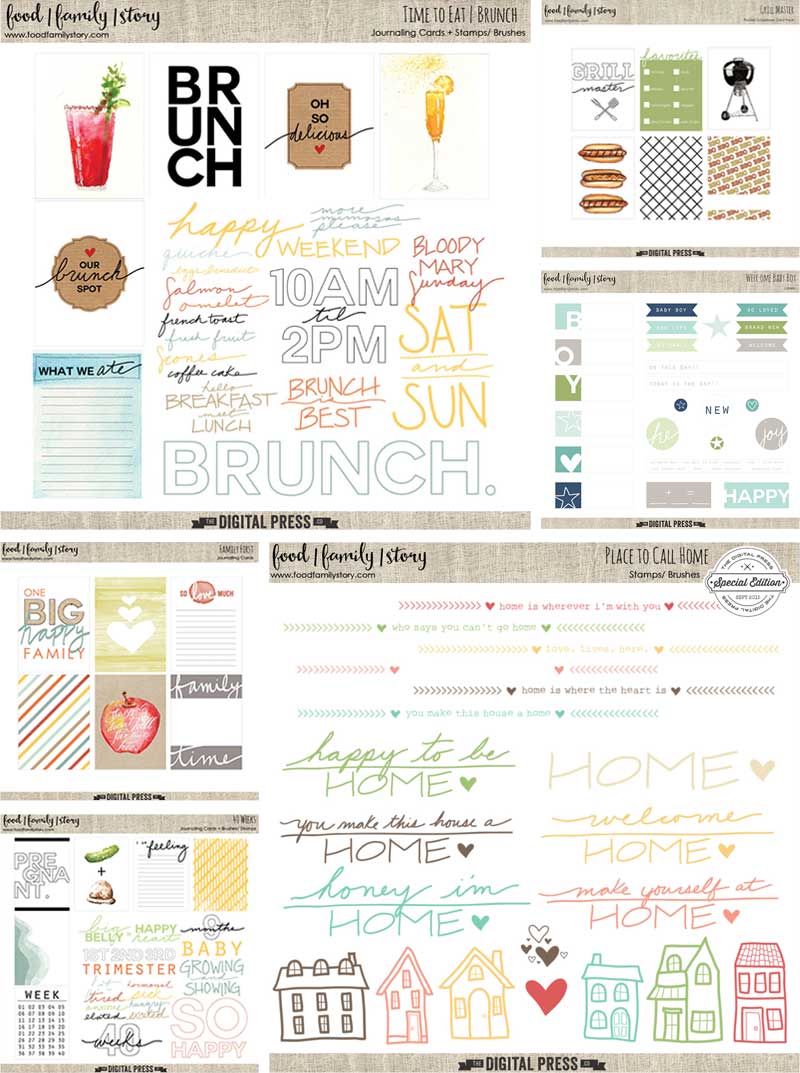
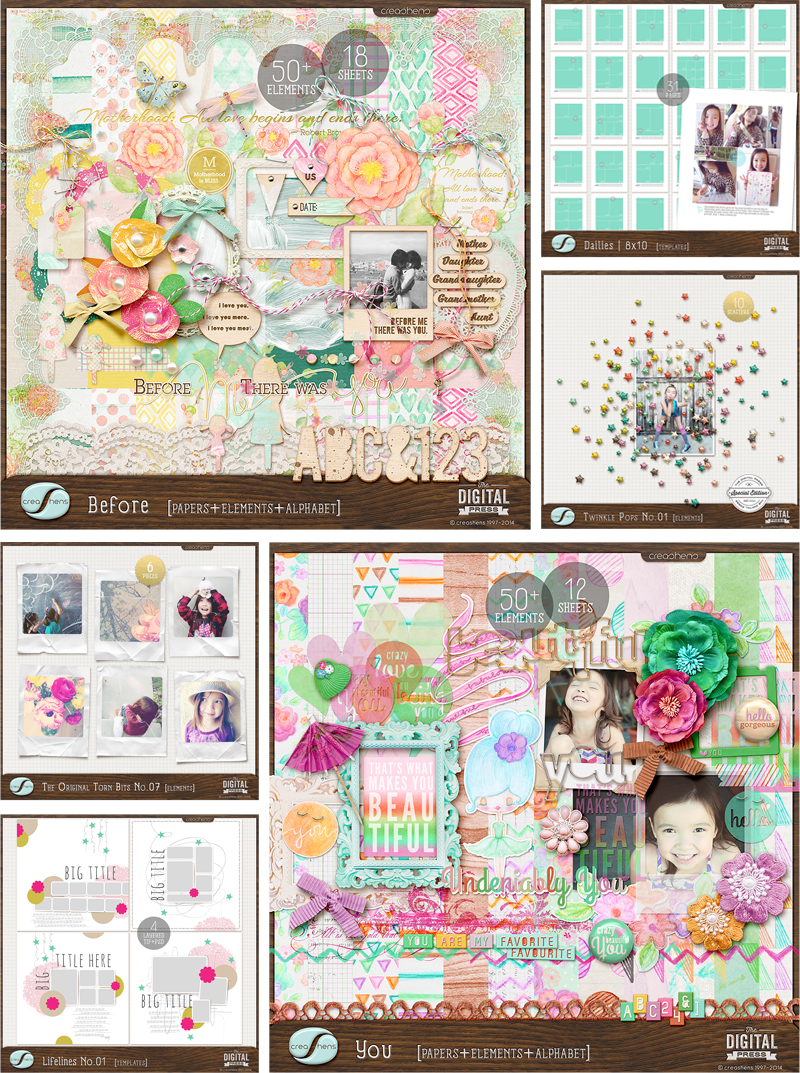
Here are just a few of my favorite products by Laura Passage

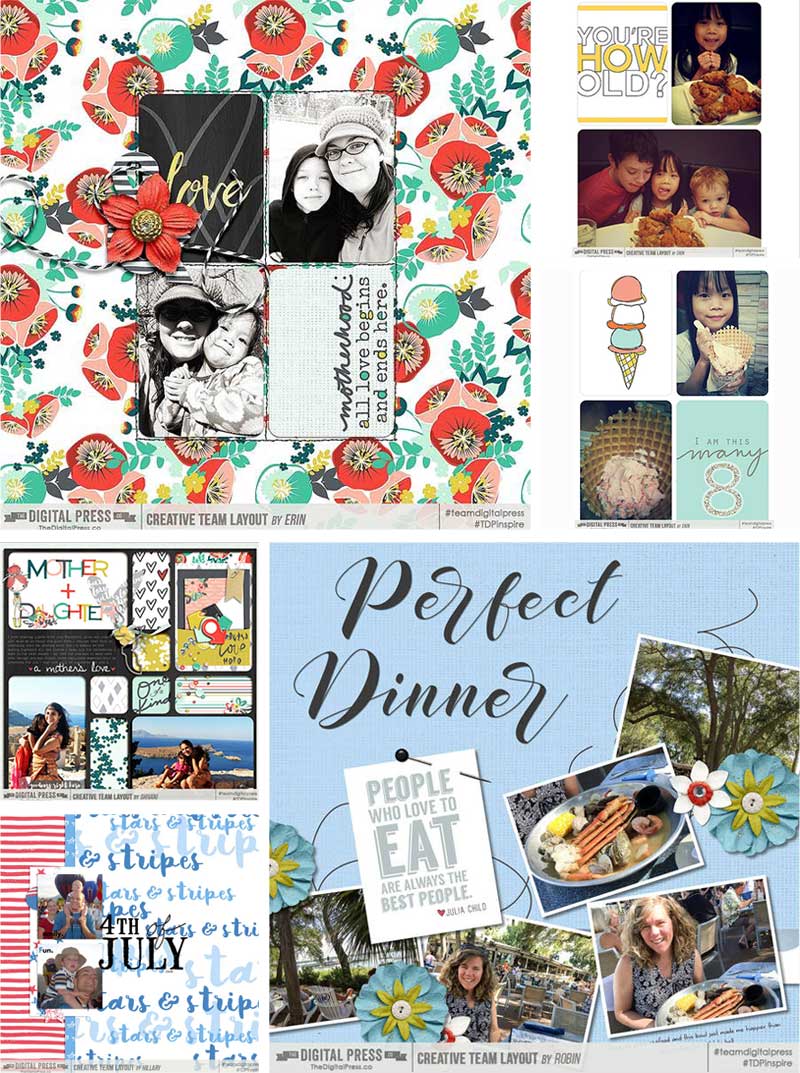
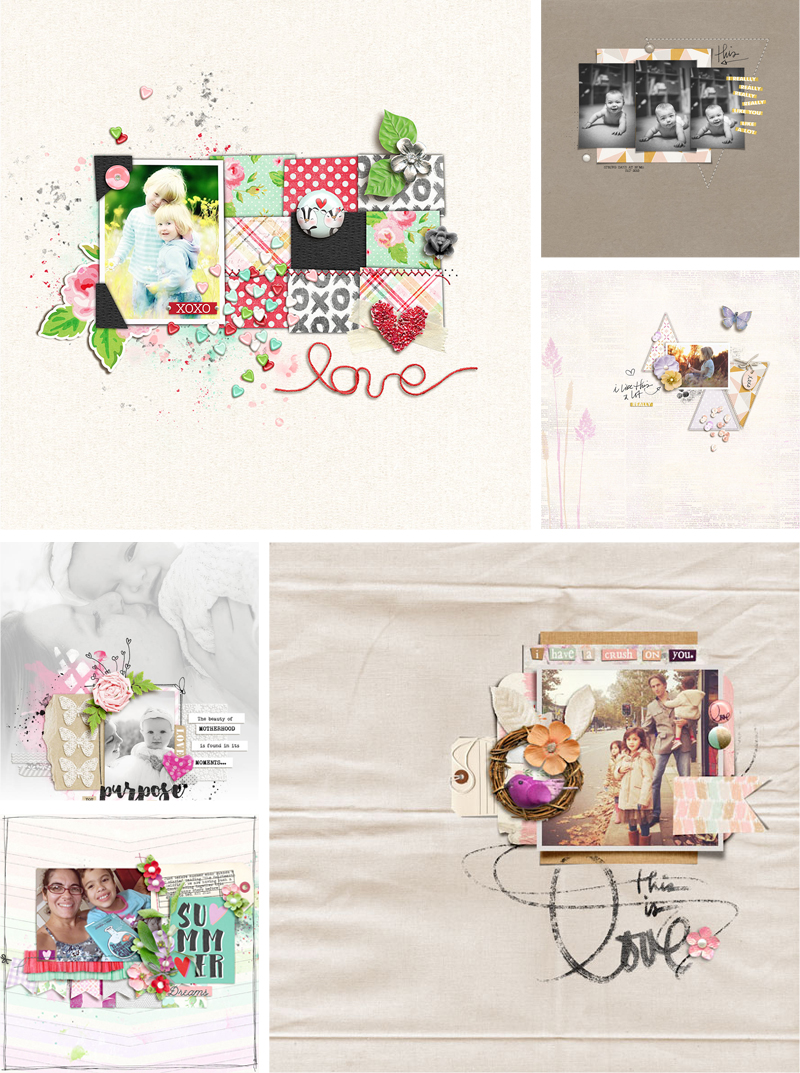
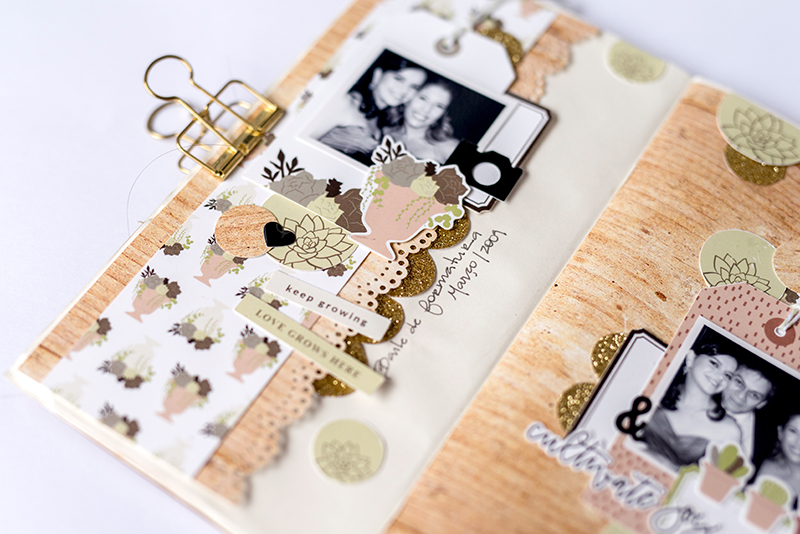
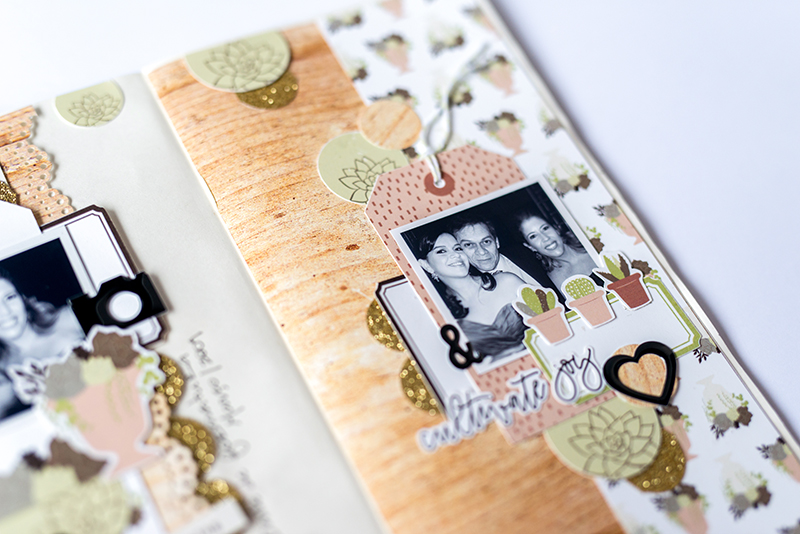
Additionally, here’s a look at just a small sampling of the gorgeous projects that have been created using Laura’s products…

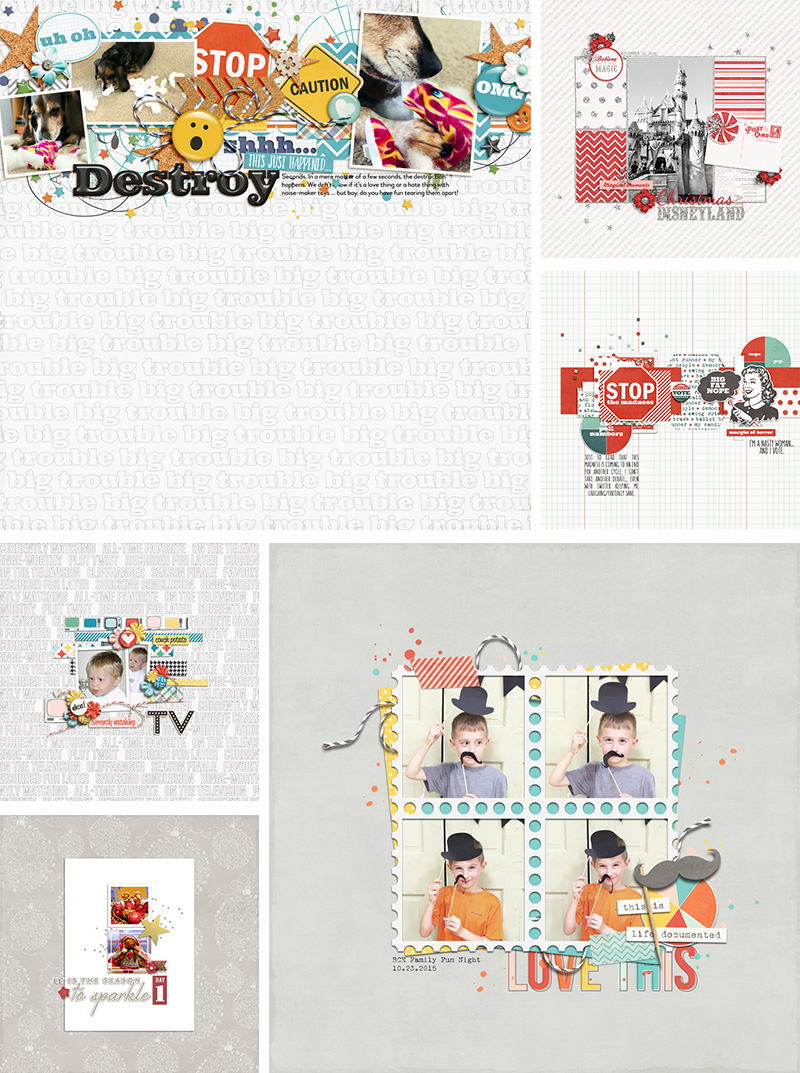
Isn’t it all so fun and inspiring? 🙂

I hope you have enjoyed getting to know a little bit more about Laura and peeking into her creative space! If your wish-list grew while you looked through the inspiration, above, then I have some good news for you! During her entire feature week, you will find all of Laura’s products 30% OFF in her shop at The Digital Press! (the sale will end at 11:59pm ET on Thursday 7/20). Check your wish-list, and don’t miss out on this great chance to clear your favorite items off it — at a discount!

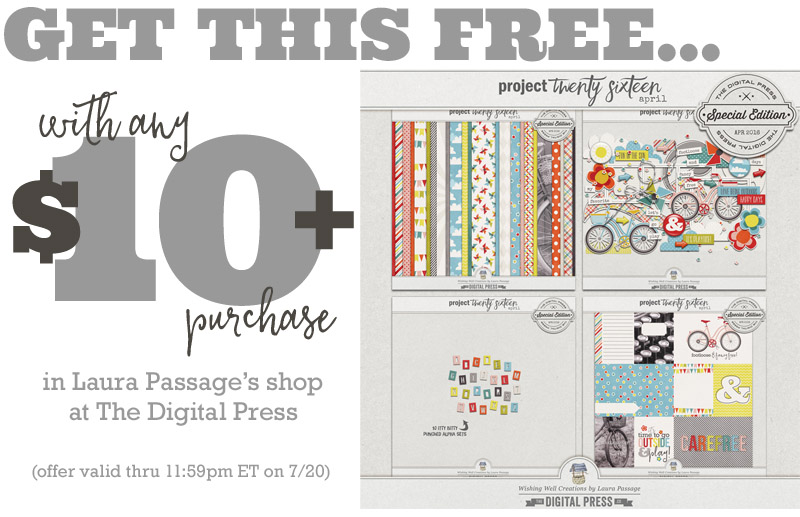
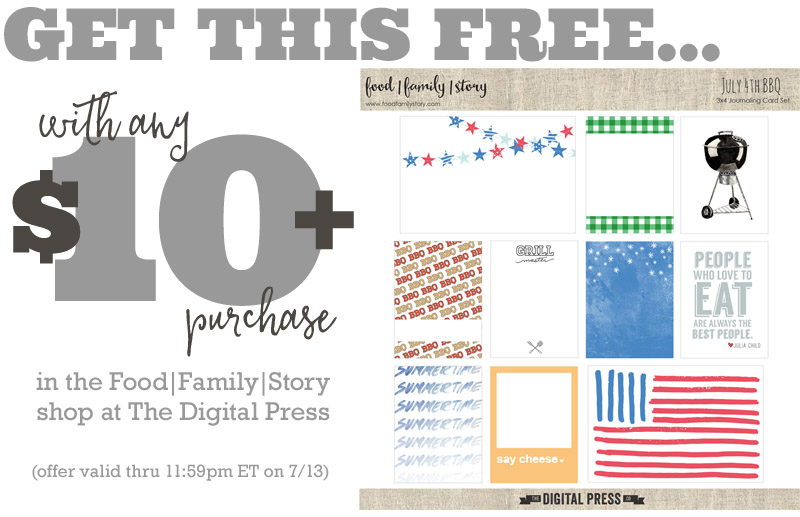
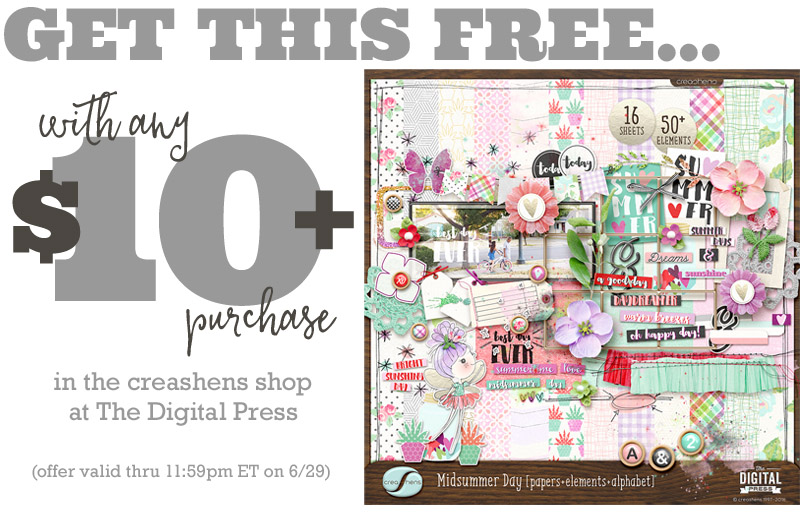
And finally, this week only — you can snag the following FULL COLLECTION (!) from Laura’s shop for FREE with any $10+ purchase in Laura Passage’s shop at The Digital Press (this offer also ends at 11:59pm ET on Thurs 7/20)…


Gaelle About the author Gaelle is a member of the creative team here at The Digital Press. She lives in France with her hubby, her two sons and her kitty. She loves digiscrap and discovered this activity in 2012, since she’s totally addict and scrap to keep memory her everyday life. Her family is definitively her principal source of inspiration.

Enregistrer

Enregistrer

Enregistrer

Enregistrer

Enregistrer

Enregistrer

Enregistrer

Enregistrer

Enregistrer

Enregistrer

Enregistrer

Feature Friday | Food|Family|Story

Hello, it’s Friday once again, and therefore time for another edition of our Feature Friday series here on The Digital Press blog! This week, I am excited to share more information about the very talented Danielle of Food|Family|Story.

This is Danielle’s first feature here on The Digital Press blog, and we’re using her feature article to help you get to know her a little better by giving you a little peek into her creative space, as well as more insight into her creative processes.

We also asked her to provide us with a Top 5 list that is somewhat representative of herself at this point in her life, and she chose to share with us her Top 5 Favorite Vegetables

  1. Tomatoes (sure they are technically a fruit, but I still count them as a veggie)
  2. Beets
  3. Kale
  4. Fennel
  5. Broccoli

When it comes to Danielle’s products, what I love about them is that they all tend to have a theme that revolves around family, friends, and gatherings (including food!)… and so they’re really easy to use for a lot of different projects.

Here’s just a tiny sampling of some of my favorite products that you can find in the Food|Family|Story shop at The Digital Press (just look at the Grill Master | Pocket Cards with the cute little grill card — isn’t it wonderful?! …or the super cute houses on the Place to Call Home | Brushes and Stamps)…

Additionally, here is a sampling of some truly beautiful layouts made with her products…

I hope you have enjoyed getting to know a little bit more about Danielle of Food|Family|Story, as well as getting a look at her work space and some of her amazing products! And as if that wasn’t already enough fun… I have good news! Her entire shop at TDP will be 30% OFF throughout her entire feature week (the sale will end at 11:59pm ET on Thursday 7/13)!

Additionally, this week only — you can snag this fantastic patriotic-themed pocket card set for FREE with any $10+ purchase in the Food|Family|Story shop at The Digital Press (this offer also ends at 11:59pm ET on Thurs 7/13)…

______________________________________________________________________________________________________________

blogfotoAbout the author  Astrid is a member of the creative team here at The Digital Press. She lives with her husband and her 2 teenage/adult kids in Germany. As a mini-jobber with only 10 hours/week, she has plenty of time for her digital scrapbooking hobby. She has Netflix and Amazon Prime, and is addicted to nearly all series. Vampires, zombies, vikings… it doesn’t matter; she likes everything. She loves the ocean and the summer heat, but lives in the opposite: mountains. Therefore, she loves visiting her family in Algeria or the south of France.

Merken

Merken

Merken

Merken

Feature Friday | creashens

Hello and happy Friday to you all!

Being Friday, we have another exciting edition of our Feature Friday series for you today… and this week, we’ll be spotlighting one of our awesome Designers here at The Digital Press — Shen of creashens! I just adore Shen’s work, and I am sure you will, too!

This is Shen’s second feature here on the blog (you can find her first feature from October 2016 HERE)… and whereas last year we used our feature series to help you get to know some fun trivia about your favorite designers — this year, we’ve been using our designer feature series to give you a little peek into our designers’ creative spaces, and more insight into their creative processes.

One way we are doing that is by showing you the designer’s work space… and I have to say, I LOVE this! I really think a work space says so much about a designer’s personality and creative style. And if you look back through previous posts about other designers, you will see what I mean by that! You’ll also see what I mean by that when you look at Shen’s creative work space…

If you know Shen at all, you know how much this work space fits her carefree personality! She says, “This is where I go to draw/paint/etc. I always do my drawings “old school” / by hand, first… and then I digitize them later.”

We also asked Shen to share with us a Top 5 list that is representative of herself at this point in her life… and she chose to share her Top 5 Favorite Snacks (along with a recipe! wahoo!)…

  1. Gummies (give me all the gummies!)
  2. Chili dried mango
  3. Beef jerky
  4. Calbee Japanese seaweed flavored potato chips
  5. Hurricane Chex Mix (sharing the recipe, below, because everyone should try this!)

SHEN’S HURRICANE CHEX MIX RECIPE

  • Mix — 21 oz box Chex cereal; 1.7 oz furikake; 1 pkg arare ice crackers; 10 sheets nori; non stick cooking spray
  • Sauce — 1/2 c. butter (1 stick); 1/2 c. oil; 3/4 c. sugar; 1/2 c. light corn syrup; 2 -4 tbs soy sauce
  • Heat oven 250 degrees. Get a large deep roasting pan and coat with non stick cooking spray or a light coat of oil. Add Chex, crackers, and cut-up strips of nori into pan.
  • Meanwhile, mix the sauce ingredients in a medium saucepan until sauce mixes and starts to boil a little; take off stove immediately.
  • Spoon the sauce over dry mixture in pan and sprinkle the furikake as you turn the mixture with 2 wooden spoons. make sure to coat the pieces as evenly as possible and make sure the nori gets coated, too.
  • Bake at 250 degrees for 1 hour, mixing every 15 minutes. Pour onto wax paper and let cool. Untangle the nori strips. Pack into airtight bags or containers when cool. Keeps 7-10 days.


As for Shen’s digital products… they are always so fun and playful, and her shop boasts a beautiful assortment of color combinations from which to choose. In addition to her beautifully-coordinated kits, Shen also produces an wide variety of stand-alone packs — from vellum paper, to confetti and alphas, to beautiful flowers, to journal cards, and even some great paint spatters. I am never lacking in inspiration while browsing her shop.

I admit, I struggle to choose favorites from so many gorgeous items, but if forced to do so… here are a few that really stand out to me…

Do you see what I mean? So fun and playful! What is there not to love?!

There are so many gorgeous layouts in our gallery using Shen’s fun products, but here are a few that really highlight her bright and airy, playful style…

Swoon! OK, so my girl crush is revealed and out there now — but I really do just adore playing with Shen’s products. They make the most beautiful pages. And I am so glad that I got to share her work with all of you this week!

One last thing before I forget… Shen has a special Free-with-Purchase offer for everyone this week! Don’t miss out on this opportunity to stock up on your favorite products from creashens while they’re marked down 30% OFF… and you can also snag her gorgeous “Midsummer Day” Kit at the same time, for FREE with any $10+ purchase in her shop — this week only! Don’t miss out!


Erin is an artsy crafty kind of girl who is currently dabbling in far too many things, but is working hard to enjoy every moment of it, while avoiding the rain, which is difficult due to living in the land of many rains. She is slowly learning to use her smart phone to capture all the fun little bits of life that would otherwise go unremembered in the busy craziness that is raising a family!

Tutorial Tuesday | Posing tips

I’m a fervent advocate of scrapbooking yourself and being in the picture. Yeah, I know… I can hear you from afar! “But, I hate to be photographed!” “But, I’m not photogenic!” “But, but, but…”

Enough with those big buts! Today I am here to share a few different tips that will surely lead to more flattering pictures of yourself. My hope is that if you employ these tips, you’ll feel more confident to join your family in the picture (and/or to take more self-portraits)!

Tip 1 | Make the Turtle

The first posing tip is to “make the turtle”. It’s a posing trick I discovered through Peter Hurley, one of the greatest head shot photographers in the world. When you take a close-up of your face, remember to move your face slightly forward and down. You will feel and look super weird from the side, but this “turtle-like” move will define your jaw line and make you look 5 pounds lighter. Seriously, it’s magic. In the following photos (before using this tip), I’m standing in a natural position and I look OK, I guess….

But here in the next two photos, I followed the turtle tip. Look at the difference it made! Defining the jaw line has a huge effect (left photo). Of course, it’s somewhat weird from the side (right photo), but who cares! It’s worth the effect you get from the front angle…

Tip 2 | Create Movement

For photos that are framed more widely, the key is to create movement, shapes, and empty spaces with your body. The golden rule here is “if it bends, bend it!” Remember that whatever goes towards the camera will look bigger/wider, so the general advice is to put body weight on the leg that is farther away from camera.

Look at how the use of different poses completely changes the way my curvy self looks!


Tip 3 | Use a New Shooting Angle

If you want to elongate your body and focus on your face and eyes, try taking the photo from slightly above. Be careful, though, as the angle of the shop might change the body’s perspective and look unnatural if it’s too extreme!

*NOTE* besides concealing a few pimples, the pictures above are not retouched at all. No make up, no photoshop, and still feeling good… that’s the magic of posing!

I hope these few posing tips will help you feel more confident to get in front of the camera more often. You, too, deserve to be photographed, scrapped, and remembered in your family’s album! But above all, know that you are a beautiful person and soul — so let your light shine, smile, have fun, and be YOU! And scrap a page or two (or ten!) to celebrate YOU!

Here’s a layout I created using one of my recent photos…


ChloéAbout the author  Chloé is in charge of PR and communication for her small town by day, is a digiscrapper “by night,” and a photographer whenever the light is beautiful. She lives with her man and fur-babies in a small town of Alsace (in the northeast of France), where she loves to read, watch good TV shows (TWD being her absolute favorite), and just hang out with her friends — no matter if they are close by, online, or away in her Swiss hometown. She recently became quite obsessed with Bullet Journaling, FLyLady and Zero Waste.

Hybrid How-To | Traveler’s Notebook

Hello everyone! It’s Saturday, and therefore it’s time for another edition of our Hybrid How-To series here on The Digital Press blog! Today I’m going to show you how make a traveler’s notebook using supplies from your digital stash.

Supplies Needed:

  • A small notebook
  • Any physical supplies/embellishments you might want to add (I used enamel stickers and glitter tape)
  • Digital kit of your choice (I used Rooted By Sahin Designs)

Instructions:

First, I measured my notebook and then opened a new  document in Photoshop and used a canvas that was the same size as my notebook’s pages. By dragging different papers and elements from my digital kit onto my canvas in Photoshop, I made a 2-page spread as shown the image below…

I always make my hybrid projects in Photoshop first, in order to print the papers and the elements in the correct size and quantity. Then, once I know which items I want to use, I print them out separately. After printing, I cut out all of the individual pieces using my Silhouette Cameo (you can also use scissors and fussy cut everything, too, if you don’t have a cutting machine). This transforms the printed digital elements into beautiful die cuts…

Now, it’s time to assemble it, which is always so much fun! You’ll notice that as I began arranging my items, I changed my mind a little bit and the final spread is different from the digital version I originally made in Photoshop (up above).

Here is a look at the final project as it took form…

I used some enamel stickers, glitter tape, and a scalloped border punch just to give more depth and details to my spread…

BLOG 4

I really love using digital kits and turning them into physical projects. It’s so much fun to see something that starts out digital take form in a physical format… and the added benefit is that we can print digital products as many times as we want!

BLOG 5

As you can see, a traveler’s notebook such as this is an easy and fun project that you can make in just an hour or two using any notebook or planner you already have on hand.

If you’d like to give this a try, too, don’t forget that you can earn challenge points at The Digital Press! Come visit the CROSSWORD SECTION in The Digital Press forum, and you’ll find this month’s Hybrid Challenge thread (*NOTE* for each month’s Hybrid Challenge at TDP, you get to choose one of the two (2) “Hybrid How-To” tutorial posts from here on the blog for that month, and then you get to make your own version of that chosen project). If you choose to give today’s project a try… all you have to do is make a traveler’s notebook using digital papers and elements that have been printed and cut into a physical format (similar to mine, but it doesn’t have to be identical in size or format — you can do what works for you!).

Give it a shot, and share your final results with us! We can’t wait to see what you come up with. 🙂

Have a great weekend… and happy scrapping!


IMG_5877
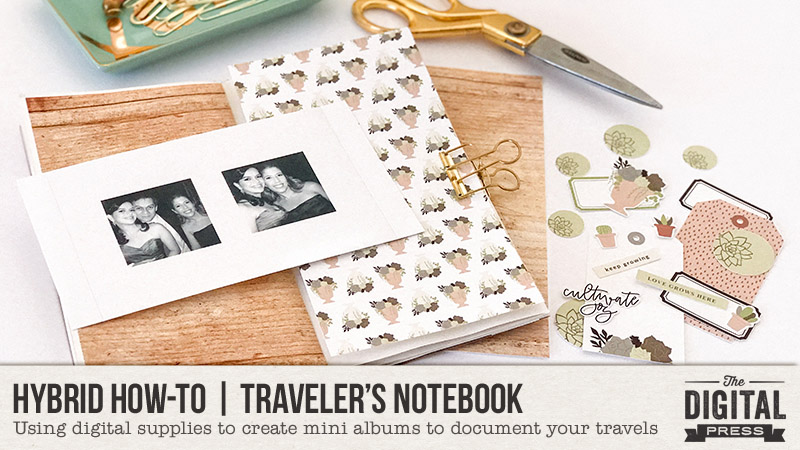
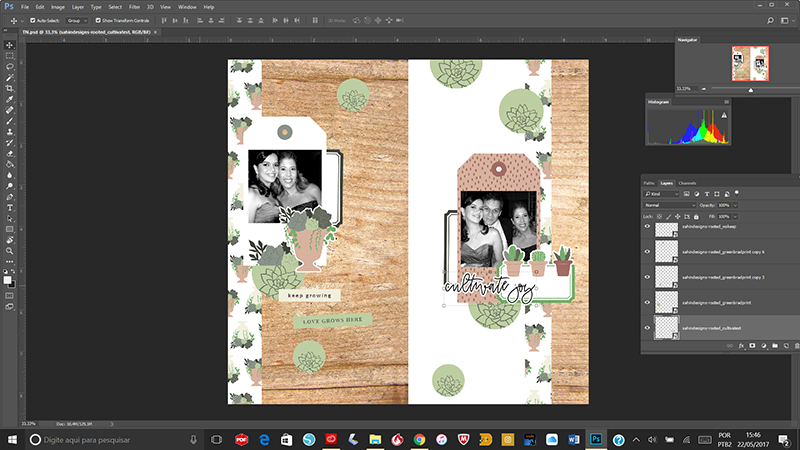
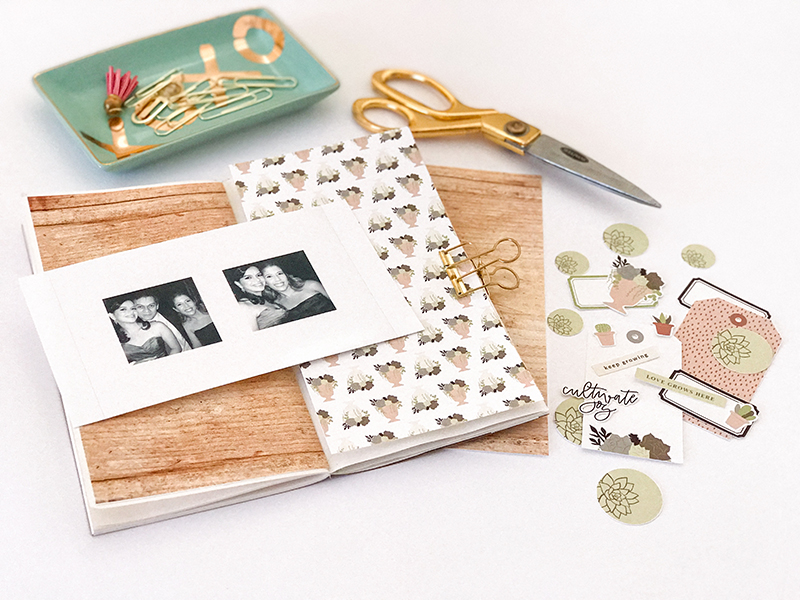
About the Author  Andrea Albuquerque is part of the Hybrid Creative Team here at Digital Press. Andrea has been a scrapper since 2010 and a photographer since 2012. Although she adores the flexibility and creativity of digital, she can’t resist playing with paper, paint, and embellishments… so hybrid scrapping is the perfect medium for her! She lives in Brazil with her hubby.

Tutorial Tuesday | Summer Bucket List

Summer is officially here next week in the Northern Hemisphere. A lot of the kiddos are already out of school and a few weeks into their summer break, however. For me, that is when summer actually starts. Well, the fun activities of summer, anyway! 🙂

Every summer since my kiddo was about 5, we sit down as a family and make a fun-filled and jam-packed summer bucket list! What is a summer bucket list? A bucket list, itself, is a list of goals, achievements, activities, etc. that a person wants to complete during their entire life. A summer bucket list is exactly as it sounds: a bucket list for your summer!

Today, we’ll cover how to create a fun summer bucket list that has been created using digital scrapbooking supplies, and printed out in order to post in your house for the whole family to see and use all summer long.

Supplies Needed:

  1. Your list
  2. Digital scrapbook supplies of your choice
  3. Printer*
  4. Laminating machine & sheets*
  5. Dry erase marker

* if you don’t have access to a printer and/or laminating machine, you can also take your digital file to a professional printer to have it printed and laminated; here in the United States, businesses like Staples, Office Max/Depot, etc. provide these services at a relatively cost-effective rate

When it came to choosing digital supplies to make my list, I had a lot of options! There are so many great items in the store here at The Digital Press. I chose to use a product that was created specifically for this purpose — a kit called Summer Bucket List that was designed by Laura Passage as a collaboration with Amanda Yi Designs a couple of summers ago…

Instructions:

I use Photoshop Elements (PSE) 13, but most of the following steps will be the same (or similar) in most versions of PSE or Photoshop (PS). That being said, this project is more of a “make it as your heart desires” kind of thing. There are no set rules on how your list should look, or how you go about completing it. It is your bucket list, after all! 🙂

For mine, I started out with an 8.5″ x 11″ canvas in PSE. That is the standard-sized paper here in the states; therefore, it is easier for me to print at home and laminate. You can use whatever size canvas you like best, however (and/or whatever size is easiest for you)…

Next, I chose a patterned paper from the digital kit I was using, and opened it in PSE to use it as a background for my list.

It’s important to note that there are 2 ways to go about importing a 12″ x 12″ paper into a 8.5″ x 11″ file. You can drag the paper into your canvas after you open it separately in PSE — and because it’s bigger than your canvas (1″ taller, and 3.5″ wider) it will cover the entire canvas area and overlap the edges. This is fine; when you save your final image, you’ll only “see” what you can see on the canvas area that you’re working on.

Alternatively, you can open the paper straight into your canvas, which is smaller than the paper, and it will fit itself into the width of your canvas (but won’t be tall enough to cover your entire canvas). You’ll see what I mean in the following image (it fits nicely horizontally, but not vertically)…

In this second situation, you don’t want to stretch it out to cover the entire page (i.e. re-size it by stretching it vertically but not horizontally), or else you will distort the pattern. Instead, another solution is to copy the paper layer, lay it on top of the original paper layer, and then scoot it down until the blank area at the bottom is filled up.

As you can see, however, this will cause a visible line if the digital paper has any distressing around the edges (most do)…

This can be easily remedied. Choosing your Eraser tool, you set it at whatever size you like — big enough to cover the line, but not so big that it erases the entire paper. I set my opacity at 50% and then erased over the distressed edge area that created the visible “line.” Simple as that! You end up with what looks like a solid 8.5″ x 11″ page, as long as you’ve lined up the pattern between the two paper layers…

Now comes the part we all know and love so much — using elements and scrapping!

There are no rules here; you don’t even have to use the same size as I am showing. You can make a list, pocket scrap it, cluster and journal, add photos, and more.

Here is a look at the finished digital copy of my 2017 Summer Bucket List…

Once I was done creating the image of the list itself, I sent it off to a local printer to be printed. I chose 65lb cardstock and had it printed via a color laser printer (it’s personal preference, but I find that a laser-printed finish often not only looks better, but it usually holds up better in the long run, as well). I had it laminated with 5ml laminate. Here is the completed finished product…

As you can see from the photo above, there was a reason I chose to use a list format and to laminate the final product after printing it off — my 9-year-old son thinks it is his job to mark off each item as we complete things throughout the summer. He is determined that we will get through every single one of these this year!

You can do bucket lists for just about anything in your life: vacation bucket lists, “30-before-30” bucket lists, and pretty much anything you can list and label. Most of us have busy summers. Making a list (of even the simplest variety) and marking those fun family things off each time you complete a list item can make it just a little bit more fun — and also ensure that you remember all of your fun summer goals! It is also a great yearly keepsake to add to your album at the end of the summer, because it will go along with all of the photos will be taking and scrapping!


IMG_20160814_144851_e

About the Author  La’Shawn Castings is a creative team member here at The Digital Press. She is a 30-something, full-time working, nerdy, somewhat lazy, digi-scrapping, photo taking, college football loving, panda obsessed, yellow wearing, Harry Potter nerding, Doctor Who watching, historical fiction reading, southern wife & mom.