Category: Hybrid Crafting

Hybrid How-To | Shrink Plastic Bracelets

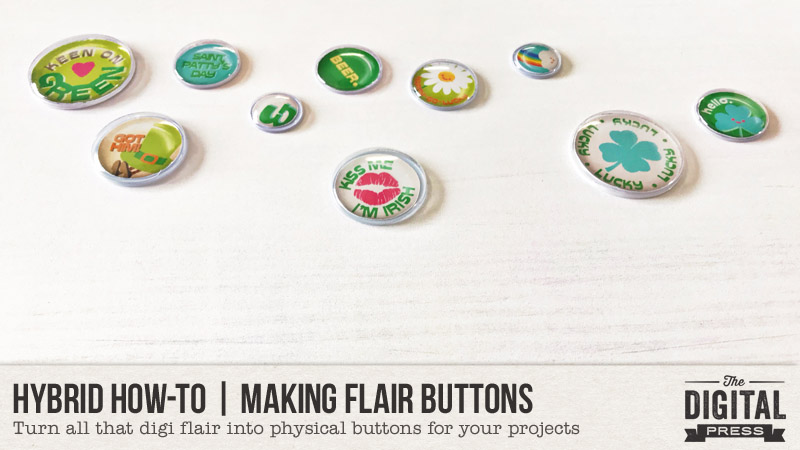
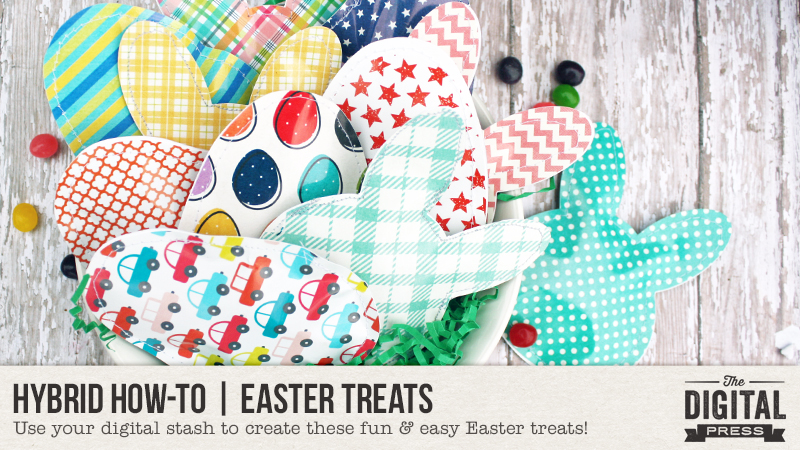
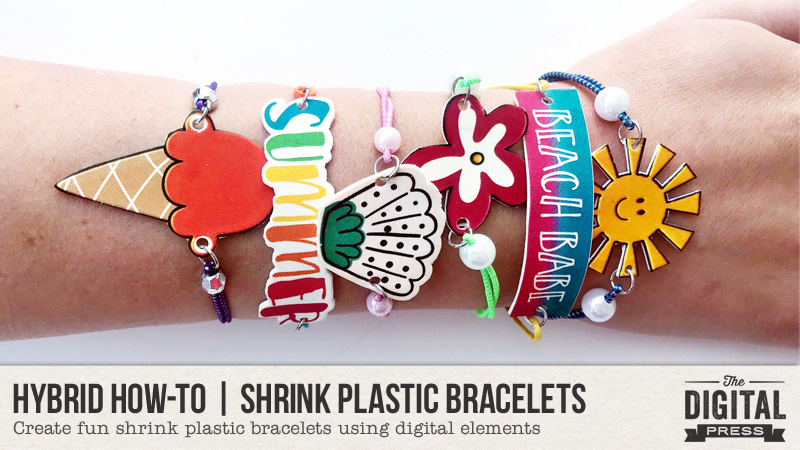
Hi, everyone! Kate here with another edition of our Hybrid How-To series here on The Digital Press blog. Today I am going to show you how to make these cute summer bracelets using printable shrink plastic and embellishments/etc. from your digital scrapbooking stash!
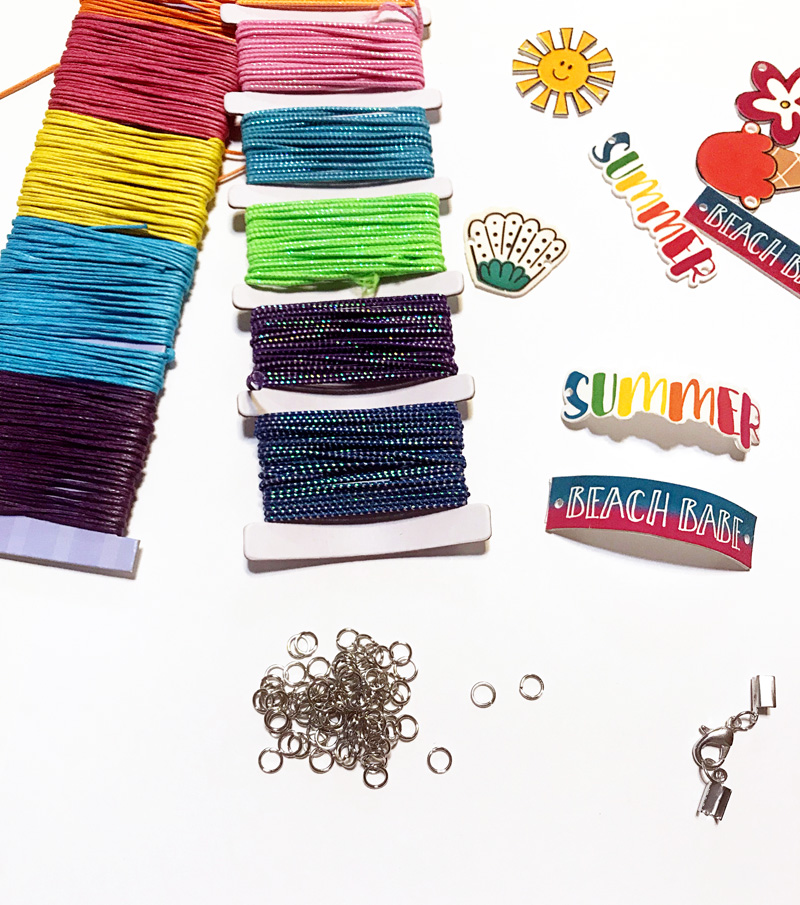
Supplies Needed

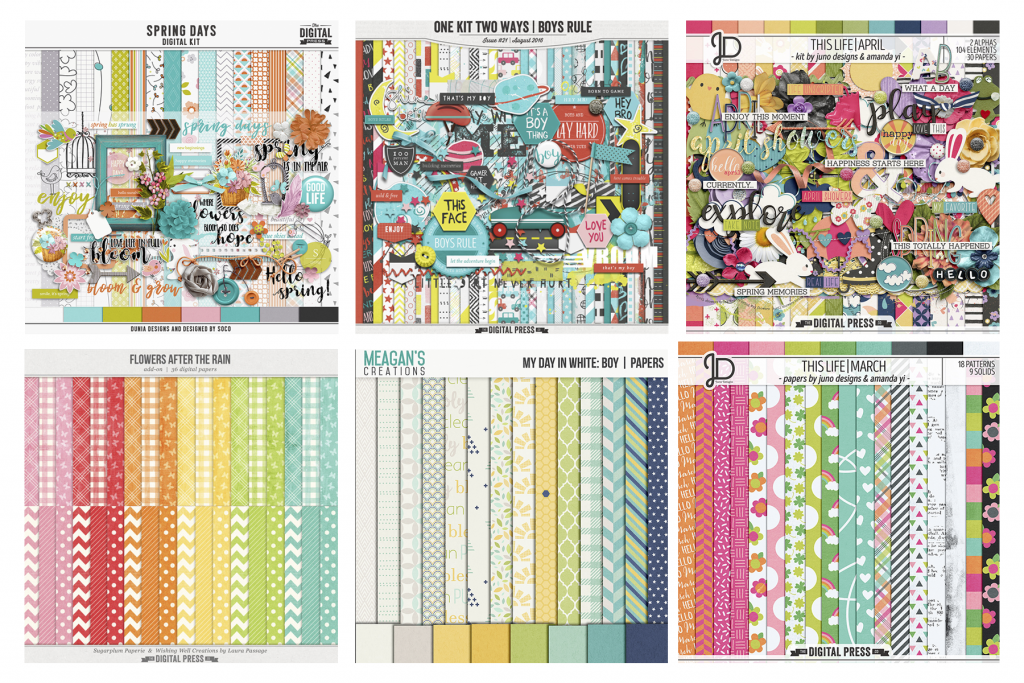
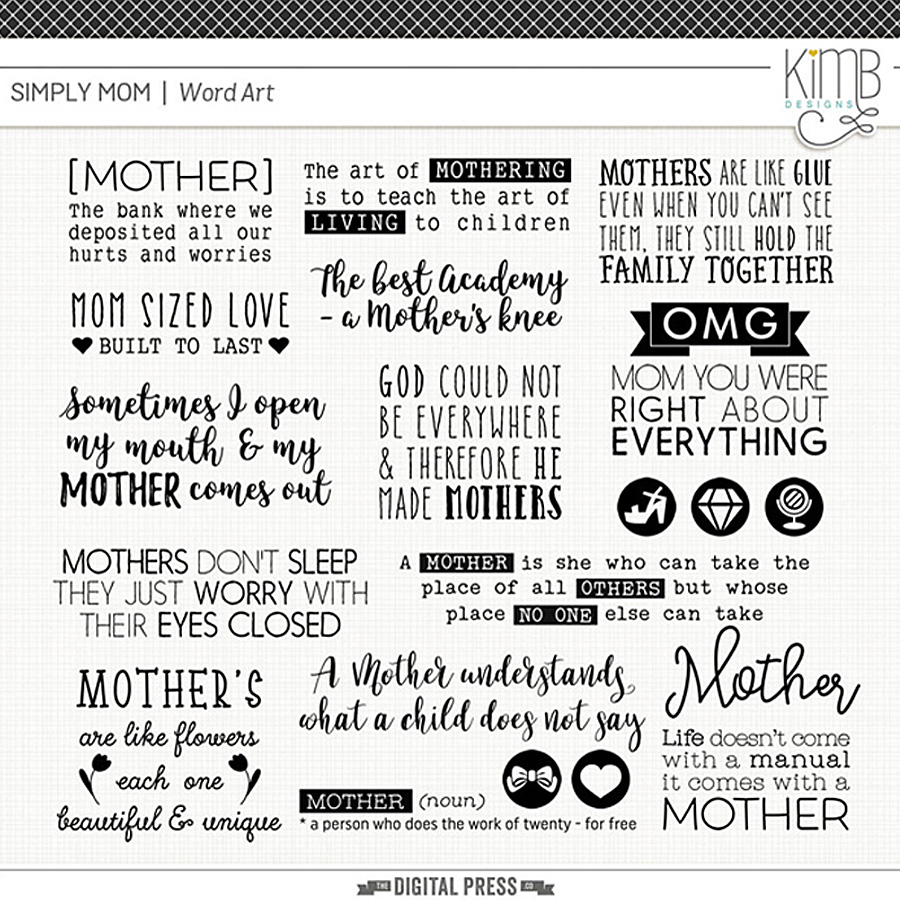
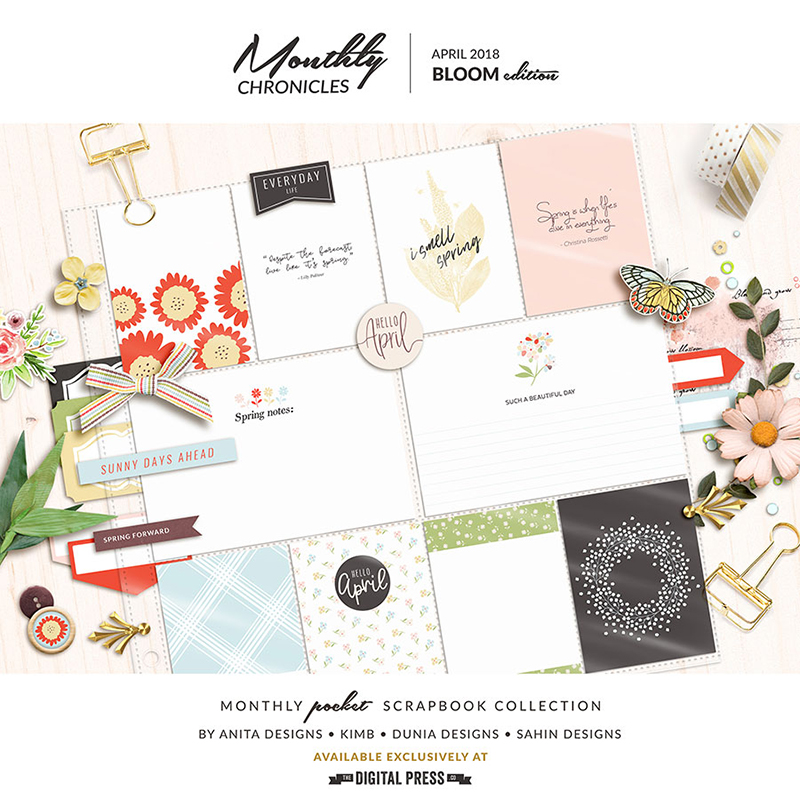
  • Digital elements of your choice (I used This Life: Summer Elements by Juno Designs)
  • Photo editing program (such as Photoshop, Photoshop Elements, etc.)
  • Printable shrink plastic
  • Cutting machine or scissors
  • Hole punch
  • Tin foil or parchment paper
  • Jump rings, clasps, crimp tubes, and a pair of needle nose pliers (optional, but gives jewelry a finished look)
  • Beads (optional)
  • Cord or elastic

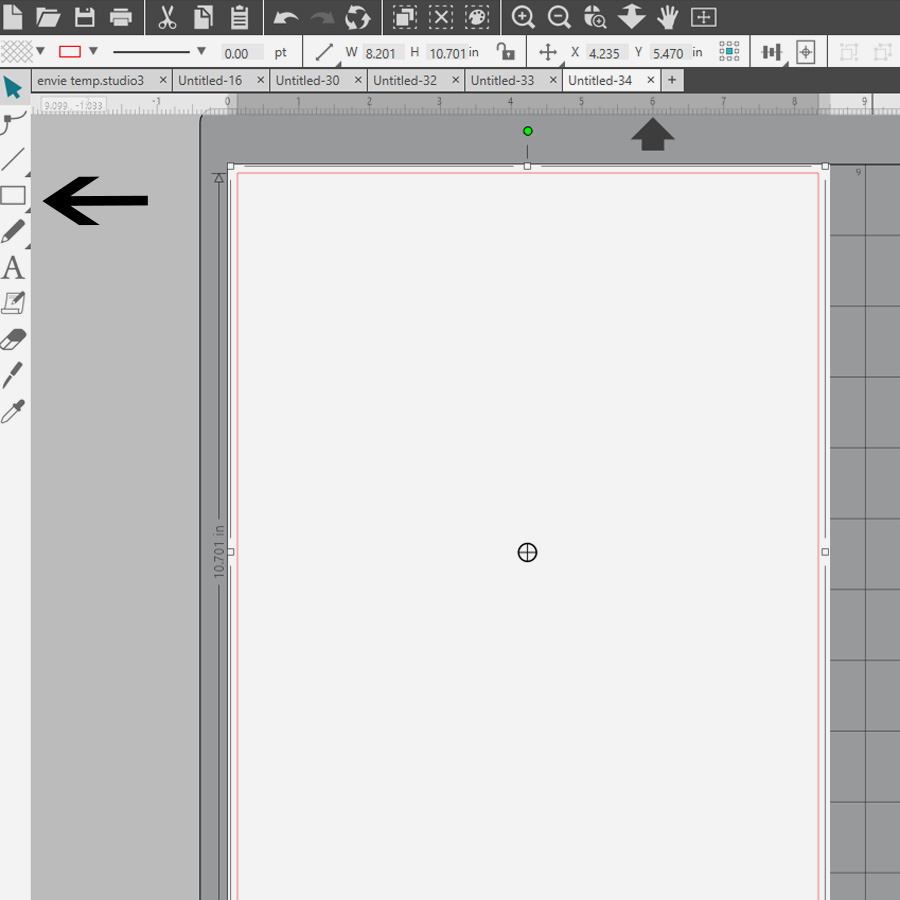
The first thing to do is pull your chosen elements into your photo editing program and size them…

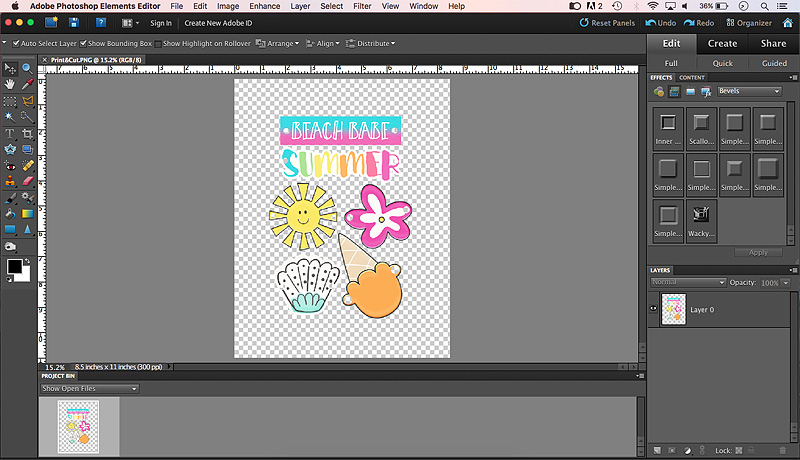
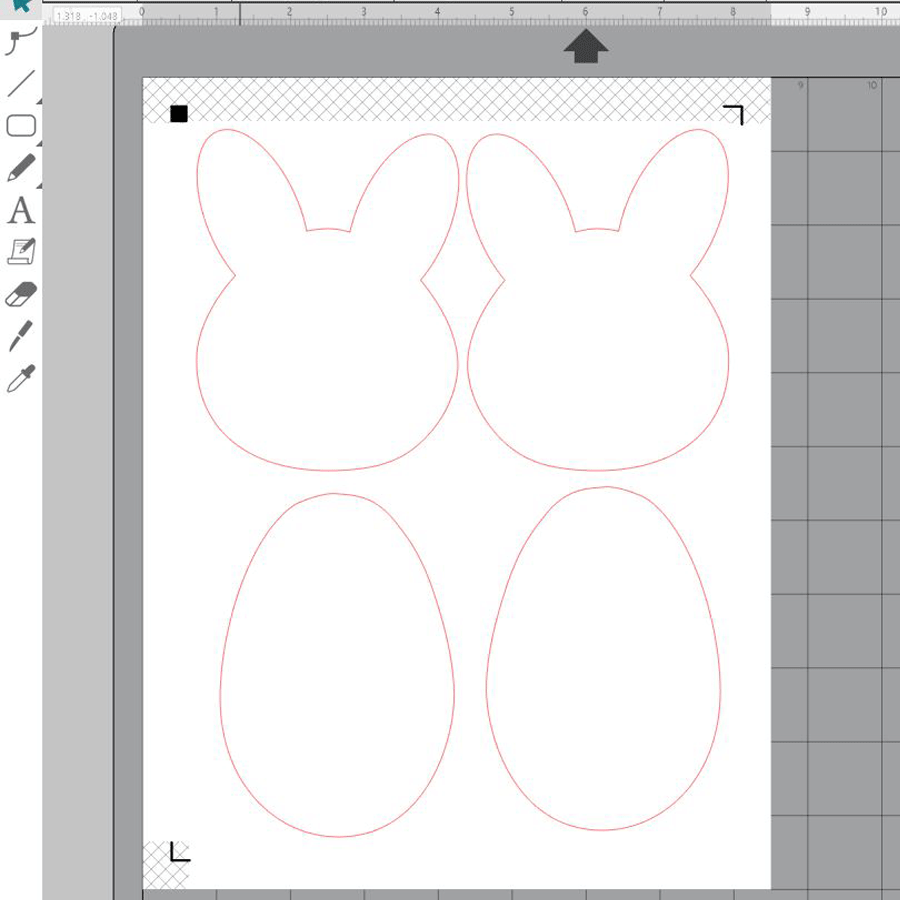
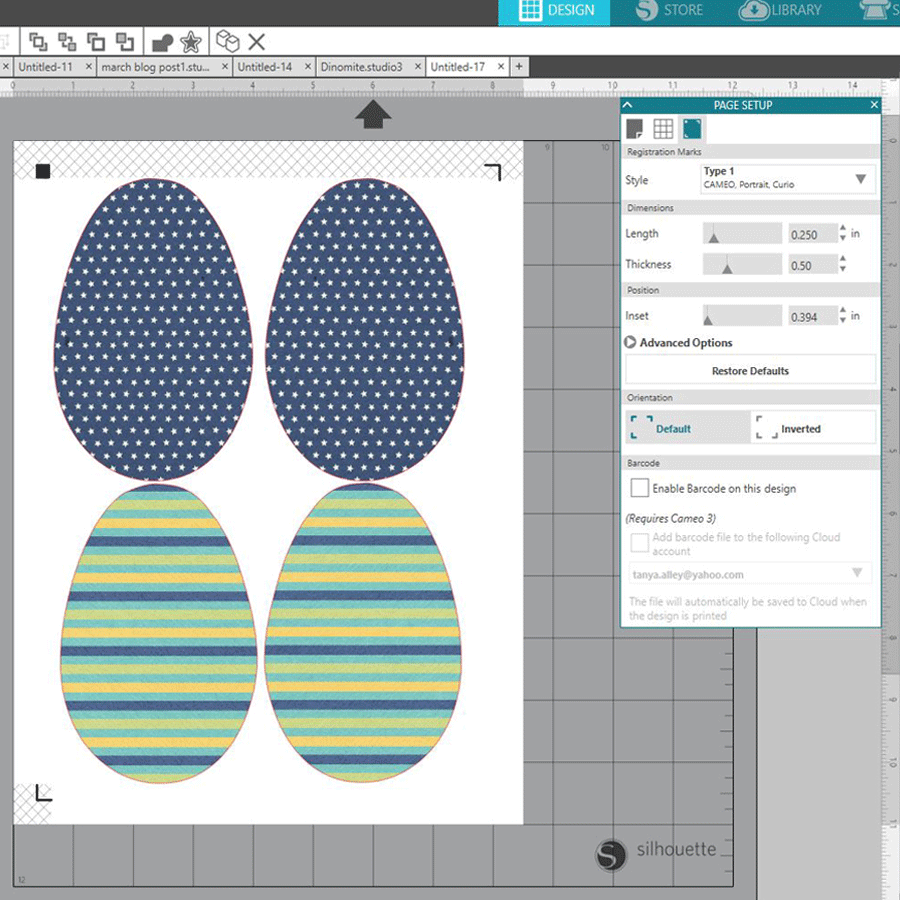
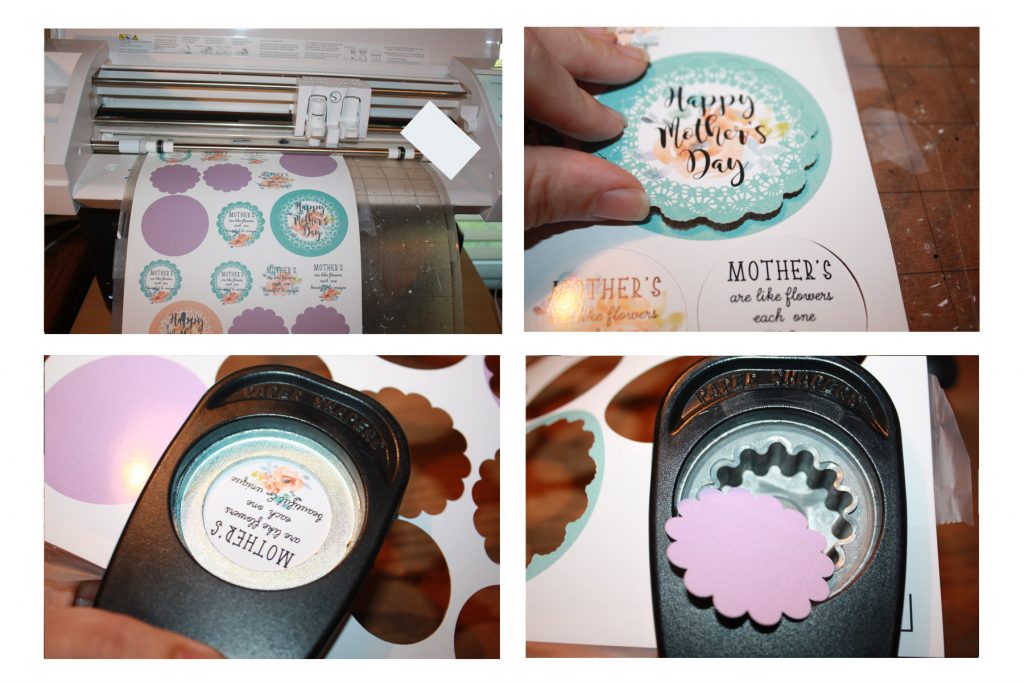
Every brand of shrink plastic is different, so check the packaging to determine how much bigger your shapes need to be to allow for shrinking. Mine needed to be 3x the finished size, as shown here…

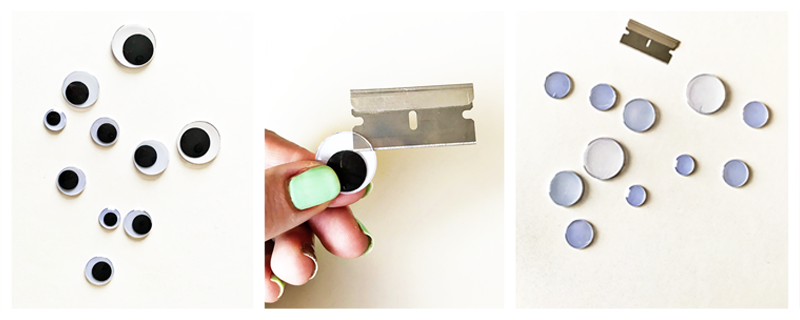
At this point, I also added the holes for the jump rings. You can do this with a hole punch after you’ve printed and cut, but you have to punch the holes before you bake the pieces.

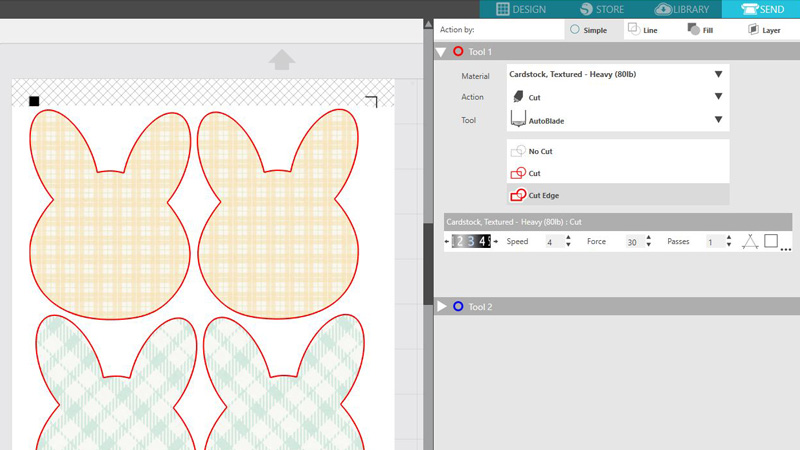
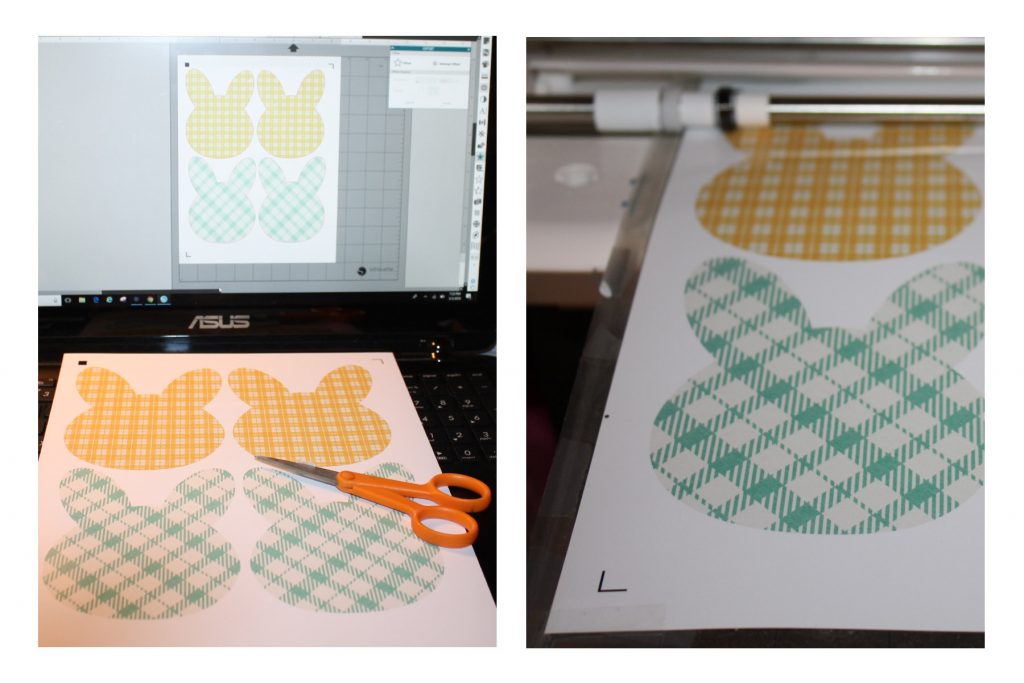
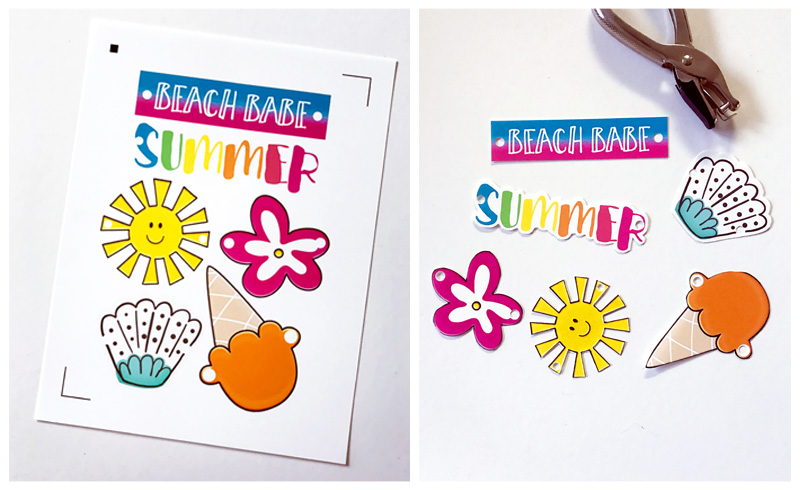
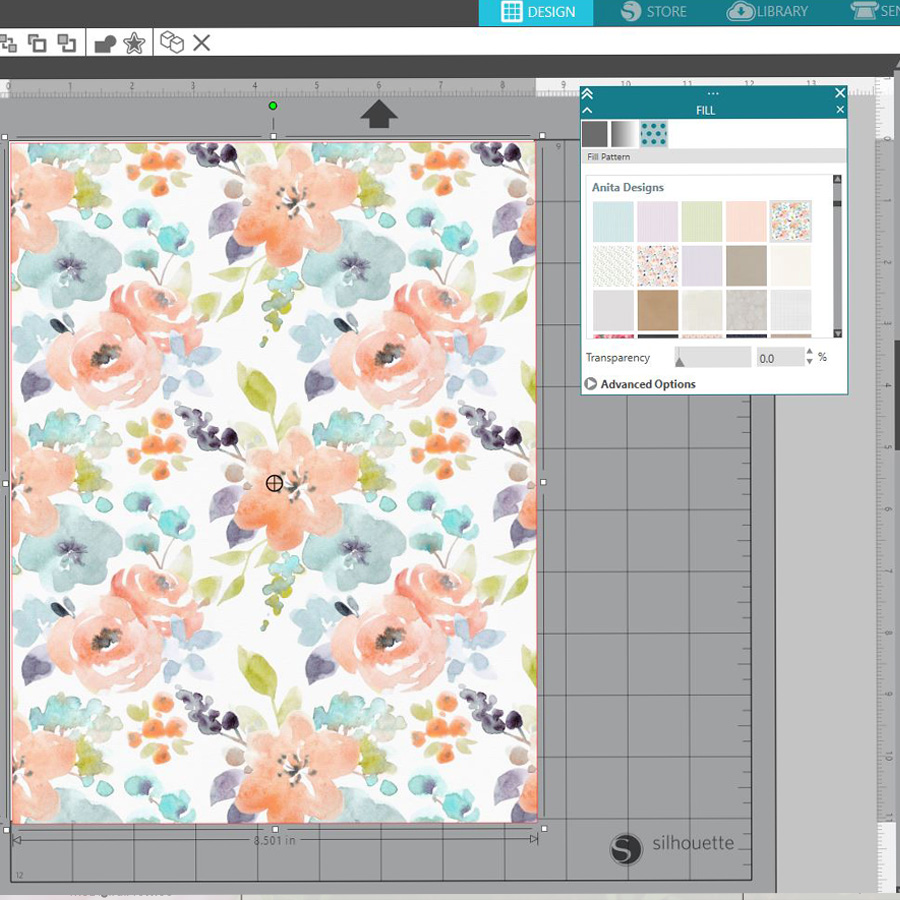
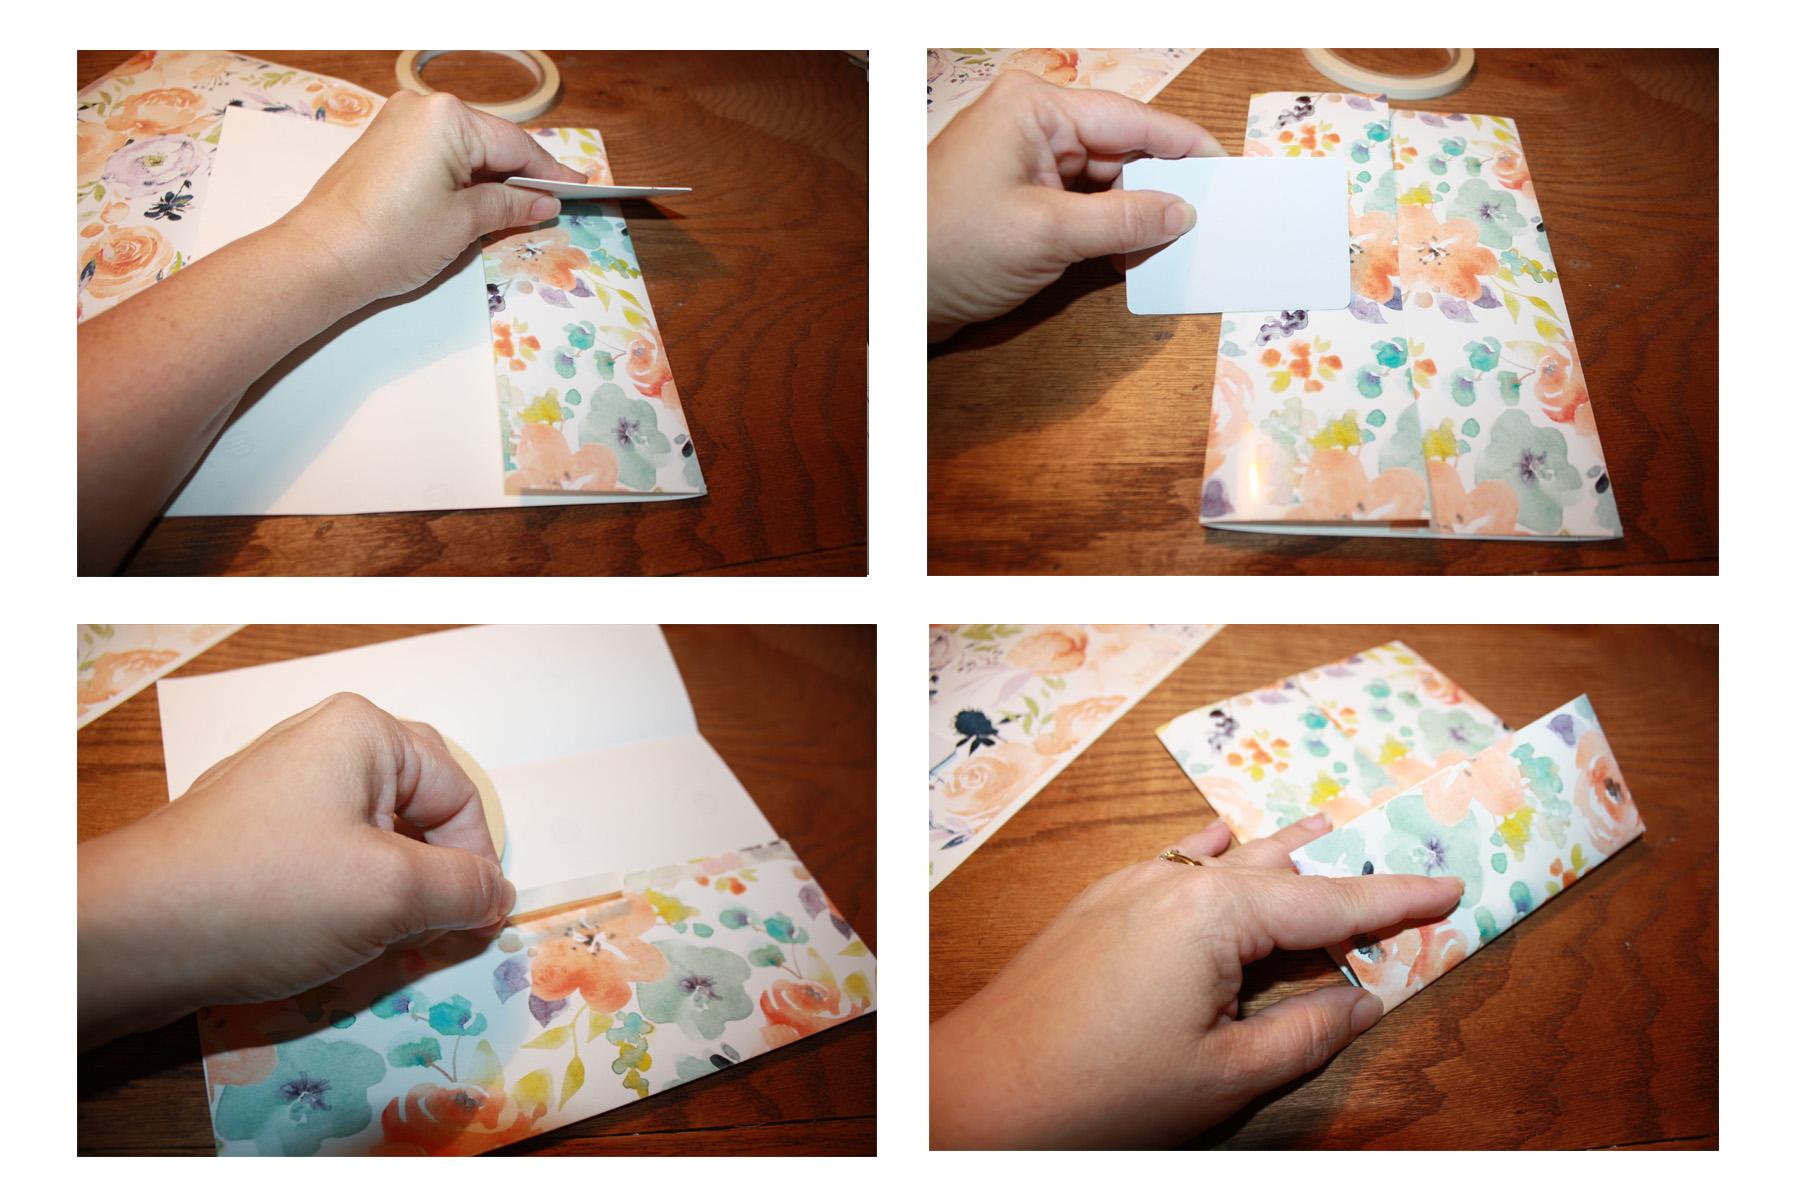
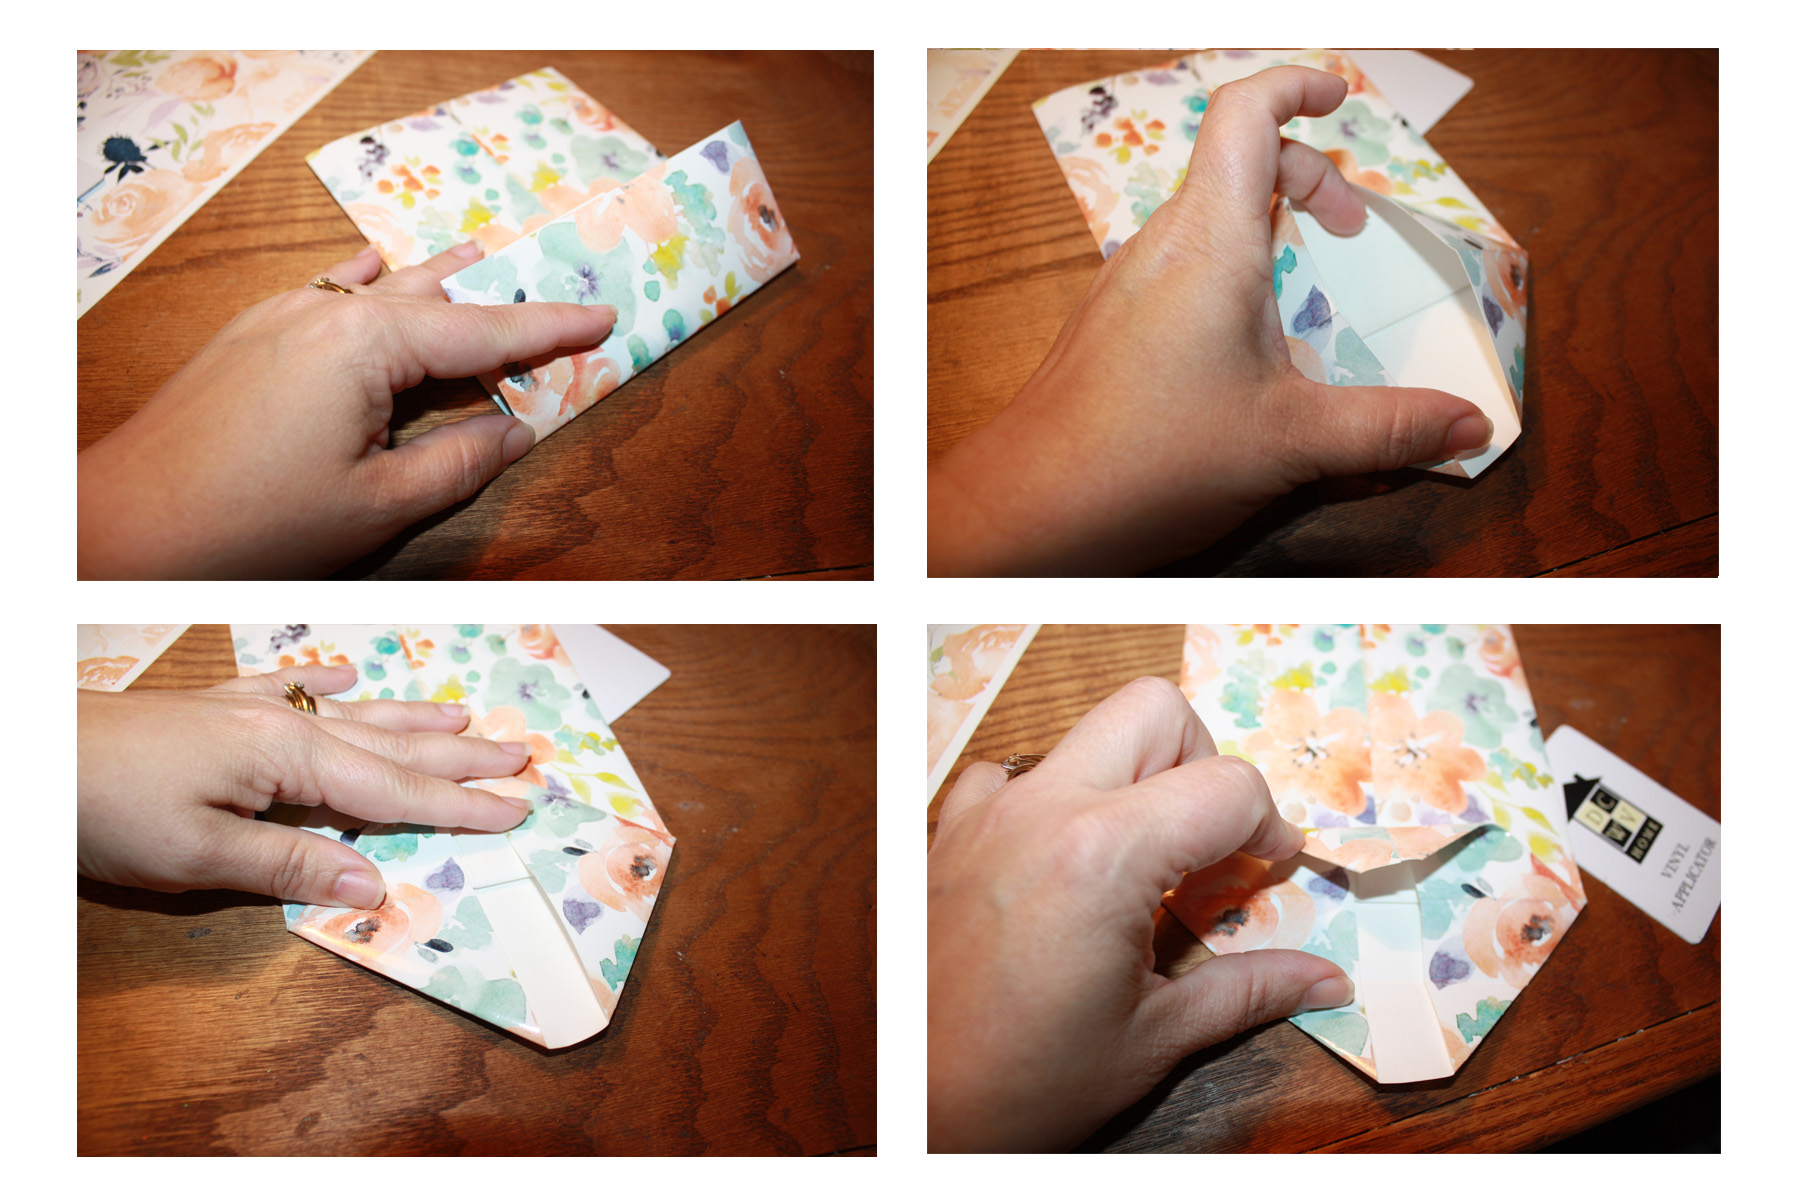
The next step is to print and cut. I used my Silhouette for this part, but I also used scissors to finish cutting through the plastic, in the end.

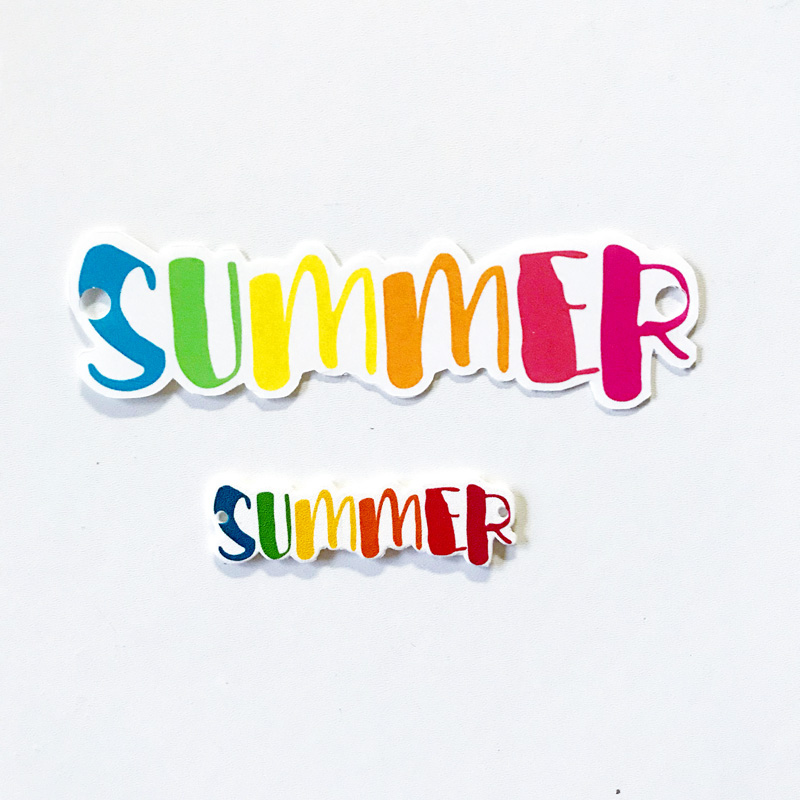
After that, it’s time to bake the pieces. Check the shrink plastic packaging for the specific instructions. I baked mine on foil at 325 degrees F for 2-3 minutes. While baking, they will shrivel up a bit and eventually go almost flat…

Immediately after pulling them out of the oven, I covered them with a sheet paper and used a piece of cardboard to push them down flat. To get the word art pieces to be rounded, however (see image above), I put them back in the oven for 20 seconds and then used a hot pad to wrap them around a pop can until they cooled.

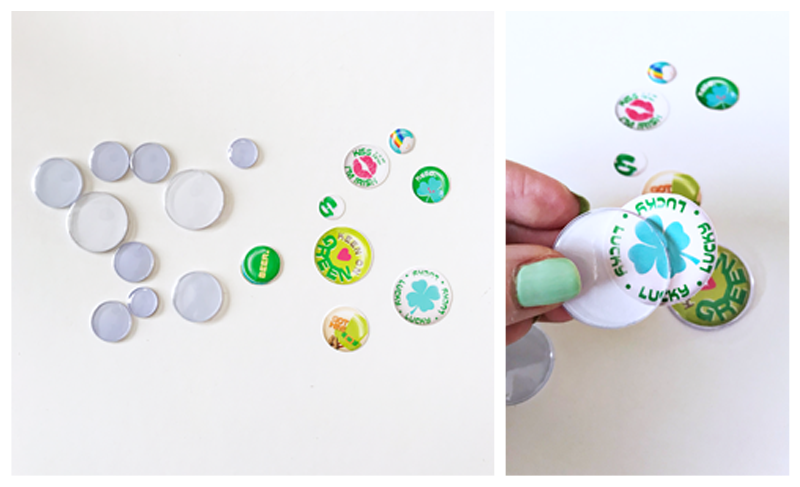
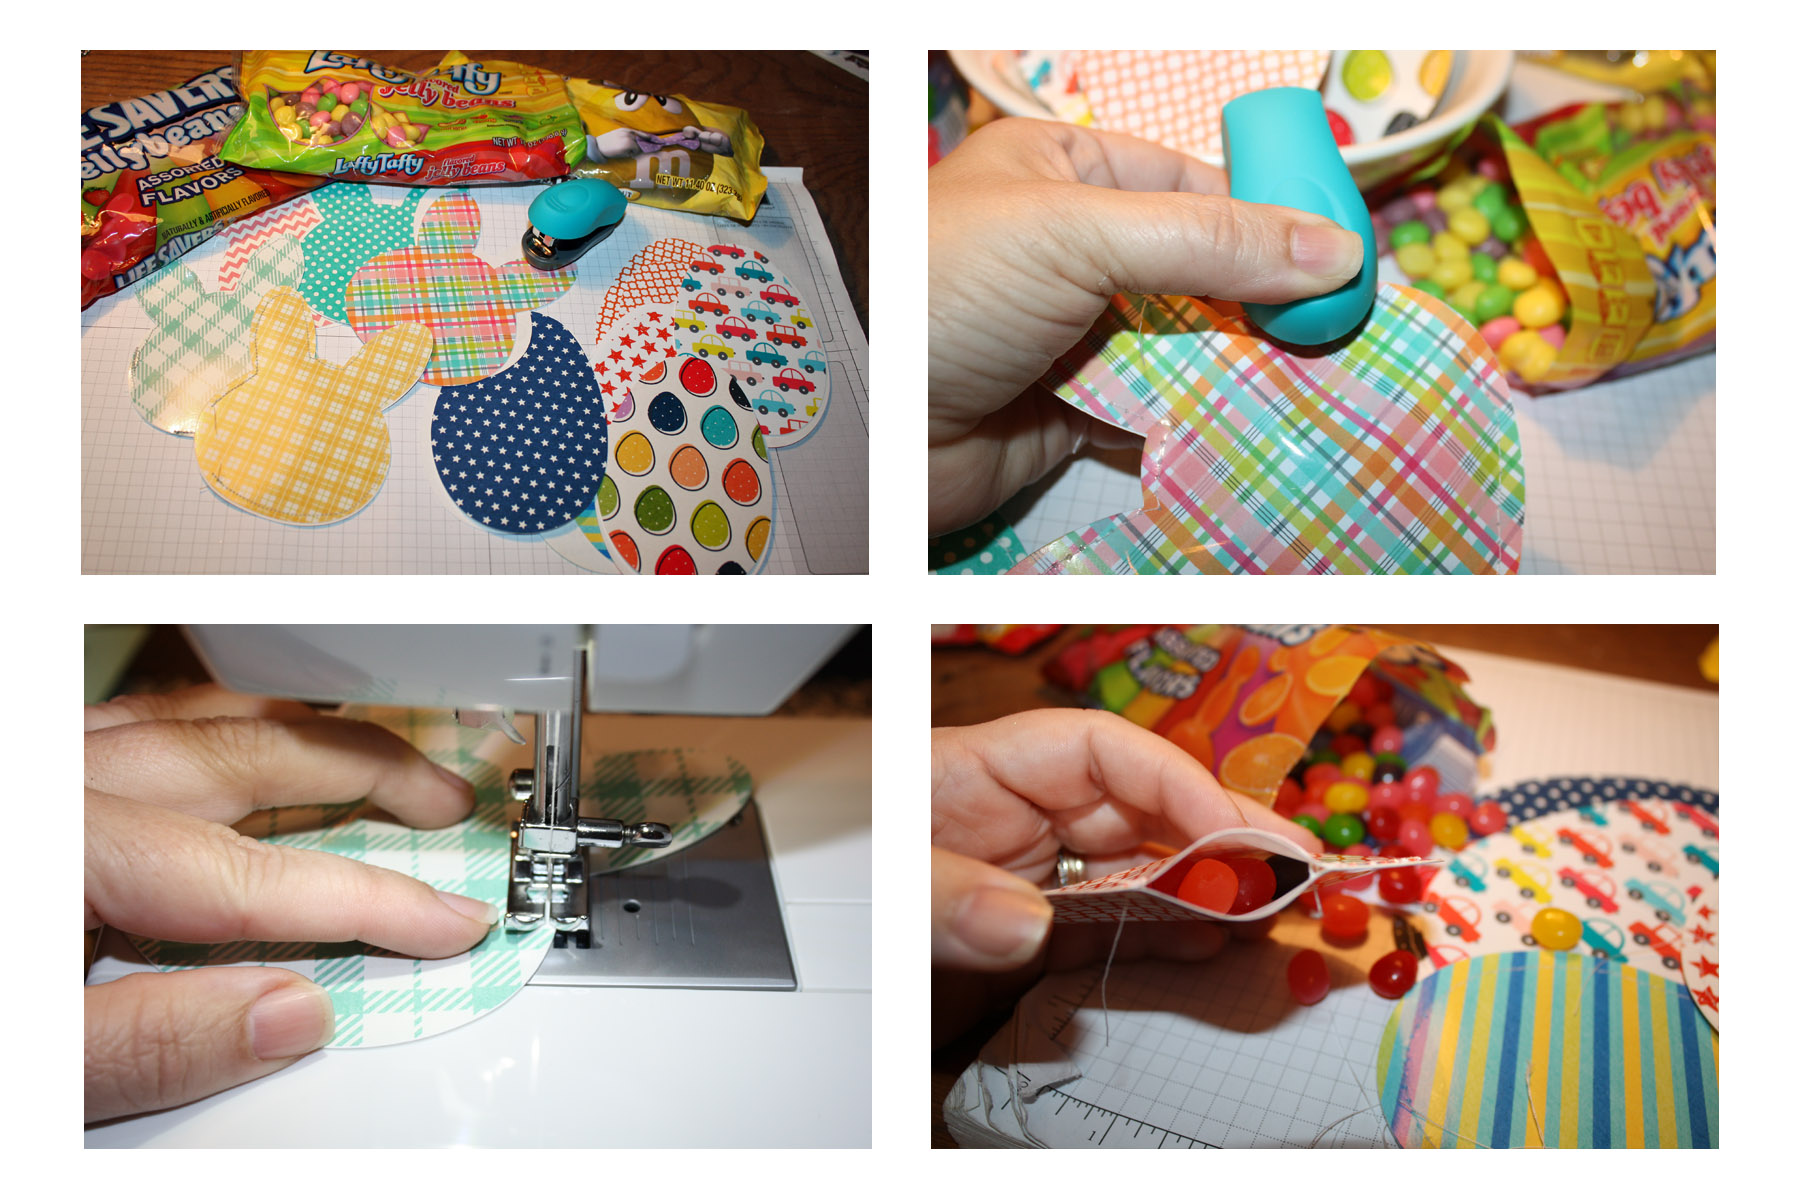
The next step is to assemble the bracelets. I attached jump rings to each side of the shapes and then threaded the cord/elastic band through the rings, using a crimp tube to complete the loop on the back of the bracelet.

I added beads to the bracelets with elastic band to help keep the band in place. I used clasps the back of the word art bracelets.

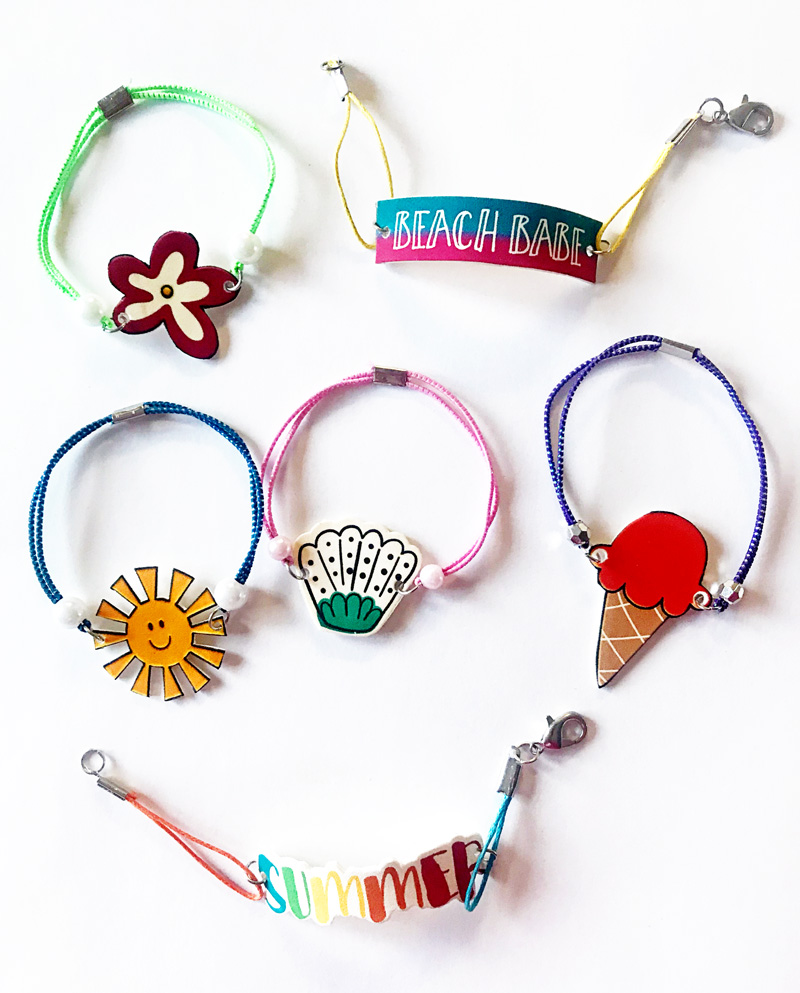
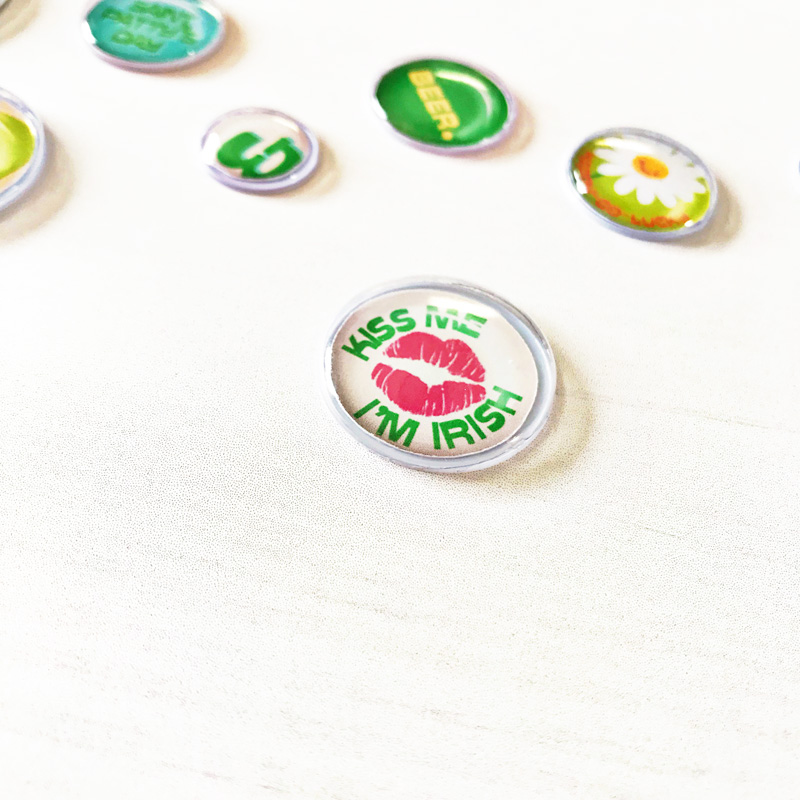
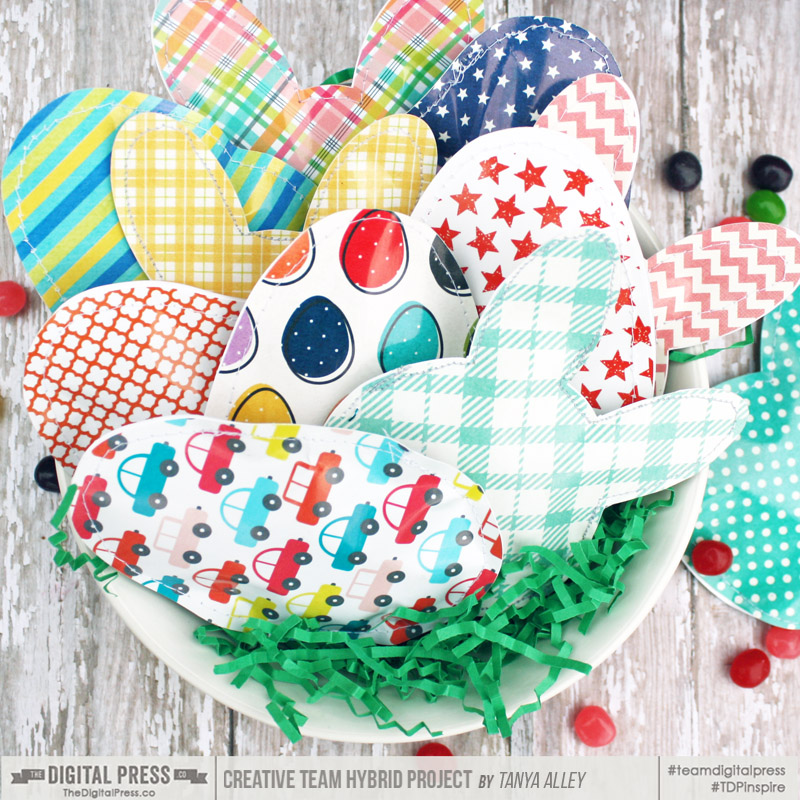
And there they are! Using your favorite elements from a digital kit, you can have a cute set of coordinating bracelets.

I hope that you have enjoyed this edition of Hybrid How-To. Don’t forget to visit the CROSSWORD SECTION in The Digital Press forum, and jump into this month’s Hybrid Challenge if you are thinking of trying this project. You can earn points toward discounts & FREEBIES! I hope that you will join in!


Kate About the Author  Kate is on the hybrid team here at The Digital Press. She lives on the Utah/Colorado border with her husband, 5 kids, 10 chickens, and a dog named Gracie. She’s a city-born girl who found she’s really a country girl at heart. She can be found outside, barefoot, and probably in her garden.

Hybrid How-To | Gifts For Mom

Hello everyone! It’s Tanya here, and I’m excited to share another edition of our Hybrid How-To series with you here on The Digital Press blog! With Mother’s Day just around the corner, I thought I’d show you how to use your digital papers and/or elements to create a couple of cute (but simple!) gifts for Mom.

I made these gifts for my husband’s Mom for Mother’s Day, but you can change up the tag to suit any occasion.

SUPPLIES NEEDED:

  1. Your favorite digital scrapbook products
  2. White cardstock
  3. Glossy photo paper (not a must, but it works best)
  4. Circle &  scallop shaped punches
  5. Hole punch
  6. Wooden skewer or popsicle stick
  7. Ribbon
  8. Pop dots
  9. Tape
  10. Scissors

For my sample project, shown below, I used the following digital products: the Lean On Me kit by Anita Designs and Kim B Designs, and Simply Mom Word Art by Kim B Designs. Here’s a look at each of those…

For this project, I used my Silhouette Studio Business Edition software. You can use any photo editing software, however.  The first step is to draw out a 8 1/2 x 11 triangle.  To do this, I used the draw tools to the right of the work space…

Next, I filled the shape with a digital paper I choose by opening the fill pattern on the right…

The next step is to print it out. I have a HP Office Jet and it prints really nicely… but I’ve found that to get the best print possible, you need to make sure when you change between different types of paper that you go into your printer preferences and change the ‘paper type’ there, as well. I also turned ‘borderless’ to ON…

Now, the fun part — creating the little gift bag! Fold as pictured below. I used a flat card (like a credit card) to get good creases. When making your second fold, overlap just a little and use double-sided tape to hold it together. Then fold the bottom up, as shown…

Now, we’ll open the bottom of the bag as shown… and flatten it down… and then fold the top down…

We will do the same to the opposite side by folding the bottom up (I taped with scotch tape). Now, we’ll stick our hand into the bag to open it up. At this point, we’ll want to fold a small portion over and punch holes for the ribbon. Of course we’ll be filling the gift bag with Mom’s favorite treats before closing with the ribbon…

Here is a look at the finished gift bag… isn’t it cute?! Instructions for the tag can be found below, as well. 😉


Next, the cute matching tag!

For the tag, I used my Silhouette Studio software again… but just as with the bag, you can use any photo editing software and a couple of punches… no cutting machine necessary. I created several choices, including the tag that you saw on my gift bag, above… and also, a cute plant flag…

Like I mentioned, above… even though I used my Silhouette to cut out my tags, it’s not a must. You can see below how I also used a couple of hand-held punches…

Next, we will take the bamboo skewer and a couple of the printed pieces… and make a plant flag with all of it. The bamboo skewer will likely be too long, so we will need to trim it with a pair of scissors. We’ll also add a couple of pop dots to the back of the top layer of the flag (I also used a small piece of tape to secure the skewer down). Now we attach to the scalloped circle to create a pretty plant flag for Mom…

Here is a look at the finished project. Just a little touch to let Mom know we went the extra mile to make her feel special…

Aren’t they so adorable?

I hope that you have enjoyed this edition of Hybrid How-To. Don’t forget to visit the CROSSWORD SECTION in The Digital Press forum, and jump into this month’s Hybrid Challenge if you are thinking of trying this project. You can earn points toward discounts & FREEBIES! I hope that you will join in!


Tanya

About the Author  Tanya is a part of the hybrid team here at The Digital Press. She has been hybrid crafting for at least 16 years now, and loves creating and sharing those creations with others. Her all-time favorite tool is her Silhouette Cameo. She has been married for 29 years to her high school sweetheart, Richard and has two sons: Chris, 26 and Chance, 22. She also enjoys crocheting, photography and woodworking.

Hybrid How-To| Creating Interactive Features

Hi everyone, and welcome to another edition of our Hybrid How-To series here on The Digital Press blog!  Today, I’m here to show you how to create interactive features — such as flaps and pockets — to add to your hybrid and paper projects. It’s a really fun way to add more photos and journaling into your projects!

I think it makes a project more interesting and fun to add interactive pages, which give the possibility of finding some fun surprises by flipping open the pages within our  notebook — surprises like hiding journaling notes and even some photos under flaps and in pockets.

For my project today, I will be using one of TDP’s Monthly Chronicles digital collections — Bloom — shown here…

I’m going to be adding some of these interactive features to my own Traveler’s Notebook project.

Sometimes I want to work on smaller projects like this, because they’re very fun and not as time consuming. A Traveler’s Notebook is a great way to document things in a smaller format. We can make our spreads one day at a time, without being  overwhelmed about finishing a larger 12×12 page or even a full mini album. It’s also a good way to document a weekend, a trip, a single date or event, or any other small moment in our lives.

The first interactive feature I wanted to add was a tiered page, with multiple layers/flaps for the viewer to open. This is an easy technique that you’ll master in no time at all!

The supplies you will need are listed here:

  • digital printed papers
  • your favorite embellishments
  • your photos
  • trim and score board
  • double-sided tape or glue
  • a pencil

My Traveler’s Notebook is a standard size, measuring 4.33″ x 8.25″ — but you can apply this tiered page technique to any size page/album or any kind of journal, simply by adapting the measurements to fit your own project’s “canvas”. No matter what size you are creating, keep in mind that you will have to trim the paper slightly smaller  than your journal, for a nice border finish and to prevent your book from becoming too bulky.

First, I cut three pieces of different patterned paper, measuring as follows…

  • 3 1/4″ x 4″
  • 4 1/2″ x 4″
  • 5 1/2″ x 4″

Once my papers were cut, I folded them at 1/4″ from the top, as shown in the photo above.

Next, I glued the folded top 1/4″ of each of the 3 papers down onto my main notebook page, in 3 tiers, as shown here…

Each paper was glued just below the one above it. Here’s a look at the second level…

And finally, the lowest level (and what appears underneath it)…

Tips & Tricks:

  • Have your paper widths cut evenly so they will all line up perfectly.
  • Keep the paper that lines your page slightly smaller for a nice border finish and to prevent your book from becoming too bulky.
  • Make sure your fold lines are nice and crisp for a sleek finish.
  • For a softer edges, you can round the corners.
  • Use different contrasting papers for each tier, which really adds to the effect of this technique.

Here is a look at my final spread; you can see all 3 layers nicely on the left side…


The second interactive feature that I want to show you today is a fold-out page, as you can see in the following photo…

For this page, I chose my paper and cut it so that it measured 7-1/2″ x 8-1/8″. Then, I folded it at 3-1/2″ from the right side (as shown, above).

As you can see, the flap allowed me to insert three photos on the far right, and still have space for a lot of journaling in the middle section of my notebook.

It’s a really quick/easy technique that makes the page more fun and interactive!


Finally, the last interactive feature I want to show you is the addition of a pocket on one of the fold-out pages, as shown here…

For this pocket, I cut a piece of paper, measuring slightly smaller than my notebook page’s size (mine ended up being 4″ x 3-1/2″).

Then, I folded each side at 1/4″ in order to glue my pocket on my page…

Once the paper was glued down to create the pocket, I could start sliding items inside (like the 2 tags I created, shown here)…

Then I glued some photos onto the tags, and added tag strings, to make the process of pulling the tags in/out of the pocket really fun…

Here’s another look at the finished tags, out of the pocket…

Aren’t these techniques fun? And they’re really very easy, as well!

I hope that you have enjoyed this edition of Hybrid How-To! I had a great time making this project.

If you’re feeling inspired and you’d like to give this a try, too, don’t forget that you can earn challenge points at TDP! Come visit the CROSSWORD SECTION in The Digital Press forum, and you’ll find this month’s Hybrid Challenge thread (for each month’s Hybrid Challenge at TDP, you get to choose one of the month’s “Hybrid How-To” tutorial posts from here on the blog and make your own version). You’ll see how fun it is! Give it a shot, and share your final results with us! We can’t wait to see what you come up with.

Have a great weekend you guys, and happy scrapping!


About the Author  Andrea Albuquerque is member of the hybrid creative team here at Digital Press. Andrea has been a scrapper since 2010 and a photographer since 2012… and although she adores the flexibility and creativity of digital, she can’t resist playing with paper, paint, and embellishments. Hybrid scrapping is the perfect medium for her! She lives in Brazil with her hubby.

Hybrid How-To | Memory Flip Calendars

Hi everyone! This is Sabrina from the hybrid creative team at The Digital Press, and I’m here on the blog with you today to share a really fun and easy hybrid project that you can create in order to showcase some of your favorite photos — a memory flip calendar!

I think you’ll really love this project. Let’s get started!

To begin this project, I first gathered my favorite photos from 2017. I went with “weekly favorites” in order to correspond with the numbers on each of my date tags.

Once I had my digital photos collected and ready… I selected some digital products to use. Here’s a look at just a few of the products I chose to use (all of them came from the Sahin Designs shop at TDP)…

The main product I used, which became the foundation for my entire project, was the Equinox Tags (see above, upper left image).

After compiling my photos and digital products, I was ready to begin! The first step was to open the Equinox Tags in my photo-editing software; I use Photoshop Elements (PSE).

I decided to change the text on the tag from “day” to “week” (because my calendar was going to be a weekly calendar, instead of a daily calendar). I did this by covering the word “day” with a white piece of the tag to cover it up and then typing in the word “week” above it.

Here’s a look at the “before” tag (with the word “day” …and I’m in the process of getting ready to cover it with a rectangle of white tag)…

…and here’s where I covered it with the new word, “week”…

After getting the calendar date tags ready, as shown above… I began using the same tag shape as a clipping mask to shape my photos (in PSE, you place the photo in the layer above the tag… and use Ctrl-G to clip it; in Photoshop (PS) you do the same thing but the keystroke command is Ctrl-Alt-G).

As you see in this screenshot, my photo took on the same shape as the tag I clipped it to… 

Next came the fun part! …printing and putting everything together. 🙂

You can either use the print-&-cut feature of a paper cutting machine like a Silhouette… or… you can print and then fussy-cut by hand with scissors or a paper trimmer. Whatever works best for you!

Once I had everything printed & cut out, I attached my tags to single binder rings hanging from empty frames, as shown here…


Once I had it assembled, I found that it actually worked better if I trimmed off an additional 1/4-inch from each tag — to make the flipping of the pages easier once they were on the frame.

Here are a few more shots of the calendar and its different pages…

Isn’t that fun? A flip calendar to remember the best moments of the year!

I loved how this project came out… and I hope you’ll try making a fun memory flip calendar of your own, using your digital supplies! If you do… please share your projects with me — I’d love to see what you come up with! If you’re participating in The Digital Press’s challenge system for April 2018, don’t forget to visit the CROSSWORD SECTION in TDP’s forum to get the details about this month’s Hybrid Challenge — because you can earn challenge points if you give this project a try (earning you points toward discounts & FREEBIES)!


00 Headshot
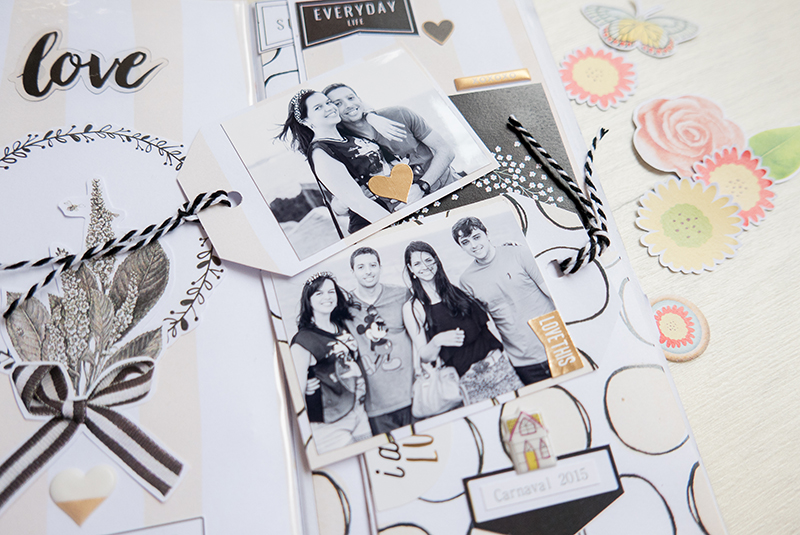
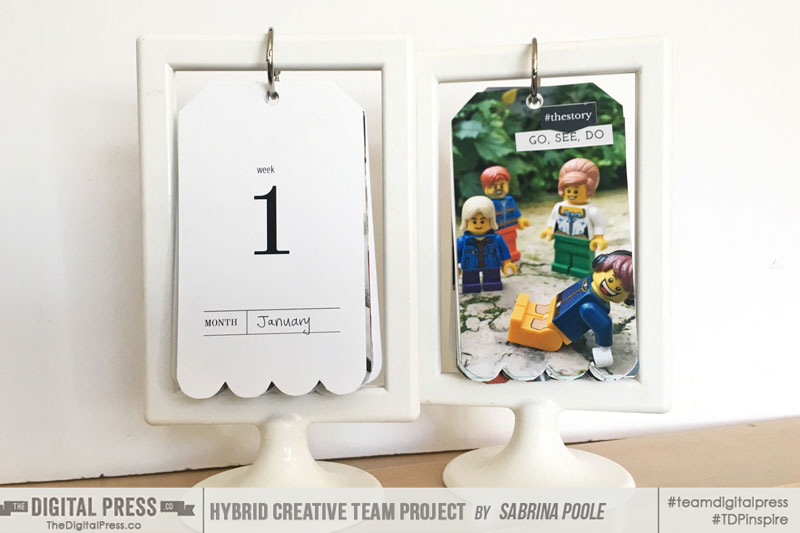
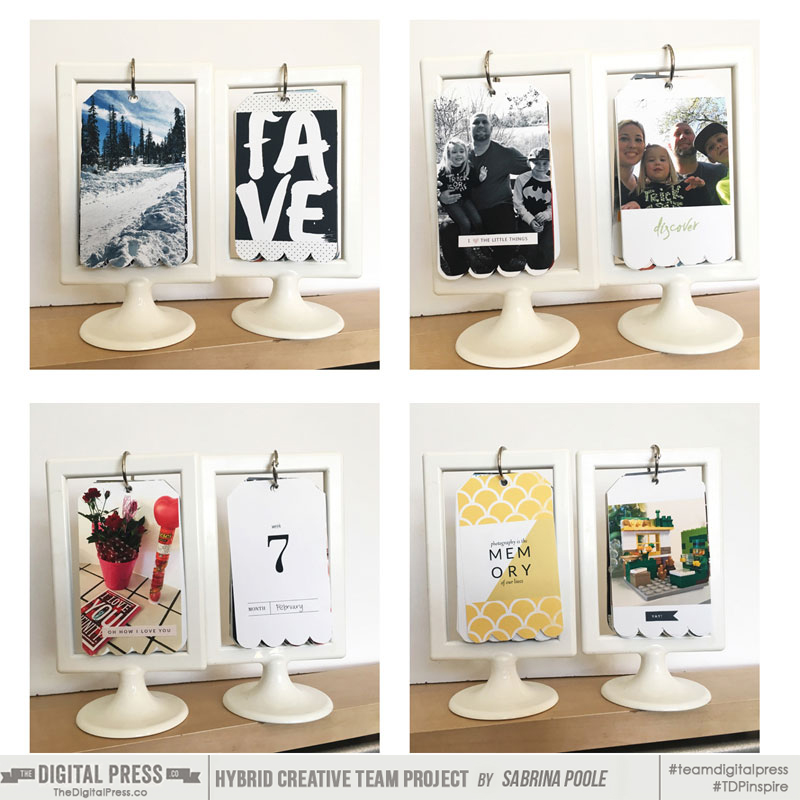
About the Author  Sabrina is an avid documenter of life — herself, her children, her hubby, and her everyday life. There is beauty in the ordinary moments, and they are what she loves to scrap. She is also always on the hunt for a quiet, peaceful moment… and she usually spends it reading or playing at her crafty desk.

Hybrid How-To | Making Flair Buttons

Hi, everyone! It’s Kate here, and I’m so stoked to present another edition of our Hybrid How-To series here on The Digital Press blog! Today, I’ll be sharing my process for making hybrid flair — a quick and easy trick I’ve been using for a long time now.

I love digital flair so much, but it doesn’t always transfer very well to the hybrid world. A couple of years ago, I started using googly eyes to give the printed digital flair some dimension and I LOVED the result. The best part of hybrid flair? You can make it any size you want (because googly eyes come in every size imaginable!)… and additionally, they’re flatter than real flair buttons, which makes it much easier to store your pages.

Supplies Needed:

  • Digital flair images of your choice (I used Get Lucky by creashens)
  • Photo editing software, like Photoshop (PS) or Photoshop Elements (PSE). Cutting machine software also works for this project; you just need to be able to re-size.
  • Photo paper or cardstock; photo paper makes it more vibrant.
  • Googly eyes
  • Straight blade or X-ACTO knife.
  • Scissors or cutting machine

Instructions:

1. The first step is to cut a slit along the edge of the googly eyes. I used the corner of a straight blade to punch through where the clear plastic meets the backing. Then I held the blade still while moving the eye around it in a circle, until I had cut about half-way around the plastic. Basically, you just need a slit big enough to pop the black part out and pop the printed flair in…

2. Next, measure the googly eyes and size your flair in your photo-editing software program accordingly. Then, print and cut your flair.

3. Now, just pop the flair into the plastic. You can secure the slit with a little bit of hot glue if you want to. I used to do this, but I’ve found over the years that it’s not really necessary because there’s always a little lip all the way around that holds the paper in place.

Here’s a close-up look at my finished “googly-eye” flair buttons…

Easy-peasy hybrid flair with dimension!

And to think that my kids think I keep googly eyes around for their projects. Psh. No. I keep them around for my projects. 🙂

I hope you’ll give this project a try! And please share your projects with me — I’d love to see what you make with your new flair. If you’re participating in The Digital Press’s challenge system for March 2018, don’t forget to visit the CROSSWORD SECTION in TDP’s forum to get the details about this month’s Hybrid Challenge — because you can earn challenge points if you give this project a try (you can earn points toward discounts & FREEBIES)!


Kate About the Author  Kate is on the hybrid team here at The Digital Press. She lives on the Utah/Colorado border with her husband, 5 kids, 10 chickens, and a dog named Gracie. She’s a city-born girl who found she’s really a country girl at heart. She can be found outside, barefoot, and probably in her garden.

Hybrid How-To | Easter Treats

Hello everyone! It’s Tanya here, and I’m excited to share another edition of Hybrid How-To with you here on The Digital Press blog! With Easter just around the corner, I thought I’d show you how to use your digital papers and or elements to create some really fun Easter treats.

This is a great project because you can truly use just about any of your favorite digital products to create these treats. I used soft papers for the girls’ Easter bunny and brighter colors for the boys’ Easter egg.

SUPPLIES NEEDED:

  1. Your favorite digital scrapbooking products
  2. White photo paper
  3. Printer (or, you can also have it printed at any copy shop)
  4. Jelly beans, M&M’s, or any other small candies
  5. Scissors
  6. Stapler or sewing machine

Here is a quick look at the kits I used for my treats…

[ (1) Spring Days (2) One Kit Two Ways | Boys Rule (3) This Life | April (4) Flowers After The Rain (5) My Day In White | Boy (6) This Life|March ]

For this project, I used my Silhouette Studio Business Edition software. You can use any photo editing software, however. The first step is to draw out your Easter bunny head and your Easter Egg. To do this I used the draw tools to the right of the work space. You can also find similar patterns by googling “outline Easter egg shape” or “outline Easter bunny head”…

Open the paint palette on the right side of the page, and then choose the little box with the polka dots to open your patterned papers. To fill the pattern, click on the bunny or egg image and then click on the paper you want…

Page Setup  —  I usually do this step first thing; it’s just habit now. But if you haven’t already turned on your registration marks (if you are choosing to cut with your Silhouette machine), you will need to do that now. Open the Page Setup menu and choose the third icon (see screenshot, below). Next, choose the machine you are using and then slide the Inset all the way to the left. This gives you the most work space for cutting as possible…

If you choose to send the pages through your printer, you will want to make sure that your cut lines are turned on. To do this go into the SEND menu, and if it doesn’t show up with red cut lines on, you will need to highlight everything and choose the cut edge option (this will turn on the cut lines)….

You are now ready to move on to the next step, which is to print it out. Once you print it, you can either use a pair of scissors and hand cut it… or… use your cutting machine to cut them out. Honestly, it is probably just as fast for a simple project like this to just cut them out by hand… 😉

Next, you will take two of the same-shaped pieces and put them back to back. Make sure that the printed sides are facing outward. You can either staple them all the way around… or… sew them together. Either way, make sure to leave a small space to fill the pouches with your candy of choice.

For myself, I love the stitched look and have a sewing machine just for hybrid projects. This was my first time using it… and about halfway through closing the little opening for the candy, it stopped working. UGH! …it’s always something, isn’t it?! 😉 I guess this means I will have to watch the “How-To” disk the sewing maching came with.

Here’s a look at one finished egg and one finished bunny. Aren’t these just the cutest things? You can make them for your co-workers, your child’s Easter parties, etc.

You could even make a bunch and display them together (as shown here) and use them as party favors, etc…

I hope that you have enjoyed this edition of Hybrid How-To, and that you will give this easy project a try (and/or come up with a shape of your own for these Easter treats!).

If you’re participating in The Digital Press’s challenge system for March 2018, don’t forget to visit the CROSSWORD SECTION in TDP’s forum to get the details about this month’s Hybrid Challenge — because you can earn challenge points if you give this project a try (you can earn points toward discounts & FREEBIES)! I hope that you will join in!


Tanya

About the Author  Tanya is a part of the hybrid team here at The Digital Press. She has been hybrid crafting for at least 15 years now, and loves creating and sharing those creations with others. Her all-time favorite tool is her Silhouette Cameo. She has been married for 29 years to her high school sweetheart, Richard and has two sons: Chris, 26 and Chance, 22. She also enjoys crocheting, photography and woodworking.