Category: Hybrid Crafting

Hybrid How-To | DIY Hybrid Kids’ Games

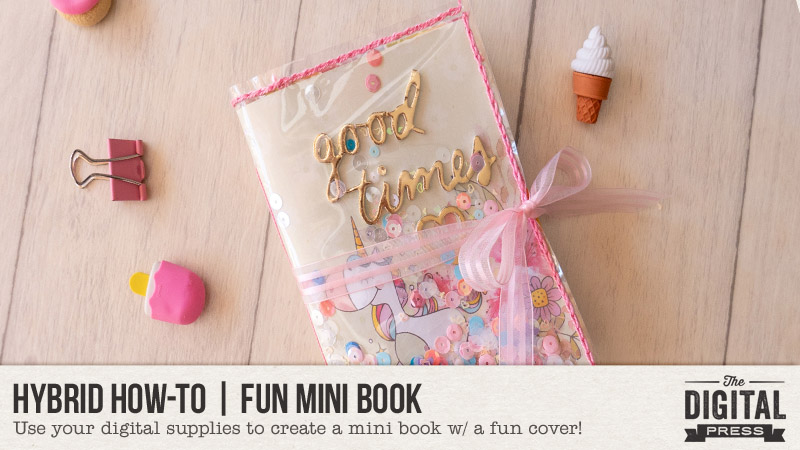
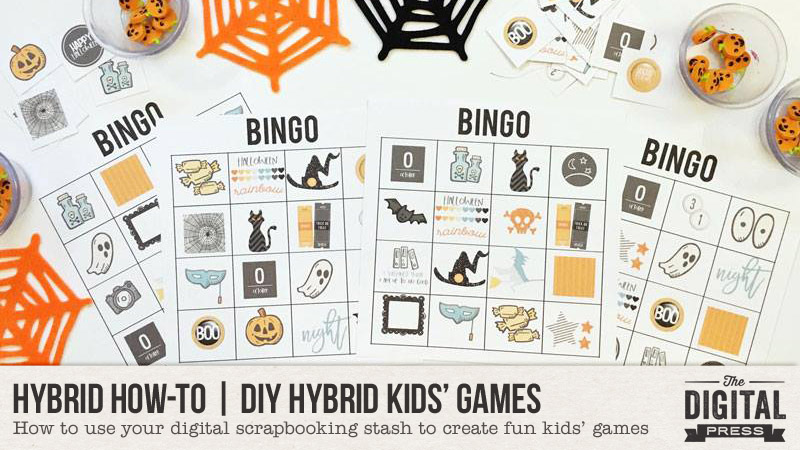
Hello, and welcome to another edition of our always-popular Hybrid How-To series here on The Digital Press blog!

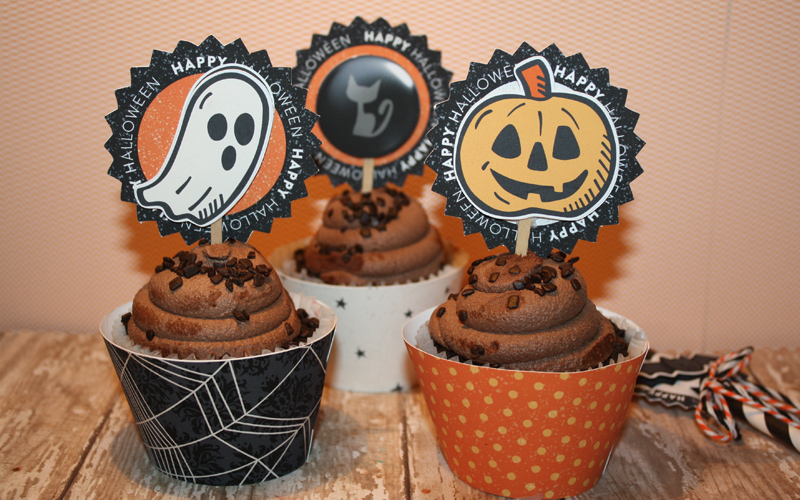
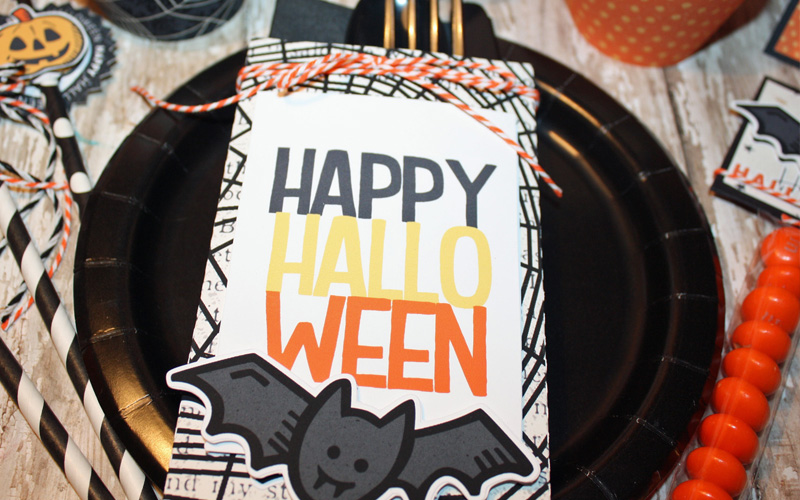
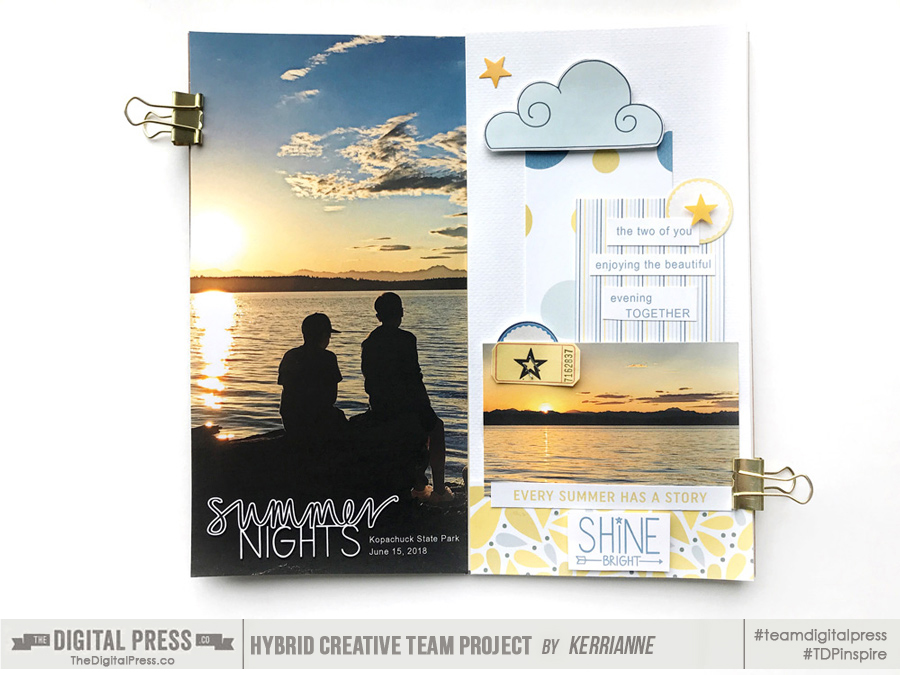
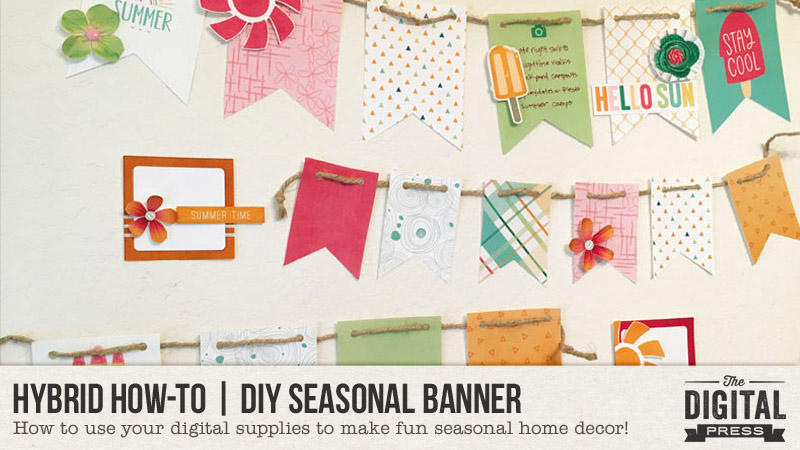
I’m here today to show you how to use your favorite digital supplies to create kids’ games…such as the fun BINGO game you see pictured below.

This project is soooo simple, and really just requires a BINGO template and your favorite digital kits to create.

Let’s get started!

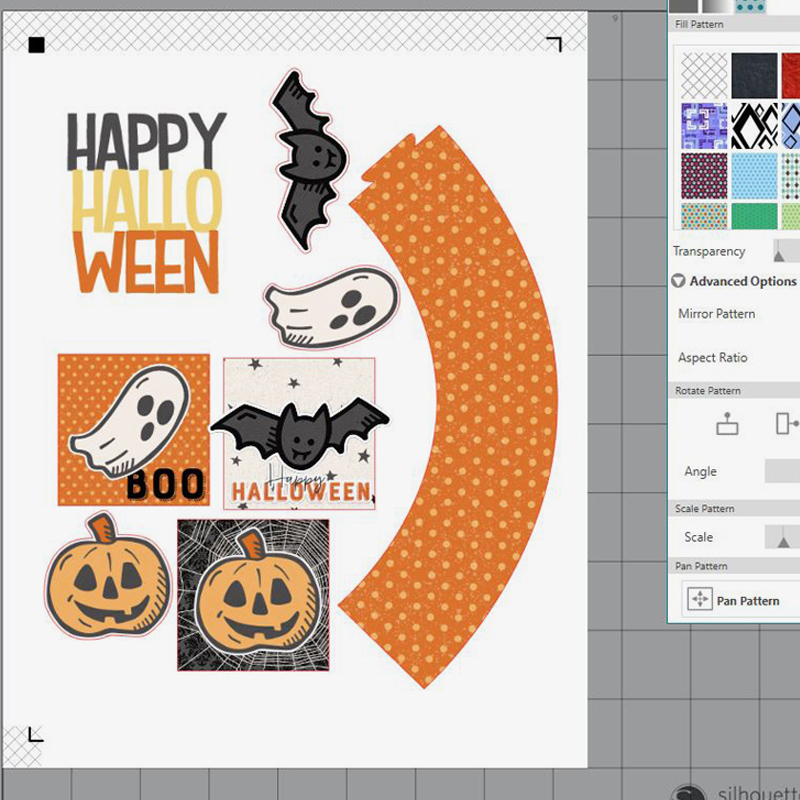
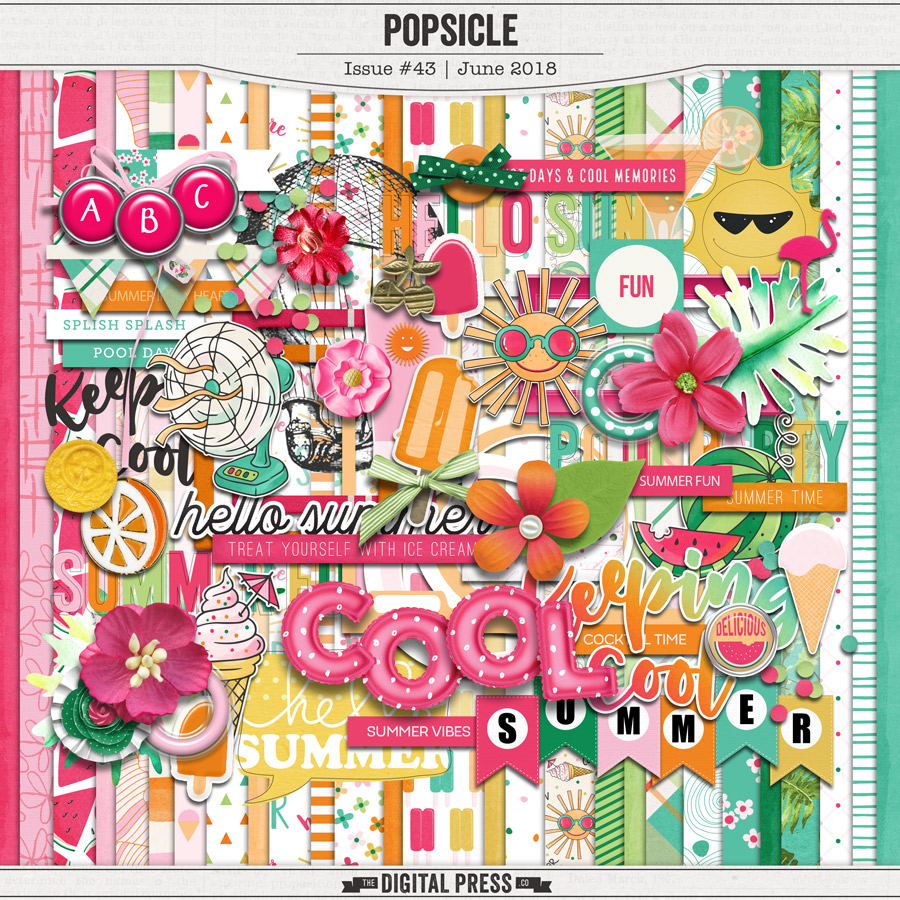
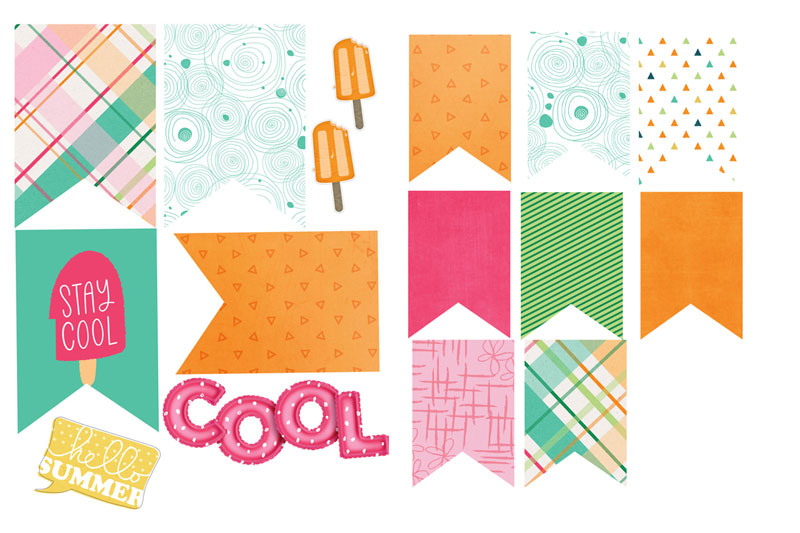
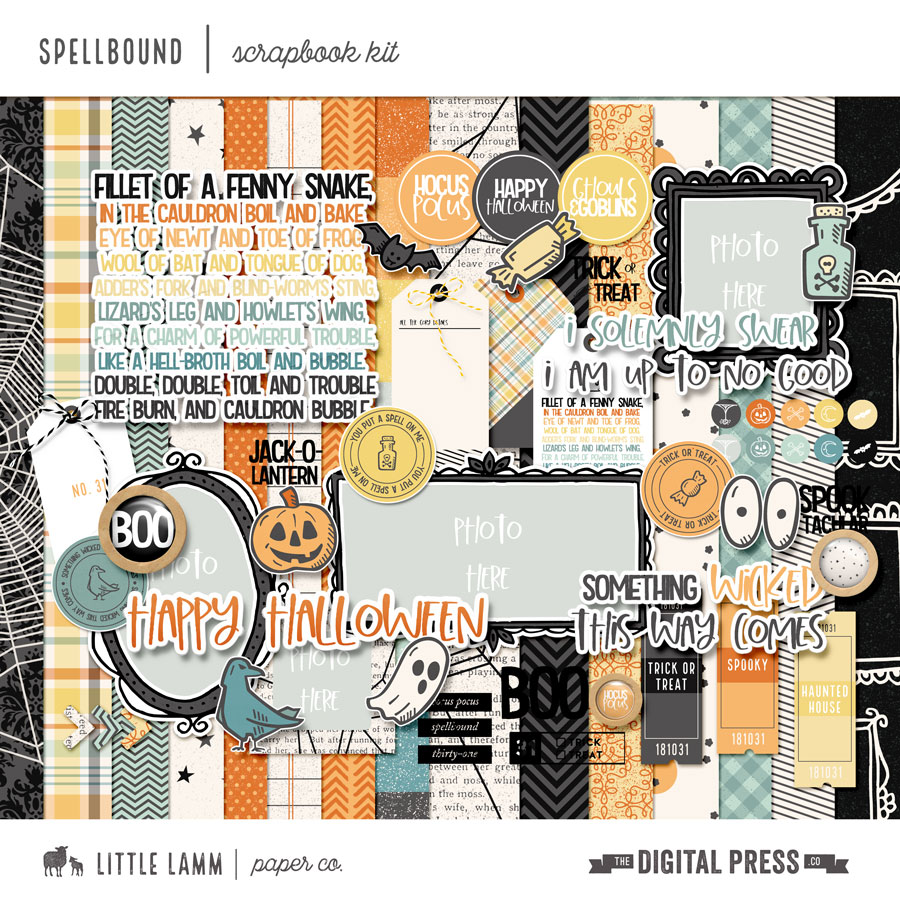
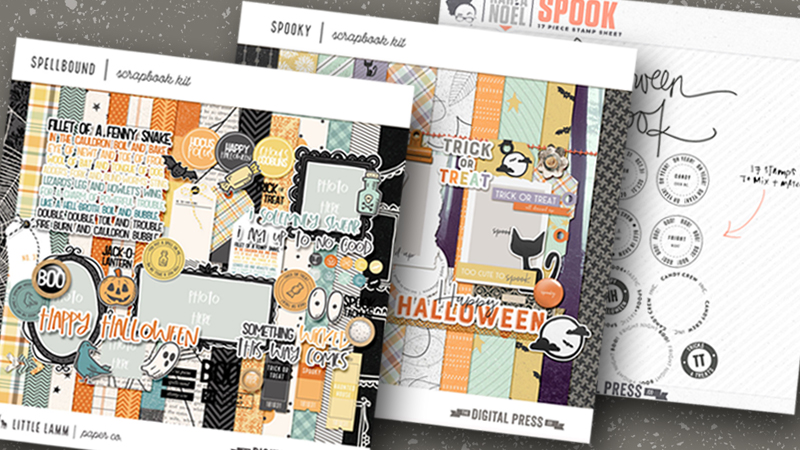
The first thing you’ll want to do is decide on a theme for your game cards, if desired, and choose a digital kit (or a selection of kits) that contain images that you’d like to use. For my Halloween-themed BINGO cards, I chose an awesome new collection called Spellbound that was designed by Little Lamm Paper Co., shown here…

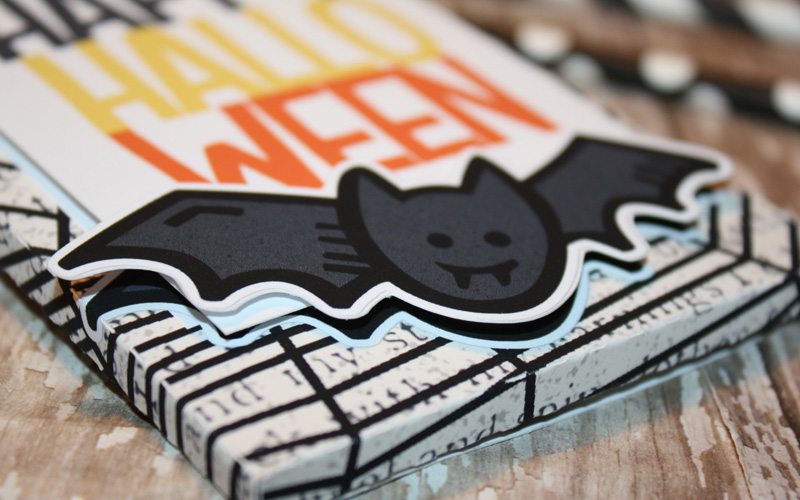
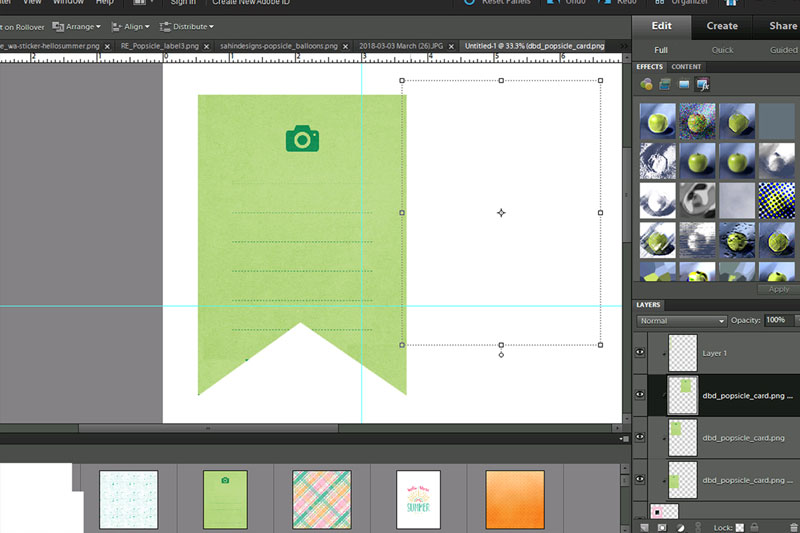
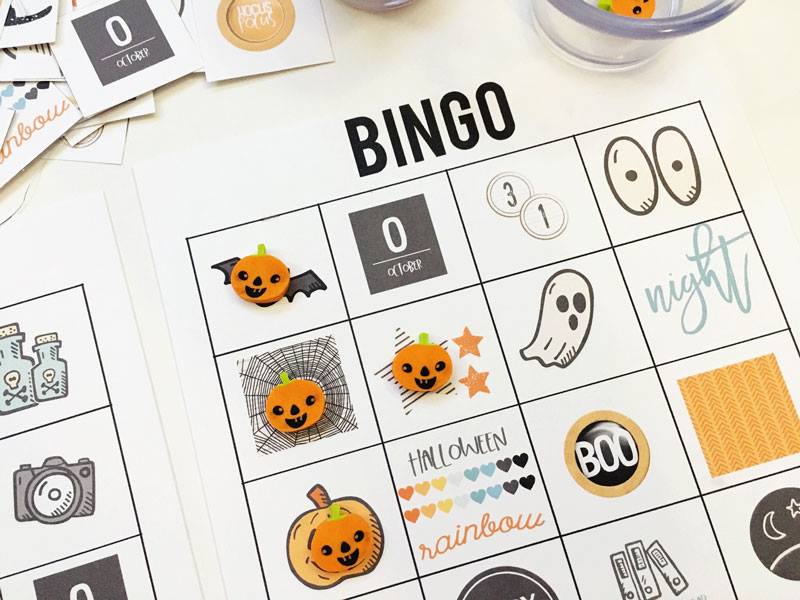
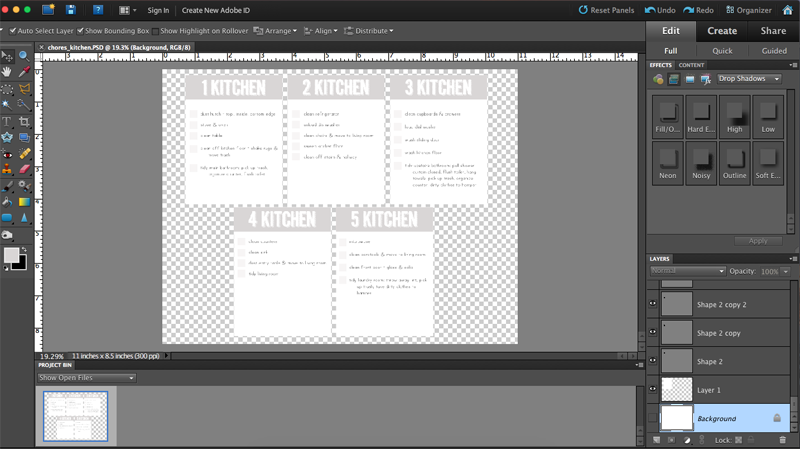
I used the images contained within this collection to get started on filling up my BINGO card. I chose to make 6 different cards, and in doing so I placed the different images/stickers (like the tickets, candy, bat, ghost, potion and jack-o-lantern) into different spots on each card, filling all of the squares of a simple BINGO template I’d created (one of which I’ve shown here)…

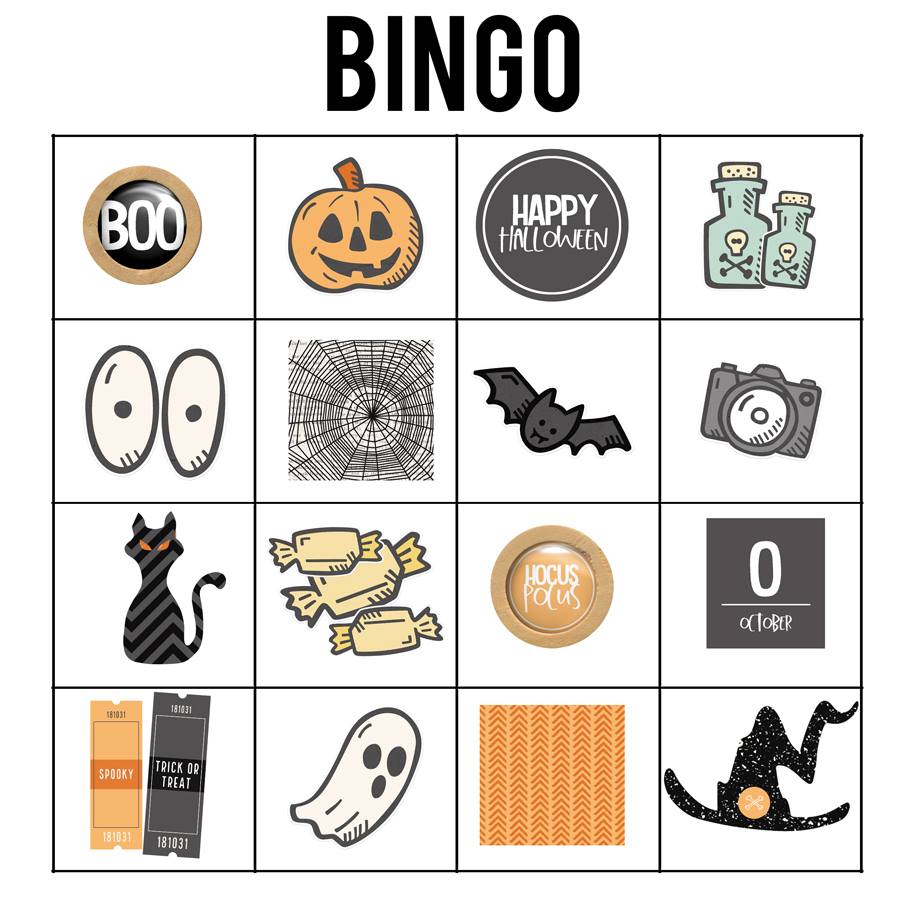
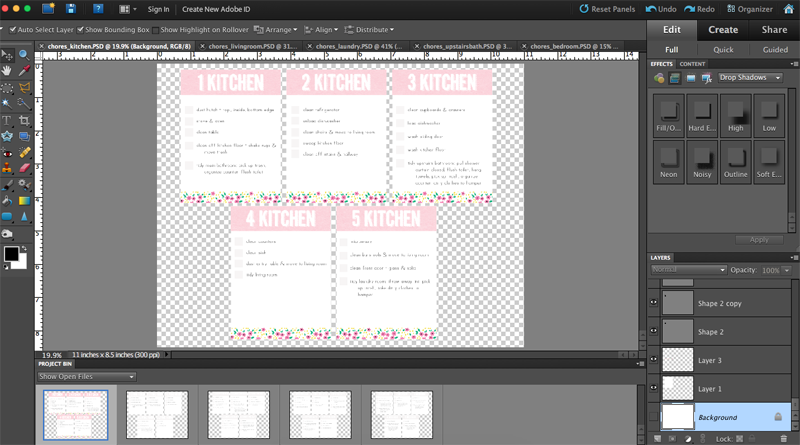
When I found that I needed more images than the stickers I found in the kit, I decided to look at using the word strips and stamps, as well. I liked the tickets, the two flairs, and a circle with “Happy Halloween” printed on it… so I used those, as well. I also decided to use two ‘swatches’ of paper to represent a spider web and the color orange.

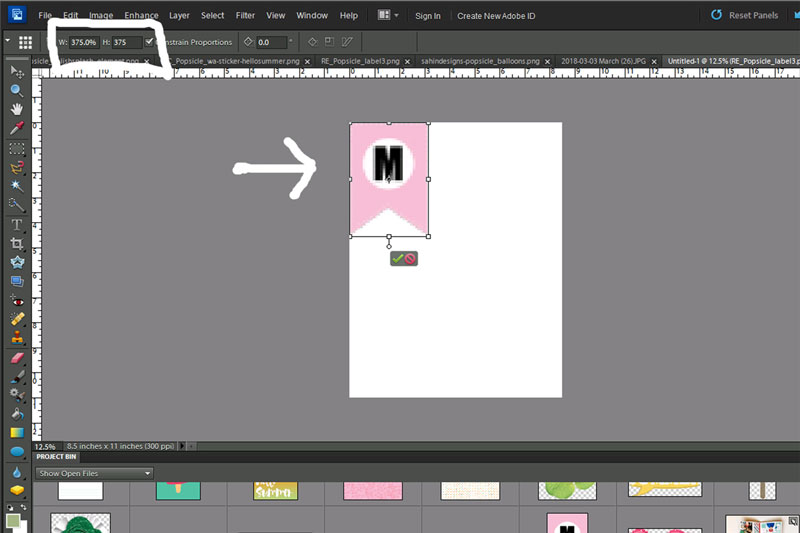
I also used a dingbat font (you can find some really great dingbat fonts for FREE on the internet) for shapes such as the cute black cat you see in the 3rd row of the card shown above. It started out as a plain black font, however… and I wanted to jazz it up a bit. In this next screenshot, you can see I found dingbat font shape I wanted — a cat — and then I simplified the layer and clipped a paper to it (the black/grey chevron pattern) from the Spellbound kit I was using…

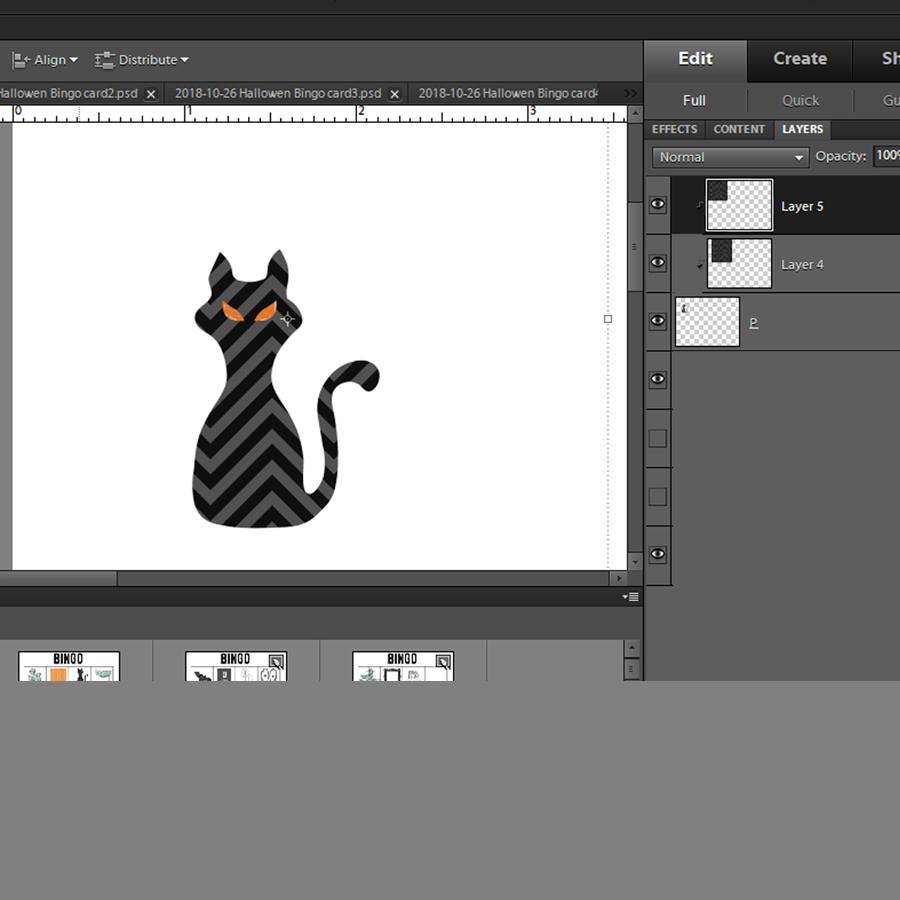
I also added in an orange paper behind the cat shape for the eyes and just erased the parts I didn’t need… so the orange would show through the “holes” where the eyes were in the dingbat font. Cute, right? Such a simple way to add a cat into my BINGO card even though the actual digital collection I was using didn’t have one. 🙂 (I repeated this same process to create a witch’s hat and a flying witch).

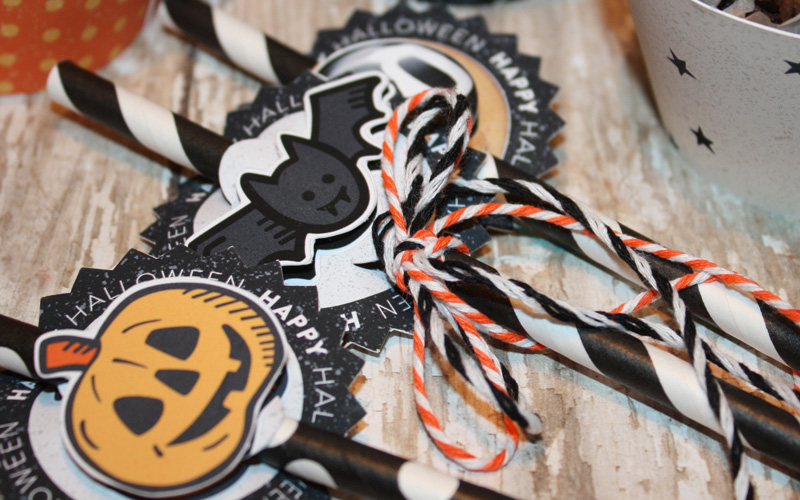
As I worked, I found that this project was a wonderful way to re-think my digital products, and was a great way to re-purpose a bunch of things! For instance, I used two chipboard numbers (“31”) from a girl-themed kit to stand for the day of the month/Halloween. I also was able to use shapes like the circle moon and star from other kits, re-purposing them for this project.

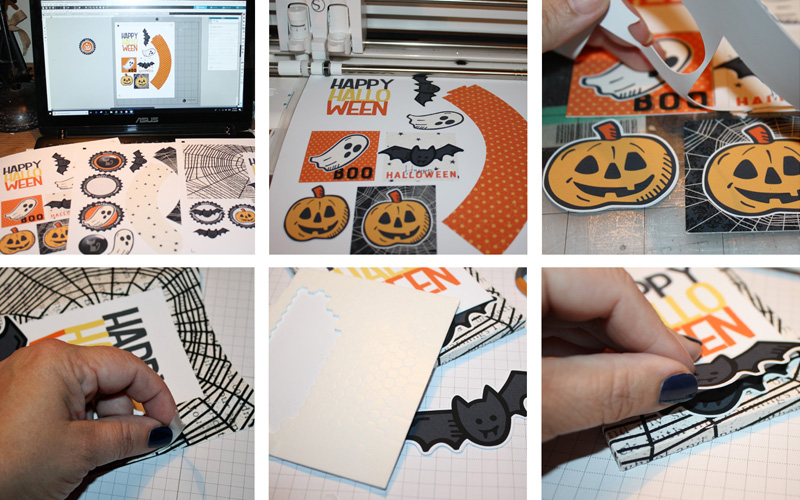
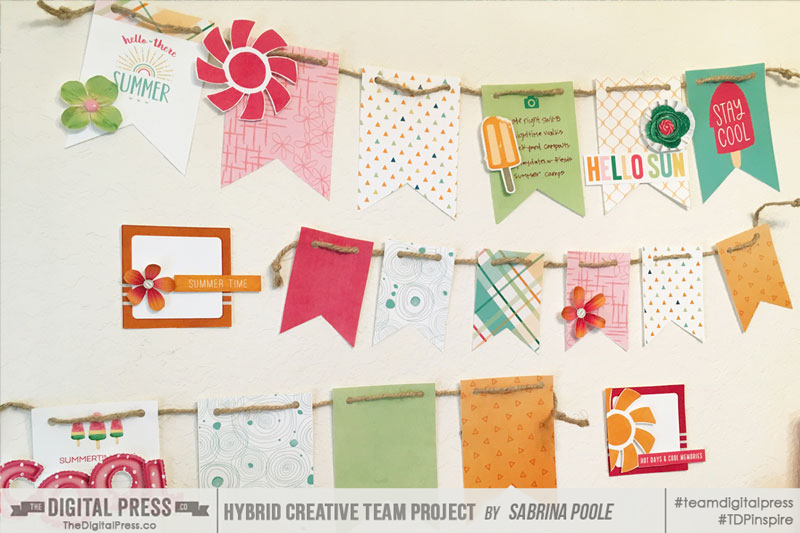
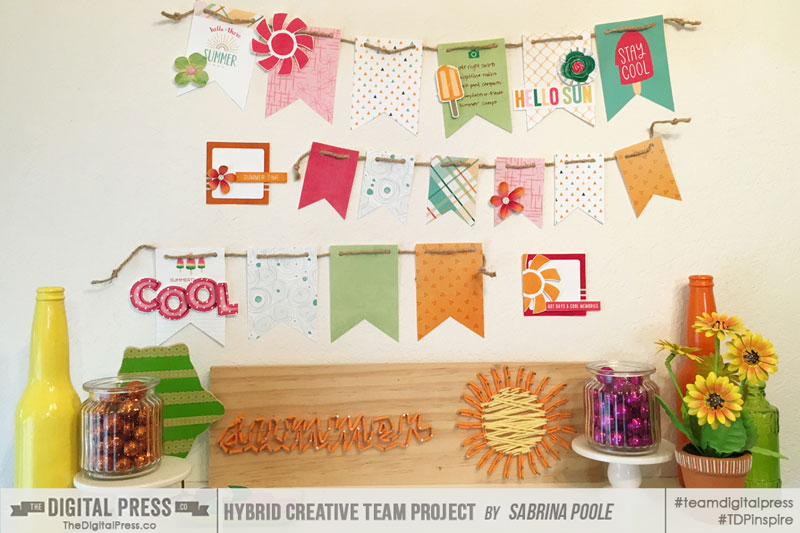
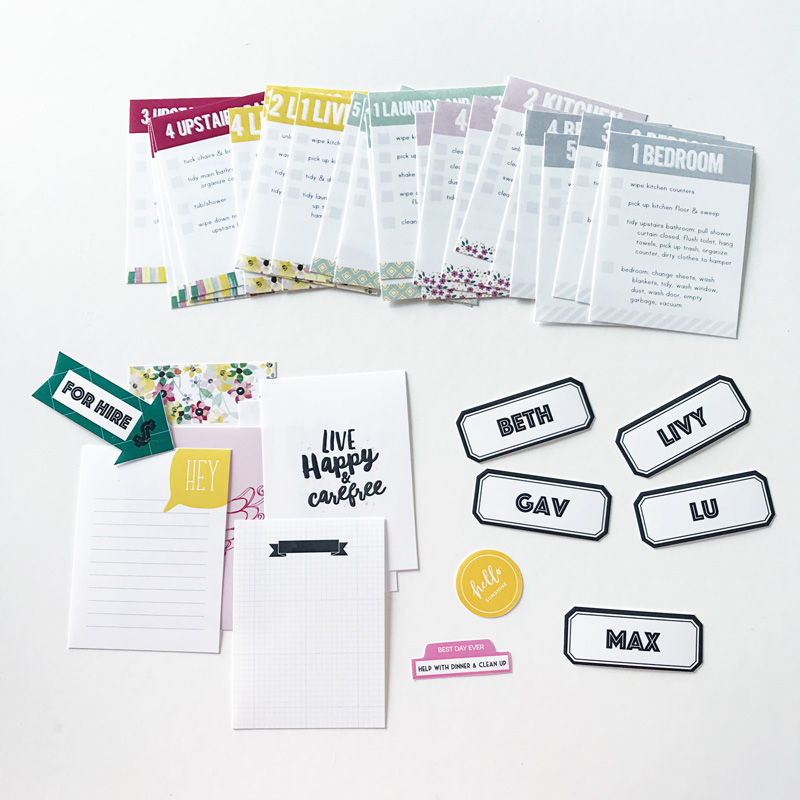
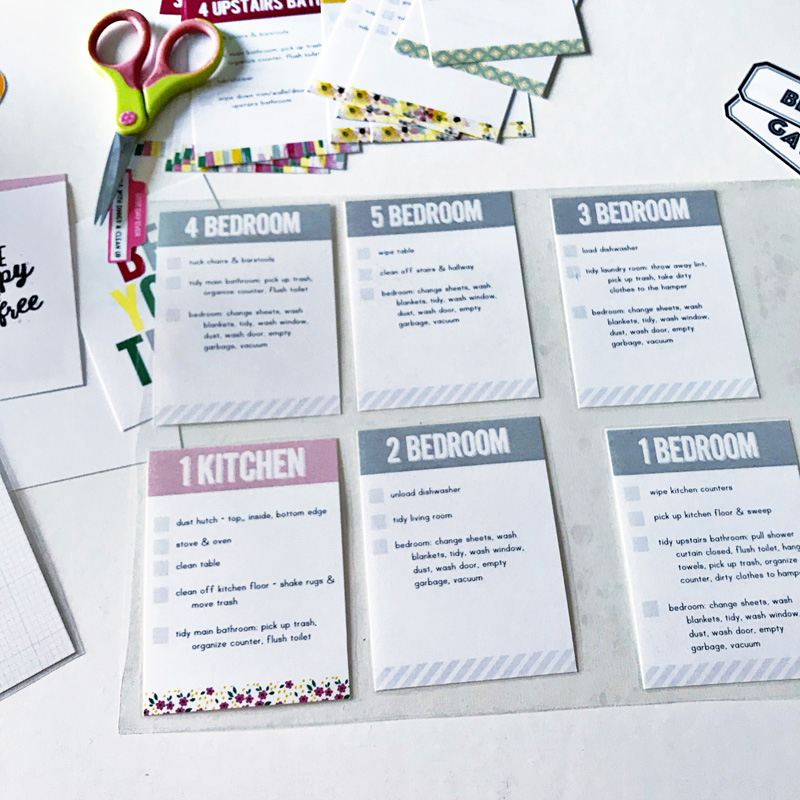
Here’s a look at a bunch of my cards after I was finished creating them in Photoshop, and printing them out…

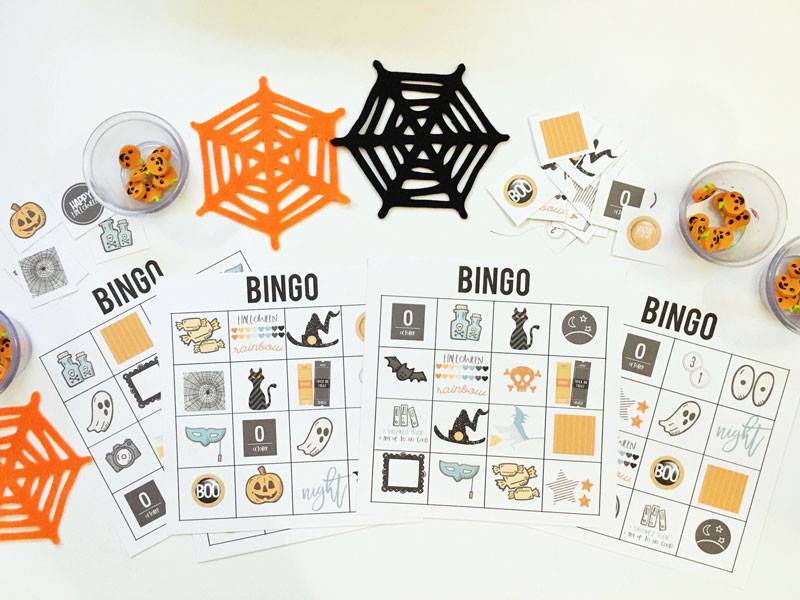
Aren’t these cards fun?

I hope today’s tutorial inspires you to re-think your own digital supply stash, and have fun playing with your digital products to make something completely new, fun, and festive — something as simple as an everyday BINGO-themed game!

Don’t forget to visit the CROSSWORD SECTION in The Digital Press forum, and jump into this month’s Hybrid Challenge if you are thinking of trying out this project. You can earn points toward discounts & FREEBIES! I hope that you will join in!


00 Headshot

About the Author  Sabrina is an avid documenter of life — herself, her children, her hubby, and her everyday life. There is beauty in the ordinary moments, and they are what she loves to scrap. She is also always on the hunt for a quiet, peaceful moment… and she usually spends it reading or playing at her crafty desk.

Hybrid How-To | Chore Chart

Hello, everyone! Kate here to show you how I made our family chore chart. Every couple of years our chore chart gets a reboot because things change a little bit. This year, I’m adding our youngest (who is now old enough to help) and taking away chicken chores because my oldest has taken that over as part of her involvement with FFA.

Supplies

– Digital kit of your choice. I used Monthly Chronicles: Carefree.

– Photo-editing program, such as Photoshop or Photoshop Elements

– Scissors

– Lamination paper

– Glue dots

– Binder clips

– Tacks

– Cork Board

The first thing I did was type out every single chore in all the rooms of our house. I like to have one room per day deep-cleaned and the rest of the rooms tidied up. Obviously that will vary depending on preference. This is what works for us. I printed this list out so it would be easy to refer to and check off when working on the cards.

I have five kids so I made five cards per room. I started assigning chores to each card. Once I had all the cards built, I clipped in fun paper and printed everything out. My kids requested a “for hire” section where they can earn some money doing non-required chores. We also rotate the chore cards so no one gets the same chores all the time. I added a little element that I can switch between names on the chore chart to keep track of who gets the Number 1 card each day. And I also needed a tab to keep track of who’s helping me with dinner and clean up each night, because we also rotate that between kids who are 8 years and older.

I used lamination paper to laminate everything except the name cards so we can check things off or write things down.

I used tacks to secure the binder clips to the cork board. I attached magnets to the back of the two tabs I need for rotation. The name tags and “for hire” arrow are secured to the cork with glue dots.

And here’s my finished chore chart. I hope you’ll give this customized chore chart a try!


Kate About the Author  Kate is on the hybrid team here at The Digital Press. She lives on the Utah/Colorado border with her husband, 5 kids, 10 chickens, a dog named Gracie, and a cat named Kit. She’s a city-born girl who found she’s really a country girl at heart. She can be found outside, barefoot, and probably in her garden.

Hybrid How-To | Halloween Party Fun

Hello everyone! It’s Tanya here, and I’m excited to share another edition of our Hybrid How-To series with you here on The Digital Press blog!

I don’t know about you, but I love fall. I love the crisp cool air, the colors, the smells, and the events to come… October Fest, Old Settlers Day, and most of all HALLOWEEN (the cutesy, not scary)! Today I am going to show you how to create some fun Halloween party supplies using your favorite Halloween digital kits!

I have several fun things to show you…. so let’s get started.

SUPPLIES NEEDED:

  1. Your favorite digital Halloween kit(s)
  2. White cardstock
  3. Pop dots
  4. Double sided tape
  5. Wooden picks for cupcake toppers
  6. Party Straws
  7. Ribbon
  8. Plastic silverware
  9. Scissors

For this project, I used the following digital products…

[ the brand new kit Spellbound by Little Lamm Paper Co, — Spooky by Little Lamm Paper Co. — and Spook by Karla Noel ]

*NOTE* I have recently upgraded from Silhouette Studio Edition software to the Silhouette Business Edition. There are a few features that I have really liked so far… the biggest being that with the Business Edition is that you can use more than one computer at a time. I haven’t tried it yet, but I will soon!

For my first step, I opened the following silverware box cut file that I already had in my stash of hybrid files. I did reduce the file size by just a little (and after cutting it out, I’ve decided that you can go even a tad smaller if you want to; It’s just one of those things you have to play around with)…

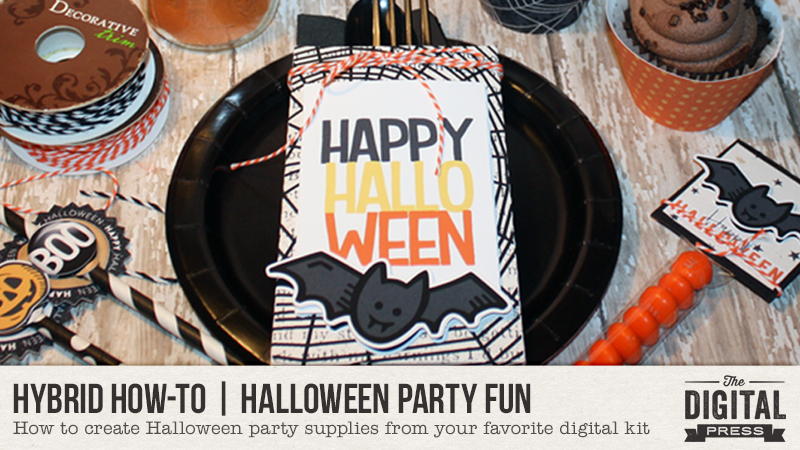
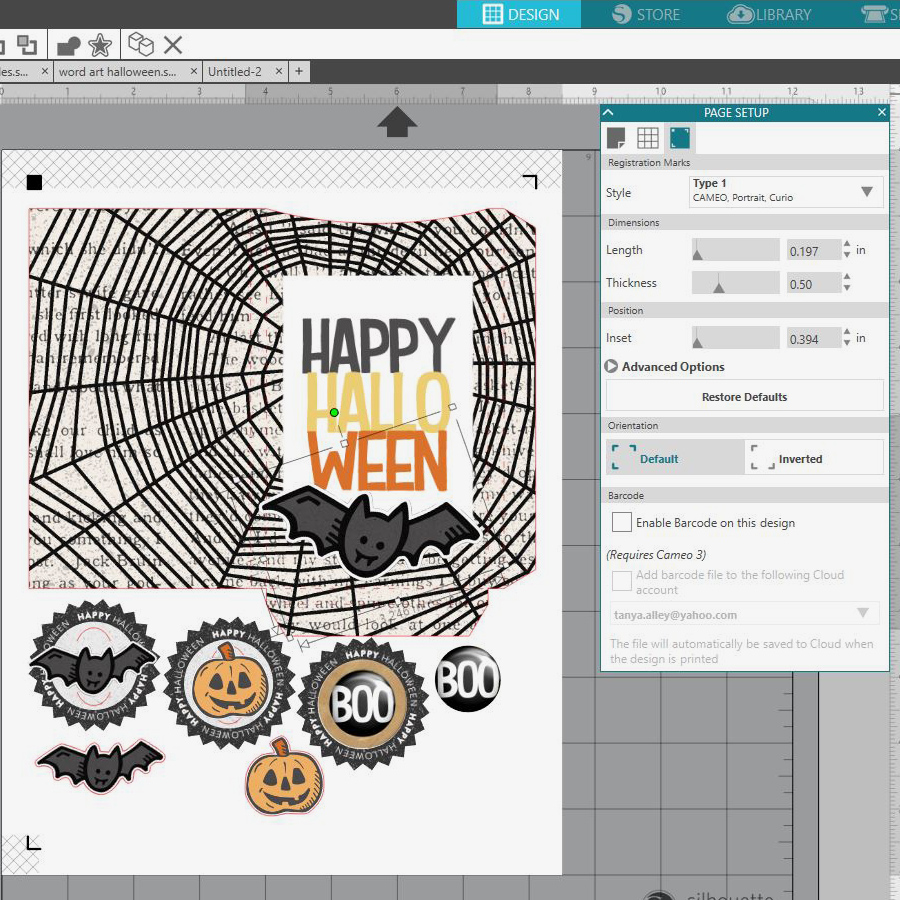
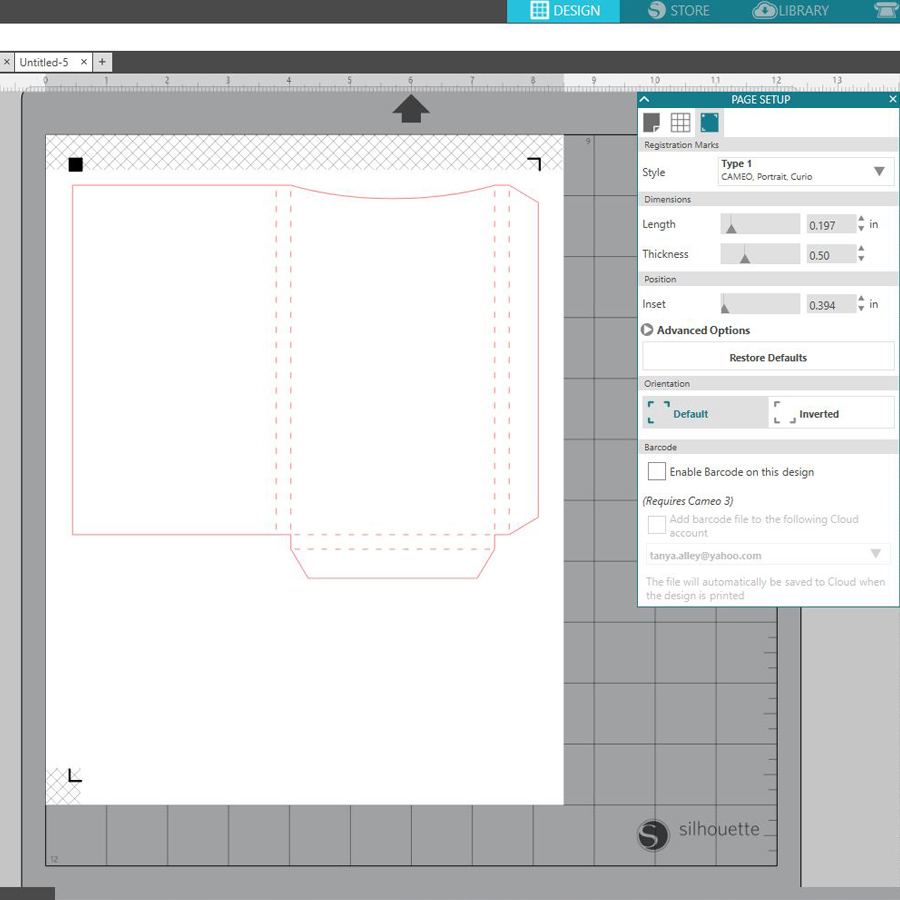
My next step was to choose digital paper for my project. For this, I opened the file where my paper was saved on my computer and drug it straight to the box file within my Silhouette software. You can see here how simple it is (and note that you can go into FILL PANEL and adjust the size and orientation of the paper)…

Next, I continued opening the elements and journal cards that I wanted to use for this project. I moved them around until I was happy with the placement. I love to have dimension on my projects, so I usually cut out extra pieces that I want to be raised up. This isn’t necessary, but I think it gives a neat finish to the project. However, if I were having a really large party, I don’t think that I would waste the time or money doing this.

After I finished creating the party supplies I printed each sheet out, ran it through my cutting machine, and assembled as shown below. Here are a couple of tutorials from TDP’s blog if you need more info on print and cuts… HERE & HERE. I used double sided tape to assemble, and then I used pop dots to attach the embellishments I’d cut out in order to add dimension.

Once I had the silverware holders assembled, I filled them with plastic cutlery…


Next came the cupcake holder… and for this, I opened a cupcake cut file that I created a while back. It’s simple and no scallops, and so I thought for Halloween it would be a good choice. I created toppers, as well, with extra pieces for dimension.

After creating the pieces you see above… I simply print, cut, and assembled…

*NOTE* For the toppers, I used little flat wooden sticks that I purchased from Hobby Lobby (they can be found in the raw wood section; I have also seen them at JoAnns Fabrics). I prefer using these over toothpicks because they are flat and your toppers lay flat without ugly ridges in your toppers. I used double sided tear tape to assemble. You can use glue, but the tear tape is awesome.


Finally I created some candy treat toppers, as well. For these, I created 2″x 2″ squares, filled them each with digital papers, and then added some elements. Again, I also added extra elements with pop dots for dimension.

To assemble the toppers, I used 1″ treat bags and filled them with Halloween-colored M&M’s. For the topper, I cut strips of black card stock just a little bigger than the printed square… and then I used double-sided tape and pop dots to assemble…

Below are some of the close ups of all of the projects shown above. Aren’t these the cutest thing you’ve ever seen?!

I also created straw toppers for this Spooky party. I really adore these cute elements. I like the fun part of Halloween, not the really scary part!

I hope that you have enjoyed this edition of Hybrid How-To. Don’t forget to visit the CROSSWORD SECTION  in The Digital Press forum, and jump into this month’s Hybrid Challenge if you are thinking of trying this project. You can earn points toward discounts & FREEBIES! I hope that you will join in!


Tanya

About the Author  Tanya is a part of the hybrid team here at The Digital Press. She has been hybrid crafting for at least 16 years now, and loves creating and sharing those creations with others. Her all-time favorite tool is her Silhouette Cameo. She has been married for 29 years to her high school sweetheart, Richard and has two sons: Chris, 26 and Chance, 22. She also enjoys crocheting, photography and woodworking.


Hybrid How-To | Starting a Traveler’s Notebook

Hi everyone, and welcome to another edition of our Hybrid How-To series here on The Digital Press blog! I’m here today to show you how you can start a Traveler’s Notebook and use it for your memory keeping.

Everywhere I look, I am seeing people using Traveler’s Notebooks (also called TN’s) to document all kinds of things… not just trips and vacations! If you look on Pinterest, ETSY, Amazon, or even if you just google “traveler’s notebooks” …you will get a wide display of manufacturers, sizes, and different ways people are using them. Today I would like to show you a bit about the traveler’s notebooks I am using, and how/why I decided to start using them for all sorts of scrapbooking and memory keeping projects!

Here’s just one example of the types of things you can do with a TN, with regard to memory-keeping…

Here are a few of the reasons I decided to give traveler’s notebooks a try:

  • quick, flexible memory keeping
  • no pressure to do a weekly or monthly layout
  • easy way to break into doing a hybrid project
  • no plastic pockets (unless you want them as accessories)
  • simplicity — photos, journaling, and maybe some stickers & washi tape
  • great for quick topics (vacations, food, recipes) or to record ongoing progress (weight loss, pregnancy, etc.)
  • I, personally, am drawn to the vertical orientation
  • easy to use to document things while on-the-go
  • great way to use digital templates, patterned papers, & supplies

Here’s a look at the Traveler’s Notebooks I am currently using…

I picked a few of them up at my local scrapbook store, and one is from a scrapbooking subscription club. As you can see, two of them are the “standard or regular” size (on the right), and one is a smaller size that is often referred to as the “passport” size (on the left). I didn’t spend too much money on any of them, because I wasn’t sure how often I was going to use them. It turns out, though, that I am documenting in them quite often and may eventually splurge for one of the real leather notebooks. For now, however, I am happy with these less expensive TN’s! They are made of a soft “plether” (plastic/leather) type of material, and come with the elastic bands inside that hold the inserts, and also a band that goes around the book to hold it closed.

Most TN’s come with at least one paper insert. The inserts can be made out of different colors, weights and styles of paper. Here’s a closer look at the inserts from the three TN’s I showed you, above…

The type of paper insert is important depending on how you are going to use them. For instance, f you do a lot of painting or stamping, then a thicker paper maybe needed. If you are mostly journaling in them, maybe you will want plain or lined paper instead of a dot or grid pattern. The color of the paper is important, too, if you want to work directly on that paper; for instance, up above you can see that one of these paper inserts is very cream in color, as opposed to a more pure white — but since I usually cover the insert with patterned paper, that worked for me.

One of mine came with a craft folder that has a place to put supplies and/or keepsakes, as shown here…

Some inserts are stitched together, and some are stapled… and this is also something to consider. The first TN I used had an insert that was stapled together… which enabled me to take the staples out and have flexibility moving the papers and getting them to lay perfectly flat while stamping or gluing things in place, which was nice! Since that first book, I have just left the inserts intact. Both ways work really well, and I think it is just a matter of personal preference.

There are many types of accessories and extra options you can purchase to use with your TN. Extra elastics, charms to put on the outside bands, tags, plastic pockets, zipper cases, and pen loops are all very popular and help you customize your TN…

I love the zipper pocket! Although I don’t scrapbook on-the-go very much, I often will stick in supplies that I want to use just to keep track of everything!

To give you a little more inspiration and let you see the kinds of things you can do with your TN… here are a couple of pages from my Summer 2018 Traveler’s Notebook…

And trust me, it’s all so easy! I simply printed some photos and products I liked, and then played around with putting them together on the pages. As you can see, this format works well for multi-photo pages and also for large photos. I use Epson Premium Presentation Matte paper and a Canon Pixma printer.

For the projects I’ve shown you, above, I printed digital products from these beautiful kits that you can find at The Digital Press…

The great thing about a TN is that you can use your favorite digital products and edit/alter the contents, re-size things, and even change a few colors here and there, before printing… in order to have your own personalized scrapbooking supplies ready to add to the TN. And as we discussed above, there are a lot of options to choose from when selecting and beginning a Traveler’s Notebook. Here are a few final thoughts you might consider, as you get ready to give this a try…

  • the cost — you can spend a lot or a little
  • the size — standard or regular is used by most scrapbookers (it is approximately 8.5″ tall by 4.25″ wide)
  • the paper inserts/refills — the color, weight and the style; grid, dot and lined patterns are popular
  • the topic — decide whether you want your book to be about a specific topic or just a bunch of random photos & stories you love
  • the record-keeping — TN’s are a great way to journal your thoughts, and many people use their own handwriting rather than typing
  • the supplies — use your digital supplies in a whole new way; journal cards, labels & pattern papers work well
  • the contents — large, full-size photos are dramatic and pair well with papers, journaling and embellishments
  • the rules — there are really NO rules! Just play around and find out what works for you!
  • the starting point — really, just get started! it’s so much fun to print, touch, and play around with the items you add to your TN

The important thing is to have fun with it and make it work for you. We would love to see what you create using products from The Digital Press, so please feel free to leave us comments and link us up to any projects you load into the hybrid gallery here at TDP!


IMG_2617lightedt100w

About the Author  KerriAnne is a homebody who resides in the desert SW. She started scrapbooking when her kids were little and hasn’t stopped despite the teenagers rolling their eyes and sticking out their tongues!  When not scrapping or being a chauffeur, she can be found consuming large amounts of iced coffee.


Hybrid How-To | Fun Mini Book

Hi everyone, and welcome to another edition of our Hybrid How-To series here on The Digital Press blog!  Today, I’m here to show you how to create a very fun and easy mini book that you can make to keep your memories in a small and beautiful way.

For my project today, I will be using the digital kit (and also cards) Just Be You by Julia Makotinsky, shown here…

Let’s get started on our our mini book!

The first thing to do is to choose (a) the size of your mini book, and (b) the digital papers that you want to use.

I chose to make my mini book in the size of 4.5″ x 6″.  I also chose several elements and cards that I planned to use to embellish my project. 

As seen in the photos below, after choosing the papers, I printed them  in the size corresponding to the mini book. Then I cut and folded each sheet in half…


I wanted to make a fun cover for my mini book and use sequins for a magical unicorn effect. To do so, I decided to use a plastic page protector to put my sequins/embellishments inside and make my cover. First, I added a fun dimensional title onto one of my printed pages…

Then I added sequins and decorations into the protector, and used embroidery floss to sew it shut…
BLOG 3

To close the cover, I hand sewed the page protector with an embroidery chain stitch. If desired, you could also use a sewing machine or a fuse tool…

BLOG 4

Once I had my cover ready… it was time to make the inner pages of my mini book. The first thing I did was adjust the page sizes and cut off the excesses, as you can see here…

Before I could decorate any of my book’s pages, I needed to assemble my mini book.

*TIP* Make sure all your pages are folded down the middle and arranged in the order that you want them. Use two clips to hold the pages in place. Put an old catalog or a foam mat under your pages and line up their centers. This makes it really easy and safe to punch through all the pages. You’re going to punch three holes using a paper piercing tool. Use a ruler to mark where you’ll punch these holes. My mini book is 6″ tall, so I punched the center hole at 3″, as shown here…

I used the holes I’d punched into my book to attach all of the pages/cover together using embroidery floss…

How To Stitch Your Journal:

  1. You should have already punched your three holes. Thread your needle with a long piece of cotton and thin crochet thread. Start at the center hole, insert the needle from the inside of the journal, and pull the needle through but leave a long tail.
  2. Push the needle from the outside of the journal through the top hole.
  3. Next, push the needle from the inside of the journal through the center hole again
  4. Next, push the needle from the outside of the journal through the bottom hole.
  5. Bring the bottom hole thread to the center hole and tie both ends. You are done! The book is bound and it’s time to insert our photos and embellishments.

I printed several elements and cards, as you can see here…

Here is a look at a few of my pages once I’d started embellishing them with all of my printed goodies. As you can see, I also used vellum and watercolor paper in order to make my project more fun…

Finally, I also used some mixed media techniques along  my project., like watercolors and acrylic paints.

Isn’t this mini book fun? And it’s a very beautiful way to have fun with your memory keeping, as well!

If you’re feeling inspired to give this a try, as well… don’t forget that you can earn challenge points at The Digital Press! Come visit the CROSSWORD SECTION in The Digital Press forum, and you’ll find this month’s Hybrid Challenge thread (for each month’s Hybrid Challenge at TDP, you get to choose one of the month’s “Hybrid How-To” tutorial posts from here on the blog and make your own version). You’ll see how fun it is! Give it a shot, and share your final results with us. We can’t wait to see what you come up with.

Have a great weekend you guys, and happy scrapping!


_DSF0358_PB


About the Author  Andrea Albuquerque is member of the hybrid creative team here at Digital Press. Andrea has been a scrapper since 2010 and a photographer since 2012… and although she adores the flexibility and creativity of digital, she can’t resist playing with paper, paint, and embellishments. Hybrid scrapping is the perfect medium for her! She lives in Brazil with her hubby.


Hybrid How-To | DIY Seasonal Banner

Hi everyone, and welcome to another edition of our Hybrid How-To series here on The Digital Press blog! I have a fun project to share with you today that will get your home ready for the summer season. It’s a fun, simple way to decorate for any new season using your digital scrapbooking supplies.

Let’s get started…

For this tutorial, I will be using the latest TDP Designer Collaboration, called Popsicle. It just launched in the shop last week, and it’s perfect for this project!

To begin, I opened up the kit and decided to use one of the banner shapes (see bottom right of the preview, above) as a “template” for my own banner. I pulled it into Photoshop and enlarged it* to 375% so the banner shape was around the same size as a 3×4 pocket card. Enlarging the banner allowed me to use it as template/clipping mask.

*please note that while you wouldn’t normally ever want to enlarge a digital scrapbooking element (because doing so results in a noticeable loss of quality/resolution)… for my purposes, it is OK because I am actually using it as a clipping mask. This means that the end result won’t show the banner image itself; specifically, if you look at the next screenshot, below… you’ll see that the “M” becomes really blurry when I enlarged it. That will be covered up, though, so it will be OK.

The following screenshot shows how big the banner is at 375% (as compared to an 8.5″ x 11″ page)…

Next, you can see how I used the enlarged banner shape as a clipping mask. I chose various papers and journaling cards, and then placed them directly above the banner shape layer in Photoshop. Once the desired paper/card was above the banner layer — I used the “clipping mask” function (CTRL-ALT-G in Photoshop; CTRL-G in PSE) to clip the items to the banner shape. This is what allows the paper/card to take the shape of the banner…


After that, I simply repeated the banner shape until I had enough different patterned shapes to be able to hang up a string of banners on my wall. Here is a look at a couple of the print sheets that I wound up with…

You’ll see that my print sheets included banner shapes in 2 different sizes (I wanted variation for my final product)… and also a few embellishments, which I eventually cut out and added as pop-ups on the banner itself, to add dimension/decoration.

Once I had cut everything out, I used twine (you can also use string, yarn, etc.) to string the pieces together. Here is a close up of my finished banner…

Just a side note — the 2 suns you see, above, are part of a free font (called “Sun and Stars”), and I used the sun shape as a clipping mask with papers from the kit. I clipped an orange paper and pink paper to them, in order to match the rest of the items I printed/cut.

Here’s a view of my final banner, hanging on the wall, along with some other summertime decorations in my house…

Isn’t that fun? I hope this simple banner inspires you to decorate for the season and to try using your digital supplies in a new way!

If you’re feeling inspired and you’d like to give this a try, too, don’t forget that you can earn challenge points at TDP! Come visit the CROSSWORD SECTION in The Digital Press forum, and you’ll find this month’s Hybrid Challenge thread (for each month’s Hybrid Challenge at TDP, you get to choose one of the month’s “Hybrid How-To” tutorial posts from here on the blog and make your own version). You’ll see how fun it is! Give it a shot, and share your final results with us! We can’t wait to see what you come up with.


00 Headshot

About the Author  Sabrina is an avid documenter of life — herself, her children, her hubby, and her everyday life. There is beauty in the ordinarymoments, and they are what she loves to scrap. She is also always on the hunt for a quiet, peaceful moment… and she usually spends it reading or playing at her crafty desk.