Summer Camp 2017 | Mess Hall | WEEK #1

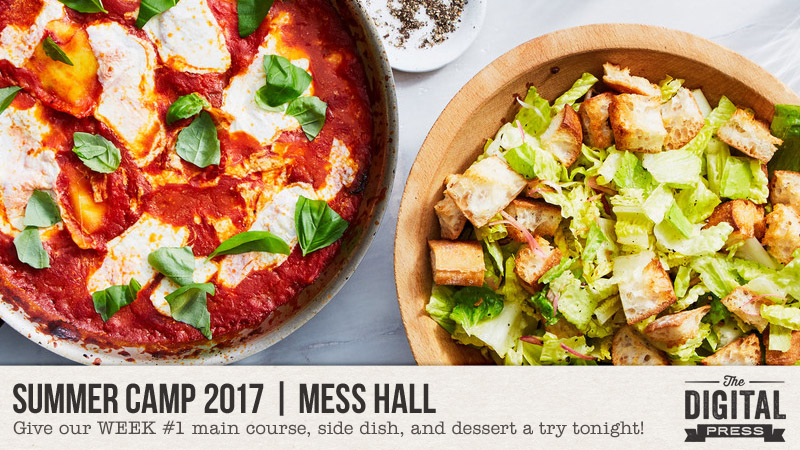
Hello, and welcome to the first edition of our weekly “Mess Hall” feature — part of The Digital Press’s big SUMMER CAMP 2017 event this July!

If you haven’t already checked out our lineup of activities for SUMMER CAMP 2017… definitely swing through the forum, grab yourself a badge tracking card, and join the fun! We’ve got events, challenges, tutorials, and more lined up throughout the month of July… including a weekly FOOD article! 🙂

Each Sunday throughout the first 4 weeks of July, members of our team will be here on the blog sharing a meal with you — a main course, side dish, and dessert that are each tried-and-true (tested personally by members of our team!). Give any of the meal items a try, and you could earn a SUMMER CAMP 2017 badge! Get the full details HERE.

The WEEK #1 meal is very, very worth a little time in the kitchen, folks. Trust us on this (and it’s actually sooooo quick & easy!).

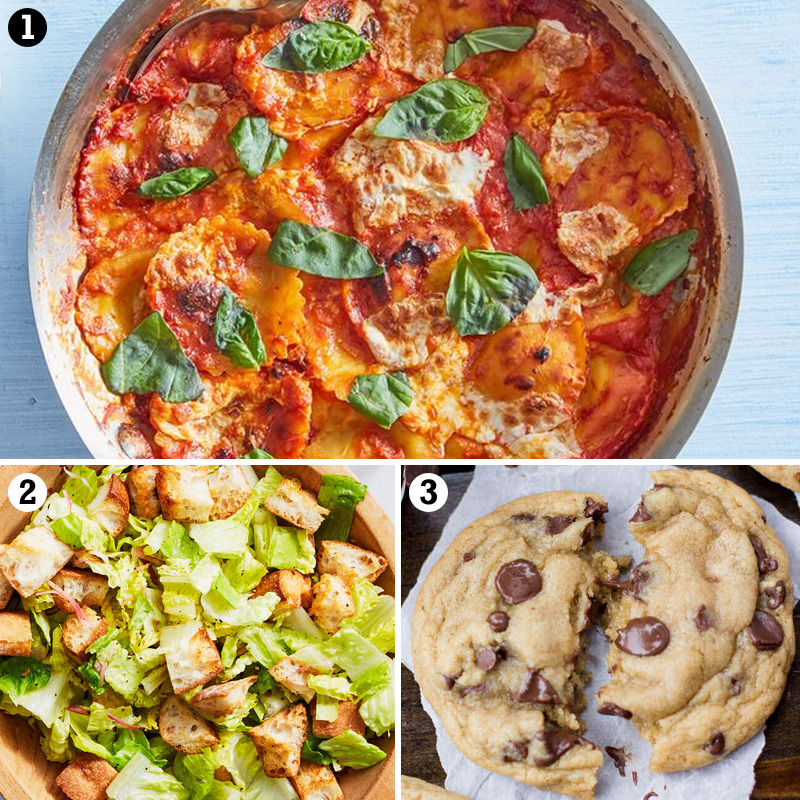
photo credits to [1] [2] Marley Spoon and [3] Sugar Spun Run

What is that up there, you ask?

  • Skillet Ravioli Lasagna
  • Salad with Homemade Croutons
  • The World’s Best Chocolate Chip Cookies

Seriously, just YUM. To all of it. You won’t be disappointed if you give any of these recipes a try.


SKILLET RAVIOLI LASAGNA

I’ve made this recipe 3 times in the past few weeks. It’s that good (and easy!). Every time we eat it for dinner, my husband and I sit and try to figure out how the sauce could possibly be so flavorful and delicious… because seriously, it doesn’t seem like there’s anything in it other than tomatoes and tomato paste… and… shallot. BOOM. I never realized what an amazing little onion a shallot could be (and I cook with them all the time, folks, seriously)… until this recipe. This pasta sauce is living proof that a single shallot can season a tomato sauce like nobody’s business (and probably lead to world peace, and also, yes, I know that the sauce isn’t living proof of anything because it’s not alive. It’s an expression, and we’re going to roll with it).

INGREDIENTS NEEDED

—1 package of store-bought fresh cheese raviloi (I use the “RANA” 4-cheese variety, but really any will do; that’s simply my definite favorite)
—1  14oz can of tomatoes (I use diced… but again, anything works; the original recipe calls for whole/peeled, and my way cuts down on the work of smashing them up)
—1 Tbsp tomato paste
—1 medium-to-large shallot*
—1 ball of fresh mozzarella cheese (recipe actually calls for about half this amount, but I use the whole ball so I don’t end up with weird portions of leftover cheese in my fridge)
—fresh basil (I use 2-3 stems’ worth; equivalent to just under one of the small plastic containers you get in the fresh herb section of your grocery)
—olive oil, salt, and pepper

INSTRUCTIONS

*if you’ll be making the salad, below, as well… cut your shallot in half and use half for this pasta recipe, and half for the salad. If you’re only making the pasta, you can use a slightly smaller shallot OR you can just throw it all in the pan because it won’t hurt anything! mmmm mmmm good

—Pre-heat oven to 450 degrees
—Pick the basil leaves from stems and tear leaves into bite-size pieces; divide into 2 portions
—Cut the fresh mozzarella ball into bite-sized pieces (about 1/2″ to 3/4″ cubes)
—Finely dice the shallot
—Heat about 1 Tbsp olive oil on medium-high in an oven-proof skillet; once shimmery and hot, throw in the shallot and cook until softened and fragrant (1-3 min)
—Stir in about 1 Tbsp of tomato paste and mix into the shallot/oil for about 1 min
—Add the can of tomatoes and half of the basil leaves; season with salt and pepper to taste; cook for 3-5 min, until heated through
—Add 1 cup of water and the ravioli pasta; stir to combine, and then continue cooking for about 5 min until the sauce is bubbling and pasta is softening
—Remove from heat, add half of the mozzarella pieces, and stir to combine
—Add the rest of the mozzarella pieces to the top, and then place the entire skillet (again, as long as it’s oven-proof) in oven to bake for about 8 min

[recipe adapted slightly from an original recipe found on Marley Spoon]

SALAD WITH HOMEMADE CROUTONS

Salad is salad is salad, right? Usually, yes. Except for when the salad uses fresh, warm, homemade croutons… and the dressing is a simple oil and vinegar with shallots that is, once again, inexplicably delicious.

INGREDIENTS NEEDED

—1 ciabatta roll (my grocery store carries them in bulk in the bakery section, right next to the bagels)
—1 small head of romaine lettuce (or you can also use pre-cut/bagged romaine heart lettuce)
—1 small-or-medium shallot*
—1 Tbsp red wine vinegar
—1-1/2 Tbsp olive oil
—salt and pepper (and about 1 extra tsp of olive oil for baking the croutons; optional)

INSTRUCTIONS

*if you also made the pasta, above… you likely have half of a medium-to-large shallot leftover for this salad recipe; if not, however, you can just use one small-to-medium-sized shallot instead

—Pre-heat oven to 450 degrees (if you are also making the pasta, you can bake the croutons at the same time you bake the pasta)
—Thinly slice the shallot and then add it into a large bowl with the vinegar and the olive oil; season with salt and pepper to taste; whisk together
—Cut the ciabatta roll into 3/4″ to 1″ cubes
—Toss the ciabatta with a teaspoon or two of olive oil (optional; you an also bake them dry) and sprinkle with a little salt and pepper
—Bake the ciabatta pieces in the oven for about 6-8 min, until they’re starting to toast slightly
—While the croutons are baking, cut or tear the lettuce into bite-sized pieces and add into the bowl with the salad dressing
—Once the croutons have cooled slightly, add them to the salad
—You can also add other ingredients, if desired (in our house, we occasionally also use grape tomatoes, cucumbers, celery, and more)

[recipe adapted slightly from an original recipe found on Marley Spoon]

CHOCOLATE CHIP COOKIES

These are, hands-down, the best chocolate chip cookies I’ve ever made. They are totally delicious — and they come out chewy and gooey, but also with a slightly “crispy outer shell” (there’s really no other way to describe that, although I know it sounds ridiculous). They’re so good I often make a double-batch and then keep the dough in a tupperware container in our fridge for a week or two so we can bake up a few fresh, hot cookies every night for dessert.

INGREDIENTS NEEDED

—1 cup butter (use the real stuff; melt it and let it cool off for a few minutes before mixing it, so it won’t melt the sugar too much)
—1-1/2 cups light brown sugar
—1/2 cup granulated white sugar
—2 eggs (or equivalent amount of egg substitute, which is preferred if you like to eat raw dough) 😉
—1/4 cup maple syrup
—1 tsp vanilla extract
—3-1/4 cups all-purpose flour
—2 tsp cornstarch
—1 tsp baking powder
—1 tsp baking soda
—1 tsp salt
—at least 2 cups semi-sweet chocolate chips (I use half regular-sized chips and half mini-chips, per recommendation of the original author of the recipe)

INSTRUCTIONS

—Once the melted butter has cooled slightly, mix it completely in a very large mixing bowl with the brown sugar and the granulated white sugar
—Add the eggs and mix completely
—Add the maple syrup and the vanilla extract and mix completely
—In another large bowl, combine the following ingredients: flour, cornstarch, baking powder, baking soda, and salt
—After whisking together the dry ingredients completely, gradually add (in about 3-4 batches) the flour mixture to the wet ingredients in the other bowl
—The more flour mixture you add, the harder it will get to stir… so pat yourself on the back for your “upper body workout” and pour yourself a glass of wine
—Finally, add the chocolate chips (I usually add about 1/2 a package of the big chips, and 1/2 a package of the mini chips — if making a regular batch)
—Once combined, you’ll probably want to eat a spoonful or two of raw dough (sooooo good)… and then put the rest into the fridge to chill for about 30 minutes
—While the dough is chilling, pre-heat your oven to 350 degrees
—Place dough onto parchment paper-lined cookie sheets about 2+ Tbsp at a time in balls that are a bit taller than they are wide
—Bake at 350 degrees for 12-14 minutes (keep an eye on your first couple batches until you know how hot your oven is and how long it takes to bake)
—Cookies are done once they start to turn golden brown around the edges
—You’ll probably want to do a few taste tests to figure out if the cookies are better warm & fresh out of the oven, or cooled completely with a slightly crispy outside and a soft inside. This will require eating at least 2 or 3 cookies from every batch. This is normal; just enjoy.

[recipe adapted slightly from an original recipe found on Sugar Spun Run, where you’ll find a bunch of other amazing & desserty recipes, as well]

.

Want to give one of these recipes a try and earn your WEEK #1 MESS HALL BADGE for TDP’s SUMMER CAMP 2017? Come get the details in the forum —> HERE.

.


Laura Passage

About the Author  Laura Passage is the owner of The Digital Press, and also the designer behind Wishing Well Creations by Laura Passage (WWC). She works now as a graphic designer in both the digital and paper scrapbooking industries, but previously spent over a decade working as a college soccer coach. She lives in the Pacific Northwest with her husband and two young sons (affectionately referred to as The Tiny Terrorists), and will rationalize eating coffee ice cream for breakfast to anyone who questions it.

Feature Friday | Meagan’s Creations

TGIF! Friday not only means the end of the work week… but also, it means it’s time to learn something new about one of our fabulous designers here at The Digital Press!

Today I am happy to share more information with you about Meagan Tuck of Meagan’s Creations. This is Meagan’s second feature here on The Digital Press blog (you can find her first feature from January 2017 HERE), and whereas last time we used her feature article to help you get to know some fun trivia about Meagan — this time, we’re using her designer feature to give you a little peek into her creative space, as well as more insight into her creative processes.

With that in mind, here’s a look at Meagan’s creative work space…

We also asked Meagan to give us a Top 5 list that is representative of herself at this point in her life… and she shared with us a list of the Top 5 Things She Also Does While Designing

  1. Listen to Pandora — My channel is a mix of Adele, The Lumineers, The Head and the Heart, Florence + the Machine, as well as some 90s favorites.
  2. Tutor Math Online — I actually mentor math tutors for the past year, but before that I was an online math tutor and would tutor while designing all the time. I occasionally still tutor and it’s easy to do a couple of quick things in between the 1-2 minutes it takes the student to respond.
  3. Snack! — I love cheese and crackers, apple slices and peanut butter, or popcorn while I design. And lots of water!
  4. Watch a Show — I’ll have my Photoshop window on half of the screen, while watching a show on the other half. I just finished Designated Survivor, and before that I watched This is Us.
  5. Getting Pinterest Inspiration — I love looking up color palettes, party supplies, and scrapbook layouts on Pinterest to get ideas for unique elements and styles. And I almost always wind up downloading a new font!

Meagan’s creations (see what I did there?! 😉 ) are bright, colorful, and fun! She designs amazing themed collections full of papers, embellishments, alphas, clusters, word art, glitters, journaling cards.. and more often than not, coordinating templates!

Here’s just a tiny sampling of some of the products you can find in the Meagan’s Creations shop at The Digital Press

Meagan’s products are also versatile and simple to use for just about any layout. Here are a few projects that use her products and caught my eye…


Thank you for spending some time getting to know more about Meagan with me today! I had a blast browsing through her store, and I definitely found a few things to add to my wishlist! And I have some great news! Her entire shop here at The Digital Press will be 30% OFF throughout the coming week during her feature (the sale will end at 11:59pm ET on Thursday 7/6).

And last but not least… Meagan has a fantastic Free-with-Purchase offer for everyone this week! You can snag her brand-new (just landed in the shop today!) “Sk8ter Boy” Kit for FREE with any $10+ purchase in Meagan’s shop at The Digital Press — this week only (again, the offer runs through 11:59pm ET on Thursday 7/6)…


AmieAbout the Author  Amie is a craft-loving dental hygienist who lives in Washington state. She loves her husband, her two kids (ages 9 & 6), and her English Bulldog… as well as coffee, baking cupcakes, daffodils, glitter & sprinkles, reading a good book, and lip gloss — not necessarily in that order.

Tutorial Tuesday | Writing Text Around a Circle

Hello, and welcome another edition of Tutorial Tuesday here on The Digital Press blog! Today I am going to show you how you can use Photoshop to write text around a circle, which is a trick I recently learned and am currently having some fun with!

I like to include journaling on most of my pages. Not always a lot of journaling, but usually at least a few sentences — just enough to re-tell the story that the pictures show. Because it’s something I almost always do, I think it can be fun to mix things up a bit and to try journaling in ways that are new and visually different (not just straight/lined blocks of text).

In the following examples, I am using Photoshop CS5.1… but hopefully the process will be similar in the program you use, as well.

To start out, I’ll show you a 12″x12″ layout that I recently made, using a template from Petrichor Templates by MEG Designs. This particular template has some fun circles on it, sort of echoing the balls with which we were playing footgolf in the photos…
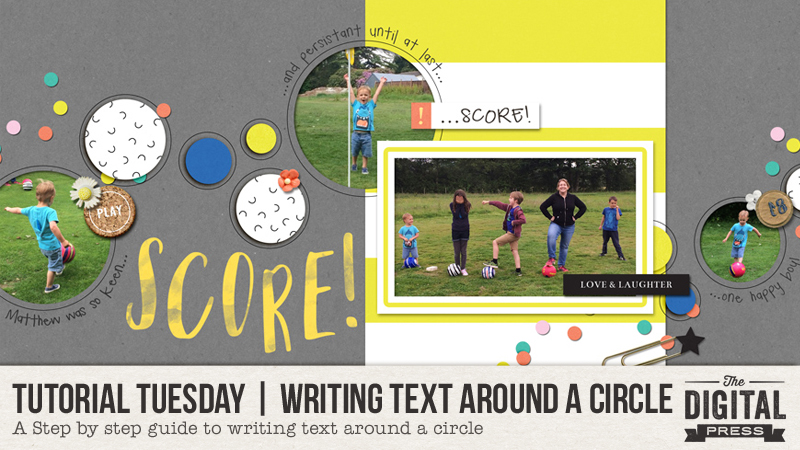
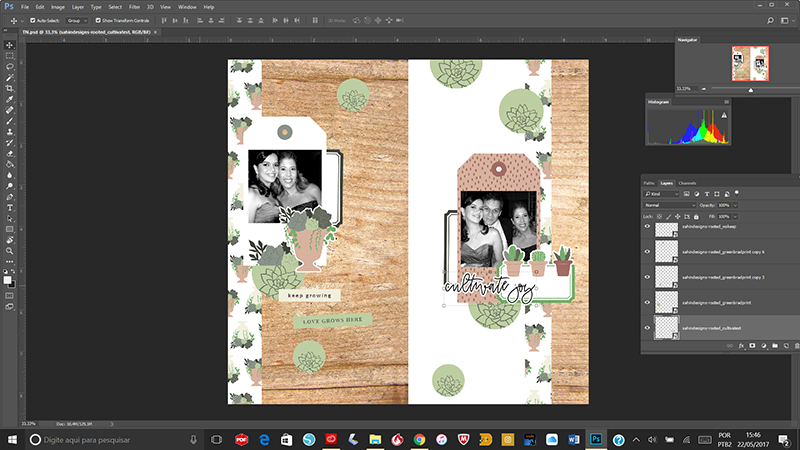
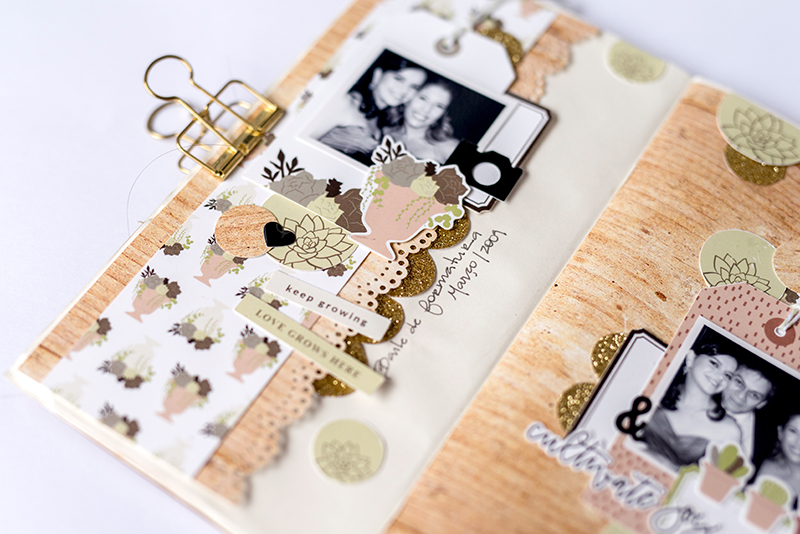
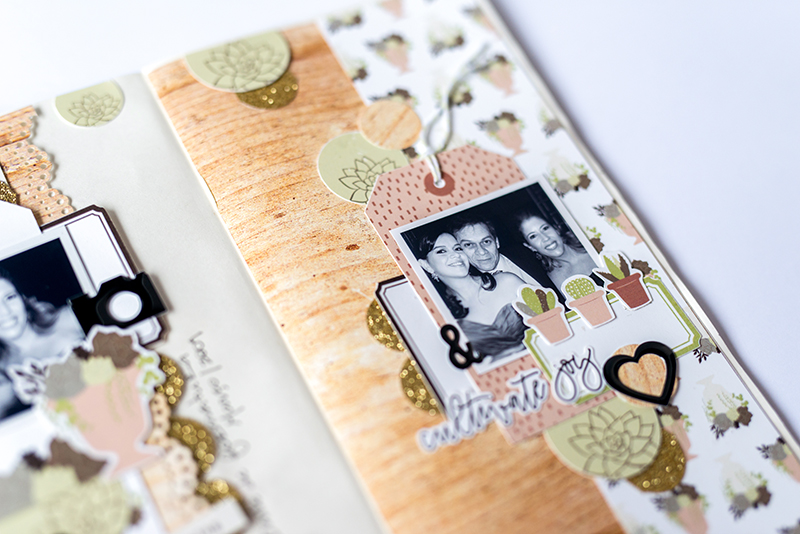
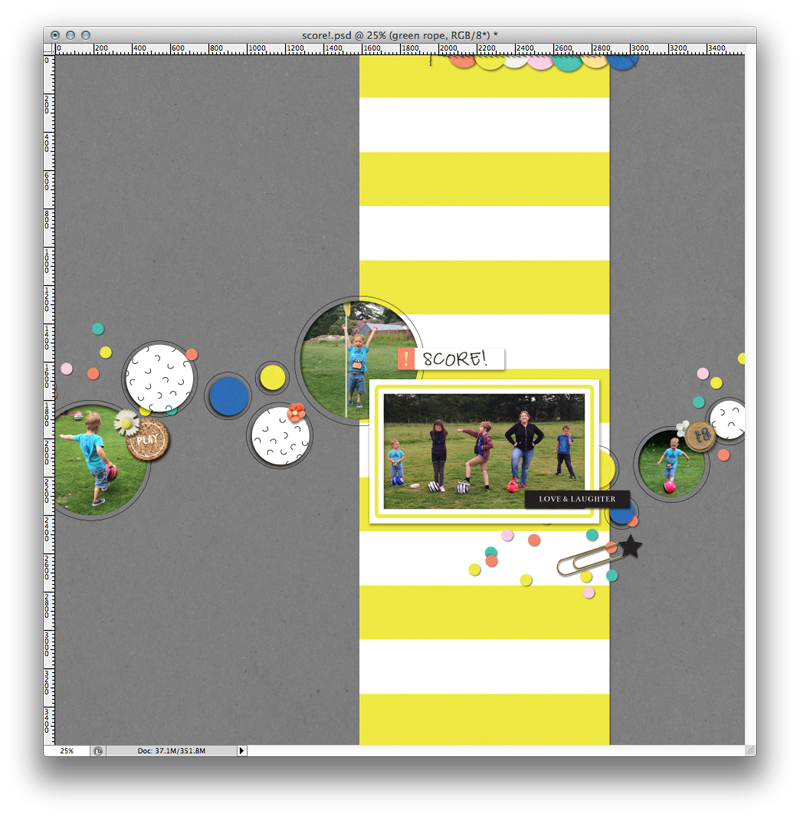
With regard to those fun circle shapes, I wanted to create a text path around them and have my journaling in place around the circles (sort of jumping from one circle to the next).

First, I needed to create a path around the circle, so I used the “Ellipse Tool,” which can be found in the tool panel (you may need to hover over the rectangle until a pop up menu appears with the Ellipse Tool — and other tools — in it)…

Once I had the Ellipse Tool selected, I needed to select the “Path” mode from the option bar up at the top of my screen (see image, above, along the top menu bar).

From there, I drew my path! In order to get a perfect circle, instead of an oval, I held down the “Option” + “Shift” keys (Mac) as I clicked on the center of my circle and dragged the cursor outwards, to make the circle the size I wanted it to be (*note* if you are using a Windows operating system, then you will need to hold the “Alt” + “Shift” keys instead). Once the circle is the right size, make sure you release the “Option”/”Alt” +”Shift” keys before you release the mouse button, or your perfect circle will go a bit kooky!

You’ll see here that I have moved my text path over a little (below) simply so you can see the next steps a little more clearly, but here’s a look at my first text path circle…

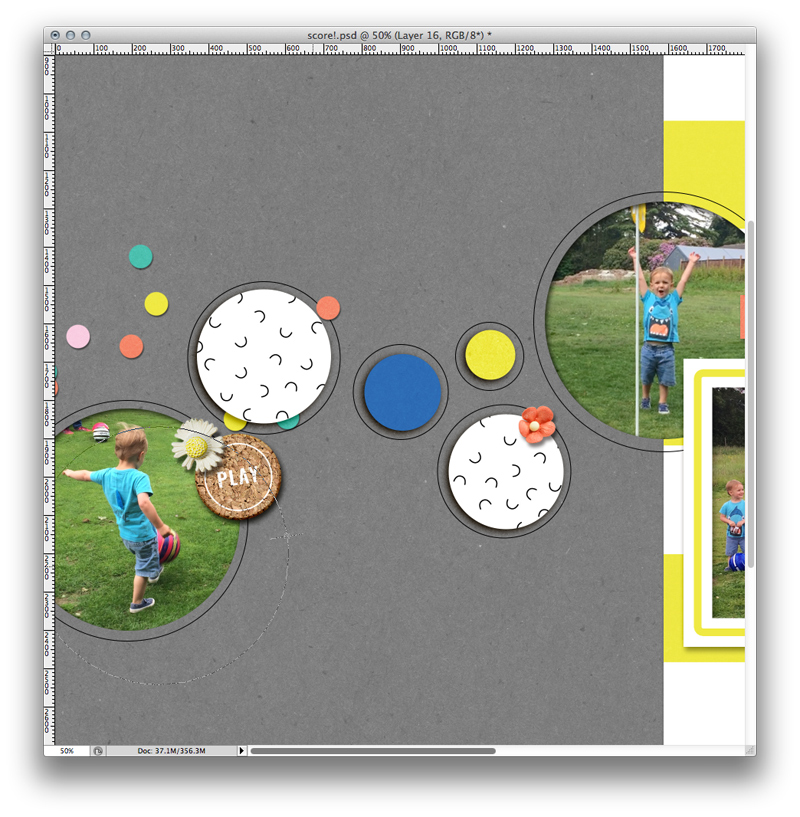
At that point, I was ready to start my journaling! I chose the “Text” tool from my tool bar, and then chose my preferred font, size, alignment and color. Then I moved my cursor over the text path, and the icon changed to an “I” shape with a wavy line through it — meaning that my text will stay on the path drawn. Once that was in place, I clicked on the circle and began my journaling. I just wanted to write a few words on each circle, but I also could have gone all the way around each circle with text if I had wanted to…

While working, I realized that I wanted my journaling to go the opposite way around each circle (look below and you’ll see what I mean if you compare each circle of text)… so I chose “Edit” –> “Transform Path” –> “Flip Vertical” to change it around. You can also fiddle with the size of the font (etc.) at this point. Additionally, by holding the little dot at the start of your first word, you can also drag that starting point left or right around the circle, if desired.

I repeated these steps a few times on my layout to create a few more circle text paths around the other circles on my page, added a title, and I was done! Here’s a look at the final project…

That’s all there is to it! Follow these simple steps, and you are ready to roll (get it?! circles …roll! oh-so cringe-worthy!). I hope this helps if you fancy having a go at journaling in a fun and new way!


Corrin
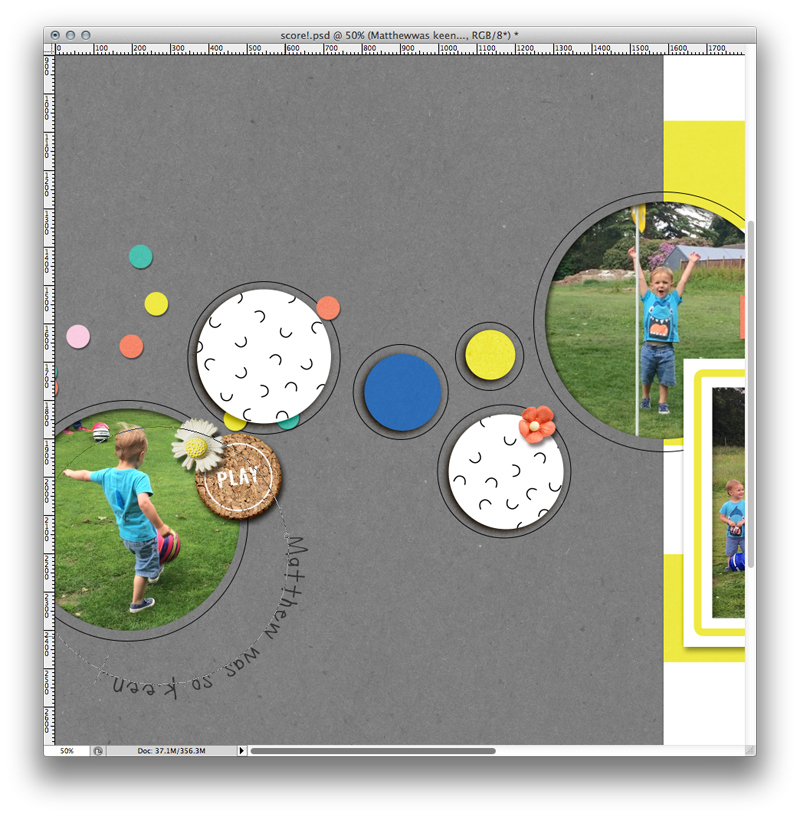
About the Author  Corrin is a member of the creative team here at The Digital Press. She is a fan of the Big Bang Theory and a lover of cozy pajamas. She lives in the breezy South of England with her husband and 4 crazy kids, who regularly discover & plunder her secret chocolate stashes! She is still trying to get the house straight after moving nearly 3 years ago. Who knows… maybe this will be the year she reaches the bottom of the laundry pile!

Feature Friday | creashens

Hello and happy Friday to you all!

Being Friday, we have another exciting edition of our Feature Friday series for you today… and this week, we’ll be spotlighting one of our awesome Designers here at The Digital Press — Shen of creashens! I just adore Shen’s work, and I am sure you will, too!

This is Shen’s second feature here on the blog (you can find her first feature from October 2016 HERE)… and whereas last year we used our feature series to help you get to know some fun trivia about your favorite designers — this year, we’ve been using our designer feature series to give you a little peek into our designers’ creative spaces, and more insight into their creative processes.

One way we are doing that is by showing you the designer’s work space… and I have to say, I LOVE this! I really think a work space says so much about a designer’s personality and creative style. And if you look back through previous posts about other designers, you will see what I mean by that! You’ll also see what I mean by that when you look at Shen’s creative work space…

If you know Shen at all, you know how much this work space fits her carefree personality! She says, “This is where I go to draw/paint/etc. I always do my drawings “old school” / by hand, first… and then I digitize them later.”

We also asked Shen to share with us a Top 5 list that is representative of herself at this point in her life… and she chose to share her Top 5 Favorite Snacks (along with a recipe! wahoo!)…

  1. Gummies (give me all the gummies!)
  2. Chili dried mango
  3. Beef jerky
  4. Calbee Japanese seaweed flavored potato chips
  5. Hurricane Chex Mix (sharing the recipe, below, because everyone should try this!)

SHEN’S HURRICANE CHEX MIX RECIPE

  • Mix — 21 oz box Chex cereal; 1.7 oz furikake; 1 pkg arare ice crackers; 10 sheets nori; non stick cooking spray
  • Sauce — 1/2 c. butter (1 stick); 1/2 c. oil; 3/4 c. sugar; 1/2 c. light corn syrup; 2 -4 tbs soy sauce
  • Heat oven 250 degrees. Get a large deep roasting pan and coat with non stick cooking spray or a light coat of oil. Add Chex, crackers, and cut-up strips of nori into pan.
  • Meanwhile, mix the sauce ingredients in a medium saucepan until sauce mixes and starts to boil a little; take off stove immediately.
  • Spoon the sauce over dry mixture in pan and sprinkle the furikake as you turn the mixture with 2 wooden spoons. make sure to coat the pieces as evenly as possible and make sure the nori gets coated, too.
  • Bake at 250 degrees for 1 hour, mixing every 15 minutes. Pour onto wax paper and let cool. Untangle the nori strips. Pack into airtight bags or containers when cool. Keeps 7-10 days.


As for Shen’s digital products… they are always so fun and playful, and her shop boasts a beautiful assortment of color combinations from which to choose. In addition to her beautifully-coordinated kits, Shen also produces an wide variety of stand-alone packs — from vellum paper, to confetti and alphas, to beautiful flowers, to journal cards, and even some great paint spatters. I am never lacking in inspiration while browsing her shop.

I admit, I struggle to choose favorites from so many gorgeous items, but if forced to do so… here are a few that really stand out to me…

Do you see what I mean? So fun and playful! What is there not to love?!

There are so many gorgeous layouts in our gallery using Shen’s fun products, but here are a few that really highlight her bright and airy, playful style…

Swoon! OK, so my girl crush is revealed and out there now — but I really do just adore playing with Shen’s products. They make the most beautiful pages. And I am so glad that I got to share her work with all of you this week!

One last thing before I forget… Shen has a special Free-with-Purchase offer for everyone this week! Don’t miss out on this opportunity to stock up on your favorite products from creashens while they’re marked down 30% OFF… and you can also snag her gorgeous “Midsummer Day” Kit at the same time, for FREE with any $10+ purchase in her shop — this week only! Don’t miss out!


Erin is an artsy crafty kind of girl who is currently dabbling in far too many things, but is working hard to enjoy every moment of it, while avoiding the rain, which is difficult due to living in the land of many rains. She is slowly learning to use her smart phone to capture all the fun little bits of life that would otherwise go unremembered in the busy craziness that is raising a family!

Tutorial Tuesday | Posing tips

I’m a fervent advocate of scrapbooking yourself and being in the picture. Yeah, I know… I can hear you from afar! “But, I hate to be photographed!” “But, I’m not photogenic!” “But, but, but…”

Enough with those big buts! Today I am here to share a few different tips that will surely lead to more flattering pictures of yourself. My hope is that if you employ these tips, you’ll feel more confident to join your family in the picture (and/or to take more self-portraits)!

Tip 1 | Make the Turtle

The first posing tip is to “make the turtle”. It’s a posing trick I discovered through Peter Hurley, one of the greatest head shot photographers in the world. When you take a close-up of your face, remember to move your face slightly forward and down. You will feel and look super weird from the side, but this “turtle-like” move will define your jaw line and make you look 5 pounds lighter. Seriously, it’s magic. In the following photos (before using this tip), I’m standing in a natural position and I look OK, I guess….

But here in the next two photos, I followed the turtle tip. Look at the difference it made! Defining the jaw line has a huge effect (left photo). Of course, it’s somewhat weird from the side (right photo), but who cares! It’s worth the effect you get from the front angle…

Tip 2 | Create Movement

For photos that are framed more widely, the key is to create movement, shapes, and empty spaces with your body. The golden rule here is “if it bends, bend it!” Remember that whatever goes towards the camera will look bigger/wider, so the general advice is to put body weight on the leg that is farther away from camera.

Look at how the use of different poses completely changes the way my curvy self looks!


Tip 3 | Use a New Shooting Angle

If you want to elongate your body and focus on your face and eyes, try taking the photo from slightly above. Be careful, though, as the angle of the shop might change the body’s perspective and look unnatural if it’s too extreme!

*NOTE* besides concealing a few pimples, the pictures above are not retouched at all. No make up, no photoshop, and still feeling good… that’s the magic of posing!

I hope these few posing tips will help you feel more confident to get in front of the camera more often. You, too, deserve to be photographed, scrapped, and remembered in your family’s album! But above all, know that you are a beautiful person and soul — so let your light shine, smile, have fun, and be YOU! And scrap a page or two (or ten!) to celebrate YOU!

Here’s a layout I created using one of my recent photos…


ChloéAbout the author  Chloé is in charge of PR and communication for her small town by day, is a digiscrapper “by night,” and a photographer whenever the light is beautiful. She lives with her man and fur-babies in a small town of Alsace (in the northeast of France), where she loves to read, watch good TV shows (TWD being her absolute favorite), and just hang out with her friends — no matter if they are close by, online, or away in her Swiss hometown. She recently became quite obsessed with Bullet Journaling, FLyLady and Zero Waste.

Hybrid How-To | Traveler’s Notebook

Hello everyone! It’s Saturday, and therefore it’s time for another edition of our Hybrid How-To series here on The Digital Press blog! Today I’m going to show you how make a traveler’s notebook using supplies from your digital stash.

Supplies Needed:

  • A small notebook
  • Any physical supplies/embellishments you might want to add (I used enamel stickers and glitter tape)
  • Digital kit of your choice (I used Rooted By Sahin Designs)

Instructions:

First, I measured my notebook and then opened a new  document in Photoshop and used a canvas that was the same size as my notebook’s pages. By dragging different papers and elements from my digital kit onto my canvas in Photoshop, I made a 2-page spread as shown the image below…

I always make my hybrid projects in Photoshop first, in order to print the papers and the elements in the correct size and quantity. Then, once I know which items I want to use, I print them out separately. After printing, I cut out all of the individual pieces using my Silhouette Cameo (you can also use scissors and fussy cut everything, too, if you don’t have a cutting machine). This transforms the printed digital elements into beautiful die cuts…

Now, it’s time to assemble it, which is always so much fun! You’ll notice that as I began arranging my items, I changed my mind a little bit and the final spread is different from the digital version I originally made in Photoshop (up above).

Here is a look at the final project as it took form…

I used some enamel stickers, glitter tape, and a scalloped border punch just to give more depth and details to my spread…

BLOG 4

I really love using digital kits and turning them into physical projects. It’s so much fun to see something that starts out digital take form in a physical format… and the added benefit is that we can print digital products as many times as we want!

BLOG 5

As you can see, a traveler’s notebook such as this is an easy and fun project that you can make in just an hour or two using any notebook or planner you already have on hand.

If you’d like to give this a try, too, don’t forget that you can earn challenge points at The Digital Press! Come visit the CROSSWORD SECTION in The Digital Press forum, and you’ll find this month’s Hybrid Challenge thread (*NOTE* for each month’s Hybrid Challenge at TDP, you get to choose one of the two (2) “Hybrid How-To” tutorial posts from here on the blog for that month, and then you get to make your own version of that chosen project). If you choose to give today’s project a try… all you have to do is make a traveler’s notebook using digital papers and elements that have been printed and cut into a physical format (similar to mine, but it doesn’t have to be identical in size or format — you can do what works for you!).

Give it a shot, and share your final results with us! We can’t wait to see what you come up with. 🙂

Have a great weekend… and happy scrapping!


IMG_5877
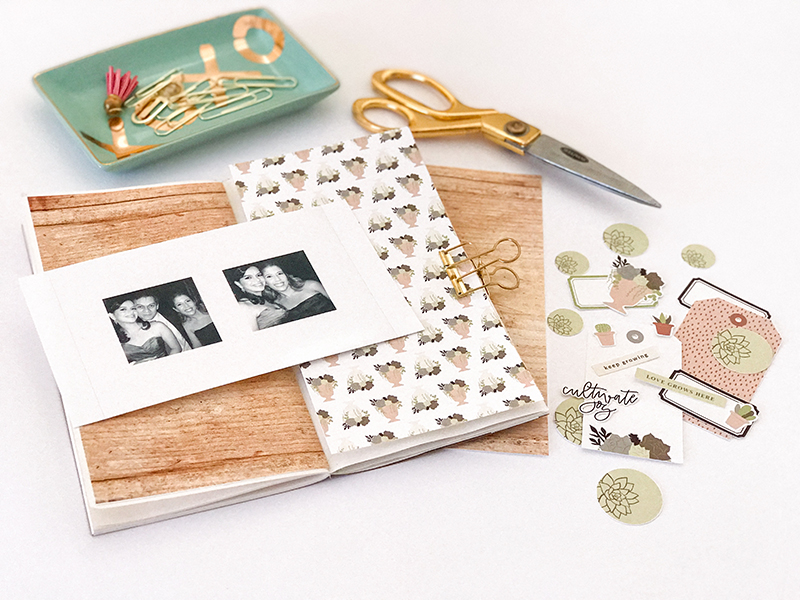
About the Author  Andrea Albuquerque is part of the Hybrid Creative Team here at Digital Press. Andrea has been a scrapper since 2010 and a photographer since 2012. Although she adores the flexibility and creativity of digital, she can’t resist playing with paper, paint, and embellishments… so hybrid scrapping is the perfect medium for her! She lives in Brazil with her hubby.