Feature Friday | River~Rose Designs


Today we are excited to feature the lovely Bobbie of River~Rose Designs as a part of our Feature Friday series. Personally, I love her designs and I am thrilled to get to know her better while also showcasing my favorites from her store at The Digital Press with you.

Bobbie creates digital products that are very versatile and easy to work with when you’re scrapping your memories. She always includes a lot of great elements in her kits, like flowers, flair buttons, butterflies, hearts, and cute little elements like owls… and I love the extra element packs that she creates, which give you even more variation to work with. Bobbie’s kits are always bright and colorful and fun to work with.

Here are a few of my favorite designs by River~Rose Designs…


Don’t you just love how bright and colorful all of those kits are? 🙂

I asked Bobbie a few questions, in order to get to know the person behind all of those wonderful designs even better…

Where do you live?
Right in the middle of the Unites States, in Missouri.

When you’re not designing, what do you do with your time?
I love to crochet!

What are 5 tidbits of trivia we might not know about you?
—We love playing pool, we have a pool table in our living room and entertain often for our friends who love to play, as well.
—I don’t have a favorite color; I like them all!
—At the age of 40, almost all my children are grown. They are ages 16, 18, 22, and almost 24.
—I am self-taught in Photoshop. I just sat down one day with the program and started playing and never stopped.
—I was named after my father. His name is Robert Louis and they called him Bobby Lou when he was young. So, I’m named Bobbie Lou.

Which of your products is your favorite?
Beautiful Life

You may have noticed that I am a huge fan of Bobbie’s designs, and so here is a sampling of some of the layouts I have created with her kits…

I hope you’ve enjoyed getting to know Bobbie better. Check out her store HERE and don’t forget to have a look at the beautiful new products that she released today. Also, there will be a 30% OFF SALE in Bobbie’s shop all week long (sale will end at 11:59pm ET on Thurs 7/21)!

Wishing you a great day!


biancka

About the Author Biancka is a creative team member here at The Digital Press. She is a stay-at-home mom (SAHM), a wife to Edwin, and mom to Jasper. She lives in the east of The Netherlands (about 30 minutes from the German border). She is addicted to scrapping, but also enjoys baking, reading books (mostly thrillers), watching her favorite TV shows, and photography.

Tutorial Tuesday | Capture the Everyday

I’ve been following a few photography challenges this year, and even if I don’t do them every week (or at all, let’s be honest!), they are slowly influencing me and helping me see my daily world with new, creative eyes. A few days ago I was doing our laundry and decided to capture this everyday, mundane task as artistically as possible, and in as many different ways as I could think of. And it was so, SO fun!
Capture the Everyday

Of course, some of my images didn’t turn out… but that’s OK because experimenting was part of the fun. I decided to implement various photography techniques — like macro, changing angles and perspectives, long exposures, purposeful blurs, compositional “rules” like leading lines, centered compositions, repetition/pattern, texture, rule of thirds, etc.

Capture the Everyday

This was truly an eye-opening experience and I never thought photographing something as mundane as the laundry would be so fun and could bring so much variety in the images.

Capture the Everyday

To add some cohesiveness to the photos I took, I edited them all with The Basics Lightroom Presets (#1) by Dunia Designs.

If you, too, want to see — and document — your everyday life with new eyes, why not try something similar?

  • Grab your camera and focus (pun intended!) on some daily aspect of your life — a task (like my laundry), an object, a place, etc. You don’t need much time to do this; 5-10 minutes is plenty to do this sort of creative exercise
  • Try to look at your everyday event like an explorer would when discovering a new civilization. Forget everything you know about this thing and try to see it with fresh eyes, as if it were the first time you laid your eyes on it
  • Then… simply grab your camera and start playing! Change your angles, take a wide shot to capture the whole environment (or the opposite — come closer and do a close-up shot), play with light and shadows, experiment with the composition rules and have fun. Maybe you won’t produce a masterpiece but you will definitely start seeing your world with new eyes!

I hope you’ll have fun experimenting and being creative, and I’d LOVE to see the result if you try your hand (and eye) at it! You can leave links to photos in the comments, below… or if your photos actually result in the creation of a scrapbook layout, you can post it in TDP’s gallery and then link me up here!


ChloéAbout the author  Chloé is in charge of PR and communication for her small town by day, is a digiscrapper “by night,” and a photographer whenever the light is beautiful. She lives with her man and fur-babies in a small town of Alsace (in the northeast of France), where she loves to read, watch good TV shows (TWD being her absolute favorite), and just hang out with her friends — no matter if they are close by, online, or away in her Swiss hometown. She recently became quite obsessed with her BuJo (bullet journal) and can’t wait to discover how much it’ll help her improve her (so far non-existent!) organisational skills!

Feature Friday | Sabrina’s Creations

Hey there! I am super excited to bring you a new Feature Friday… this time, featuring Sabrina’s Creations!

I asked Sabrina to talk to me about her designs, and here is what she had to say about her work… “I try to give my designs a clean look because I like to keep my scrapbook pages simple. What I really like to have in every kit is a lot of wordart pieces, splatters, or coffee stains. I also love to make templates, which makes it easy to make a scrapbook page. I even love it when people use my templates and give it a personal touch. My favorite item to design are wordarts.”

Here is a look at some of my own favorite products designed by Sabrina…


I asked Sabrina to answer a few questions so we could get to know her better…

Where do you live?
I live in a small city in Belgium, 30 minutes from Ghent.

When you’re not designing, what do you do with your time?
I’m a SAHM of 4 kids so I know what to do… I wish I had more free time but the household can’t wait. I try to do everything that has to be done in the morning so I have some free time for myself in the afternoon before the kids come home from school. Mostly, I’m designing in my free time. I have to make work of our yearly photobooks. I also love the see series and taking photos. Also, I’m very active in the schoolcomité and we do a lot of activities during the school year. In the weekends, we are also working in our house, still doing renovations but it goes slower than a year ago.

What are 5 tidbits of trivia we might not know about you?
—I broke my both wrists when I fell with my bike below a bridge when I was 12 years old, it was not funny at all.
—When I had my driver license for about a week, I accidentally hit a tree in a turn… whoops
—I met my husband through the internet in a chatroom. After 3 months of saying just hi and bye to each other, we got to talk to each other and after almost 16 years, I’m still happy that we have been talking to each other. 🙂
—I love pickle potato chips; when I have them at home, I can’t stay off on them, so not bringing them a lot from the store.
—Love to take a long warm bath with some music, that’s the time when I really have no children around me. 🙂

Which of your products is your favorite?
Although my favorite type of item to design are wordarts… I’m in love with the kit So Good Together. I was immediately in love with the colors, and I love the pattern papers and the word pieces…


Here is a sampling of layouts using products designed by Sabrina’s Creations…


I am so glad to have had the opportunity to help you get to know Sabrina’s Creations a little better today! She is a wonderful designer (and person). If you haven’t had a chance to take a look at her shop here at The Digital Press, I can’t wait for you to check it out! And even better news…  there will be a 30% OFF SALE IN HER SHOP all week long (sale will end at 11:59pm ET on 7/14)!


Krista


About the Author  Krista Lund is a mom of 3, married to her high school sweetheart and living in the San Francisco Bay Area. Some of her favorite things are brownies, chips ‘n’ dip, taking pictures, and documenting her family’s story.

Tutorial Tuesday | Using Clipping Masks

In Photoshop, I often create clipping masks in order to “change the shape” of the papers and photos I am using on my page, and/or to blend my photos or papers into the rest of the page. Today, I’m going to share a few ways that I utilize them and how I achieve different looks with clipping masks.


CREATE A MASK FROM A SHAPE OR ELEMENT

One way to use a clipping mask is to clip a photo or a digital paper to an existing shape or element, such as I’ve done in my Vroom Vroom page, shown here…


See the photo, above? It takes the shape of a mask that I created using flower elements (if you look on the right-hand edge of the photo mask in the layout above, you can see a few spots along the edge of the mask that look like flower petals… similar to the flower you see on the left-hand side of my layout. That’s because I created the mask using those shapes!).

To do this, first I selected a few flower elements and then merged those layers to create one shape. Then I applied a color overlay to it (while this step isn’t totally necessary, it’s really helpful because the colored flattened layer makes it much easier to see what your masking shape looks like without any dimension to it).

At this point you can re-size, warp, or re-position your newly-created mask shape as much as desired. Warping or puppet-warping are my preferred tools for manipulating a mask shape.

Once you have a shape you like… it’s time to clip your photo or your digital paper to that shape. While your newly-created mask layer is selected, open whichever item you want to use (photo/paper/etc.) and drag or place it onto your page. It will create a layer just above your mask layer. Now you are ready to clip them together. There are a few ways to achieve this and it all boils down to a personal preference. To create your clipping mask you can select Layer > Create Clipping Mask in the menu… or you may right-click on the paper layer and select “create clipping mask” from the pop-up menu that appears… or a third option is to press CTRL-ALT-G (for Photoshop) or CTRL-G (for Photoshop Elements, a.k.a. PSE). My personal preference is to hold the ALT key as I hover over the line between the paper and mask layer (you will see the cursor change to a downward pointing arrow) and then click. Choose your favorite method.

Now your item is clipped to your mask shape, and your item takes the shape of that mask. Refer again to my photo in the layout image above. Meanwhile, if you look in the layers palette at the right side of your Photoshop/PSE workspace… you’ll see that the top photo or paper layer will be indented just above your mask layer when you look at it in the list. Until you merge these layers, you will be able to independently manipulate these layers.

In my layout, above, I actually used a second clipping mask, as well — see the pink painty splatter just behind the photo layer? I clipped a pink paper to a mask from Hello Sweet Pea: Masks by KimB Designs, positioning this below the first mask and resizing to allow edges to peek out from under the other mask. Here’s a look at the mask I used before I covered it with that pink paper you see in my layout…


…and that actually brings me to my second method for using clipping masks on my digital pages…


CLIP MULTIPLE PHOTOS OR PAPERS TO A MASK

Another way to use a clipping mask is to clip more than one photo or paper to a mask, as I’ve done in my Ruffle Your Feathers page, shown here…

This mask was a little more labor intensive, as I ended up stuffing my mask with 3 photos, some paint, and an overlay.

To do this, I used a mask from Cracked {Quick Masks} by Anita Designs, shown here…

You can clip as many products as you wish to your mask. To clarify, the bottom layer will be your mask, and then each layer above it will be “clipped” (CTRL-ALT-G in Photoshop; CTRL-G in PSE) to the one below, so that all layers clip together above the mask layer.

Because the mask I chose to use was not solid (there were some transparent areas, as you can see in the examples on the preview, above), some of the underlying background paper was visible in the masking. When I erased back some edges from the photos, they blended more easily because of the transparency of the mask, allowing the underlying background to unify the 3 images (there had been rocks that I erased out of one photo). In addition to adding some paint and an overlay into my mask… I stamped over the clipped layers with some paint and another overlay.

The mask opacity may be increased or decreased. A simple way is to erase away the desired areas you wish to be more transparent or if you want the mask to be more solid, select a brush and fill in areas of the mask. Be sure to have selected the mask layer in the palette first.

If you haven’t used a clipping mask before, give it a try! It opens up a myriad of possibilities in your page design (and the process can also be quite addicting). Have fun with it!


Rae


About the Author  Rae is part of the design team at The Digital Press and has been a scrapbooker and photographer for many years. She lives on the west coast (USA), with her hubby and labradoodle. She’s addicted to chocolate, TV shows, books and Photoshop.

Hybrid How-To | 4th of July Party Favors

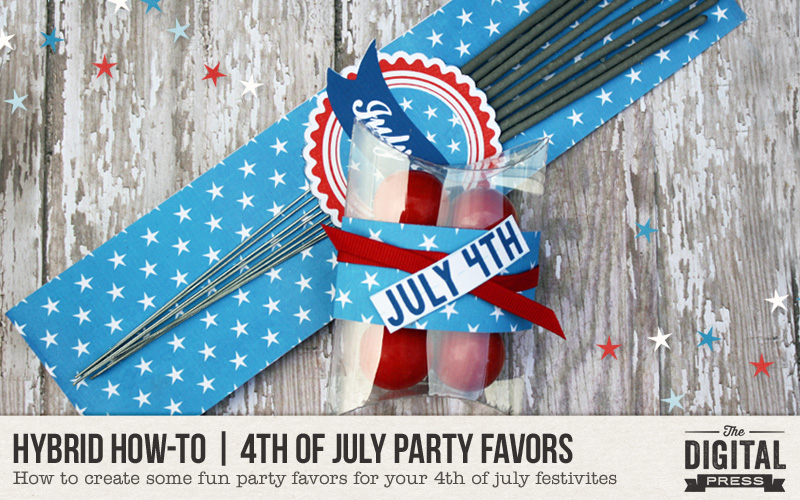
Summer is in full force, heat and all. So many fun things happen during the summer… vacations, pool parties, barbecues, and more — including the 4th of July! A lot of people celebrate the 4th with food, family, friends, games, and lots of fireworks. I love the 4th, and the meaning behind the celebration, so I decided to do make some 4th of July party favors. It’s easy, and I’m going to teach you how in today’s Hybrid How-To post!

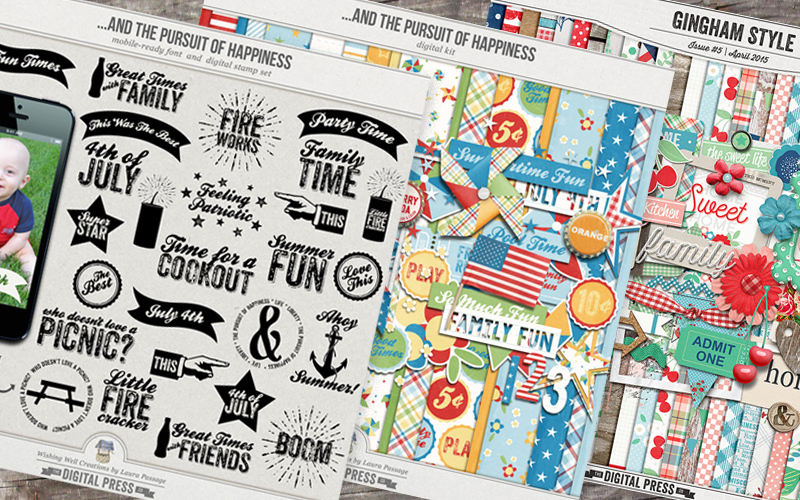
For this project I used the …And the Pursuit of Happiness | Kit & the coordinating digital stamp set set (which is also mobile-ready!) — both designed by Laura Passage. I also used the Gingham Style collab collection by The Digital Press Design Team (from back in April 2015).

I am a Silhouette girl… and I use the SSDE (Silhouette Studio Designer Edition) for almost everything. I find that even some of the more difficult things are easier to do in this software over Photoshop Elements (PSE). I still use PSE for my all of my scrapbooking, however.

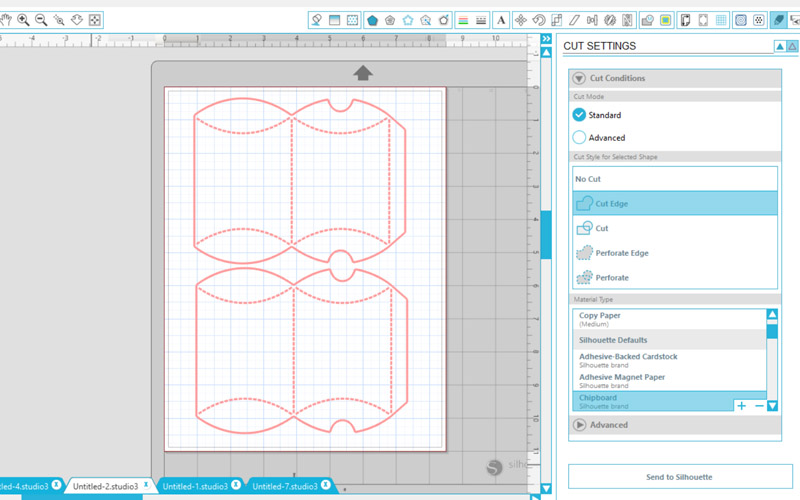
First, I opened this pillow box file I already had in my stash of hybrid files. I re-sized it until two of them fit onto an 8.5″ x 11″ page. *NOTE* there is no need to turn on registration the marks here, but do make sure the cut lines are on.

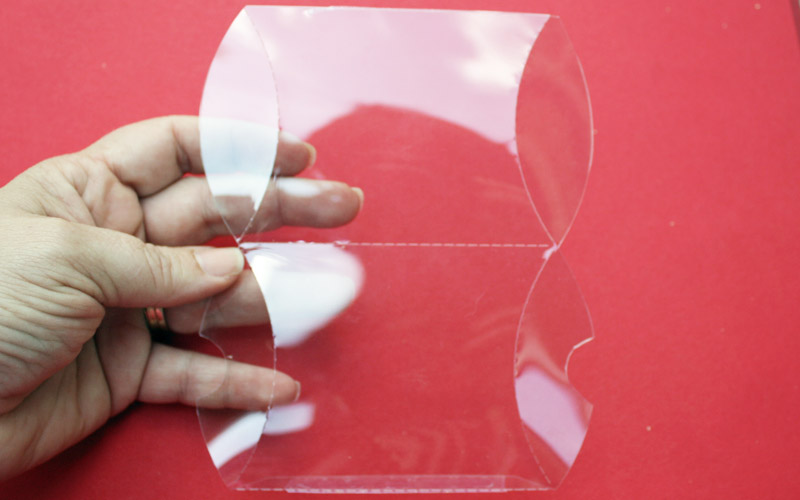
Then, I used SSDE to cut out my project on clear cardstock. I loooove clear cardstock! It can be purchased online. It is a little thicker than the acetate sheets that I used in my floating ornament tutorial. I put my cardstock onto the cutting mat, loaded it, and cut. The cut settings are “chipboard, blade on 7 and double cut.” Then, to assemble it… I just used one strip of double side tape on the edge.

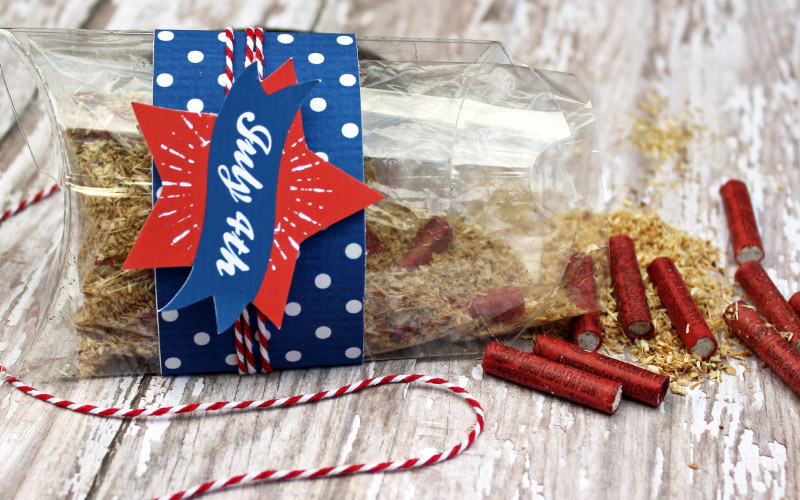
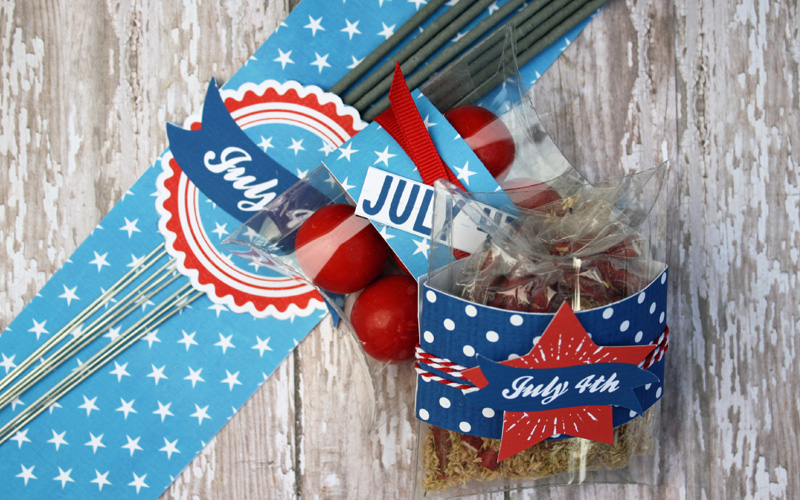
Next, I filled my new pillowbox container! I used fireball candies to fill this one. I think the finished product will be cute in a little basket on the treat table at a party. I also filled another pillowbox container with little firecracker pops.

The next step was to embellish the pillow box. I drew out long strips and used various digital papers from the kits to fill them in. I also opened up a few element files (using the star shapes, and stamps from the mobile-ready font & stamp set) and put them on the same page.  Again, no need to turn on the registration marks in SSDE, because after printing I will cut them out with my scissors.

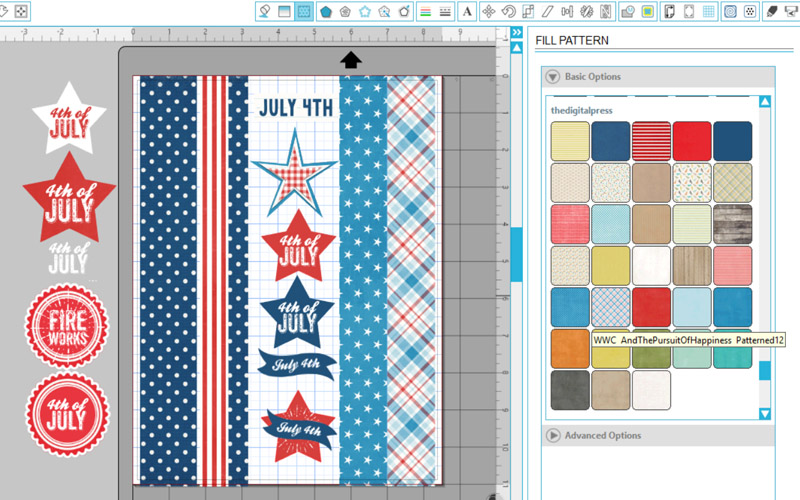
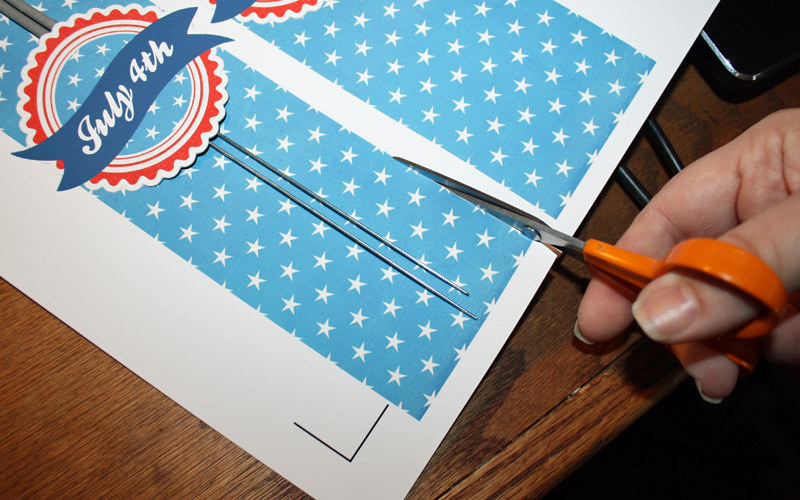
Here’s a look at some of the pieces after I printed them out, as I was cutting them out…

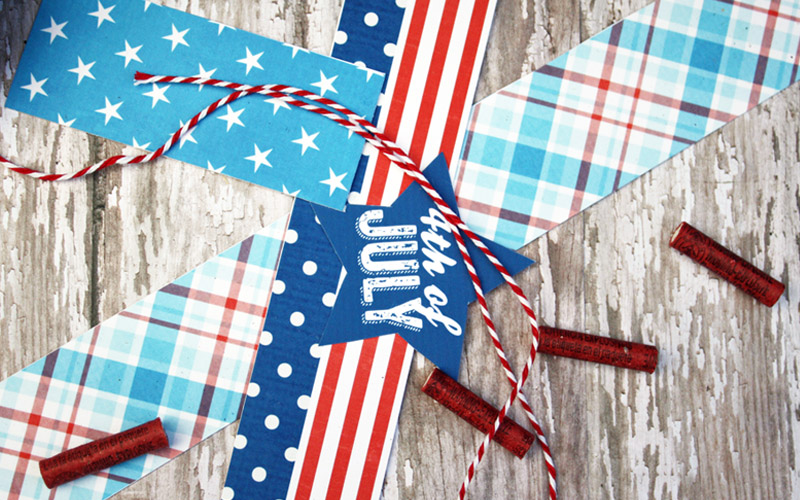
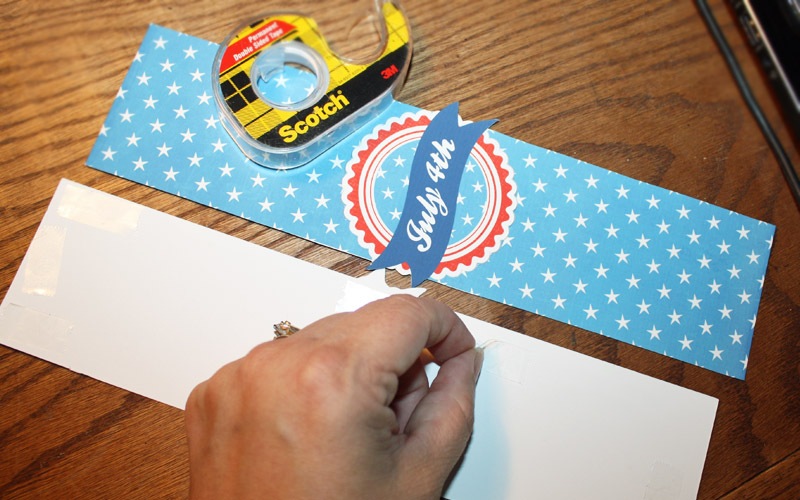
Next, I combined the paper strips with the other elements — attaching them with double sided tape. I also embellished with ribbon. How cute are they?

This next one is the one I filled with the firecracker snaps (you throw them on the ground to pop)…

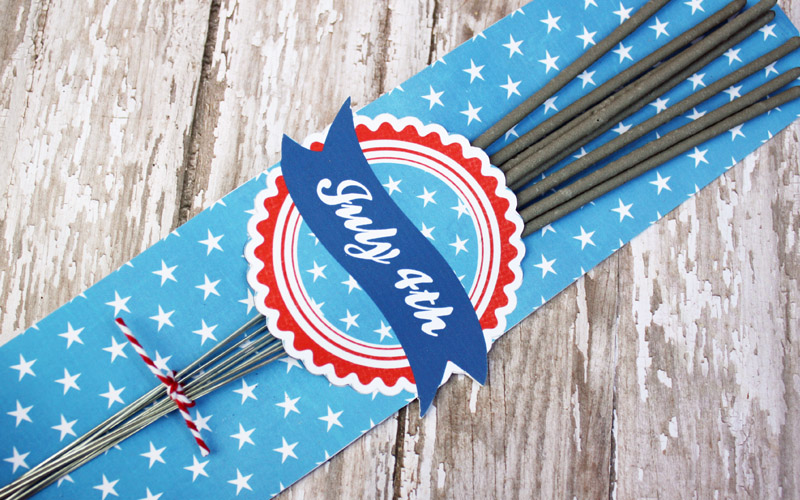
Now, to make the sparkler holder. These will be presented as a “Thank You” gift for coming to our 4th of July festivities…

For this part of my project, I used Silhouette Studio. To design the holder, I used elements from all three products.


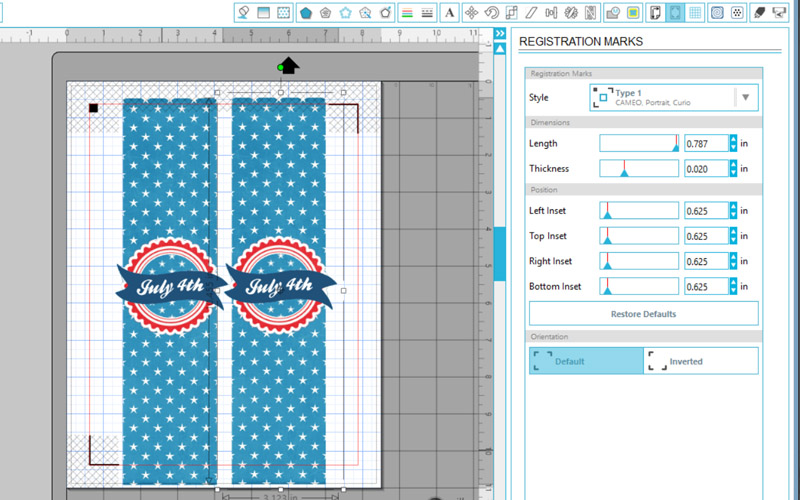
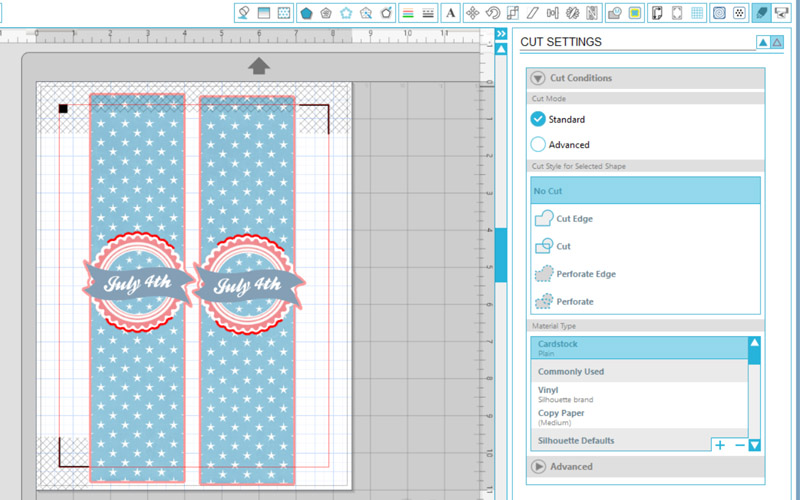
You can print and use scissors (or an exacto knife) to cut around the opening… OR… if you have a Silhouette, you can turn on your registration marks and do a print and cut. As you can see, the design is past the registration marks — and that is okay because I will cut that part with my scissors. You can see here that I have cut marks around only part of the middle part of the design. I did this by tracing the “circle” part of the design and cutting part of it away. This is to ensure that it would only cut a small opening for the sparklers to fit through.

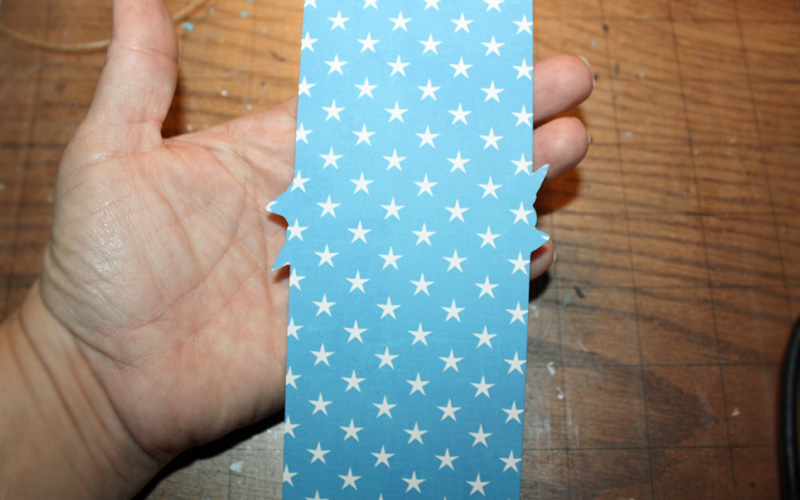
You can see here in this next image where it cut (I put the sparklers through the opening so that you can see what I mean)…

The part that goes past the registration marks will not cut. That is okay for this project. I simply took my scissors and cut out the rest.

I backed the sparkler holder to make it a little more sturdy. To do this, I started out by drawing out a 8.5″ x 11″ shape then filled it with paper from the …And the Pursuit of Happiness kit. To get the shape of the template, I mirrored the image and turned on my cut lines before printing. After printing, I cut it out with my machine. You do not have to use the registration marks for this part of the project. If you don’t want to go through all the steps above, you can simply print the paper and cut a strip with your paper cutter or scissors. It just won’t cover the back of the banner on the sides… but I think that would be just fine, and a lot quicker!


After cutting, adhere with double sided tape…

What a fun party favor! You could always add more details, as well… like the year, your name, etc.

This project was really fun. There are so many more things you can make for your party. I’m thinking of things like cupcake toppers, garland, and food tags… just to name a few. Let your creativity run wild!

I hope that you enjoy giving these fun projects a try, and I also hope you have a safe and Happy 4th of July weekend! Thanks so much for stopping by the blog today!


TanyaAbout the Author  Tanya is a part of the hybrid team here at The Digital Press. She has been hybrid crafting for at least 12 years now, and loves creating and sharing those creations with others. Her all-time favorite tool is her Silhouette Cameo. She has been married for 26 years and has two sons: Chris, 24 and Chance, 20. She also enjoys crocheting, photography and woodworking.

Feature Friday | Sherry Ferguson

Today we are featuring the lovely Sherry Ferguson as a part of our Feature Friday series, and I’m excited that we will all get to know more about her and her awesome designs.

Sherry’s designs are very versatile, and fantastic to use when scrapping your photos and memories. Her designs are fun, funky, and colorful, and always include fun embellishments. I love her patterned papers (whether available separately, or within a larger kit/collection), as they are fresh and full of color! I love to work with her designs, as they almost always contain a lot of flowers, buttons, and word strips — completely perfect for my style of scrapping.

Here are a few of my favorite Sherry Ferguson designs…


We asked Sherry to answer a few questions so we could get to know her better… so let’s see what we might not already have known about her!

Where do you live?
I live in North Texas, USA

When you’re not designing, what do you do with your time?
When not designing… I’m usually cooking or baking for my daughter, who has severe food allergies.

What are 5 tidbits of trivia we might not know about you? 
— I have a degree in accounting
— I love country music
— I love burritos and eat them everyday
— I love swimming & water parks
— I never watch TV; only an occasional movie

Which of your products is your favorite?
I guess that depends on the time of year. County Fair is one of my all-time favorites, and perfect for this time of year. 🙂

I really love to use Sherry’s designs! They always make me want to create more and more pages. Here are just a few pages that I have done with her designs…


I hope you enjoyed our little tour through Sherry’s designs, and that you are interested to see more of her work. If you haven’t had a chance to take a look at her shop here at The Digital Press, I definitely recommend that you check it out! There will be a 30% OFF SALE IN HER SHOP all week long (sale will end at 11:59pm ET on Thurs 7/7)!


Miranda

About the Author  Miranda is mom of two teenage boys, aged 13 and 15 years old, and is also a fur-mummy for her 3 Bernese Mountain Dogs. She lives in the South of the Netherlands, close to the beach where she loves to walk with her dogs. In real life she is HSE-responsible for few companies in the construction industry. She loves to read Danielle Steel novels, long walks at the beach and she loves Italy; and has been digiscrap-addicted since 2007.