I can’t believe Christmas is just around the corner. It’s all happening way too fast this year; even my boys mentioned that it doesn’t quite feel like Christmastime yet. I mean, I just put up my tree and haven’t even gone shopping yet… and before you know it, we will be cheering “HAPPY NEW YEAR!” I’m going to do my best in the next two weeks to slow down and enjoy the holidays. I’ll let you know how that works. 😉
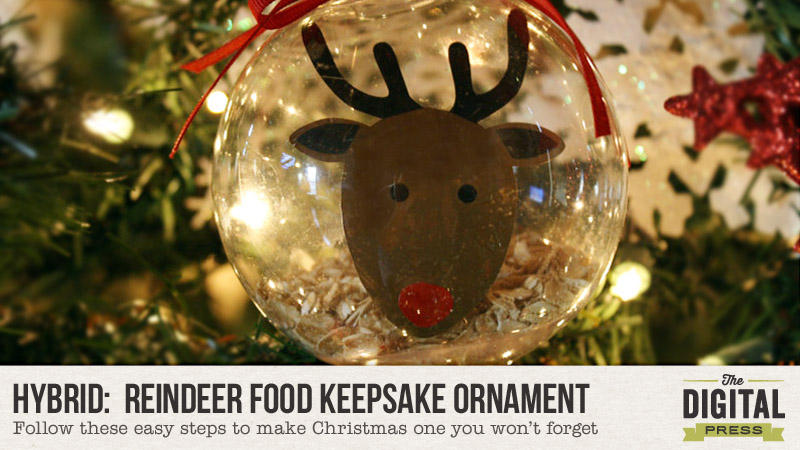
Meanwhile, today I am here to show you how to make an adorable “Reindeer Food” keepsake ornament!
I have seen the idea behind today’s tutorial before (the concept of making “Reindeer Food,” that is)… and I thought it would be cute to put my own little twist on it. Instead of simply putting the reindeer food in baggies to put out on Christmas Eve, I decided to also make an ornament so that when the kiddos are done putting out their reindeer food the can have a cute ornament to keep.
SUPPLY LIST
- 4 in plastic fillable ornament (I purchased mine at the Dollar tree)
- projector sheets (acetate sheets; found at any office supply store)
- vinyl (I got mine from Hobby Lobby)
- white cardstock
- ribbon
- printer and cutting machine (I use a Silhouette Cameo)
- the special reindoor food (see below for recipe)
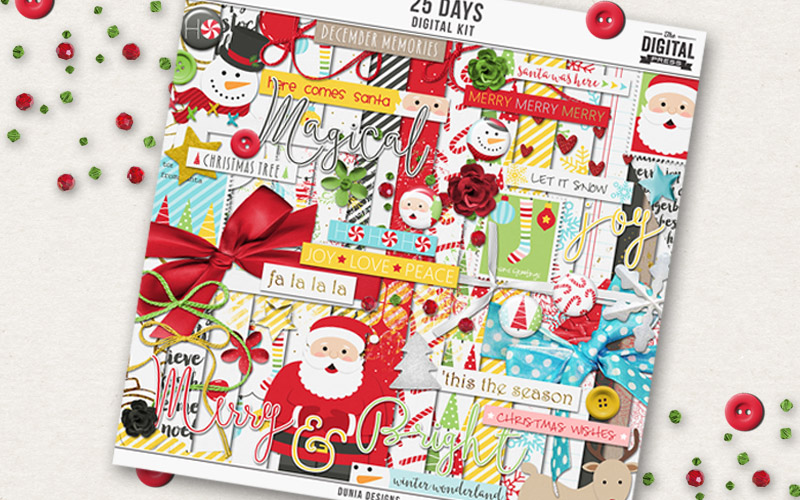
- digital scrapbooking kit of your choice (I used 25 Days by Dunia Designs; I am absolutely in love with this kit!)
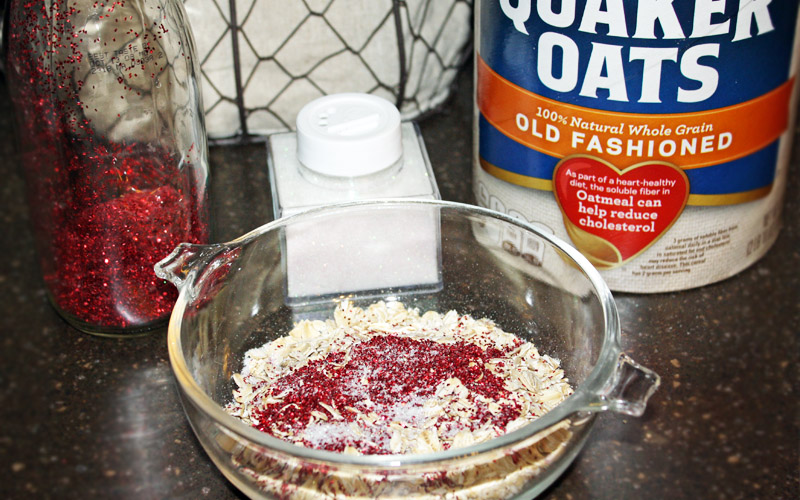
Here is my secret Reindeer Food recipe: oats and glitter (I use both red and green). That’s it! …top secret, right!? I have also seen cheerios and little Christmas candy beads use before, too. I’m sure you can just add whatever you think Santa’s reindeer will eat. If they were my reindeer, they would be filling up on sweets… lots of sweets… 😉
Next, we’ll create the ornament. First on that task list is creating the clear acetate insert for the ornament.
If you don’t have cutting machine available to cut the vinyl shapes that make up the reindeer, you can also print the reindeer directly onto the acetate sheets (just make sure that you get the right sheets for your printer). I like the look of the vinyl on the acetate, so the next few steps will detail that method.
First, you need to draw out the ornament template… and then use that shape to cut out the insert from the acetate so that it will fit inside the ornament. I cut my inserts at about 3.75 inches.
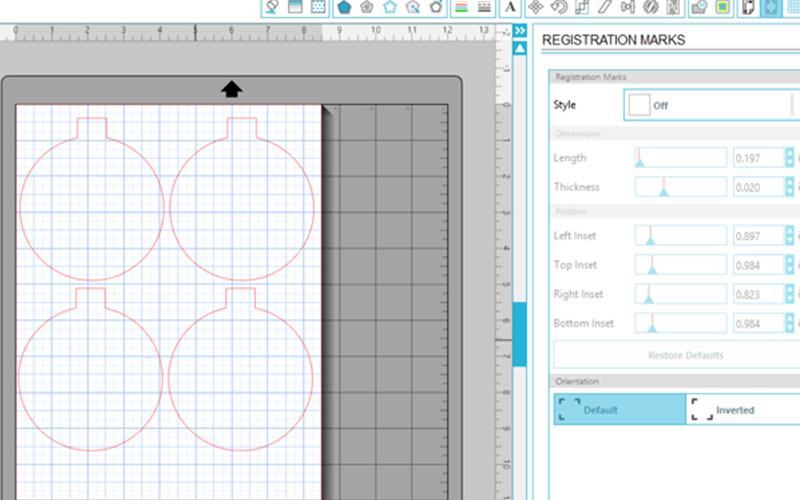
I chose a reindeer image from the digital kit, and then before I “pulled it apart” (see below for explanation), I first laid it on top of my ornament template to test it and make sure it would fit.
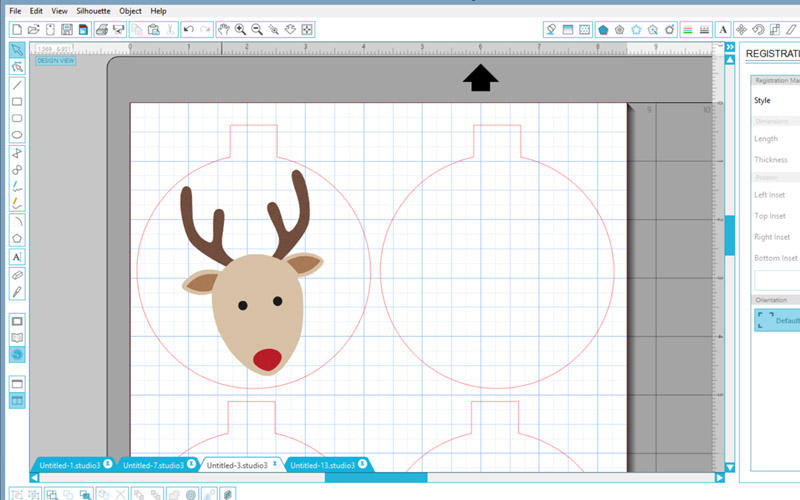
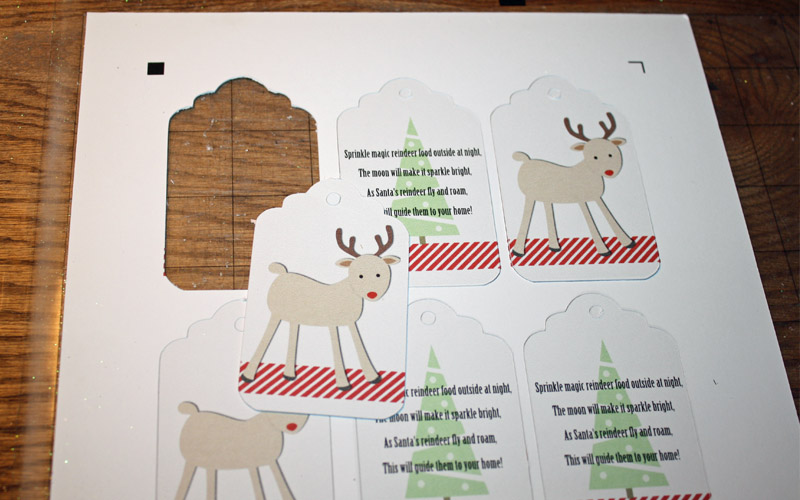
Next, I traced the pieces of the reindeer and separated them in my software (I use Silhouette Studio Designer Edition v3). I laid it out as shown below (separated by color) so that I could put my different pieces of vinyl on my mat in the same places cut one time instead of five.
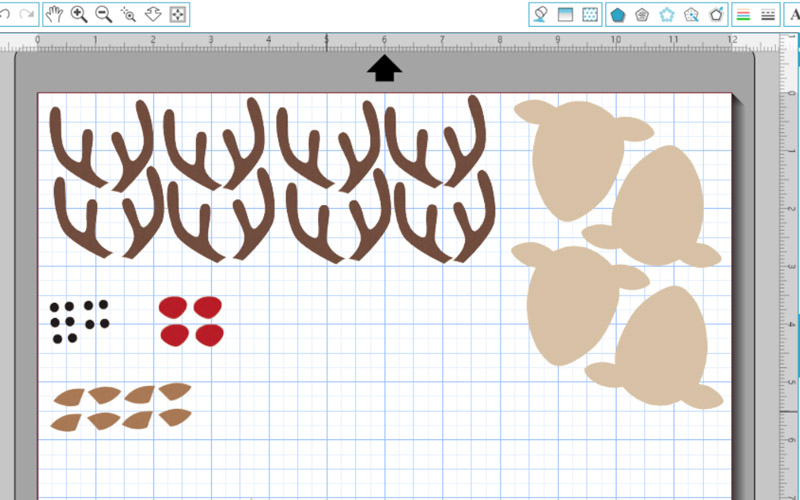
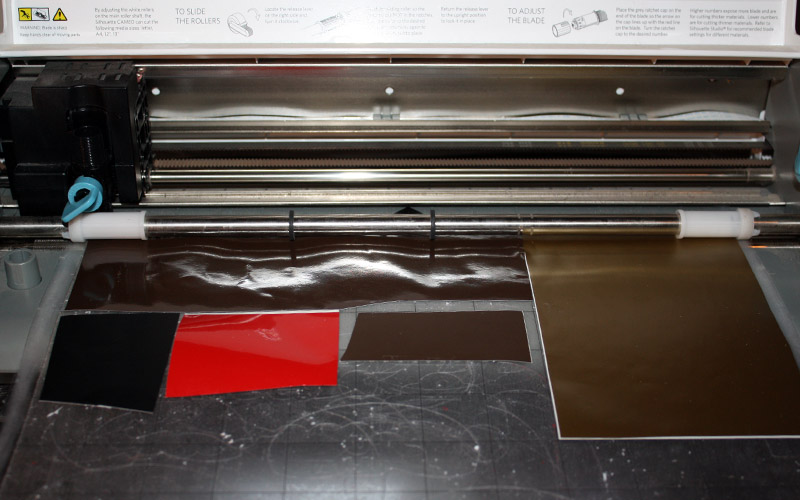
Here’s a look at how I arranged my vinyl pieces on the mat; notice how the arrangement corresponds with the layout of the reindeer pieces in the image above. This is a good way to use up those vinyl scraps (I don’t do a lot of vinyl projects with my Cameo, so most of my pieces are scraps). My favorite thing to do with my machine is print and cut.
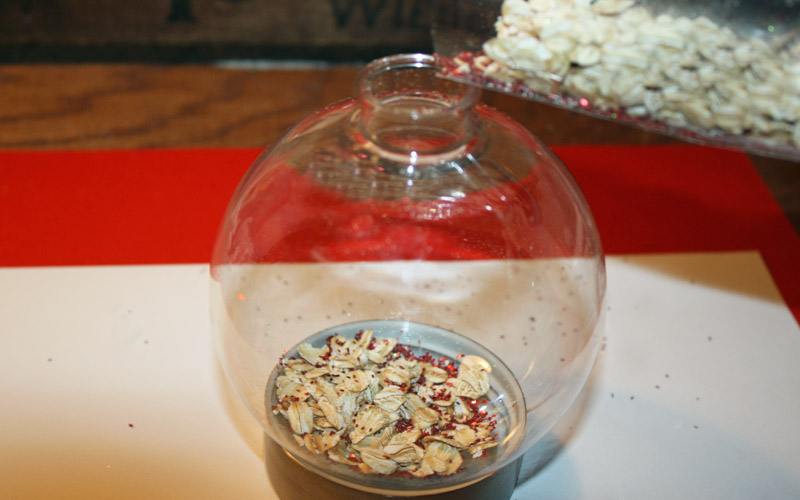
After I had my vinyl reindeer pieces, it was time to fill the clear glass ornament. First, I removed the top of the ornament and filled it with the reindeer food…
…and then it was time to assemble the rest. I inserted the clear acetate sheet with the reindeer vinyl adhered to it as shown here:
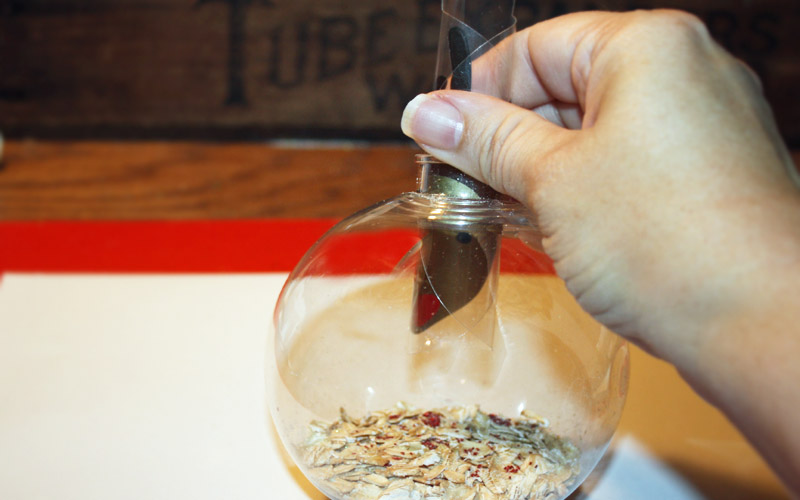
To get the projector sheet in the ornament, simply roll it up and stick it in the ornament. It will unroll when it is all the way in, and will look like this:

*NOTE* If you don’t have all of the necessary supplies to make the ornament, you can also simply design a header and fill little treat bags with the food — no cutting machine required! With that in mind, a tag comes in handy (you can also use a tag like this on the ornament itself). Here’s how to make the tag…
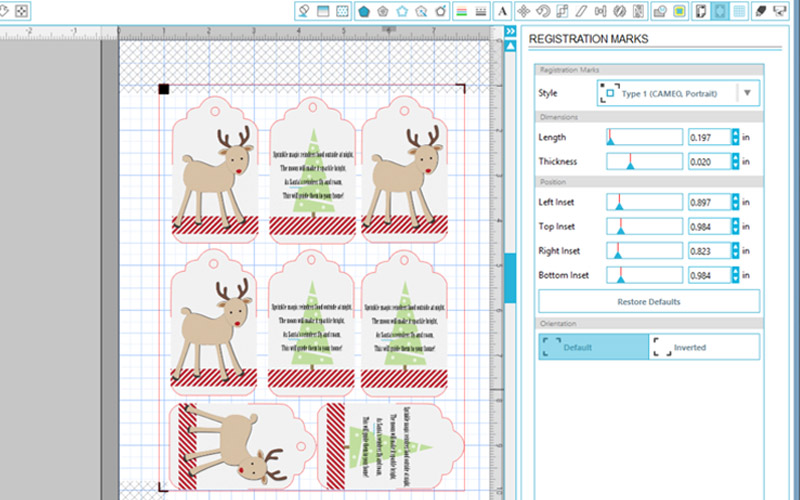
I created the tag in the Silhouette software… but you can also do this with any photo editing program and a pair of scissors.
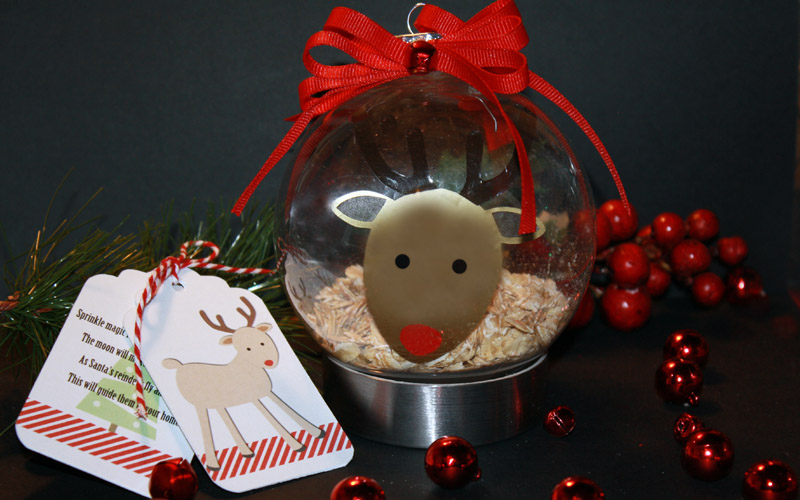
I created two tag images (one reindeer image, and one with a written sentiment), and then tied them together. Aren’t these so cute?

Here’s a look at the final version of this ornament with the tags. I love this little reindeer! I made a couple of these ornaments for some friends’ little guys… and they loved them!
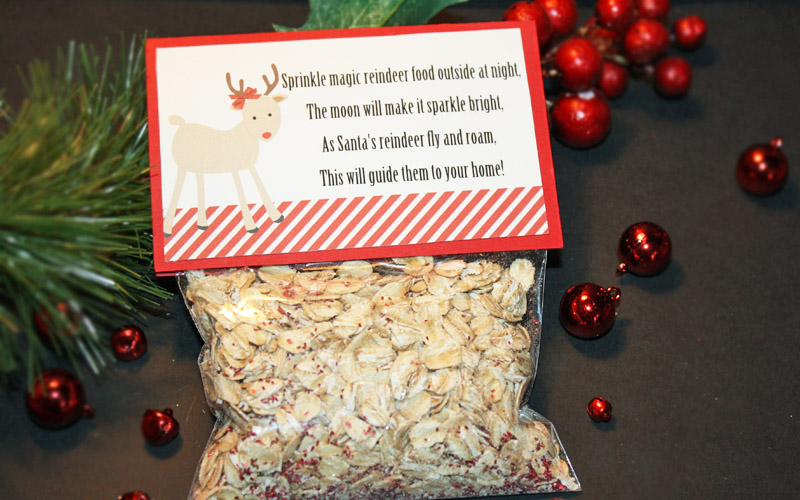
I also put the same sentiment onto a wider piece of cardstock in order to make a “treat bag topper”…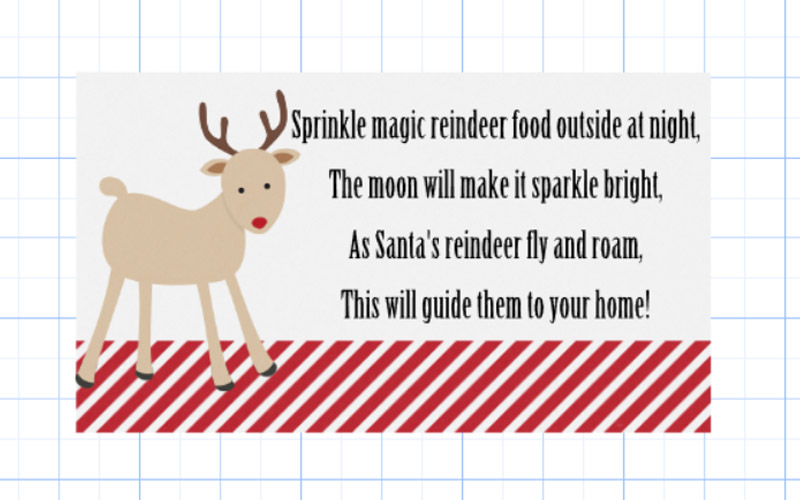
Here’s a look at the treat bag (just the reindeer food, without the ornament). This is a fun little gift, as well!
And there you have it!
I hope this tutorial has inspired you! If you’d like to give it a try, please join me in the forum and have fun creating something awesome for Christmas. You can earn points toward this month’s hybrid challenges! I can’t wait to see your creations.
Have a very Merry Christmas and a Happy New Year. Take time to slow down and spend time with the ones you love the most!
About the Author  Tanya is a part of the hybrid team here at The Digital Press. She has been hybrid crafting for at least 10 years now, and loves creating and sharing those creations with others. Her all-time favorite tool is her Silhouette Cameo. She has been married for 26 years and has two sons: Chris, 23 and Chance, 19. She also enjoys crocheting, photography and woodworking.
One comment