Foodie Friday | k.becca

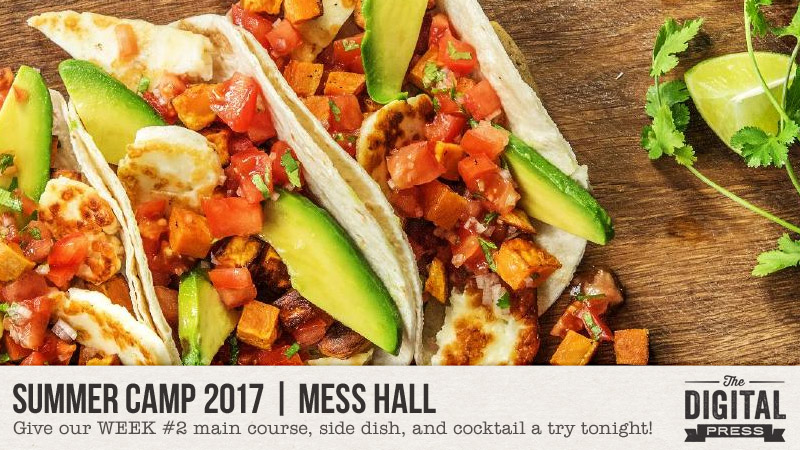
Hello, and welcome to our very first Foodie Friday blog post!

Based on the amazing response we had to our “Mess Hall” activities during TDP’s Summer Camp back in July, each Friday for the rest of the year we’ll be combining our weekly designer features with some fun in the kitchen! Every week, you’ll get the chance to peek into the lives (and kitchens!) of your favorite TDP designers and creative team members.

Not only will we be featuring one of our fantastic designers at The Digital Press each Friday, but you’ll also get to head into the kitchen with her and one of our talented creative team members (and you’ll get a few delicious recipes to add to your rotation!).

This week we will be featuring the talented Kristen Magee of k.becca, and peeking into her kitchen to learn a few of her favorite recipes… as well as a smattering of extra tips provided by me, TDP Creative Team member Carrie (caliten). This is Kristen’s second feature on The Digital Press blog (you can find her first feature article from April 2017 HERE, if you want to learn more about her).

foodieFriday_kbecca_1Sep2017

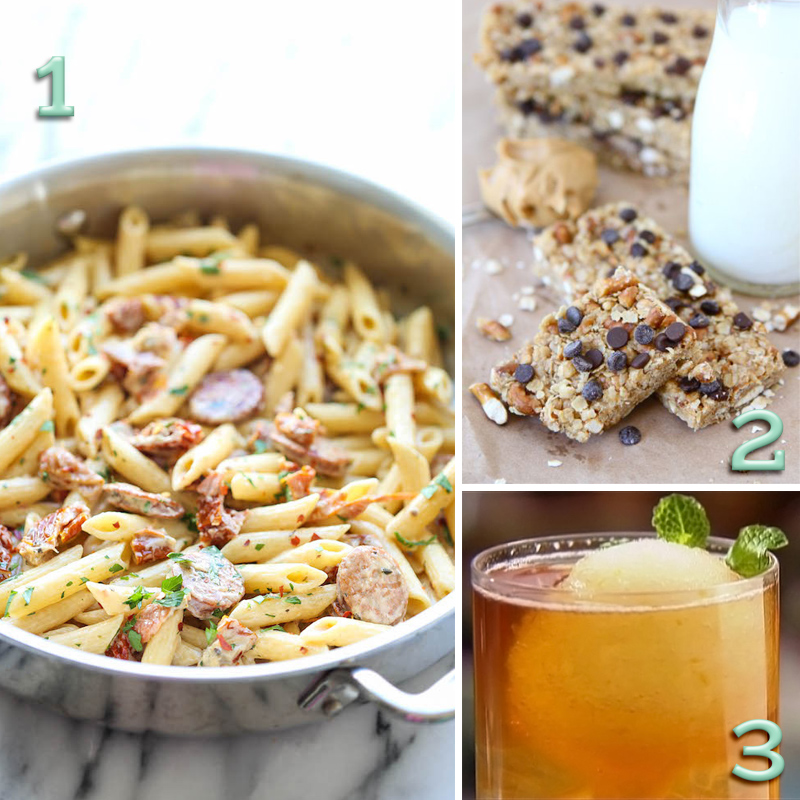
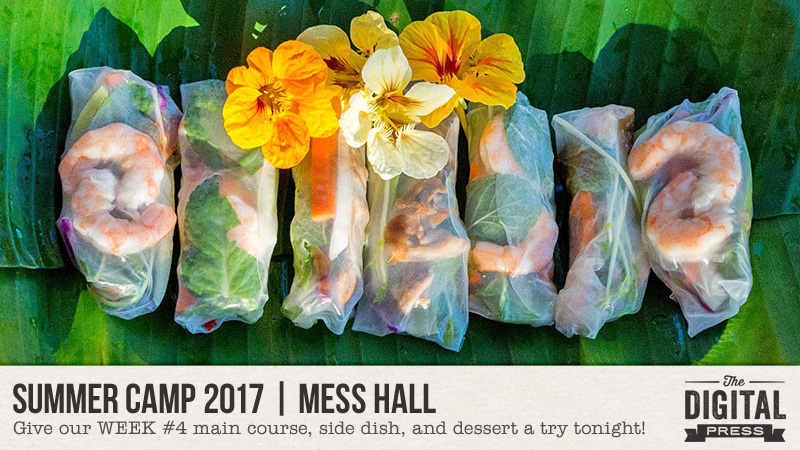
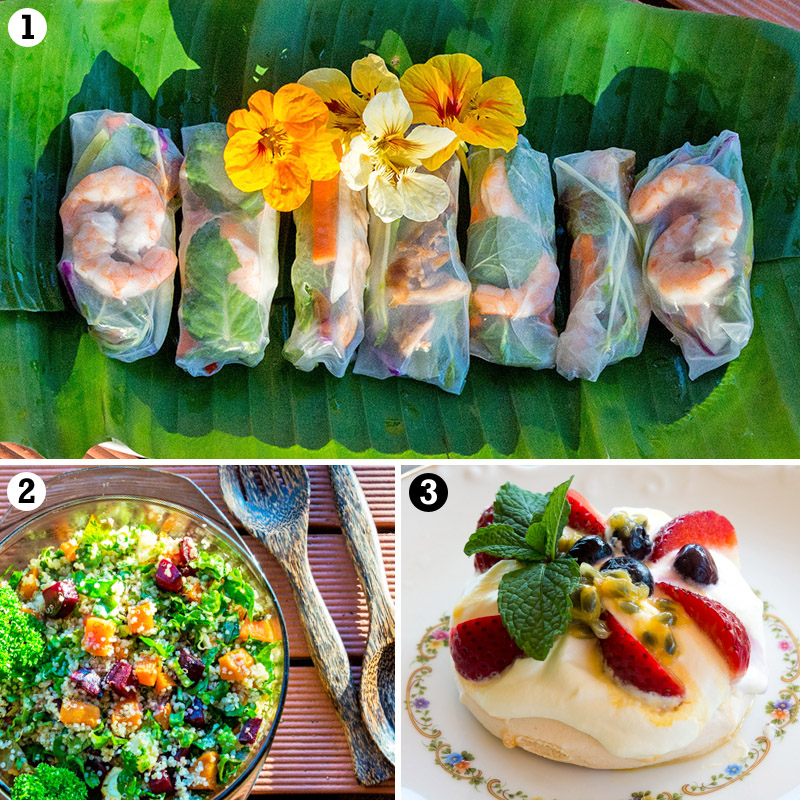
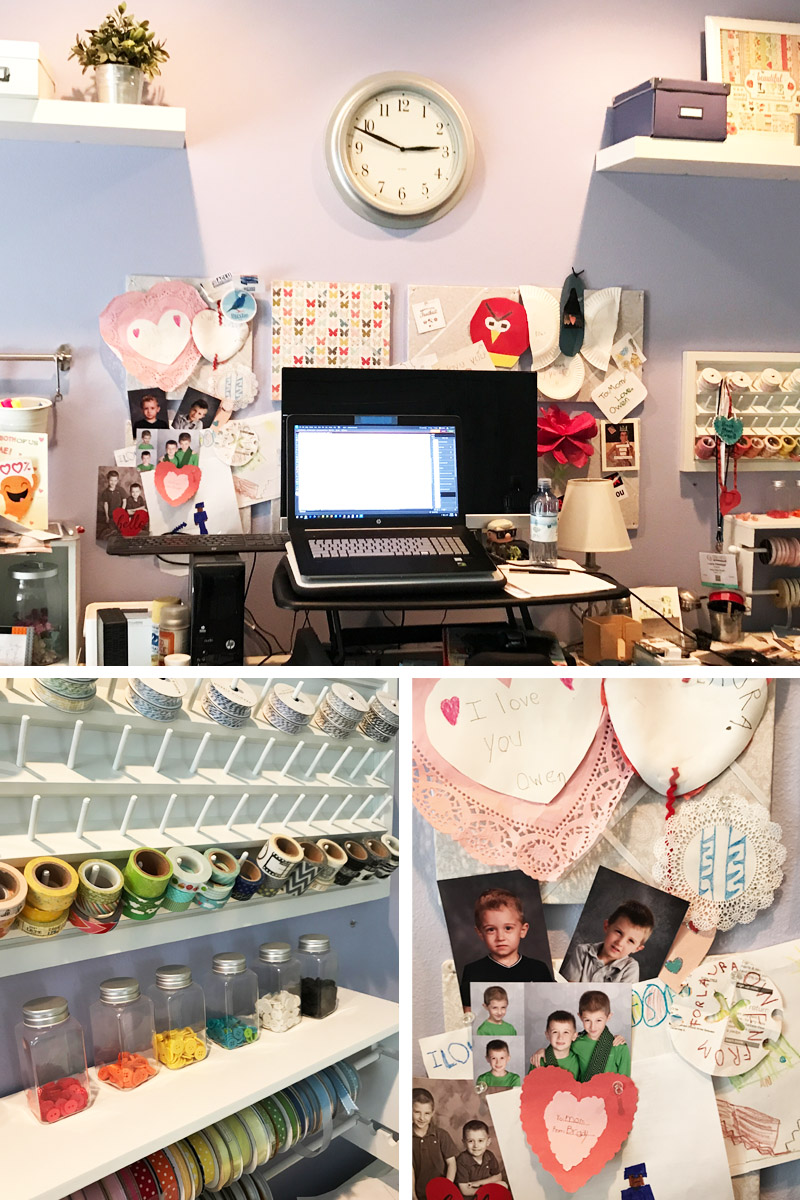
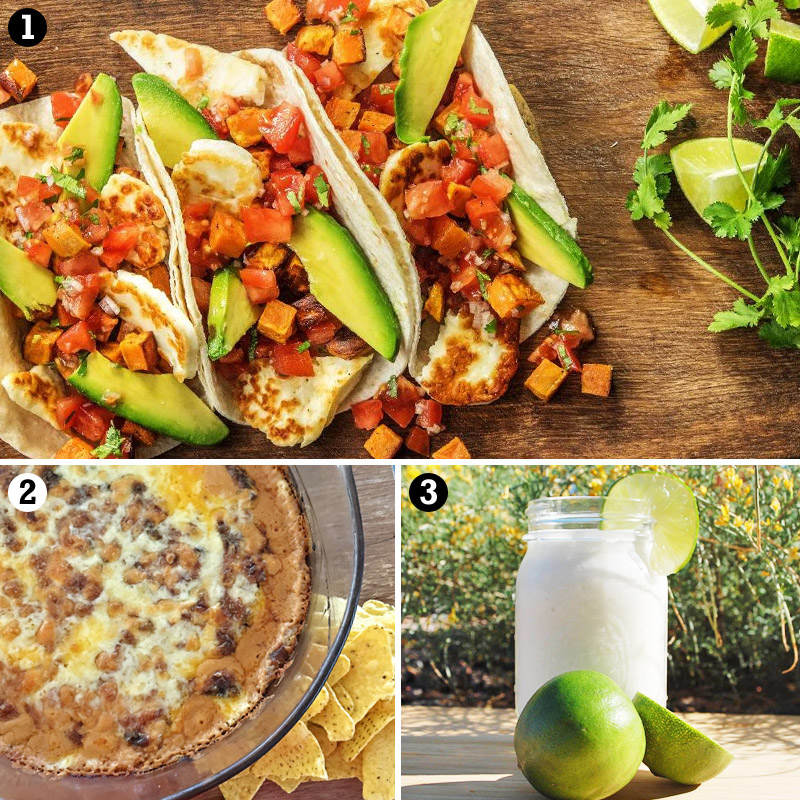
photo credits for [1] [2] and [3] to TDP designer Kristen Magee (k.becca)

So, what are these delicious things you see pictured above?

  • Pasta with Sun-Dried Tomato Cream Sauce
  • No-Bake Sweet & Salty Granola Bars
  • Arnold Palmer

PASTA WITH SUN-DRIED TOMATO CREAM SAUCE

Kristen says, “this is one of my go-to weeknight meals because it’s quick, easy to make, and delicious. The sausage and sun-dried tomatoes give the dish so much flavor and balance out the richness of the cream.”

Carrie says, “if Andouille isn’t your thing, or it’s hard to find, another type of pre-cooked sausage or even a shredded rotisserie chicken breast could be substituted.”

INGREDIENTS NEEDED

—8 oz. penne pasta
—1 tablespoon olive oil (omit if using a non-stick pan)
—2 smoked Andouille sausage links (12-16 oz.), thinly sliced
—2 tablespoons chopped fresh parsley leaves (optional)

FOR THE CREAM SAUCE

—2 tablespoons unsalted butter
—3 cloves garlic, minced
—2 tablespoons all-purpose flour
—1 cup chicken broth
—1/2 cup heavy cream
—1/3 cup julienned sun dried-tomatoes in olive oil, drained
—1/4 cup freshly grated Parmesan
—1/4 teaspoon dried oregano
—1/4 teaspoon dried basil
—1/4 teaspoon red pepper flakes, or more, to taste
—Kosher salt and freshly ground black pepper

INSTRUCTIONS

—Bring a pot of salted water to a boil and cook pasta according to the package directions. Drain well.
—While the pasta is cooking, heat olive oil in a large skillet over medium high heat. Add sausage and cook, stirring frequently, until sausage is lightly browned on both sides, approximately 2-3 minutes per side. Remove from pan and place in a bowl.  Set aside.
—To make the cream sauce, melt butter in a large skillet over low heat. Add garlic and cook, stirring frequently, about 1-2 minutes. Whisk in flour until lightly browned (about 1 minute). Gradually whisk in chicken broth and cook, whisking constantly, until incorporated (about 1-2 minutes).
—Stir in heavy cream, sun dried tomatoes, Parmesan cheese, oregano, basil, and red pepper flakes until the sauce is slightly thickened. Season with salt and pepper to taste.
—Stir in pasta and sausage until well combined.
—Garnish with parsley (optional) and serve immediately.

*NOTE* To make this recipe gluten free, use gluten free pasta and replace the all-purpose flour with 1 tablespoon of cornstarch. Stir the cornstarch into the chicken broth before adding it to the pan. Adding about 8 ounces of steamed broccoli when stirring in the pasta and sausage before serving adds a great crunch.

[recipe adapted from Damn Delicious]

NO-BAKE SWEET AND SALTY GRANOLA BARS

Kristen says, “I love the mix of sweet and salty in these granola bars, which are perfect for snacks or breakfast. Just looking at this recipe makes me want to whip up a batch!”

Carrie says, “This looks awesome!”

INGREDIENTS NEEDED

—1/4 cup unsalted butter
—1/4 cup brown sugar
—1/4 cup honey
—1/4 cup creamy peanut butter
—1 teaspoon vanilla extract
—2 cups quick oats
—1/2 cup crispy rice cereal
—3/4 cup chopped pretzels
—1/4 cup mini chocolate chips

INSTRUCTIONS

—Cut out an 8 x 8 inch square of parchment paper. Place the parchment paper into an 8 x 8 inch baking pan. If you don’t have parchment paper, a piece of foil lightly sprayed with non-stick cooking spray works can be substituted.
—In a large sauce pan, add butter, brown sugar, honey, and peanut butter. Heat over medium-low heat, stirring occasionally until the mixture starts to bubble. Once it starts bubbling, cook for 2 minutes while stirring constantly. Remove from heat and stir in the vanilla extract.
—Stir in the oats, crispy rice cereal, and pretzels. Keep stirring until everything is well coated with the butter and brown sugar mixture. Pour the mixture into the prepared pan and press evenly into the pan. Sprinkle the mini chocolate chips over the top and gently press into the granola bars with your hands.
—Place the bars in the refrigerator and let cool for at least 30 minutes before cutting. Cut into bars and serve.

*NOTE* Store the bars in an air tight container in the refrigerator. The original recipe says that they’ll keep up to a week or more this way, but they’ve never lasted that long in Kristen’s house! For gluten free granola bars, use gluten free oats and pretzels.

[recipe adapted from Two Peas & Their Pod]

ARNOLD PALMER

Kristen says, “most of the time, I only drink water… but every once and a while, I like to treat myself to a sweet beverage. The Arnold Palmer is one of my favorites, especially during the summer months. I like this version of the recipe because the lemonade is made into a slush that both flavors and chills the drink.”

Carrie says, “the zest off all those extra lemons would be perfect for some candied lemon peel or even homemade limoncello!”

INGREDIENTS NEEDED

—4 English breakfast tea bags
—1 tea kettle filled with boiling water (approx. 6-8 cups of water)
—1 cup Simple Syrup, recipe below
—1 cup lemon juice (approx. 6-8 lemons)
—zest of 1 lemon
—2 cups ice cubes

FOR THE SIMPLE SYRUP

—1 cup sugar
—1 cup water

INSTRUCTIONS

—For the simple syrup : Add the sugar and water to a medium saucepan. Bring to a boil and allow to simmer until the sugar has dissolved. Remove from the heat and set aside to cool completely.
—For the tea : Tie the tea bags together and place into a large pitcher. Pour the hot water over the tea bags and into the pitcher. Set the tea aside to steep for 5 minutes.
—For the lemonade : To a blender, add the simple syrup, lemon juice, lemon zest, and ice cubes and pulse to puree. Place the mixture into the freezer until the tea has finished steeping. Add ice cubes to a large glass and top with the tea. Using an ice cream scoop or large spoon, scoop the “lemonade” into the glass.

[recipe adapted from The Food Network]

We’re betting that you’re hungry just reading through these recipes, and that you can’t wait to try them out!

Well, if you’re up for a challenge… come to the forum and check out our new Recipe Book challenge, which is launching this month and is designed to help you create a quick-&-simple book of your favorite recipes — get this — in time to print it up and give it to friends and family members as a holiday gift later this year (!). Sound like fun? Come check it out HERE.

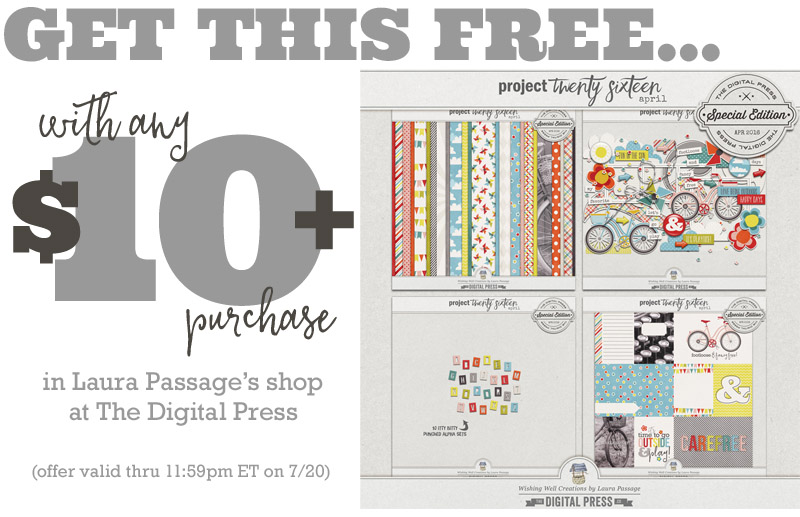
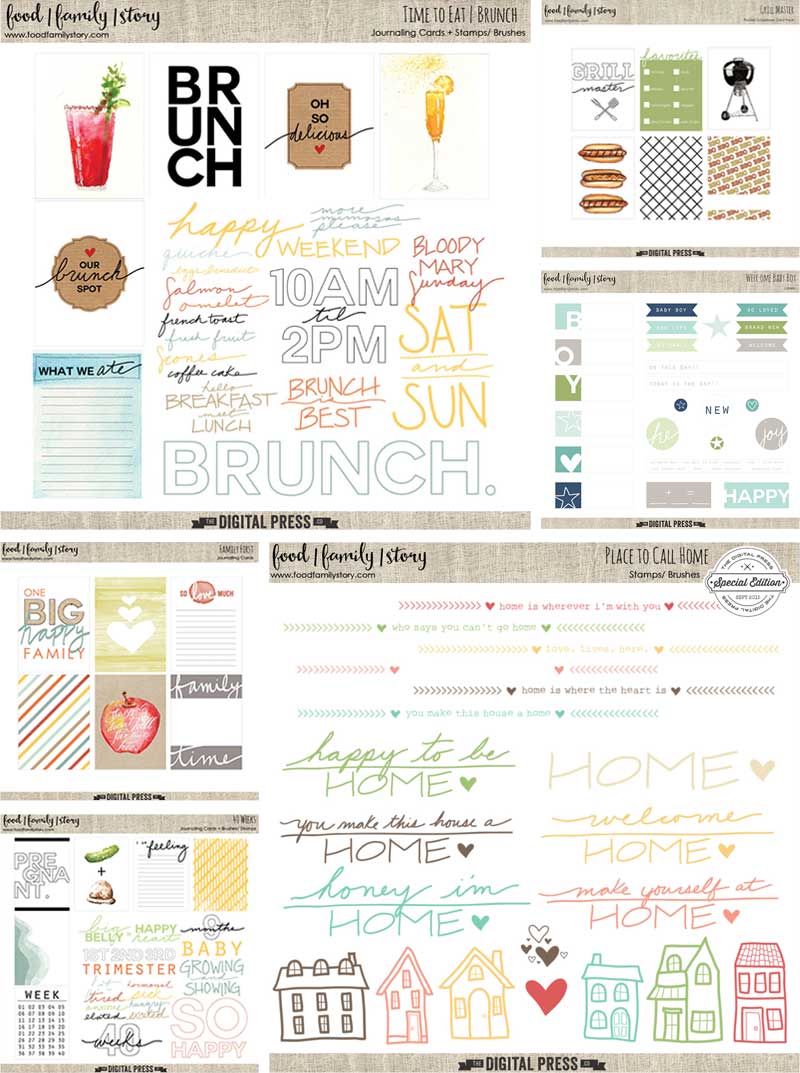
Meanwhile, it wouldn’t be a designer feature week without a fantastic sale and a special Free-with-Purchase offer… so you’ll be excited to see what Kristen has in store for you! Not only is her entire shop marked down 30% OFF throughout her entire feature week (sale prices will be valid through 11:59pm ET on Thurs 9/7)… but she also has this awesome deal in her shop all week long, as well! Spend $10+ in the k.becca shop at The Digital Press, and get her “Homebody” Kit completely FREE!


caliten

About the Author  Carrie is a creative team member here at The Digital Press. She and her family enjoy spending time outdoors, year-round, near their home in Colorado. In addition to scrapbooking and the occasional hybrid home decor project, Carrie also reads voraciously, accumulates fabric, makes soap, brews beer, grows hops, and tries to keep indoor plants alive.

Summer Camp 2017 | Mess Hall | WEEK #4

Hello, and welcome to the fourth and final edition of our weekly “Mess Hall” feature during The Digital Press’s big SUMMER CAMP 2017 event that has been taking place throughout July!

If you haven’t already checked out the other “Mess Hall” meals that have been a part of SUMMER CAMP 2017 (and/or any of the other fun activities)… definitely swing through the forum, grab yourself a badge tracking card, and join the fun! We’ve got one week left in this month-long event, and there’s actually still plenty of time to jump in and earn a chance at some prizes! We’ve got events, challenges, tutorials, and more lined up throughout the final week of July! 🙂

As for today’s “Mess Hall” …as you know, throughout the month of July the members of our team have been here on the blog sharing a weekly meal with you — a main course, side dish, and dessert (or cocktail!) that are each tried-and-true (tested personally by members of our team!). Give any of this week’s meal items a try, and you could earn a SUMMER CAMP 2017 badge! Get the full details HERE.

So… let’s jump right into this week’s meal!

The WEEK #4 meal comes to you from TDP creative team member Carolyn, who hails from the Sunshine Coast of Australia… and you can definitely tell where she’s from by the tropical/beachy vibe you get from the meal she’s whipped up for us! Whereas our first week’s meal (WEEK #1, found HERE) was Italian-inspired… and the second week’s meal (WEEK #2, found HERE) was Mexican-inspired… and last week’s meal (WEEK #3, found HERE) was very comfort-food-inspired… this final meal is very island-inspired! And can we just say? …we think you’re going to love it. YUM!

photo credits for [1] [2] and [3] to TDP creative team member Carolyn

What is that up there, you ask?

  • Rice Paper Wraps with Chicken or Prawns
  • Quinoa Salad with Roasted Vegetables
  • Mini Pavlovas

We keep saying it every week, and even though we might sound like a broken record… we’ll say it again — YUM! You truly won’t be disappointed if you give any of these recipes a try.


RICE PAPER WRAPS WITH CHICKEN OR PRAWNS

Carolyn had the following to say about this recipe: “We try to eat as healthy as possible and always cook from scratch. This, however, does not mean that we spend hours in the kitchen everyday… as no one has time for this. This recipe is wonderful to serve on a hot summer’s day and can either be prepped ahead of time*, or made at the table with your family. We find that it is a fun family dinner, as children just love rolling up their own wrappers. You can use a variety of fillings so just select ingredients that are familiar to your family..”

INGREDIENTS NEEDED

—1 packet of Vietnamese rice paper wraps (see prep photo HERE)
—1 cup shredded barbecued chicken
—1 cup of peeled and de-veined prawns
—1 carrot (cut into short thin strips or shredded)
—1 small cucumber (cut into thin strips)
—1 cup bean shoots or sprouts
—1/2 cup fresh mint (or other herbs as desired)
—a few cabbage leaves (sliced finely)
—sweet chili sauce

INSTRUCTIONS

*these wraps should be made as close as possible to the time they are to be eaten; if preparing ahead of time, however, store on plastic wrap in fridge.

—Prepare all of the filling ingredients first (as noted above) by arranging each individually on separate plates or one very large plate.
—Fill a large bowl with hot water.
—Take one of the rice paper wrappers and dunk it into the water for a few seconds (just enough to soften it; do not soak the wrappers).
—Select desired filling ingredients and place in center of wet softened wrap (do not overfill).
—Add approximately 1 teaspoon of chili sauce over ingredients.
—Fold up the base of wrapper over ingredients; fold in both sides; and then roll it up (see prep photo HERE). Serve.

*TIP* I will often use a wet tea towel as my plate to do the wrapping, as I have found that it is easier to roll the wraps on the wet towel.


QUINOA SALAD WITH ROASTED VEGETABLES

Carolyn had the following to say about this recipe: “This is one of our favourite recipes, which we are lucky to make largely from fresh ingredients straight out of our garden. This salad is so easy, and a great way to use leftover vegetables and salad greens. It is perfect for summer, as you can prepare it a day ahead and keep it in the fridge. It is also gluten-free and vegan.”

INGREDIENTS NEEDED

—1 cup quinoa (dark or white)
—2 cups water
—mixed vegetables for roasting (I used 1 beetroot, 1 large sweet potato, and 1 parsnip [see prep photo HERE]… but you can use just about any vegetable you have available)
—olive oil
—1 colander of mixed salad greens (I used rocket, parsley and lettuce)
—DRESSING: 1/4 cup olive oil, 1/4 cup apple cider vinegar, salt, and pepper (I also usually add grated lemon rind; a.k.a. lemon zest)

INSTRUCTIONS

—Combine quinoa with water in a saucepan on stove and bring to boil; once boiling, put lid on saucepan and reduce heat to low; simmer for 10 minutes.
—Remove saucepan from heat, and leave lid on for approximately 30 minutes for quinoa to finish steaming; then, fluff up quinoa with a fork.
—Prepare vegetables for roasting by peeling and dicing into small pieces. You will need approximately 2 trays for roasting. Drizzle veggies with olive oil. You can add herbs if you like (I also added some fresh thyme and oregano; see prep photo HERE).
—Bake vegetables at 190 degrees C (375 F) for about 25 minutes.
—Meanwhile, prepare the salad greens by cutting into strips.
—Prepare salad dressing by whisking together all of the “DRESSING” ingredients (listed above).
—Place the cooked quinoa into large salad bowl, add prepared greens, and mix in the dressing. Add roasted vegetables as the last ingredient. Serve.


MINI PAVLOVAS

Carolyn had the following to say about this recipe: “I had to include this recipe, as it is a traditional Australian recipe — although it is usually served as a large Pavlova, rather than as minis. You can use whatever fruit is in season. This recipe should make 6-8 minis.”

INGREDIENTS NEEDED

—4 egg whites (at room temperature)
—1 cup caster sugar (very fine granular sugar; otherwise you can use standard granular sugar but it will just take a little longer)
—fresh cream (approximately 1/2 cup)
—mixed fresh fruit, sliced (I used a combination of blueberries, strawberries and passionfruit; see photo, above, of the final product)

INSTRUCTIONS

—Cover oven tray with baking paper (a.k.a. parchment paper).
—If using whole eggs, separate the whites from yolk and beat egg whites in a bowl at medium speed with electric mixer until soft peaks form (see prep photo HERE).
—Gradually add sugar, 1 Tbsp at a time, beating until dissolved between additions. Once the last of the sugar is dissolved, your mixture should be glossy and thick.
—To make the minis, you can use a cookie cutter as a shape guide. Add approximately 2 Tbsp of meringue mixture to inside of shape mounding more on the outer edges. Lift cutter for next shape.
—Bake at 150 degrees C (300 F) for 30 minutes. Then, turn off oven and leave in oven to dry and cool.
—Whip the fresh cream (I do not feel sugar is needed… but add if you prefer; I usually flavour the cream with rose water).
—Once cool, decorate the minis with whipped cream and fresh fruit. Serve.

* Per Carolyn: you will see in my photos that these mini pavlovas were a little flat; this can occur if you beat the egg whites too quickly / at too high a speed. They still tasted fantastic!

.

Want to give one of these recipes a try and earn your WEEK #4 MESS HALL BADGE for TDP’s SUMMER CAMP 2017? Come get the details in the forum —> HERE.

.


Laura Passage

About the Author  Laura Passage is the owner of The Digital Press, and also the designer behind Wishing Well Creations by Laura Passage (WWC). She works now as a graphic designer in both the digital and paper scrapbooking industries, but previously spent over a decade working as a college soccer coach. She lives in the Pacific Northwest with her husband and two young sons (affectionately referred to as The Tiny Terrorists), and will rationalize eating coffee ice cream for breakfast to anyone who questions it.

Summer Camp 2017 | Mess Hall | WEEK #3

Hello, and welcome to the third edition of our weekly “Mess Hall” feature — part of The Digital Press’s big SUMMER CAMP 2017 event this July!

If you haven’t already checked out our lineup of activities for SUMMER CAMP 2017… definitely swing through the forum, grab yourself a badge tracking card, and join the fun! We’re only halfway through the month, and there’s still plenty of time to jump in! We’ve got events, challenges, tutorials, and more lined up throughout the month of July… including a weekly FOOD article, like this one! 🙂

Each Sunday throughout the first 4 weeks of July, members of our team will be here on the blog sharing a meal with you — a main course, side dish, and dessert (or cocktail!) that are each tried-and-true (tested personally by members of our team!). Give any of the meal items a try, and you could earn a SUMMER CAMP 2017 badge! Get the full details HERE.

So… let’s jump right into this week’s meal!

Whereas our first week’s meal (WEEK #1, found HERE) was Italian-inspired… and the second week’s meal (WEEK #2, found HERE) was Mexican-inspired… this third week’s meal by TDP designer Kristen Magee of k.becca is very comfort-food-inspired! I mean, who doesn’t love themselves a flavorful slow-cooker masterpiece, and some good old-fashioned mac-n-cheese?! YUMMM!

photo credits to [1] and [2] TDP Designer Kristen Magee and [3] Gluten-Free on a Shoestring

What is that up there, you ask?

  • Slow Cooker Italian Chicken & Peppers
  • Kristen’s Favorite Stove Top Mac-&-Cheese
  • Gluten-Free Chocolate Chunk Quick Bread

We keep saying it every week, and we’ll say it again — just YUM, about all of it! You truly won’t be disappointed if you give any of these recipes a try.


SLOW COOKER ITALIAN CHICKEN & PEPPERS

Kristen had the following to say about this recipe: “Slow cooker recipes are so great when you’re short on time or on hot days when you don’t feel like turning on the oven. I love that this recipe is so flexible. Serve it over pasta or rice, or spoon some onto sandwich buns for a slightly messy but super tasty meal.”

INGREDIENTS NEEDED

—3 bell peppers (any color)
—1 medium onion
—24 oz (1.5 lbs) boneless, skinless chicken breasts or thighs
—1 tsp basil
—1 tsp oregano
—3 cloves of garlic, minced
—1/2 – 1 tsp. crushed red pepper flakes (optional – if you want the sauce to have a bit of a spicy kick)
—24 oz jar marinara sauce
—salt & pepper

INSTRUCTIONS

—Slice the bell peppers and onions into 1/4 inch wide strips. Lay half of the cut onion and peppers in the bottom of a 4 quart / large slow cooker.
—Place the chicken breasts on top of the onions and peppers and season with salt and pepper. Sprinkle the basil, oregano, minced garlic, and (if using) crushed red pepper flakes over the chicken.
—Cover the chicken with the remaining onion and peppers, and pour the marinara sauce over top.
—Place the lid on the slow cooker and cook on high for four hours or low for eight hours.
—After cooking, remove the lid and use tongs or two forks to shred the chicken. The chicken should be so tender that it just about falls apart on its own.
—Stir everything together after shredding the chicken and serve over pasta or rice. Or you can do what I did : grab some rolls and make sandwiches with it!

[recipe adapted slightly from an original recipe found on Budget Bytes]

KRISTEN’S FAVORITE STOVE TOP MAC-&-CHEESE

Kristen had the following to say about this recipe: “Mac & cheese is one of my favorite comfort foods, and this recipe is incredibly cheesy, creamy, and delicious. Plus, you can make it in one pot on the stove top! On several occasions, I’ve sprinkled crumbled bacon on top and served it as a main dish with a side of broccoli or mixed vegetables. So good!”

INGREDIENTS NEEDED

—8 oz (1/2 lb) elbow macaroni
—4 Tbsp butter
—2 eggs
—6 oz evaporated milk (or, I’ve also tried this recipe with half-&-half, a mix of cream and 2% milk, and whole milk… and it’s always turned out great!)
—1 tsp kosher salt
—1/4 tsp fresh black pepper
—1/2 tsp hot sauce
—1/2 tsp yellow or Dijon mustard
—10 oz mild or sharp cheddar cheese, grated (the original recipe calls for sharp cheddar, but I prefer mild cheddar so that’s what I use. You can even mix both!)

INSTRUCTIONS

—In a large pot of boiling, salted water cook the pasta to al dente and drain.
—Return the pasta to the pot and melt in the butter. Toss to coat.
—In a mixing bowl or measuring cup, whisk together the eggs, milk, hot sauce, mustard, salt, and pepper.
—Stir into the pasta and add the cheese. Over low heat, stir continuously for 3-5 minutes or until creamy. For the first few minutes, it might not look like it’s going to come together, but once the cheese starts to melt, everything becomes creamy very quickly.

[recipe adapted slightly from an original recipe by Alton Brown]

GLUTEN-FREE CHOCOLATE CHUNK QUICK BREAD

Kristen had the following to say about this recipe: “A moist and tender, not-too-sweet quick bread that is so yummy no one will guess it’s gluten free!”

INGREDIENTS NEEDED

—1-3/4 cups (245g) all-purpose gluten free flour (I use Bob’s Red Mill 1 To 1 Baking Flour)
—6 Tbsp (54g) cornstarch
—1 tsp xanthan gum (omit if your flour blend already contains it)
—1 tsp vanilla
—1-1/2 tsp baking powder
—1/2 tsp baking soda
—1/2 tsp kosher salt
—3/4 cup (150g) granulated sugar
—6 Tbsp (84g) unsalted butter, at room temperature
—1 cup (227g) plain yogurt, at room temperature
—2 eggs (120g, out of shell), at room temperature
—4 oz. chopped milk or dark chocolate (chocolate chips work great, too!)

INSTRUCTIONS

—Preheat oven to 350°F. Spray a standard 9-inch by 5-inch loaf pan with non-stick spray and set it aside.
—In the bowl of a stand mixer (or a large bowl with a hand mixer), place the gluten free flour blend, cornstarch, xanthan gum (if needed), baking powder, baking soda, salt, and sugar. Whisk to combine well with a separate, handheld whisk or a fork.
—Create a well in the center of the dry ingredients. In a measuring cup, whisk together the yogurt, eggs, and vanilla. Add the butter and the yogurt/egg/vanilla mixture into the well in the center of the dry ingredients.
—Mix on medium speed with the paddle attachment of your stand mixer (or a handheld mixer) for 2-3 minutes, or until the batter is combined and smooth. The batter will be thick.
—Fold the chopped chocolate into the batter with a spatula until the chocolate is evenly distributed throughout the batter. Scrape into the prepared baking pan. To create a dome shape, run a wet spatula along the edges of the pan and pull the batter toward the center.
—Place the pan in the center of the preheated oven and bake for 30 minutes. Reduce the oven temperature to 325°F, and continue to bake for another 20-35 minutes*, or until the top of the loaf springs back when pressed lightly and a toothpick inserted in the center comes out with, at most, a few crumbs attached.
—Remove from the oven and allow to cool in the loaf pan for 15 minutes before transferring to a wire rack to cool completely. Once cool, slice and serve.

* Per Kristen: the original recipe states to continue baking for 20 minutes after reducing the oven temperature, but in my oven it always takes about 30-35 minutes to finish baking. So, I’d suggest checking with a toothpick at 20 minutes to see if it’s done. If not, continue baking for a little longer.

[recipe adapted slightly from an original recipe found on Gluten-Free on a Shoestring]

.

Want to give one of these recipes a try and earn your WEEK #3 MESS HALL BADGE for TDP’s SUMMER CAMP 2017? Come get the details in the forum —> HERE.

.


Laura Passage

About the Author  Laura Passage is the owner of The Digital Press, and also the designer behind Wishing Well Creations by Laura Passage (WWC). She works now as a graphic designer in both the digital and paper scrapbooking industries, but previously spent over a decade working as a college soccer coach. She lives in the Pacific Northwest with her husband and two young sons (affectionately referred to as The Tiny Terrorists), and will rationalize eating coffee ice cream for breakfast to anyone who questions it.

Feature Friday | Laura Passage

Hello everyone, and welcome to another edition of our Feature Friday series here on The Digital Press blog! Today, I am super excited to be showcasing the very talented Laura Passage (known to many of us as Wishing Well Creations by Laura Passage, or just WWC)! This is Laura’s second feature here on the blog (you can find her first feature article from July 2016 HERE)… and whereas last time we used our feature series to help you get to know some fun trivia about your favorite designers — this time, we’re giving you a little peek into the designers’ creative spaces, as well as more insight into their creative processes.

With that in mind, here’s a look at Laura’s creative work space…

Here’s what Laura had to say about her space: “My “office” is a long counter/desk that runs along one wall of our guest bedroom. It’s a complete disaster zone. I didn’t even bother cleaning it up in order to take this photo (ha! ha! I just creatively cropped out the piles of paperwork and scrapbooking supplies (LOL!) that are stacked on either side of my main desk area, which is a Vari-Desk variable-height standing/sitting workstation desk that my husband bought me after I had emergency back surgery a few years ago). You can also see close-ups of two areas of my work space that speak to my personality… (a) my rainbow-addiction in tangible form (a.k.a. All the Rainbow Ribbons, and All the Rainbow Washi, and All the Rainbow Baker’s Twine, and All the Rainbow Buttons)… and (b) the area of my bulletin board that houses all of the cute notes/etc. that I get from my kids.”

We also asked Laura to give us a Top 5 list that is representative of herself at this point in her life… and she shared with us her Top 5 TV & Movie Quotes She Most Often Uses in Her Daily Life

  1. How was your day? Did you have a good day today or a bad day today? Well what kind of day was it?!” ~Michael Richards, from Seinfeld (used by my husband and I when we come home at the end of our day, as a joke, based on Kramer’s monologue about marriage)
  2. I’ll stuff you all in the crust!” ~Steve Carell as Gru, from Despicable Me (used anytime my kids are making me crazy and I need them to settle down and go away and stop pestering me)
  3. Change approved!” ~just about any character, from Cougartown (used anytime I decide, on a whim, to redefine something… or any time that I decide, for instance, to eat dessert for breakfast… etc.) 😉
  4. Is your house on fire, Clark? Don’t throw me down, Clark!” ~Aunt Bethany, from National Lampoon’s Christmas Vacation (used anytime I’m offering up “be careful”-type advice to someone that is unnecessary or over-protective or silly, etc.)
  5. Stop trying to make ‘fetch’ happen! It’s not going to happen.” ~Regina George, from Mean Girls (used anytime someone — usually one of my kids — is trying to get me to agree to something and they’re pestering me with no end in sight)
[ click on any of the quotations, above, to see the original video clip that relates to each 😉 ]

.

As for her designs… Laura creates digital scrapbooking products that also have a distinctly paper-ish style and feel. You’ll find lots of flat stickers and icons in her kits, mixed with the types of dimensional items you tend to find used on traditional paper scrapbook layouts — stuff like wood veneer, string, staples, paper flowers, etc. Her kits are always bright and colorful and fun to work with.

Here are just a few of my favorite products by Laura Passage

Additionally, here’s a look at just a small sampling of the gorgeous projects that have been created using Laura’s products…

Isn’t it all so fun and inspiring? 🙂

I hope you have enjoyed getting to know a little bit more about Laura and peeking into her creative space! If your wish-list grew while you looked through the inspiration, above, then I have some good news for you! During her entire feature week, you will find all of Laura’s products 30% OFF in her shop at The Digital Press! (the sale will end at 11:59pm ET on Thursday 7/20). Check your wish-list, and don’t miss out on this great chance to clear your favorite items off it — at a discount!

And finally, this week only — you can snag the following FULL COLLECTION (!) from Laura’s shop for FREE with any $10+ purchase in Laura Passage’s shop at The Digital Press (this offer also ends at 11:59pm ET on Thurs 7/20)…


Gaelle About the author Gaelle is a member of the creative team here at The Digital Press. She lives in France with her hubby, her two sons and her kitty. She loves digiscrap and discovered this activity in 2012, since she’s totally addict and scrap to keep memory her everyday life. Her family is definitively her principal source of inspiration.

Enregistrer

Enregistrer

Enregistrer

Enregistrer

Enregistrer

Enregistrer

Enregistrer

Enregistrer

Enregistrer

Enregistrer

Enregistrer

Summer Camp 2017 | Mess Hall | WEEK #2

Hello, and welcome to the second edition of our weekly “Mess Hall” feature — part of The Digital Press’s big SUMMER CAMP 2017 event this July!

If you haven’t already checked out our lineup of activities for SUMMER CAMP 2017… definitely swing through the forum, grab yourself a badge tracking card, and join the fun! There’s still time to jump in! We’ve got events, challenges, tutorials, and more lined up throughout the month of July… including a weekly FOOD article, like this one! 🙂

Each Sunday throughout the first 4 weeks of July, members of our team will be here on the blog sharing a meal with you — a main course, side dish, and dessert (or cocktail!) that are each tried-and-true (tested personally by members of our team!). Give any of the meal items a try, and you could earn a SUMMER CAMP 2017 badge! Get the full details HERE.

So… let’s jump right into this week’s meal!

Whereas last week’s meal (WEEK #1, found HERE) was very Italian-inspired… the WEEK #2 meal is every bit as Mexican-inspired! The main course, in particular, is pretty unique and fun (but again, sooooo quick & easy!)… and the food we’ve accompanied it with is just YUMMMM!

photo credits to [1] Hello Fresh [2] TDP Designer Rachel Hodge and [3] TDP creative team member Carrie

What is that up there, you ask?

  • Grilled Cheese Tacos (w/ Avocado, Sweet Potato, & Tomato Salsa)
  • Rachel’s Bean Dip & Chips
  • Carrie’s Frozen Coconut Limeade

We said this last week, and we’ll say it again — just YUM, about all of it! You truly won’t be disappointed if you give any of these recipes a try.


GRILLED CHEESE TACOS

This recipe has become a once-every-other-week thing in our household in the past few of months, ever since the first time we tried it. It’s sincerely that good (and easy!). And to think… the first time I saw the recipe, I thought it sounded a little bit too weird. Well, if weird = delicious, then yes.

INGREDIENTS NEEDED

—6 flour tortillas
—6-8 oz “grilling cheese” (otherwise known as Halloumi cheese; I buy mine at Trader Joe’s and it comes in a package that looks like THIS)
—1-2 medium tomatoes (orig. recipe calls for “1 roma” but I usually use the equivalent of 2, and not just roma — even a cup of grape tomatoes works fine!)
—1 avocado
—1 sweet potato
—1 medium shallot
—1 lime
—1/4–1/2 oz fresh cilantro (because I use slightly more tomato, I also use more cilantro)
—olive oil OR vegetable oil (your preference; I use olive), salt, and pepper

INSTRUCTIONS

—Pre-heat oven to 400 degrees & wash/dry all produce items; quarter the lime and juice half of it
—Peel the sweet potato & dice into 1/2-inch cubes; toss w/ a small amount of oil, salt, and pepper on a foil-lined baking pan (for easy clean-up)
—Bake the sweet potato for about 20-25 minutes (toss around on the pan at about the 15 minute mark)
—Finely dice the shallot (orig. recipe calls for 1 Tbsp; but again, I use the whole shallot because I am using extra tomato & because I like shallot!)
—Dice the tomato, and chop about half of the cilantro leaves into small pieces (save the rest for garnish)
—Mix the tomato, chopped cilantro, shallot, and juice of half a lime in a bowl; season w/ salt & pepper to taste & set aside
—Peel & pit the avocado and cut it into slices; set aside
—When the sweet potato is almost finished roasting, heat about 1 Tbsp of oil in a non-stick frying pan over medium-high heat
—Fry the grilling cheese slices about 1-2 min per side (the Trader Joe’s variety comes pre-sliced in 6 slices; or, slice yours first into about 1/4-inch thick slices)
—Once the cheese slices are golden brown and warmed up, fold a damp paper towel around the tortillas and microwave for about 30 seconds (or if you prefer not to microwave, you can heat them in a damp paper towel that is covered completely in foil for about 5 min in the oven before you turn the oven off)
—Fill each tortilla with cheese, sweet potato, avocado slices, spoonfuls of tomato salsa, and some of the leftover cilantro garnish; serve w/ remaining lime wedges

[recipe adapted slightly from an original recipe found on Hello Fresh]

RACHEL’S BEAN DIP & CHIPS

Is there anything more satisfying than a warm, gooey, bean dip served with corn chips when you’re throwing together a quick-&-easy Mexican-inspired dinner night? TDP Designer Rachel Hodge has just the recipe to fill that need! YUM.

INGREDIENTS NEEDED

—250g (8oz) block cream cheese (at room temperature)
—300g (2 cups) sour cream
—½ bunch spring onions (chopped)
—1 jar mild or medium salsa
—1 packet taco mix
—1 can refried beans
—1 green chili (finely diced)
—sprinkle of dried oregano
—sprinkle of cheese
—corn chips

INSTRUCTIONS

—Mix all the ingredients together EXCEPT for the cheese & corn chips, and place mixture in a baking dish
—Bake at 180 C (350 F) for 1 hour
—Remove from oven & immediately sprinkle cheese over dish; bake for another 5 mins (or until cheese is melted)
—Serve with corn chips!


CARRIE’S FROZEN COCONUT LIMEADE

This last recipe is a fun one because it can be served kind of like a dessert, after your meal… or as a cocktail, before your meal… or both! TDP creative team member Carrie loves to make this recipe in 2 stages — her kids get a serving from Stage 1 (pre-rum)… and the adults get a serving from Stage 2 (with rum added). It’s a fun way to let everyone in the family enjoy cocktail hour!

INGREDIENTS NEEDED

—5 cups of ice
—3/4 cup original (not lite) coconut milk
—4-6 Tbsp frozen limeade concentrate
—3 Tbsp water (or Malibu rum) 😉

INSTRUCTIONS

—Blend the first 3 ingredients first (mixing in a blender on high until smooth)
—If serving to kids, too, pour out glasses for the kids before adding the rum (and then add rum & another cup or so of ice cubes & blend again)
—Can be served with lime slices on the glass (and/or in frozen mugs/glasses/etc. to keep it colder!)

[recipe adapted slightly from an original recipe found on dessertnowdinnerlater.com]

.

Want to give one of these recipes a try and earn your WEEK #2 MESS HALL BADGE for TDP’s SUMMER CAMP 2017? Come get the details in the forum —> HERE.

.


Laura Passage

About the Author  Laura Passage is the owner of The Digital Press, and also the designer behind Wishing Well Creations by Laura Passage (WWC). She works now as a graphic designer in both the digital and paper scrapbooking industries, but previously spent over a decade working as a college soccer coach. She lives in the Pacific Northwest with her husband and two young sons (affectionately referred to as The Tiny Terrorists), and will rationalize eating coffee ice cream for breakfast to anyone who questions it.

Feature Friday | Food|Family|Story

Hello, it’s Friday once again, and therefore time for another edition of our Feature Friday series here on The Digital Press blog! This week, I am excited to share more information about the very talented Danielle of Food|Family|Story.

This is Danielle’s first feature here on The Digital Press blog, and we’re using her feature article to help you get to know her a little better by giving you a little peek into her creative space, as well as more insight into her creative processes.

We also asked her to provide us with a Top 5 list that is somewhat representative of herself at this point in her life, and she chose to share with us her Top 5 Favorite Vegetables

  1. Tomatoes (sure they are technically a fruit, but I still count them as a veggie)
  2. Beets
  3. Kale
  4. Fennel
  5. Broccoli

When it comes to Danielle’s products, what I love about them is that they all tend to have a theme that revolves around family, friends, and gatherings (including food!)… and so they’re really easy to use for a lot of different projects.

Here’s just a tiny sampling of some of my favorite products that you can find in the Food|Family|Story shop at The Digital Press (just look at the Grill Master | Pocket Cards with the cute little grill card — isn’t it wonderful?! …or the super cute houses on the Place to Call Home | Brushes and Stamps)…

Additionally, here is a sampling of some truly beautiful layouts made with her products…

I hope you have enjoyed getting to know a little bit more about Danielle of Food|Family|Story, as well as getting a look at her work space and some of her amazing products! And as if that wasn’t already enough fun… I have good news! Her entire shop at TDP will be 30% OFF throughout her entire feature week (the sale will end at 11:59pm ET on Thursday 7/13)!

Additionally, this week only — you can snag this fantastic patriotic-themed pocket card set for FREE with any $10+ purchase in the Food|Family|Story shop at The Digital Press (this offer also ends at 11:59pm ET on Thurs 7/13)…

______________________________________________________________________________________________________________

blogfotoAbout the author  Astrid is a member of the creative team here at The Digital Press. She lives with her husband and her 2 teenage/adult kids in Germany. As a mini-jobber with only 10 hours/week, she has plenty of time for her digital scrapbooking hobby. She has Netflix and Amazon Prime, and is addicted to nearly all series. Vampires, zombies, vikings… it doesn’t matter; she likes everything. She loves the ocean and the summer heat, but lives in the opposite: mountains. Therefore, she loves visiting her family in Algeria or the south of France.

Merken

Merken

Merken

Merken