Tutorial Tuesday | Digital Mini Albums (Part 4)

Hello once again, and welcome to another edition of our Tutorial Tuesday series here on The Digital Press blog!

Today I will finally be wrapping up our 4-part series on creating a digital mini album (you can find Part 1 from March 2018 HERE …Part 2 from April 2018 HERE …and Part 3 from May 2018 HERE).

In the first few editions of the series, I shared that mini albums can be handy for…

  • Scrapping a family vacation
  • Creating a special gift for someone
  • Marking a special holiday
  • Documenting a specific family tradition
  • Capturing a sports season
  • Life Events such as adoption, graduation, birthday, wedding, birth, or death

I also shared that I have found there to be four main steps in the process of creating a mini album…

  1. Planning
  2. Organizing
  3. Filling & Finishing
  4. Printing

In Part 1 we looked at the first step: PLANNING; in Part 2 I shared with you 4 different areas in which you could ORGANIZE to make the creation portion more streamlined; in Part 3 we got to do the fun part — FILLING AND FINISHING. Today, we finish it all off by looking at PRINTING.


Step 4: PRINTING

There are a variety of different ways you can go about printing your album (including not printing at all). But before I get into that I want to hit on one very important thing… making sure your pages are print-ready. This will mean different things to different people, depending on how and where you decide to get your pages printed. Therefore, you will want to make sure you look into the specs & requirements before uploading and purchasing your prints.

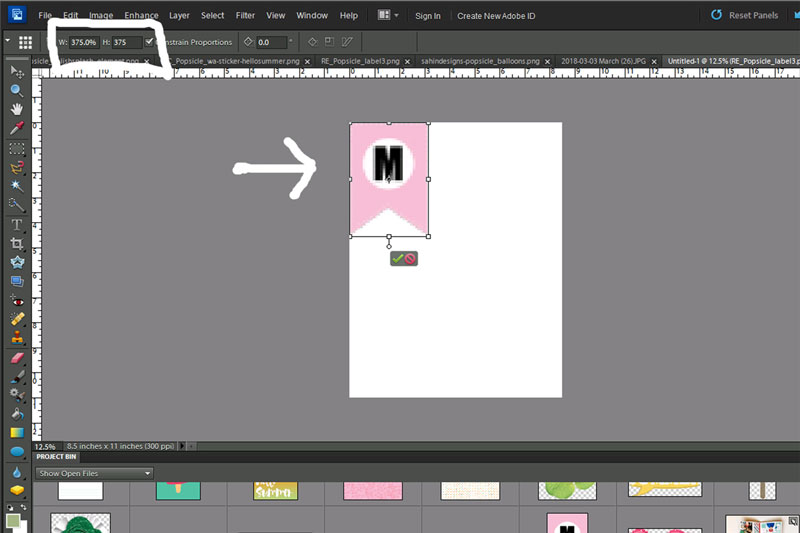
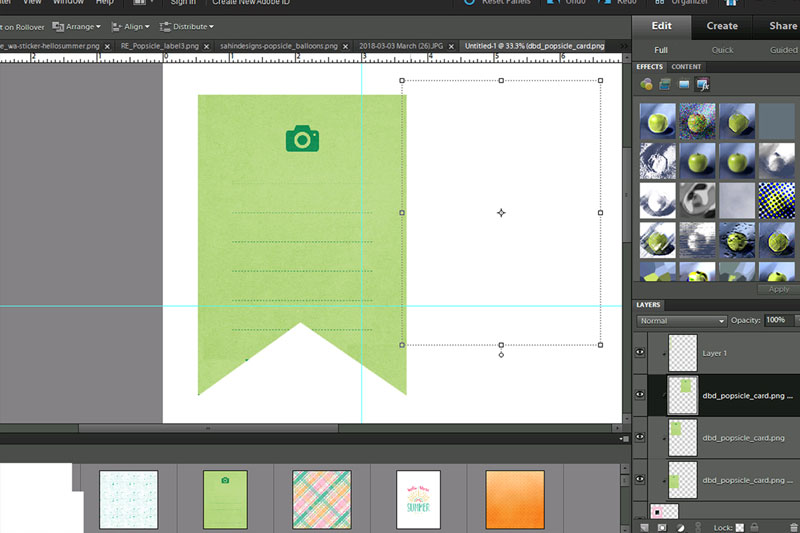
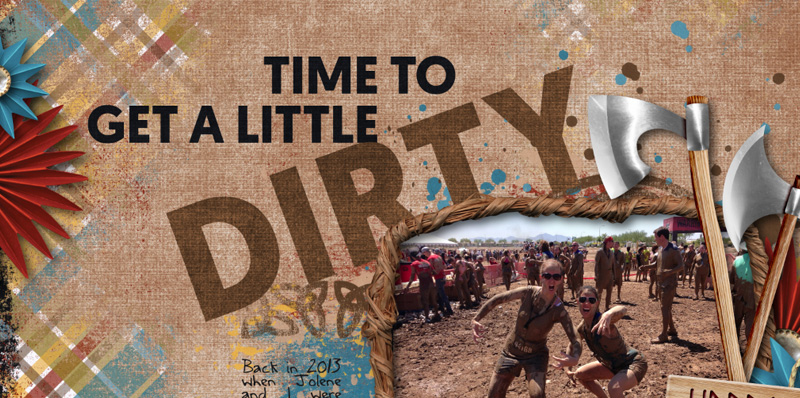
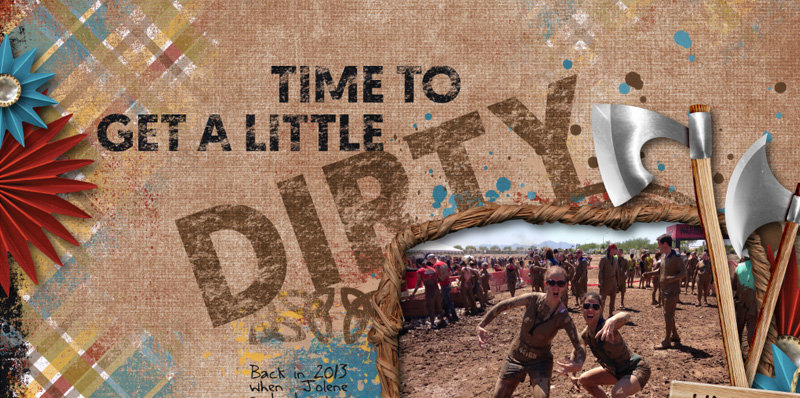
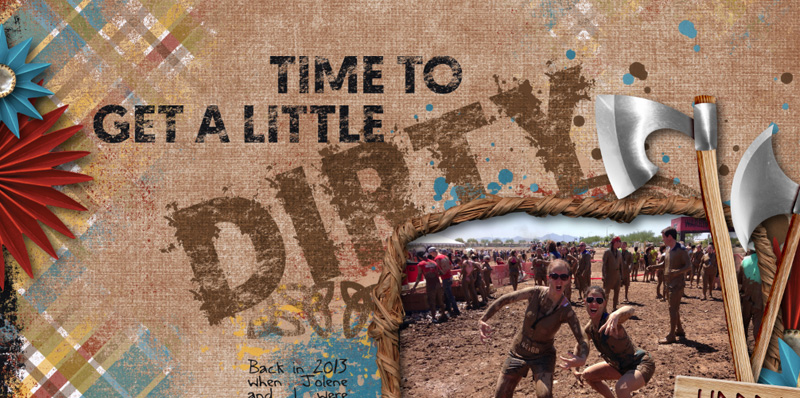
Specifically, no matter which printing method you choose, you will likely want to leave a little space around the edges; this is known as margin. You want to give the printer a little room for error, so they don’t chop off a title or cut an embellishment in half. To solve this, you can leave a little white space near the edges of your designs… or you can try not to put anything important in the outer 1/4-inch of space around the margin of the page.

Now, as for the where and how of getting your pages printed, there are many options. I polled some of the other creative team members here at The Digital Press to get some ideas on how they like to print their pages… and I’ve outlined what I learned, below. Obviously, this is not an exhaustive list, but it should at least help give you some ideas on how to go about it.


1. DON’T PRINT
You don’t have to print; you can keep it totally Digital and save trees!

I once made a special 50th Anniversary mini album for my grandmother and I loaded the pages onto one of those digital photo frames.  The frame would cycle through the page images, and she loved it!

Creative team member Shannon says, “I made my husband build me a scrapbook showcase website/app so now I mostly keep them online to save trees and space in my house.”

What a brilliant idea! Why have I not thought of this? Now I know what I will be working on this summer for sure!

2. PRINT AT HOME
Many people simply opt to print a home.  You can get a number of decent printers for fairly cheap these days, and many stores selling printers offer guides to help you decide which printer is best for you.  I recently had to buy a new printer and I learned a LOT just by going in to stores and asking questions.  The sales reps are more than willing to talk to you-  just don’t buy anything until you decide what you really want or need!

I will share that if you can do an Ink Tank method, instead of buying a printer that uses cartridges, you will save yourself a LOT of money in the end.  These printers can be a bit more pricey to start with but the ink lasts a LONG time and only costs $20 to refill in most cases.

OR, Color Laser Printers are amazing as the images don’t blur or run in humidity.  They just cost a good amount of money, so be aware of that!

PRO

  • Time friendly as you can print on your own schedule and reprint as needed
  • Make your own paper choices
  • Cost effective if you already own a printer
  • Can buy a printer to exactly fit your specific needs

CON

  • Depends largely on your printer, if you don’t have a good one the images will not look nice and the colors might not be right
  • If using an ink jet, images could run or bleed easily if they get wet – or even if the weather is overly humid
  • Cost of ink if printing large amounts of pages can be prohibitive if using the cartridge system
  • Limited paper size choices

We have a few posts here on the blog that give some tips for printing at home; if this is the option you choose, you might want to take a look HERE and HERE.

3. PRINT ON A BUDGET
For many people, printing on a budget is a must.  We all love the look of high quality printed pages, but we just can’t afford it for every page we make, especially if you are a prolific scrapper.

There are a number of printing options that are simplified and within a price range most people can afford.  From Pharmacies, to Department Stores, and even Office Stores, there are different printing services for different printing needs.

Department Stores: Walmart, Fred Meyer, Target, etc.

PRO

  • You can walk in or take advantage of the online upload capabilities as well as shipping options if needed
  • Have a variety of size options and now have more style options (like canvas)
  • Print photo style so less likely to run or fuzz in humidity
  • Fairly cheap

CON

  • Often very busy
  • Limited paper choices
  • Sizes usually have to be Photo Sizes (though you can print and trim)
  • Can have quality issues if  not printed properly (usually the people printing are not experts), so make sure to check your prints before paying
  • Many locations no longer offer this service so there is no guarantee that the nearest location will have it

Pharmacies: Walgreens, CVS, Rite Aid

These are mostly the same as the Department Stores, however, they are usually less busy and less crowded, so able to offer quicker turnaround times.  They also generally seem to be a little better quality.

Office Stores: Office Max/Depot, Staples

Most office stores offer printing services, but mostly geared towards businesses and office needs. You may be able to find what you are looking for at one of these stores, so don’t be afraid to go in and ask.  I have found the staff at most to be very helpful.

PRO

  • Often less crowded/less busy than photo labs
  • Can laser print (in color) on normal paper or cardstock
  • They can offer a few binding techniques as well if you are wanting a book

CON

  • Each branch differs in what services they offer, so your local office store might NOT be able to laser print in color or bind your pages
  • Many of their services are not archival
  • Limited in page size, style, and paper type

Shipping Stores: FedEX, UPS

I have never printed at one of these locations, but I have had people recommend them for some uses. These locations are usually more restricted.  Some do offer full photo printing (and online you can see more about that) . Many offer only black and white printing, or passport printing, but some do have color laser printing.  If you are in a bind, it is worth looking into.  You never know.

4. PRINT LOCAL
Many people like to support local businesses these days, and getting your pages (or album) printed can be a fun way to learn about your local printing options. You can do a search online, in a local MAP app, ask in local Facebook or neighborhood groups, or even just drive around to get an idea of what local options are available to you.

Often Groupon or other similar companies will have special offers for local Professional Print Shops, and many print shops offer discounts for first time customers.

Types of shops to search for when looking to print locally:

  • Professional Print Shops
  • Local Pharmacies (not chain stores, but locally owned small business ones)
  • Photo Labs
  • Frames and Prints Stores
  • Digital Printers
  • Photography/Camera Shops
  • Photo Finishing Centers
  • Imaging Centers (but not the medical ones 🙂 )

5. PRINT ONLINE
By far the most popular choice among our creative team members seems to be Online Printers.

But that makes sense, seeing that we are an online digital scrap community!

Scrapbook Printers

There are a growing number of these around.   One of the biggest, and most popular ones is Persnickety Prints.  They offer printing of individual pages and full albums.  The company is run by a scrapbooking enthusiast, so she understands the needs of Scrappers and aims to provide both good quality products and good quality service.

You can find them here: www.persnicketyprints.com

Persnickety Prints offers a system where you can buy coupons or points to use at a future date.  (x number of prints for $X)

Creative team member Katherine suggests that you “‘wait for the sales and purchase ‘coupons’ that allow you to print later” as this is cheaper and allows you to save money now.  She also said  “I love their customer service, speed, and the quality of their prints is awesome – really true to color.”

Amie agreed. When asked where she prints she said, “Persnickety prints hands down! Anytime I’ve had an issue their customer service does above & beyond to fix it!”

Photography Printers:

Online Photo Printers have been around for a while.  Some have flourished while others have gone out of business. The nice things about these printers is that they will print an entire bound book for you, often with various options.

Shutterfly, Snapfish, Nations Photo Lab, are just a few of the sites I heard about when I was asking around.

Sometimes these printers can be a hassle to work with because they are so popular with the masses.  They do offer good quality prints, but again, it is usually restricted to “standard photo sizes” Becuse they are so popular, sometimes things go wrong, orders get confused, or are not quality checked very well.  Never be afraid to contact Customer Service if this happens to you.

Professional Art Printers:

These printers are all about quality, and they are a fun way to explore a new option.  AND, most of them are already archival and fade resistant, since their main market is in printing artwork that is meant to last for years.  The big PLUS here – paper choice.

Art Printers offer the widest range of paper choices and sizes that I have found, so if you are wanting to have something extra special, and don’t mind paying a little extra, this is definitely the choice for you.  This is especially good if you are wanting to print a “Gift Page”

The good news, the prices for Scrapbook sized pages using most papers runs pretty similar to photo printing sites.  The biggest difference is that with Art Printers you can completely customize your size, where scrapbook or photography printers often have size regulations.  So if you are printing a size that is not normal for photo printers, this is your best option!  I have found that getting my 6×8 sized pages printed, most photo shops will not do it – I have to size up to 8×8 or 8×10.  Not so with art printers.

I have used a few art printers to print copies of some of my paintings, and my favorite one so far is Giclee Today.  Their work is high quality, and their customer service has been very helpful.  Their prices are pretty competitive as well, and they offer bulk pricing, so if you are printing a number of sheets of the same size – even if the image is different – your price per page goes down!  The major drawback, they do take a while to complete large orders.  However if that is a problem they also offer RUSH production for a small fee.

Book Printers

I had never thought to look at book printers before, but after talking with another of our creative team members, Robin, I now want to check this one out.

She shares “I love Blurb and always wait for a 40% coupon. I have had 100+ page albums printed and love the quality and the feel of the pages. They have held up very well even with my kids pulling them out over and over.”

Just looking on their site, their books look amazing!  I can already think of a few folders on my computer that would look superb printed through Blurb.

There are loads of other online printers you can look into.

Stationery printers, variety printers, etc.  Feel free to explore our options.

6. LOOK INTERNATIONALLY
If you don’t live in the US and don’t want to pay the crazy shipping prices to print with any of the above, then you are well acquainted with the frustrations of trying to find a place to print your scrapbook pages.

When I lived in Thailand, I made friends with a local family that printed professional portraits.  I asked them if they could print my digital art (including scrapbook pages) and they assured me they could. They did an amazing job of printing my pages, and if I am honest, I miss them!

Creative team member Chloé lives in France and she shares “I have printed albums through the french companies Photobox and Photoweb, always waiting for promotions. There are often good deals around the end of the year/beginning of the new year as they advertise to print last year’s memories.”

Stefanie, who lives in South Africa says “I use a local printer and print out 12×12 for 3 ring albums. This side of the ocean it’s the most cost effective for me. ”

So if printing from a US company is just a no go for you, do a little exploring online – or pop a question in the forum – and lets see if we can find you a place to print your pages.

MY TAKE
So what did I do?

I ordered my final prints from my sister with my Art Printer. I had 23 pages printed on thick Watercolor Paper for about $2.03 a page.  Not too bad, and I know they will look amazing!

However, they have not arrived yet, LOL. In fact, I think they are still being printed.

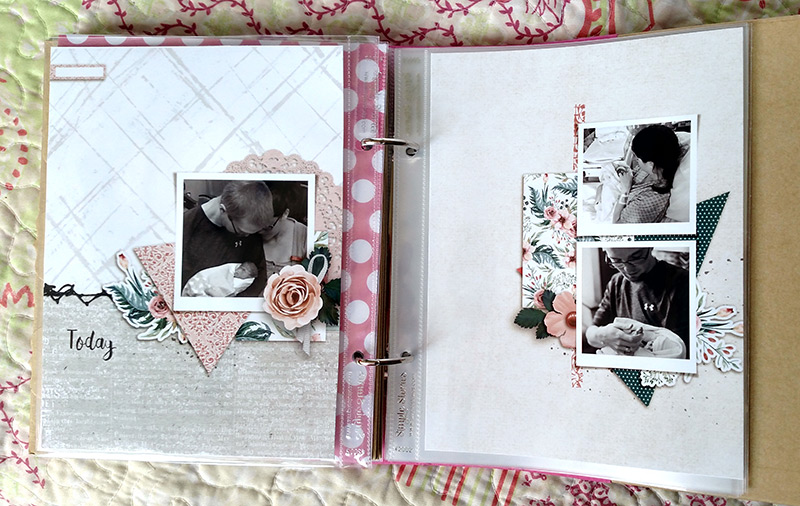
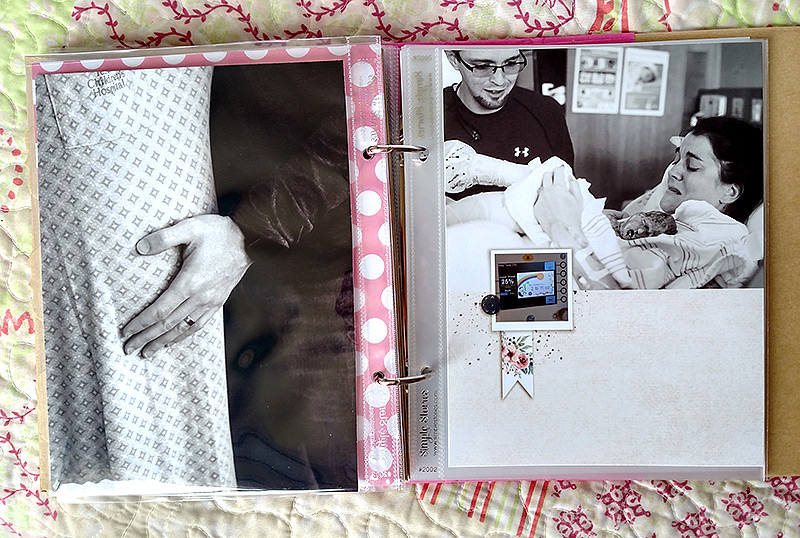
So I went ahead and had some sample pages without journaling (to protect their privacy) printed at a local print shop.  I already knew I just wanted to print individual pages so that I could use this SNAP album.  My thought was that my sister and her family could easily insert their own additions to the album this way, whereas if I had printed a book it would not work quite as well. This book is for her and her two small children to look at and remember the little girl they lost.  And since it is all digital, I sent her copies of the files as well, so if a page gets worn out, she can simply print another one.

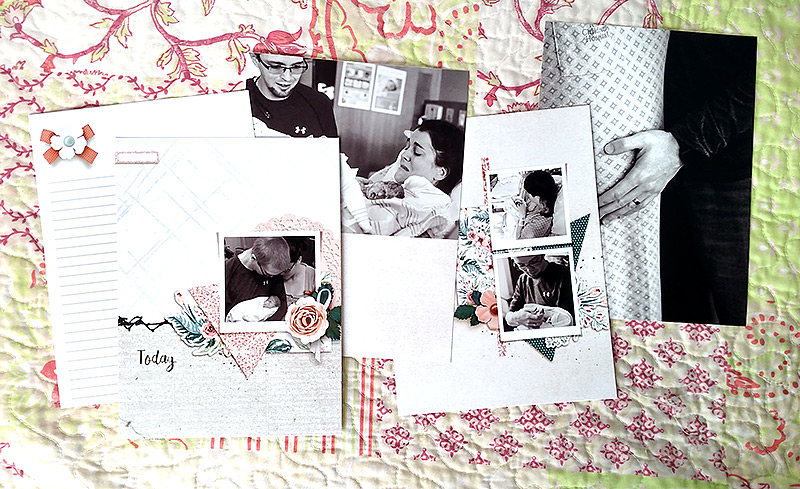
The print shop I used knows me well, and so I was able to proof each print before paying for them, and I really think they did a superb job!  Once I got them home I just inserted them into the Page Protectors that go with the Album and DONE!

I also uploaded all the pages to an online gallery that my family shares, so that my entire family can enjoy the little mini album and its tribute to our sweet Hannah.

Well, thank you for going on this little adventure with me for the past few months w/ regard to this series! I have enjoyed learning a bit about myself, my options, and my process… as well as learning a LOT about printing options. I hope you learned something, as well.

If you decided to make a mini album, as well, after following this series… we invite you to share it with us in the gallery (and/or in the forums). I would love to see what you created! Until next time… happy scrapping!


ErinErin is an artsy crafty kind of girl who is currently dabbling in far too many things, but is working hard to enjoy every moment of it, while avoiding the rain, which is difficult due to living in the land of many rains. She is slowly learning to use her smart phone to capture all the fun little bits of life that would otherwise go unremembered in the busy craziness that is raising a family!

Hybrid How-To | DIY Seasonal Banner

Hi everyone, and welcome to another edition of our Hybrid How-To series here on The Digital Press blog! I have a fun project to share with you today that will get your home ready for the summer season. It’s a fun, simple way to decorate for any new season using your digital scrapbooking supplies.

Let’s get started…

For this tutorial, I will be using the latest TDP Designer Collaboration, called Popsicle. It just launched in the shop last week, and it’s perfect for this project!

To begin, I opened up the kit and decided to use one of the banner shapes (see bottom right of the preview, above) as a “template” for my own banner. I pulled it into Photoshop and enlarged it* to 375% so the banner shape was around the same size as a 3×4 pocket card. Enlarging the banner allowed me to use it as template/clipping mask.

*please note that while you wouldn’t normally ever want to enlarge a digital scrapbooking element (because doing so results in a noticeable loss of quality/resolution)… for my purposes, it is OK because I am actually using it as a clipping mask. This means that the end result won’t show the banner image itself; specifically, if you look at the next screenshot, below… you’ll see that the “M” becomes really blurry when I enlarged it. That will be covered up, though, so it will be OK.

The following screenshot shows how big the banner is at 375% (as compared to an 8.5″ x 11″ page)…

Next, you can see how I used the enlarged banner shape as a clipping mask. I chose various papers and journaling cards, and then placed them directly above the banner shape layer in Photoshop. Once the desired paper/card was above the banner layer — I used the “clipping mask” function (CTRL-ALT-G in Photoshop; CTRL-G in PSE) to clip the items to the banner shape. This is what allows the paper/card to take the shape of the banner…


After that, I simply repeated the banner shape until I had enough different patterned shapes to be able to hang up a string of banners on my wall. Here is a look at a couple of the print sheets that I wound up with…

You’ll see that my print sheets included banner shapes in 2 different sizes (I wanted variation for my final product)… and also a few embellishments, which I eventually cut out and added as pop-ups on the banner itself, to add dimension/decoration.

Once I had cut everything out, I used twine (you can also use string, yarn, etc.) to string the pieces together. Here is a close up of my finished banner…

Just a side note — the 2 suns you see, above, are part of a free font (called “Sun and Stars”), and I used the sun shape as a clipping mask with papers from the kit. I clipped an orange paper and pink paper to them, in order to match the rest of the items I printed/cut.

Here’s a view of my final banner, hanging on the wall, along with some other summertime decorations in my house…

Isn’t that fun? I hope this simple banner inspires you to decorate for the season and to try using your digital supplies in a new way!

If you’re feeling inspired and you’d like to give this a try, too, don’t forget that you can earn challenge points at TDP! Come visit the CROSSWORD SECTION in The Digital Press forum, and you’ll find this month’s Hybrid Challenge thread (for each month’s Hybrid Challenge at TDP, you get to choose one of the month’s “Hybrid How-To” tutorial posts from here on the blog and make your own version). You’ll see how fun it is! Give it a shot, and share your final results with us! We can’t wait to see what you come up with.


00 Headshot

About the Author  Sabrina is an avid documenter of life — herself, her children, her hubby, and her everyday life. There is beauty in the ordinarymoments, and they are what she loves to scrap. She is also always on the hunt for a quiet, peaceful moment… and she usually spends it reading or playing at her crafty desk.

Feature Friday | Dunia Designs

Happy Friday, and thank you for joining me for another edition of our Feature Friday series here at The Digital Press! This week, I have the honor of highlighting the lovely Dunia Acauan of Dunia Designs! This is the fourth time Dunia has been featured here on the blog (if you want to learn even more about her, you can find her feature article from September 2016 HERE… her feature article from April 2017 HERE… and her most recent “Foodie Friday” post from January 2018 HERE).

To learn even more about Dunia, this time around I asked her to share 5 Things We Might Not Already Know About Her… and here’s what she had to say…

  1. I’m from Brazil — We moved to Michigan (USA) in 2016, and we are loving it here — except for the winters! It’s spring currently, and we are enjoying it so very much!
  2. I’m a photographer — It started as a hobby, but it’s turned into my passion. It’s sometimes hard to make time for both businesses (designing and photography), but I love them so much that I can’t imagine my life without both.
  3. I’m a TV series addict — I love everything from “This is Us” to “The Big Bang Theory” to “Game of Thrones” …everything is on my playlist!
  4. I should be healthier — But, I’m definitely not (shame on me)! Coca-cola, chocolate, and pasta make me so happy!
  5. I only listen to rock and roll music — My favorites are the good old ones, such as Led Zeppelin, The Clash, and Pink Floyd.

I don’t know about you, but I feel like I have a lot in common with Dunia! 🙂

When it comes to Dunia’s design work… you’ll find that her shop is filled with lots of products that boast beautiful colors, fun doodles, unique word art… and items that are perfect for digital layouts, pocket pages (both digital and hybrid), and paper-style layouts. Her templates will make your scrapping life easier and quicker, and who doesn’t want that?! She also has a variety of products that will become staples in your scrapbooking stash — items that will inspire you to create unique projects that showcase your style and your wonderful memories!

Here are a few of my personal favorites from Dunia’s store at The Digital Press

…and if that doesn’t inspire you, then take a peek at these fun projects created with the many products you’ll find in her shop…

Aren’t those layouts gorgeous and fun?!

I hope that you’ve enjoyed learning more about Dunia today! To aid in our celebration of her upcoming week as our Featured Designer at The Digital Press… her entire shop will be 30% OFF all week long (ending at 11:59pm ET on Thursday 6/14).

Additionally, Dunia has a special Free-with-Purchase offer for everyone this week, as well! Don’t miss this opportunity to stock up on your favorite products in Dunia’s shop while they’re discounted… and you can also grab this fantastic full kit — Cats & Dogs — completely FREE with any $10+ purchase in the Dunia Designs shop (again, this offer will be valid through 11:59pm ET on Thursday 6/14).


Heidi NicoleAbout the author  Heidi Nicole is happily married to an amazing man, is a step-mama to 2 wonderful kiddos, and is a cat mama extraordinaire. She’s a radiation therapist by day and a runner and creator of pretty things by night. She loves her family and friends, coffee, wine, books, Friends reruns, St. Louis Blues hockey, craft beer, good food, cats, Jeeps, and traveling. She lives a normal and happy life, and enjoys all of the absolutely fascinating people she gets to share it with on a daily basis.

Tutorial Tuesday | Editing Colors Individually

Hey everyone, and welcome to another edition of our Tutorial Tuesday series here on The Digital Press blog! Let’s talk about photo editing and color today!

You probably know how to change the colors of your picture globally (and if you don’t, there are some other tutorials on the blog that can give you some simple tips like this one about saturation and contrast, etc.). But sometimes, editing all the colors of a picture at once can lead to an unnatural, “fake” looking photo. To avoid that, you can work on each color individually so that you can edit just the color you want to change, not the whole picture. I will show you how to do so in Lightroom and Photoshop, but I’m confident you will have similar settings available in just about any photo-editing software.

Here’s a look at the picture I will be working on today…

This is the straight out of camera image (SOOC). As you can see, the red rose is very bright and saturated — almost neon — and I would like it to be more natural-looking.

First, I will show you how to do that in Lightroom. Import the image in the software, then open it in the “Develop” module. Then find the HSL/color/B&W panel, which is the one open on the image below, on the right. We will work in the HSL settings. HSL stands for Hue, Saturation and Luminance. In each of those three areas you can edit eight different colors: red, orange, yellow, green, aqua, blue, purple and magenta.

If you’re not sure which color you should be working on, use the little circle (pointed by the arrow in the image below), click on the color you need to edit and move it all the way up and down. You will see one of the colors change drastically, probably one or several other less notably. The main color will be the one that changed the most, that’s the one you need to work on.

For my rose here, I had to work mainly on the color red and a bit on the color magenta (in the inner petals). I edited those two colors in saturation (to change how “strong” the colors are)…

… and in luminance (to change how bright or dark the colors are).

As you can see, the greenery in the background isn’t affected at all by the changes I made in the red and magenta areas.

Let’s move to Photoshop now. You can do something pretty similar using the “hue/saturation” adjustment layer. To use this tool, go to Layer –> New Adjustment Layer –> Hue/Saturation or click on the “new adjustment layer” icon on the bottom of your layers panel. As you can see, unlike the HSL panel in Lightroom where you decide first what setting you’ll work on (hue, saturation or luminance), and then which color you’ll edit, here you will first decid on the color and then on the settings you’ll edit. To do so, you will pick the color in the menu that says “global” by default. You will have 6 colors to pick from: reds, yellows, greens, cyans, blues and magentas.

As in Lightroom, if you’re unsure exactly which color you should be working on, there is a helpful tool. Use the little “hand” (pointed by the arrow below), click on the color you wish to edit and move the hand from left to right. The “global” menu will change for the right color you need to change.

As I did in Lightroom, I changed the reds, editing saturation and luminance…

… and the magentas, where I changed saturation and luminance but also the hue (teinte in French). I did that because I wanted to bring the pinkish inner petals closer to the rest of the flower, which is more red than magenta.

And that’s it! As you can see, it’s not super complicated and it can be very useful for specific images, like making a red dress pop (be careful as skin often has red and yellow in it, so don’t oversaturate your subject’s skin if you don’t want her to look like an alien!) or decreasing the “visual weight” of the bright greenery we often get in Spring, so that your subject will stand out, not the grass he/she’s sitting on!

I hope you’ll find this tutorial helpful, don’t hesitate to ask your questions in the comment below or in the forums!


ChloéAbout the author  Chloé is in charge of PR and communication for her small town by day, is a digiscrapper “by night,” and a photographer whenever the light is beautiful. She lives with her man and fur-babies in a small town of Alsace (in the northeast of France), where she loves to read, watch good TV shows (TWD being her absolute favorite), and just hang out with her friends — no matter if they are close by, online, or away in her Swiss hometown. She recently became quite obsessed with Bullet Journaling, FlyLady and Zero Waste.

Feature Friday | KimB Designs

Hello, Happy Friday, and welcome to another edition of our Feature Friday series here on The Digital Press blog! This week, I am thrilled to highlight Kim Broedelet of KimB Designs. Kim and I go way back… to my very first creative team spot (and we both live in sunny South Africa!). This is actually Kim’s fourth feature here on The Digital Press blog (you can find her feature from June 2016 HERE… from February 2017 HERE… and her more recent Foodie Friday post from January 2018 HERE).

In order to give you even more information about Kim, this time around I asked her to share with us 5 Things We Might Not Already Know About Her

  1. I’m the eldest of 3 sisters. I have been very lucky to have worked with my younger sister, Gaye (GS Creations), throughout most of my adult life. Starting from beginner layout artists, graphic designers, and studio managers at an advertising agency (Y & R Hedley Byrne)… right up to now as digital designers. It’s been an amazing privilege to have someone so close — a sister, at that — to share in my career and in something we are both so passionate about.
  2. I love music and have an eclectic collection… from Opera to Deep House. I can even play the old fashioned organ… you know, the type with the pedals and double keyboards? Yup — my Gran had one, and sent Gaye and I for lessons — which we hated at the time, but it did give us a good grounding for reading and playing music.
  3. I can’t go to sleep at night (even after a good party) if I haven’t at least read a page of my latest book (although I might have to re-read it later, LOL). I have to read before bedtime, though! It’s my way of relaxing. I’m a total bookworm — another thing I share with my whole family — and we have a ‘swop and meet’ every time we get together. My bookcase — filled with everything from horror to romance — gets swapped out every time we get together. So there is always something new for someone to read.
  4. I did acrobatics when younger, and loved it! I can still (at my age) put my feet on my head while sitting, and it freaks everyone out when I put my toes in my mouth… or run around doing cartwheels. It’s usually a party trick that comes out after a few glasses too many — LOL.
  5. I love to compete with the men in my life. I play golf, and love to fish against them. It’s great to have that competition in our family, which always brings a special banter and teasing each time we get together to do both. Right now my son Nathan — who has his South African colours for fishing — takes the ‘day’ most times, but I can still give him a go on the golf course thanks to the wonderful handicap system, LOL.

As for Kim’s designs …you’ll definitely want to check out her shop here at TDP. If you love pretty florals, fabulous tone-on-tone patterned papers, and gorgeous dimensional elements with simply the best word art stamps and stickers… then Kim is the designer for you! She has a great assortment of products; from her solo products, to collabs with other designers, to fabulous minis that will have that perfect special something to add the finishing touch to all of your layouts.

Here is a sampling of just some of the gorgeous things you’ll find in Kim’s shop at The Digital Press, just so you can see what I mean…

Additionally, here are some fantastic examples of projects that have been made with her designs, so you can see the versatility of Kim’s kits in action…

Aren’t her designs so much fun to see in action? I hope that you’ve enjoyed learning a little more about Kim today! 🙂

While we celebrate her week as our Featured Designer at The Digital Press, her entire shop will be discounted 30% OFF all week long (the sale will end at 11:59pm ET on Thursday 6/7)

Additionally, Kim has a special Free-With-Purchase offer for everyone this week! Don’t miss this opportunity to stock up on your favorite products from KimB Designs… and you can also snag this brand-new (just released today!) full kit — Styling — for FREE with any $10+ purchase in her shop(again, the offer is valid through 11:59pm ET on Thurs 6/7).


small avi

About the author Stefanie is a member of The Digital Press creative team and a stay at home mother of three older children living in Cape Town, South Africa with her hubby of 30 years, two of their three children, and 3 Siamese cats. She loves photography, traveling, and digital scrapbooking — documenting the good and the ordinary everyday.

Tutorial Tuesday | Grunge Text Effects

Hi scrappers! It’s time for another tutorial… and this week I’d like to share my technique in creating a grunge title.  I’ve been all about simplicity lately, and this effect is quick, simple effort for a big effect result. Perfect!

I ran a Warrior Dash race with a friend of mine years ago and we got all kinds of messy! I think it was the mud pit that we had to army crawl through at the end that really did us in.  So for this page, I wanted a grunge title to match.

Here’s what my page ends up looking like.

It’s super easy to do this! To get started, I chose a big chunky font that had plenty of surface area for effects. The font I used here is called Geomanist.  Go ahead and create your text layers, positioning your title where you want it on the page.

Next, we need to convert the text to shapes.  To do this, right click on the layer in the layers panel and choose “Convert To Shape”.  You can also hit Cmd/Ctrl + E.

Before I added the grunge effect, I wanted to give my text the right color and texture.  So I clipped one of the papers in the kit I was using to the text.  Since we need that to be just one layer, I then merged the clipped paper and the text shape by selecting both layers and then right click in the layers panel to choose “Merge Layers”.

Now it’s time to use some brushes. I used two sets of brushes for this effect. First was a set of grunge brushes that I got for free here. The second set, which I’ll use later, are paint splashes, and I got those for free here.  To use these, first make sure that new shape layer (the one that used to be text) is selected. Then go to Layer > Layer Mask > Reveal All to add a layer mask to the shape.  Then using the Brush tool (B) and with your foreground color set to black, choose a grunge brush (like the ones I referenced above) and click over and around the edges of the text shape until you get a texture effect that you’re happy with.  I changed my brush size to about 700 in this example.

grunge-step3

Next, I added a new layer just underneath the text layers.  To do this, select the layer just underneath your text shape layers in the layers panel and then choose Layer > New > Layer. This is going to be for my paint splotches that will match the color of the text.

With this new layer selected, I first make sure my foreground color is the same as the text. I used the color picker to match it exactly.  Now I’ll grab my brush again, this time choosing one of the paint splatter brushes that I just added.  I actually used a few different brushes from that same set, and I brushed (just click once, no dragging) some paint splatters behind my text to get something that looks like this:

And finally, I added a tiny bit of beveling to both the text and the paint layers. To do this, I double clicked on the paint layer and checked the Bevel and Emboss checkbox and used the following settings.  I did the same with the text shape layer.

The result is this grunge, paint splattered titled that works really nicely with the theme of my page!  Hopefully you guys will try this out and find it to be super easy to get this cool effect for a title.  Experiment with your brushes – both the brush and the size – until you get it looking just how you want it to.  Have fun!


About the Author  Shannon has been completely addicted to digiscrapping since she began in early 2016 (though she’s been a scrapper since 2000). Her early morning ritual of a few quiet hours of scrapping while sipping a chai tea is her favorite part of each day. She is also the owner of a web design company, and when she’s not at the computer designing websites or digiscrap layouts, she’s probably hiking one of the local mountains in her hometown of Phoenix, Arizona. She is an avid reader and loves to travel to foreign countries.