Author: The Digital Press

Feature Friday | Jen C Designs

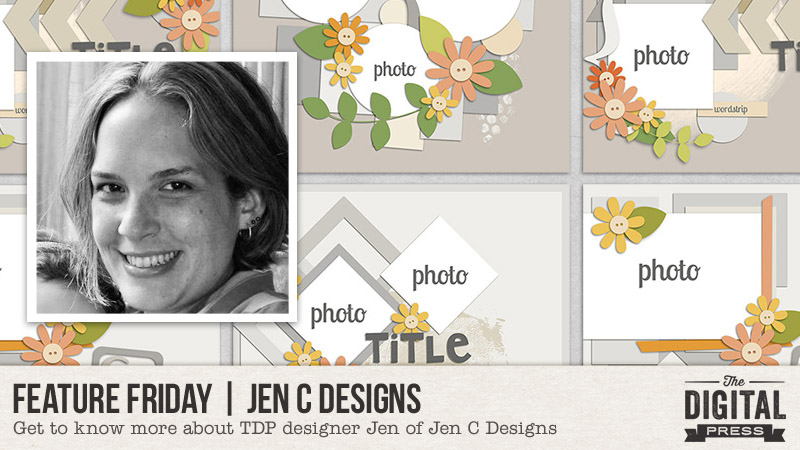
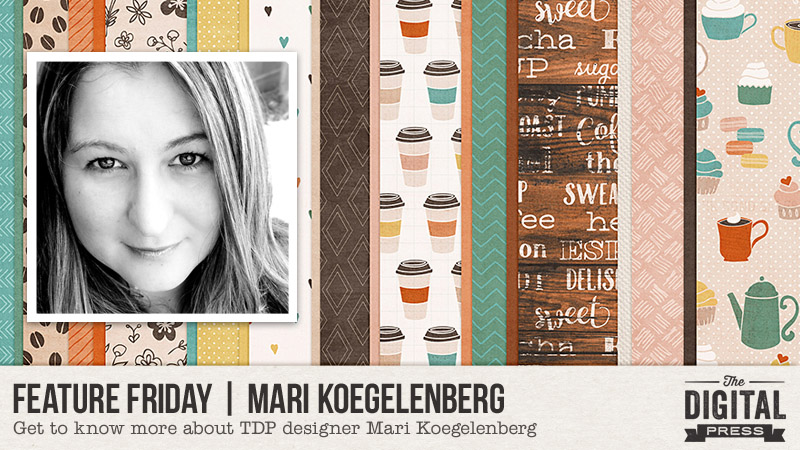
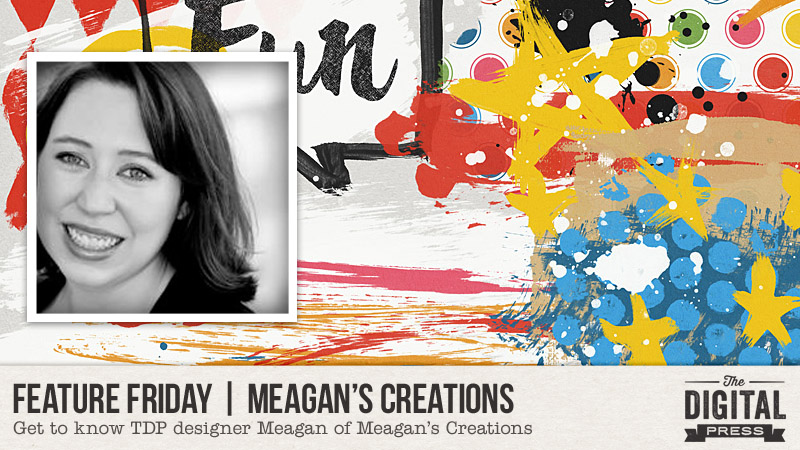
Happy Friday to one and all, and welcome to another edition of our Feature Friday series! Today I’m here to help everyone get know Jen (of Jen C Designs) a little bit better! She is the newest designer at The Digital Press, and we are so delighted to have her fantastic selection of layered templates in the shop here on a permanent basis!

Jen is a template designer with a knack for unique, trendy, and creative page designs. Her templates are easy to use and easy to personalize to match your own style of scrapbooking. Her products save time, while also encouraging us to continue with our memory-keeping by making it such an effortless process! Her designs are definitely reflective of her motto — making your memories scraptacular!

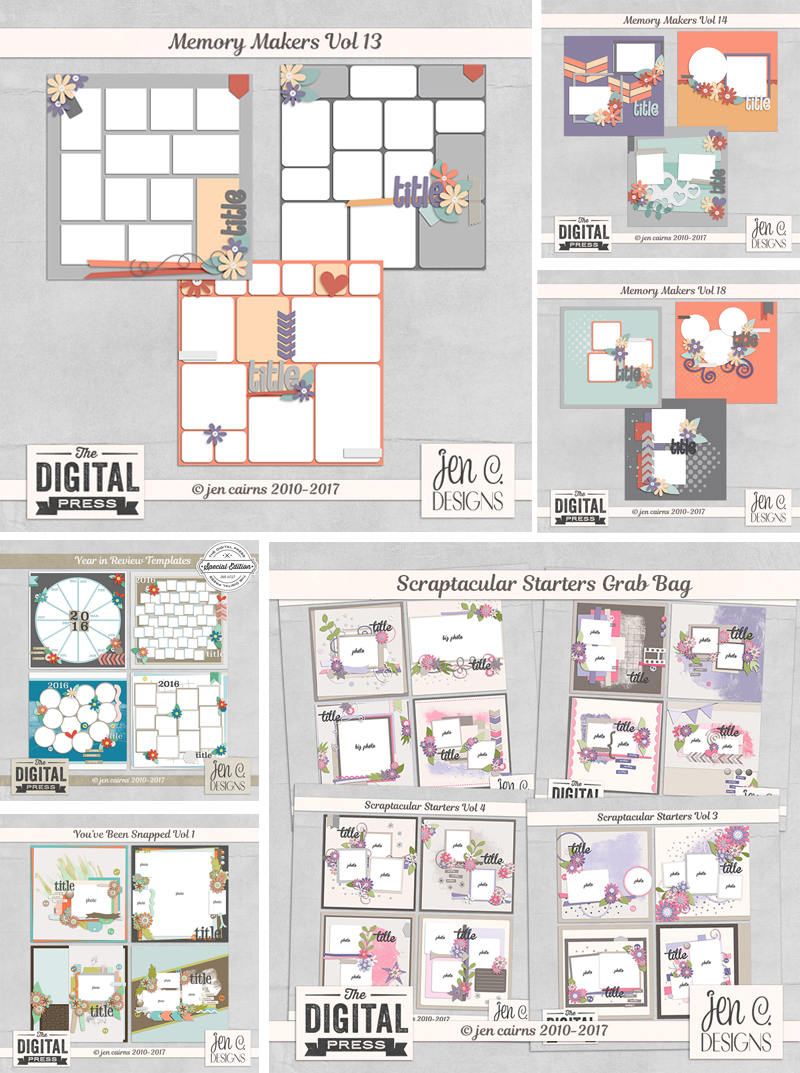
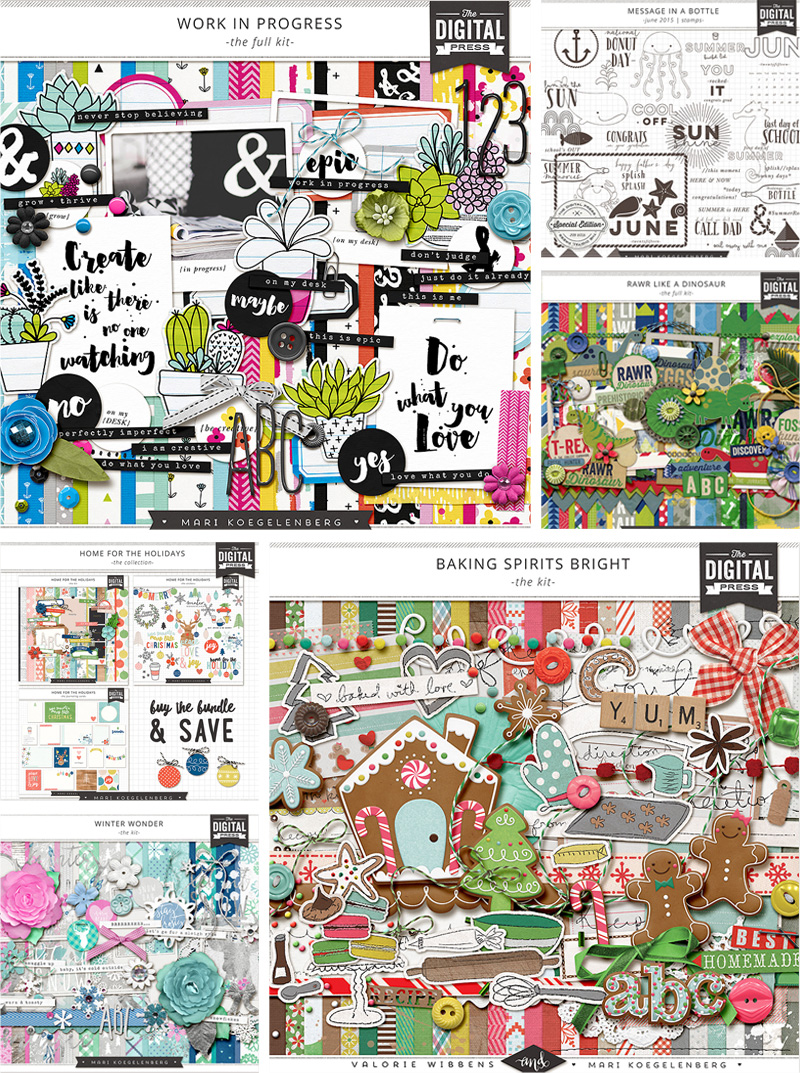
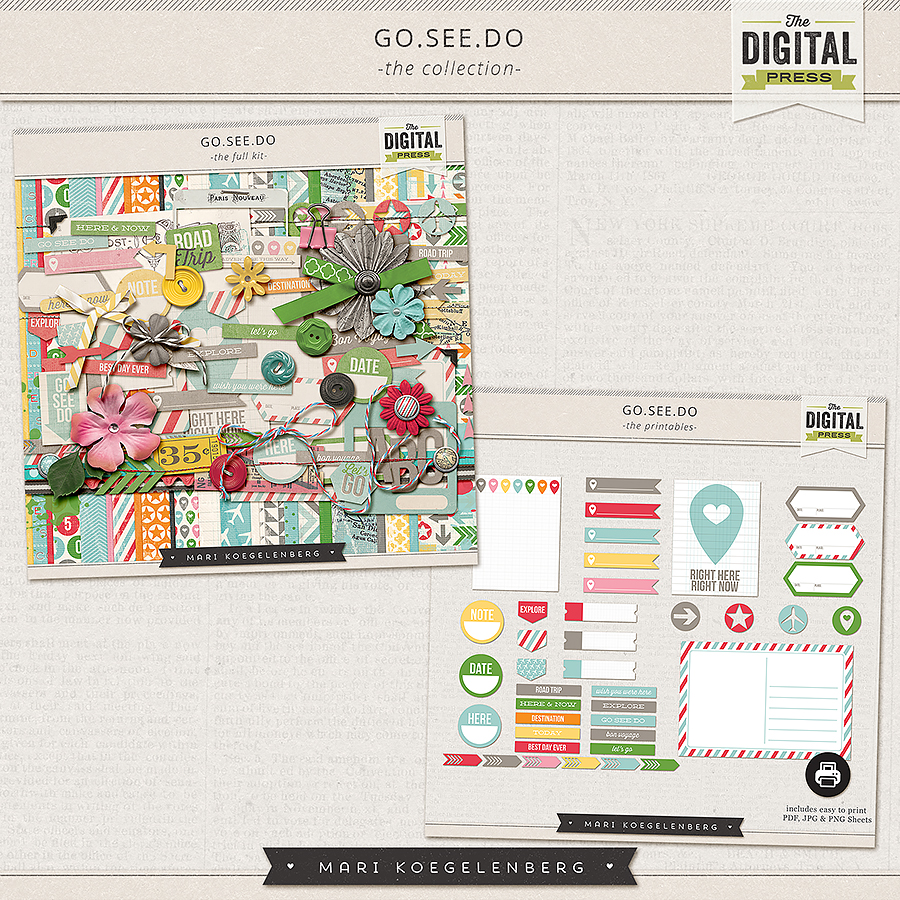
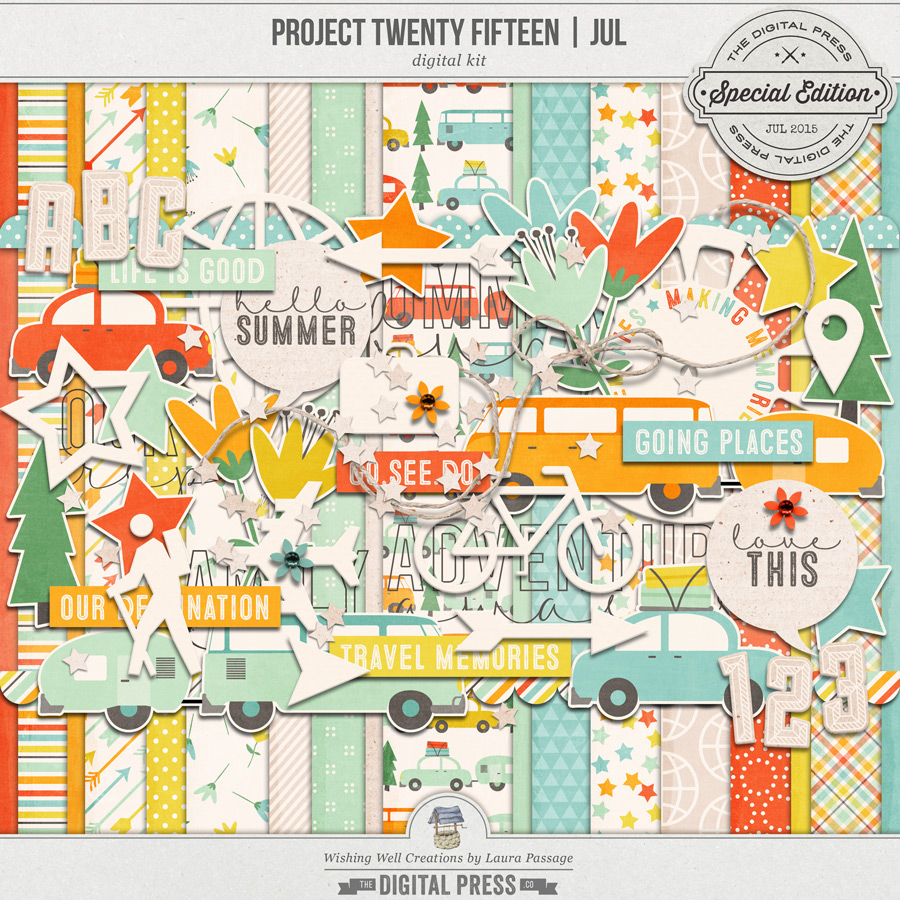
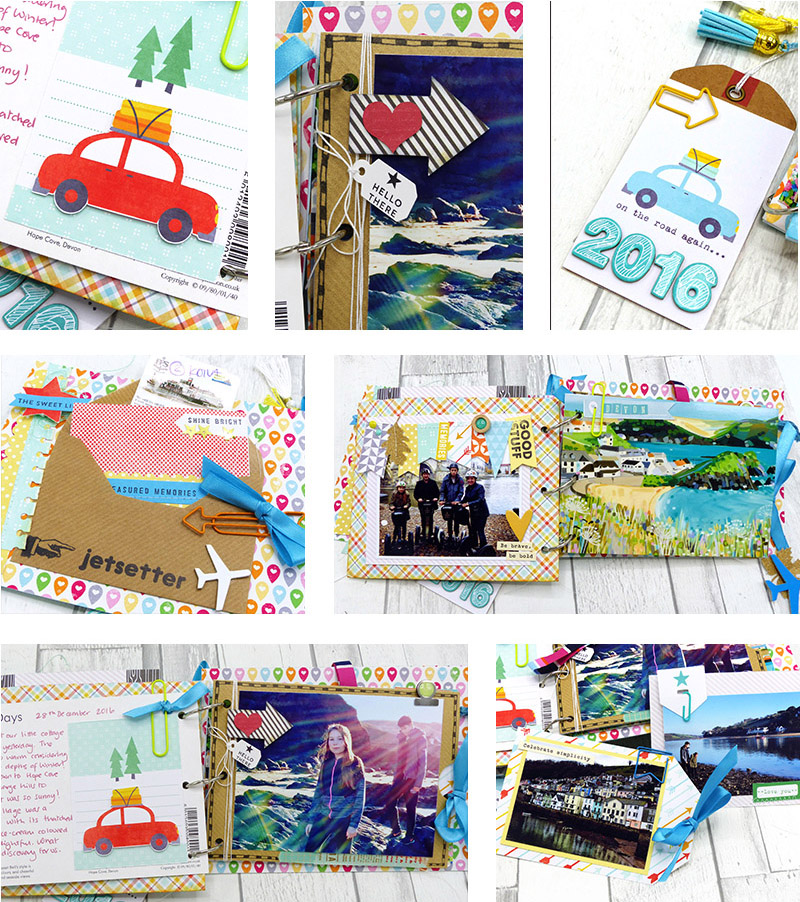
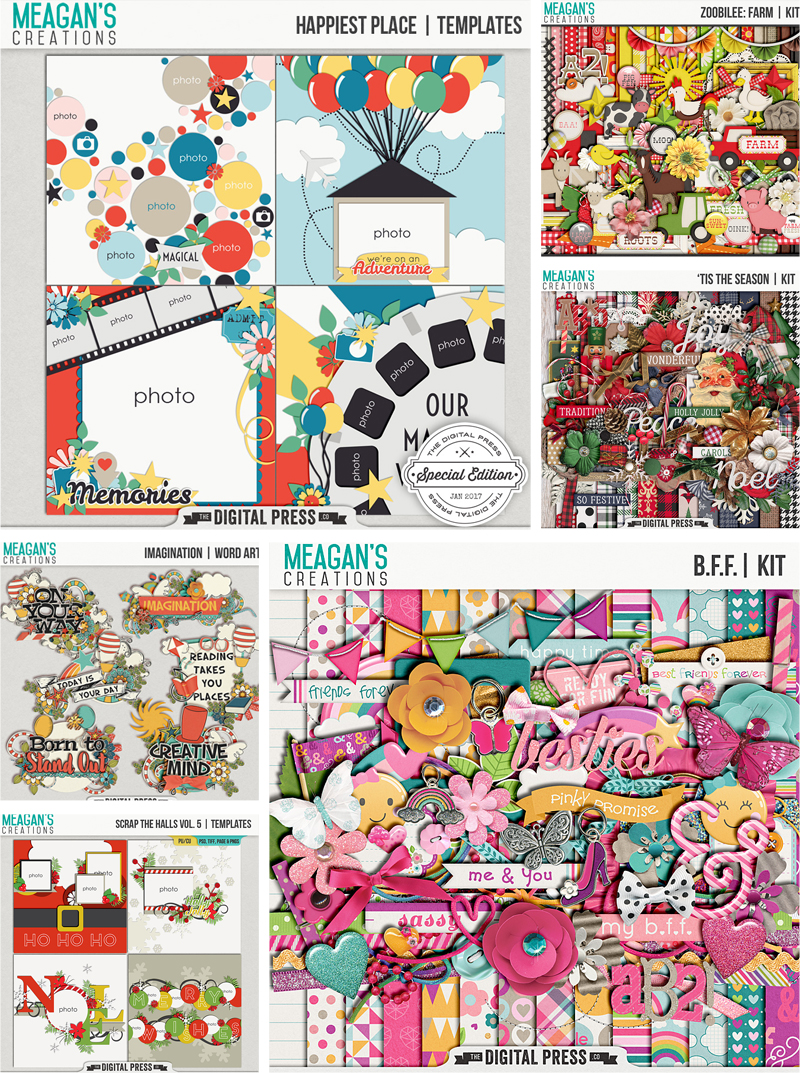
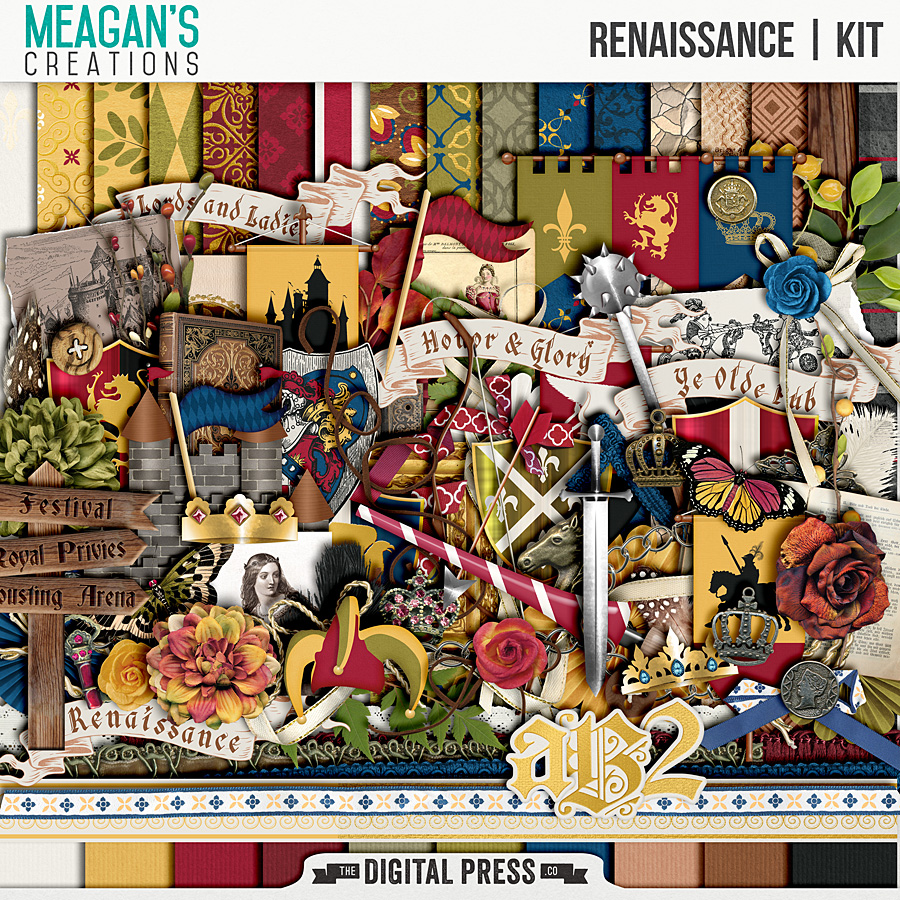
Here are a few examples of the beautiful products you will find in her store here at The Digital Press

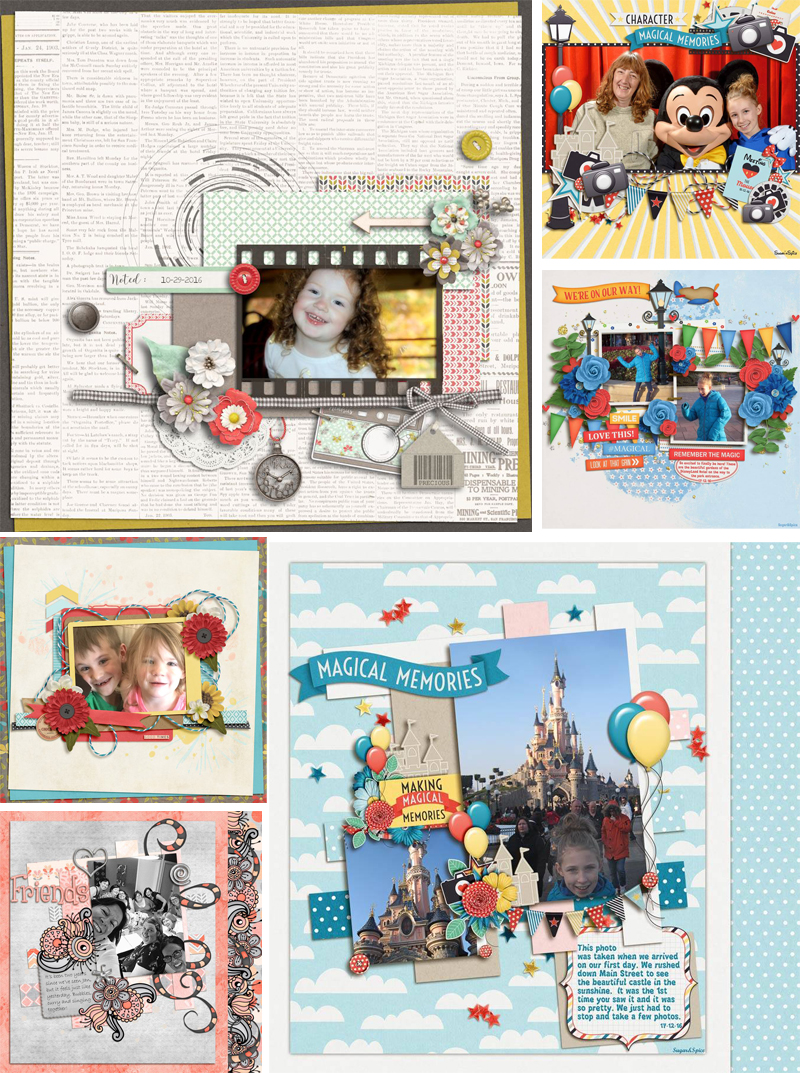
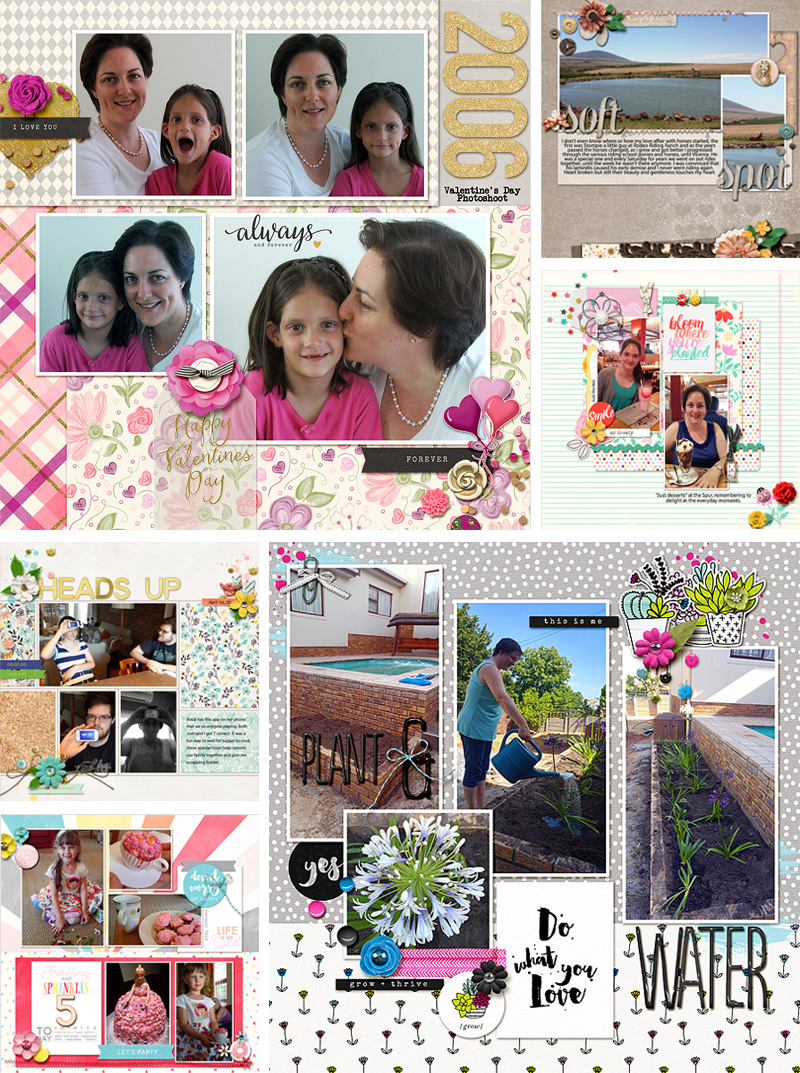
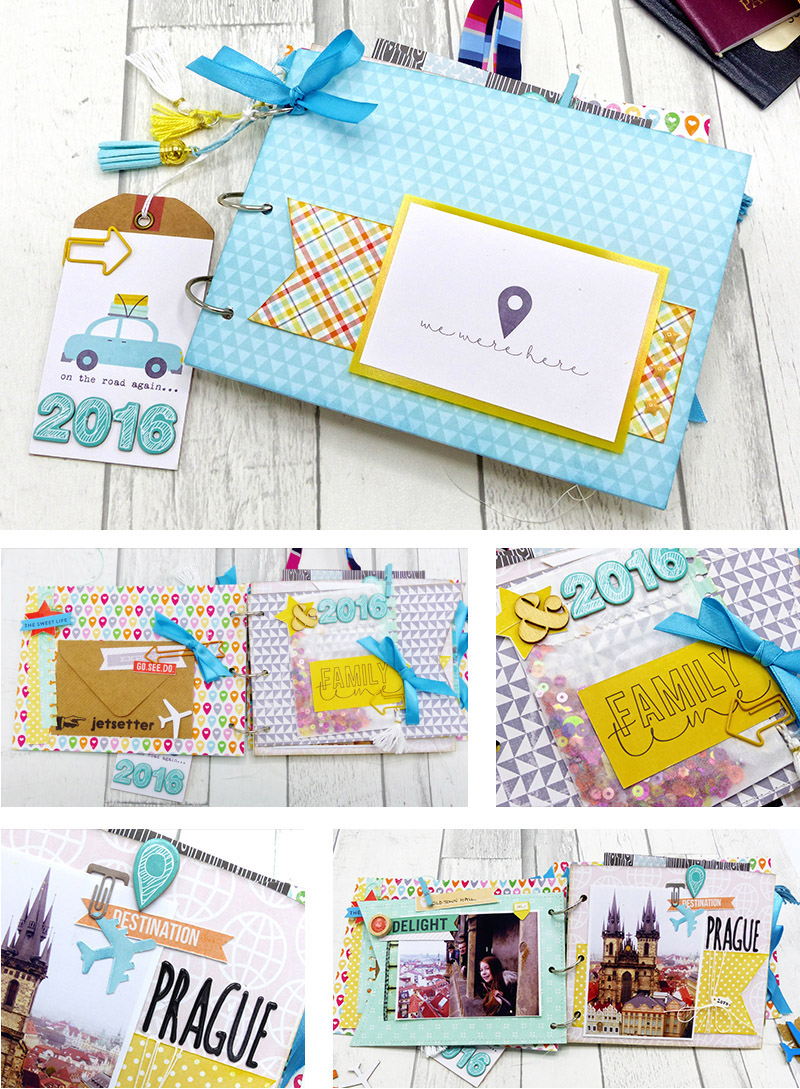
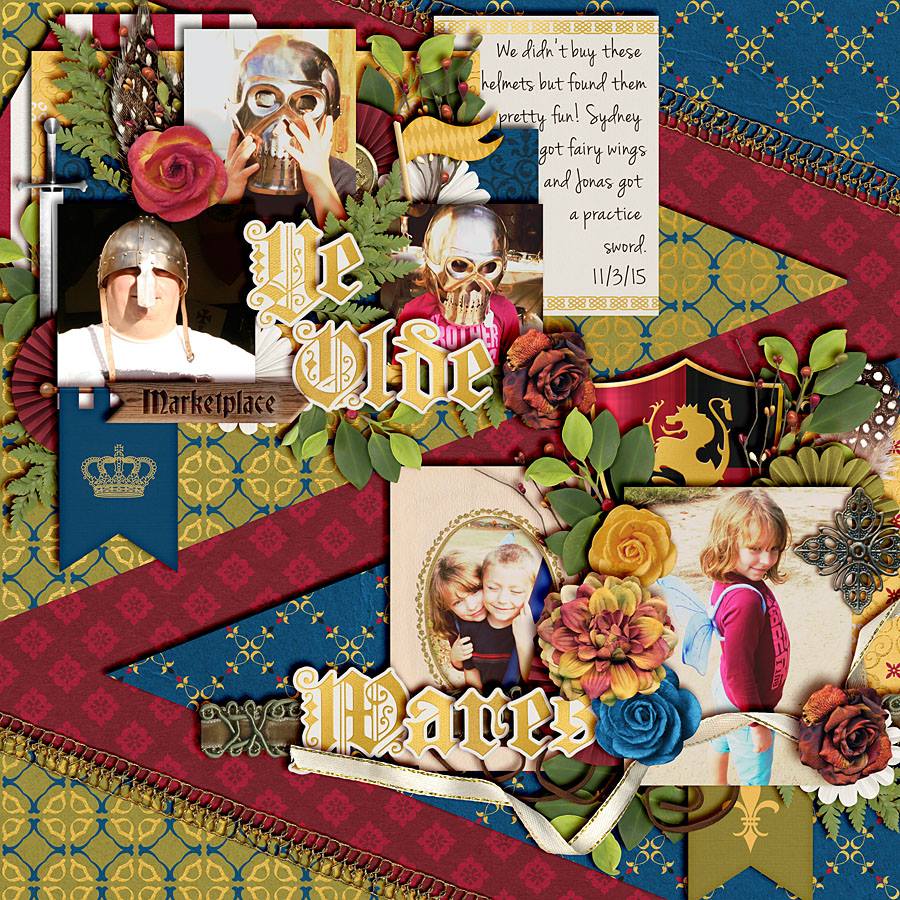
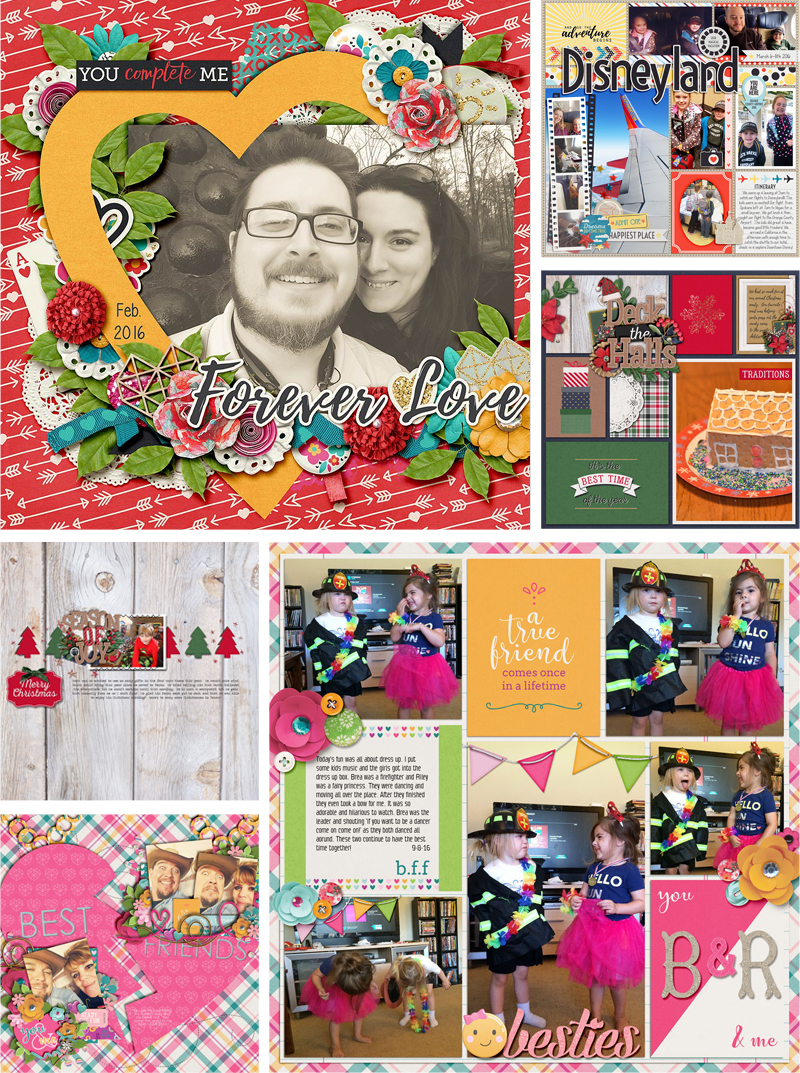
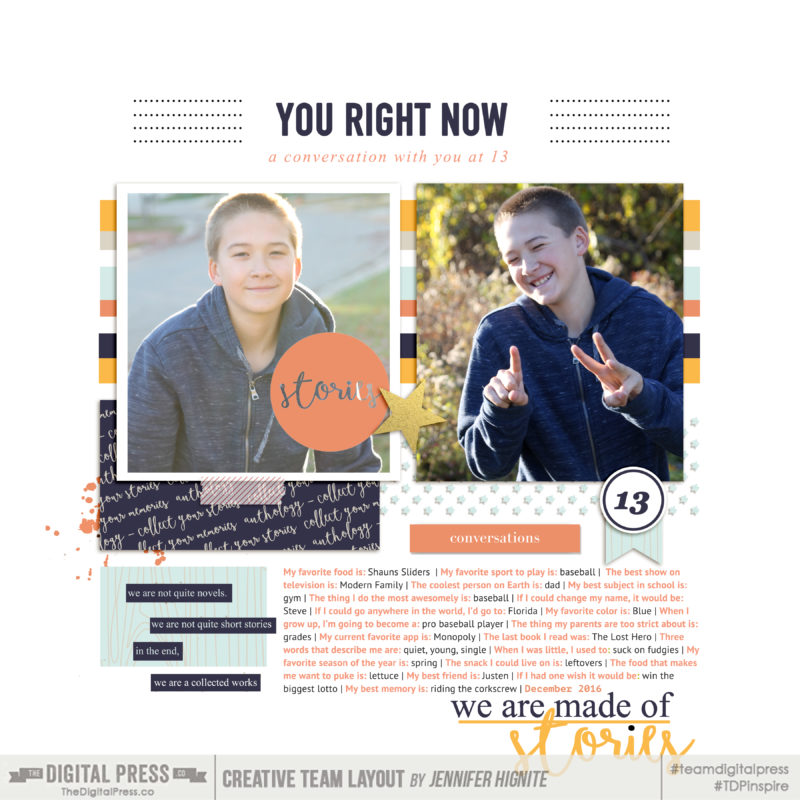
Jen’s templates always inspire creativity! Here are some layout examples that use her templates…

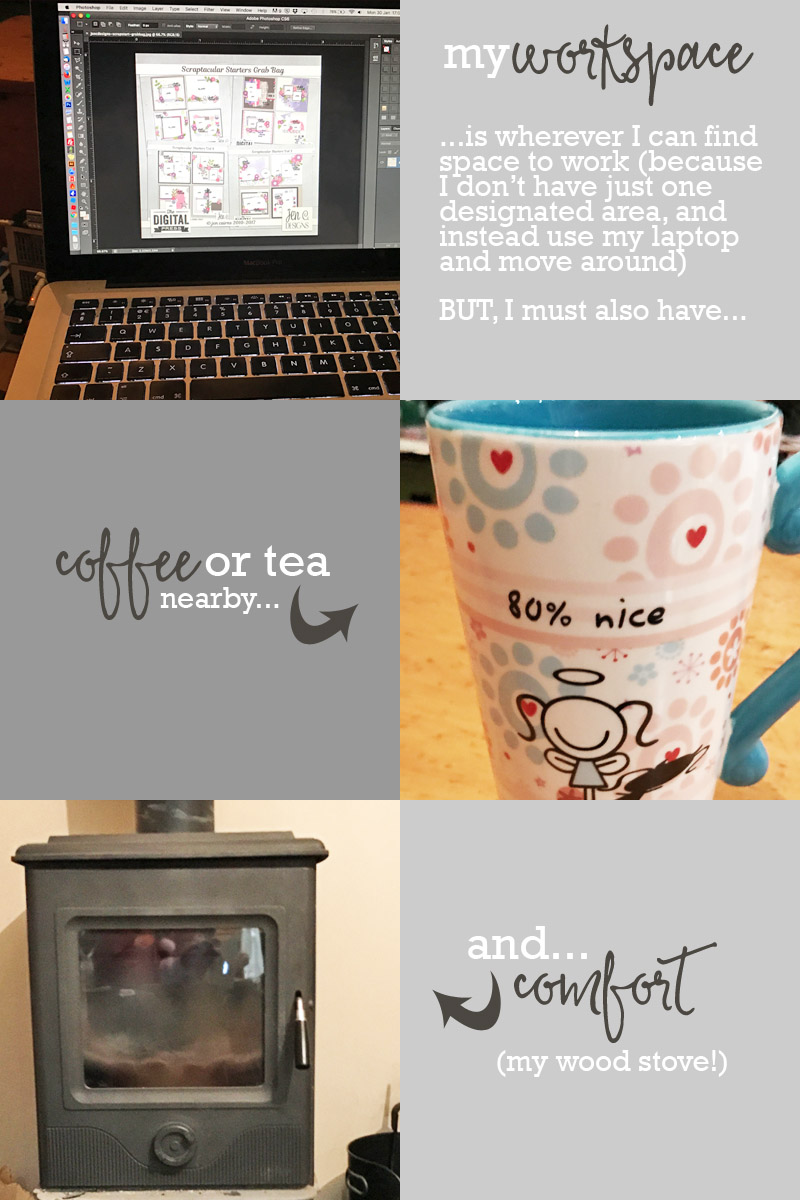
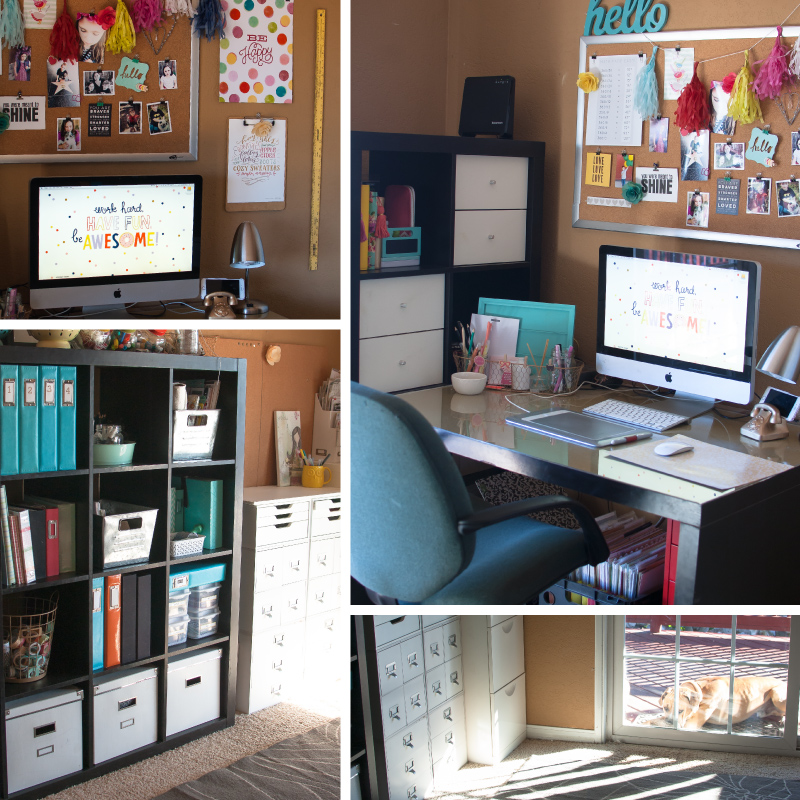
As we noted in last week’s Feature Friday post… in 2017, we’re using our designer feature series not only to introduce you to each designer and her products, but also to give you a little peek into each designer’s creative space (and a little more insight into each of their creative processes!). So with that in mind, here’s a peek at Jen’s workspace arrangement…

Jen-C-Designs_workspace

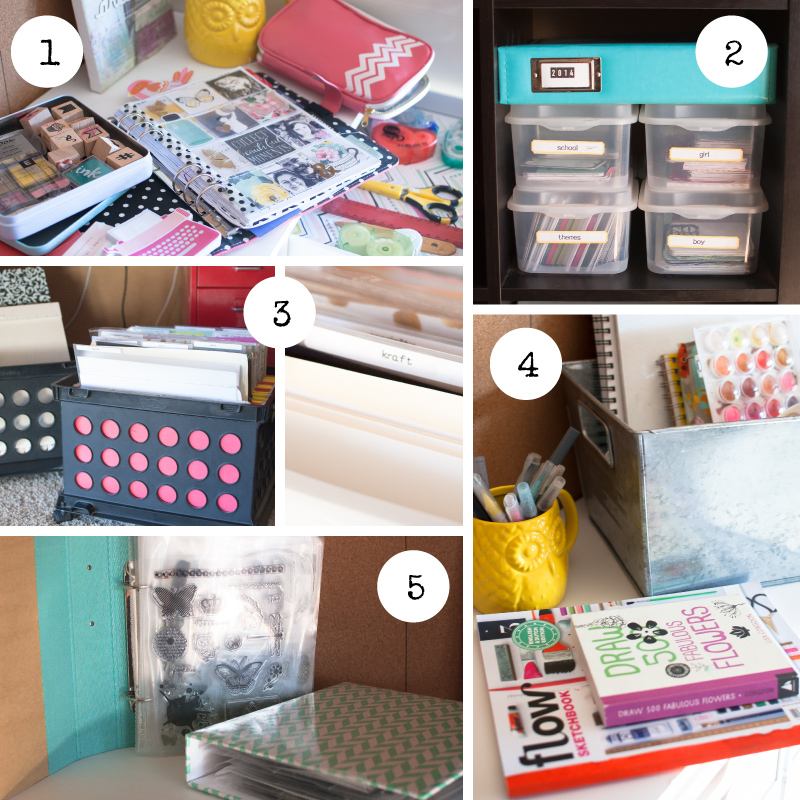
Additionally, we also asked Jen to share with us a Top 5 list that is representative of herself at this point in her life… and she chose to share her Top 5 Must-Have Apps, as shown here…

Jen’s Top 5 Must-Have Apps (in her words)…

  1. PINTEREST — It’s not often that a simple app can do so much! It’s the perfect place to be inspired, to relax, to be motivated, to be encouraged, to feel like maybe this time my chocolate chip cookies will turn out a wee bit better! Or maybe that my New Years resolutions (long since discarded) could still be shifted into a mid-year resolution. As a designer, I love the “secret board” function — I’ve used it for colour palette hoarding (though I have plans to organize them into a slightly more sensible fashion and start sharing them for others to see!). For scrapping there’s no shortage of inspiration to be found from around the papercrafting and digiscrap world!
  2. NETFLIX — Sure, it’s another relatively obvious choice… but there is a reason that millions of people love it! By way of recommendations, I love… Once Upon a Time, Designated Survivor, Suits, and Lewis (to mention my most current list of recently viewed box sets). As I watch while I design, I often have to skip back a bit (and quite frequently) to keep on top of what I’m watching! But as a parent, the most important feature is the fact that we can have separate profiles. It means I can monitor what my kids are watching while they don’t accidentally click on recently-watched episodes of Black Mirror!
  3. CANDY CRUSH SAGA — Everyone needs a game to play, and this one is definitely my favourite. I don’t have time to keep up with time-constraints and quests. But I do love some candy-crushing relaxation.
  4. KINDLE — I wish I could spend as many hours reading as I do watching TV, but designing plus life means that’s not possible (due to the functional limitation of being unable to read lines on a page, turning pages, all while using Illustrator or Photoshop)! Kindle has renewed my love for reading — I used to read a book a day as a child/teen! — but BookBub (a free daily newsletter) has introduced me to dozens of new authors I’d never have come across otherwise! While in some cases you get what you pay for, it’s easy to just delete the book when you lose nothing for doing so! Plus you can set your own preferences for the reading selection which is sent out to you.
  5. EVERNOTE — I simply cannot live without this app! I use it for organizing everything! Between setting reminders, brainstorming, tracking my progress, sharing documents/inspiration with my CT, and many other uses… I’ve found it to be an invaluable source of sanity over the last couple of years since it was first shared with me. It’s much easier than using just Pinterest — as I can collect images and write notes that correspond with them, as well as use the integration with my calendar.

So tell us… which, if any, of those apps are you already addicted to? And which are you now excited to check out now that they’ve got the official “Jen C Stamp Of Approval”? 😉

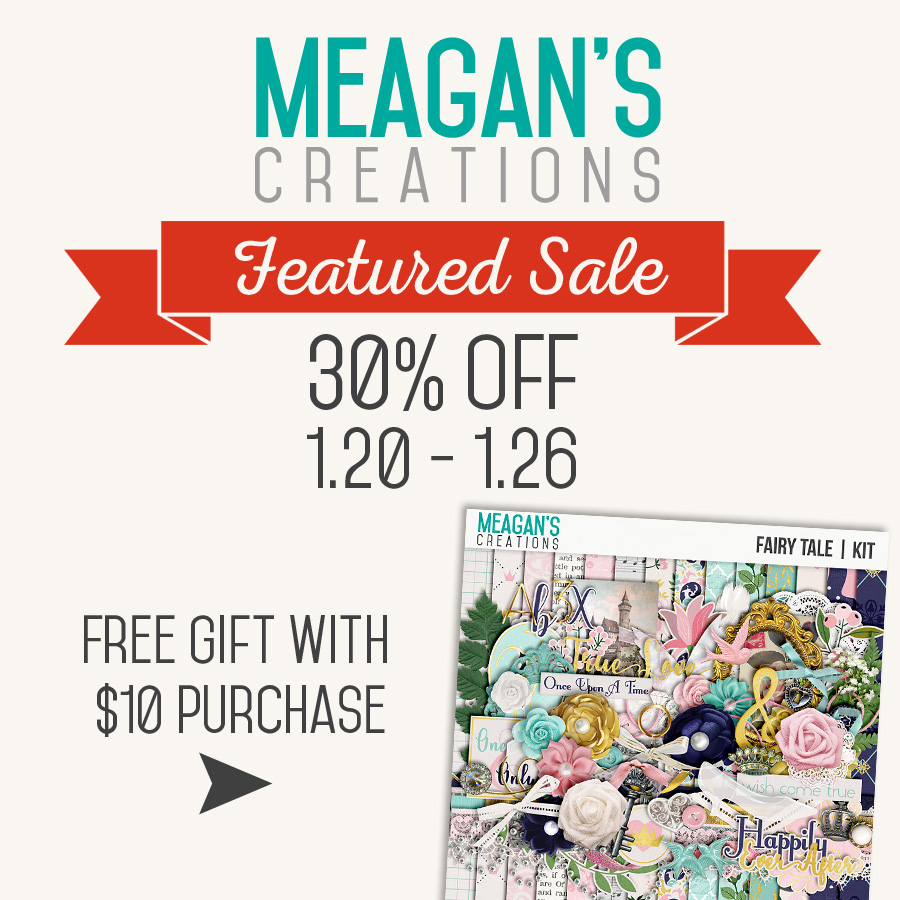
As you can clearly see, Jen is an awesome asset to our community here at The Digital Press, and we’re so happy that she has decided to stick around on a permanent basis after her guest spot in January! To celebrate her feature week, her entire shop will be on sale 30% OFF throughout the coming week (sale will end at 11:59pm ET on Thurs 2/9). We think you will definitely appreciate her creative page designs, as well as the time you’ll save using her products!

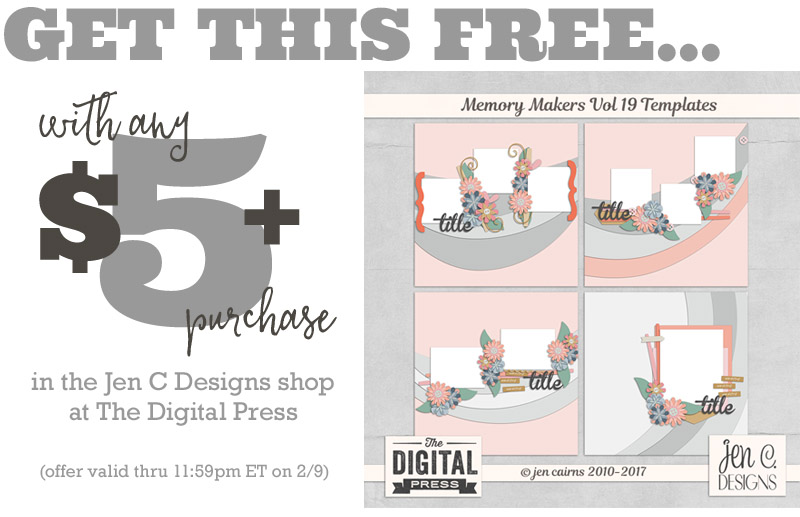
Additionally, this week only — you can snag the following FREE TEMPLATE SET with any $5+ purchase in the Jen C Designs shop at The Digital Press! Exciting stuff…


Heidi NicoleAbout the Author  Heidi Nicole is happily married to an amazing man, a step mama to 2 wonderful kiddos, and mama to 3 sweet and sassy furbabies.  She’s a radiation therapist by day and creator of pretty things by night (she’s pretty confident that she’s hit super hero status, but refuses to wear a cape.)  She loves cats and huskies, coffee, audio books, FRIENDS reruns, St. Louis Blues hockey, cooking, baking, and traveling.  Oh, and wine… she really likes wine.  She lives a normal and happy life, and enjoys all the absolutely extraordinary people she gets to share it with on a daily basis!

Feature Friday | Mari Koegelenberg

This week, I am excited to feature Mari Koegelenberg here on The Digital Press blog! This is Mari’s second feature here on the blog (you can find her first feature from October 2016 HERE)… and whereas last year we used our feature series to help you get to know some fun trivia about your favorite designers — this year, we’re going to use our designer feature series to give you a little peek into our designers’ creative spaces, and more insight into their creative processes.

Mari is a fellow South African (although she now lives in California) who loves to be creative and make pretty things, but “dislikes making mistakes and waiting for paint to dry.” She has worked in the scrapbooking industry since 2005 and sells her creations in digital format here at The Digital Press, but has also worked for the paper scrapbooking industry for many years (you can find her past work printed through companies such as My Mind’s Eye and Pink Paislee, among others). Her latest obsession is Memory Planning.

She loves color, and says that this is what drives the mood and themes of her collections. She loves to sketch and draw — and even if these doodles don’t end up in her products, they always serve to loosen up her muscles and get her creative blood flowing.

Here is a look at her creative space, where you’ll often find her drawing, painting, and converting all of the loveliness into the finished digital products we have all come to know and love…

mkc-office001-01

When speaking about her office space, above, Mari said this… “Last year was a crazy whirlwind of so many BIG changes. Our family moved twice — frantically searching for a home until we finally got the place of our dreams. We have always wanted an acreage… and living in the beautiful central coast area of California, the idea of being able to live off our own land and grow our own food was always something we were striving toward. We have been in our home only a few months now, and there is so much to do! But even though life is busy on our homestead… it is also so full and rich.”

She continued… “So having said that… just bear in mind that my office has not been on the top list of priorities. It might not be a dream space (yet!) but its my space and I can dream! The biggest and probably most immediate change I’d love to see would be to paint it a beautiful bright white and get rid of the dark furniture and install white countertops running on both sides of the room. Maybe also removing the dysfunctional closet and adding lots and lots of wall storage and peg boards. For now, though, I am just enjoying my lovely and inspirational wall art, and the fact that my carpet is vacuumed (!) and everything is in its proper place. Oh, and did I mention my glittery tabletop? Don’t worry, all you glitterphobes… haha! …it’s just beautiful gift wrap, covered with an acrylic sheet — and oh boy, do I love it! I also included a pic of my beautiful big baby (dog) who doesn’t understand why he is not allowed inside …boo!”

We also asked Mari to share with us a Top 5 list that is representative of herself at this point in her life… and she chose to share her Top 5 Organizational Hacks (makes sense, from someone who just moved and is getting a new home all organized, right?!)

mkc-office002-01

Mari’s Top 5 Organizational Hacks…

  1. My most-used supplies are easily accessible, and my planner supplies are mostly portable so I can just grab them and take them with me wherever I go.
  2. These Steri-lite CD containers are the perfect size for holding pocket cards, and they are stackable and clear!
  3. This next one is one of my favorite hacks 🙂 …and it’s very functional. Its the plastic stackable/hanging file boxes… I added some wheels to the bottoms, so now they just roll out from under my desk to where I can easily access them. One of them holds all my beautiful 12×12 papers and some scraps using hanging folders and labeled dividers… and the other holds my paper pads and cutting mats, etc.
  4. Painting and drawing is such a soothing and meditative task, and I love my little bin of artsy goodness! Everything I need is inside this one container, so I can grab it and go sit under the tree or on the porch or even in bed. Portability!
  5. I have started using these 6×8 binders with their corresponding clear pocket sleeves to hold all my acrylic stamps… and boy, it has made storing (and finding!) and using them so much easier!

Aren’t those some fun tips/tricks?

As for Mari’s products and design style… you will find lots of flat stickers in her digital products, which are perfect for the more traditional paper scrapbook style… as well as flowers and other dimensional goodies that are fabulous for those who mainly scrap digitally. Her kits are always bright and cheerful and fun to work with.

Here are a few samples of the designs you will find in her shop here at The Digital Press (you will find that there is something for everyone!)…

Here are some of the layouts I have created with Mari’s digital designs through the years…


I trust that you have enjoyed getting to know Mari a little better, and the chance to see a peek of her creative space and appreciate her creative process! Remember that her shop at The Digital Press Co will be on sale 30% OFF all week long (sale will end at 11:59pm ET on Thurs 2/2). Surely that’s all the excuse you need to visit her shop and clear your wish-list! 🙂

Additionally, this week only — you can snag the following FREE COLLECTION with any $10+ purchase in the Mari Koegelenberg shop at The Digital Press! Exciting stuff…


About the author  Stefanie is a member of the creative team here at The Digital Press. She is a Mom of three older children, all living in Cape Town, South Africa, with her hubby of 29 years and their two cats. In her free time she loves digital scrapbooking, dabbling in photography, and reading.

Tutorial Tuesday | Crop Tool in Lightroom

Today we are going to talk about the crop tool in Lightroom. I absolutely love this tool, and I think you will, too!

Mainly, I love this tool when I am sorting through pictures that I would like to print and put into frames. How many times have you struggled to make the photo you want to print the right size to fit in a particular frame? If you are like me, this happens a lot! That’s where this crop tool comes in really handy.

If you are a Lightroom user, you can find the crop tool in the Develop module within the software program. First, select the picture you want to crop… and then click on “Develop” near the top right. The crop tool is a small rectangle box found just under the histogram. I have highlighted it in the picture below…

When you click on that crop button, you will see a few different options. Click on the one that says ”original” and then, in that drop-down menu, you will see various size options.

The size options are the typical photo sizes: 4×6, 5×7, etc. (basically, the most common frame sizes). There is also a custom option in case you have a frame that does not match the given sizes.

When you select a particular size, a hand icon will appear on your image. You will be able to move your image with this hand and decide what section of your image you want printed and what section you want outside the printed area.

In my image below, you can see that I have chosen the 5×7 size. Once I selected that size… I could then move the highlighted part of my image (shown below with the 9 rectangular boxes) to select the area of my image that I want included when I crop the original…

This next part is what I like the best, however… the option to easily switch between a vertical and a horizontal orientation (portrait or landscape) with a simple keystroke.

See, the thing I struggle with most when framing photos is trying to use a horizontal picture and make it fit in a vertical frame (or vice versa). It is almost like putting a square peg in a round hole, and I have wasted quite a few photo prints trying to do just that! Lightroom has a very easy fix for this, however.

Once you have selected the photo/frame size in your drop-down menu, you can simply press ”x” on your keyboard. The crop orientation will then change from horizontal to vertical and you can go about the business of moving the active area of the photo to crop it down to just the portion you would like to print. Yes, it’s that easy! I use this technique a lot! You can see the vertical crop in the picture below. You can toggle between vertical and horizontal by pressing “x” multiple times.

I hope these simple Lightroom tips and tricks will help you more quickly process and prepare your photos — whether for printing and framing, or for exporting to Photoshop in order to scrapbook them, etc.

If you have any questions… definitely feel free to reach out to me using the comments on this post, and ask away!


Pallavi

About the Author Pallavi resides in the United Kingdom with her husband and their son, Rajveer. She has previously lived in Calcutta, Pune, San Francisco, Chicago, London, and Mexico City. She reflects all these places in her pages as she captures her everyday stories. She is an alumnus of Northwestern University, and currently she is learning photography and working towards getting to a healthy weight. Her days are full and she loves it that way!


Hybrid How-To | Printing & Cutting Digital Elements

It’s Saturday… and time for another edition of our Hybrid How-To series here on The Digital Press’s blog! Today, I’m here to help you all see how easy (and fun!) it is to use digital embellishments in your physical projects (like mini albums, and more)!

For those of us who can’t resist pretty paper and embellishments — digital kits are a fantastic way to stretch your crafty budget. For me, patterned papers and adorable die-cuts are probably the best thing about crafting. I am always a little reluctant, however, to use pretty items from my stash because they’re just so cute. For me, the real beauty of digital products is that I can print and cut as many times as I like. Buy a digital kit once, and you can use the items contained within it again and again and again!

For the mini album project I am going to show you today, I chose two kits from The Digital Press — the Go.See.Do collection by Mari Koegelenberg, and also Laura Passage’s Project Twenty Fifteen | July kit, both shown here…


I like to choose kits that are versatile and can be used for lots of different topics or occasions. Although each of these two kits are travel-themed, there are also plenty of generic elements and papers that I know I can use for so many different purposes (and also, for other projects in the future, as well!). For instance, see those tags and labels above? Or the word art stamps, flowers, stars, etc. in this next kit…

For my project, I documented some of our family travels from 2016 in a handmade mini-album.

I used a variety of methods to create the pages. For instance, as shown in the photos below, I created pages by printing out some of the digital papers as foundations for each page; some I made rectangular, and others I notched so that they were flag/pennant-shaped.

Once I had the foundation pages, I came up with some interesting things to attach to each of them (in addition to the photos). For example, I upcycled some old clothing tags to add a bit of interest… creating a title tag with date (top photo, left). I also upcycled some old envelopes that I saved from Christmas, and turned them into pockets (middle row, left). I filled a plastic page protector with sequins and sewed it shut (middle row, right). I also used various fasteners (paper clips, mini clothespins, string, etc.) to add dimension and decoration to each page. So easy!


But the main embellishments on my pages came from the digital kits. Not only did I print out the papers to create pages, I also printed out some of the flat elements and added them to my pages after cutting them out.

I’m lucky enough to own a Silhouette, and the best feature of a cutting machine is the ability to quickly print and cut the adorable elements found in digital kits. The Silhouette makes it a cinch to create my own die-cuts. Today, I’ll take you through the basic steps to trace an element and ready it for cutting.

Step 1:
First, you will need to set up your page to the correct size and add registration marks. These are printed on your page and used to align the cut later (see the marks in the corner of the page in the image below). Then you will drag and drop your digital element onto the page (that car is cute right?!). Anything in the cross-hatched area shown in the picture below won’t be cut… so make sure you position your element in the main body area. In order to cut around the outside of the element, click the Trace button. Then click Select Trace Area.

Step 2:
Now you will drag the box around the shape. The software analyzes the shape (yellow means that it won’t cut in that area). Depending on the shape and color, you may need to drag the sliders for High Pass and Low Pass filters (the more contrast in the image, the better the results). Note that in my example image, below, the car windows are not highlighted in yellow — so the Silhouette can cut the window detail if I want. I just want to go around the outside of the car, however, so I chose Trace Outer Edge.

Step 3:
Voila! In the next image, I moved the car so that you can see the cutting outline that has been created. I group the object and the outline together so that they can be moved around the page easily.

Now that we’ve dealt with how to trace an element… give it a try! Go wild and look at all of those fabulous elements in your digital kits in a completely new light. Think of the things you can do!

As shown in the next image, I added a couple more elements to my project. The trace function did an amazing job on the bicycle shape…

Another way to make the most of those great digital elements is to combine them to create your own elements. Above, you’ll see the yellow tag with “Family Time” written on it. To create that, I dropped the “Family Time” word art from the Project Twenty Fifteen | July kit onto a block of yellow paper… and then I inserted a tag shape over the top. Now I have my own custom-made tag element!

Of course, if you don’t have a cutting machine, you can also do all of this by hand. Fussy cutting is very therapeutic! I often find myself cutting out shapes by hand just because it’s relaxing and a lot quieter! 🙂

Here are a few more photos of my finished project… so you can see a few more examples of the fun things you can create when you print and cut digital elements…

Are you up for a challenge? If you come to the CROSSWORD SECTION in The Digital Press forum, you’ll find this month’s Hybrid Challenge thread… and if you try one of the two hybrid projects we’ve featured on the blog this month, you can earn challenge points for January! For today’s project, all you have to do is print and cut some digital embellishments and include them on a hybrid project of some kind. It doesn’t have to be a travel album — it can be anything, really (a card, a physical scrapbook page, a mini-album like mine, etc.) — as long as you can decorate it with some cut-out digital elements, any project goes! Give it a shot, and share your final results with us! We can’t wait to see what you come up with…


About the Author  Morag Cutts is part of the Hybrid Creative Team here at Digital Press. Morag has been an avid scrapper and photographer for ten years.  Although she adores the flexibility and creativity of digital, Morag can’t resist playing with paper and embellishments – so hybrid scrapping is the perfect medium for her!  Morag lives in the UK with her hubby, two kids and recently adopted puppy.


Feature Friday | Meagan’s Creations

We’re back with another edition of Feature Friday… and this week, it’s all about Meagan of Meagan’s Creations.

Meagan’s style is bold, colorful, and versatile. She puts together awesome collections… jam-packed with embellishments, papers, alphas, clusters, word art, journaling cards, and more — all of which have a wonderful color scheme and can be used on multiple projects or even full albums! She also designs great templates with tons of layers that create wonderful movement.

Here is a sampling of the different types of things Meagan creates. You’ll see that she offers a wide range of wonderful products that contain all different types of embellishments and extra goodies…

And since Meagan is one of our newest designers, I was excited to ask her a few questions to get to know her better.

Where do you live?
I live in Houston, TX, USA.

When you’re not designing, what do you do with your time?
When I’m not designing, I’m playing board games with my family, cooking, baking, reading, watching a favorite show (not a whole lot and actually
usually while also designing!), or sleeping!

What are 5 tidbits of trivia we might not know about you?
—I was born in Berlin, Germany. Since the time that my family moved back to the States (when I was almost 2), I’ve never been back outside of the United
States again, ever.
—I have a Bachelor’s degree in Math Education with an Art Education minor.
—I also work part-time for an online tutoring company.
—I got married kinda young (19 years old!), but he’s still my best friend and favorite person in the world!
—I actually don’t like to drink milk with my cookies. I prefer water. Weird, I know!

Which of your products is your favorite?
Picking my favorite product is very tough! I’ll say Renaissance because this was a very personal choice for me. I have fond memories of my mother making us dresses to wear to a Renaissance festival and seeing everyone dressed up. I went again with my family a couple of years ago and it was a blast. I also made an add-on that is “Lord of The Rings”-inspired (it is one of my favorite movie series)…

And as an extra-special treat 😉 — here is an awesome layout from Meagan, herself, using her favorite kit…

Additionally, here is some other eye candy using Meagan’s awesome and colorful products…

Aren’t the designs of Meagan’s Creations so colorful and versatile? 🙂

Now that you have seen her products in action, you can get busy scrapping with them and you’ll be happy to know that the entire Meagan’s Creations shop at The Digital Press will be 30% OFF this week (sale will end at 11:59pm ET on Thurs 1/26). Yay! That is the perfect motivation is grab some beautiful and fun collections from her shop and start scrapping some memories!

Additionally, this week only — you can snag a FREE KIT from her shop with any $10+ purchase in the Meagan’s Creations storefront at The Digital Press! Exciting stuff!


Sabrina

About the Author  Sabrina is an avid documenter of life — herself, her children, her hubby, and her everyday life. There is beauty in the ordinary moments, and they are what she loves to scrap. She is also always on the hunt for a quiet, peaceful moment, and she usually spends it reading.

Tutorial Tuesday | Extracting Digital Elements

Today I am here on the blog to share with you how to use simple extraction techniques to create your own digital elements from journal cards (or similar). This is a fun little trick I find myself using over and over on my layouts… and it is a really easy way to create your own customized embellishments and extend your digital stash!

The journal card I will be using for this tutorial is from Anthology | Pocket Cards by Little Lamm & Co., shown here…

First, you will want to open the journal card you want to use in a photo editing program (I am using Photoshop Elements 10 (PSE10) for this tutorial). Select the Magic Wand Tool on your toolbar…

With the Magic Wand tool, hold down the Shift button and click your mouse on the element/shape you want to remove from the journal card (here, you will see that I selected the orange area). Once it is selected, you should see little “marching ants” around the element…

***TIP*** to select the insides of letters — like the portions of the letters O and E, shown here — hold the shift key and click the inside of the letters so those areas are surrounded by the ‘marching ants,’ too.

Now you will need to right click (with your mouse) on the selected element and it will pull up a menu that looks like the image below. Move you mouse down and highlight ‘Layer via Copy’…

Once you do that, you will see a copy of the selected element in your layers palette. In the layers palette, de-select the original layer of the journal card… and you should be left with the extracted element. Voila! Now you can drag and drop that element anywhere you want onto your layout!

You can see examples of how I used this technique on this layout…

On the layout shown above, I used this extraction technique to create the “stories” circle brush on the top left photo, and also to create the navy word strips (shown at lower left).

Once you know how to extract simple digital elements, the possibilities are endless! You will find that this trick opens up a whole new world… with not only journal cards, but many other items found in digital kits (i.e. you can create a flower sticker from a floral paper… or word art from papers/cards… and more!).

If you try this trick or your own, please share your finished project with us in TDP’s gallery! We’d love to see what you come up with. Happy Scrapping 🙂


JenniferHigniteJennifer Hignite is a mom of three boys and new homeowner with her fiance in the mitten state of Michigan. When she is not scrapbooking, she enjoys photography, decorating, and shopping at Target.