Author: The Digital Press

Hybrid How-To | Bag Toppers

My daughter passed out donuts to her entire 5th grade class for Valentine’s Day. She wanted to add a little card or something she could sign her name to, so I whipped up these bag toppers we could staple to ziplock bags. It was such a quick project… and I was thinking it would be just perfect for any party favor. Throw the candy/treats/toys into any size bag and add the personalized topper. Fun and simple!

The first thing I did was measure the width of the bag. I used regular old sandwich bags for the donuts… each of which measured about 6.5″ wide. I wanted the front of the design to be 1.5″ x 6.5″ — making the total dimension for each topper (front and back) 3″ x 6.5″.

To do this, I clipped patterned paper to a simple rectangular template I made (see image, below), and then I designed the front of the topper using digital elements from the same kit. I kept my design flat — so it ended up being a simple flat digital design that I could easily print off (i.e. no extra cutting or assembling of extra embellishments/layers). I thought it would be easier that way since I was making like 30 of them. 😉

*PRO TIP* When creating your rectangular designs… make sure the “front” of the design stays on the bottom half of the template so it won’t be folded over to the back once you attach them to the bags.

After creating the design in Photoshop… the next step is to print, cut, and fold each topper in half. I filled all my bags with donuts, sealed the bags, and then stapled the toppers onto the zippered portion of the bags…

Here’s a look at the back (left) and front (right) of one of my topper designs…

This project literally took me about an hour from designing the toppers in Photoshop to completing the finished project — with no fancy cutting machine required. I hope you’ll give it a try!


Kate About the Author  Kate is on the hybrid team here at The Digital Press. She lives on the Utah/Colorado border with her husband, 5 kids, 10 chickens, and a dog named Gracie. She’s a city-born girl who found she’s really a country girl at heart. She can be found outside, barefoot, and probably in her garden.

Feature Friday | LJS Designs


Happy Friday, everyone! It’s time for another edition of our Feature Friday series… this time, starring the wonderful Lorie of LJS Designs. Lorie is a single mother (to a 25 year old son), and she has been designing for about 3-1/2 years now. By day, she works for an international fruit company as a production planning supervisor, and she loves coming to her home office where she can be artistic and creative in peace and quiet.

This is Lorie’s second feature here at TDP (you can find her first feature article from September 2016 HERE)… and whereas last year we used our feature series to help you get to know some fun trivia about your favorite designers — this year, we’re going to use our designer feature series to give you a little peek into our designers’ creative spaces, and more insight into their creative processes.

With that in mind, here’s a peek at Lorie’s creative space…

When talking about her work space, Lorie said, “my work space is located in my basement in my home office/laundry room.  I love the combination for three reasons: (1) my laundry is always caught up… (2) in the past, the noise from the washer and dryer would drown out any noise from my son or the TV or the dogs, or most anything else… and (3) it is always warm! For someone who is always cold, those warm comfy spots are really important.”

Additionally, we also asked Lorie to share with us a Top 5 list that is representative of herself at this point in her life… and as a huge Disney fan, she decided to share her Top 5 Favorite Disney Characters (she recently celebrated her 50th Birthday at Disney World, and as you can see she had a lot of fun)…

Lorie’s Top 5 Favorite Disney Characters…

  1. Belle from Beauty and The Beast. I love to read and am often lost in a book, so I totally relate to Belle. I appreciate her sense of self, that she is not afraid to be different, and that she is a dreamer. But what what makes her my favorite is her ability to see with her heart, and not just her eyes. In a world that too often judges a book by its cover, I appreciate that Belle reads each line of every page until she understands the whole story. It’s also really cool that it is Belle’s ability to see beyond the Beast’s exterior and love him for who he is, that saves him, which kinda makes her the hero in the end. I love tough chicks!
  2. Rolly from 101 Dalmatians. Rolly was the chubby puppy in 101 Dalmatians who was always hungry — which I can also relate to — but that is not the reason I love him. I love him because when my son was little he used to imitate Rolly’s big line in the movie when he was ready for supper… telling me, “but Mama, I’m hungry. I’m really hungry.” It always made me smile then, and the memory still makes me smile now.
  3. Captain America. Now, I know he is not the traditional Disney character… but he is part of Disney, and he is my superhero super crush (and thus, he made the list!). It helps that Chris Evans is a total hottie, but really I love Cap because of his old fashioned values, his sense of honor, and his unwavering loyalty to his country and friends. In Winter Soldier when he tells Bucky (who is beating the tar out of him at the time), “Then finish it. ‘Cause I’m with you ’til the end of the line…” I want to swoon. Seriously, I don’t care how old he is, I’d date him.
  4. Winnie the Pooh. I have to say that for a bear full of fluff and hunny, who is a terrible speller like I am, Pooh is really rather smart in all the ways that matter. He appreciates good food, good friends, and good times… and is not afraid to talk about the important stuff. One of my favorite quotes comes from Pooh: “If there ever comes a day when we can’t be together, keep me in your heart, I’ll stay there forever.” He’s got a place in my heart for sure.
  5.  Mickey Mouse. If you’re a Disney fan, then you gotta love the mouse that started it all, right? Everything about Mickey is great, but I think I like his giggle best. As a giggler myself, I can totally appreciate the joy behind it. Disney and Mickey are magic to me. They allow me to let go of the serious side that usually rules my personality and embrace my inner child. I did a lot of giggling on my recent birthday trip, and felt like I was turning five, not fifty. It was a wonderful gift. Did I mention that Mickey sang Happy Birthday to me? It was awesome!


Just like her personality — Lorie’s designs are always full of color! Also, they contain a wealth of elements — many of which are hand-drawn and distinctly her own! She is especially talented at putting together themed kits. She also makes some wonderful blocked template sets, as well, which are perfect for pocket scrapbookers (and also for those of us who simply have too many photos!). 😉

If you haven’t ever had a chance to do so… you will love looking through the LJS Designs at The Digital Press! Here’s a peek at just a fews of my favorite products…

Additionally, here are some layouts that were created using some of Lorie’s fun product offerings…

I hope you have enjoyed getting to know a little bit about Lorie! To celebrate her week as our Featured Designer at The Digital Press, the entire LJS Designs Store will be 30% OFF this week (the sale will end at 11:59 EST on Thursday 2/23).

Additionally, Lorie has a special Free-with-Purchase offer for everyone! Don’t miss out on this opportunity to stock up on your favorite products from LJS Designs… and you can snag her entire “Summer Fun: At Walt’s Place” Collection for FREE with any $10+ purchase in her shop — this week only!


AvatarAbout the author  Carolyn lives with her partner and 3 rescue dogs on 5 acres of paradise in the hinterland of the Sunshine Coast, Australia. Her camera, along with an assortment of lenses, is never out of sight. When not taking photos, she loves cooking and gardening and, of course, scrapbooking.


Discount

Save

Save

Save

Save

Save

Tutorial Tuesday | Creative Journaling

I recently found out that breaking up is easy to do! Oh it’s okay, really… I’m only talking about breaking up the journaling on my digital scrapbook pages. 😉 I’m here today to share some tips for this process.

One of the reasons I am so passionate about digital scrapbooking is because the pages I am creating today will be a legacy for future generations to enjoy years from now! I am in the process of creating books for our two beautiful grandbabies, and I try to include as much information as possible on each page.

While I’m comfortable with journaling on the pages, I have recently felt that I am in a rut with regards to the actual placement of the journaling. Simply put, I realized that my process was only to “find a spot I like and start typing and stop when the story ends.” The journaling I do is usually along one edge or the other – or smack dab in the center of the page. I have been known to ramble… and ramble… so I started thinking more about the placement and how it affected the visual composition of the page.

When I created the page shown below, I concentrated on breaking up the journaling. I wanted the words to become part of the overall design of the page, and I wanted them to flow together with the photos and the other elements of the layout.

I realized that by breaking up the journaling on the page, it gave the reader a little visual break. Perhaps even a chance to contemplate what they just read before moving on… or a breaking point to examine the photos after reading part of the story… or simply to admire the other aspects of the page. It also allows the eye to flow around the page rather than concentrating on one big block of text.

Here are a few tips you can employ in order to break up your journaling while scrapping your memories…

  • Use your title work to break up the sentences/paragraphs (this technique is shown above)
  • Similarly, you can break up your story by placing word art and/or elements right in with the journaling itself
  • Align the text differently throughout your page (right / left / center… you’ll note, above, that I changed the alignment depending on which side of the page the journaling appeared)
  • Use “bullet” type journaling — placing the bullet points randomly around your page
  • Place the photos and elements on the page first, then fit the journaling to align with the photos (something I did when I created the page shown above)

There are many more ways to achieve this, but I hope the tips I’ve shared here have at least given you a bit of journaling inspiration today! Thanks for stopping by the blog for another edition of our Tutorial Tuesday series… and until next time, “Happy Scrapping!”

____________________________________________________________________________________________________________________________________

Jill WAbout the Author  Jill has been digiscrapping since 2006 when she came across it (quite by accident) while Googling “computer crafts.” Since that time, her love for the hobby has only increased! Her love of photography melds perfectly with digital scrapping, and she is thrilled that she has the opportunity to be part of The Digital Press creative team!

Save

Save

Save

Save

Save

Save

Save

Save

Save

Save

Save

Save

Save

Save

Save

Save

Feature Friday | KimB Designs

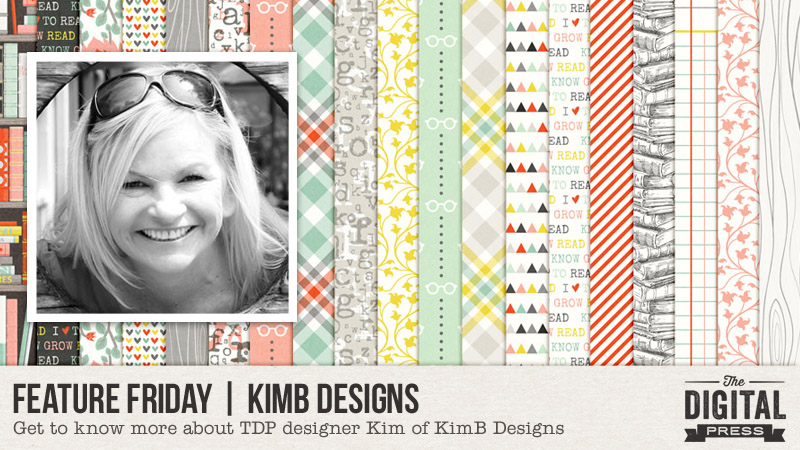
Hello everyone, and welcome to another edition of our Feature Friday series here on The Digital Press blog! Today, I am super excited to be showcasing the talented Kim of KimB Designs! This is Kim’s second feature here at TDP (you can find her first feature article from June 2016 HERE)… and whereas last year we used our feature series to help you get to know some fun trivia about your favorite designers — this year, we’re going to use our designer feature series to give you a little peek into our designers’ creative spaces, and more insight into their creative processes.

So with that in mind, here is a look at Kim’s creative space… where you’ll often find her scanning real-life items, extracting them in Photoshop, and converting all of it into the finished digital products we have all come to know and love…

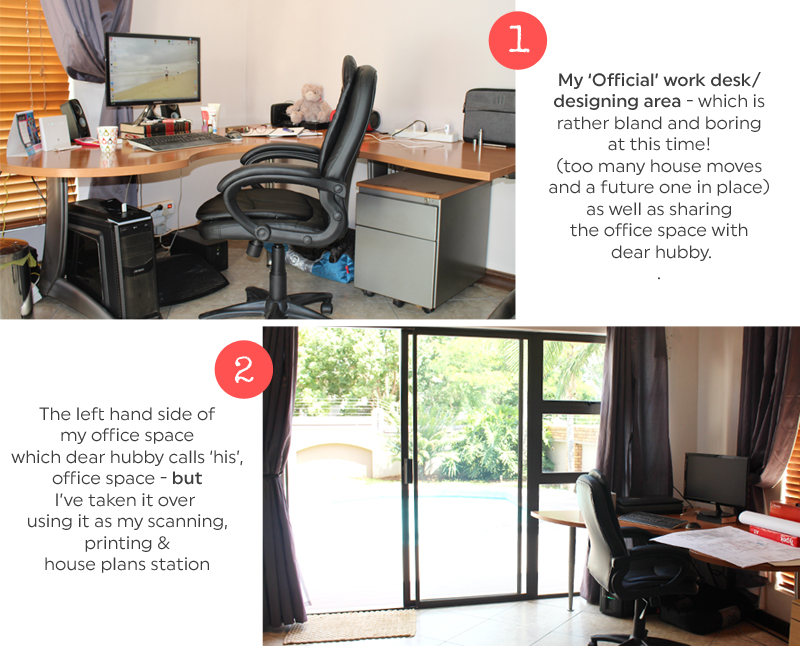
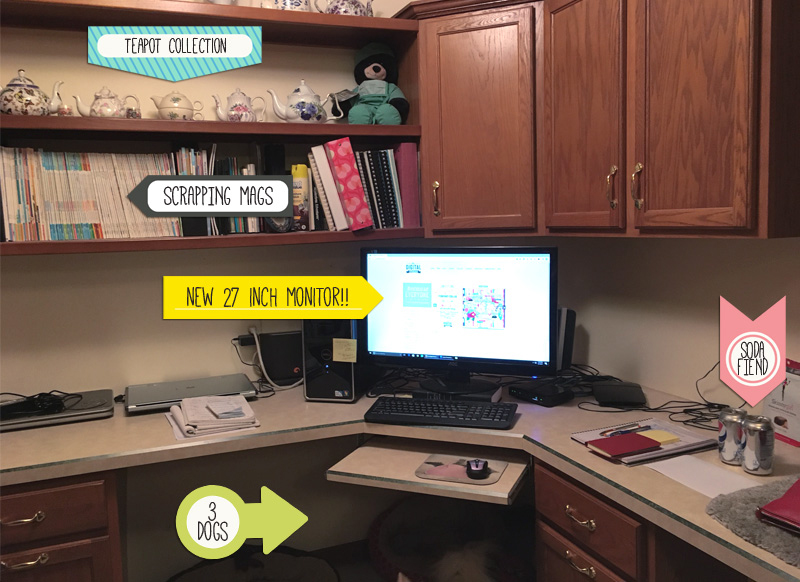
When speaking about her office space, above, Kim said… “Due to three house moves in the last 6 years, my office space has become a little boring and minus any interesting and creative decor. With another move coming up in 6 months, lets just say it’s going to stay like that LOL! I share my space with my hubby who uses his desk (now my adopted scanning and printing area) only on the odd occasion. I’m lucky enough to have big sliding doors which stay open to the pool and backyard right through the year. Nothing like fresh air to keep the old brain active.”

We also asked Kim to share with us a Top 5 list that is representative of herself at this point in her life… and she chose to share a list of Top 5 Things She Currently Needs to Keep Herself Sane (which makes sense, from someone who is smack in the middle of a long-distance move that involves building a new house, as well!)…

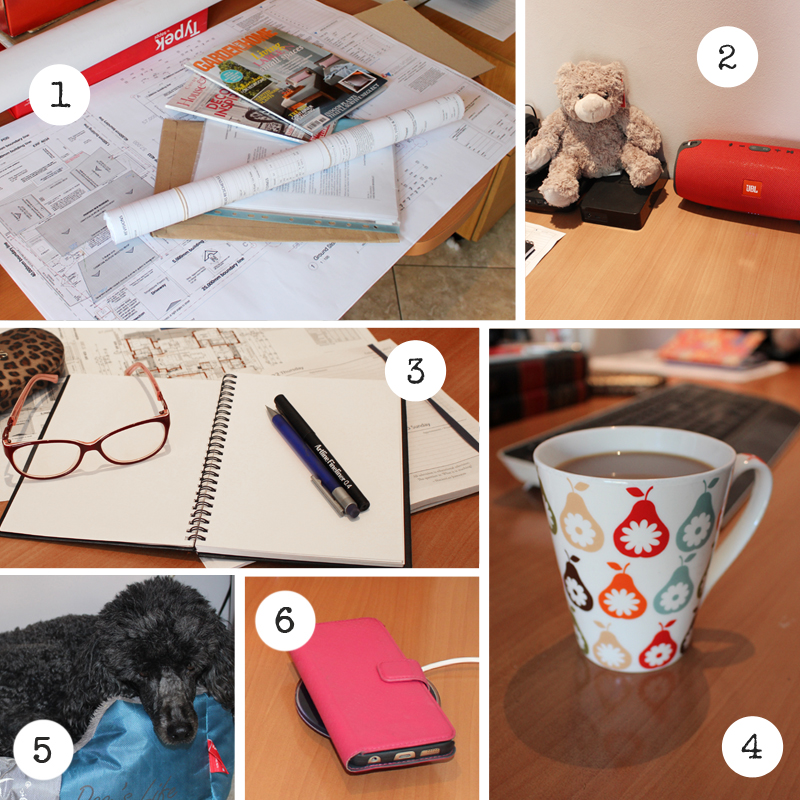
Kim’s Top 5 (okay, 6! haha) Things She Currently Needs to Keep Herself Sane…
“Due to seemingly living on an airplane right now (an ill father, a move, and our new house in progress)… these are my constant desk/sanity companions without which I cannot live…”

  1. House plan drawings, documentation, and home magazines for inspiration (when I get the time to browse them, that is). Having to constantly answer questions from the architects and builders while on the fly means these have to be at my fingertips for quick access.
  2. My bluetooth speaker, which is permanantly playing music (anything from the 70’s right through to new house music… an eclectic mix, just like my designing) — and a little furry fellow that was a gift from one of my fellow designers from overseas, which makes me smile every time I see him sitting on my external drives (keeping them safe LOL).
  3. Reading glasses (old age sucks!), my sketch book, pencil, fineliner (for the times I doodle and get inspired for a kit I want to design), and a diary which is my saving grace right now.
  4. COFFEE… and I wish it had an automatic refill button! LOL
  5. My constant companion, Pepsi, who will sit with me under my desk all day until I get off for the day…
  6. My phone… permanently on charge next to me as it rings all day recently thanks to the home building (and of course it’s the lifeline to my family).

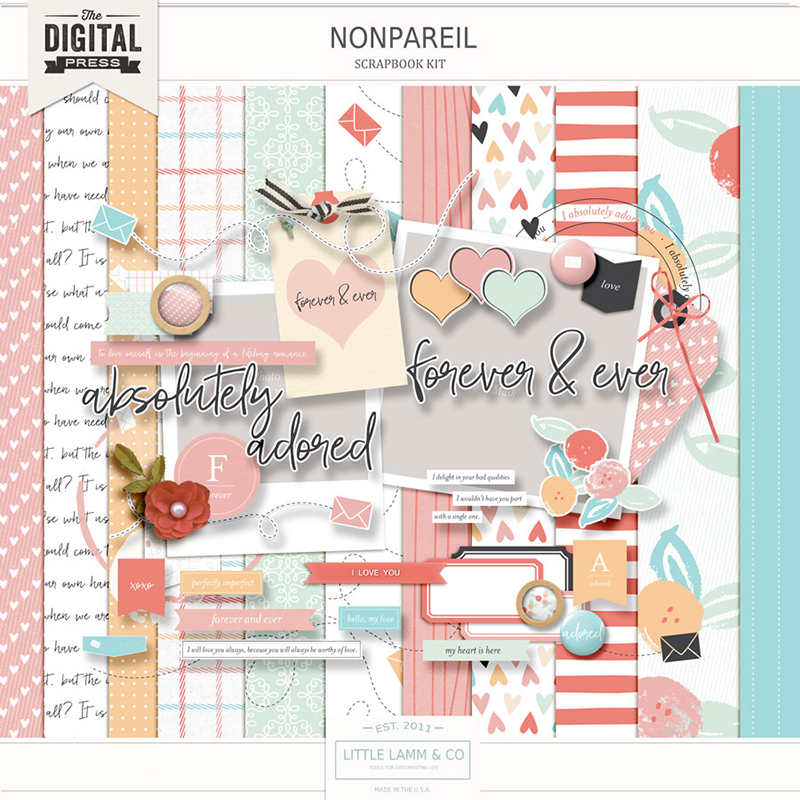
As for Kim’s products and design style… she creates lovely digital scrapbooking kits, stamps, templates, and more. Her designs are perfect for the everyday scrapper, the pocket scrapper, the scrapper who likes a more minimalist style, and even those scrappers whose style falls in more of an art journaling realm. Kim’s designs have a whimsical and fun feeling to them. You can tell she takes time and puts heart into her art. There is no mistaking a kit/collection made by Kim, and you will be hard-pressed to find another one like it!

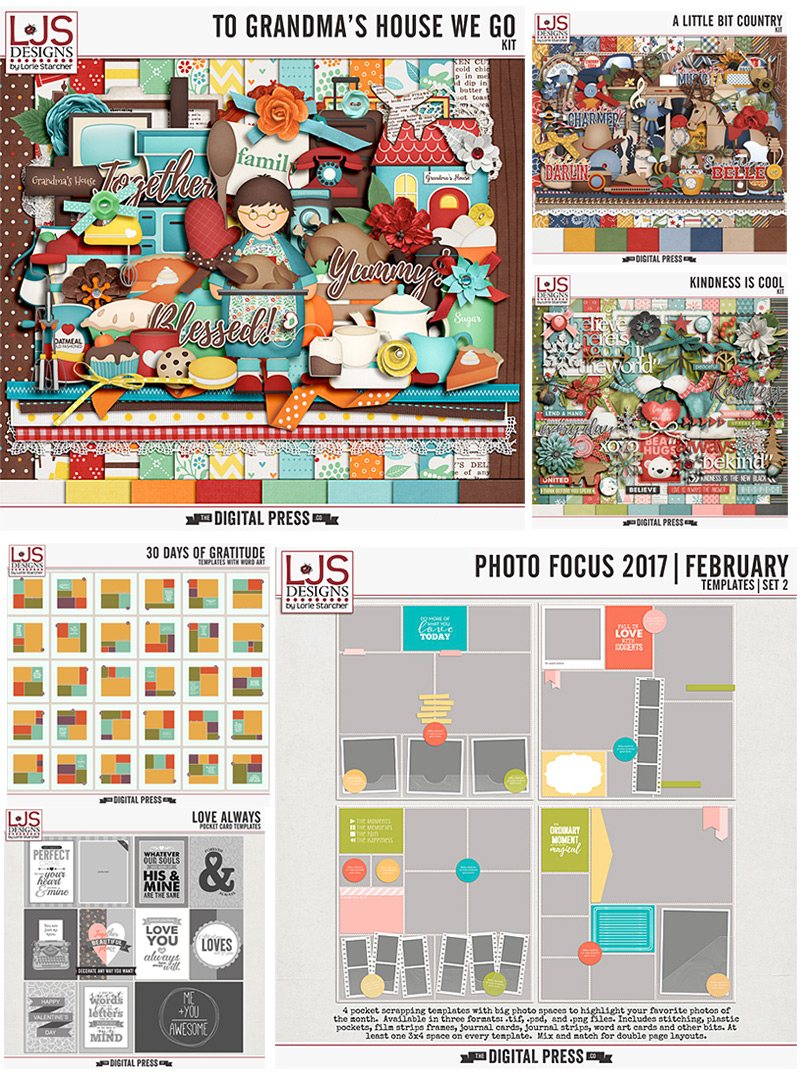
Don’t just take my word for it, though… have a peek! Here is just a sampling of what you will find in the KimB Designs shop here at The Digital Press…

See?! I told you she has some fantastic, fun, and original designs! 🙂

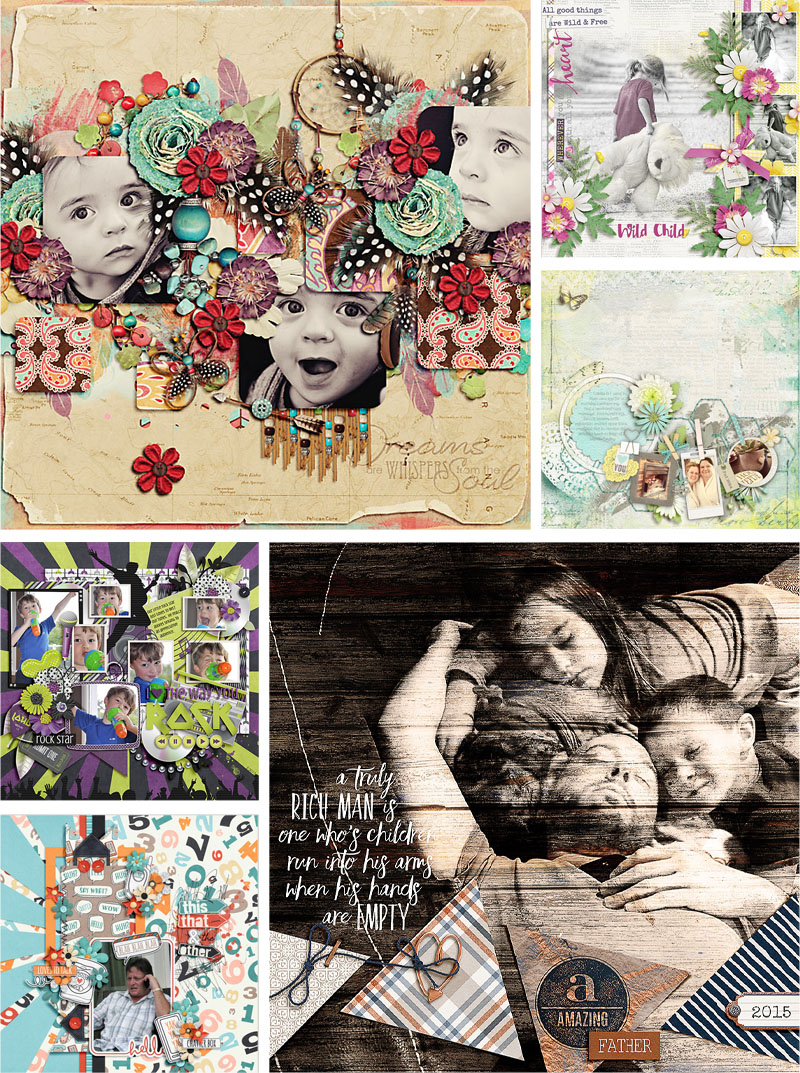
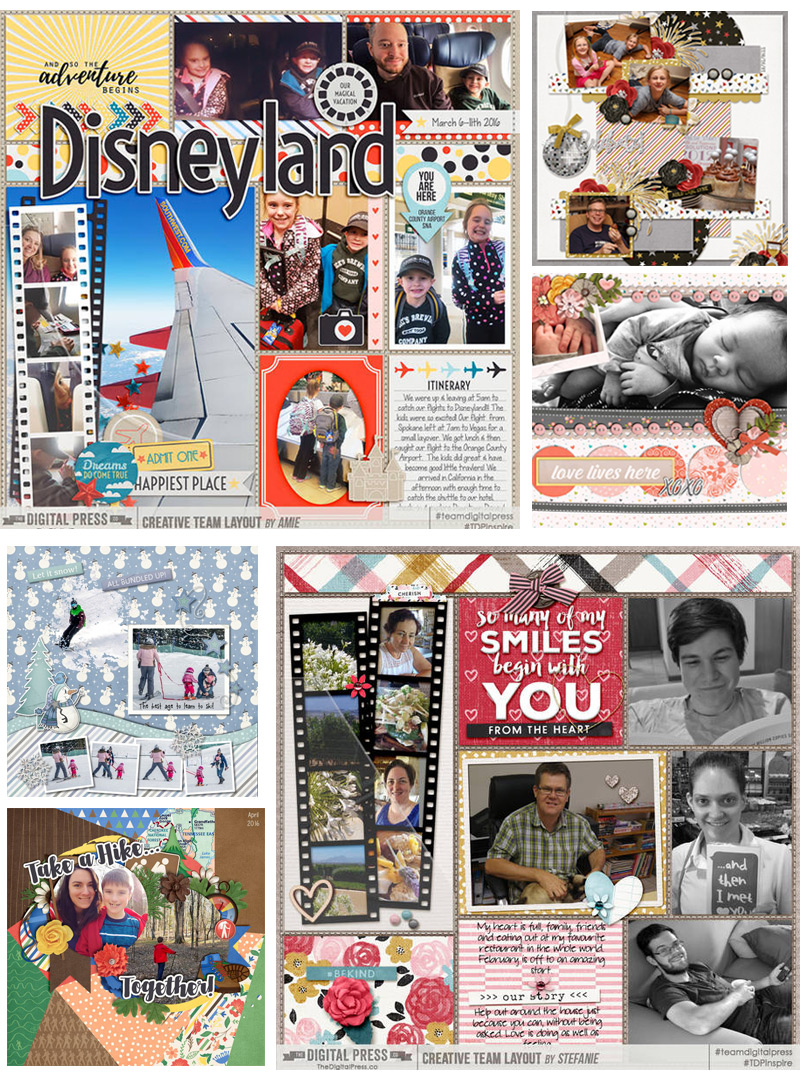
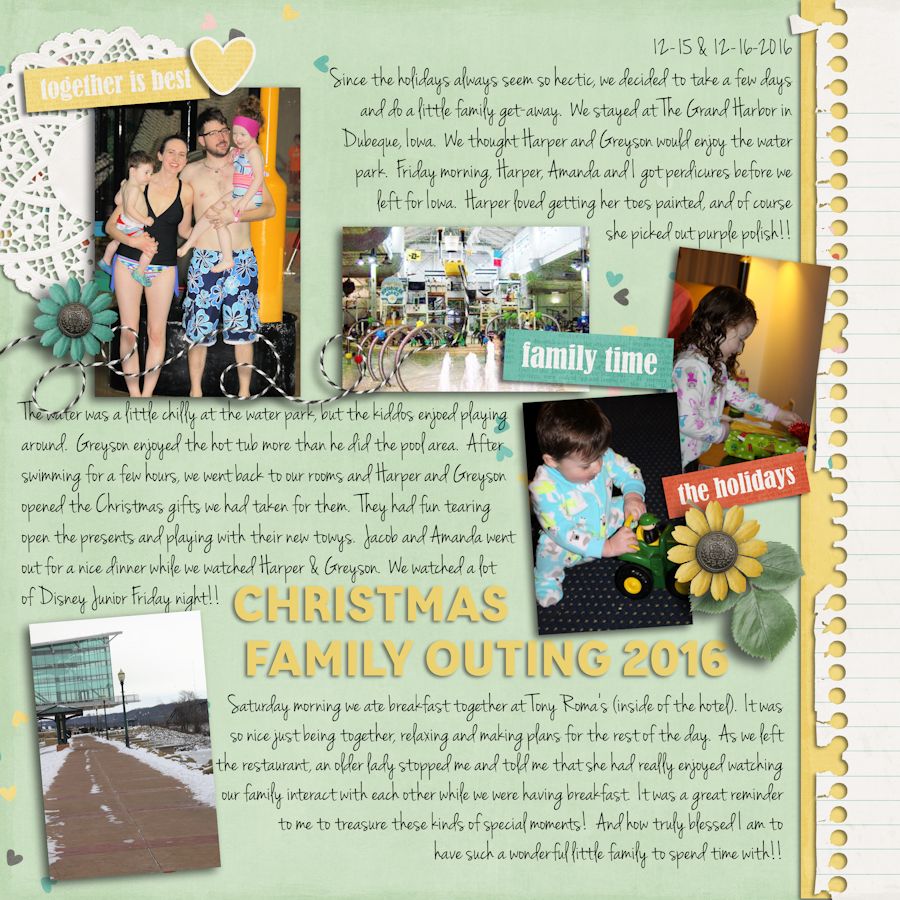
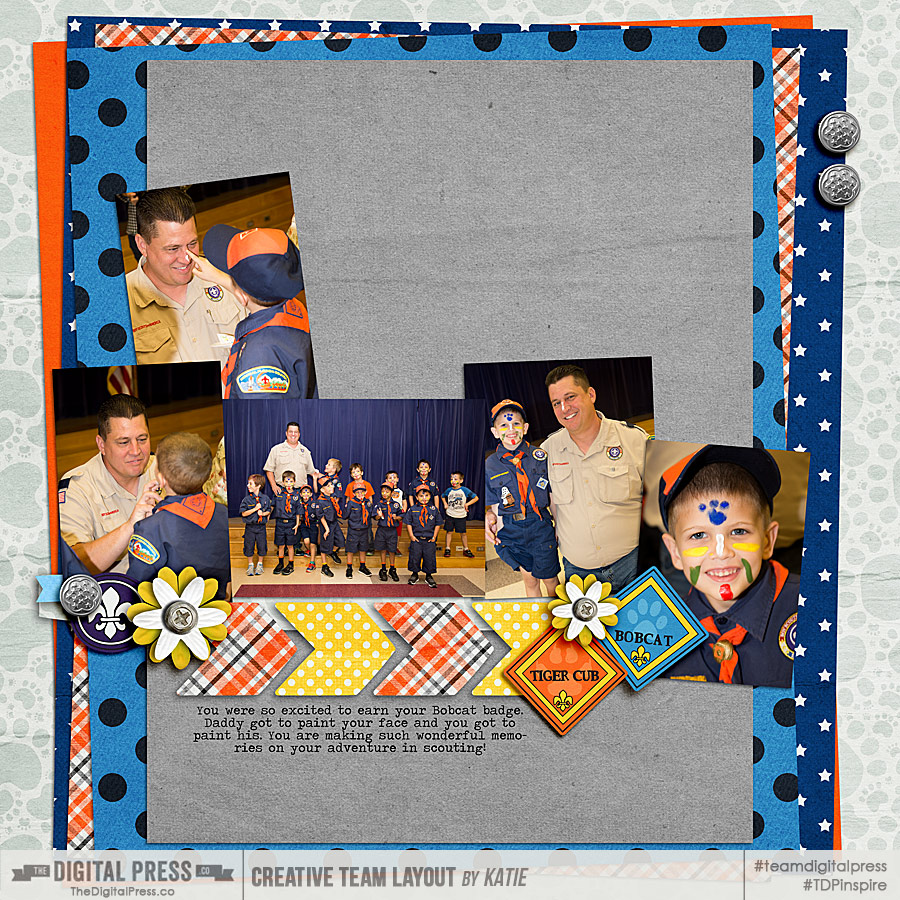
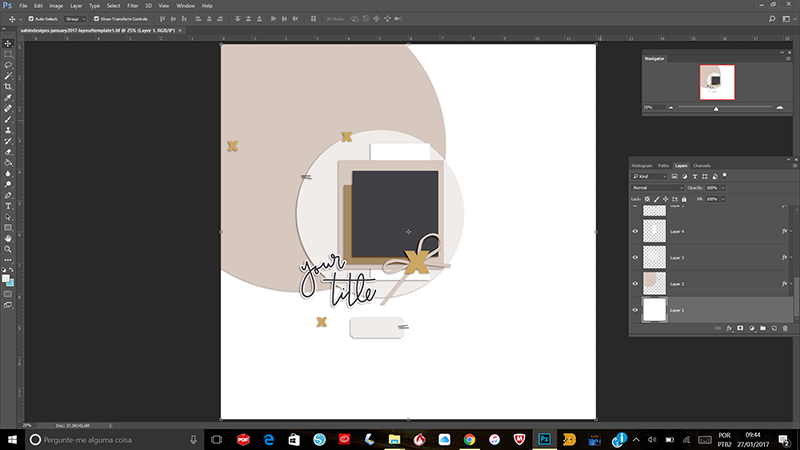
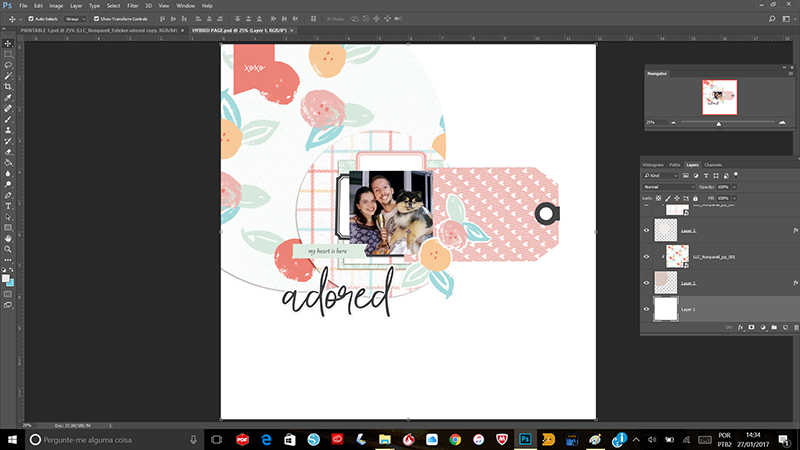
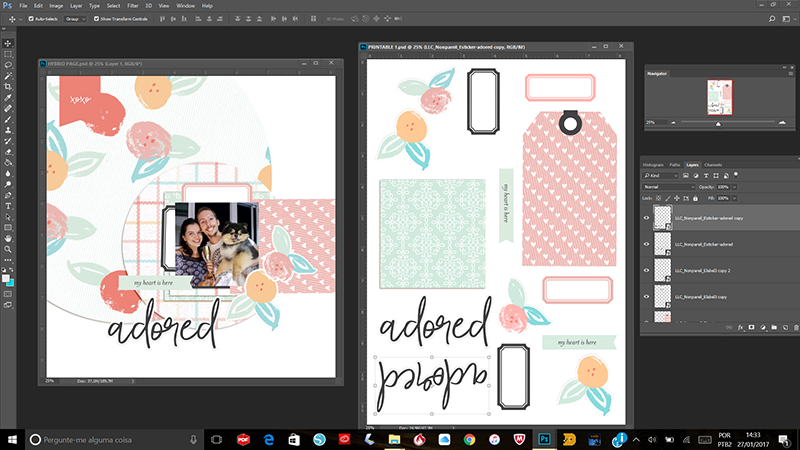
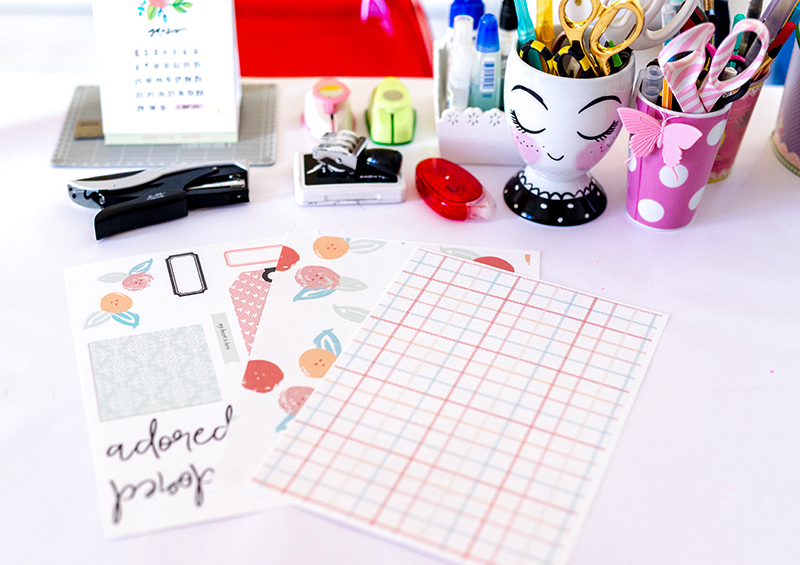
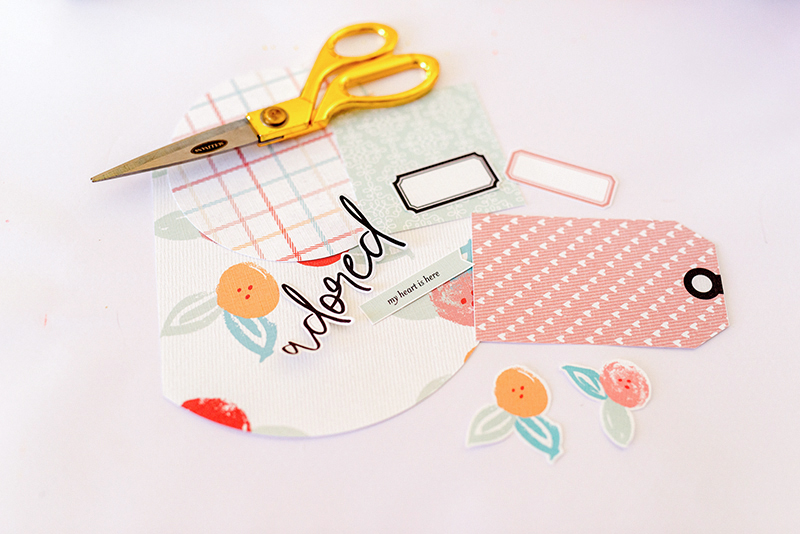
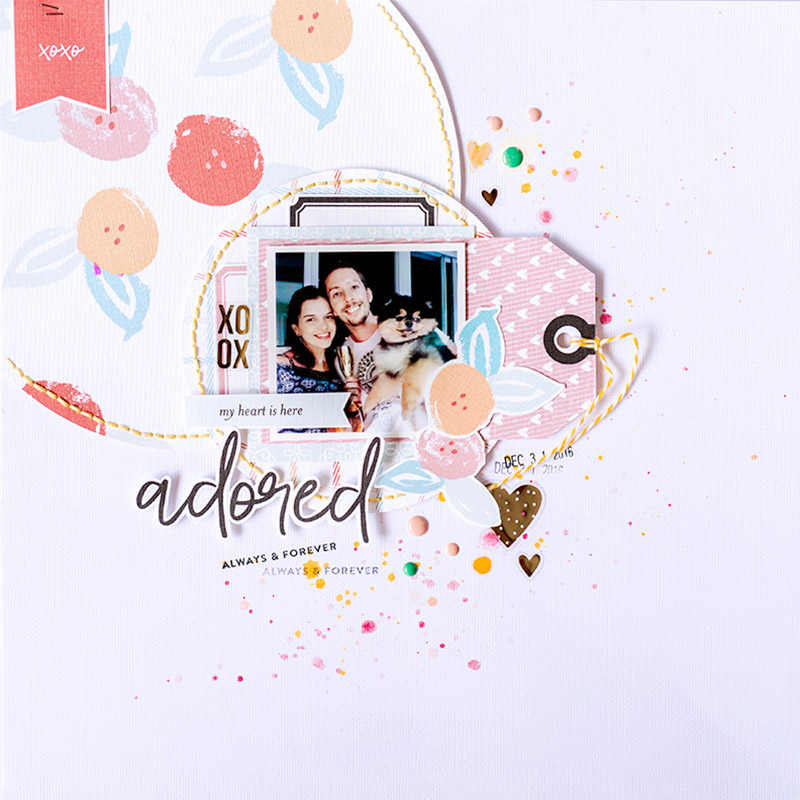
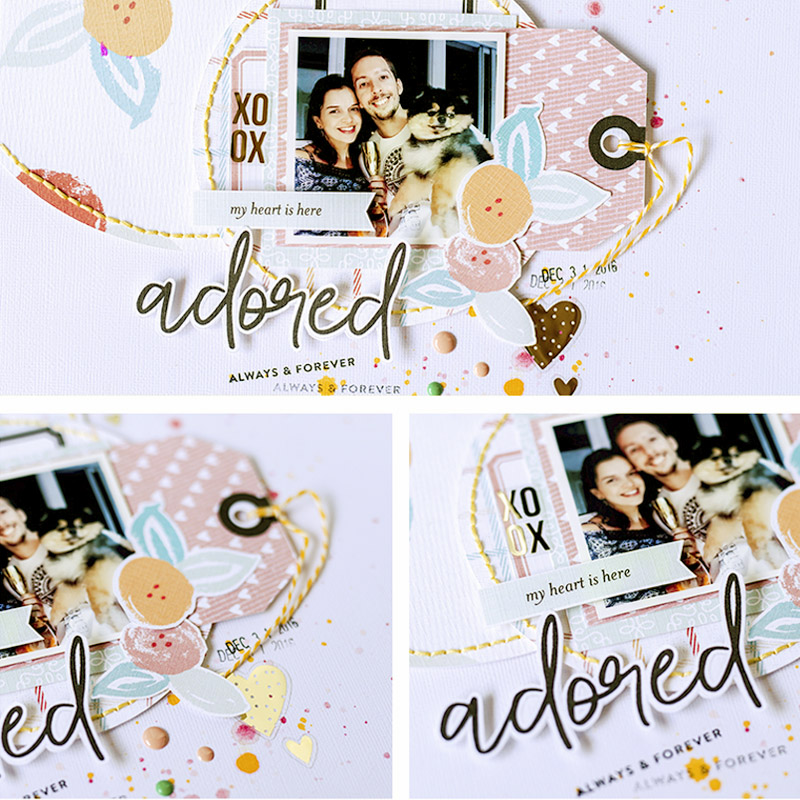
If you are anything like me, though, you also like to see products in action. Here are some layouts that were created using Kim’s designs…

And there you have it, everyone! I hope you enjoyed getting to know a little bit more about Kim, and I have no doubt you will adore to find out that Kim’s shop here at the Digital Press will be 30% OFF all week! (the sale will end at 11:59 EST on Thursday 2/16). Check your wishlist, and don’t miss out on this great chance to clear it at a discount!

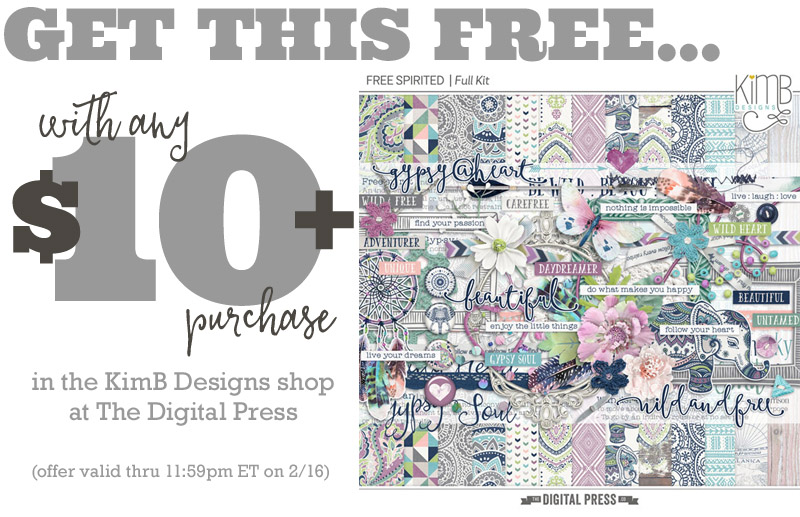
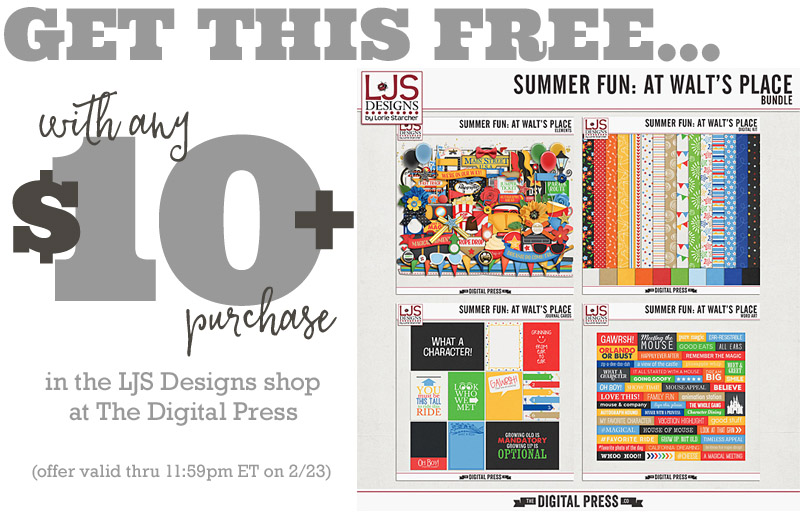
Additionally, this week only — you can snag the following FREE KIT with any $10+ purchase in the KimB Designs shop at The Digital Press! Exciting stuff…


IMG_20160814_144851_e

About the Author  La’Shawn Castings is a creative team member here at The Digital Press. She is a 30-something, full-time working, nerdy, somewhat lazy, digi-scrapping, photo taking, college football loving, panda obsessed, yellow wearing, Harry Potter nerding, Doctor Who watching, historical fiction reading, southern wife & mom.
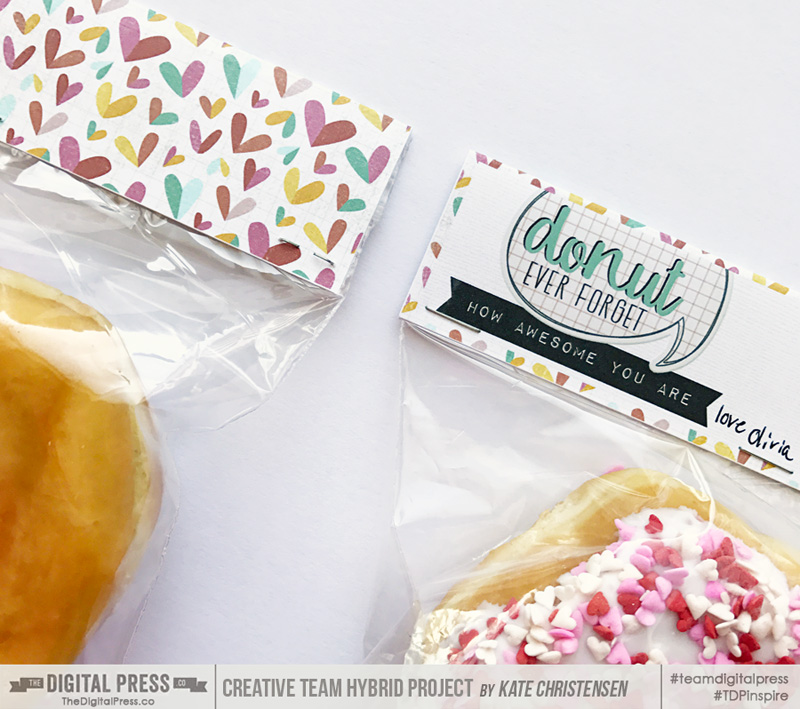
Tutorial Tuesday | Combining Templates

Do you ever struggle to find a template that’s just right for the photos you’re trying to scrap? If so, I have a quick tip for you today!

I love using templates to speed up my scrapping while also making layouts with a beautiful design. Sometimes, though, I can’t find the perfect template to match my photos/topic. What’s a scrapper to do, you ask? My solution: combine templates to create one that perfectly suits my images!

For the example I’m showing you today, I chose to work with a template set from our newest designer at The Digital Press — Jen C Designs’ You’ve Been Snapped Vol 1. Here is a look at the original template set (before I made any alterations to any of the templates)…

I love the layered paper background in the template shown at the top right… but I knew that I needed quite a few more photo spaces. I looked at the other templates in the set, and found the one at the bottom right, which featured three additional photo spots. I also liked the arrows on that second template!

To combine the two templates…

  • First, I opened one of the two templates (the one shown at top right, above) in Photoshop.
  • Next, I opened the second template (the one shown at bottom right, above)… and I selected all of the layers that I wanted to use and dragged them over into the first template.
  • After a few quick tweaks and a bit of re-sizing here and there… I had an all-new template that would work beautifully for my photos.

Here is a look at my resulting layout after combining the two templates…

Once you give the idea of combining templates a try, I think you will see that the possibilities are endless! You’ll never be stuck looking for the right template again… but you can still benefit from the ready-made aspects of using layered templates (paper layers, embellishment placement, page balance, etc.). It really stretches your template stash, too… as you can use each template as-is, and then combine them to create new options from the same set!

I hope you’ll give combining templates a try… and if you do, I’d love to see your finished page! Load it up in the gallery at TDP, and leave me a link to it in the comments, below. 🙂


About the Author  Katie is a member of the creative team here at The Digital Press. She lives in Central Florida with her husband and their four sweet but crazy boys. When she’s not dodging Nerf bullets or trying to dig out from under the never-ending pile of laundry, she enjoys photography, cooking, going to Disney World with her family, and, of course, digital scrapbooking.

Hybrid How-to | Creating a Hybrid Page Using a Digital Template

Hi everyone, It’s Saturday and time for another edition of our Hybrid How-To series here on The Digital Press blog!  Today, I’m here to help show you how easy it is to create a hybrid page using a digital template.

I love working with paper and physical elements/stamps, but sometimes I also miss being able to change things and make adjustments like I can with my digital layouts… so hybrid projects are my favorite way to make pages. The best of both worlds! I also think digital kits are a fantastic way to stretch our crafty budgets; we can print and cut as many times as we like.

When I make a hybrid page, I like to use the digital templates I have in my stash… and let me tell you, it’s really fun and easy!

For the layout I am making for today’s tutorial, I used two different digital products — a template from Sahin Designs — January 2017 Layered template 1

…as well as a digital kit by Little Lamm & Co. — Nonpareil Scrapbook Kit

With Valentine’s Day right around the corner, I’d like to celebrate my loves, so I’ll be making a page about them.

I’ll start out by creating my page in Photoshop, using my digital template and the digital items that I plan to print out. Here’s a look at the template, before I begin working…

…and here’s a look at the template once I’ve added my photo, digital papers, and embellishments…

After I have all of my printable items sized the way I want, I separate each of the pieces (see image, below right) and save them all as a PNG file to print and fussy cut. Although I have a Silhouette Cameo, sometimes I simply fussy cut just because I love it!

6


I also print out the papers for the larger circles… and these I actually cut with my Silhouette Cameo (see full printed papers in image, below right)…

7

As you can see, I duplicated some elements. I do this often just because I want to have some cute stash ready to use.

Here are my pieces printed and cut…

8

After I have all my pieces cut out, I just put them back together on a physical 12×12 page and then add my elements, stamps, hand-stitching, and some spray ink splatters, as shown here…

And there you have it! A beautiful hybrid page without all the guesswork or the need to re-print several times to get things right. 🙂

If you’d like to give this a try, too, don’t forget that you can earn challenge points at TDP! Come visit the CROSSWORD SECTION in The Digital Press forum, and you’ll find this month’s Hybrid Challenge thread (for each month’s Hybrid Challenge at TDP, you get to choose one of the month’s “Hybrid How-To” tutorial posts from here on the blog and make your own version). If you choose to give today’s project a try… all you have to do is make a hybrid page using some digital elements and papers, along with a digital template as your foundation for the composition of the page. You’ll see how fun it is! Give it a shot, and share your final results with us! We can’t wait to see what you come up with.

Have a great weekend you guys, and happy scrapping!


AndreaAbout the Author  Andrea Albuquerque is part of the Hybrid Creative Team here at Digital Press. Andrea has been a scrapper since 2010 and a photographer since 2012. Although she adores the flexibility and creativity of digital, she can’t resist playing with paper, paint, and embellishments… so hybrid scrapping is the perfect medium for her! She lives in Brazil with her hubby.