Category: Foodie Friday

Foodie Friday | Sherry Ferguson

Welcome to another edition of our Foodie Friday series here on The Digital Press blog!

Due to our 10 Holiday Tips & Tricks series in December 2017, it’s been quite a while since we ran one of these Foodie Friday posts on the blog… but if you remember this series from last year, it is a combination of our weekly designer features along with some food and recipe fun in the kitchen! Every week on Foodie Friday, you get the chance to peek into the lives (and kitchens!) of some of your favorite TDP designers and creative team members.

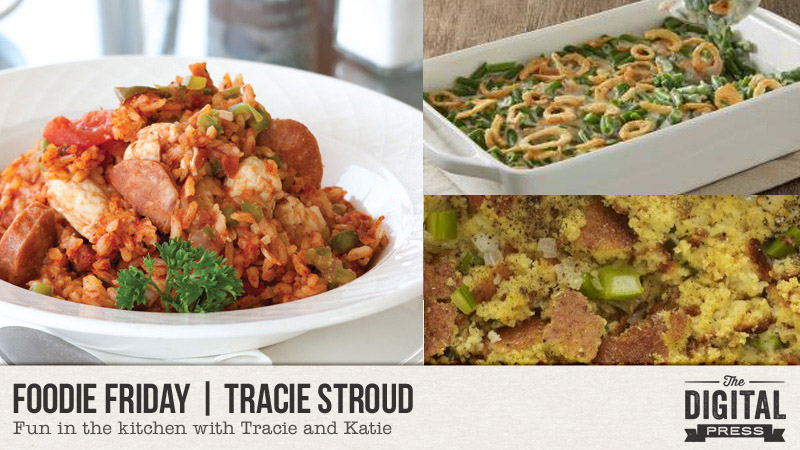
This week, we are featuring Sherry Ferguson, and peeking into her kitchen to learn a few of her favorite recipes. This is Sherry’s third feature on The Digital Press blog (if you want to learn even more about her, you can find her first feature article from July 2016 HERE, and her second feature article from February 2017 HERE).

According to Sherry, “I cook a lot for my younger daughter who has so many food allergies she can’t eat out. Here are some things I find myself making for her over and over. The girls and I are carb lovers so not a lot of meat in these recipes… but you can always add your own meat to the pizza or the macaroni.”

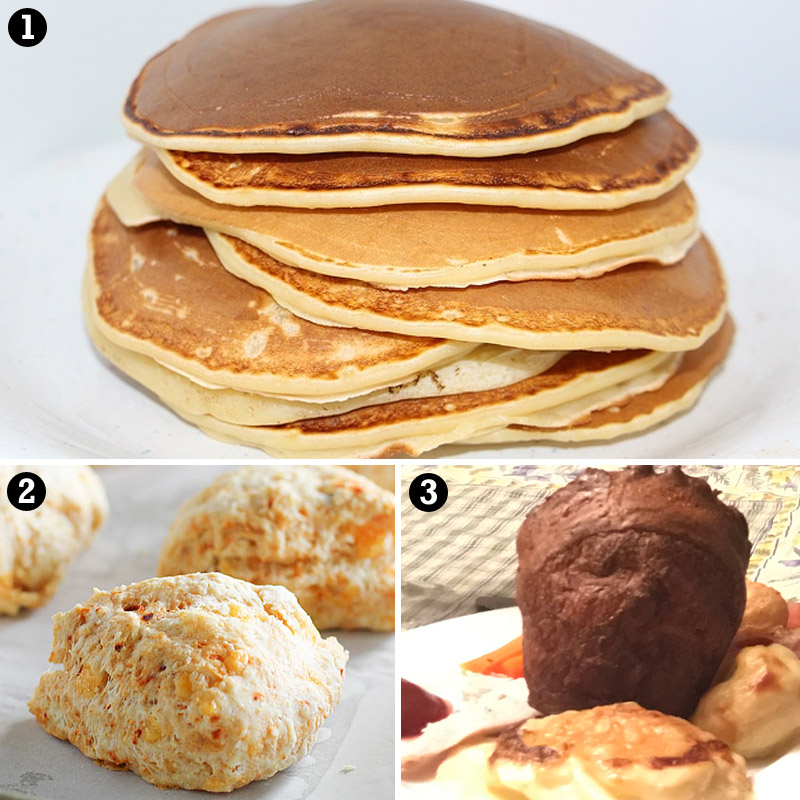
Here’s a peek of what she’s been cooking up for us…

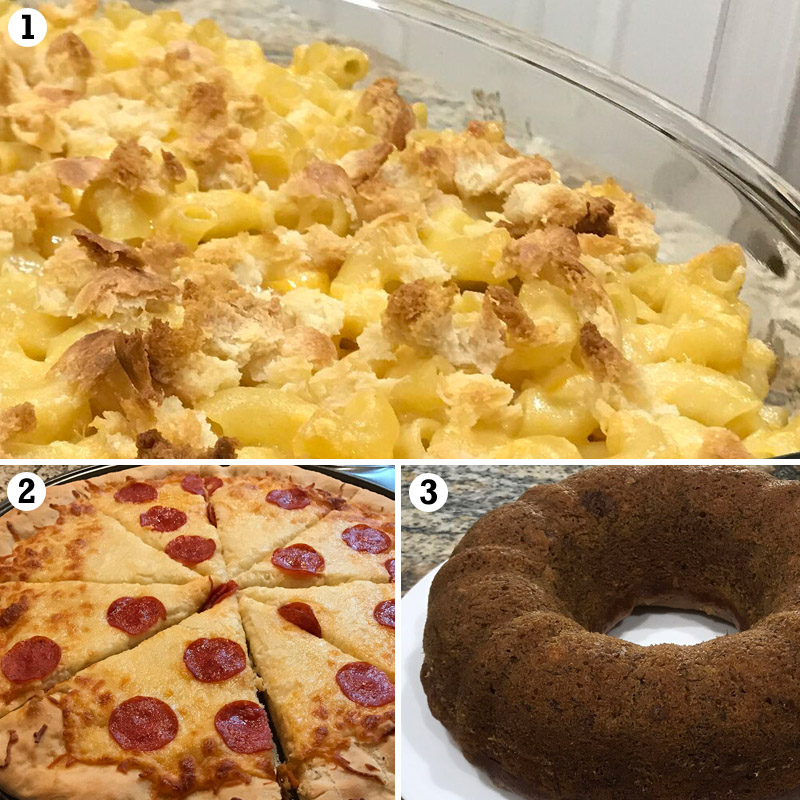
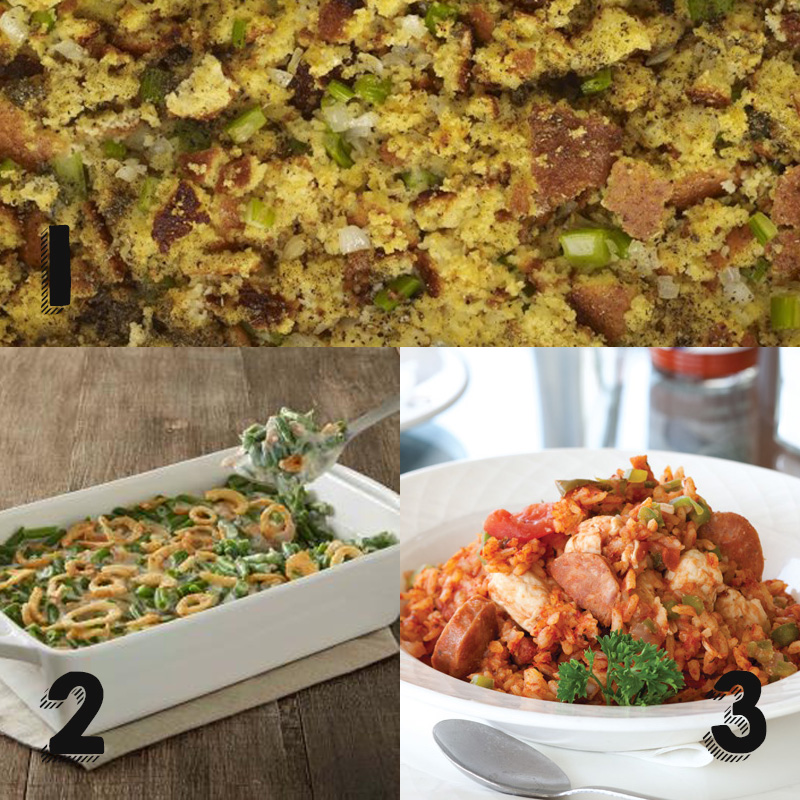
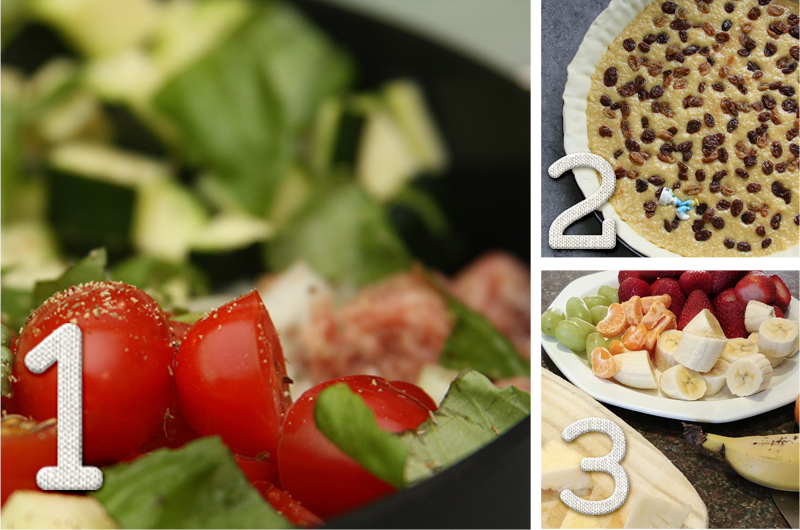
photo credits for [1] [2] and [3] to TDP designer Sherry Ferguson

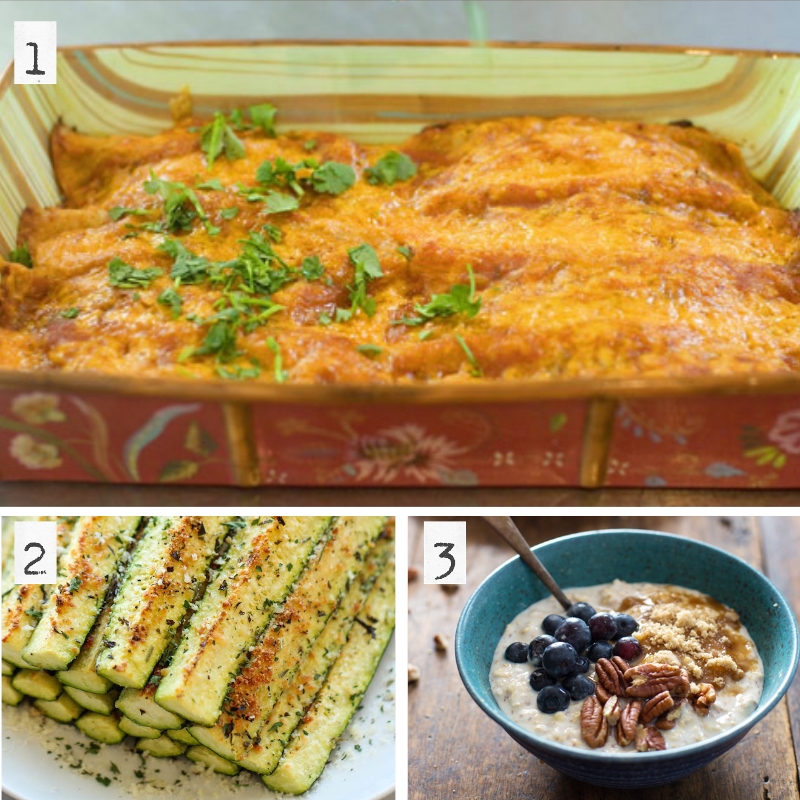
So, what are these delicious things you see pictured above?

  • Easy Baked Mac & Cheese
  • Quick Homemade Pizza
  • Banana Cake

EASY BAKED MAC & CHEESE

Sherry says, “I swap in homemade breadcrumbs on the top instead of Panko.”

INGREDIENTS NEEDED

—1 (16 oz.) package elbow macaroni or shell pasta
—8 tablespoons butter, divided
—2 cups heavy cream or half and half, warm
—2 cups shredded cheddar cheese
—1 cup shredded mozzarella cheese,
—1 cup shredded Monterrey Jack cheese,
—8 ounces Velveeta, cubed
—1 cup Panko breadcrumbs
—Salt and pepper, to taste

INSTRUCTIONS

—Preheat oven to 350 degrees. Cook pasta according to package directions for 8-10 minutes or until al dente; drain.
—Meanwhile, melt 6 tablespoons of the butter.
—Transfer pasta to a large bowl and toss with melted butter. Stir in cream.
—Add shredded cheese and Velveeta and mix well. Season with salt and pepper to taste.
—Pour pasta mixture into a greased, 9×13 baking dish (cheeses will not be melted yet).
—Melt the remaining 2 tablespoons of butter and stir into the breadcrumbs. Sprinkle the breadcrumbs over the macaroni.
—Bake for 30-35 minutes or until cheese is hot and bubbly and topping is golden brown.

[recipe adapted from Let’s Dish Recipes ]

QUICK HOMEMADE PIZZA

About this recipe, Sherry says, “We always skip the sauce on ours… but the beauty in making your own is you can add whatever you like!”

INGREDIENTS NEEDED

—1 tablespoon yeast
—1 cup warm water (use hot water from the tap)
—1 teaspoon honey
—1 teaspoon salt
—1-2 Tablespoons olive oil
—2-1/2 cups unbleached flour (I usually add 1 cup whole wheat)
—cornmeal (optional)
—sauce and toppings of choice

INSTRUCTIONS

—Add yeast to a mixing bowl and pour the 1 cup of hot tap water over it and mix.
—Add the remaining ingredients and let the mixer run at medium speed until the dough clears the side of the bowl (you can do this by hand: beat vigorously for 30 strokes).
—Let dough rest in the bowl 15-20 minutes while you preheat the oven and prep the toppings.
—On a large baking sheet or pizza pan/stone, sprinkle a bit of cornmeal. With oiled hands, remove the dough from the bowl and pull/shape into a general rectangle or circle (depending on your pan), then lay it on top of your cornmeal coated pan. Using a rolling pin or your hands, flatten and stretch the dough to fill the pan.
—Bake the dough for 10 minutes in a 425 degree oven (you don’t have to, but it ensures a fully cooked center crust, no matter how many toppings you add).
—Remove prebaked crust from the oven and spread with your toppings: sauce, shredded cheese, cooked meat and chopped vegetables.
—Place topped pizza back into oven and bake for 10-15 minutes more, or until cheese is melted and toppings are browned.
—Slide the whole pizza from the pan to a cutting board and slice into pieces.

[recipe adapted from An Oregon Cottage ]

BANANA CAKE

Sherry says, “This is such an easy cake to make, and the bananas themselves help bind it since there are no eggs.”

INGREDIENTS NEEDED

—1-3/4 cups ripe banana, mashed (about 4 medium bananas)
—1/2 cup oil
—2 cups flour
—3/4 cup brown sugar, firmly packed
—1 tsp baking powder
—1 tsp baking soda
—1/2 tsp salt
—vegetable cooking spray

INSTRUCTIONS

—Preheat oven to 350 degrees. Coat bundt pan with vegetable cooking spray and then set aside.
—In a large bowl, combine flour, brown sugar, baking powder, baking soda, and salt. Stir well and then set aside.
—In another bowl, combine banana and oil. Stir well.
—Add banana and oil mixture to the dry ingredients, stirring just until moistened.
—Spoon all of the batter into the bundt pan.
—Bake 40-50 minutes* or until a cake-tester inserted in the center comes out clean.
—Cool in pan for 10 minutes first, and then remove from pan and cool completely on a wire rack.
—Cake can be served plain for breakfast… or topped with chocolate glaze and served for dessert… etc.

*NOTE: Sherry bakes hers for just 35 minutes; it likely depends on your oven, etc.

[recipe adapted from The Food Allergy News Cookbook ]

We’re betting that you’re hungry just reading through these recipes, and that you can’t wait to try them out!

Meanwhile, it wouldn’t be a designer feature week without a fantastic sale and a special Free-with-Purchase offer… so you’ll be excited to see what Sherry has in store for you! Not only is her entire shop marked down 30% OFF throughout her entire feature week (sale prices will be valid through 11:59pm ET on Thurs 1/11)… but she also has this awesome deal in her shop all week long, as well! Spend $10+ in the Sherry Ferguson shop at The Digital Press, and get her “A Tranquil Life” Kit completely FREE!


Laura Passage

About the Author  Laura Passage is the owner of The Digital Press, and also the designer behind Wishing Well Creations by Laura Passage (WWC). She works now as a graphic designer in both the digital and paper scrapbooking industries, but previously spent over a decade working as a college soccer coach. She lives in the Pacific Northwest with her husband and two young sons (affectionately referred to as The Tiny Terrorists), and will rationalize eating coffee ice cream for breakfast to anyone who questions it.

Foodie Friday | Tracie Stroud

Welcome to another edition of Foodie Friday here on The Digital Press blog!

With Thanksgiving right around the corner, I can almost taste all of the deliciousness that the holidays brings! This week, we have a special treat for you scrappy food lovers… Tracie Stroud and I are here to share some delicious Thanksgiving recipes and tips that will have you looking forward to Turkey Day!

Thanksgiving is my absolute favorite holiday, and Tracie loves it too! There is something so special about family and friends gathering to share delicious food and appreciate all they have. When I asked her about her favorite Thanksgiving dishes, Tracie said, “I grew up in South Louisiana, and for Thanksgiving we always had a few must-haves: Cornbread Dressing, Green Bean Casserole, and Jambalaya. All three are still favorites in our family.”

And seriously, don’t these dishes look amazing?…

photo credits: [1] All Recipes [2] French’s and [3] Louisiana Cookin’

So, what is all of this deliciousness you see above?

  • Cornbread Dressing
  • Green Bean Casserole
  • Chicken and Sausage Jambalaya

Cornbread Dressing

About this recipe, Tracie says, “The key to authentic cornbread dressing is to use day-old cornbread. I don’t know why, but it makes all the difference. When the dressing is done, we always add some of the Thanksgiving turkey into it.”

My favorite tip for cornbread dressing is to add some jalapeños. It gives the dressing a little kick that can cut the richness a bit.

INGREDIENTS NEEDED

—2 tablespoons butter
—1/2 cup chopped celery
—1 small onion
—2 eggs, beaten
—2 cups chicken stock
—2 tablespoons dried sage
—salt and pepper to taste

INSTRUCTIONS

—Prepare the dry corn bread mix according to package directions. Cool and crumble.
—Preheat oven to 350 degrees F (175 degrees C). Grease one 9×13 inch baking dish.
—In a large skillet over medium heat, melt the butter and saute the celery and onion until soft.
—In a large bowl, combine the celery, onions, 3 cups crumbled corn bread, eggs, chicken stock, sage and salt and pepper to taste; mix well.
—Place into prepared dish and bake at 350 degrees F (175 degrees C) for 30 minutes.

[ recipe adapted from All Recipes ]

Green Bean Casserole

The classic side dish! About this dish, Tracie says, “This is my very favorite dish from my childhood. My mom had this one down to an art, and she would always give me a few of the extra “crunchies” to munch on. She always used the French’s recipe, and it was always perfect. My kiddos aren’t crazy about green beans, so sometimes I make a smaller batch of this just for me.”

My own tip for delicious green bean casserole — it is the perfect make-ahead dish. On Thanksgiving, I am always running around like a crazy person. To save some time, I prep the green bean casserole the day before… just leaving off the fried onions on the top. By doing that, you can save yourself some time on the big day and give all the flavors in the casserole a chance to come together.

INGREDIENTS NEEDED

—1 can (10 1/2 oz.) Campbell’s® Condensed Cream of Mushroom Soup 
—3/4 cup milk 
—1/8 tsp. black pepper 
—4 cups cooked cut green beans or 2 cans (14.5oz each) any style Del Monte® Green Beans, drained
—1 1/3 cups FRENCH’S® Crispy Fried Onions 

INSTRUCTIONS

—MIX soup, milk and pepper in a 1 1/2 -qt. baking dish.

—Stir in beans and 2/3 cup Crispy Fried Onions.
—BAKE at 350°F for 30 min. or until hot. Stir.
—TOP with remaining 2/3 cup onions. Bake 5 min. until onions are golden.

[ recipe adapted from French’s ]

Chicken and Sausage Jambalaya

Says Tracie, “Jambalaya takes a lot of practice to get right, and it can be quite an undertaking, but it’s always worth it in the end.”

INGREDIENTS NEEDED

—2 pounds mild smoked pork sausage, sliced ¼-inch-thick
—2½ pounds boneless, skinless chicken, chopped
—1½ pounds onions, finely chopped
—1 cup finely chopped celery
—1 cup finely chopped bell pepper
—2 tablespoons minced garlic
—1 cup diced tomato
—1 (6-ounce) can tomato paste
—1 tablespoon Creole seasoning
—1 tablespoon chopped fresh parsley
—2¼ teaspoons fresh thyme
—2¼ teaspoons chopped fresh basil
—5⅓ cups chicken stock
—1½ pounds long-grain rice

 INSTRUCTIONS

—In a large cast-iron Dutch oven, cook sausage on high heat for 3 minutes.
—Add chicken, and cook until browned on all sides, 15 to 20 minutes.
—Lower heat to medium, and add onion, celery, bell pepper, and garlic; cook until vegetables are soft, about 15 minutes.
—Add tomatoes, tomato paste, Creole seasoning, parsley, thyme, and basil. Simmer over low heat for 10 minutes.
—Add chicken stock, and bring to a boil over high heat.
—Add rice, and stir. When jambalaya returns to a boil, reduce heat to simmer.
—Cover and cook until rice has absorbed all liquid, about 25 minutes.

By Cafe Reconcile, New Orleans, Louisiana
[ recipe adapted from Louisiana Cookin’ ]

Don’t these recipes make you want to pop your turkey into the oven and start prepping your holiday feast right now?

What are your favorite holiday foods? We would love to hear what recipes your families likes best to celebrate the holidays.

Meanwhile, it wouldn’t be a designer feature week without a fantastic sale and a special Free-with-Purchase offer… so you’ll be excited to see what Tracie has in store for you! Not only is her entire shop marked down 30% OFF throughout her entire feature week (sale prices will be valid through 11:59pm ET on Thurs 11/23)… but she also has this awesome deal in her shop all week long, as well — Spend $10+ in Tracie Stroud’s Shop, and get the following brand-new FULL KIT (just landed in the shop today) completely FREE!


KatieAbout the Author  Katie is a member of the creative team here at The Digital Press. She lives in Central Florida with her husband and their four sweet but crazy boys. When she’s not dodging Nerf bullets or trying to dig out from under the never-ending pile of laundry, she enjoys photography, cooking, going to Disney World with her family, and, of course, digital scrapbooking.

Foodie Friday | Meagan’s Creations

Welcome to another edition of Foodie Friday here on The Digital Press blog!

Continuing our fun blog series that explores “what’s cooking in the homes of our designers and creative team members?” …I had fun chatting with Meagan Tuck of Meagan’s Creations to see what she has going on in her kitchen! It seems that as the weather is getting cooler here in the United States, we’re both reaching for comfort foods — pasta and warm cookies for Meagan, and beans, rice, and potatoes for me (love me some carbs!). Between the two of us, we’ve put together a main dish, a side, and dessert for you. If you like the combination of savory and sweet, you’re definitely in for a treat!

Doesn’t this all look yummy? I just had to make the cookie picture the biggest… because, well, cookies!

photo credits: [1] Kevin and Amanda, [2] TDP creative team member Kat Hansen, and [3] I Heart Nap Time

So, what is all of this deliciousness you see above?

  • Garlic Chicken Farfalle
  • Black Beans
  • Pumpkin Chocolate Chip Cookies

Garlic Chicken Farfalle

About this recipe, Meagan says… “For a main meal, my family loves chicken farfalle — everyone enjoys this! For the garlic in this recipe, I use a spoonful of crushed garlic.

INGREDIENTS NEEDED

—16 ounces Farfalle pasta
—1 cup heavy whipping cream
—3-4 chicken breasts (boneless, skinless)
—2-3 cloves garlic, crushed or garlic salt
—1/2 tablespoon pepper
—1/2 cup butter
—1 pound bacon, cooked and crumbled
—1/2 cup shredded Parmesan cheese
—12 oz mesquite barbecue sauce mixed with 1/4 cup lime juice

INSTRUCTIONS

Place chicken and barbecue sauce with lime juice in a crock pot; cook on low for 6 hours.
—Pull marinated chicken out of the juices, allow to cool a little bit, and shred. Set this aside. Meagan’s tip — “I pull the chicken apart with two forks. For added barbecue flavor, I like to put the shredded chicken back in the crock pot with the juices until the pasta is cooked and then scoop out the chicken with a slotted spoon.
About a half-hour before serving, boil the pasta. In a small saucepan, melt butter, add garlic, whipping cream, pepper, Parmesan cheese, and crumpled bacon. Whisk together on low heat for 3-4 minutes. In a large bowl, pour over cooked, drained pasta, add chicken and stir through.
—Sprinkle a little bit more shredded Parmesan cheese on top, and serve!

[ recipe adapted from the Kevin & Amanda site ]

Black Beans

Beans are a staple in my pantry, and I just love black beans. By themselves, however, they can be a bit… blah. I love spices, so this is a recipe to jazz things up a bit and add an earthy, rich flavor (and it’s awesome to mix into rice, stews, or even chili). With the Liquid aminos in here, I don’t find the need to add any additional salt in the cooking, and I try to get low-sodium beans, too, if I can find them in the grocery store. If the beans sit for a while (re-heated the next day, even), the flavors really start to come through. This, literally, takes less than 10 minutes to put together!

INGREDIENTS NEEDED

—16 oz can black beans, drained
—1 tablespoon extra virgin olive oil
—1/4 teaspoon each chili powder, paprika and cumin
—1 tablespoons light soy sauce or Liquid Aminos (a soy derivative)

INSTRUCTIONS

—Combine all ingredients in a saucepan, mix well. Heat over medium heat for 3-5 minutes or until heated through. Serve immediately.

[ recipe adapted from Beachbody ]

Pumpkin Chocolate Chip Cookies

Says Meagan, “Quite simply, the BEST pumpkin chocolate chip cookies!

INGREDIENTS NEEDED
—1 cup canned pumpkin
—1 egg
—1/2 cup vegetable oil
—1 cup white sugar
—2 cups flour
—2 teaspoon baking powder
—1 1/2 teaspoon cinnamon
—1/2 teaspoon salt
—1 teaspoon baking soda
—1 teaspoon milk
—1 tablespoon vanilla
—2 cups chocolate chips (or 11 oz bag of chocolate chips)

INSTRUCTIONS

—Combine pumpkin, sugar, vegetable oil, vanilla and egg in a large bowl. In a separate bowl, stir together flour, baking powder, ground cinnamon, and salt. Dissolve the baking soda with the milk and stir into the wet ingredients. Add flour mixture to pumpkin mixture and mix well. Stir until combined.
—Add chocolate chips and stir until combined.
—Line baking sheet with parchment paper. Drop cookies on by the spoonful about 2 inches apart. Bake at 350°F for 10-12 minutes, or until a toothpick comes clean.
[recipe adapted from I Heart Nap Time ]

Don’t these recipes all look delicious?! What is your favorite go-to comfort food in the cooler weather? We’d love to know!

Meanwhile, it wouldn’t be a designer feature week without a fantastic sale and a special Free-with-Purchase offer… so you’ll be excited to see what Meagan of Meagan’s Creations has in store for you! Not only is her entire shop marked down 30% OFF throughout her entire feature week (sale prices will be valid through 11:59pm ET on Thurs 11/16)… but she also has this awesome deal in her shop all week long, as well! Spend $10+ in the Meagan’s Creations shop, and get the following brand-new FULL KIT that just landed in the shop today — completely FREE!


KatAbout the Author Kat Hansen is a creative team member here at The Digital Press. A Director of Human Resources by day, she loves the opportunity to spend a few hours each evening being creative. Vacation memories feature pretty heavily in Kat’s scrapbooking pages, as do her son and “daughter” (of the four-legged furry kind). Kat has quite the sense of humor (she “blames” her father for this), which she incorporates into her journaling and memory-keeping.

Foodie Friday | MEG Designs

Hello! Stefanie here, to bring you another fun edition of our Foodie Friday series here on The Digital Press blog!

As you’ve seen this fall, Foodie Friday is our newest blog series… based on the amazing positive response we had to the “Mess Hall” feature during TDP’s Summer Camp back in July. People just loved our food features… and as such, most every Friday throughout the rest of the year we will be combining the Foodie Friday thing with our weekly designer feature series — and having some fun in the kitchen! Every week you will get the chance to peek into the lives (and kitchens) of your favorite TDP designers and creative team members.

It’s been really fun so far… and this week, Marie Eve of MEG designs is here with me to share a few delicious recipes from each of our kitchens! Take a quick look…

It all looks delicious, right? Here’s what we have put together for you…

  • One-Pan Pasta
  • King Cake
  • Fruit Kebabs

One-Pan Pasta

This a quick dish that Marie Eve says her family loves… and it is something she turns to when time is short.

INGREDIENTS NEEDED

  •  350 g spaghetti (or any  other pasta)
  •  5 sausages (chorizo or similar)
  •  1/2 red pepper
  •  1/2 onion
  •  2 cloves garlic
  •  1 small zucchini (baby marrows)
  •  20 cherry tomatoes
  •  fresh basil (or parsley if you don’t have basil)
  •  herbs of Provence
  •  750 ml of cold water
  •  1 chicken bouillon cube (chicken stock cube)
  •  black pepper pepper

INSTRUCTIONS

  • Wash the zucchini and the pepper and cube into small pieces (so that it cooks quickly).
  • Finely chop the onion and the crush the garlic.
  • Wash the cherry tomatoes and halve them.
  • Dilute the bouillon cube in cold water.
  •  In a large pan, place spaghetti in the bottom.
  •  Cut the sausages into small pieces layer them next to the spaghetti.
  •  Add the cherry tomatoes, the onion, the cloves of garlic, the red pepper and the zucchini.
  •  Add the diluted bouillon cube.
  •  Sprinkle with some fresh chopped basil and add some herbs from Provence (not too much!) and freshly ground black pepper (no salt).
  •  Cook on high heat and when the pasta begins to soften, stir gently to mix, but take care to ensure that the pasta is immersed in the water.
  •  Cook until there is no more water, watch and stir regularly so that it doesn’t attach to the bottom of the pan. It takes about 15-20 min.

King Cake

About this recipe, Marie Eve says, “this is a recipe that I have made many times and we still like it. On the 6th of January, we celebrate the Epiphany (a Christian tradition). On this day, we eat the King’s cake, in which we hide a bean (a porcelain object).. and whoever finds it is the “queen” or “king” for the day.

INGREDIENTS NEEDED

  • 2 puff pastries
  • 200g almond powder
  • 150g sugar
  •  100g butter (room temperature)
  •  2 eggs
  •  1 tbsp bitter almond extract
  •  70g of raisins
  •  1 tbsp cinnamon
  •  150ml orange juice
  •  1 bean
  •  1 egg yolk diluted  with a water to create an egg wash to crisp and brown the dough.

INSTRUCTIONS

  •  Place the raisins in a bowl, sprinkle with cinnamon and cover with orange juice. Let swell 30 min.
  •  Preheat the oven to 180 °C (6).
  •  Arrange the first puff pastry in a pie dish and prick it with a fork. Do not cook it.
  •  Mix all the ingredients: almond powder, sugar, eggs, butter and almond extract. Spread it on the puff pastry base.
  •  Cover with drained raisins. Push them lightly into the mixed ingredients. Slip the bean into the filling.
  •  Cover the pie with the second puff pastry. Weld the edges lightly with your fingers.
  •  Mark the top of the cake with the tip of a knife before brushing with the diluted egg yolk.
  •  Bake for 35 min.
  •  Take the cake out, sprinkle it with sugar (through a sieve). Increase the oven to 250 °C  (8-9) and bake the cake for 5 minutes more.

Fruit Kebabs

This is a recipe from my own kitchen, and it’s one that my daughter requested when she wanted a picnic party for her 18th birthday with her closest girlfriends. Girls are always so health-conscious, and so I made this fresh fruit selection on a skewer. They loved it!

INGREDIENTS NEEDED

  • pineapple, peeled and cubed
  • bananas, peeled and sliced
  • blueberries, washed
  • strawberries, washed and halved
  • mandarins, peeled and separated into segments
  • seedless green grapes (but any seedless ones will do)
  • basically you want a mix of different colours that look pretty together

INSTRUCTIONS

  • I started with pineapple and then layered them on to the stick one by one, ending with a blueberry
  • Serve cold, one per person

There you have it! …something for everyone, no matter where people are located in the world. These recipes are easy to make, and sure to be crowd pleasers.

After checking out these fun recipes… if you’re up for a challenge, come to the forum and check out our Recipe Book challenge, which is designed to help you create a quick-&-simple book of your favorite recipes — get this — in time to print it up and give it to friends and family members as a holiday gift later this year(!). Sound like fun? Come check it out HERE.

Meanwhile, it wouldn’t be a designer feature week without a fantastic sale and a special Free-With-Purchase offer… so you’ll be excited to see what Marie Eve has in store for you! Not only is her entire shop marked down 30% OFF throughout her entire feature week (sale prices will be valid through 11:59pm ET on Thurs 11/9)… but she also has the following awesome deal available in her shop all week long, as well! Spend $10+ in the MEG Designs shop and get the following product absolutely FREE…


small avi

About the author Stefanie is a member of The Digital Press creative team and a stay at home mother of three older children living in Cape Town, South Africa with her hubby of 29 years, two of their three children and 2 cats. She loves photography, travel and digital scrapbooking, documenting the good and the ordinary everyday.

Foodie Friday | Mari Koegelenberg Creations

Hello! I’m Robin and am here on The Digital Press blog today to bring you another fun edition of our Foodie Friday series!

As you’ve seen this fall, Foodie Friday is our newest blog series… based on the amazing response we had to the “Mess Hall” feature during TDP’s Summer Camp back in July. People just loved our food features… and as such, most every Friday throughout the rest of the year we will be combining the Foodie Friday thing with our weekly designer feature series — and having some fun in the kitchen! Every week you will get the chance to peek into the lives (and kitchens) of your favorite TDP designers and creative team members. It’s been very fun so far!

This week Mari from Mari Koegelenberg Creations is here to share a few delicious recipes with us from her kitchen! Take a peek…

[ photo credits to [1] The Pioneer Woman [2] Damn Delicious and [3] Pinch of Yum ]

What is all of that yumminess you see, above? Here is the lineup of delicious recipes Mari put together this week:

  • Enchiladas
  • Baked Parmesan Zucchini
  • Flax and Blueberry Vanilla Overnight Oats  

Enchiladas

Mari says, “We call it Mexican lasagna. 😉 It’s so good! Not having grown up with this delicacy, I scoured Pioneer Woman’s vast and amazing recipe collection years ago and made this recipe one night while we had family visiting. Let’s just say its a real winner! I have also substituted chicken (and even stewing beef), which I put into the crock pot and then shred it — and its just utter comfort food deluxe. Do not skimp on the sour cream!”

INGREDIENTS NEEDED

  • Mexican red sauce
  • Low sodium chicken broth
  • Canola oil
  • Flour
  • Salt
  • Pepper
  • Cilantro
  • Ground beef
  • Onion
  • Canned diced green chilies
  • Corn tortillas
  • Chopped black olives
  • Sliced green onions
  • Freshly grated sharp cheddar cheese

INSTRUCTIONS

  • For the sauce, add 1 tbsp. each of canola oil and flour to a medium saucepan
  • Whisk these together over medium-low heat for about 2-3 minutes
  • Add in the red sauce and chicken broth then stir to mix together
  • Add in ½ tsp each of ground black pepper and salt
  • Simmer the sauce on low heat while cooking the rest
  • Dice the onions and place into a large skillet with 1 tbsp. of canola oil. Sauté the onions for a few minutes
  • Add ground beef and brown
  • Add two cans of green chilies
  • In a small skillet over medium heat, fry individual corn tortillas just until soft (about 30 seconds each side)
  • Place tortillas on a paper towel-lined plate and keep warm
  • Add 2-3 tbsp. fresh cilantro to the sauce
  • Assemble the enchiladas by dipping the corn tortillas into the warm sauce, lay them flat, and spoon the meat mixture, chopped olives, green onion, and cheese on the tortillas. Roll up the tortillas and place seam side down in a baking dish.  Continue until all tortillas are used.
  • Pour remaining sauce over rolled up tortillas and top it off with freshly grated cheddar cheese
  • Bake at 350 degrees Fahrenheit for about 20 minutes until cheese is melted and enchiladas are bubbly
  • Remove the pan and sprinkle chopped cilantro and green onions on top

Baked Parmesan Zucchini

When asked about this recipe, Mari wrote, “Just over a year ago, we moved onto our little farm… and we started a veggie garden. We planted 6 zucchini plants (in case they did not all ‘take’)… UMM OKAY… so, yep, we had an over-abundance of zucchini this summer! It’s such a versatile veggie, though, so I didn’t complain (you can use it in salads, cakes/bread, grilled on the BBQ, and more). This is one of my favorite ways to prepare and it looks so presentable and is absolutely delicious!”

INGREDIENTS NEEDED

  • 4 zucchinis, quartered lengthwise
  • 1/2 cup freshly grated Parmesan
  • 1/2 teaspoon dried thyme
  • 1/2 teaspoon dried oregano
  • 1/2 teaspoon dried basil
  • 1/4 teaspoon garlic powder
  • Kosher salt and freshly ground black pepper, to taste
  • 2 tablespoons olive oil
  • 2 tablespoon chopped fresh parsley leaves

INSTRUCTIONS

  • Preheat oven to 350 degrees F. Coat a cooling rack with nonstick spray and place on a baking sheet; set aside.
  • In a small bowl, combine Parmesan, thyme, oregano, basil, garlic powder, salt and pepper, to taste.
  • Place zucchini onto prepared baking sheet. Drizzle with olive oil and sprinkle with Parmesan mixture. Place into oven and bake until tender, about 15 minutes. Then broil for 2-3 minutes, or until crisp and golden brown.
  • Serve immediately, garnished with parsley, if desired

Flax and Blueberry Vanilla Overnight Oats

Mari was quite enthusiastic about this fabulous recipe! She told me, “OMG to die for! It’s like pudding… so good, and so so healthy. It’s also great for busy moms/dads because you can prep this ahead and let it work its magic in a mason jar.” I think you will agree with Mari after trying this!

INGREDIENTS NEEDED

  • 1/2 cup rolled oats OR quick oats
  • 2/3 cup water
  • 1/2 cup low-fat vanilla yogurt
  • 1 tablespoon flaxmeal
  • 1 baby pinch of salt
  • blueberries, pecans, brown sugar, and other goodies for topping

INSTRUCTIONS

  • In an individual food storage container, add the ingredients in the order listed (except for toppings). Do not stir. Refrigerate overnight.
  • In the morning, stir up the mixture; it should be thick and the oats should be completely soft. Add the toppings of your choice. Repeat forever.

Don’t these recipes look easy and fun to make? My kids were quite excited to try them all, after looking at the pictures!

Now, if you’re up for a challenge… come to the forum and check out our Recipe Book challenge, which is designed to help you create a quick-&-simple book of your favorite recipes — get this — in time to print it up and give it to friends and family members as a holiday gift later this year(!). Sound like fun? Come check it out HERE.

Meanwhile, it wouldn’t be a designer feature week without a fantastic sale and a special Free-with-Purchase offer… so you’ll be excited to see what Marie has in store for you! Not only is her entire shop marked down 30% OFF throughout her entire feature week (sale prices will be valid through 11:59pm ET on Thurs 11/2)… but she also has the following awesome deal available in her shop all week long, as well! Spend $10+ in the Mari Koegelenberg Creations shop and get the following FULL COLLECTION(!) completely FREE…


Robin

About the author  Robin is a member of the creative team here at The Digital Press. A wife of 25 years and a mom of 4 crazy children (3 in college and 1 still at home), she says that her life occurs mostly in the car as she transports said crazy kids to their many, many homeschool activities. When not driving, Robin loves to make her family cringe by pulling out her camera again (and again, and again…).

Foodie Friday | Jen C Designs

Hello everyone, and welcome to another edition of our Foodie Friday series here on The Digital Press blog!

Foodie Friday is our newest blog series… based on the amazing response we had to the “Mess Hall” activities during TDP’s Summer Camp back in July. As such, most every Friday throughout the rest of the year, we will be combining this fun feature with our weekly designer feature series — and having some fun in the kitchen with members of our team! Each week you will get to peek into the lives (and kitchens) of your favorite TDP designers and creative team members.

This week, you get to join Jen Cairns from Jen C Designs and TDP creative team member Astrid in the kitchen, where we’re cooking up a few delicious autumn-inspired recipes from Jen’s recipe books!

[ photo credits to Jen Cairns and tasteandtellblog.com (scones) ]

Here is the lineup of delicious recipes Jen put together this week (shown above):

  • Pancakes
  • Cheddar Biscuits
  • Yorkshire Puddings

Pancakes

About this recipe, Jen says… “they’re really simple and my kids love them! My 7 year old now makes her own pancakes!”

INGREDIENTS NEEDED*
—1 cup self rising flour
—1 cup milk
—1/4 cup white sugar
—1 egg

INSTRUCTIONS
—Combine all ingredients in a bowl and mix together.
—Heat a pan and melt some butter in the pan; pour desired amount of batter into the pan (depending on the size pancake you want to make).
—Wait until bubbles form across the top of the pancake, and then flip over. Let cook for another 2-3 minutes.
—Serve with topping of choice; we use syrup (and/or more sugar on top for extra sweetness!).

*makes 2 large or 4 small pancakes

Cheddar Scones

INGREDIENTS NEEDED
—200g self-raising flour (plus a little more for dusting)
—50g butter (chilled)
—75g grated cheese (plus extra for topping; optional)
—150ml milk

INSTRUCTIONS
—Preheat oven to 220 C (about 425 F)
—Place the flour in a large bowl, and then grate in the butter.
—Stir in the cheese, then the milk. If it feels like it might be too dry, add a touch more milk… then bring together to make a soft dough.
—Lightly dust your work surface with a little flour. Roll out the dough no thinner than 2cm. Using a 4cm plain cutter, cut out the scones.
—Transfer to a non-stick baking sheet, dust with a little more flour (and/or grated cheese topping), and then bake for 12-15 mins until well-risen and golden.


Yorkshire Puddings

INGREDIENTS NEEDED
—140g plain flour (this is about 200ml/7 oz)
—4 eggs
—200ml milk
—sunflower oil

INSTRUCTIONS
—Preheat oven to 230 C (about 450 F).
—Drizzle approx 1-2 TBSP sunflower oil evenly into 2 x 4-hole Yorkshire pudding tins or a 12-hole non-stick muffin tin and place in the oven to heat through.
—To make the batter, add 140g plain flour into a bowl and beat in four eggs until smooth.
—Gradually add 200ml milk and carry on beating until the mix is completely lump-free. Season with salt and pepper.
—Pour the batter into a jug, then remove the hot tins from the oven. Carefully and evenly pour the batter into the holes.
—Place the tins back in the oven and leave undisturbed for 20-25 mins until the puddings have puffed up and browned. Serve immediately with lots of gravy!


Here’s a fun photo Jen provided of her two kids eating the Yorkshire Puddings (left) and pancakes (right)… two of their favorites!

Doesn’t that all look delicious?!

If you’re up for a challenge… come to the forum and check out the latest edition of our Recipe Book challenge, which launched this month and is designed to help you create a quick-&-simple book of your favorite recipes — get this — in time to print it up and give it to friends and family members as a holiday gift later this year(!). Sound like fun? Come check it out HERE.

Meanwhile, it wouldn’t be a designer feature week without a fantastic sale and a special Free-with-Purchase offer… so you’ll be excited to see what Jen has in store for you! Not only is her entire shop marked down 30% OFF throughout her entire feature week (sale prices will be valid through 11:59pm ET on Thurs 10/26)… but she also has this awesome deal in her shop all week long, as well! Spend $5+ in the Jen C Designs, and get the following BRAND NEW template set that just launched in her shop today — completely FREE!


blogfotoAbout the author Astrid is a member of the creative team here at The Digital Press. She lives with her husbandand her 2 teenage/adult kids in Germany. As a mini-jobber with only 10 hours/week, she has plenty of time for her digital scrapbooking hobby. She has Netflix and Amazon Prime, and is addicted to nearly all series. Vampires, zombies, vikings… it doesn’t matter; she likes everything. She loves the ocean and the summer heat, but lives in the opposite: mountains. Therefore, she loves visiting her family in Algeria or the south of France.