Category: Designer Features

Foodie Friday | Calista’s Stuff

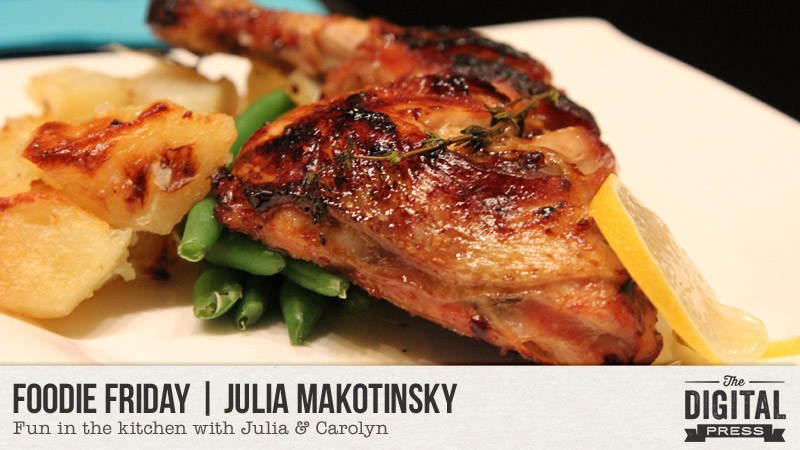
Thank goodness it’s Friday! Not only is the weekend almost here… but it’s time for another edition of our Foodie Friday series here on The Digital Press blog! This week we are featuring TDP designer Meta Wulandari — the name behind Calista’s Stuff.

Meta has already been featured once before on The Digital Press blog; if you would like to learn more about her, you can check out her first feature from May of 2017 HEREYou can also learn more about her design style by checking out her gorgeous store at TDP.

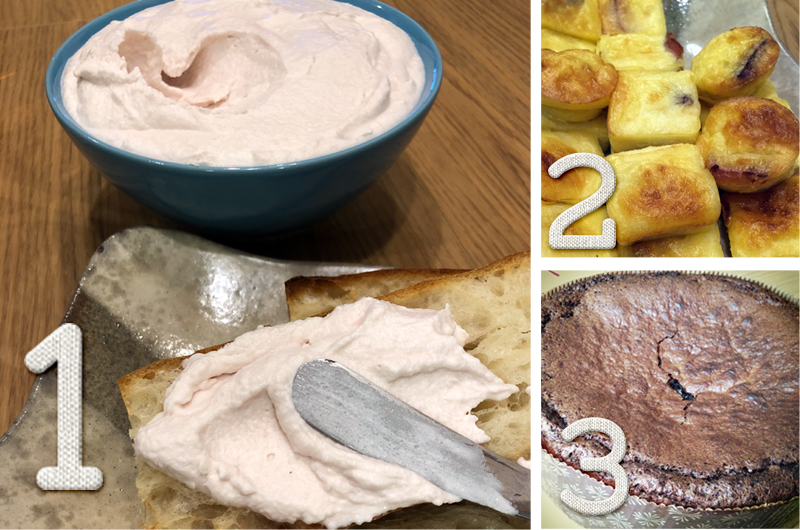
For our Foodie Friday series, though, it’s all about the food! Here is a glimpse of the yummy stuff Meta & I have for you this week…

[ photo credits: (1) Meta Wulandari, (2) Meta Wulandari, and (3) TDP creative team member Amie ]

What’s all of that deliciousness you see pictured above?

  1. Beef Semur (Beef Stew)
  2. Kolak Bola Ubi Ungu dan Pisang (Stewed Purple Sweet Potato Balls and Banana in Coconut Milk)
  3. Chocolate Chip Cookie Dough Buttercream (on dark chocolate cupcakes)

Beef Semur

Meta says… “This is a recipe my family loves to eat and I really enjoy cooking, because it’s super easy to make!”

INGREDIENTS

  • 250 gram minced beef (about half a pound)
  • 1 large potato, cut into big chunks and fried
  • 1 tomato, quartered
  • 1 clove garlic, chopped
  • 1 large onion, chopped
  • 1 spoon unsalted butter
  • 3 bay leaves
  • 300 ml water (1 1/4 cups)
  • 4 tablespoons of sweet ketchup (sweet soy sauce)
  • 1 tablespoon salty ketchup (salt, nutmeg, pepper, sugar & 1 spoon tomato sauce)

INSTRUCTIONS

  • Melt unsalted butter in a pot and add in onion, garlic, pepper, nutmeg and bay leaves.
  • Stir fry until fragrant.
  • Add the beef, and sweet soy sauce to the pot and let them brown a little bit for about 10 minutes. Pour in the water and bring to a boil and lower the heat and slowly simmer for about 1 hour until the meat is tender.
  • Add in the tomatoes after 30 minutes of cooking and add the fried potatoes in 10 minutes before the end of cooking. Gently stir everything to mix.
  • Have a taste and season with salt. It should be slightly sweet from the sweet soy sauce

Kolak Bola Ubi Ungu dan Pisang

Meta explains… “Kolak is an Indonesian common dessert which is made from pisang (banana), ubi (sweet potato), and often labu (jackfruit). It has sweet and creamy flavor from coconut milk. My family loves to eat kolak during Ramadhan (fasting month for mosleem). In this recipe I used Purple sweet potato and banana.”

INGREDIENTS

  • 4 pieces Banana, cut small pieces
  • 200 grams boiled purple sweet potato (1 cup)
  • 50 grams Javanese palm sugar/brown sugar (1/2 cup)
  • 1 can coconut milk, add 2 cups of water
  • 2 pandan leaves (screwpine leaf)
  • 4 tablespoons tapioca flour
  • 2 tablespoons rice flour, mix with 4 tablespoons of water
  • pinch salt
  • 1 Pandan leaf

INSTRUCTIONS

  • Mash boiled purple sweet potato, add salt, tapioca flour and water. Make a small balls
  • Heat the coconut milk in a boiling pan, add palm sugar and stir until the sugar completely dissolved. You can adjust the sweetness according your taste.
  • Keep stirring the coconut milk to prevent from lumpiness. Then add the banana and purple sweet potato balls, bring to boil.
  • Add the pandan leaf and pinch of salt, stir again.
  • Taste the soup to make sure it’s sweet enough for you.
  • Serve it warm or with rice.

Chocolate Chip Cookie Dough Buttercream

Amie says… “This frosting tastes like the real thing, but without the raw eggs! You can use it on any flavor of cake, or even between graham crackers for a yummy treat!”

INGREDIENTS

  • 2 cubes (1 cup) unsalted butter at room temperature
  • 1/2 cup brown sugar packed
  • 2 2/3 cups confectioners (powdered) sugar
  • 1/3 cup all-purpose flour (if worried about raw flour, omit & add additional 1/3 cup of powdered sugar)
  • 1/2 teaspoon salt
  • 2-3 tablespoons heavy cream
  • 2 teaspoons vanilla extract
  • 1/2 cup mini chocolate chips

INSTRUCTIONS

  • Beat the butter with a mixer for at least 5 minutes (it’s what makes the buttercream light & fluffy!)
  • Add the brown sugar & mix until combined.
  • Slowly add in the powdered sugar until smooth
  • Mix in the flour, salt & vanilla
  • Add in the cream 1 tbsp at a time until the desired consistency (smooth & creamy, thick enough to hold it’s shape, but not thin & runny)
  • Frost as you desire on your cooled cupcake (I baked Dark Chocolate Cupcakes, but you can use ANY cake mix or flavor with this frosting!)
  • Sprinkle Mini Chocolate chips on top to decorate & Enjoy!

Oh my… don’t those recipes all look amazing!? I’m totally adding to my shopping list this week — I’ll have to hunt down some of Meta’s ingredients! We hope you’ll give them a try, as well (and please feel free to leave us any questions or comments!). Happy Cooking!

Last but definitely not least — Meta is having a fantastic sale and is offering a special Free-With-Purchase offer! Not only is the entire Calista’s Stuff shop marked down 30% OFF throughout her entire feature week (sale prices will be valid through 11:59pm ET on Thurs 3/8)… but she also has the following Free-With-Purchase offer available in her shop all week long, as well — spend $10+ in the Calista’s Stuff shop at The Digital Press and get her entire Real Life Bundle completely FREE!


Amie

About the Author  Amie is a craft-loving dental hygienist who lives in Washington state. She loves her husband, her two crazy kids, and her English Bulldog… as well as coffee, baking cupcakes, daffodils, glitter & sprinkles, reading a good book, and lip gloss — not necessarily in that order.


Foodie Friday | Laura Passage

Hello, and welcome to another edition of our Foodie Friday series here on The Digital Press Blog! This week we are lucky to be featuring TDP Designer Laura Passage (formerly known and loved by many as the designer behind the Wishing Well Creations brand).

Laura has already been featured twice before, here on The Digital Press blog… so if you would like to learn a little more about her, check out her first feature from July 2016 HERE and her second feature article from July 2017 HERE. You can also learn a lot about her, and her design style, by having a browse around her fun and fabulous store at TDP,

But if you are really here at the blog for the food today — and keen to get to the delicious recipes — we won’t keep you waiting any longer! Here is a quick peek at the deliciousness we have each whipped up in the kitchen for you this week…

[ photo credits: (1) Hello Fresh, (2) A Sweet Pea Chef, and (3) TDP creative team member Corrin ]

What is all of that deliciousness you see pictured above, you ask?

  • Tomato and Zucchini Ragu
  • Faux Banana Chocolate Ice Cream
  • Luscious Lemon Cake

Tomato Zucchini Ragu

Says Laura… “This is one of our family’s favorites… and it’s awesome because it appeals to just about everyone (even the pickiest of eaters, like kids!), and it’s loaded with veggies! The secret to this recipe is the surprise ingredient — soy sauce — which turns a regular ho-hum tomato sauce into the most flavorful, perfect concoction ever. No joke… I don’t know why I never thought of adding soy sauce to something like pasta sauce before, but it’s AH-MAZE-ING.”

INGREDIENTS

  • 1 lb ground turkey or beef
  • 1/2 lb spaghetti (or noodles of choice)
  • 2 small zucchini (each about 8″ long-ish?)
  • 1 medium yellow onion
  • 1 large can (28 oz) diced tomatoes (or crushed, or whatever type you prefer)
  • 1/2 oz fresh thyme (can use 1 Tbsp-ish of dried thyme, if desired — but fresh is better, if you have it!)
  • 3 Tbsp soy sauce
  • 3 cloves garlic
  • 1 tsp chili flakes (red pepper flakes)
  • olive oil
  • parmesan cheese for garnish (optional)

INSTRUCTIONS

  • Wash and dry all fresh produce. Bring a large pot of salted water to a boil.
  • Cut zucchini lengthwise into quarters, and then slice into 1/4 or 1/3-inch pieces.
  • Halve, peel, and small-dice the onion.
  • Strip the fresh thyme leaves off the stems (skip this step if using dried thyme).
  • Peel the garlic and then finely mince… or put the peeled cloves into a garlic press and set aside for use later in recipe.
  • In a large (12+ inch) skillet or high-sided frying pan, cook the ground meat in about 1/2 Tbsp olive oil… breaking it up into smaller pieces while it cooks.
  • When meat is browned but not fully cooked, season with salt and pepper and then add onions and zucchini and cook it (stirring often) for about 5 more minutes, until vegetables begin to soften.
  • Add the soy sauce, the thyme, and the minced garlic (or use garlic press, pressing straight into the pan).
  • Add the pasta to the pot of boiling water and stir occasionally to keep it from sticking to itself. Cook for about 10 minutes (until al dente), and then reserve 1/2 cup of pasta water before draining the pasta in a colander.
  • While the pasta boils, add the can of tomatoes to the pan of meat/vegetables, and then add the chili flakes (to taste! they’re hot… only add as much as you like, with regard to the spiciness). Stir constantly for a minute or so, until everything is coated in the tomatoes.
  • Add the pasta water to the sauce mixture until sauce is the desired thickness.
  • After draining pasta, add it to the sauce and toss to coat pasta completely in the ragu.
  • Serve the pasta topped with parmesan cheese, if desired. Enjoy!
[recipe tweaked and adapted from Hello Fresh by Laura Passage]

Faux Banana Chocolate Ice Cream

Says Laura… “OK, so… usually on Foodie Fridays, we offer up recipes for a main dish, a side dish, and a dessert. But you know what? Our family views that pasta sauce, up above, as a main dish AND a side dish because it’s so chock full of everything — protein, carbs, veggies, all of it! And so… clearly the only option here is to double up on dessert recipes, because it’s what we all want anyway. And this one? This one is so fun, because it’s sorta healthy! It’s free of added sugars, and it’s also dairy-free! And soooooo yummy (and even customizable).”

INGREDIENTS

  • 6 large ripe bananas
  • 4 Tbsp unsweetened cocoa powder
  • OPTIONAL: other variations could include a tablespoon or two of peanut butter (= chocolate peanut butter ice cream!)… or a cup of frozen strawberries (banana split ice cream!)… or you could skip the cocoa powder and instead mix in dark chocolate chips/chunks (= Chunky Monkey ice cream!)… or really, anything else your brain can dream up to go with banana ice cream!

INSTRUCTIONS

  • Cut the bananas into approximately 1/4-inch slices, and throw them onto a parchment paper-lined baking sheet that will also fit into your freezer (IMPORTANT! haha). The slices don’t have to be lined up all neat and tidy or anything… you just want to be able to freeze them and have them remain in basically separate pieces.
  • Freeze the banana slices for a couple of hours… just long enough for them to harden so they’re not sticky when you run them through a food processor / blender.
  • Add the frozen banana slices into a food processor or blender, and process until the mixture has a thick, creamy consistency.
  • Add the cocoa powder and process again until totally blended together.
  • The mixture will be pretty soft at this point… so it’s usually best to re-freeze in an air-tight container for an hour or so, just to make the consistency more ice cream-like, before serving.
  • OPTIONAL: if, however, you were planning on adding another ingredient (see variations, above, at bottom of ingredients list)… add it after you’ve added/blended the cocoa powder, and process once again until well-blended.
[recipe tweaked and adapted from A Sweet Pea Chef by Laura Passage; makes about 6-8 servings ]

Luscious Lemon Cake

Says Corrin… “This is one of my own recipes… and it is something of an antique, having been given to me by my lovely neighbour not long after we moved into our current home. It has been a family favourite ever since!”

INGREDIENTS

  • 4oz/115g soft butter
  • 6oz/170g caster sugar (superfine sugar)
  • 6oz/170g SR flour (sifted)
  • 4 Tbsp/60ml milk
  • 2 large eggs
  • the grated rind of 1 lemon

FOR THE SYRUP

  • 3 rounded Tbsp icing sugar (powdered/confectioner’s sugar)
  • 3 Tbsp/45ml of lemon juice

INSTRUCTIONS

  • Grease and line a 2lb loaf tin, or a 7″ round tin.
  • Warm the oven to 350F (180C/gas mark 4).
  • Cream the buttter and sugar together in a bowl.
  • Add the eggs, grated lemon rind sifted flour and milk, and mix well to a soft dropping consistency.
  • Place into your baking tin smooth the top.
  • Bake for 40-45 min (until firm).
  • While the cake bakes, mix the sifted icing sugar with the lemon juice to make the syrup.
  • Pour the syrup over the cake as soon as it comes out of the oven.
  • Leave in the tin until completely cooled… and then, enjoy!

Doesn’t that all look so yummy?! I hope you have a chance to try out some of these dishes soon (you won’t be disappointed)! If you have any questions don’t hesitate to ask in the comments, below… and if you try something and love it, we’d love to hear about that too! 🙂

Meanwhile, it wouldn’t be a designer feature week without a fantastic sale and a special Free-With-Purchase offer! Not only is Laura’s entire shop marked down 30% OFF throughout her entire feature week (sale prices will be valid through 11:59pm ET on Thurs 3/1)… but she also has the following Free-With-Purchase offer available in her shop all week long, as well — spend $10+ in the Laura Passage shop at The Digital Press and get her Flip Flop Season | Kit completely FREE!


CorrinAbout the Author  Corrin is a member of the creative team here at The Digital Press. She is a fan of the Big Bang Theory and a lover of cozy pajamas. She lives in the breezy South of England with her husband and 4 crazy kids, who regularly discover & plunder her secret chocolate stashes! She is still trying to get the house straight after moving nearly 4 years ago. Who knows… maybe this will be the year she reaches the bottom of the laundry pile!

Foodie Friday | ninigoesdigi

nini2

Hello everyone, and welcome to another edition of our always-popular Foodie Friday series here on The Digital Press blog! This week, we are excited to be featuring Nini of ninigoesdigi. Nini joined The Digital Press as a permanent designer this past year, and therefore this is her first feature on the blog. We are so excited to have her sharing her recipes with us, as she loves to cook and has whipped up some really unique things in her kitchen this week!

Nini

What are those yummy things you see, above?

  1. Ham Mousse
  2. Quiche (without pastry)
  3. Gateau au Chocolat

Ham Mousse

INGREDIENTS

  • 250 g of white ham
  • 400 ml (2 cups) of fresh cream (divided in 250 ml + 150 ml to be used separately)
  • 6 g of gelatin (soak it in a little bit of cold water – this time I tried with only about 2 g to see if it was less hard and I prefer that texture. You will need to test and see what you prefer)
  • salt and pepper to your taste (depending on the saltiness of the ham too)

INSTRUCTIONS

  • Cut  away the hard bits (hard gristle) the white ham might have. I take out the white soft greasy parts too. I only keep the pink meat of my ham 😉
  • Put 250ml of liquid fresh cream in a saucepan with the ham cut into small pieces on medium heat. Don’t let it boil. Take off the heat once it starts make bubbles.
  • Place that mixture in your blender, or like me, mix with a hand mixer until smooth. Add the gelatin. I am not patient so when the recipe said “blend 10 minutes until smooth” I totally didn’t follow through lol. Just blend as desired until you think it is smooth enough for you. Scrape the mix from the sides too so that everything gets well blended.
  • Cool the mixture by placing your bowl or saucepan on an icy bain-marie (water bath). Slowly mix with a spatula to cool it down evenly.
  • Whip the rest of the fresh cream so it gets to be the same consistency of the ham mixture (about 80% of normal whipped cream).
  • Add the cream and ham mixture to the cooled mixture in the bain marie and mix gently together. If it is not seasoned enough for you, you can add salt and pepper to your taste.
  • Pour into a bowl and refrigerate for at least 20 minutes before serving.

Special note: this amount makes quite a bowl of ham mousse so maybe you could try half of it first, if you are concerned it will be too much.
I love to spread it on a slightly toasted baguette pieces, or fresh baguette. One suggestion: if you have a French baguette that is 1 day or 2 days old, spray a bit of water on your slice before you toast it. It will help bring back the good crunchy outside/soft inside taste, like a fresh baguette.


Quiche (without pastry)

INGREDIENTS

  • 200 g of diced bacon
  • 3 eggs
  • 500 ml of milk
  • 100 g of flour
  • 140 g of grated Gruyère / but for the one on the picture I used grated Parmesan
  • salt (to your taste but depends also on the bacon) + pepper

INSTRUCTIONS

  • Brown the bacon bits in a pan.
  • Spread them in a cake pan/mold (about 24cm, and buttered).
  • In a pitcher/bowl, mix the flour, the eggs one by one, the milk, 140 g of grated cheese, or Parmesan like I did. Pour the mix on top of the bacon.
  • Bake for about 40 minutes at 180°C or 200°C (350°F/390°F) depending on your oven you might need more or less time. Take a look sometimes to see if it’s not too burnt! lol

Special note: I usually make this when I have guests, for a party and I use silicon mold with many divisions. That’s why in my picture I have serving sized  bits of quiche (some round, some square). Perfect for an appetizer, no? Since there is no pastry/pie at the bottom you can make as many shapes as you like. But don’t forget to adjust the cooking time if they are smaller than a whole pie. I loved using the Parmesan instead of some other grated cheese. The cheese taste was delightfully  stronger.


Gâteau au Chocolat

INGREDIENTS

  • 200 g of black chocolate (70%)
  • 125 g of butter
  • 100 g of flour
  • 8 to 10g of baking powder (I usually put 10g)
  • 4 eggs (separate yolks and whites)
  • 200 g of sugar
  • 1 pinch of salt

INSTRUCTIONS (20 mins preparation time)

  • In a saucepan melt the chocolate with the butter. Remove from the heat and pour in the flour and the baking powder. Mix well.
  • Pre-heat your oven to 180°C (350°F)
  • In a bowl beat the yolks with the sugar until they whiten. Mix with the chocolate.
  • Beat the whites with a pinch of salt. Add them to the chocolate, mix slowly so that the meringue doesn’t break too much.
  • Pour the mix in a mold that has been buttered and floured.
  • Put in the oven for 30 minutes. Check around the end of the cooking time by sticking the cake with a knife to see if it comes out dry. I actually don’t mind it to be a little humid as it means the outside is cooked but the middle is still a little moist. Yum! Be careful that the top of the cake doesn’t burn too much. If you think it’s too cooked but need to add a few more minutes because the inside is not yet cooked, add a layer of foil on top.
  • Let it cool before you turn it out.

Special note: This is my all-time favorite. I use French cooking chocolate that I bring back from France or that my mum kindly sends me to Japan. It is a 70% cacao chocolate bar. I tried with the cooking chocolate selling in common Japanese supermarkets but it got super greasy… I don’t know why. Maybe there was too much fat in that chocolate? But I won’t make that mistake twice.


These recipes all sound fabulous, and definitely easy enough to pull off! Please share in the comments if you try the recipes, and let us know what you think of them!

Meanwhile, as is always the case with our designer feature weeks — they come with a fantastic week-long sale and a special Free-With-Purchase offer. You’ll be excited to know that the entire ninigoesdigi shop at The Digital Press will be marked down 30% throughout her feature week (sale prices will be valid through 11:59pm ET on Thursday 2/15)… and if that weren’t good enough news, she will also have the following Free-With-Purchase offer available in her shop all week long as well — spend $10 in the ninigoesdigi shop at The Digital Press and get the following brand-new FULL KIT completely FREE!


small avi

About the author Stefanie is a member of The Digital Press creative team and a stay at home mother of three older children living in Cape Town, South Africa with her hubby of 29 years, two of their three children and 4 Siamese cats. She loves photography, traveling and digital scrapbooking, documenting the good and the ordinary everyday.

Foodie Friday | Julia Makotinsky

Hi everyone! It’s Friday, and as always that means it’s time for another edition of our Foodie Friday series here on The Digital Press blog! This week, we’re featuring Julia Makotinsky who recently jointed The Digital Press as a permanent design team member. Therefore, as this is Julia’s first blog feature here at TDP, I have asked her to give a brief introduction.

Julia was born in Moscow, Russia… but now resides in New York in the USA, where she has lived for a little over 25 years. She graduated as an illustrator from the Fashion Institute of Technology in New York, and then later began designing digital scrapbook kits in 2008. She says, “learning as a designer is a never-ending process. But designing is my passion — and not only digitally. My style is mostly hand-painted/sketched and illustrative, and I do love to sketch. I am a night owl and quiet evenings are the time when most of my creativity begins. I love to drink black tea with lemon or fresh mint. I also love to ski, I love living right by the ocean, I love riding my bicycle in summer, and I love reading books and flipping actual paper pages (rather than kindle). “

If you have not checked out Julia’s store here at The Digital Press yet, you are in for a wonderful surprise! Her extraordinary and unique art features prominently in her designs, which are also highly colorful.

Julia also loves to cook… and says, “we Russians are big on cooking — especially during holidays — and most of our food is very colorful, both in taste and calories! 🙂 I prefer more healthy choices, lately, however.”

Here’s a look at two of Julia’s favorite recipes, and one of mine…

What are those amazing, delicious-looking items you see up above?

  1. Herb Crusted Salmon with Arugula Salad
  2. Oven Baked Chicken
  3. No-Bake Date Slice

Herb Crusted Salmon with Arugula Salad

INGREDIENTS

  • 2 salmon fillets (6oz each)
  • 1 heaping tablespoon coconut flour
  • 2 tablespoons fresh parsley (or dried, if you have on hand)
  • 1 tablespoon olive oil
  • 1 tablespoon dijon mustard
  • salt and pepper, to taste

FOR THE SALAD

  • 2 cups arugula
  • 1/4 red onion, sliced thin
  • juice of 1 lemon
  • 1 tablespoon white wine vinegar
  • 1 tablespoon olive oil
  • salt and pepper, to taste

INSTRUCTIONS

  • Preheat oven to 450 degrees.
  • Place salmon fillets on a parchment or foil lined baking sheet.
  • Top your salmon off with olive oil and Dijon mustard and rub into your salmon.
  • In a small bowl, mix together your coconut flour, parsley, and salt and pepper.
  • Use a spoon to sprinkle on your toppings on your salmon and then your hand to pat into your salmon.
  • Place in oven for 10-15 minutes or until salmon is cooked to your preference.
  • While the salmon is cooking, mix together your salad ingredients.
  • When salmon is done, place salmon on top of salad and consume.

Oven Baked Chicken

In Julia’s words “This is my girlfriend’s recipe… and all of our friends absolutely love it, I’ve cooked it myself at my house many times, but I still prefer hers. It’s the easiest recipe ever and the best part there is no measuring involved!”

INGREDIENTS

  • Chicken thighs or entire legs (thigh and drumstick) fatty part cooks best so chicken breasts won’t work
  • salt and pepper
  • minced garlic from the jar

INSTRUCTIONS

  • Preheat oven to 400 degrees.
  • Place chicken into oven pan, sprinkle each piece with salt and pepper working it into chicken, use your hands to smear it on all sides.
  • Do the same with minced garlic even going under the skin.
  • Cover the entire pan with aluminum foil on top and place in the oven for an hour.
  • After an hour remove the foil and using  a spoon baste each piece of chicken with the juice that came out of the pieces. Place them back into the oven uncovered for another hour, basting occasionally as required.
 “That’s it! It takes 2 hours to cook all together but it’s sooooo delicious and juicy inside and crisp outside, and can be served with any side dish of your choice such as mashed potatoes, salad, pasta etc.”

No-Bake Date Wafers

“This was my own favorite biscuit recipe growing up as a child. My mum used to prepare it whenever she needed something quick to take out. Now we only prepare this at Christmas, due to the sugar content… but I still love it.” ~Carolyn

INGREDIENTS

  • 4 cups puffed rice or Rice Bubbles
  • 3/4 cup sugar
  • 2 oz margarine
  • 1 large lemon (juice and rind)
  • 1/2 pound chopped dried dates
  • 1/2 teaspoon vanilla extract
  • 4 Tablespoons unsweetened desiccated coconut.

INSTRUCTIONS

  • Line biscuit tin (rectangle app 12″ x 7″) with paper then sprinkle half of coconut over base.
  • Cook dates on stove top (medium heat) until soft with sugar, butter and lemon rind. (This will take app 15 minutes)
  • Remove from stove and add all remaining ingredients (except coconut).
  • Spread mixture over coconut in lined tin then sprinkle remaining coconut over firmed down biscuit.
  • Cool in fridge before cutting into squares.

I hope that you have enjoyed these new recipes from Julia and myself. Let us know if you decide to try one of them, or if you have any questions!

Meanwhile, it wouldn’t be a designer feature week without a fantastic sale and a special Free-With-Purchase offer! Not only is Julia’s entire shop marked down 30% OFF throughout her entire feature week (sale prices will be valid through 11:59pm ET on Thurs 2/15)… but she also has the following Free-With-Purchase offer available in her shop all week long, as well — spend $10+ in Julia Makotinsky’s shop at The Digital Press and get the following item completely FREE!


AvatarAbout the author  Carolyn lives with her partner and 2 rescue dogs on 5 acres of paradise in the hinterland of the Sunshine Coast, Australia. Her camera, along with an assortment of lenses, is never out of sight. When not taking photos, she loves cooking and gardening and, of course, scrapbooking.

Foodie Friday | Jimbo Jambo Designs

Hi everyone! It’s Friday, and as always that means it’s time for another edition of our Foodie Friday series here on The Digital Press blog! This week, we’re featuring Aga of Jimbo Jambo Designs. This amazing designer has already been featured twice (if you want to learn even more about her, you can find her first feature article from October 2016 HERE, and her second feature article from May 2017 HERE).

In addition to creating super fun and inspiring templates, she has many other talents as well… including cooking! Let’s discover the three fabulous recipes she will be sharing with us today…

What are those yummy things you see, above?

  1. Chicken in Garlic and Orange Juice
  2. Gazpacho Andaluz
  3. Strawberry Crumble Cake

Chicken in Garlic and Orange Juice

INGREDIENTS

  • 4-6 pieces of chicken
  • 1/4 teaspoon salt
  • 1/3 teaspoon pepper
  • 1/2 cup orange juice
  • 1 teaspoon honey
  • 1 teaspoon ground ginger
  • 1/2 teaspoon curcuma
  • 2  clove of garlic
  • a bit of rosemary and cayenne (pepper) if you like spicy food.

INSTRUCTIONS

  • Season chicken with oregano, salt and pepper, to taste; set aside.
  • Melt butter in a large oven-proof skillet over medium high heat. Add chicken, sear both sides until golden brown, about 2-3 minutes per side; set aside.
  • Mix all ingredients and heat up without boiling and leave to cool.
  • Add chicken and toss to coat. Cover and marinate at least 3 hours up to overnight in the refrigerator.
  • Place into oven and roast until completely cooked through, reaching an internal temperature of 180 degrees C, about 25-30 minutes.

Gazpacho Andaluz

INGREDIENTS

  • 1 kilo of ripe tomatoes (with an accentuated red color)
  • 1 green pepper Italian type (about 60 grams)
  • 1 piece of cucumber (about four fingers wide)
  • 1 piece of onion (about 100 grams)
  • 1 clove garlic
  • 3 tablespoons olive oil
  • 3 tablespoons of white wine vinegar
  • 1 small spoonful of salt
  • Optional: 1/2 green apple (for example a Golden) and cold water

INSTRUCTIONS

  • Wash tomatoes, apple, cucumber and pepper well. Let it drain. If you want you can remove the tomatoes’ skin.
  • Remove the corner and seeds from the pepper, cut it into four or five pieces and put it with the tomatoes.
  • Peel the clove of garlic and put it with the rest of the vegetables.
  • Take the piece of onion (peeled) and cut it into three or four pieces. Add to the blender jar.
  • Take a piece of cucumber about four fingers long and peel it. Cut it into four or five pieces and to the blender.
  • Now that all the vegetables of the gazpacho are in the glass of the blender we will turn it on (well covered) and we will leave it working until there is no piece of vegetable left (the time will depend on the power of the blender).
  • Now add the salt, the oil, and the vinegar. I advise you to start with three tablespoons of vinegar and to rectify (adding more) to your liking. Give the blender five seconds and try. Rectifies of salt and vinegar to taste.
  • makes 4 glasses (1 liter)

Strawberry Crumble Cake

INGREDIENTS FOR CRUST

  • 200 g of wheat flour or spelled or oat flour
  • 50 g of rice or potato flour
  • 1 teaspoon of baking powder
  • 150 g butter (cold)
  • 50 g sugar
  • 1 egg

INGREDIENTS FOR CRUMBLE

  • 150 g of wheat flour
  • 50 g of rice or potato flour
  • 50 g sugar
  • 125 g butter (cold)

INGREDIENTS FOR FILLING

  • 800 g strawberries
  • 3 tablespoons of potato flour
  • powdered sugar

INSTRUCTIONS

  • Put baking paper in a form of a size 24 x 34 cm.
  • Put into the bowl both flours, add baking powder, sugar, cut into pieces butter and an egg. Rub your fingers with the rest of the ingredients into a small crumble, then quickly knead the dough by combining the ingredients into a homogeneous sphere. Place the bottom and a piece of the side of the mold with the dough. Punch the bottom with a fork and put in the fridge. Heat the oven to 180 degrees C.
  • Place the baking tray with the dough in the oven and bake for 15 minutes for a pale golden color. Take out the dough, but do not turn off the oven.
  • Crumble: pour the flour into the bowl, add the sugar and cut into pieces cold butter. Rub the butter with the rest of the ingredients with your fingers until you have a crumble (small pastry crumbs).
  • Strawberries: cut into smaller pieces (eg into quarters), put in a bowl, mix with potato flour.
  • Put the strawberries on top, put the crumble on top and put in the oven. Bake for approx. 35 – 40 minutes for a golden color. After baking sprinkle with powdered sugar.

All of those recipes look amazing, right? Aga is a world traveler, and it definitely shows in the foods she prepares! I love them! Unfortunately, I won’t be able to try the gazpacho because I’m allergic to raw tomatoes… but I hope you’ll tell me in the comments if it’s as tasty and delicious as it sounds!

And of course, it wouldn’t be a designer feature week without a fantastic sale and a special Free-With-Purchase offer! Not only is Aga’s entire shop marked down 30% OFF throughout her entire feature week (sale prices will be valid through 11:59pm ET on Thurs 2/8)… but she also has the following Free-With-Purchase offer available in her shop all week long, as well — spend $10+ in the Jimbo Jambo’s shop at The Digital Press and get the following item completely FREE!


ChloéAbout the author  Chloé is in charge of PR and communication for her small town by day, is a digiscrapper “by night,” and a photographer whenever the light is beautiful. She lives with her man and fur-babies in a small town of Alsace (in the northeast of France), where she loves to read, watch good TV shows (TWD being her absolute favorite), and just hang out with her friends — no matter if they are close by, online, or away in her Swiss hometown. She recently became quite obsessed with Bullet Journaling, FLyLady and Zero Waste.

Foodie Friday | Rachel Hodge

Hello! Welcome to The Digital Press blog today for another fun edition of our always-popular Foodie Friday series!

I’m Robin, and this week we are featuring TDP Designer Rachel Hodge, and peeking into her kitchen to learn a few of her favorite recipes. This is actually Rachel’s third feature on The Digital Press blog (if you want to learn even more about her, you can find her first feature article from April 2016 HERE, and her second feature article from March 2017 HERE).

Rachel has some amazing recipes to share with us this week. Take a peek…

So, what are these delicious things you see pictured above?

  • Scalloped Potatoes
  • Afghan Cookies
  • Spiced Treacle Gingerbread

Scalloped Potatoes

About this recipe, Rachel says, “I love me a good scalloped potatoes recipe! This one is super easy and super tasty… and it’s a family favorite in my house.”

INGREDIENTS

  • 4 large potatoes, thinly sliced
  • 1 onion, sliced finely
  • 1 cup grated cheddar (for those who are also in Australia, I use the dairylea block)
  • 1-1/2 cups cream
  • 2 teaspoons chicken stock

INSTRUCTIONS

  • Preheat oven to 180 C (350 F)
  • Arrange a layer of potato slices in a baking dish and then top with a layer of the sliced onions.
  • Set aside half the grated cheese (this will be for the top layer) and then sprinkle some of the remaining cheese over the onion.
  • Continue this layering until all the potato and onion is used.
  • In a separate bowl gently mix the cream and chicken stock together then pour over potato and sprinkle with the rest of the grated cheese.
  • Cover and bake for 40 minutes, or until potato is tender.

Afghan Cookies

When I asked Rachel about this recipe, she replied, “Oh my gosh, these are the best! This is a favorite I love to have with a coffee or cup of tea. This is sweet, crunchy, and chocolatey… what’s not to love?”

INGREDIENTS

  • 220g butter (at room temperature)
  • 90g caster sugar
  • 185g plain flour
  • 30g cocoa
  • 60g crushed cornflakes

FOR THE ICING

  • 2 cups icing sugar
  • 1 heaped tablespoon cocoa (approx. may need a bit more or less, depending on how rich you like the icing)
  • 1 tablespoon melted butter
  • Water
  • Flaked almonds

INSTRUCTIONS

  • Grease an flat oven tray and preheat oven to 180 C (356 F)
  • Beat butter and sugar till pale and fluffy.
  • Add the flour, cocoa and cornflakes and mix together.
  • Scoop a small amount (around a tablespoon’s worth) onto tray, repeat till mixture is gone and then bake for around 15 minutes.
  • Remove from oven and cool
  • ICING: While cookies are cooling, make the icing. Mix the icing sugar and the cocoa together, add the butter and enough water to make a thick paste consistency.
  • Ice with the chocolate icing and place flaked almonds on top.

Spiced Treacle Gingerbread

While describing these cookies, Rachel wrote, “This is my favorite gingerbread recipe because it’s not a hard recipe (like a lot of them can be), and the flavor is spot on — especially with some chocolate M&M’s added on.

INGREDIENTS

  • 140g unsalted butter
  • 1/2 cup dark brown sugar
  • 1/4 treacle
  • 1 egg
  • 2 cups plain flour
  • 1/4 cup self raising flour
  • 3 tsp ground ginger
  • 2 tsp ground cinnamon
  • 3/4 tsp ground cloves
  • 3/4 tsp ground nutmeg
  • 1 tsp bicarbonate soda

FOR THE ICING

  • 1 egg white
  • 1/3 tsp lemon juice
  • 1 cup icing sugar
  • Food coloring

INSTRUCTIONS

  • Lightly grease two baking sheets. Beat the butter and sugar with electric beaters until light and creamy, then beat in the treacle and egg. Fold in the flours, spices and baking soda. Turn out onto a lightly floured surface, knead for 2-3 minutes. Cover with plastic wrap and chill for 10 minutes.
  • Divide dough in half and roll out first half in between two sheets of baking paper to about 4mm thick. Repeat with 2nd half, and lay each on a tray to chill for 15 minutes. Preheat oven to 340 F.
  • Use cookie cutters to cut out desired shapes, place on trays and bake for 10 minutes. Remove from oven and let cool before icing.
  • ICING: Whisk egg white till foamy. Add the lemon juice and sugar and beat till glossy. Add desired food coloring, then place in piping bag (or a small plastic bag with the tip cut off in one corner), and ice away…

Don’t all of these goodies look delicious?! After simply seeing these pictures, my youngest son has asked to make them this weekend. I’m sure he will love these as much as Rachel does!

Meanwhile, it wouldn’t be a designer feature week without a fantastic sale and a special Free-with-Purchase offer… so you’ll be excited to see what Rachel has in store for you! Not only is her entire shop marked down 30% OFF throughout her entire feature week (sale prices will be valid through 11:59pm ET on Thurs 2/1)… but she also has the following awesome deal available in her shop all week long, as well! Spend $10+ in Rachel Hodge’s shop at The Digital Press and get the following bundled collection completely FREE…


Robin

About the author  Robin is a member of the creative team here at The Digital Press. A wife of 25 years and a mom of 4 crazy children (3 in college and 1 still at home), she says that her life occurs mostly in the car as she transports said crazy kids to their many, many homeschool activities. When not driving, Robin loves to make her family cringe by pulling out her camera again (and again, and again…).