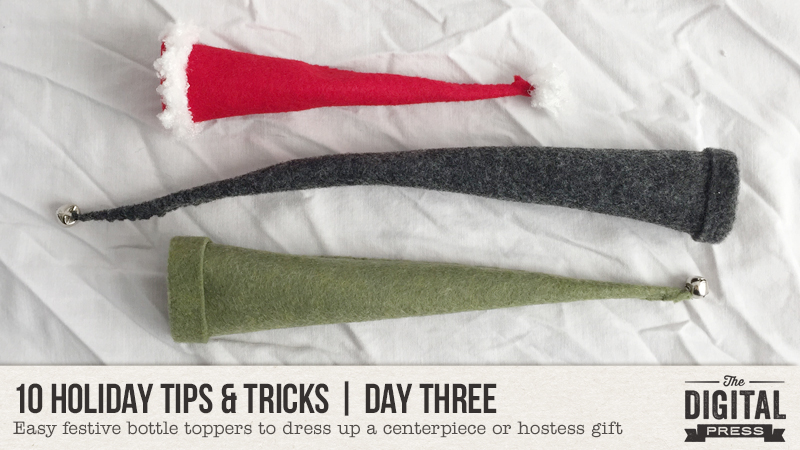
Welcome to Day Three of the 2017 edition of our always-popular 10 Holiday Tips & Tricks series here on The Digital Press blog!
I’m here today to show you how you can make the cutest (and easiest!) bottle toppers to use for hostess gifts, festive home decor, and more!
In December, my family and I often find ourselves going to all sorts of holiday gatherings for which we bring along a hostess gift. We usually bring a bottle of wine or a lidded jar filled with shiny wrapped candy, but I like to go a step further and dress up the container a bit. If it’s a seriously last-minute event, this means I end up crocheting a little scarf and maybe a hat for the container while my husband drives us to the event, but if I have a little more time to prepare, I like to make one of these cute festive bottle toppers…
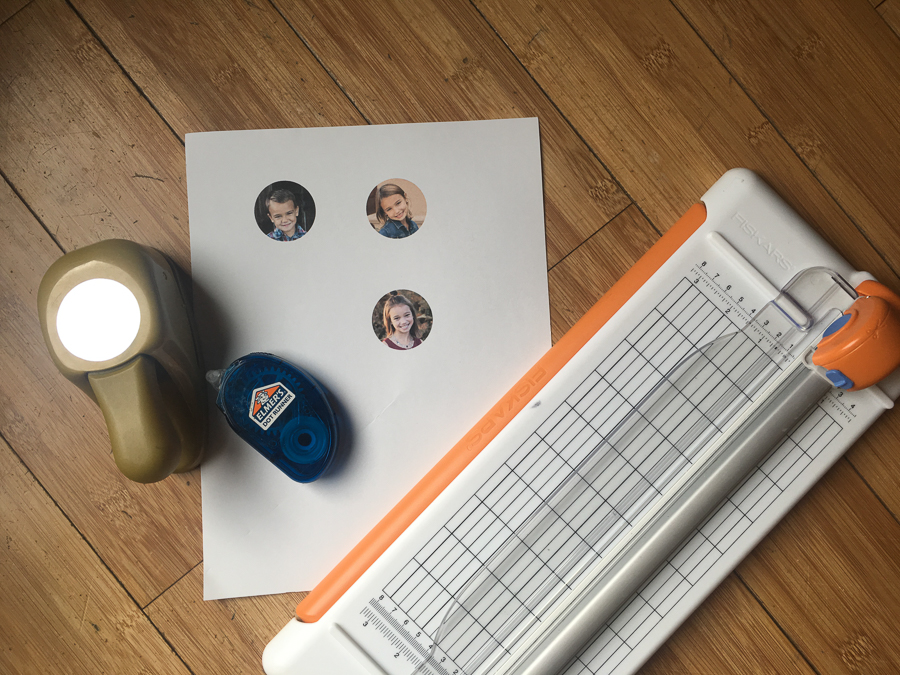
Step 1
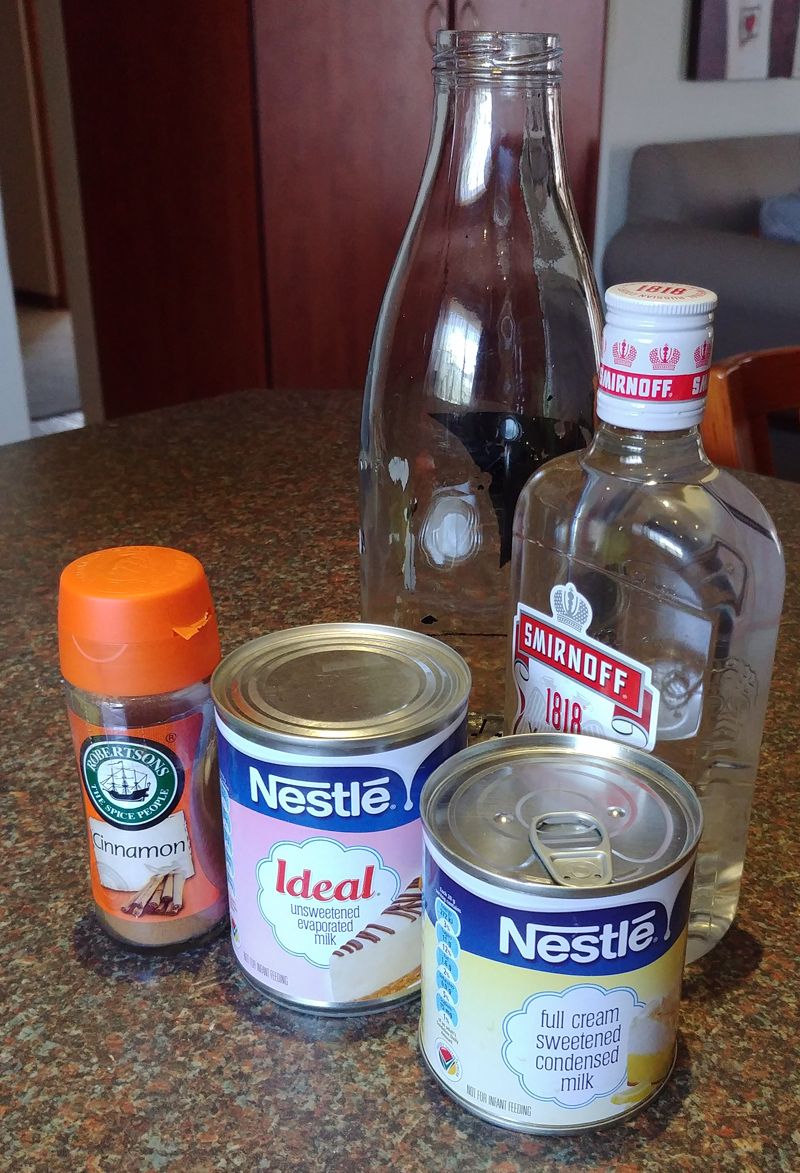
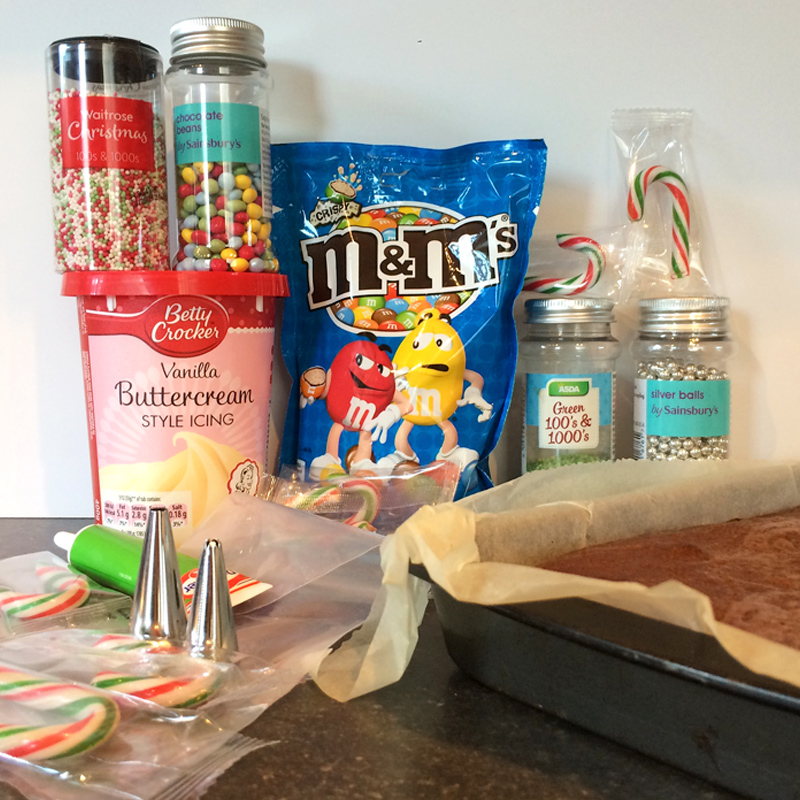
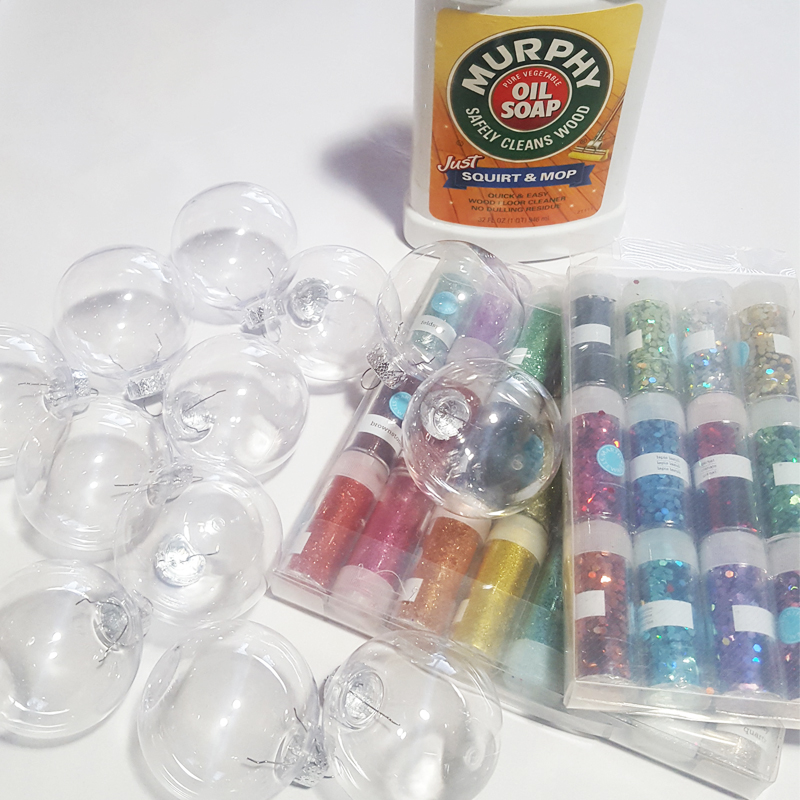
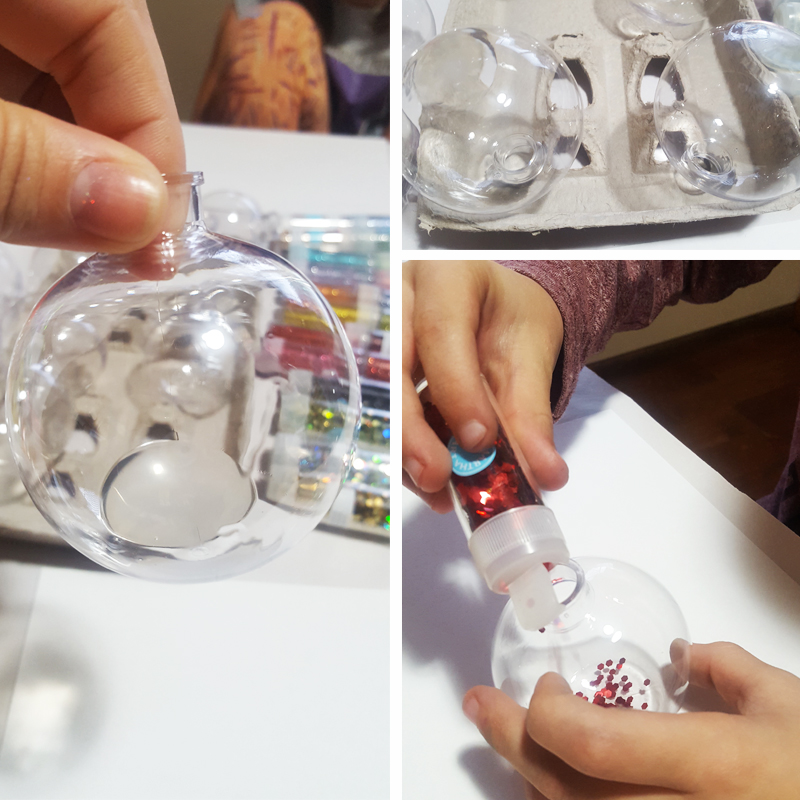
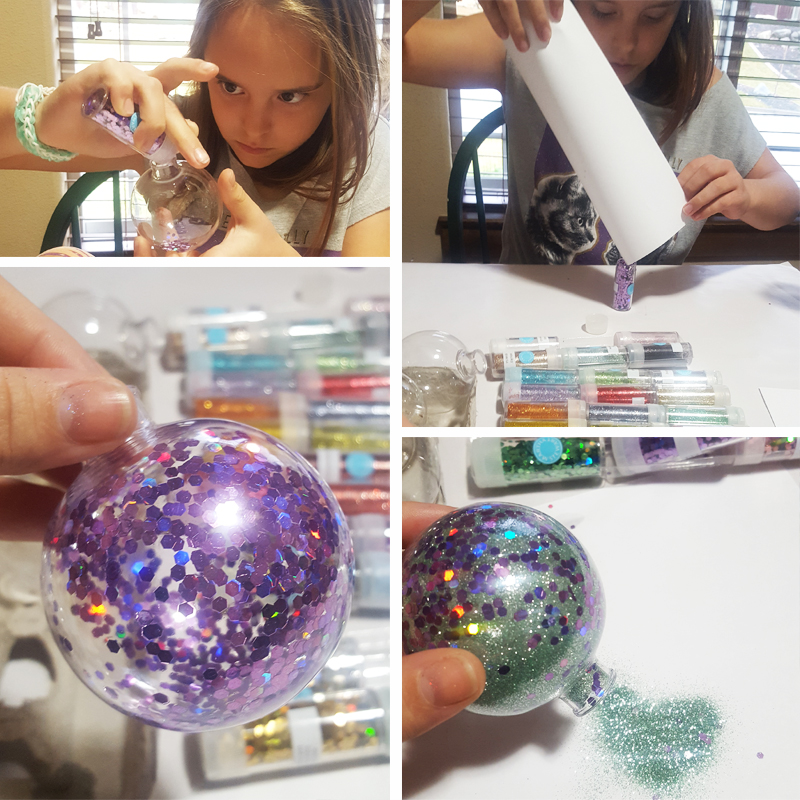
Gather your materials, as shown here…
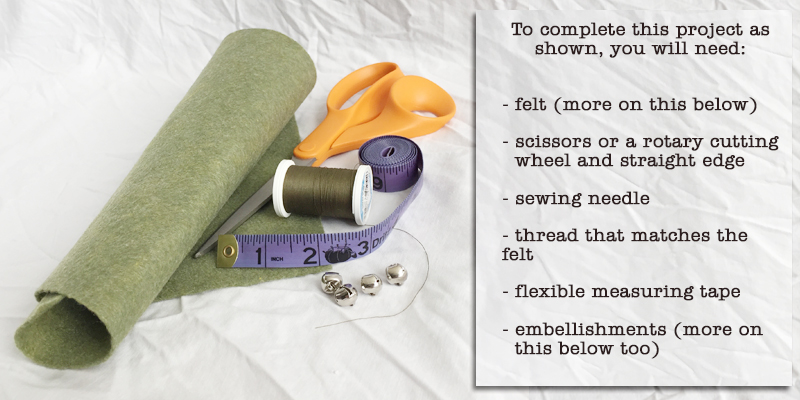
About the felt — for this project, one of those sheets of felt from the craft store works fine, but so do leftover scraps (thus whittling down any accumulated fabric, which is always a bonus in my book!). The most important component here is ensuring that the piece of felt you choose is sufficiently wide to go around the container, and tall enough to get sufficient height on the finished topper (I like mind tall; the end product shown up above is is about 8 1/2″).
Step 2
With the flexible measuring tape, measure the circumference of the container for which you’re making the topper. Add 1/2″. For a standard 750-ml wine bottle, this measurement should be 4 1/2″; for a regular Mason jar with a canning lid, it’s 9 1/2″.
Step 3
Because I like these toppers to be rather tall, I usually just use the full height (the shorter of the sides of a craft store felt sheet) of whatever piece of felt I’m using. On one of those craft-store felt sheets, that’s about 9 1/4″. Lay out the felt, and along the bottom edge, measure and mark that circumference. I usually just make a tiny snip with the scissors to make the mark.
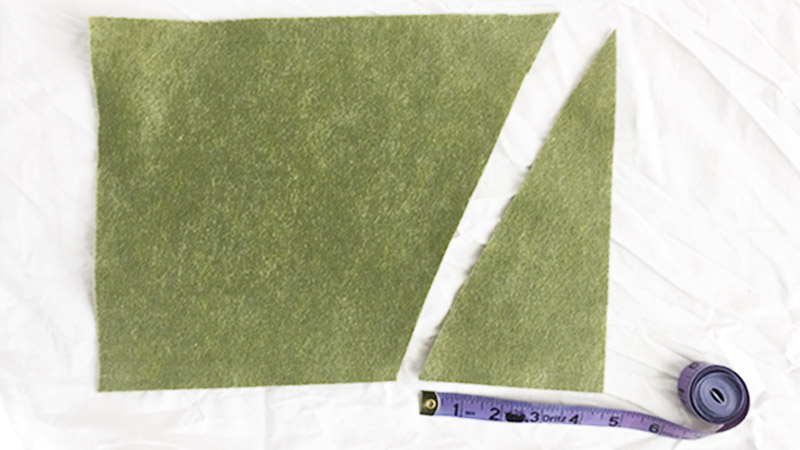
Step 4
If you’re satisfied with your straight-line cutting skills, cut a straight line from that tiny snip to the upper corner for a “full height” topper. If you’re not confident that your scissors will obey, then line up a straight edge between those two points and cut with a rotary cutting wheel, or draw a line with a fabric pen and cut with the scissors. If you don’t have a fabric pen, make sure you draw on the back side of the material, and then flip it over before starting the next step so the marker line stays hidden in the final product. Your end result after cutting should look like a tall right triangle. If you want a shorter hat, just aim for a point further down the long straight edge (remember, though, that you’ll be trimming about an inch off that long edge in Step 5, below).
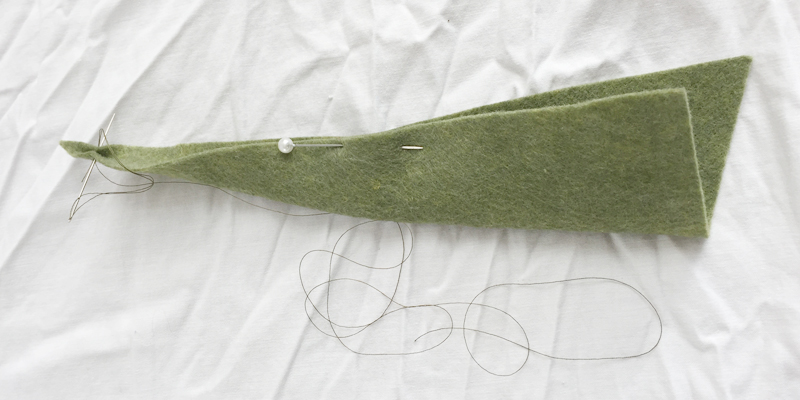
Step 5
Thread your needle with a piece of thread 2.5 to 3 times as long as the hypotenuse (diagonal line) of that triangle. Fold the hypotenuse over to the long edge, and pin it closed if desired. The bottom edge will not line up correctly. This is okay. Don’t cut anything, as we’ll clean that up in the next step. Starting at the top (this is key!), but about 1/4 to 1/2″ down, whip stitch the two edges together, keeping the stitch depth about 1/8″ and the spacing about 1/8″. Stitch all the way to the short end of the felt, and knot off your stitch so it doesn’t unravel.
Step 6
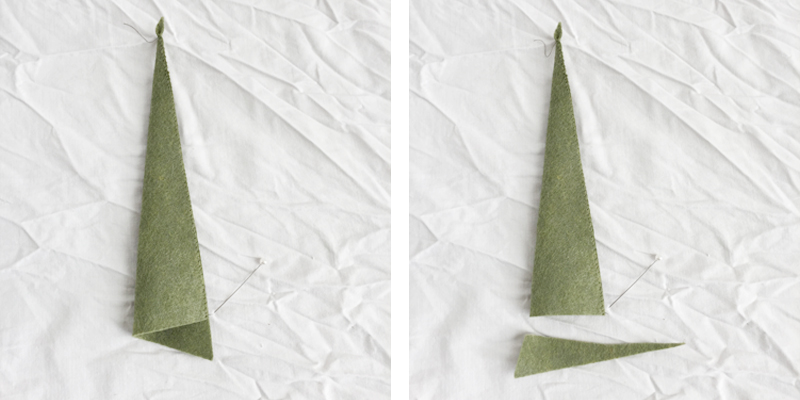
I usually do a quick fit-check at this point, just to be safe. The topper should be loose enough to fit over the top of the bottle, but not so snug that you really have to shove and tug to get it on (these aren’t skinny jeans!). Once that’s done, I even off that bottom edge by eyeballing a straight line and cutting it off with scissors. Be sure not to inadvertently snip off that nice knot you just made, though. You can also snip off that top edge too (be sure not to cut off the knot on this end, either, though). Fit-check again; if the topper seems a bit loose, simply fold up the bottom edge (this also reduces the gnome-y look slightly).
Step 7
To embellish or not to embellish… that is the question. 😉
Sometimes I like the rustic elf look, and I just stop here. More often than not, however, I add a bell or a button to the end of the topper, and/or a strip of ribbon or felt as a hat band.
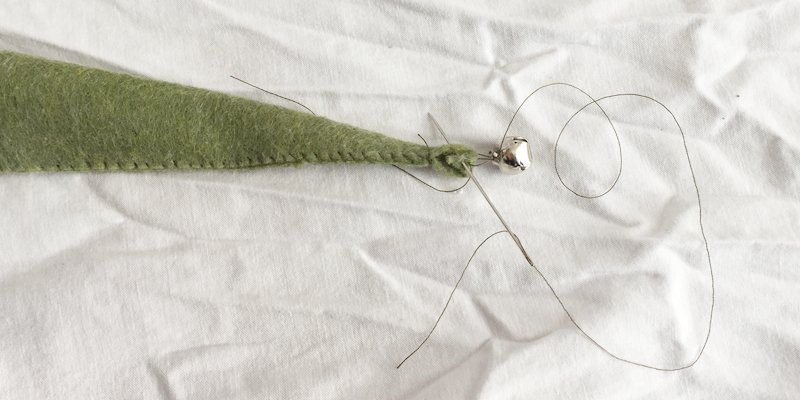
If adding a band, add an extra 1/2″ so you can fold over the outer edge for a cleaner finish. If adding a hat band, make sure that the final result isn’t narrower than the base of the hat. A too-tight band will warp the hat and it won’t sit nicely on the bottle or jar. Hot glue is probably the easiest way to get ribbon or a hat band on, but it’s more susceptible to breaking with rough handling than a handful of small, independent stitches. If using fabric glue, don’t forget about the necessary drying time so that you don’t end up getting sticky fingers in the car on the way to the party.
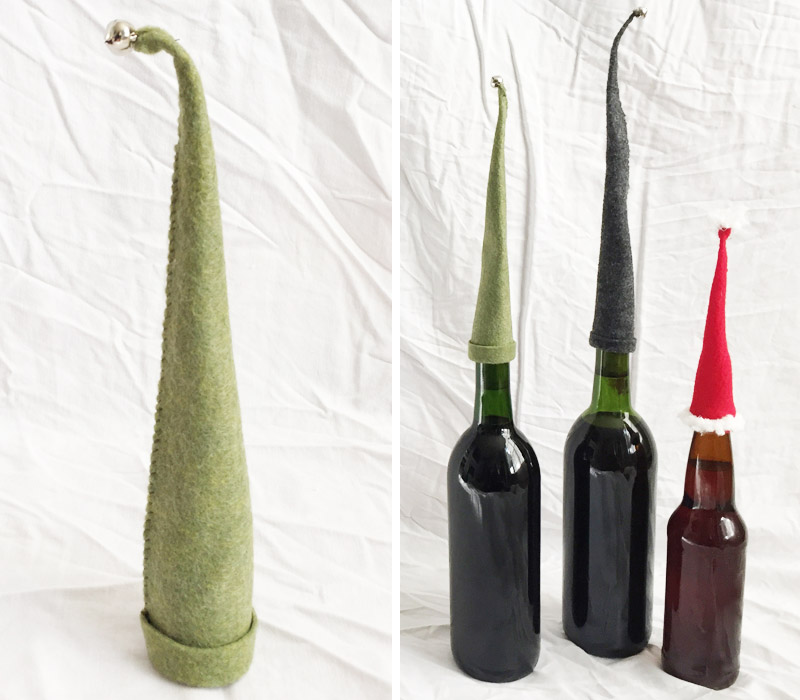
You probably noticed in the first image of this post that there’s a special red “Santa” hat topper. To get the Santa hat effect, I use Baby Bee Lambie Pie yard in “angel”. I cut a length about 12 to 16″ long (fingertips to elbow) and wad it up, making sure the ends are tucked in. Then I wrap white thread around the bundle a few times, and stitch that into the pointy end of the topper.
*TIP* If your felt isn’t really stiff or thick, I recommend folding the pointy tip down about 1/2″ and tucking it into the cone, then sewing on the yarn ball. To get the fluffy hat band, I loosely wrap the Lambie Pie yarn four or five (or more if you want it to look fuller) times around the base, 1/4″ to 1/8″ up from the bottom edge. I secure the ends and all the loops with white thread in four separate places, each about 90 degrees apart on the circle.
And that’s all there is to it — easy-peasy festive bottle toppers! Can you image how cute it would be to show up with a six pack of fancy soda bottles all wearing cute hats like these? Actually, I love that idea so much I think I might just make a few more and put them out on my mantel…
If you’re thinking of trying this project… head over to The Digital Press’s challenge forum to get details about how you can earn challenge points for December 2017 at TDP if you try any of our “Holiday Tips & Tricks.”

About the Author Carrie is a creative team member here at The Digital Press. She and her family enjoy spending time outdoors, year-round, near their home in Colorado. In addition to scrapbooking and the occasional hybrid home decor project, Carrie also reads voraciously, accumulates fabric, makes soap, brews beer, grows hops, and tries to keep indoor plants alive.


 About the Author Corrin is a member of the creative team here at The Digital Press. She is a fan of the Big Bang Theory and a lover of cozy pajamas. She lives in the breezy South of England with her husband and 4 crazy kids, who regularly discover & plunder her secret chocolate stashes! She is still trying to get the house straight after moving nearly 3 years ago. Who knows… maybe this will be the year she reaches the bottom of the laundry pile!
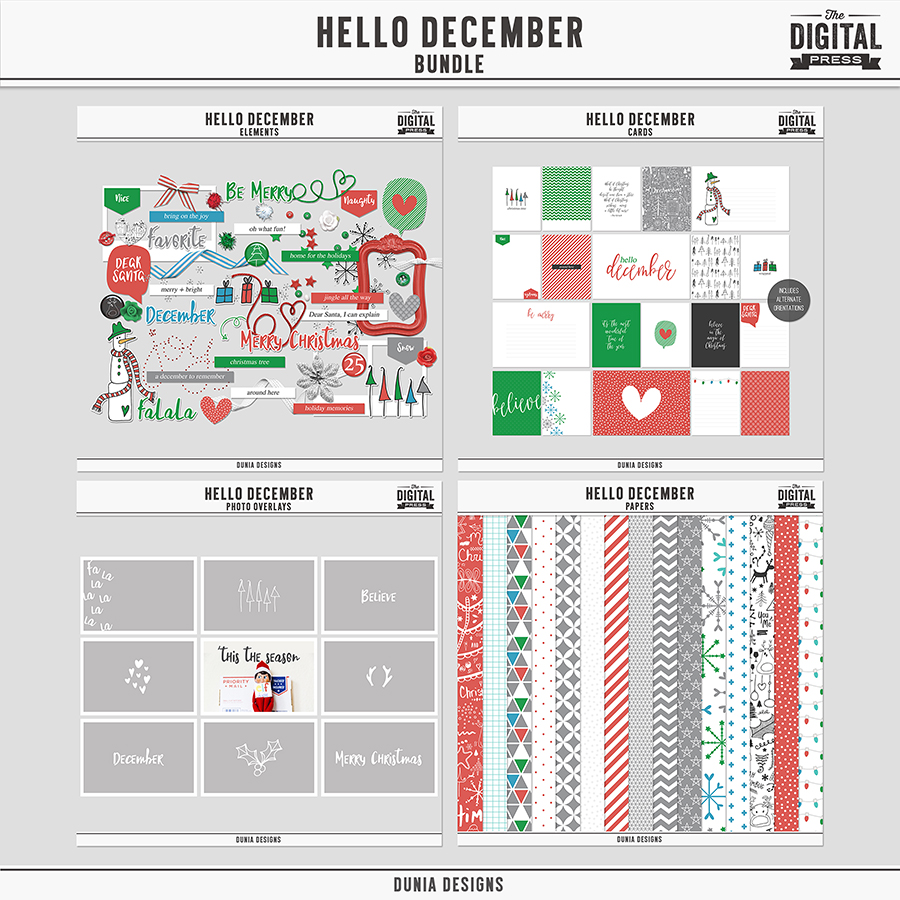
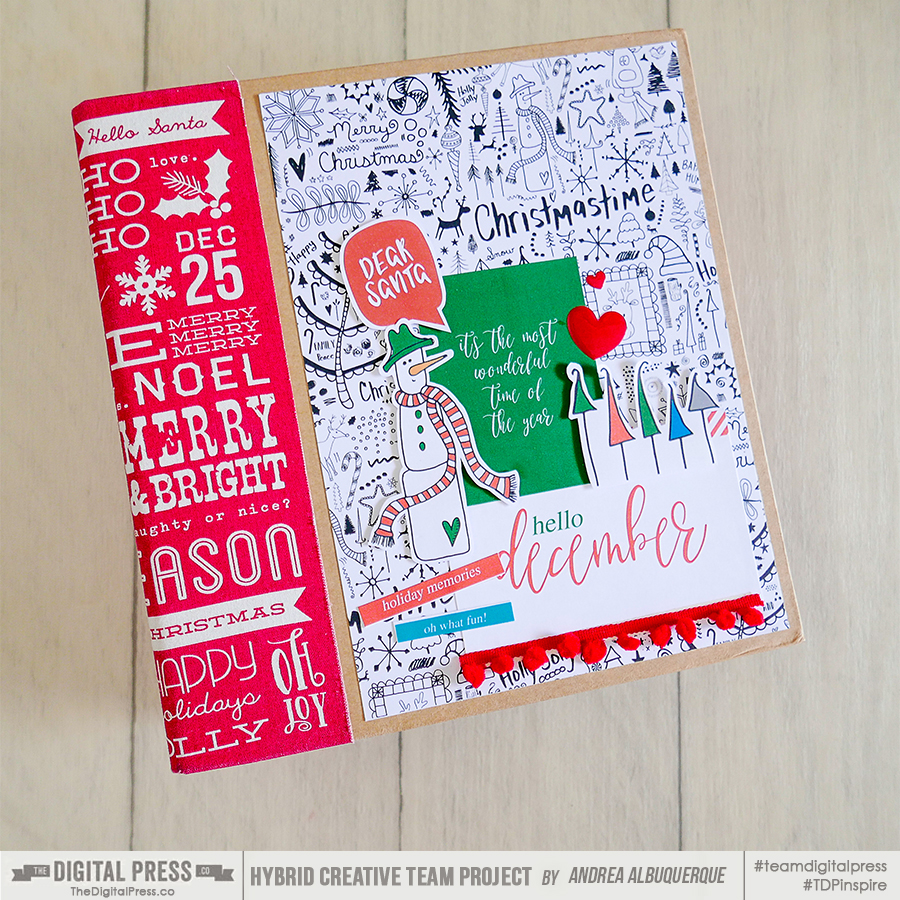
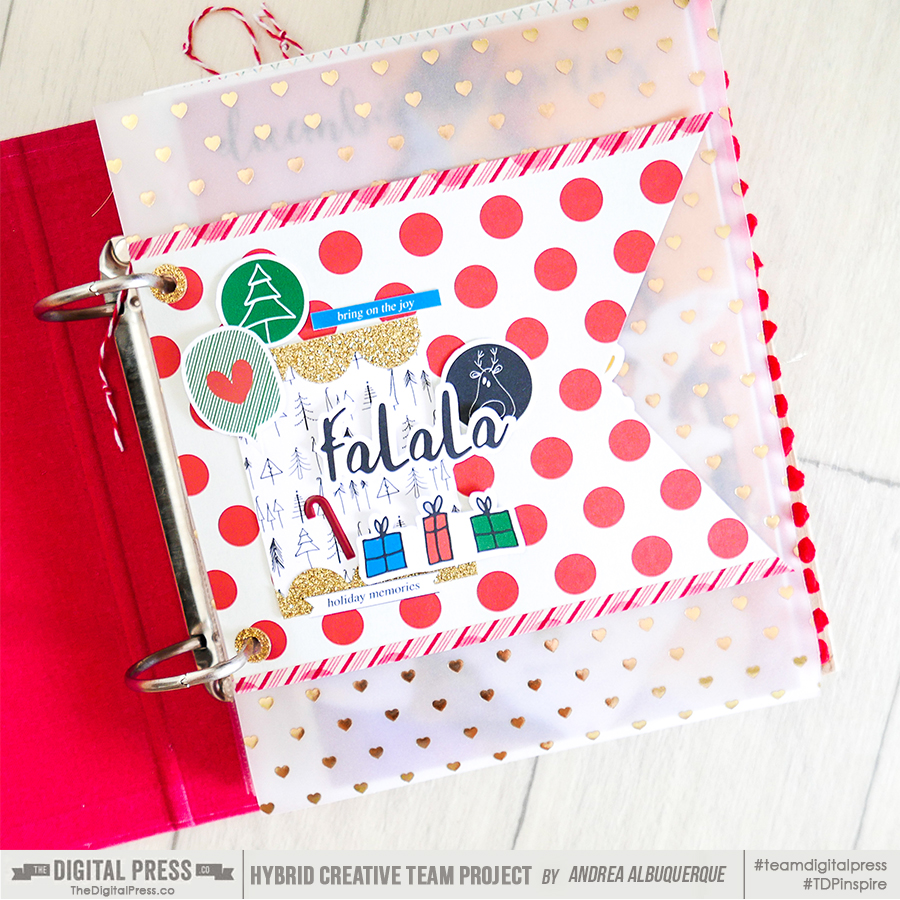
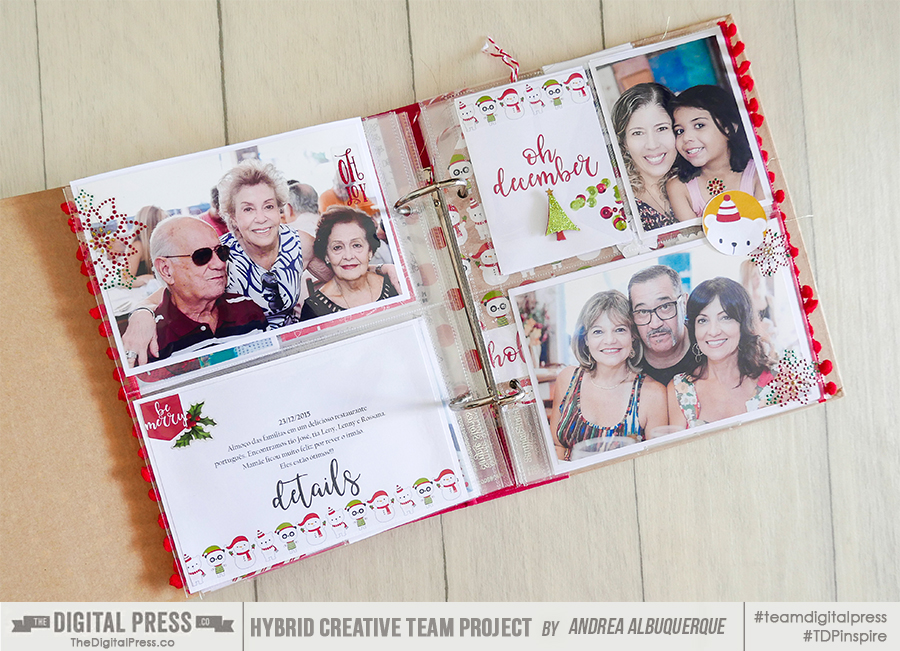
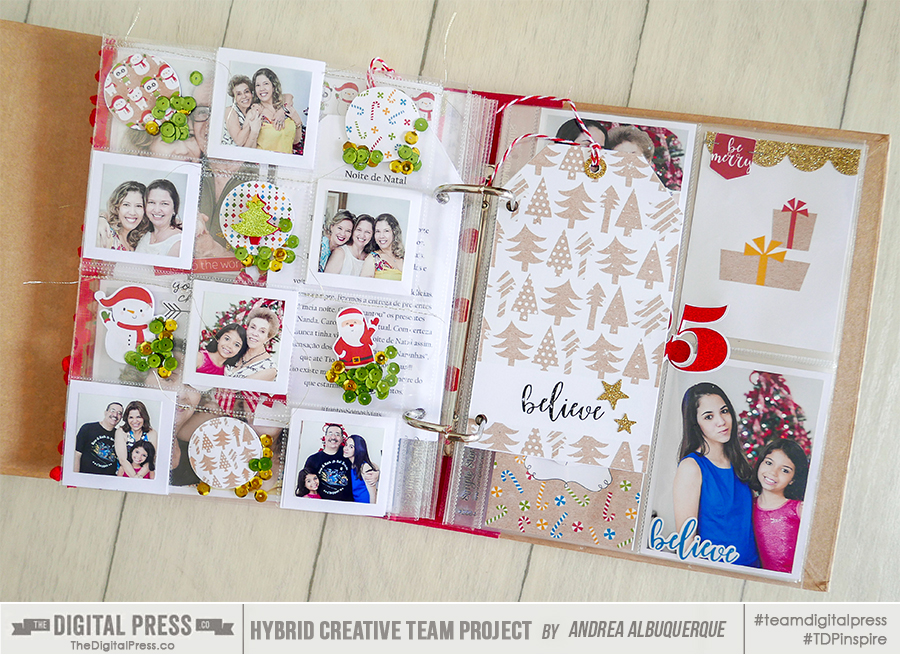
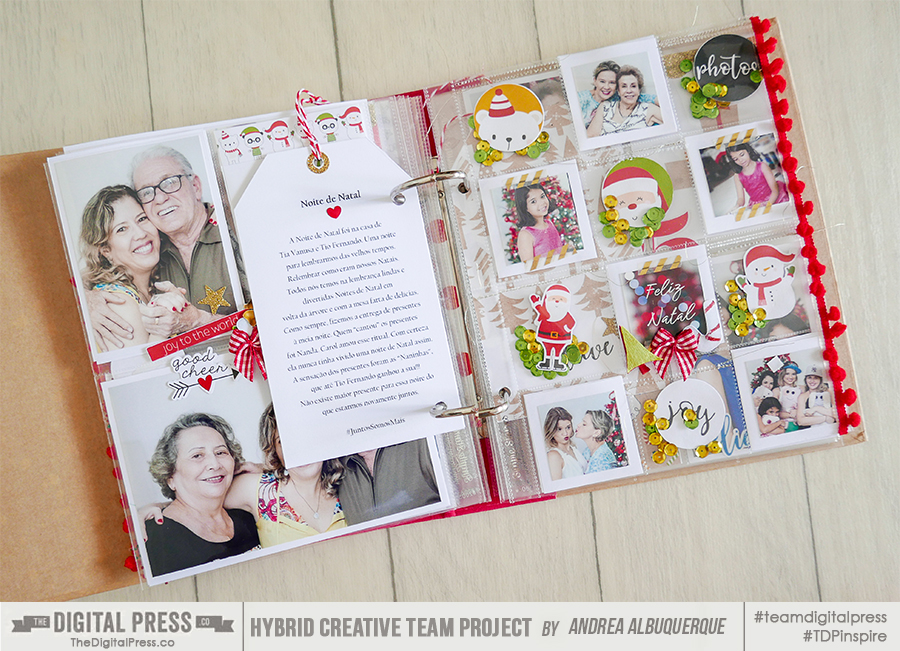
 About the Author Andrea Albuquerque is part of the Hybrid Creative Team here at Digital Press. Andrea has been a scrapper since 2010 and a photographer since 2012. Although she adores the flexibility and creativity of digital, she can’t resist playing with paper, paint, and embellishments… so hybrid scrapping is the perfect medium for her! She lives in Brazil with her hubby.
 About the Author Amie is a craft-loving dental hygienist who lives in Washington state. She loves her husband, her two kids (ages 9 & 6), and her English Bulldog… as well as coffee, baking cupcakes, daffodils, glitter & sprinkles, reading a good book, and lip gloss — not necessarily in that order.