Flourish Design Challenge

flour-ish
1. To make dramatic, sweeping gestures, like a conductor flourishing his baton for the crescendo.
2. To decorate or embellish (writing, a page of script, etc.) with sweeping or fanciful curves or lines.

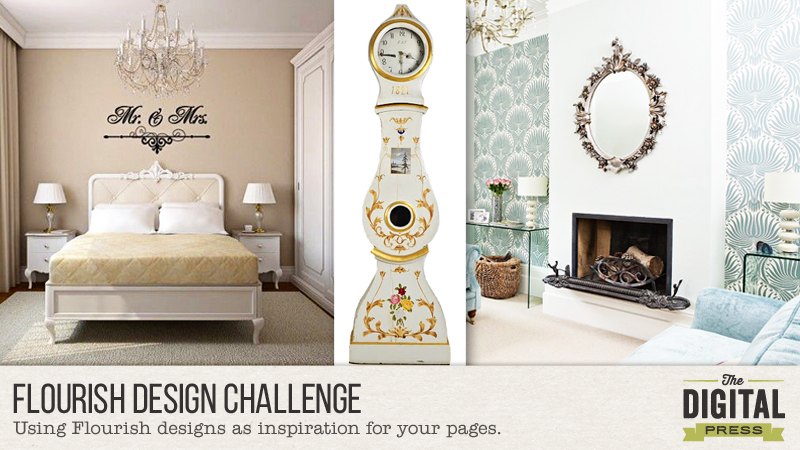
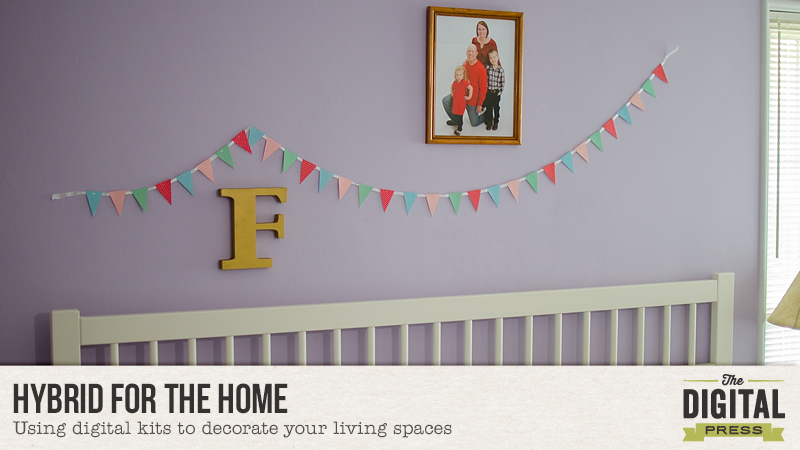
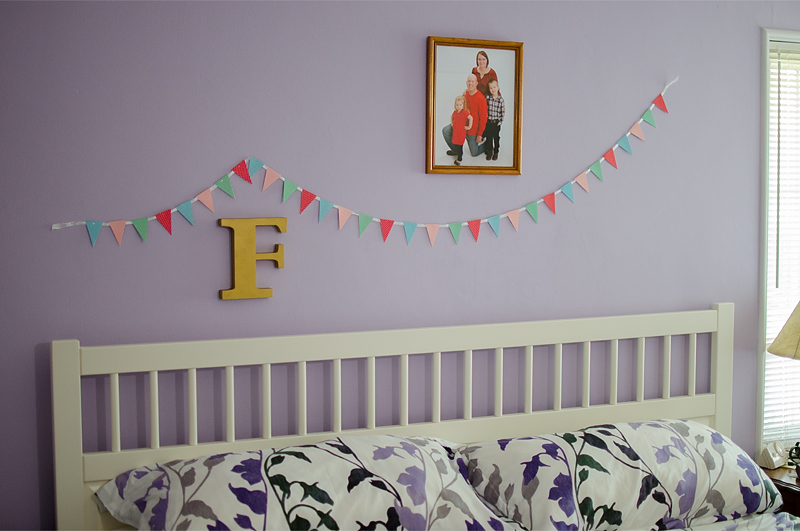
I just love looking at rooms that are designed with some type of flourish somewhere. The movements that graceful lines give to a room are just beautiful to me. I love clean and simple in my home decorations and I find I design my layouts the same way. The following photographs show ways you can look at a room or piece of furniture and get inspiration for a design in a layout.

Flourish Design Challenge

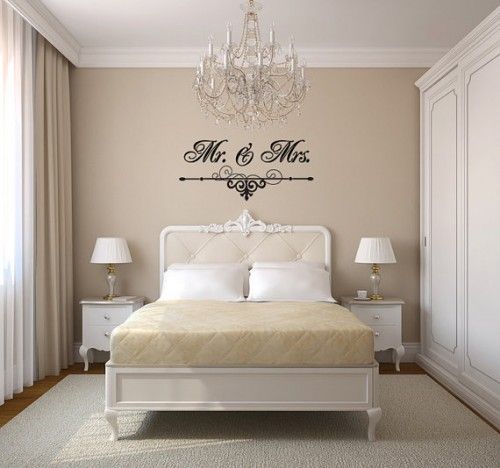
Here is a clean and simple room then they added the flourish into the room by way of the headboard and then added the wall decal above to match. So beautiful! The Mr. & Mrs. are taking the flourish into the letters by giving them gracefully swirls to start off the letters.

Flourish Design Challenge

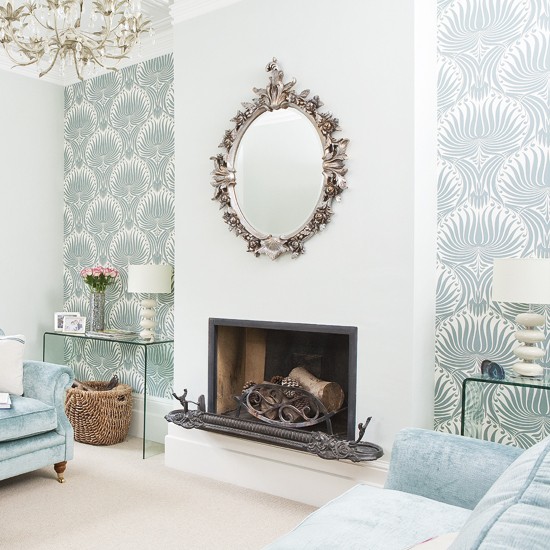
In the living room here what inspired me to pick this room for a flourish design is that amazing wallpaper! All those beautiful curves! What works for me is they made the wall that frames in the fireplace painted just white, that way you get the beauty of the wallpaper without it being too overwhelming. At least for me. I have a girlfriend who would do a whole room in this wallpaper and be in her happy place! Take the wallpaper and use that as inspiration to find beautiful papers that has the same type of design.  The mirror is also a item that you could take a flourish design item and use that as inspiration for a layout. I could easily see that as a frame with the photograph of a loved one inside of it.

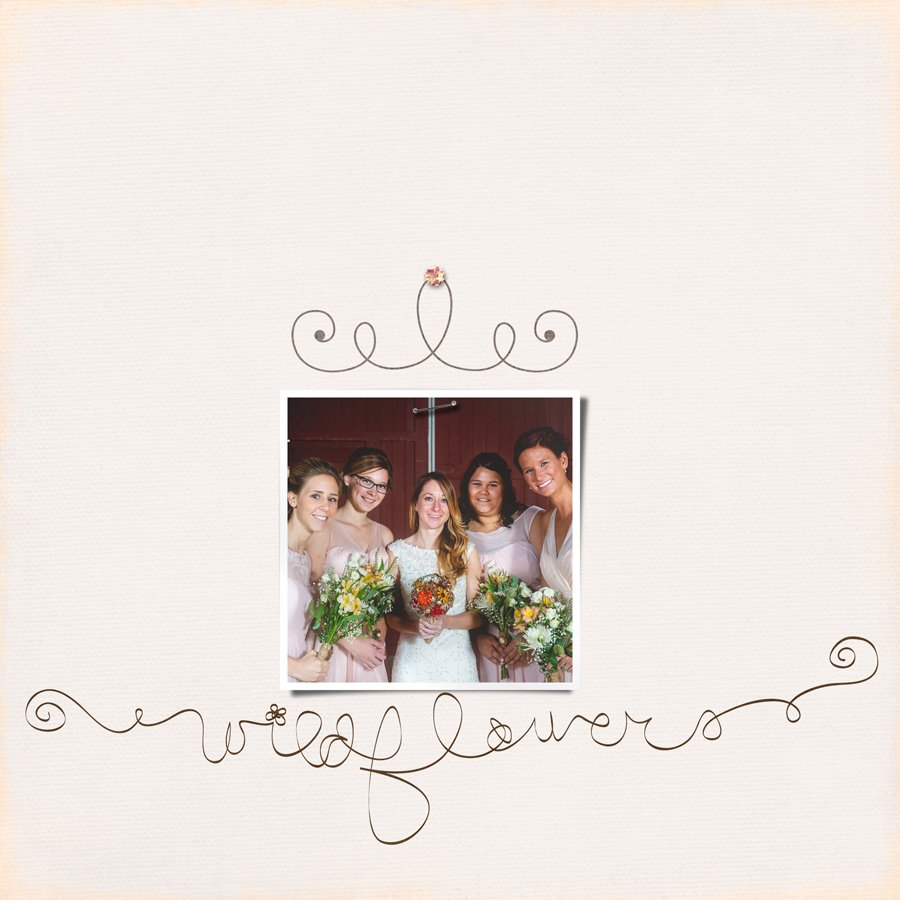
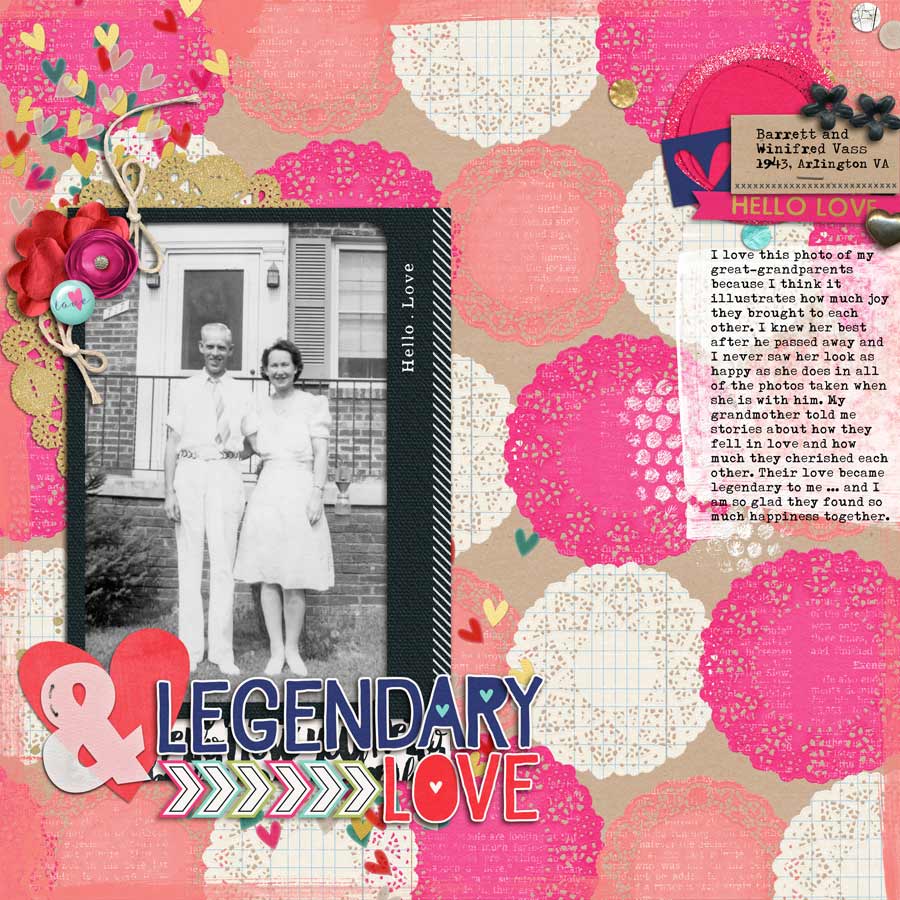
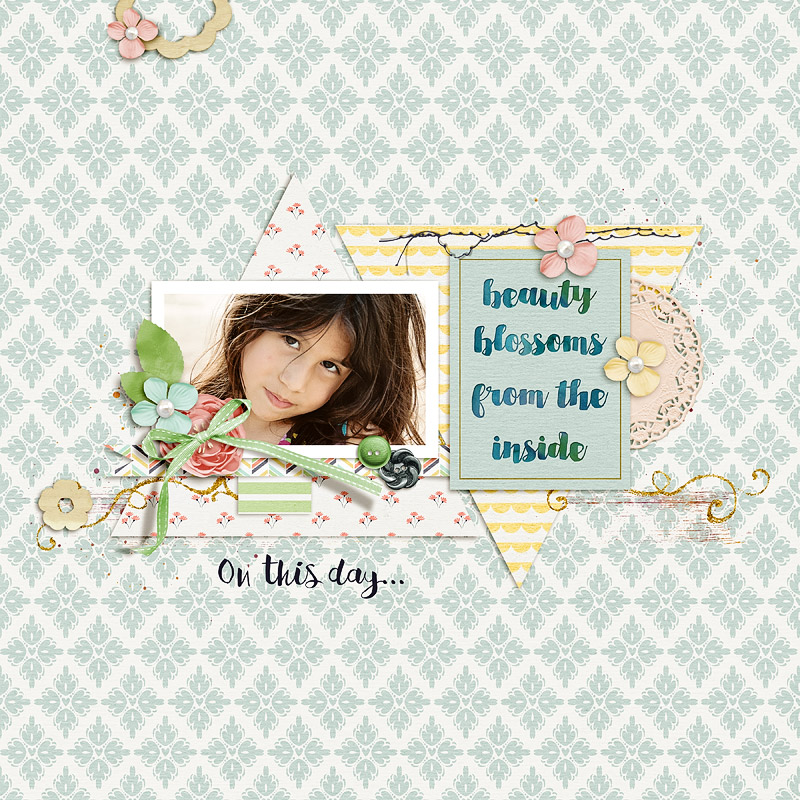
Now for my layout that I created using flourish design as my inspiration, as you see I took the elements from the photograph with the Mr. & Mrs. I used the flourish lines above my photograph and then use a wordart that has graceful lines.

Flourish Design Challenge

I would love for you to join me in a Flourish Design Challenge! Look for me HERE!

Barbara

About the Author: I started paper scrapbooking in 2001, then in 2009ish I had an online friend who dared me to give digital a try. Wow! life changing in my busy day of being a stay at home mom to six children. In my free time I also love to visit antique malls for treasures, reading, meeting friends for tea and then my woman’s bible study group is a highlight of my week.

Hybrid For The Home

Hybrid For The Home

This month the design team here at The Digital Press created a lovely collaborative mega kit called Gingham Style, and included is a set of printable banners. Being a member of the hybrid team, they immediately caught my attention. I know some of you out there who purchased Gingham Style might be wondering what you could do with them, so today I’m sharing a little home decor project I used the banners for!

Gingham Style Printable Banners


These are a great “introduction to hybrid crafting” project. All you need is a regular pair of scissors or a straight edge and X-Acto blade. If you can cut a straight line you can do this! I happen to have an electronic die cutting machine, so I used my Silhouette Cameo to do the cutting. I set up my Print & Cut file in the software that I use with my cutting machine. Because I wanted it to be double sided, I duplicated each banner, rotated 180 degrees, and aligned the straight edges to form a diamond shape. Don’t forget to add your cut lines! Mine are shown as the black line around the edge of each diamond.


Hybrid For The Home


Once everything is cut out I scored down the middle and folded to create a 2 sided banner, which I then strung on a piece of seam binding. Ribbon, embroidery floss, baker’s twine, or yarn would all make excellent choices as a stringing material. I closed by banners around my seam binding by placing a glue dot near the bottom point of the triangle. Once I had each banner strung, I distributed them evenly and then stapled at the top with my mini stapler.

Once my banner was completed I used it to decorate an empty wall above my bed. By adding a family photo and a decorative letter (F for our last name) I picked up on clearance at the craft store, I’ve quickly and affordably livened up this living space. These banners are a fun & temporary way to bring color to an otherwise boring space in your home.


Hybrid For The Home


Digital Scrapbooking kits are a great resource for creating your own custom decor for any season or holiday! Have you created anything for your home? If so, I’d love to see it. Leave a comment with a link to your project.


About the Author: Amber Funk enjoys a vast assortment of interests such as scrapbooking, photography, getting crafty with her Silhouette Cameo, reading, and playing video games. She is a Wife and Mother of 2 living in Northern California and blogs her crafty adventures at http://perfectly-fabulous.com/
Amber

Flourishing through the difficult times (every flower must grow through dirt)

Flourishing through difficult times

How many times have you gone through a difficult situation and thought, will this ever pass? And then when you least realize it, the situation is behind you and you’re stronger because of it. This past year was hard for our family, we lost my step-mom, my best friend (who’s more than a sister to me) lost her dad, and some other stuff that had us begging for the year to end. And while this one hasn’t been exactly a bed of roses, we have chosen to rise through it and flourish though (and despite) the difficult times.

Flourish through difficult times

There was one thing that helped me not lose it completely, and that was scrapping. While I’m not big on journaling at all, I found that losing myself in PS was a life saver. And while not all my pages were art-journaly ones, I did come up with some of my very favorite pages ever during that period. Here’s a page by Amy who’s going through a difficult time right now, and I hope that when she looks back on it she can savor the memory and be grateful that she had it.

Flourish through the difficult times


Your challenge (which you can find in the forums here) will be to tell us how you made flowers push through the dirt in a particularly difficult time in your life. Can’t wait to see your pages!

Cynthia

About the Author: Cynthia is a CT Member here at The Digital Press. She lives in sunny (way too sunny!) Mazatlan, Mexico with her hubby and their 8-going-on-40 yo daughter, plus the 2 most spoiled Westies who ever lived. She loves reading, cooking, photography and of course, scrapping!


Flourish Your Journaling Skills

Flourish Your Journaling Skills

Journaling on your scrapbook pages can be a great way to both communicate basic information as well as give the reader a more in depth picture of what took place during an event or photo. We often find it fairly easy to include the five W’s on our pages (who, what, where, when and why) because they are the easiest things to pull to the surface as they are the most basic information about something. I’d like to share five ways to go beyond the five W’s to capture your stories on your scrapbook pages. Using these five suggestions can allow you to tell meaningful stories and show your personality on the scrapbook page.

  1. Just Write – My first suggestion is to just write. Don’t worry about grammar, sentence structure, spelling or any of the rules that we think of when writing. Just get your thoughts and words down on the page. You can always go back and edit later, if you feel the need. Don’t over think things or get caught up in telling yourself you can’t journal or worrying if it will be good … just write! The more that you journal, the better you’ll get. Practice really does make perfect. And remember – there is no right or wrong way to add journaling to your scrapbooking. There are no rules so just let go and write!
  2. Write Like You Speak – Imagine yourself telling someone about a scrapbook page you’re working on … what are the things you’d want to share? Writing as you speak is the best way to ensure your unique voice is captured in your scrapbook pages. It can be easier to let go of the idea of formal writing and just write whatever it is that you’d say when describing what’s on your page. It will ultimately be more authentic and more YOU!
  3. Focus on the Unique – Instead of just answering the basics (the five Ws) on your pages, try to find something unique about your photo or event and focus your journaling on that. Think about the various stories or facets of experience that someone might appreciate knowing and focus your attention there! You will make more impact by focusing in areas of detail within the story – it will help your audience feel something more about the story you’re trying to tell.
  4. Journal Outside of the Box – It’s not always necessary to journal in the traditional way. Journaling outside of the box can help you journal in less complicated formats. Examples of these techniques would be using pie charts, Q&A and bullet point lists to tell your story in a new and unique way. You can also record conversations as well as use poems/quotes/songs to communicate a story. Don’t get hung up on traditional writing as the only way to communicate something – use other techniques and methods to tell your stories in new and different ways.
  5. Appeal to the Senses – One of the best ways to connect your audience to the experience you’re describing in your jounaling is to use the most descriptive words possible. Descriptive language can help clearly describe any number of sights, sounds, smells, tastes and feelings that were experienced. Journaling that connects to the sensory experience can add an entirely new dimension of interaction for the audience.

Here are a couple of layouts that I wanted to share that demonstrate my using these suggestions to create meaningful journaling on my pages!

Flourish Your Journaling Skills

Flourish Your Journaling Skills

I hope that these tips and suggestions will help you to flourish your journaling skills!

Please head over to check out the Challenge Forum where I’ll be hosting a journaling challenge! I hope to see you there!


Amy

About the Author: Amy lives in Reston, VA with her husband of 13 years and their 9 year old boy/girl twins. Their 18 year old daughter is in the midst of  her second year at West Virginia University!  Amy has been scrapbooking since the early 1990s but discovered digital scrapbooking in 2005 when her twins were born and has primarily scrapped digitally since that time. She is passionate about telling her family’s stories and documenting their life together! Amy is a huge reader (mostly literary fiction) and is a pop culture junkie! She also LOVES all things beauty & makeup!


Adding your layouts to Instagram

AddingLOtoIG

With Flourish being our word for the month, it’s time to learn a new skill or take a look at a process and streamline it. With that in mind, it’s time to get social, more specifically – Instagram social!

We hear a lot about how people love seeing layouts on Instagram, but we also get asked quite often about how to get your layouts from your computer on to your phone in order to upload them!

There’s several options, so we thought we’d share a couple to get you started: The Email method, the Flickr method and the Gallery method!

The Email Method

Make sure your mobile device (phone, tablet or music player) has an internet connection, the Instagram app installed, and access to your email account.

When you’ve finished your layout and created your usual gallery friendly file for uploading, all you need to do is take a few minutes to also email your layout to yourself.

Then, open the email to yourself on your mobile device and save it to your Camera Roll or Photo Album so you can access it later.

Next, open the Instagram app and press the central icon on the row at the bottom to begin an image upload. Choose your layout that you saved to your Camera Roll or Photo album.

Follow the prompts on screen until you are prompted to write a caption.

In your caption, don’t forget to use our hashtags and to mention us!

#teamdigitalpress #tdpinspire @thedigitalpressco

 Post-Graphic

The Flickr Method

If you usually upload your creations to Flickr, then I have good news for you! You can skip the email step.

Inside of the Flickr app on your mobile device once you have navigated to your image, you can press the ‘share’ icon (in the shape of an arrow). This will give you several options, including the option to save to Camera Roll or Photo Album. Choose this option.

Then, follow the instructions from the Email method and don’t forget to use our hashtags!

The Gallery Method

Once you’ve uploaded your creation to our gallery, you can visit the gallery on your mobile device and navigate to your layout. When you’ve made it to your layout, then you can save your layout image directly from the page – you should be able to press and hold the image until you see the ‘Save Image’ dialogue appear. Save your image to your Camera Roll or Photo Album.

Then again, follow the instructions from the Email method and don’t forget to use our hashtags!

Instagram Contest

TDPbyME-contest400px

So, now you know how to upload your awesome creations to Instagram, we really want to see them!

From now, until Friday the 17th, we are running a small giveaway for $5 to spend in store, you can enter as follows:

1 – follow us on Instagram at @thedigitalpressco

2 – find our contest image, and like it.

3 – upload your layout to your Instagram account, and use your usual hashtags along with the contest hashtag #TDPbyME


Rules:

– There will be one winner selected at random from all entries received before 12.00 noon EST on Friday 17th April.

– The contest is open internationally.

– Giveaway and Contest accounts on Instagram are not eligible.

– You may enter as many times as you like, with as many layouts as you like!

CynthiaAbout the Author: Juliette is a Social Team CT Member here at The Digital Press. She is a girly crafter, and a creative procrastinator, and she shares her home with her husband and a rebellious cat. She loves scrapping, photography and music!

Flourish with your words

let your words flourish

For me, one of the hardest parts about scrapping is coming up with my titles or my journaling. Maybe it’s because I’m too scared to pour it all out, or that nothing will make sense and will look like a messy, hard-to-read jumble of words. So what do I end up doing most of the time? Well, of course it’s quotes to the rescue! I find most of the times that I can include a quote that perfectly sums up what I wanted to say in the first place, or make me smile or feel better or even a bit teary-eyed.

Let your words flourish

There are tons of quotes that can be uplifting, that can make you feel better in a moment’s notice, and that can take the place of journaling in a snap.

Let your words flourish

So next time you find yourself in a tight spot as far as journaling goes, give quotes a chance, you might be surprised!

Don’t forget the check the forum here for a great challenge using, you guessed it, quotes! Hope to see you there!

CynthiaAbout the Author: Cynthia is a CT Member here at The Digital Press. She lives in sunny (way too sunny!) Mazatlan, Mexico with her hubby and their 8-going-on-40 yo daughter, plus the 2 most spoiled Westies who ever lived. She loves reading, cooking, photography and of course, scrapping!