Thoughts on your Real Home

Thoughts on Your Real Home
Hello Scrappers! As I write my first blog post for The Digital Press, I ‘really’ couldn’t be more excited! 🙂

As I thought about this month’s word – REAL – it got me thinking about places. Places that are real…places where “I” am real. And there’s only one place that fit the bill… it took me back to my home. The place where I can really be me…no pretenses…just at home with myself…with the ‘real’ me. My home…where I come back to for love and for comfort…where I am welcomed for who I am. My home…which isn’t perfect ….but puts me perfectly at ease. I am sure you would agree that there’s no place like home 🙂

Another thing that also became clear to me is that in my pages, the stories about my home, were the ones that were really untold. In the hum drum of capturing my everyday life with my toddler, I had forgotten about the site where all the action takes place 🙂

That is what I set out to do initially that got me thinking about ‘Home’.

Is home really a place…a house? Where all our memories are created? Where each corner is full of ‘that incident where…’

Or, is it about the city? I know for myself that we’ve moved around so much that just a mere mention of some places tugs at the heart..like really does!

Or finally…and most importantly, is it about the people? No matter where we are…when we are with ‘our own’ it doesn’t matter the place, it feels like home.

Well, after all these heavy…soul searching thoughts (I was also getting tired with all the thinking by that time :)), I realized that these are all stories that were left uncaptured by me so far and I need to get started with capturing these very important snippets that make me who I am today.

My first layout was about the first city I called home..the city where I grew up…the city of my friends and family.

Thoughts on your Real Home

In this process I came across some layouts that also beautifully captured my thoughts. Below is a layout by CT Alina where she talks about the city where she lives now…

Thoughts on your Real Home

In the next layout, CT Amie beautifully captures the sunlight streaming through her home…both through her picture and through her words…

Thoughts on your Real Home

Last but definitely not the least 🙂 … is the layout by CT Pamie. She captures her gorgeous house here.

Thoughts on your Real Home

I hope you feel inspired by some of my thoughts. I’m hosting a challenge over in The Digital Press forum today and I’d love for you to share a little about whats home for you and where you can be your REAL self.  The challenge can be found here: May 18: Thoughts on Your Real Home


all photos 560 edit

About the author: Pallavi Sureka is a wife and newly designated stay at home mom to 3 years old Rajveer. She currently lives in Mexico City but her family moves around a lot. She has previously lived in Calcutta, Pune, San Francisco, Chicago and London. She reflects all these places in her pages as she captures her everyday stories.

Hybrid Scraplifting

blogtemplate_scraplift

Remember this weeks challenge for creating a layout by scraplifting? If not, you can read the full post here: inspiration scraplifting

Scraplifting is one my favorite things when it comes to scrapbooking – no matter if I scrap digital, hybrid or paper. There are so many great inspiration sources outthere and it would be a shame not to use them! Whenever I scraplift I also like to let somebody know that I scraplifted their layout and if I have a photo I will also link it. I always got good responses. They felt honored to be scraplifted. Never skip an opportunity to make someone smile!

For a scraplifting a page digitally or as a hybrid page, I open a new 12×12 document in Photoshop and the first thing I do is to drag & drop the original layout into this document as my referrence. It will be much too small, but you can make it bigger without worrying about the quality – you will not print it, as it is not your layout, but having it as big as your layout will be makes it a lot easier to keep the sizes and proportions or placements.

Browsing through the shop I found this beautiful page:

I love the simplicity and especially this little cluster at the top: a round element in the back, a piece of washi and a button. I do like the colors of this layout aswell, but I already knew which colors I wanted to use for my photo, so I went with another color scheme.

As I said the first thing I did was to create a new 12×12 document and added the layout. Normally I would now go ahead and create shapes for all papers and photos on this layout. In this case it is there is a template available, so I used the template to get me the correct shapes. Ones I finished adding shapes to the page, I will add another copy of the page I want to scraplift on top.
Now I have it as the bottom and the top layer. I will turn both off and on whenever I want to look something up. Sometimes I like to use the overlay mode to keep them semi transparent on top of my working space, but mostly that’s too distracting for me.

2015-05-15 18_33_16-hybridscraplift_3

Next step is to add papers and play around with text and embelishments. In this case I decided not to use any real elements as I don’t like to use printed buttons or flowers on my hybrid layouts. I rather use real ones from my stash. Same goes for all other 3D-objects on a page. The only exception is stitching! I do think stitching looks much better when it is real stitching, but laziness wins. It is the first time I’m trying to print a stitch, so I might throw the paper away and replace the stitch with washi tape. I think it is always worth trying to print something you are not 100% sure about. You can always throw it away if it turns out that you don’t like it.

When I know this will be a hybrid and not a digital page, I will not spend any effort on the shadows. There were shadows already in the template, so some shapes now have shadows and others don’t. Overall the page looks unfinished, but I’m ok with that this still is some kind of a prototype of what my actual page will look like.

2015-05-15 18_32_03-hybridscraplift_1

If I blend the original layout over it, you will see it looks pretty similar.

2015-05-15 18_32_54-hybridscraplift_2

My page just misses some splatters and elements.

Now comes the unpleasent part for me: getting everything on a4 and a3 pages and print it. For the layers where I need my silhouette, I will add a black color overlay, so it will be easier for me to trace them. Now it get’s to the fun part of assembling the page. I start with glue the clusters together, so I can move them aroung more easily on the page then I now where I want to add my stamps and splatters. Don’t forget to cover everything you don’t want color on, because otherwise you have to print again. Been there, done that!

The last step then is to add embelishments from my stash and this is how the finished page turned out.

hybridscraplift_photo


Anika About the Author:  Anika is part of the hybrid team here at thedigitalpress.com. She loves to travel and use the photos her boyfriend takes (thanks for that!) to scrapbook. Digital, paper and hybrid. When she is not scrapping, she is most likely playing a computer game or in a city searching for a geocache.

May 13 Find the Real You Through Inspiration Scraplift Challenge

blogtemplateMay


Sometimes, I have a hard time starting off with a black 12×12 canvas. I stare at it, close my eyes and try to imagine it finished, and then I open my eyes and I got nothin’! When I’m at a loss for creating a layout, I like to browse through my inspiration folders and the galleries looking for the perfect layout to scraplift. There’s a line between taking a layout and using it for inspiration and well, just plain copying it exactly. To really make your layout unique when scraplifting, identify the parts that you are drawn to in the first place. Is it the overall design? The use of color or elements? What exactly made you choose that particular layout to lift? Next, think about how to take the items you love from the layout you are lifting and making them your own. A true to you layout is far better than a just a copy of someone else’s layout. Of course, it will look very similar, but you’ll love it even more when you make it real!

I choose this layout by Amanda. I am initially drawn in by the design, but even more, I absolutely LOVE the use of the vellum word art stapled on top.

October1

Although, I lifted the use of vellum word art, I changed up the design a bit and used a different set of papers and elements to make my layout my own.

04.25.15-giggles2

Your challenge is to make a new layout using a layout from The Digital Press gallery as inspiration, but make it your own.

Now, for the rules…
1. Pages must be created using 100% TDP Products and loaded in the gallery no later than midnight EST on May 31, 2015.
2. Please link your gallery listing in this thread: May 13 challenge thread
3. Link your comment in this thread in the monthly challenge tracker thread. You can find it here: May’s Tracking Thread.
4. Have fun!!!


FarrahAbout the Author:  Farrah Jobling is a member of the Creative Team here at The Digital Press.  She lives in Denver with her amazing family, Mike, Nicholas (8), Claire (5) and Hope (7 mo puppy).  She works from home as a photographer and enjoys scrapping her personal photos.

Overcoming Obstacles to Project Life: Taking Photos and Journaling

OOPL_Photos


“I want to do (or continue with) Project Life®  but…”


If you’ve ever said either of these phrases to yourself, then this series is for you. (And don’t tell anyone, but this series is for me too!)


Project Life® or the more generic, Pocket Scrapping, is a way of scrapbooking that is supposed to simplify the process of documenting the everyday moments that make up your beautifully imperfect, perfect life. However, so many people feel it is too difficult to start or maintain. Huh?! That is the antithesis of why it was created! So, when I was thinking of what to write about, I asked myself how I can help others overcome their hurdles to starting or sticking with Pocket Scrapping. And this series was born. So let’s start from the beginning.


In order to document the everyday, one of two things must happen first: you must take photos of your everyday life and/or, you must journal about your everyday life. Ideally, you would do both. To some that is a lot of work. And to most there doesn’t seem to be enough excitement to warrant documentation. And that’s ok! It’s not about documenting an exciting life. It’s about documenting YOUR life. And believe me, to your family, that is exciting enough!


So, I’d like to offer a few of the more popular methods for taking photos and journaling everyday.


The No Frills Way

The best camera is the one you have with you. You’ve heard it said over and over again. And it really is true. And let’s face it, today’s phone cameras really are pretty good. So if your phone is the only camera you have, go ahead and snap some photos with it. Then do yourself a favor and delete some of them. My iPhone 6+ has an incredible burst feature, but do I really need 20 identical pictures of my daughter picking a flower? Take the photos, view them and then delete them. Right away. And if you can’t get to it right away, do it while you are waiting to pick your child up from school, while in the checkout lane at the supermarket or while at the doctor. Find your down time and use it.


Of course, you can also use your big girl (boy) camera — your dSLR. Same rules apply. Take at least one photo every day and delete your duplicates. If you don’t do this in camera, I will be talking about doing this using your computer next month when we talk about getting your photos off your phone and camera and onto the computer.


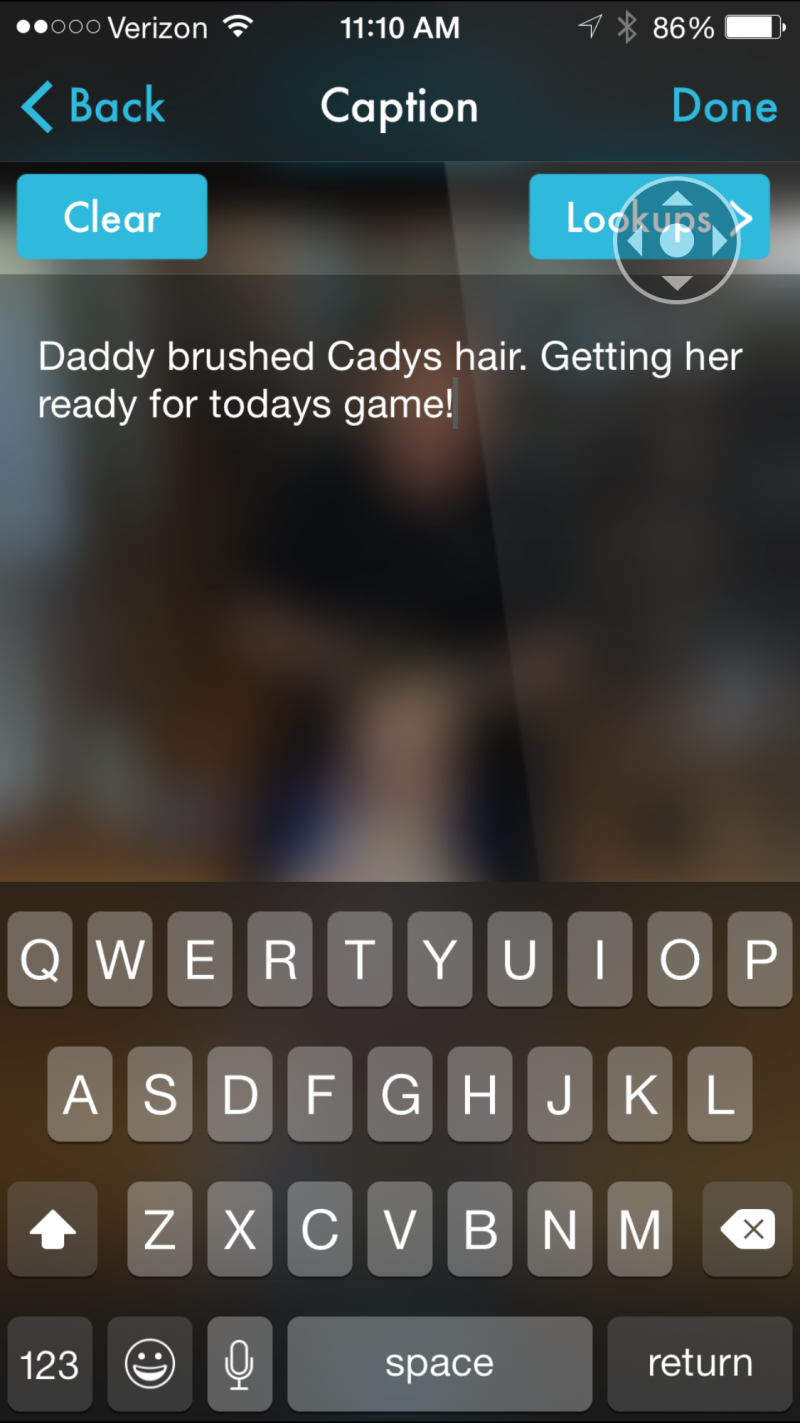
Once you take a photo, you may want to jot a note about it. Unfortunately, the iPhone does not allow for this without the use of a third party app. After much research, I finally found one called Photogene 4 which allows you to very easily modify the IPTC data on your iPhone’s photo. The IPTC data is where you can add a caption to your photo. So even if you never scrap the photo, the story is always attached to it. (Bonus: Photogene 4 is also a pretty good photo editor as well.)


Once you open a photo to use in Photogene 4, in order to edit the IPTC metadata, you need to click on the second icon to the right of the wrench.


2015-05-11_11_10_14 copy

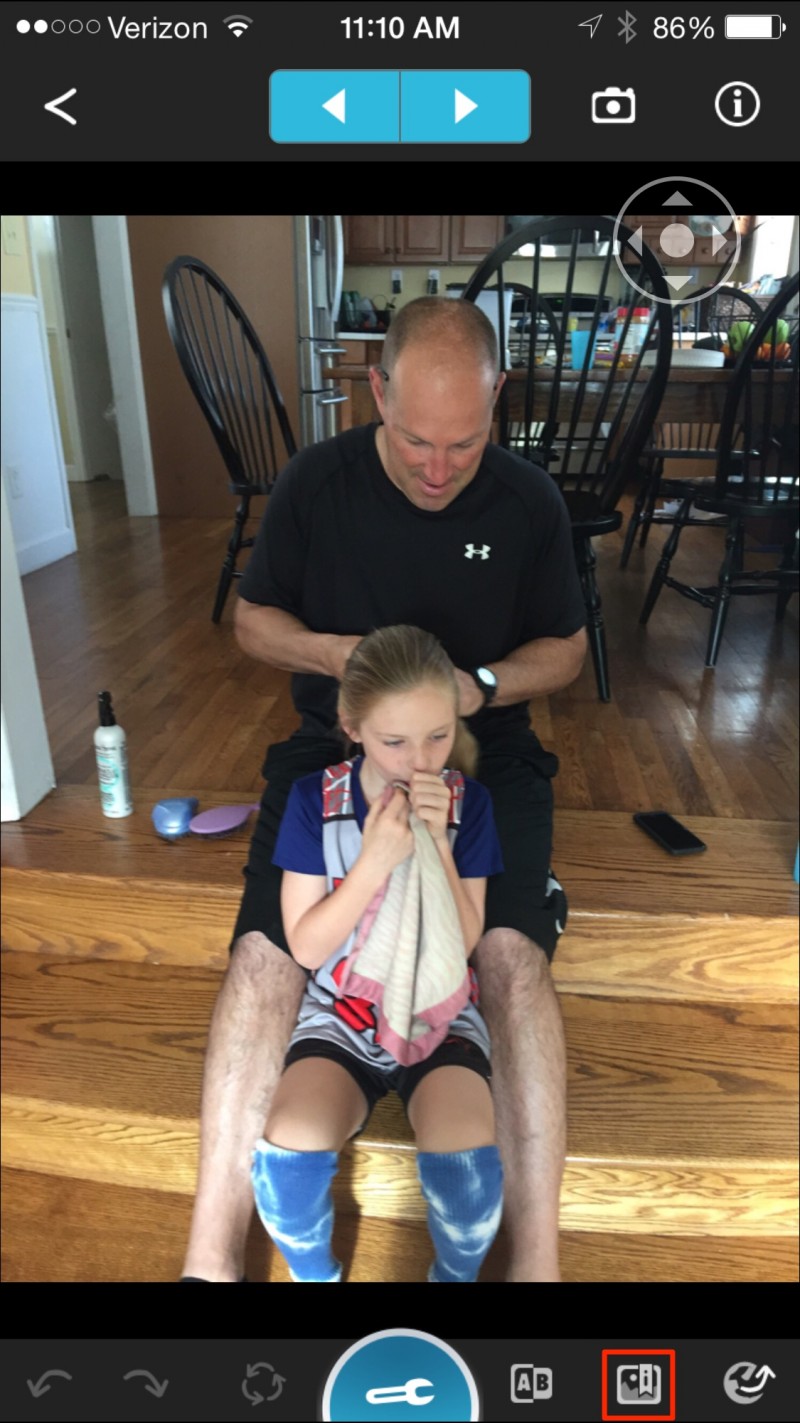
Then you can click on the tab that says, IPTC.


2015-05-11_11_10_24


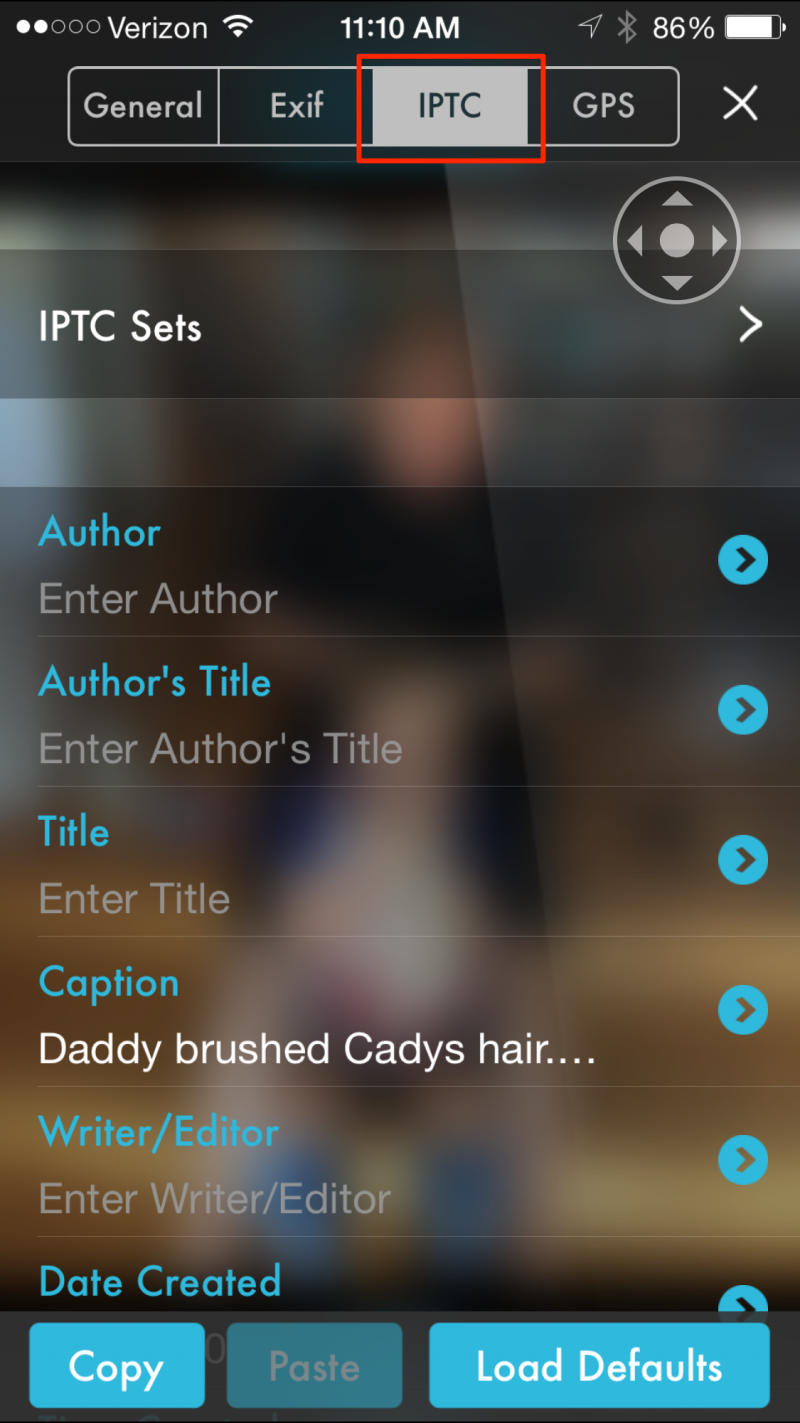
And then you can type in your photo’s story.


2015-05-11_11_10_29


Now, onto journaling. A really basic way to journal using your phone is to use the native calendar that comes with it. On my phone, I can just add a calendar entry titled, “Today,” set the time to “All Day,” and under the Notes section, type in any interesting thoughts about the day. I don’t have to type in what I did, because it’s all in the calendar already. You can also do the same on your desktop calendar if you prefer. While this method does not tell the story of individual photos, it does allow you paint an overall picture of the day or tell the stories that don’t have photos to go with them.


The App Way

Yes. There is an app for that. There is an app for everything. Two of the best apps (imho) for combining photos and stories on an iPhone are Day One and Collect.


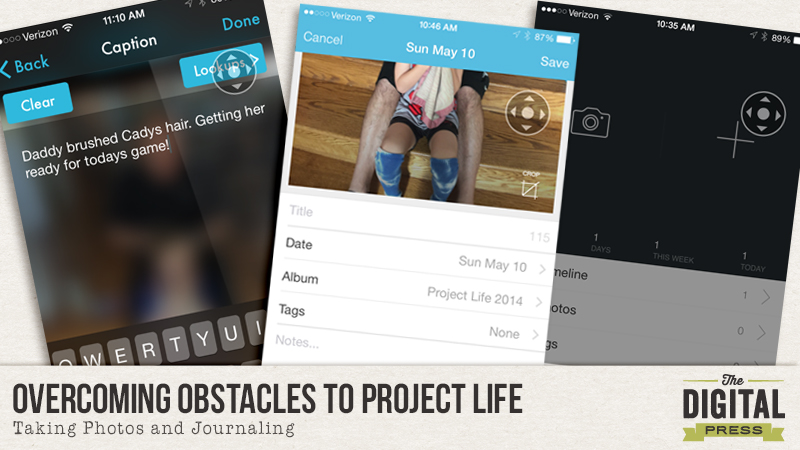
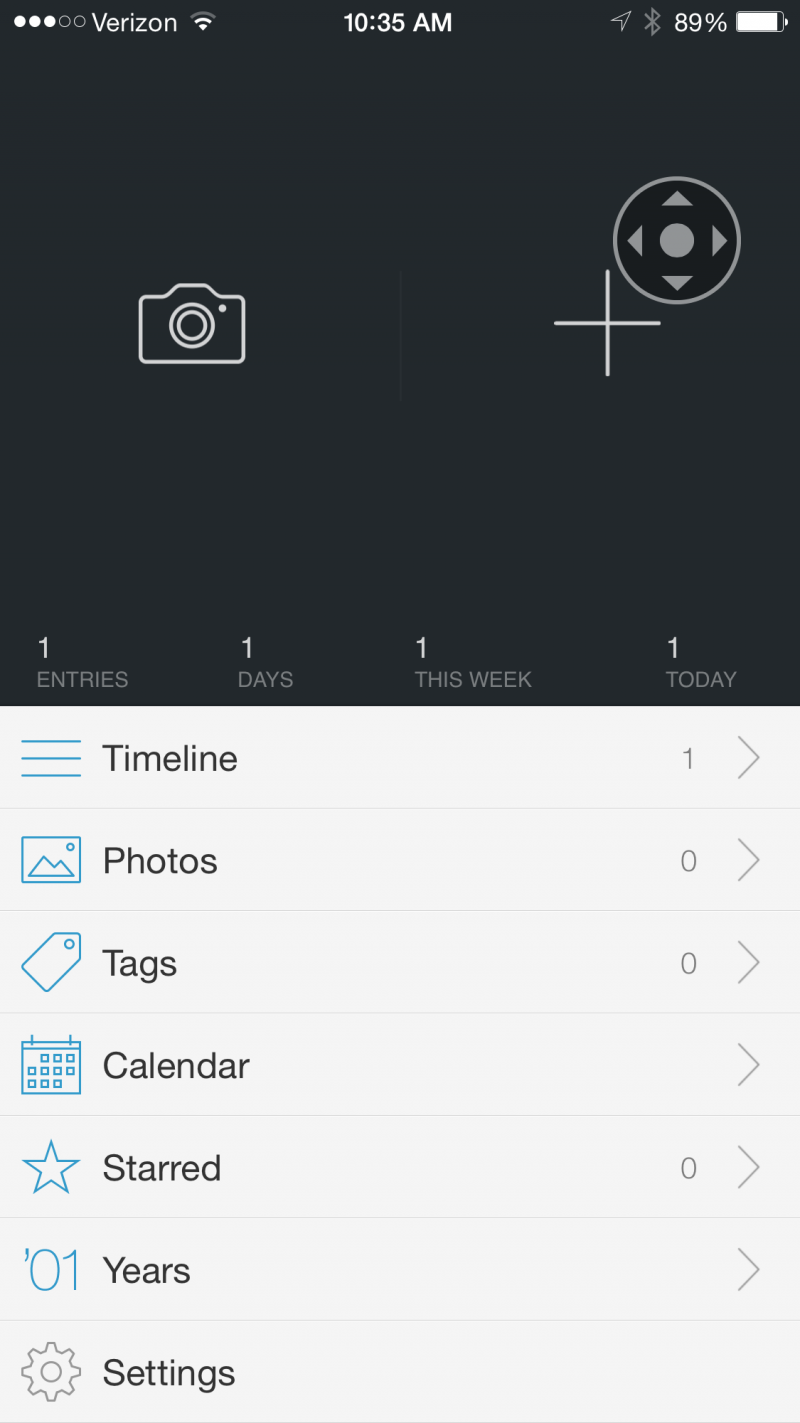
Day One is an iPhone and desktop app that will prompt you on both of your devices to journal about your day at a time specified by you. I have mine set to the end of the day so that if when it alerts me, I haven’t yet taken a photo, I can quickly take one to represent the day. When you open the app, you are met with two large icons: a camera and a plus sign.


2015-05-11 10.35.29


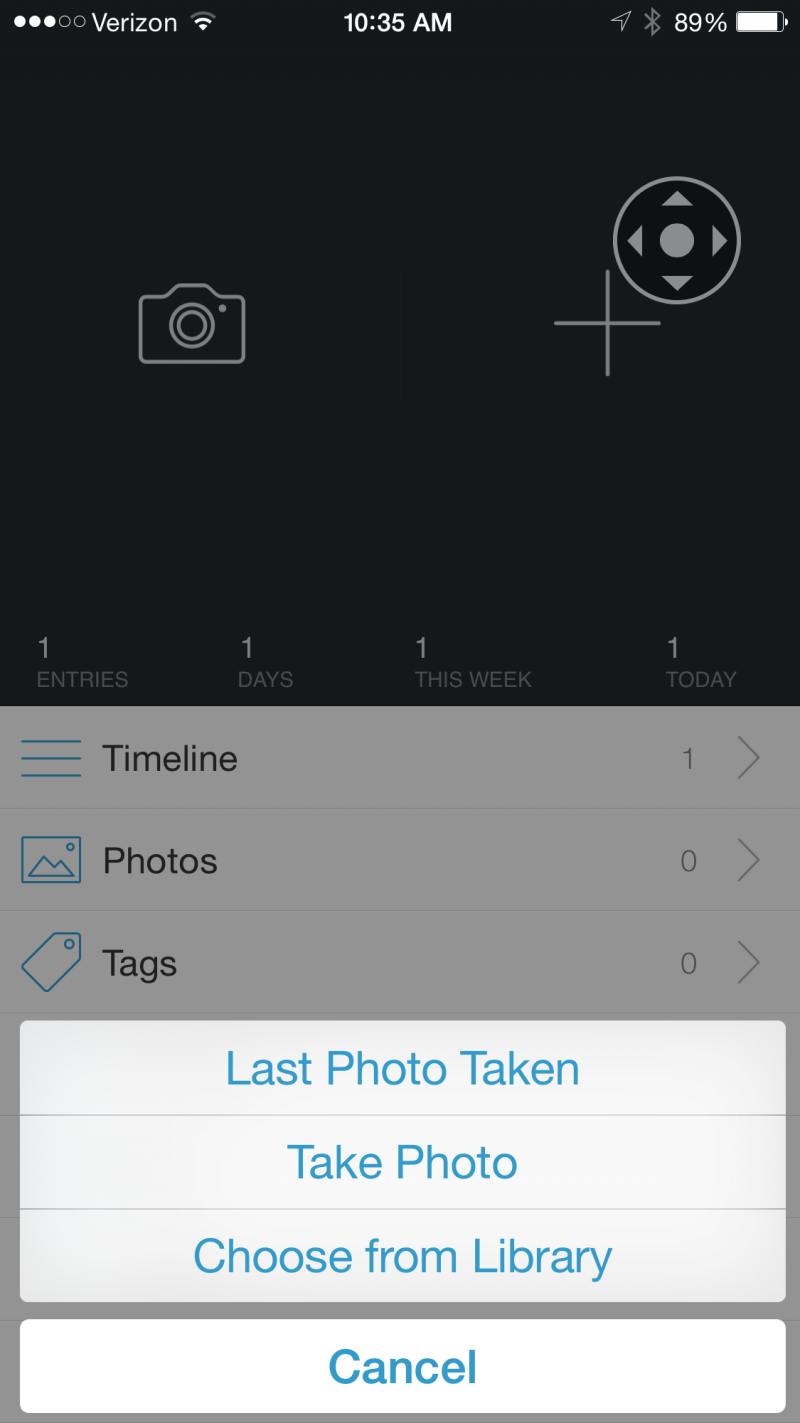
Clicking the camera gives you the option to use the last photo taken, take a photo or choose from your photo library.


OOPL: Taking Photos


Once you choose or take a photo, you will be prompted to journal about it. And that photo and journal entry will be added to that day.


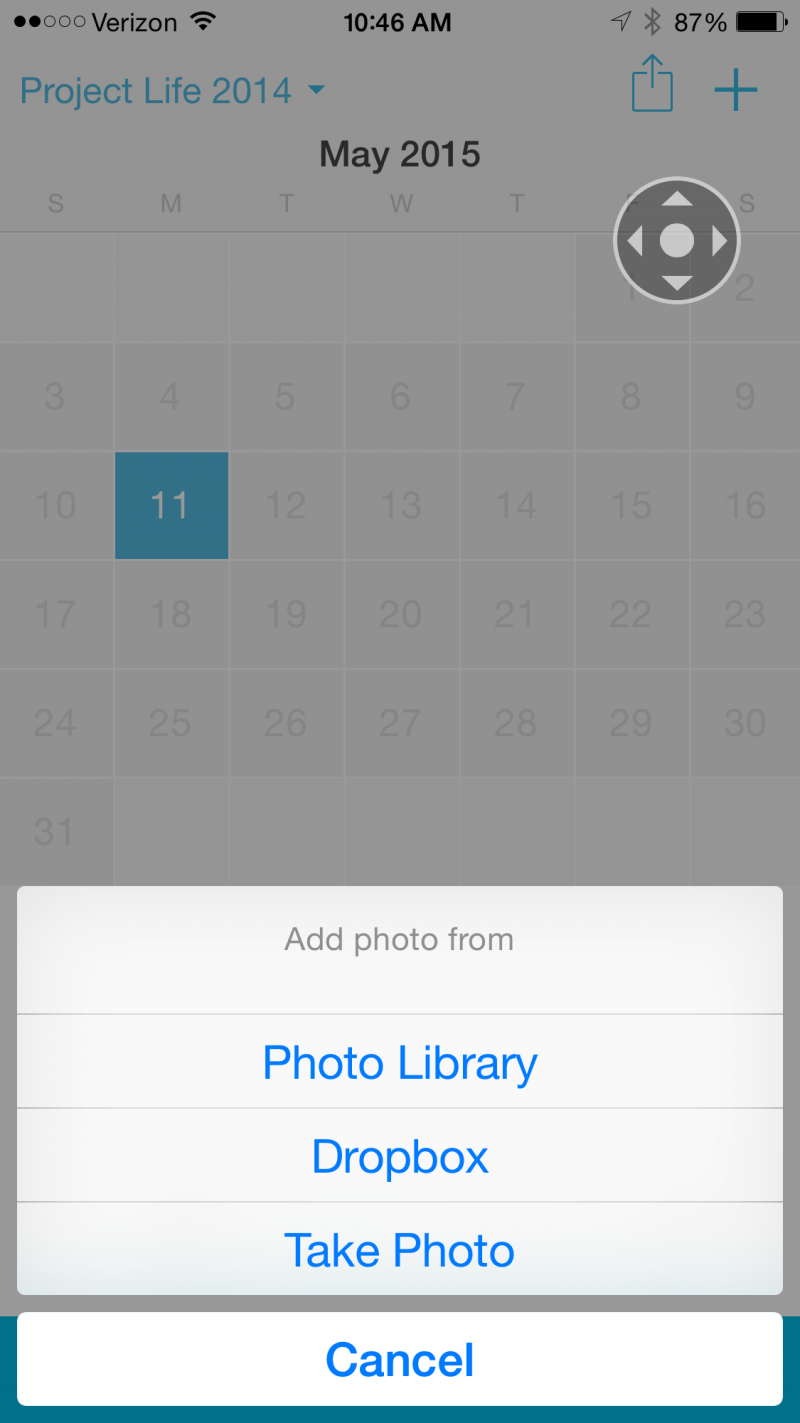
Collect is also an iPhone app. Again, it is super easy to use. Once you open it, the home screen looks like a calendar. When you select the date, a menu pops up asking you whether you want to access your photo library, dropbox, or take a photo.


2015-05-11 10.46.16


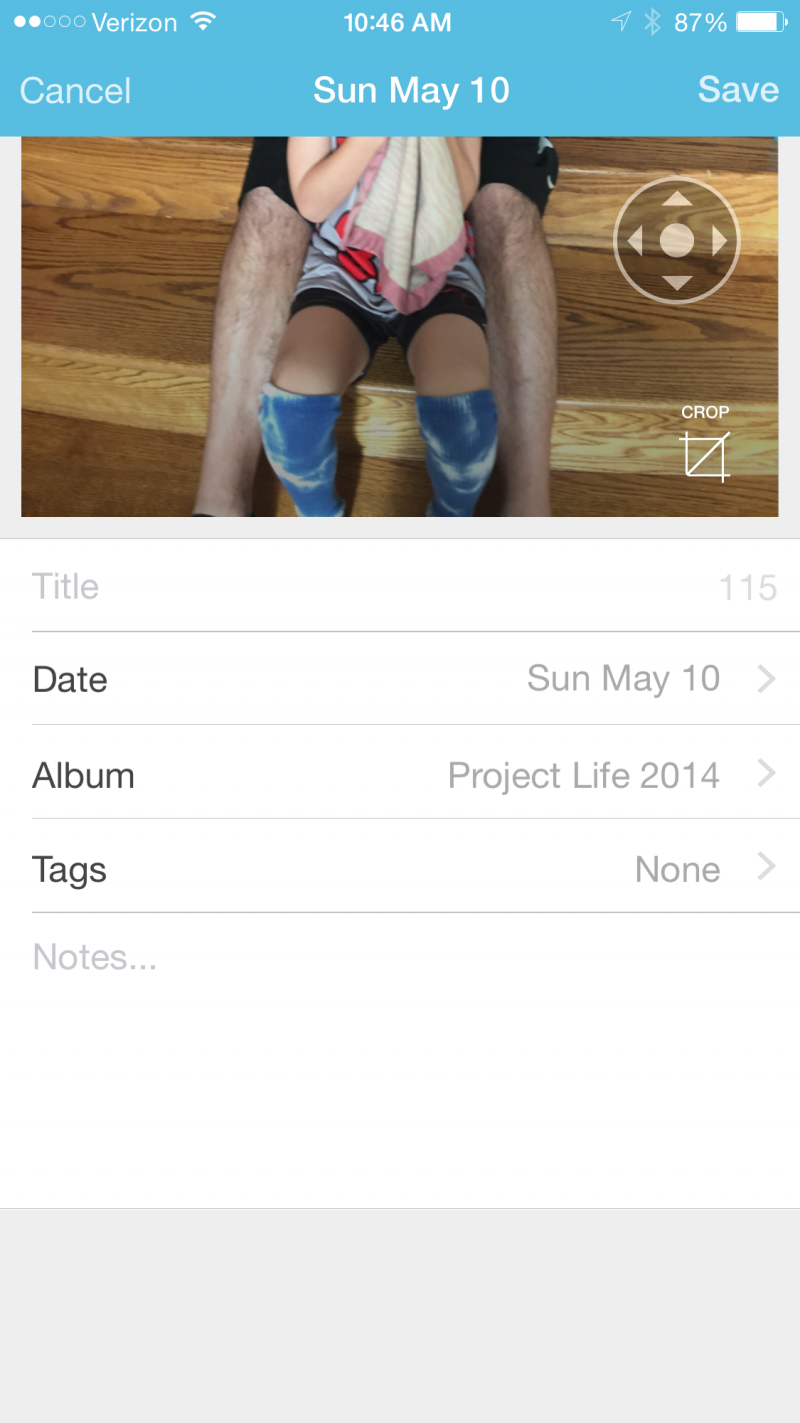
Once you add a photo to the date, you are given the option to add notes to it.


2015-05-11 10.46.32


And finally, for iPhone and Android users, another app that works similarly is Diario, which is also available on your PC and Mac Desktop. (Although I have never tried it personally.)


Photo A Day

Perhaps the hardest hurdle to overcome is figuring out what to take photos of. Some days are easy and others are more difficult and this is where the beauty of documenting your everyday life comes in. It’s finding interest in the mundane. I get my inspiration from other Pocket Scrapbookers. I find looking at their pages and following their blogs very helpful. In addition, there are a lot of Photo A Day prompts out there. Some of my favorites are:


And that leads me to my purpose for this blog series. I’d like all of us at The Digital Press who are working on  documenting our everyday lives to support each other. Let’s share with each other what and how we are documenting our every day, every day. We have started a thread in our forum, which you can find here, to do just that. Let’s help each other tell our stories. Let’s give each other the push we need to take a photo every day (or almost every day) and let’s tell a story every day. Each day, check into the forum and tell us what you took a photo of and what story you told. If you want to share the actual photo, that’s even better, but you don’t have to. But please do stop in and support your fellow scrappers by sharing your strategies for success.


And be sure to stop by next month when I share how to get your photos off your camera and onto your computer.


Jen FlahertyJen is a member of the Pocket Team at The Digital Press. Having scrapped digitally for many years, she has come to embrace the simplicity of Pocket Scrapping since it fits more easily into her busy lifestyle of shuttling her three children from field to field. When she is not on the computer, you will find her working out or really doing anything else she can besides cooking, cleaning and doing laundry.

Scrapping Imperfect Photos

Scrapping Imperfect Photos
Hi scrappers! I’m here today to talk about those less than perfect photos that we all have. You know what I’m talking about, those blurry, out of focus, grainy, or weirdly lit photos that you snapped trying to capture a moment. Sometimes I just don’t want to haul my big DSLR camera with me and sometimes I just miss that perfect shot. So, what is a scrapper to do? I say find a way to make those photos work in your layouts! Here are some strategies you can turn to when your photos are less than ideal…

1.  Make it black and white – Grain, noise, and less than perfect color can often be fixed or improved by converting your photo to black and white. I use this strategy often when dealing with less than perfect images, especially from my phone.

2.  Make it small – If I have a photo that I love but that is blurry, I often include it on my layout but make it small so the imperfections are less noticeable. This works especially well if you have a larger photo from the same event that is in focus. Then, you can include the small photo along with the larger one and still include the special memory.

Here’s an example of this strategy by Tiffany. She made these photos of birds small and cropped way in, and it worked wonderfully!
Scrapping Imperfect Photos

3.  Blend it – Use a mask for your photo or blend it with the background.

4.  Use strategically placed elements to cover up parts of the photo – Do you have distracting parts of your photo that you can’t crop out? Use a well-placed embellishment or cluster of elements to hide it!

Here’s a great example by Stacy where she was working with a scanned photo that lacked in quality. She adjusted the black and white and covered up a trouble spot with an element…

Scrapping Imperfect Photos

5.  Just embrace it! – This is my favorite choice of all! Life is messy and imperfect and sometimes the photo is too special to leave out, even if it isn’t perfect. I try to remember that someday my kids will be looking through their albums and will smile at the moments I have preserved for them. They will never think, “Oh, I wish this photo was a little less blurry” or “Gee, the lighting really could have been better in this shot.” They are going to see the love and wonderful memories that I have captured for them.

Here’s my example of just embracing the photo even when it’s not quite perfect. This photo was clearly out of focus, but it captured a special moment that I couldn’t recreate. I decided I wanted to scrap with it anyway, and I’m really happy with how it came out!

Scrapping Imperfect Photos

I’m hosting a challenge over at the TDP forums this month and I hope you’ll come play along! I can’t wait to see the layouts you are able to create with your less than perfect photos! You can find the challenge here.

KatieAbout the Author: Katie is a member of the Creative Team here at The Digital Press. She lives in Central Florida with her husband and their four sweet but crazy boys. When she’s not dodging Nerf bullets or trying to dig out from under the never ending pile of laundry, she enjoys photography, cooking, going to Disney World with her family, and, of course, digital scrapbooking.

Framed Cutfile

cutframeheader

This time I like to show you a simple way to use your cutfiles for home decor.

First you create a new photoshop file in the size of your frame. Fill it with strips of your pattern paper. They don’t have to be all part from the same collection, you can mix & match the colors just as you like.

2015-05-09 12_23_24-LOVE-CUT

The next step is to add your cutfile to make sure it has the correct size. Pay attention to the actual size of your frame. Even though they say they are made for 6×4 photos doesn’t mean the inside is actually 6×4 big! Mostly they are a little smaller and my frame was quite a bit smaller too.

2015-05-09 12_24_35-LOVE-CUT

save your cuttingfile in black, because that is most easy for the silhouette to trace and open it in silhouette studio. If you don’t have a silhouette you can definitly cut it by hand, but this will take longer.

2015-05-09 12_26_34-Silhouette Studio Designer Edition_ Unbenannt-1.studio3

Then you use the trace feature with the following options:

2015-05-09 12_27_29-

Sorry for the german screenshot, but I guess you can match the words to what you see on your screen. Make sure the file is placed far enough away from the edges of your workspace as we use the negativ space of it and we need a bigger space around it.

Print, cut, assemble and voila, here it is:

cutframe


Anika About the Author:  Anika is part of the hybrid team here at thedigitalpress.com. She loves to travel and use the photos her boyfriend takes (thanks for that!) to scrapbook. Digital, paper and hybrid. When she is not scrapping, she is most likely playing a computer game or in a city searching for a geocache.