Mapmaker, Mapmaker, Make Me a Map: Explore Using Maps

Mapmaker Mapmaker


I may just have a little bit of a fixation with maps. Not only because I love to travel, but because they always give me a spark of imagination. They can make you feel like you are a part of something bigger. They can give you a feeling of confidence and allow you to realize that you won’t lose yourself. They can shed light on mystery and give you a peek into someone else’s story.

Whether they are official maps, treasure maps, maps of fictional locations, or hand-drawn, I love them. And if there is a map inside some sort of novel I’m reading… that is even better! You can use maps for decorating and DIY projects. Nail art. Fun projects with kids. And of course, memory keeping.  No matter what type of project you’re working on, another nice thing about maps is that they are a great design feature to add some visual interest.


This pocket page is a great example of using maps for visual interest as well as adding to the story without having to journal out all of the details.

Mapmaker, Mapmaker, Make Me a Map
via Pinterest


This is a fun art-journal style page that is hybrid and shows the versatility of maps in design.

Mapmaker, Mapmaker, Make Me a Map
via Pinterest


This next page is visually gorgeous. Not only did she use a map paper background, but then also added the specific area and country info on a larger scale with a fun stitched line to connect the two.

Mapmaker, Mapmaker, Make Me a Map
via Pinterest


This is a different take on the map… using the country silhouette instead of a detailed/topographical map.

Mapmaker, Mapmaker, Make Me a Map
via Pinterest


And isn’t this just a super fun idea for a hybrid project? A cute shadowbox with a map background and different tickets. I’d love to have one of these on my wall.

via Pinterest
via Pinterest


Maps are a great replacement for patterned paper and can add depth and meaning that only enhances your pages/projects. They can tell our stories and provide a background narrative. They can provide perspective and information without using journaling. You can sketch out your own maps and add them to pages to give some local flavor. You can even map out your home and share that information with future generations. You can use world maps, country maps, state and city maps, even neighborhood or bike trail/hiking/walking paths.  And if you break maps down into parts (location, map elements, directions, etc.), you can stretch your imagination even further.

Where can a map take you??  For more map-related inspiration, you can always Google or use Pinterest to find great ideas and images to motivate you.

Be sure to check out all of the fun map-related products in the store. And check out our forum for the coordinating challenge!


Kimberlee


About the Author: Kimberlee is a lover not a fighter; a stay-at-home gran, a poet, and a lifelong learner. She grooves on saturated colors, Tuesday dance parties, optimism, glitter and sunshine. She colors outside the lines.  She is a dreamer. She is a collector of moments.  She is all about the story.  Kimberlee completed her MFA in Creative Writing and is just finished her M.Ed. in Instructional Design.

Taking Photos of Your Hybrid Projects

blog


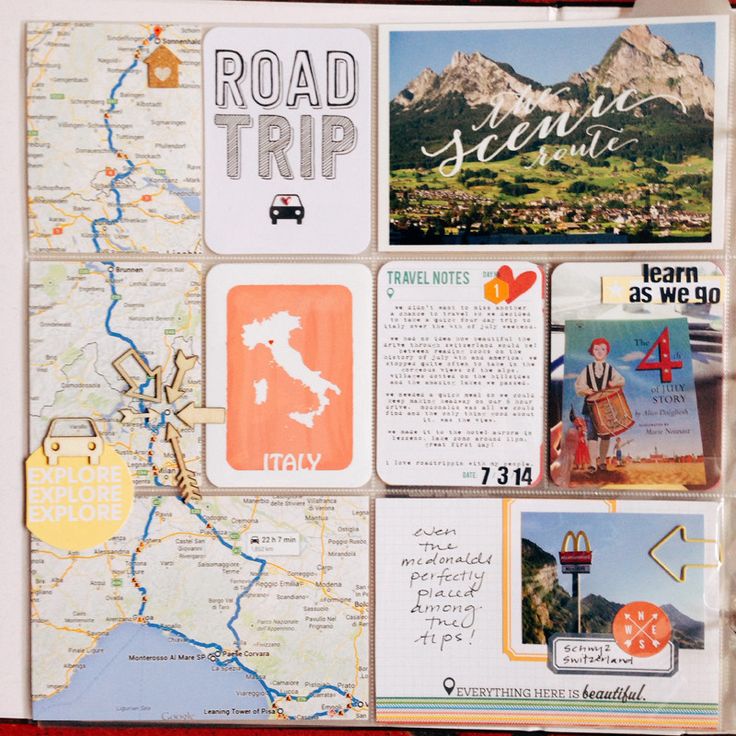
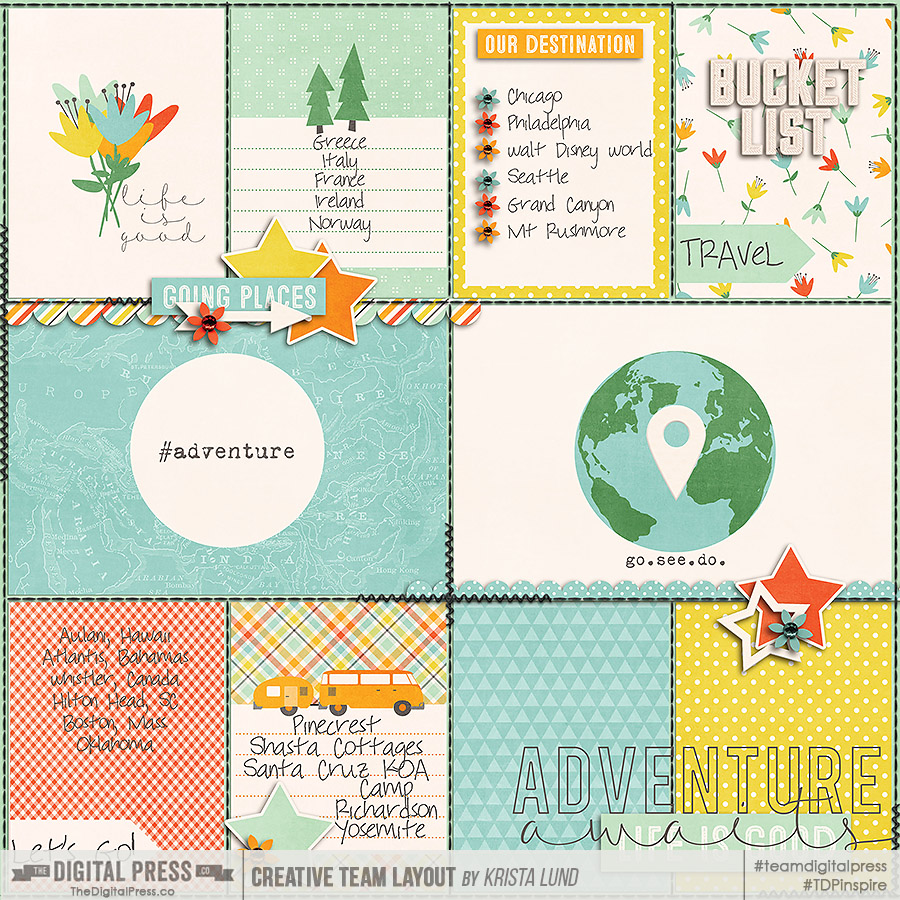
As a hybrid and paper scrapper, one of the questions I am asked most often is how I take pictures of my projects. It has taken me a good portion of my scrapping life to finally get the process streamlined and to a point that I am happy with it. To save you all the lengthy process of trial and error, I have a few tips that might help you. Today, my layout I’m working with is made using Little Lamm and Co.’s It’s My Party

Natural Light

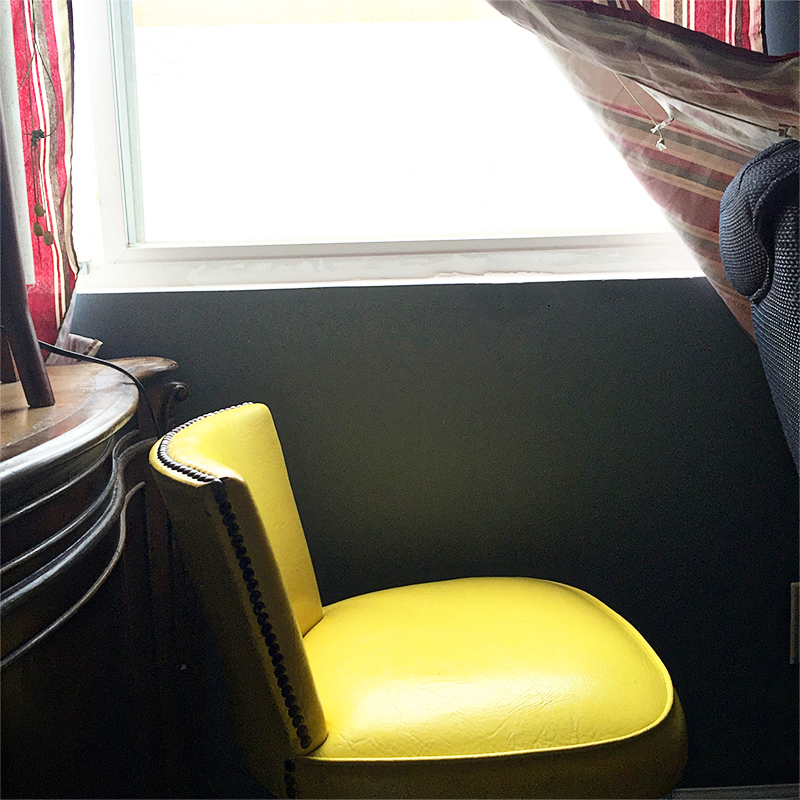
Obviously, natural light will be your greatest ally when photographing your projects. You do not want direct sunlight because of the harsh tones and glare, but if you are able to find a place within your home with the most natural, indirect sunlight, you’ll be well on your way to good photos. I recently moved from my dungeon-dark old house to a house bursting with natural light (at least by contrast), so photographing my projects has become infinitely easier. In the library/computer room, I have set a chair just underneath the window for taking my photos.


Taking Photos of Your Hybrid Projects


White Foam-Core Board

One of my secret weapons is a white foam-core board like you can find in the school presentation section at craft stores and office supply stores. They cost approximately $3 and last as long as you can keep them white. I place the board on top of the chair and then lay my project on top. I find that this allows the natural light to reflect off of the crisp white board without any weird color casts. Plus, if I need to adjust the temperature of the photo in post-processing, I have a true white neutral I can select for automatic temperature correction.


Taking Photos of Your Hybrid Projects


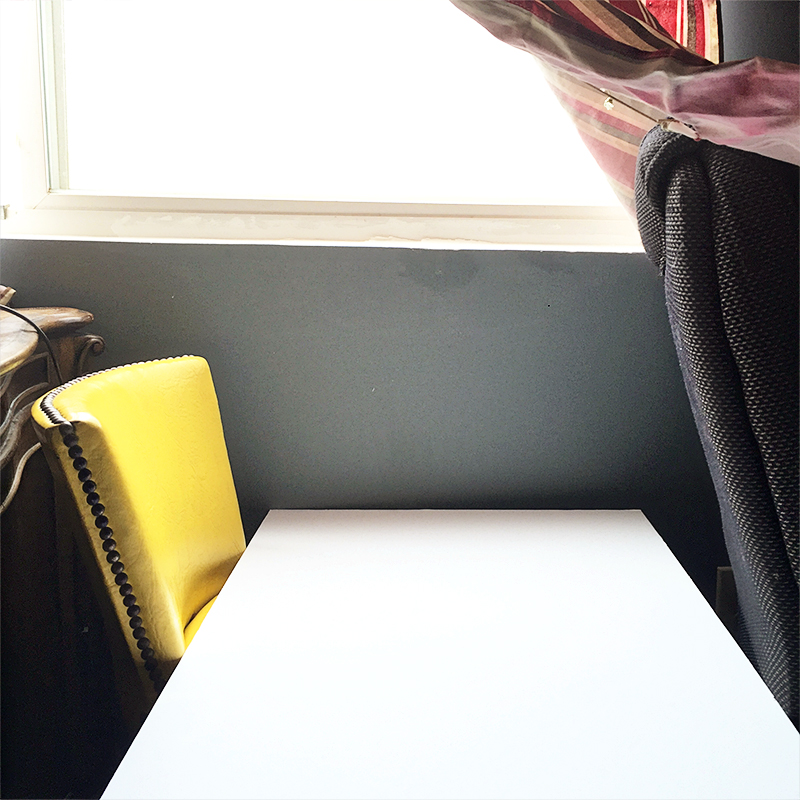
On occasion, I use an additional white board on the opposite side of my light source. So for me, it goes window, white board laying down with project on top, white board standing up against the edge of the bottom white board, and then me as the photographer. If I find I am not getting enough light on my project, I use the standing white board to bounce the light back on to my project.

Page Protectors

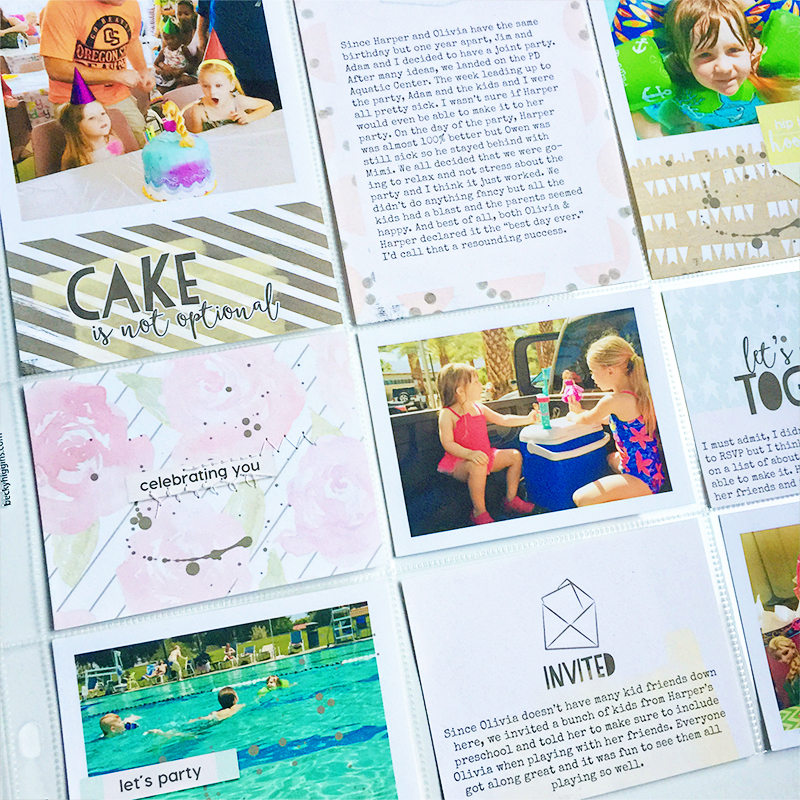
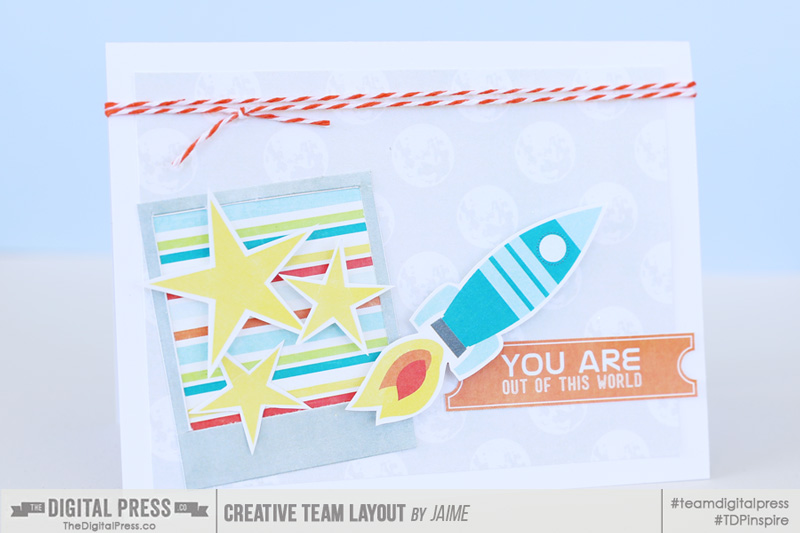
If I am photographing a pocket page, I take my cards out of the page protectors and lay them directly on top. This way, I still get the look and feel of the page protectors themselves without any of the glare of the plastic sleeves.

Taking Photos of Your Hybrid Projects


Camera

I do not use my DSLR for taking photos and this is probably mostly due to laziness, but also because I have found that my iPhone 6 Plus camera works perfectly. When photographing 12×12 layouts or pocket pages, I set my iPhone to the square setting. If the coloring still seems a little dark, tap on the screen until the sun icon pops up. Then slide your finger up while this icon is on the screen to bump up the brightness. Conversely, you can swipe your finger down if you want it to be darker.

Position

When photographing my projects, I try to stand directly above the project with my camera. I try to make the camera completely parallel with the project so there are no weird angles or distortion with the photo. I usually end up taking about 5-10 photos just to make sure I get one that will work. Then I’ll take a few closeups if I’ll be doing a blog post. I typically keep the camera on the square setting when taking closeups, but that is just personal preference.

Processing

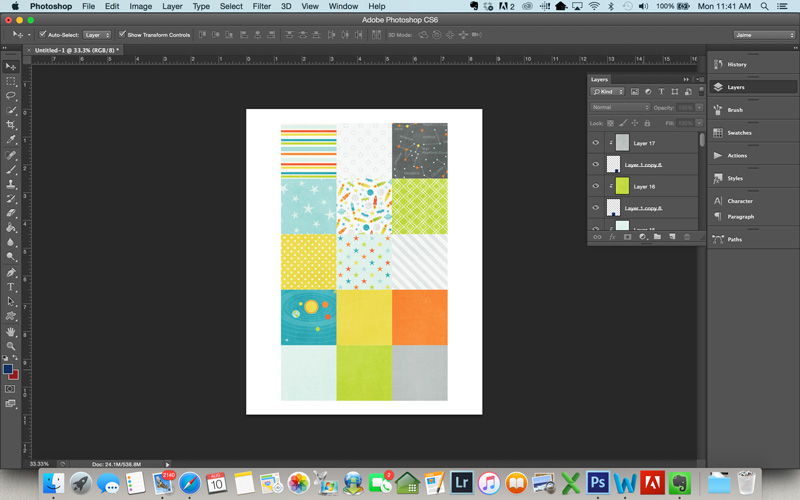
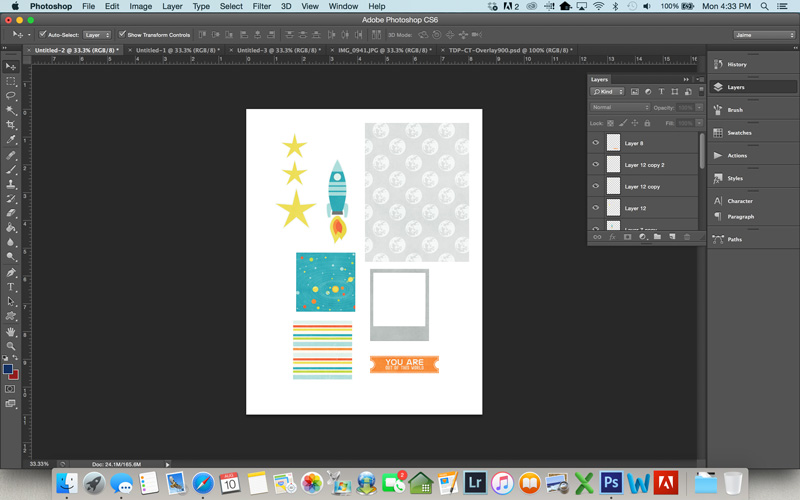
I have used both my computer and my phone for post-processing the photos. On my iPhone, I use the app PicTapGo. My go-to filters for project photos are Brightside (increases brightness), Auto Color, Crispity (sharpness), Cool it Down (I use only if I deem the photo to have too much of a yellow overtone), and Sweet Tooth or Sugar Rush (depending on the colors of my project) to increase the saturation. The fun thing about PicTapGo is that all of these filters are on a sliding scale. I hardly ever use any filter at its full strength, so it’s just a matter of playing around with the levels until you find what looks best. However, once you discover a combination of all these filters that works best for your lighting situation, you can save the recipe within the app and apply it to all future photos with the click of a button. For computer processing, I use the RadLab add on for Photoshop (it’s also compatible with PSE). RadLab is made by the same people who make PicTapGo so my method is very much the same. I bump up the brightness, decrease the warmth, and increase the sharpness, contrast, and saturation.

Ottlite

I mentioned before that my previous house had next to no natural light. Additionally, I am usually a late-night, last-minute type of scrapper so sometimes my photos have to be taken when there’s no natural light. Typical lightbulbs have a very yellow color cast and even with post-processing, I cannot make my photos look right. I discovered Ottlite, which is a brand of light bulbs and lamps that is supposed to be the closest to natural light you can get from an artificial light source. I have a desktop Ottlite Lamp that I scrap with and have attempted to use for the purpose of nighttime photos, but it is not quite bright enough. Ott lamps themselves can be quite costly, even with the use of a coupon but they also offer light bulbs that you can use with your own light fixtures. I went to my local big box craft store and bought three Ottlite bulbs for my ceiling fan. I waited for a sale and got all three bulbs for under $25.

Taking Photos of Your Hybrid Projects


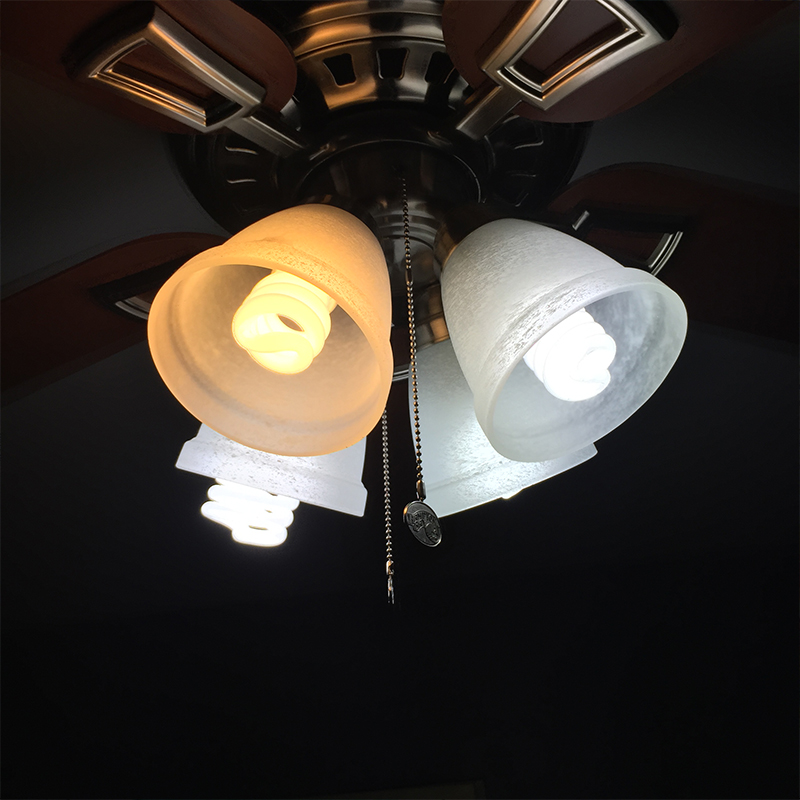
As you can see, the Ott bulbs  give off much less yellow light compared to a traditional bulb. My husband jokes that it looks like an operating room when these bulbs are in use, but I find it provides the right color and brightness of light needed for my photos.

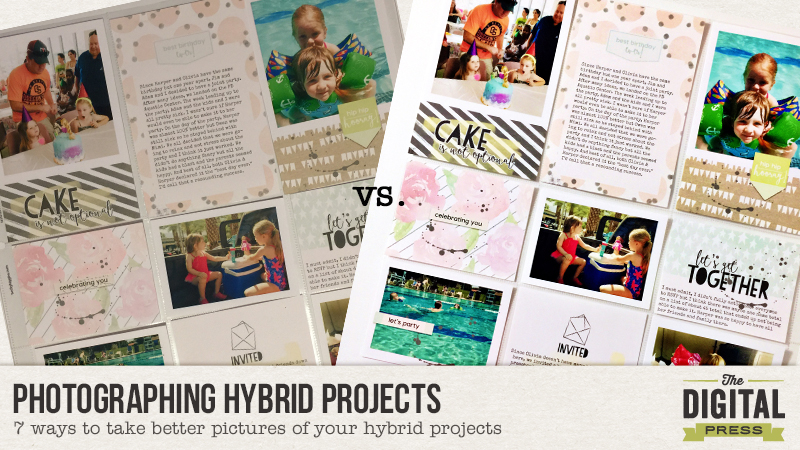
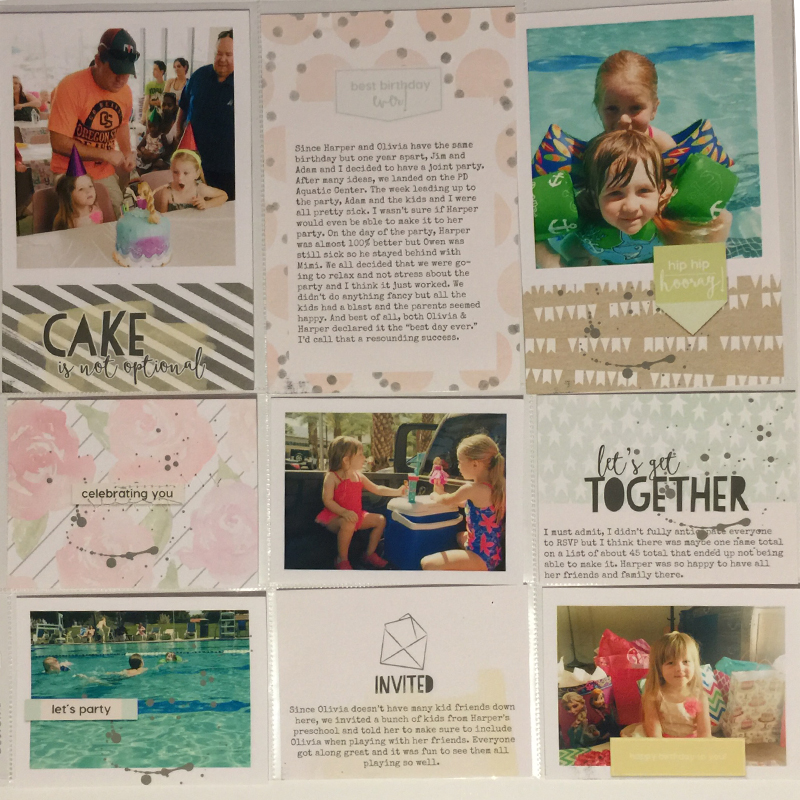
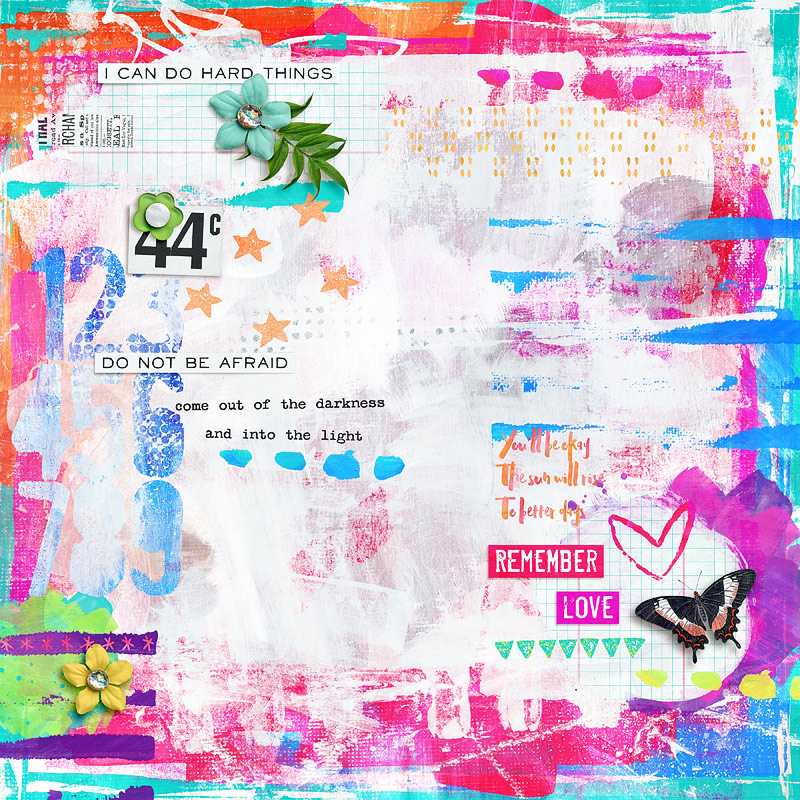
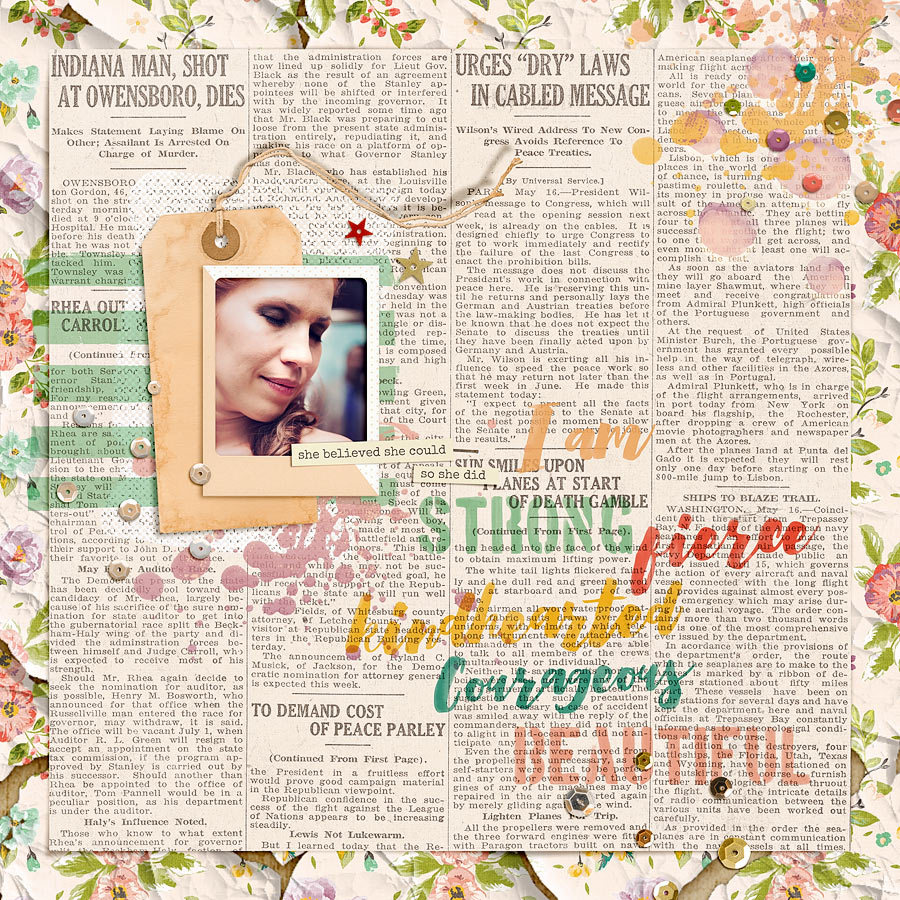
Here is a photo of my layout taken under regular light and without using any of the tips mentioned above:

Taking Photos of Your Hybrid Projects


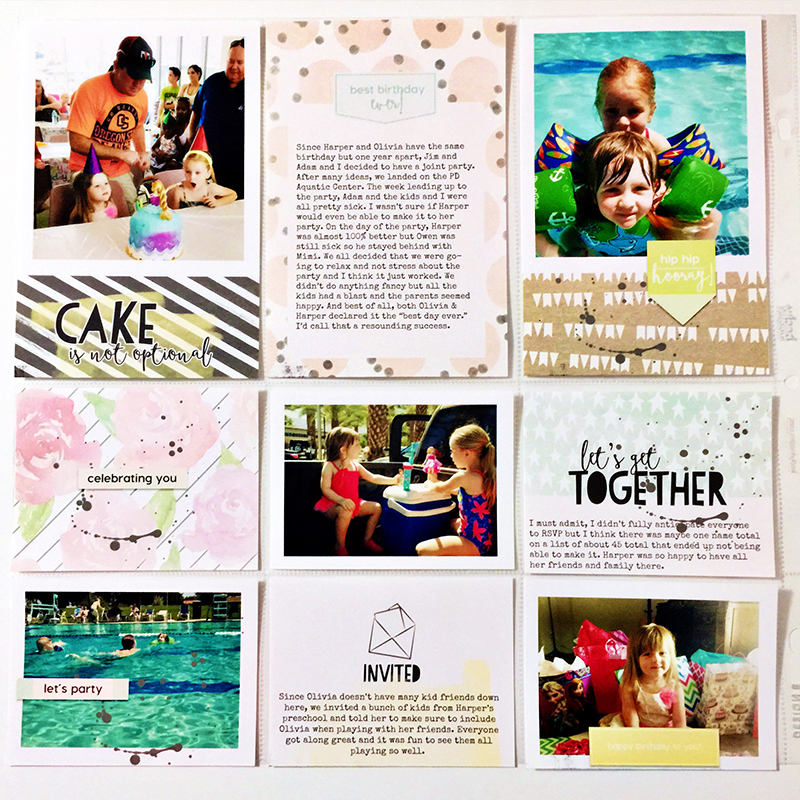
And here is the photo of the same layout following all the tips shared above:

Taking Photos of Your Hybrid Projects


I am by no means a professional photographer but this is the process that works for me. If you have any tips to add, please share in the comments. I would love to hear your tried and true methods.


Brenda

About the Author: Brenda Smith is a mother of two littles and wife located in Southern California. When she is not scrapbooking, you can find her working full-time, trying to finish up her college degree with online classes, or sleeping because there are never enough hours in the day. Hybrid scrapping satisfies her addiction to technology and her addiction to paper and glue.

Explore Within Yourself: What Makes You Strong

Explore within yourselfHello internet! This blog post couldn’t have come at a better time for me. For starters, it’s my birthday today, yay! It’s also been a hard few months (make that years) personally. From losing my stepmom to trying to come to terms that another baby is just not going to happen for us, plus dealing with substance abuse from a loved one, there have been times where the mere act of breathing has been a struggle. But then, I try and remember that I have a daughter and husband who adore me, friends who have become sisters, and an amazing group of scrapfriends who keep me sane, even when they don’t know they’re doing it. The mere act of belonging to a community, of creating a page even when it doesn’t have a deeper meaning and it’s more for the sake of creating something pretty out of the chaos around me has been a life saver.

My daughter used a blankie ever since she was born, and REFUSED to go to sleep without it. We bought several identical ones but (you guessed it) she always knew which one was THE blankie (called puffie) and drama would ensue if it was in the wash. Fast forward a few years, and one day she walks into my room, hands me the blankie, and says, “mom, I don’t need it anymore”. Turns around, walks out ad never looks back. That phrase has stuck with me and has helped me get rid of people who were toxic to me, habits that were not the best or healthiest, even those extra pounds. It has become my mantra of sorts, and while I have failed at some things, I think that that blankie has given me the strength to be a better person.

Explore within YourselfAnother thing that has helped me dig deep within myself to find the strength to face another day, and please don’t laugh, is exercising. I’m not much of a gym goer, but I forced myself to sign up for TRX and mixed strength training. I also do a couple workouts at home and my coaches have motivated me to keep moving, keep getting better, faster, stronger. I’m one of those people who actually believe the TV coach is talking directly to me, and that has helped me tremendously since I’m the kind of person who loves to procrastinate most of the times. I know a lot of people find this kind of training ineffective or boring, but it has worked for me.

Explore within yourselfSo tell me what is your secret strength? I want to hear all about it in the challenge I have prepared for you! Can’t wait to see what you come up with!

Explore the World: Go and See All You Possibly Can

aug12blog

I have always loved to travel. There is so much to see in this great wide world. My Travel Bucket List is ever long! Ireland, Europe, Greece, Italy…
But we now have 3 small children so traveling abroad isn’t within our budget…someday 🙂

Luckily, we live in the United States and it is full of wonderful places we would love to visit!
Chicago, Walt Disney World, Grand Canyon, Philadelphia, Niagara Falls…

Have you documented your Travel Bucket List yet? Wouldn’t it be fun if you did and used it as the title page to a travel scrapbook?

TDP KL 2015 Travel Bucket List

Materials Used:
STITCHED POCKETS BY: SAHIN DESIGNS
PROJECT TWENTY FIFTEEN | JULY COLLECTION BY: LAURA PASSAGE

And now come over to the forums to join us in the challenge!!


Krista About the Author: Krista Lund is a mom of 3, married to her High School Sweetheart living in SF Bay Area. Some of her favorite things are brownies, chips n dip, taking pictures and documenting her family’s story.

Tutorial: Hybrid Paper Poms

blogtemplate_8-10-15

.

I love creative gift packaging. I truly believe presentation of a gift makes a big difference. One of my favorite things to add as gift toppers are these little paper poms. Aren’t they cute? Plus, I love making them with digital supplies, because then I can just print out the paper I need. For these projects, I used papers and elements from the new One Kit Two Ways: Out Of This World | Kit by Laura Passage.

.

11

.

Here’s a tutorial on how to make these cute gift toppers. They’re really simple!


1

.

First, create a blank 8.5″ x 11″ document in Photoshop (or you can do 12″ x 12″ if you have a wide-format printer). Create squares that are about the size you want your poms to be. I used 2″ x 2″ squares because I was using a 2″ circle punch to make my poms. Clip your patterned paper to the squares to create a page of patterned paper squares as shown above.


2

.

I figured while I was crafting, I’d make a coordinating card to go with my gift. To do that, I just pulled the pieces I wanted to use onto an 8.5″ x 11″ document in Photoshop and sized them to what I wanted for the card and printed the whole sheet. If you have a Silhouette cutting machine, you can print and have the machine cut out the pieces. My Silhouette was not handy, and these weren’t super intricate cuts, so I just cut them out by hand.


3

.

Gather your supplies. For the paper poms, you’ll need a circle punch and some adhesive, and that’s it!


4

.

To punch your circles, it is easiest if you hold the paper punch upside down, then you can see how the pattern lines up. Go ahead and punch your circles. You’ll need 5 circles for each paper pom. It’s really fun to mix colors and patterns on these, but you can also do them all in the same pattern/color.


5

.

Once your circles are punched, fold each of them in half, and use your adhesive to glue the circles together (I just use a standard glue stick for these… works great). I put glue on half of a circle and glue it to the half of a different circle … just make sure you’re gluing the back sides together, not the patterned sides. 🙂


7

.

You should have something like this (above) when you’re done gluing. At this point, you can just glue the pom onto a package (or card or tag), or you can go one step further and punch a hole in the pom to thread ribbon through.


8

.

To punch a hole, fold all the circles together to create one thick half circle. I use the hole punch on my Crop-a-Dile because it will punch through that many layers. If you don’t have one of these, you may just have to punch one layer at a time.


9

.

Thread your ribbon or string through the pom.


10

.

Place the pom on top of your package and wrap the ribbon around it, puffing out the pom at the same time. Adhere the ends of your ribbon together on the bottom of the box. I use that red adhesive in the picture (called Terrifically Tacky Tape) to adhere my ribbon ends together because it is really sticky and does a good job of holding the ribbon together.


11

.

See how cute it is? It just adds a little something extra.


12a

.

Here’s another one where instead of punching holes in the poms, I just glued them on. I also used two different sizes of circle punches to get the different sized poms.


13

.

Here’s the card I made using the pieces of I printed out. I love it when my cards coordinate with the gift I’m giving.


final-project

.

Wouldn’t that be a fun little gift to receive?


JaimeAbout the Author: Jaime is a member of the creative team here at The Digital Press. She is a stay-at-home mom to 4 boys and 1 girl. When she’s not chauffeuring, volunteering at school, or helping with play costumes, she likes to digitally record her family’s memories, improve her photography skills, and read (there’s always a stack of books on her nightstand).

Explore The Everyday Moments

Explore The Everyday Moments

I often hear from other scrappers that they have run out of photos to scrap (yep, you heard that right, that can happen although never to me LOL) or they have run out of page ideas. Often the milestone events get scrapped such as birthday, graduations, holidays, etc but there are so many other moments to photograph and scrap about. Also, the focus doesn’t always have to be on your photo, you might scrap a page without a photo, choosing instead to focus on telling your story, your thoughts, your ideas. For this page, I snapped a few pics with my iphone of what I had for dinner. It’s a simple recipe so didn’t feel the need to type out the instructions but this page will remind me that I do love this casserole and will go into my food album. Food pages are a great idea because as the years go by, our health and eating preferences change, so it’s fun to look back on what you used to eat.

Explore The Everyday Ordinary MomentsAnother idea that has a lot of possibilities is to take random photos around your neighborhood, when you are out running errands, going shopping, travelling there and back and, again, you don’t need to bring a big DSLR if you don’t want to, just bring a little point and shoot or use your phone camera. I have a small mirrorless Sony camera that easily stores in my purse and I carry that with me often so I can grab quick shots with a bit better quality than my iphone (although I’m not knocking that camera by any means, it does a pretty good job). My hubby and I were driving down the highway in Bellingham, heading back from an afternoon at the casino. I snapped a pic through the windshield as we were driving.

Explore The Everyday Ordinary Moments
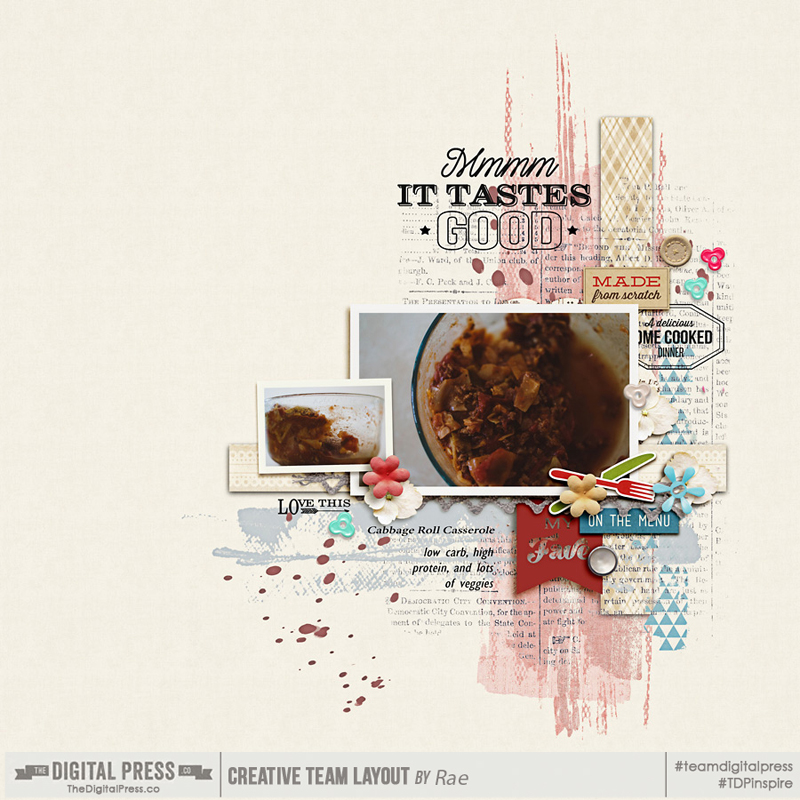
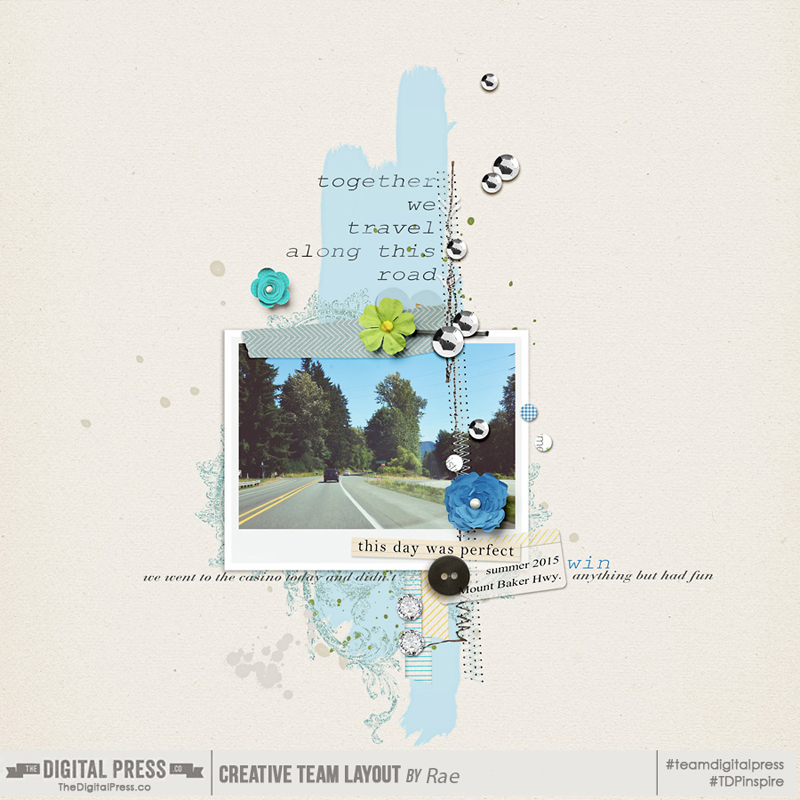
Take photos of things that have an impact on you, positive or negative. Maybe your favorite sweater shrunk in the wash; take a pic of it and scrap about it. I love to scrap about my personal items. I took photos when we went to the store to buy a new big screen TV; also when we went to buy a new fake Xmas tree last winter. I took an iphone pic of my pile of clothes that I will wash and fold to put in the luggage for our trip in a few weeks. Here’s the page I created with those pics. I journaled about the preparation for the trip and the excitement I’m starting to feel.

Explore The Everyday Ordinary Moments

We all have lots of “little moments” that make up our day and we all have hopes, dreams, fears and opinions which are great page topics you can explore. Have fun with it and head over here to check out the fun August challenges that you can participate in. Happy scrapping everyone!

Rae
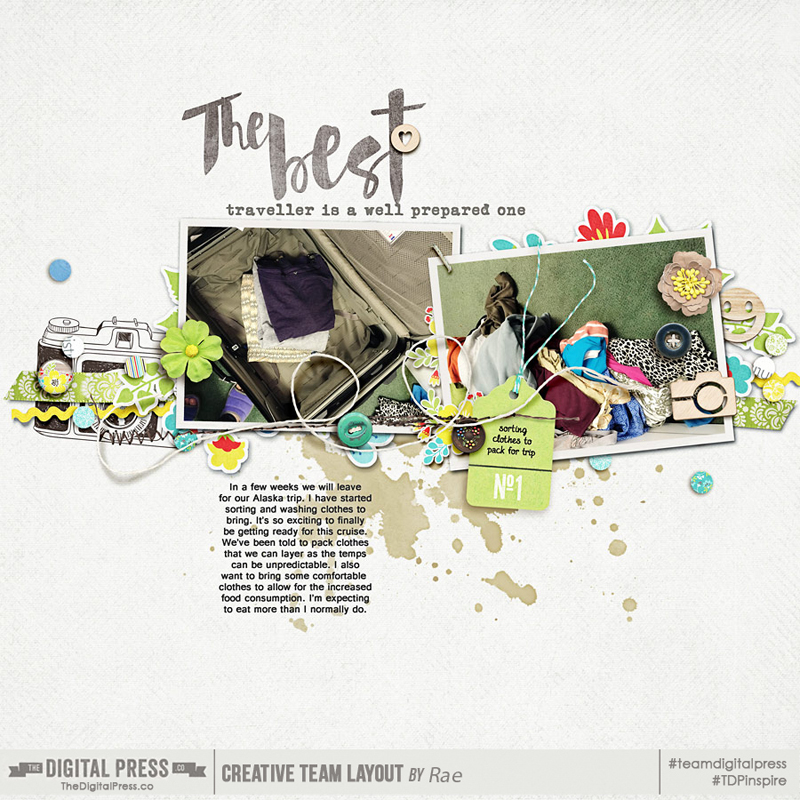
Rae is part of the creative team at The Digital Press. She’s a photographer on the west coast of BC, Canada. Passions include chocolate, reading thrillers, watching Netflix and Hulu, scrapping and hanging out with her family and Taz, her Labradoodle.