Here at The Digital Press, we love memory-keeping. We know that if you’re a fan of The Digital Press and you’re reading this, that you likely love memory-keeping, too.
With that said… life is busy. Things are always crazy, and there are never enough hours in the day. Never ever. We get it.
As such, it’s soooo easy to fall off of the scrapbooking bandwagon… and so easy to start to feel “way, way, way behind” when it comes to scrapbooking your cherished photos and memories. We’ve all been there — and sometimes, the task starts to feel insurmountable. The feeling of “I will never get caught up again!” can simply overwhelm.
About two years ago, one of our colleagues in the memory-keeping and scrapbooking industry — Becky Higgins of the Project Life brand of products — launched a completely revolutionary mobile app that made it possible for all of us to use our mobile devices to create scrapbook pages. If you haven’t yet checked out this app, you should definitely take a peek.
We’ve known Becky and her team for years now, and have simply loved watching this app — and her brand — take the scrapbooking world by storm. She has a passion for making memory-keeping something that is simple, quick, and effortless for everyone… and we adore that. Here’s a look at bunch of our team members from here at The Digital Press, meeting with her at the Craft & Hobby Association convention back in January 2015, where she excitedly showed us features of the (at the time brand-new) app…

[ group photo: (top L-R) Laura Passage, Danielle Engebretson, Karla Dudley Noél, Shannon McNab, Mari Koegelenberg, Nicole Seitler;
(bottom L-R) Kelleigh Ratzlaff, Becky Higgins ]
For those of you who have used this app on your mobile device… you know how easy it is. And it’s definitely a game-changer, because it allows you to productively use all of those little chunks of time that would otherwise be wasted (think: waiting rooms at doctors’ offices… sitting in the car line at your kids’ school for 20 minutes at the end of the school day… etc.) — to instead accomplish something, such as scrapbooking your photos, using the device that’s in the palm of your hand! 🙂
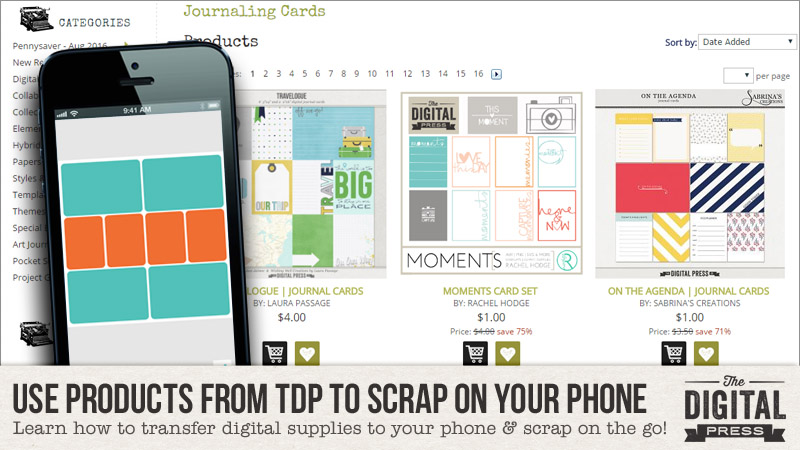
But did you know that you can use any digital scrapbooking products you like (not just the cards/etc. that are available in the app itself)?
We’re here today to show you just how easy it is to transfer your favorite digital scrapbooking products to your mobile device… and then import/use them in the Project Life app. Today’s tutorial — written by Laura, Erin, and Jen — is PART 1 in a 3-part series that will be on The Digital Press blog in the coming weeks… a series devoted to helping you use products from The Digital Press to scrap on your phone.
PART 1 — TRANSFERRING YOUR DIGITAL STASH TO YOUR MOBILE DEVICE
If you’ve used the Project Life app, you know that there are already pocket cards available within the app. Some are included in the app itself, for free… and others are available as in-app purchases. While this is awesome, and convenient… it can also become costly when you’re constantly making $1 and $2 purchases every time you’re working on a themed page and need a card to match.
Most of us, however, already have lots of fun scrap goodies sitting on our computer’s hard drive — stuff we want to use, but simply haven’t ever had time to use.
The exciting news is that you can use most of your own scrap stash in the app! Uploading your own scrap stash for use in the Project Life app is so much easier than you think.
For the purpose of today’s tutorial, we’re going to focus on transferring pocket cards to your mobile device… and then importing and using them in the app (in the future editions of this tutorial series, which are coming soon, we’ll show you how to use other items, as well).
This month, there is a FREE pocket card set available at The Digital Press [download expired 8/31/2016]. We’ll be using it in this tutorial; if you’d like to follow along. 🙂
1. First, download the cards to your computer’s hard drive. Then, unzip the file and organize the included images however you desire. This is what Erin’s cards looked like on her computer’s hard drive after she unzipped them…
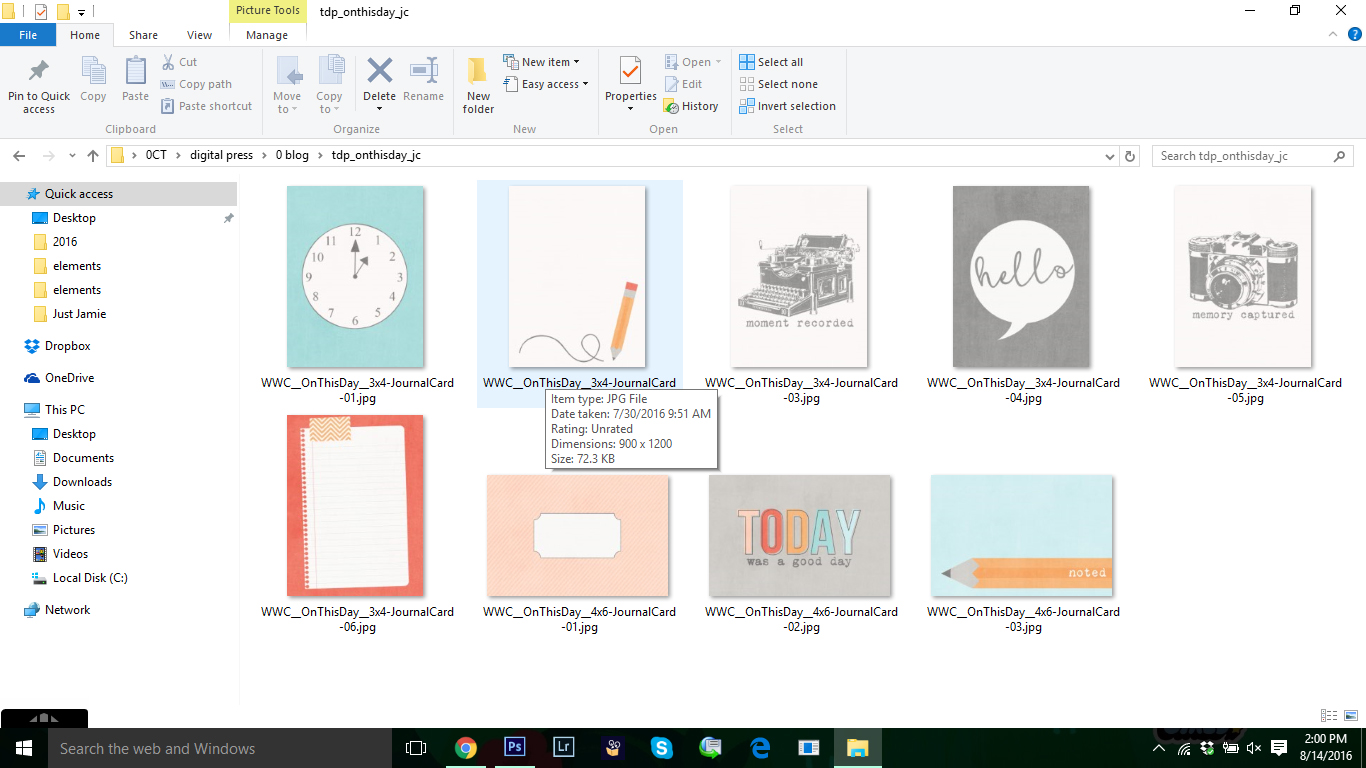
Erin likes to keep all of her TDP goodies together in one folder so that she can find them more easily. You could also create a folder full of all of the journal cards you wish to use for mobile scrapping… or you could organize in folders by designer name… or by theme… etc. It’s totally up to you!
2. Next, you’ll transfer your files to your mobile device… using an online file sharing program. The three of us all prefer to use Dropbox, but there are a variety of file sharing services out there (*NOTE* Dropbox is handy because the Project Life app actually lists Dropbox as an option when you choose your photos/images… so it’s integrated right into the app). No matter what service you choose… make sure to use one that you can access from both your computer and your phone/mobile device.
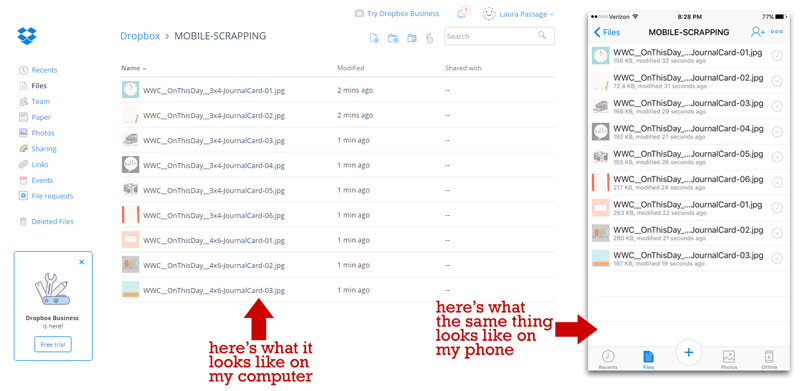
Shown above, Laura’s process for using Dropbox to transfer files from her computer to her phone is as follows: (a) she opens Dropbox on her computer, first, and creates a folder called “MOBILE-SCRAPPING” in her Dropbox account; (b) then she uploads the files from her computer’s hard drive to that same Dropbox folder; (c) next, she opens Dropbox on her phone and finds those same files in the “MOBILE-SCRAPPING” folder; (d) she saves each file to her phone by opening it in Dropbox and choosing “save image”.
**TIP** If you save your images onto your phone itself, we recommend creating an album (or albums) on your phone in which you can store your digital scrapbooking supplies. Depending on your phone’s operating system, you can do this manually; on an iPhone, you just click on “albums” within the photo app, and then click on the “+” sign in the top left corner and you can create a new album and name it anything you like.
3. You can also leave your images in Dropbox (as opposed to actually storing them on your phone, as described in 2(d), above)… because the Project Life app actually gives you the option of opening images straight out of Dropbox. More on that in the next few steps…
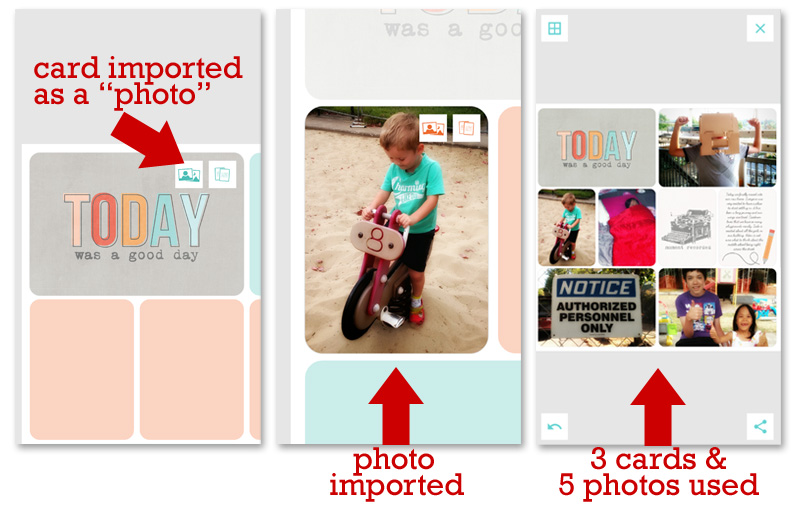
4. Now you’re ready to begin using your pocket card images in the Project Life app…
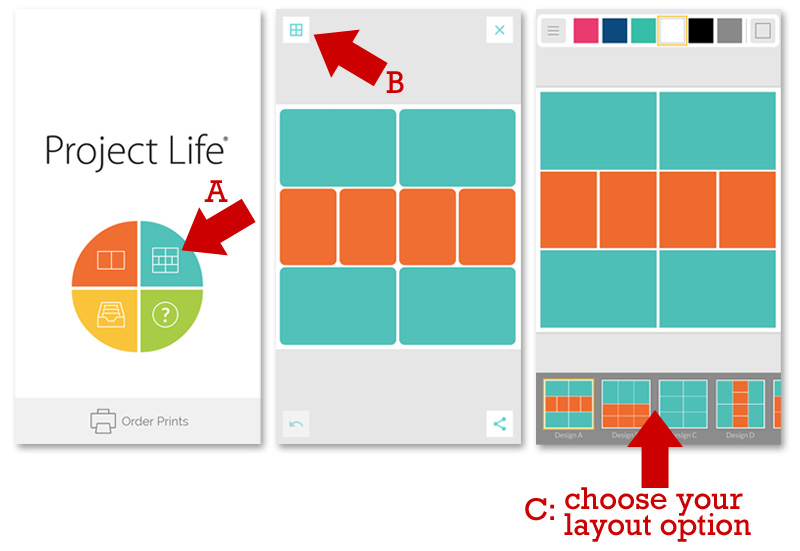
Open the app on your phone (or tablet)… click on the blue top-right layout creation option (A, on the above images)… and then use the button at the top-left (B, on the above images) to toggle open a layout selection menu (C, on the above images). Choose your layout design option.
Once you have your layout option selected… simply click on any of the blocks on the layout in order to “fill-in” that block. When you do, the app will zoom-in to that block and give you 2 options, as shown here (D, on the following image)…
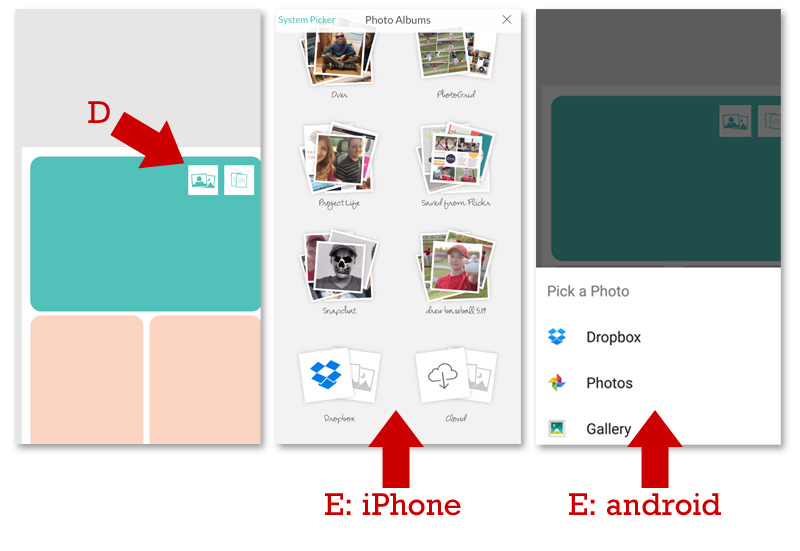
Shown above (D, on the far left image), the app gives you two options for filling any of the blocks in your layout design: photos (left) or cards (right). If you choose the cards option on the right, you are able to use any of the cards that are built-in to the Project Life app. For the purpose of this tutorial, however, you will be choosing the photo option on the left.
When you click on the photo option… your phone will open a menu to allow you to find and select the photo that you want to use (E, on the above images); note the difference in interface between the iPhone version of the app (center image) and the android version of the app (right image).
Here’s the trick — you’re not actually adding a photo. You’re adding a card… but because you’re importing the card from outside of the Project Life app, the app will view it as a “photo.” Therefore, you’ll use the photo option… and then you locate the image you want to use (which is one of the cards you’ve imported/saved in Dropbox and/or on your phone, itself).
5. Fill the blocks on your layout with cards and photos…
In the images above, you can see Erin’s step-by-step progression from “empty layout design” to “completed page” as she clicks on each block within the layout and fills it with either a card or a photo.
You’ll also notice that she added text to one of the cards (the pencil journaling card). Currently, this can’t be done directly in the Project Life app (you can only add text to the in-app cards… but not to photos). Thus, we’ll detail the process of adding text to cards from your own digital stash in the next installment of this series (coming September 6 to The Digital Press blog, so stay tuned!). For now, however, we’ll just mention a few of the other apps that we have used to quickly and easily add text to our cards from our phones: Over, Letterglow, Textgram, and the Rhonna Designs app.
6. Once you have created a page you like… it’s time to save your layout and export it as a high-resolution image.
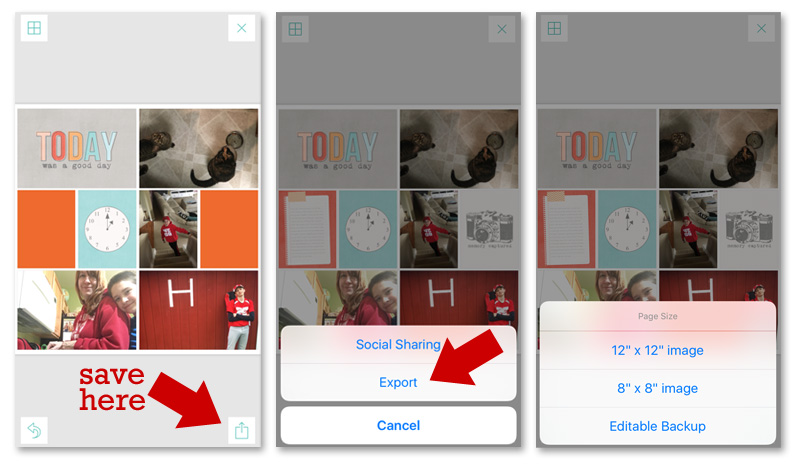
In the images shown just above, you can see Jen’s process for saving her completed page as a high-resolution image. First, she clicks on the button at the bottom-right corner of the app. Next, she chooses “Export” — and from there, she is able to choose an image size (12″ x 12″ or 8″ x 8″).
Once she chose a size, her phone prompted her to choose a location to save the final image. It is possible to save it to the user’s camera roll, or to Dropbox, or even to send the page off to be printed (yes, that’s right — you can order prints straight from the Project Life app, if you want to).
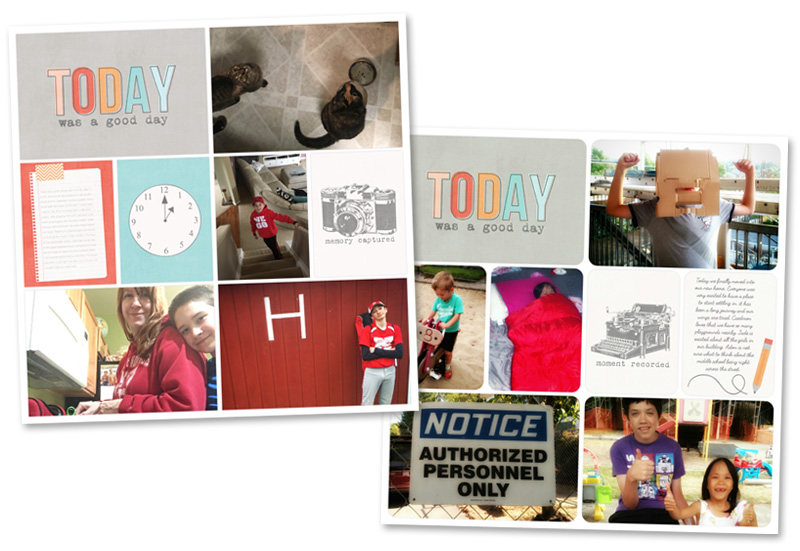
Here’s a look at 2 finished pages — one by Jen, and one by Erin — both created using the Project Life app, as well as the card set shown in this post…
This final step of saving a high-resolution copy of your image will also come in handy when we get to the 3rd and final installment of this series (coming in late-September to The Digital Press blog, so stay tuned!) — in which we will teach you how to use this app, along with your TDP scrap goodies, to create non-pocket style pages, as well. 🙂
Sounds exciting, right? IT IS! The idea of creating non-pocket style pages in this app is something that expands the possibilities of this app in a way that is just awesome. Freeing. Liberating, even. The flexibility to scrap in numerous styles from the palm of your hand is just way too cool. We can’t wait to continue this series!
For now, however, today’s PART 1 post should ensure that you are all set to make some basic pocket pages on your phone using all of your favorite scrap goodies from The Digital Press! Enjoy, and happy scrapping!
 About the Authors
Laura Passage is the owner of The Digital Press, and also the designer behind Wishing Well Creations by Laura Passage (WWC). She works now as a graphic designer in both the digital and paper scrapbooking industries, but previously spent over a decade working as a college soccer coach. She lives in the Pacific Northwest with her husband and two young sons (affectionately referred to as The Tiny Terrorists), and will rationalize eating coffee ice cream for breakfast to anyone who questions it.

Erin is a work from home mom of three living in Thailand. She loves playing with her kids and anything artsy. She can often be found knee deep in toys with paint on her face. She is slowly learning the meaning of living an authentic life, and enjoying every minute of the adventure.

Jennifer Hignite is a mom of three boys and new homeowner with her fiance in the mitten state of Michigan. When she is not scrapbooking, she enjoys photography, decorating, and shopping at Target.


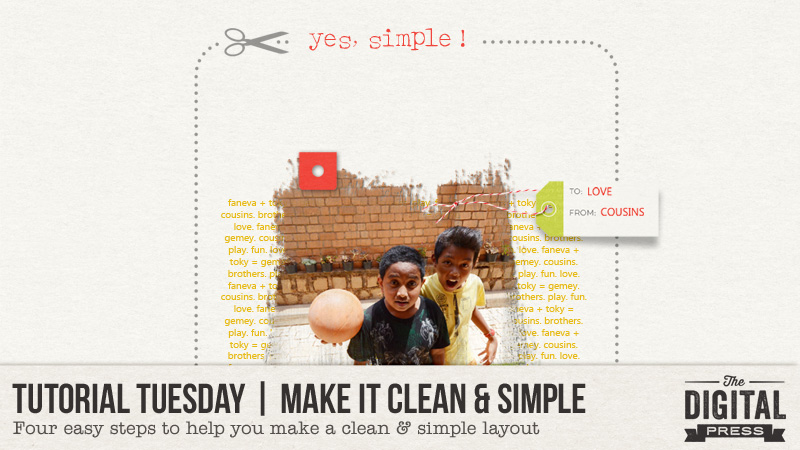
 What I like about using the gradient tool — rather than brushing away parts of a layer (which is also fun, and simply achieves a different look) — is that it creates a gradient, or a gradual blending of one layer into another. The gradient of the blending is determined by the type of gradient chosen, and also by the placement and length of the gradient that you draw.
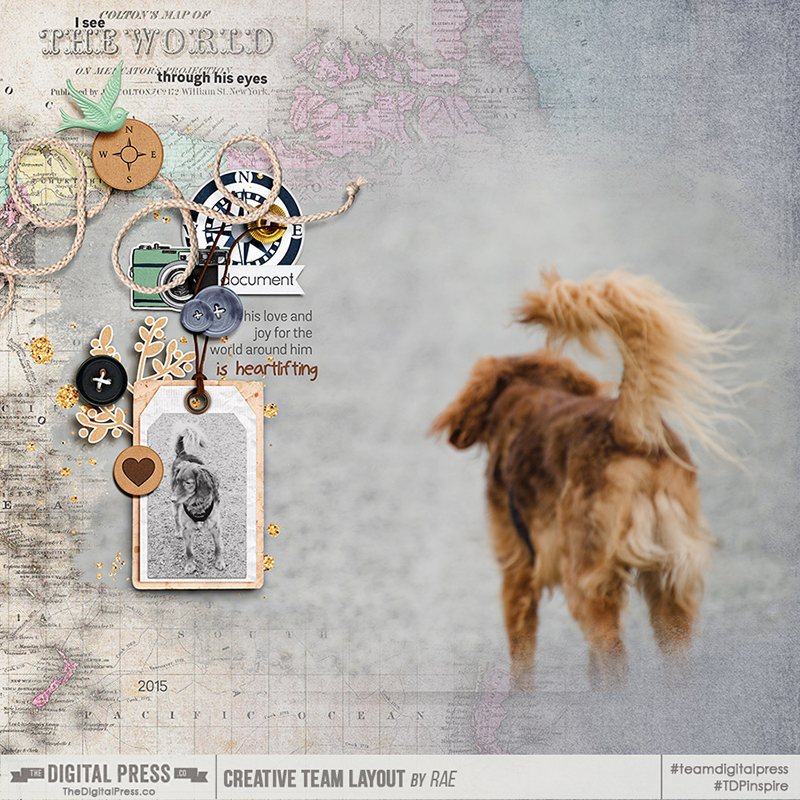
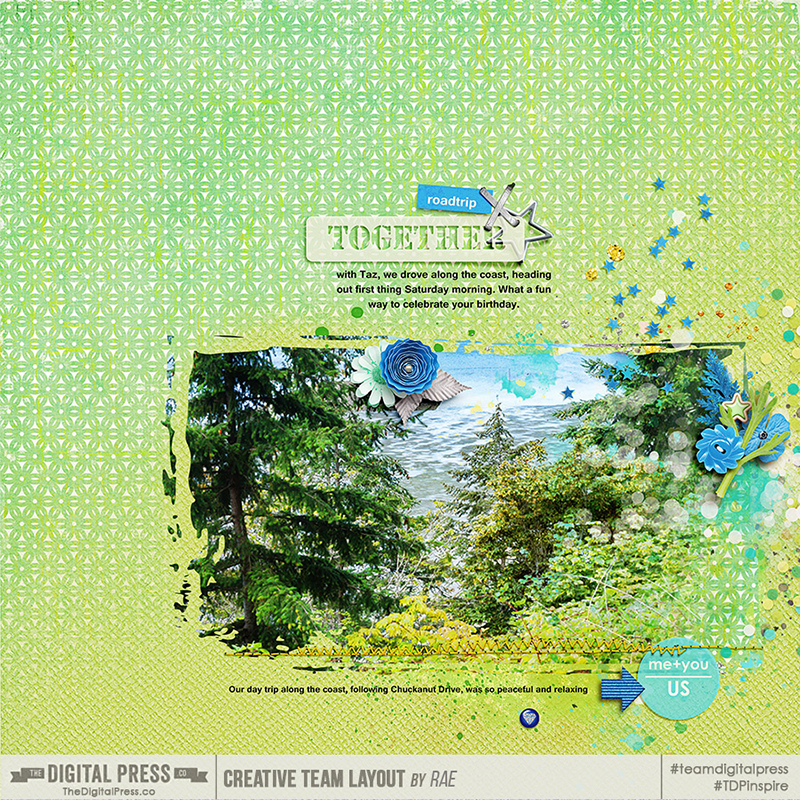
 About the Author Rae is part of the creative team here at The Digital Press, and has been a scrapbooker and photographer for many years. She lives on the west coast with her hubby and labradoodle, Taz. She’s addicted to chocolate, TV shows, and books!
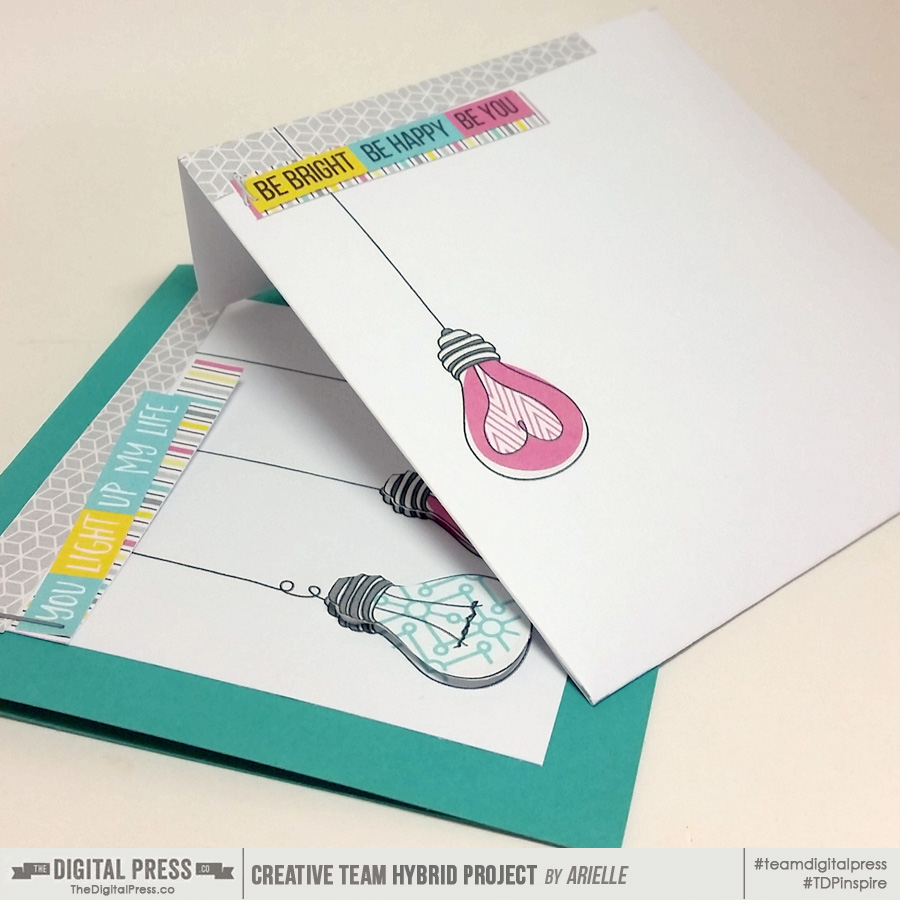
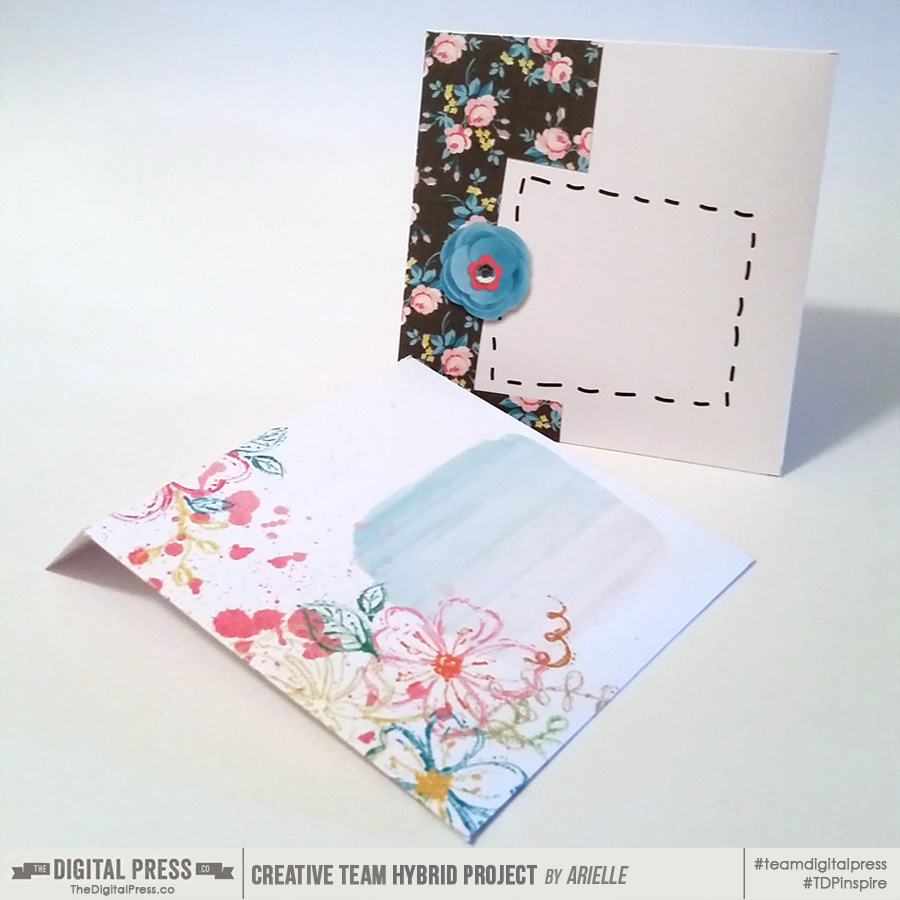
 About the author Arielle H Gordon is a wife and mom of two crazy kiddos, ages 6.5 & 8. She moved around (a lot!) before returning to settle down in her hometown of Enterprise, Alabama, to marry her sweetheart and start her family. She is an avid crafter — digital, hybrid and otherwise! She LOVES Jesus, family time, camping, gardening, reading cozy mysteries, hot tea, popcorn, and anything on BBC! This time of year, you’ll find her reading like it’s going out of style, going to the gym, or in the car-pick-up line!