September 2016 at The Digital Press | Imagination


I can’t believe I am typing this right now… but it’s September. SEPTEMBER! How? I have no idea. This year is just flying by. But it’s true… it’s September 1st.

Here in the United States, September is largely associated with “Back to School” — a time that returns us to routine, and renews our focus on the value of learning and creativity. It’s also a time — much like the start of a new year — that we often view as a chance for a “fresh start” and a chance to reinvent ourselves. It’s a time when a lot of people — from young school kids, to their parents, to retirees — all imagine a new and better existence. That might sound hokey, but it’s true! Think about these things you always hear yourself saying around this time of year… “this year, I will stay up-to-date on my child’s homework folder!” …or “this year, we will do better at meal planning and eating as a family!” …etc. We imagine a better way, and a better us.

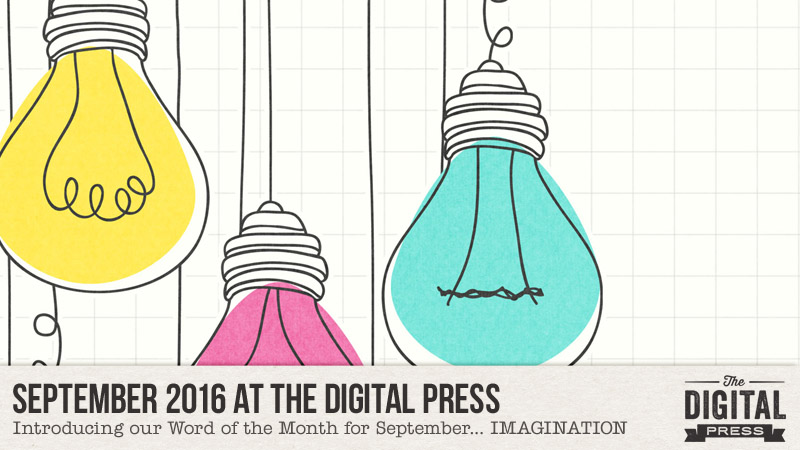
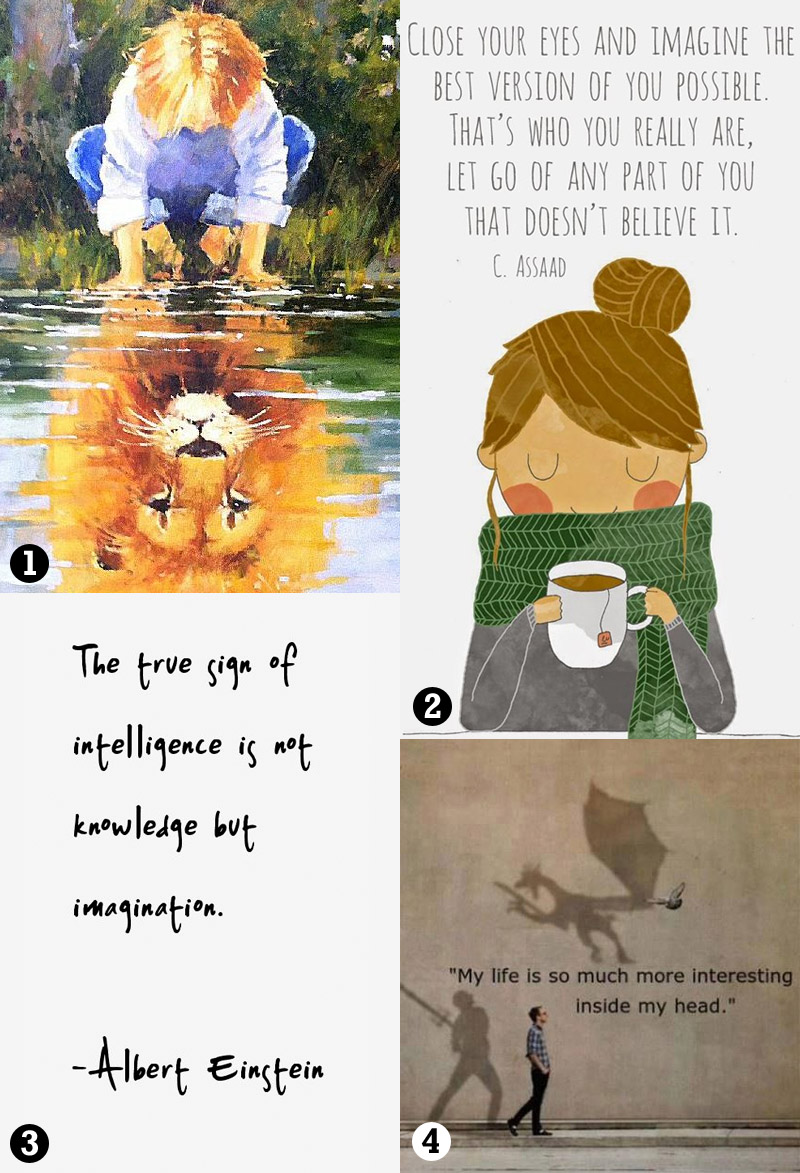
Because of this, we’re excited about our newest Word of the Month for September 2016 here at TDP… IMAGINATION. It’s applicable to everyone, from young to old, in a multitude of different ways.


image credits [1] [2] [3] [4]


Looking for ways to incorporate this idea of IMAGINATION into your scrapping and crafting this month? Come join us at TDP! We’re jumping into another month of our increasingly-popular Challenge System for September, and there are so many fun new things in store for you throughout the upcoming month — including a challenge that specifically calls upon our new word of the month — IMAGINATION. 🙂

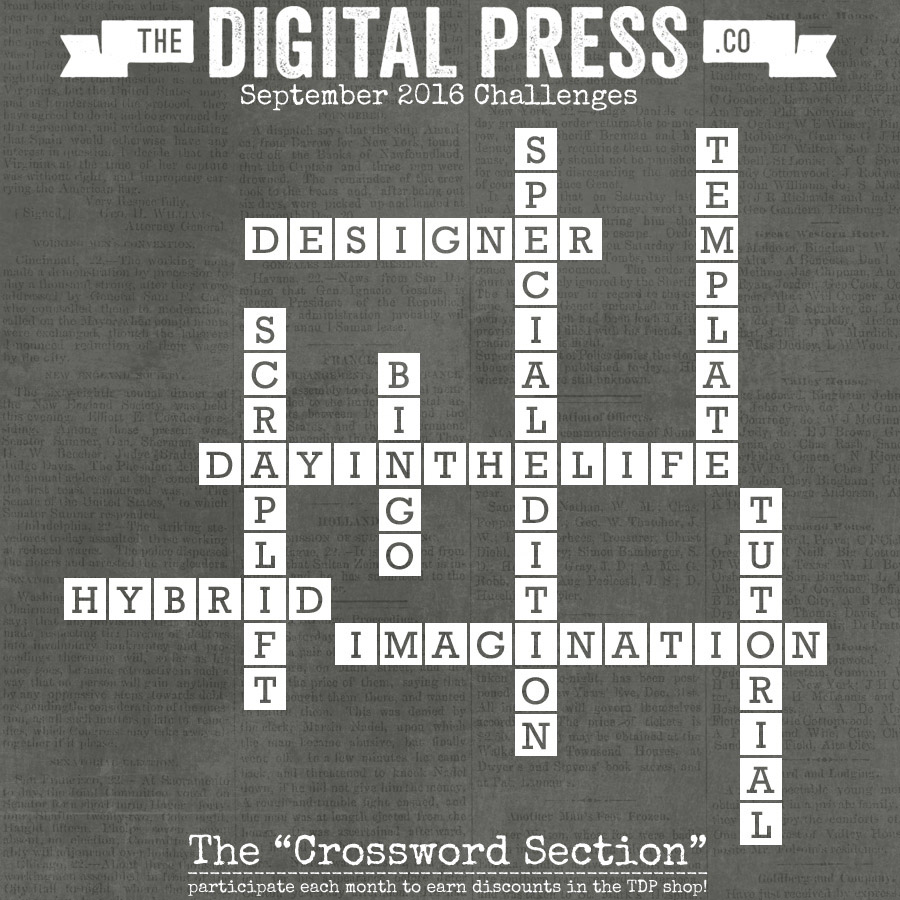
We have 9 new challenges waiting for you in THE CROSSWORD SECTION — a.k.a. our forum’s challenge section — a fun play on words that we love because (a) #WeAreNerdyThatWay, (b) our challenges have always been loosely connected to our Word of the Month at TDP (get it? “crossword” haha)… and (c) it fits nicely into TDP’s news/press theme.

Here’s a peek at the challenges you’ll find throughout September 2016…


Get more information about our monthly challenge system HERE.

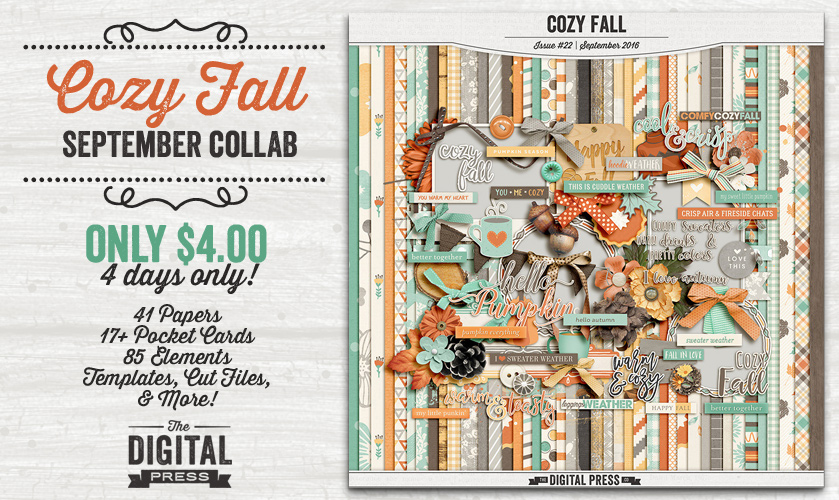
Meanwhile, make sure you check out our newest TDP collaborative collection, Cozy Fall, which launched today in the shop. The design team really knocked it out of the park with this collection… capturing the essence of early fall with rich, beautiful earthy colors and lots of great autumn-themed icons and word art. With 41 papers, 85 elements, 17+ journal cards, layered templates, cutting files, and more… it’s a must-have for scrapping your autumn memories and creating some fun hybrid projects, party decorations, and more!


We look forward to spending September with you at The Digital Press.


Laura Passage

About the Author  Laura Passage is the owner of The Digital Press, and also the designer behind Wishing Well Creations by Laura Passage (WWC). She works now as a graphic designer in both the digital and paper scrapbooking industries, but previously spent over a decade working as a college soccer coach. She lives in the Pacific Northwest with her husband and two young sons (affectionately referred to as The Tiny Terrorists), and will rationalize eating coffee ice cream for breakfast to anyone who questions it.

Tutorial Tuesday | Creating Star Bursts


When I first started out in photography, I was always amazed when I managed to capture camera lens artifacts such as star bursts, sun flares, or bokeh in my photos. They seemed to appear randomly and I had no idea when and why they were occurring. Eventually I took a look back through my photos, studied the camera settings, and then started experimenting. I now have a few tips on how you can capture star bursts such as the one in the photo below (taken at the beach just after sunrise)…


So what causes these star bursts? Simply put, star bursts are caused by the diffraction of light hitting the blades of your lens. The effect is magnified the smaller the opening through which the light passes into your camera. That is why it is easier to get this effect using a wide angle lens with a small aperture opening (i.e. higher F-setting). You can use any light source — including the sun, of course — or you can experiment with other light sources such as street lamps, night lighting, car headlights, Christmas tree lights, etc.

For those who are more technically-inclined, it is interesting however to note that the number of rays on the star burst is usually directly related to the number of blades of your lens. For lenses with an even number of blades, the number of star rays will be that number (that is — an 8 blade lens can create a star burst with 8 rays, etc.). For lenses with an odd number of blades, the number of star rays will be double the blade number (so a lens with 5 blades will create a star with 10 rays).


The following tips will help you to create star bursts…

1. Camera and lens

You can achieve this result with a simple point and shoot camera… but it is easier with a DSLR (I am not sure what is possible with all different models of phone cameras). Also, try experimenting with different lenses. The effect is usually easier to obtain with smaller focal lengths… so the wider the view the better.

2. Time of Day

It is possible to achieve this at any time of day… but I have found it is easiest early in the morning or late in the afternoon when the sun is not too overwhelming. If you shoot during the day, however, you should always make sure that you do not look directly into the sun — even through your camera’s view finder.  🙂

3. Camera Settings

You will ideally need an aperture setting smaller than f9 (i.e. f9 and above). Also you will want a wider focal length… so use your 50 mm,wide angles lens or telephoto lens at the widest angle.

4. Angle to the Light Source

This is where you will need to experiment and move about. Look through your view finder or screen while moving around and changing angles. You will be surprised at the difference a few degrees up or down or a few feet to the left or right will make. Walk around until you get the effect you desire. As a final tip, you may find it easier if you partially block the sun as I have done in some of these photos.

Here are another couple of recent photos of mine (with the camera settings I used listed on them)…


I have been experimenting trying to get star bursts in my portrait photography… but still need more practice, as you can see. 😉


To finish off, here is a page for my Word of the Year book (my word is “breathe”), which I created with one of my starburst photos…


AvatarAbout the author  Carolyn lives with her partner, eldest daughter and 3 rescue dogs on 5 acres of paradise in the hinterland of the Sunshine Coast, Australia. Her camera, along with an assortment of lenses, is never out of sight. When not taking photos, she loves cooking and gardening and of course scrapbooking.


Feature Friday | Tracie Stroud


I’m super excited to introduce you to another one of our designers here at The Digital Press… Tracie Stroud. Tracie is a designer who has a unique style that is all her own. Working from a mixed media background, Tracie creates fun products that look like real-world papers and elements from an art journal. She’s been designing for over eight years, and she loves the flexibility that digital offers — letting her incorporate her art into her designs. And the best part is that Tracie’s designs let customers play and express themselves!

Here are some of my favorite products from Tracie’s shop at The Digital Press…


And now… to find out more about Tracie. I asked her a few questions, and here’s what she had to say…

Where do you live?
Shreveport, Louisiana

When you’re not designing, what do you do with your time?
I homeschool two of our kids, so that takes up pretty much all my non-designing time. I’m also very involved in my daughter’s American Heritage Girls troop. I’m an avid reader and art journaler, so those are usually my first choice of “me” time. 🙂

What are 5 tidbits of trivia we might not know about you?
—I love to sing. I received lessons as a teenager and I was a worship leader in a couple of churches we’ve attended.
—Along the same lines, my sister is a professional opera singer.
—I have a degree in Elementary Education and Library Science and I taught in public school for several years before our daughter was born.
—Our middle child has moderate autism and we’re vocal advocates for rights for kids and adults with disabilities.
—My daughter and I are learning Latin together this school year.

Which of your products is your favorite?
My favorite kit is Sorrow, although it was a difficult one to create. I designed it in the months following the very sudden passing of my Dad. Although it’s a reminder of a difficult time, it’s also been a blessing to receive messages from others who have gone through loss, telling me how the kit has helped them document their struggles with grief as well.


Here are some fabulous layouts featuring Tracie’s gorgeous designs…


I hope you all can see why I love Tracie’s products (and the pages that are created with them!). There are just so many options and different ways to express yourself creatively.

There are ton of great pages using Tracie’s designs (check them out in the gallery here at TDP)! And while you’re at it, run off to check out her shop, too, because all of Tracie’s gorgeous products will be 30% OFF through the end of next Thursday night (sale will end at 11:59pm ET on Thurs 9/1)!


KimberleeAbout the Author  Kimberlee is a lover not a fighter; a stay-at-home gran, a poet, and a lifelong learner. She grooves on saturated colors, Tuesday dance parties, optimism, glitter and sunshine. She colors outside the lines.  She is a dreamer. She is a collector of moments.  She is all about the story. She completed her MFA in Creative Writing and recently finished her M.Ed. in Instructional Design, but still can’t figure out what she wants to be when she ‘grows up.’

Tutorial Tuesday | Rotating Homework Supply Station


Today I’m here to help teach you how to make a super easy project — a rotating homework station. This is a great way to keep all those school supplies in one place! It’s a really easy project, too… as we’ll basically just turn a lazy susan into a turntable homework station, using our favorite school-themed digital scrapbook kit.

Supplies Needed:

  • turntable & wood top
  • 4 soup cans (or similar; I used 26oz soup cans)
  • ribbon (optional)
  • magnets
  • scissors
  • school supplies
  • printer
  • card stock
  • digital papers (I used the following school-themed papers —  Star Student papers by Inside Pixels by Lisa Bell)…


Here’s a look at my supplies for this project. I chose to use 4 – 26oz soup containers; you could choose smaller cans and use one or two more, or you could even choose 3 larger cans… it’s up to you!)…


I purchased my 9″ turntable from Amazon. You can also find them at most kitchen supply stores. I wanted my platform to be a bit larger than the turntable, itself, so I added a 10″ round wooden top to my turntable.


Once the platform was secured to the turntable, I glued magnets on the top in the places where my cans would be placed.

Next, I printed some of the fun Star Student papers onto my card stock, and then trimmed them to fit my cans.

*TIP* When attaching the papers to your cans, you can hot glue the seams… or even just use glue dots to adhere the papers straight to the cans. You can even add a ribbon around the top of the cans, if you wish, as decoration (I didn’t).


Once the paper was attached to my cans, I placed the cans on the top of the magnets to hold them in place — to keep them from tipping over when rotating the turntable.

After that, we’re finally ready to fill the cans with our school supplies…


You can fill this with supplies for a teacher gift, use for a homeschool organization, college desk, craft area or anything else you can imagine!

If you have a central location where supplies are kept neat and tidy, it will be much more simple to finish your homework efficiently. Let me know if you give this a try… I’d love to see your results!


Terresa

About the Author  Terresa is a mother to 5 beautiful children. She loves capturing memories with her digital camera and creating a visual family memory book to be enjoyed and treasured. She enjoys designing and creating personalized items for her home and children. Other interests are crafting and gardening, and you will often find her enjoying the outdoors and soaking in the beauty of nature.

Hybrid How-To | Make Your Own Washi Tape

Washi tape has been a trend in scrapbooking for quite a while now, and I’ll admit to having quite a stash. I have about 3 favorites that I tend to use on every project, however… so I decided to make my own shorter versions using digital papers. I’m here today to teach you how to do the same!

STEP 1 — First, gather your supplies:

  • Tissue paper
  • Double-sided tape
  • Scissors
  • Digital papers (I used papers from Family Time by Meg Designs, and also from Count On Me by Anita Designs)…

STEP 2 — Next, in Photoshop you will open up a page as big as your printer will print. Pull a few of your favorite papers into Photoshop, and make strips down the page, as shown here…

*TIP* make the strips a little wider than the width of your tape, in order to leave some room in case you don’t lay the tape exactly straight in STEP 5

You may need to resize the papers, making them smaller and overlapping them, in order to create the right size pattern for the thin strip. If you look at the blue damask paper, above, you will see that the pattern really needed to be smaller to get the damask effect on the thin tape strip… so I shrunk the paper down, duplicated it, and overlapped it to get the repeating pattern correct.

Here’s a look at my final document in Photoshop, before I printed…

STEP 3 — Your next step will be to cut the tissue paper to the size of the paper that will go through your printer, and secure it to the end that feeds into your printer with double sided tape (I use thinner tape for this). This is because the tissue paper won’t usually feed through your printer on its own, without getting all jammed up (it’s just not thick enough). Adhering it to a thicker piece of plain copy paper ensures that it will make it through the printer without jamming up.

*TIP* I also iron my tissue paper slightly on a low setting (no steam), to ensure that it’s really flat — but this isn’t mandatory.

STEP 4 — Now you will print as many copies as you like, depending on how long you want your tape rolls to be.

STEP 5 — Attach your double-sided tape to the back of the printed tissue paper strips, joining the papers if you printed more than one sheet of the same pattern…

STEP 6 — After that, you will trim each of your new tape strips, cutting off the excess tissue that is wider than the double-sided tape. After that, you just need to roll up the strips…

STEP 7 — Have fun playing with your new tape! You can use your “limited edition” washi tape strips on everything from scrapbooking layouts… to hybrid cards… to planner pages… or anything else you can think of!  🙂


amandajane About the Author  Amanda found digital scrapbooking in 2006, as a paper scrapper who was frustrated with the limitations of paper scrapping products. She now loves to combine paper and digital products and techniques for her pages and projects. She is the wife of a Naval Officer and has two teenage children. She lives in Australia, and has also lived in the U.S and Malaysia and loves that she has had the opportunity to travel the world with her family.


Feature Friday | La Belle Vie Designs


Welcome to another Feature Friday! This week, we’re excited introduce Hannah of La Belle Vie Designs. Hannah’s kits are always full of fun patterned papers, but she doesn’t stop there. Hannah also creates great alphas, wordart, stamps, and templates. You’ll find all sorts of scrapbooking components in her store at The Digital Press — it’s a one-stop shop! The color palettes are always full of fun, bright colors… with kits for both boys and girls.

Here are a few of my favorites from La Belle Vie Designs…

One of the things I really love about being a part of the digital scrapbooking world is getting to know the designers. They’re always so willing to share a little bit about themselves. I asked Hannah a few questions to get to know the designer behind the La Belle Vie label. Here’s what she had to say…

Where do you live?
Minnesota. I’m about a half hour outside of St. Paul and Minneapolis, so we’re far enough away to enjoy the peace and quiet (but not too far away for a football game or the Farmer’s Market!).

When you’re not designing, what do you do with your time?
I’m a SAHM to four awesome little monsters (three girls and one super-spoiled little boy), so my free time is really limited 🙂 LOL On the rare occasion that I do have some time to myself, I like to read, bake cupcakes, and binge watch all things on Netflix (right now I’m re-watching Gilmore Girls).

What are five tidbits of trivia that we might not know about you?
—I absolutely love coffee, but I couldn’t stand it while I was pregnant with Liam (my youngest). It was kind of horrible — ha ha!
—I hate wearing socks! Wintertime is torture for me!
—I met David (my fiancé / partner in crime / laundry-folder-extraordinaire) by accident …literally! I was teaching my younger sister how to drive, and she hit his car. No one was hurt and there wasn’t really that much damage to the car, so I figured I’d probably never see him again. Clearly, he had other ideas. 😉
—I’m a history nerd. It was always my favorite subject in school, and I’m almost always reading some sort of autobiography or historical non-fiction book (right now I’m reading Washington: A Life by Ron Chernow).
—I love grocery shopping. Seriously. Probably sounds weird, but there’s just something about it that I love. It probably helps that most of the time I go by myself, 😉

Which of your products is your favorite?
Grace (Hat of Bunny) and I recently worked together again, and I love our most recent collab kit Under the Sea! The Little Mermaid has always been my favorite Disney movie, so I was excited to add an Ariel-inspired kit to my Disney-themed collection…


Isn’t that a great kit? I don’t see purple too often, but this works so well with the theme.

While I was looking through her store for items to share, I also compiled a few of my favorite layouts so you could see what people have created when using her kits…


If you haven’t already browsed through the La Belle Vie Designs shop here at The Digital Press… definitely check it out this week, because her entire shop will be 30% OFF through the end of next Thursday night (sale will end at 11:59pm ET on Thurs 8/25)!


KatAbout the Author  Kat Hansen is a creative team member here at The Digital Press. A Director of Human Resources by day, she loves the opportunity to spend a few hours each day being creative. Vacation memories feature pretty heavily in Kat’s scrapbooking pages, as do her son and “daughter” (of the four-legged furry kind). Kat has quite the sense of humor (she “blames” her father for this), which she incorporates into her journaling and memory-keeping.