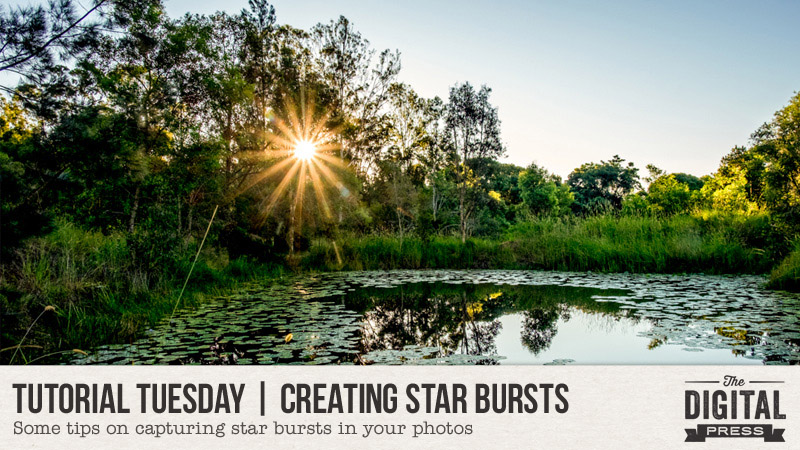
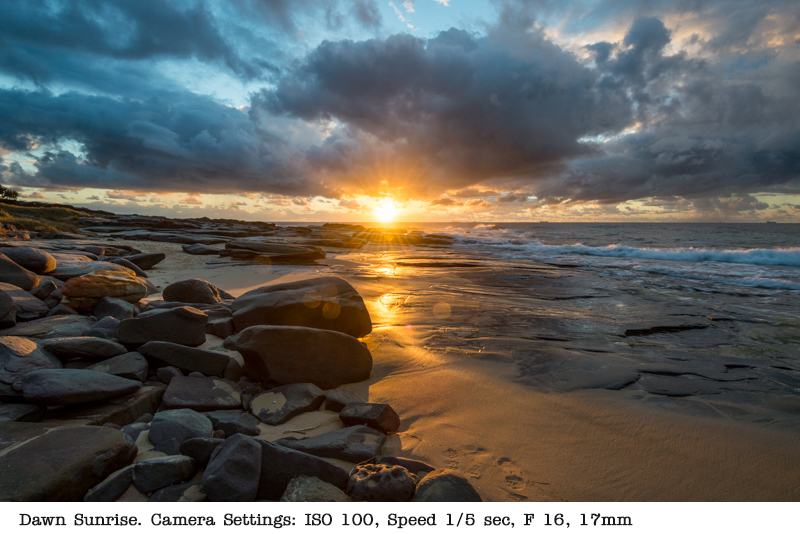
When I first started out in photography, I was always amazed when I managed to capture camera lens artifacts such as star bursts, sun flares, or bokeh in my photos. They seemed to appear randomly and I had no idea when and why they were occurring. Eventually I took a look back through my photos, studied the camera settings, and then started experimenting. I now have a few tips on how you can capture star bursts such as the one in the photo below (taken at the beach just after sunrise)…
So what causes these star bursts? Simply put, star bursts are caused by the diffraction of light hitting the blades of your lens. The effect is magnified the smaller the opening through which the light passes into your camera. That is why it is easier to get this effect using a wide angle lens with a small aperture opening (i.e. higher F-setting). You can use any light source — including the sun, of course — or you can experiment with other light sources such as street lamps, night lighting, car headlights, Christmas tree lights, etc.
For those who are more technically-inclined, it is interesting however to note that the number of rays on the star burst is usually directly related to the number of blades of your lens. For lenses with an even number of blades, the number of star rays will be that number (that is — an 8 blade lens can create a star burst with 8 rays, etc.). For lenses with an odd number of blades, the number of star rays will be double the blade number (so a lens with 5 blades will create a star with 10 rays).
The following tips will help you to create star bursts…
1. Camera and lens
You can achieve this result with a simple point and shoot camera… but it is easier with a DSLR (I am not sure what is possible with all different models of phone cameras). Also, try experimenting with different lenses. The effect is usually easier to obtain with smaller focal lengths… so the wider the view the better.
2. Time of Day
It is possible to achieve this at any time of day… but I have found it is easiest early in the morning or late in the afternoon when the sun is not too overwhelming. If you shoot during the day, however, you should always make sure that you do not look directly into the sun — even through your camera’s view finder. 🙂
3. Camera Settings
You will ideally need an aperture setting smaller than f9 (i.e. f9 and above). Also you will want a wider focal length… so use your 50 mm,wide angles lens or telephoto lens at the widest angle.
4. Angle to the Light Source
This is where you will need to experiment and move about. Look through your view finder or screen while moving around and changing angles. You will be surprised at the difference a few degrees up or down or a few feet to the left or right will make. Walk around until you get the effect you desire. As a final tip, you may find it easier if you partially block the sun as I have done in some of these photos.
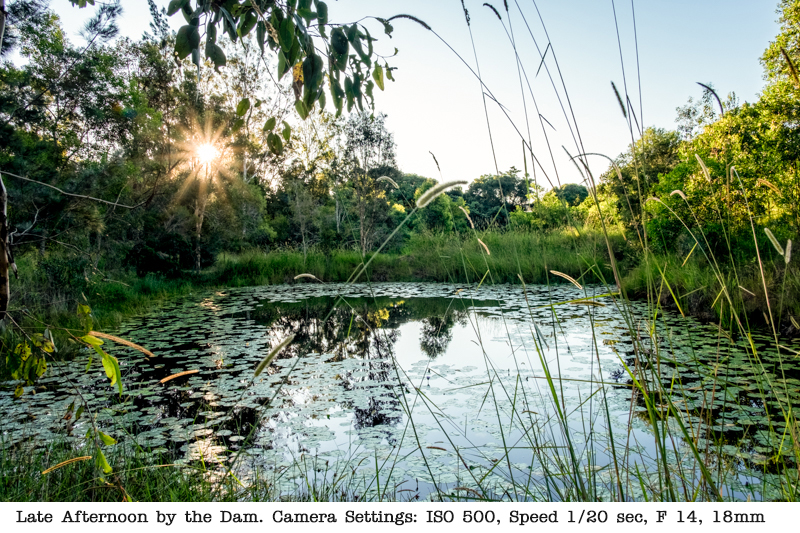
Here are another couple of recent photos of mine (with the camera settings I used listed on them)…
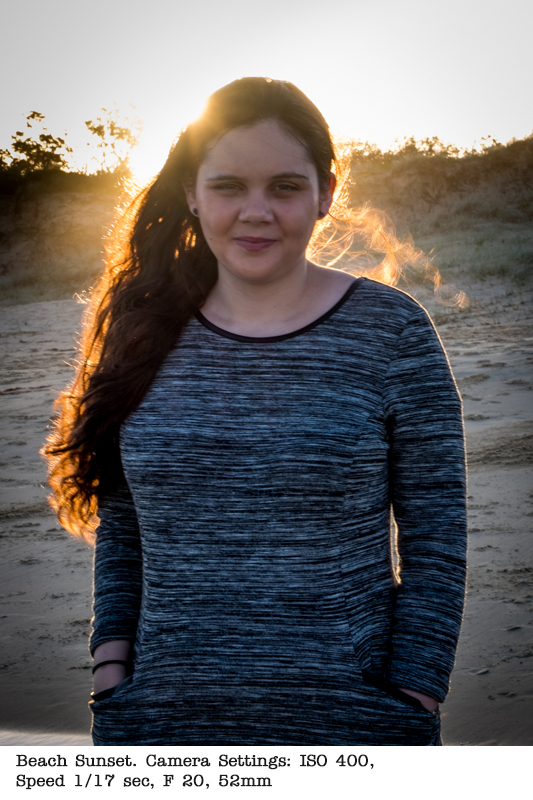
I have been experimenting trying to get star bursts in my portrait photography… but still need more practice, as you can see. 😉
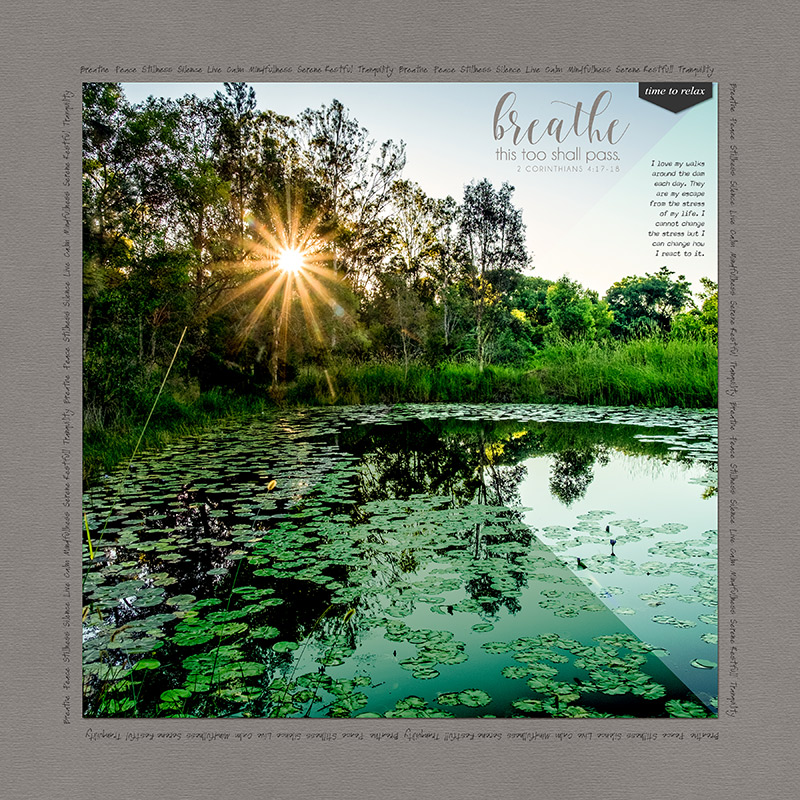
To finish off, here is a page for my Word of the Year book (my word is “breathe”), which I created with one of my starburst photos…
![]() About the author Carolyn lives with her partner, eldest daughter and 3 rescue dogs on 5 acres of paradise in the hinterland of the Sunshine Coast, Australia. Her camera, along with an assortment of lenses, is never out of sight. When not taking photos, she loves cooking and gardening and of course scrapbooking.
About the author Carolyn lives with her partner, eldest daughter and 3 rescue dogs on 5 acres of paradise in the hinterland of the Sunshine Coast, Australia. Her camera, along with an assortment of lenses, is never out of sight. When not taking photos, she loves cooking and gardening and of course scrapbooking.