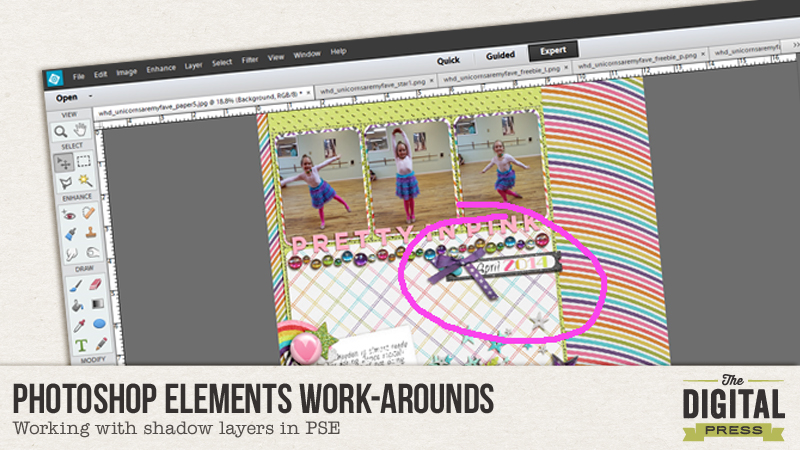
Hey Everyone! Today I’m going to give all us Photoshop Elements Users a shout out! Whoot whoot! I know just how frustrating it is to watch or read a tutorial of some fun new trick and then learn that we can’t do it that way in PSE. Well, today I’m going to show you a quick way to ‘get around’ some of those PSE road blocks!
Don’t you just love those layouts where you can manipulate the shadows to make them look realistic!? As PSEr’s, we can’t do that. BUT WAIT! YES WE CAN! Say it with me… YES WE CAN!
So the problem with PSE is that you can’t make your shadow a separate layer with a quick click of the mouse like in the big daddy Photoshop. But, here’s a few screenshots showing you how I do it in PSE. –here’s my disclaimer saying that yes, there are many ways to do this, as anything in Photoshop or PSE, but this is MY way!—
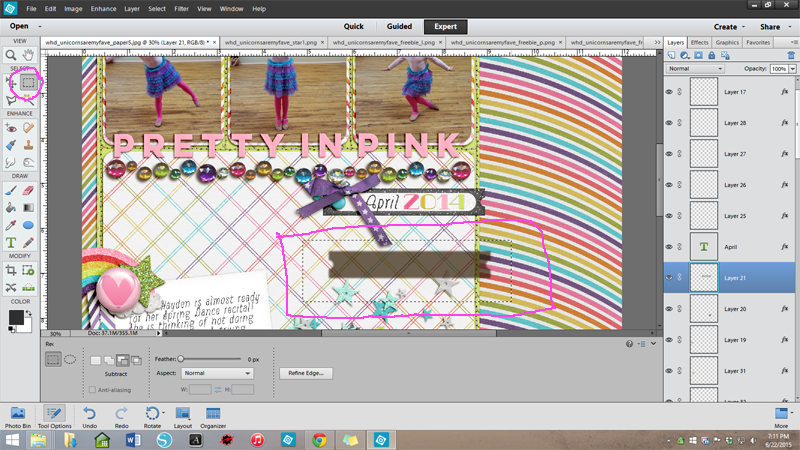
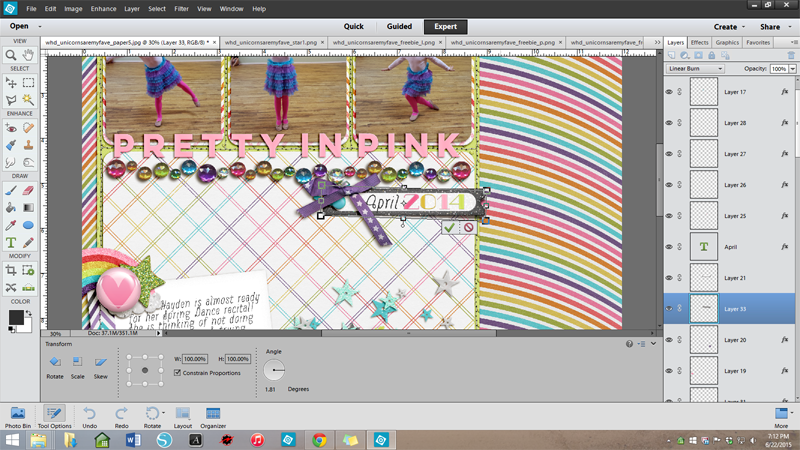
- Select the layer that you want to separate the shadow from
- Open the style settings dialog box (double click on the fx symbol)
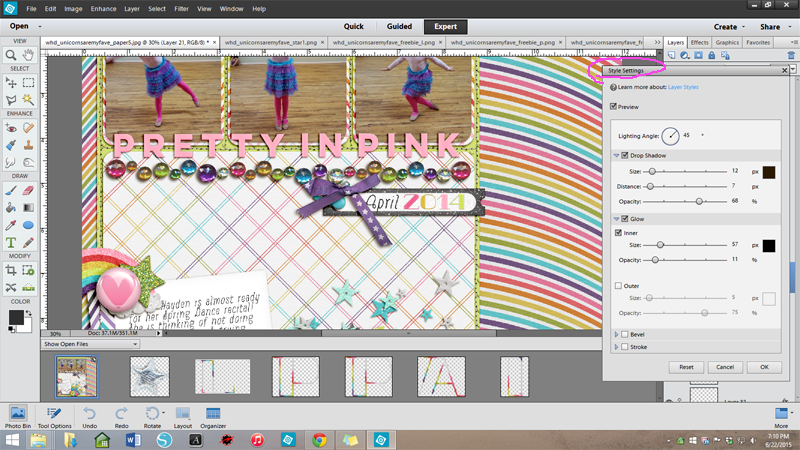
- Drag the shadow onto an open space away from your object (you can also drag the ‘distance’ slider to accomplish the same thing)
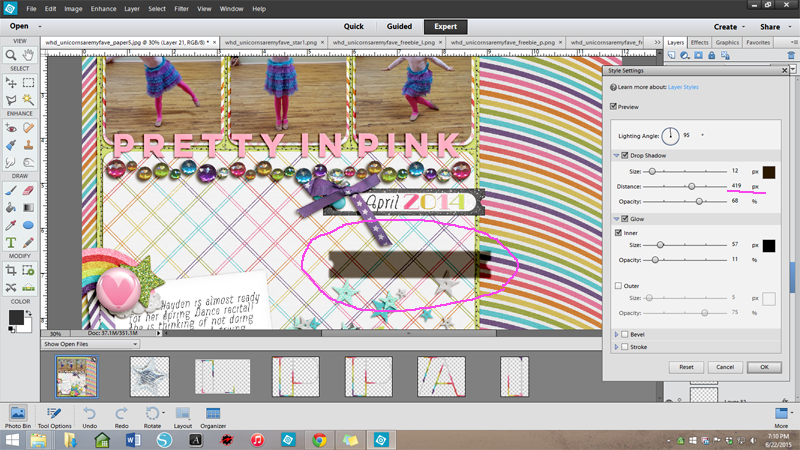
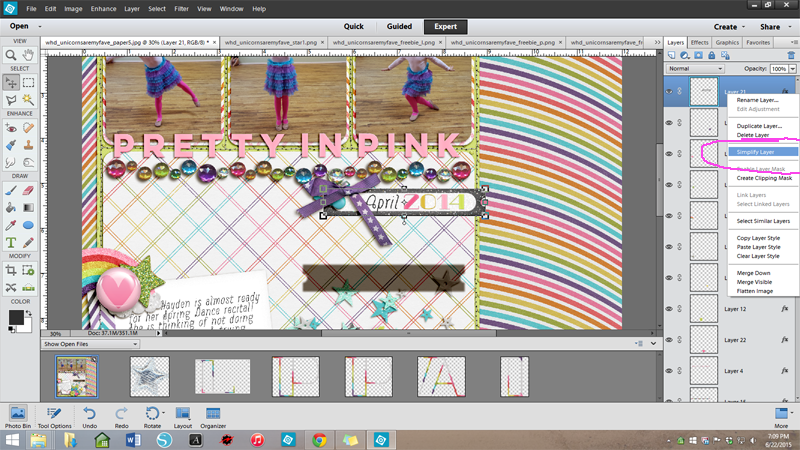
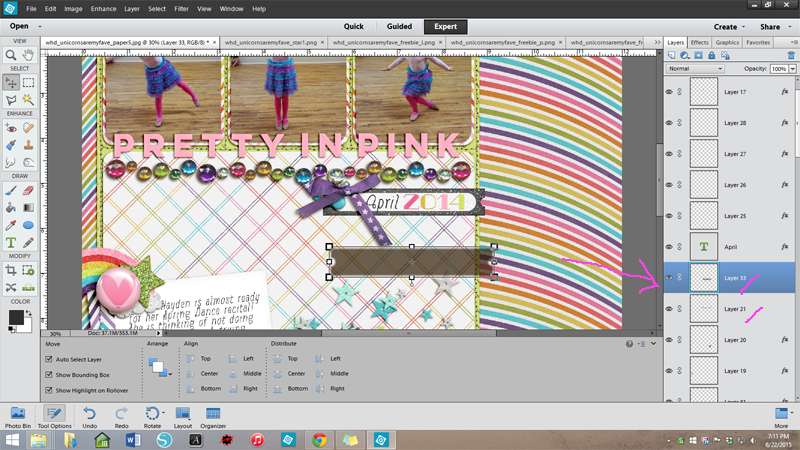
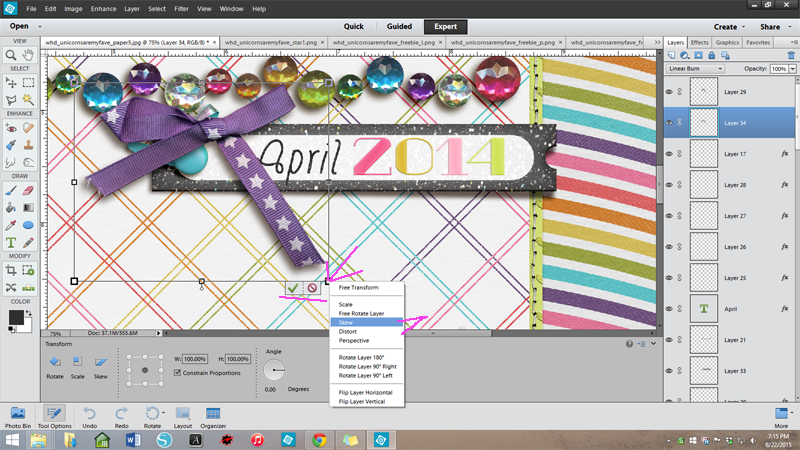
- Click ‘OK’ then simplify layer by R clicking & selecting ‘SIMPLIFY’
- Using a selection tool- square marquee for me- Select the shadow making sure to not select any part of the element
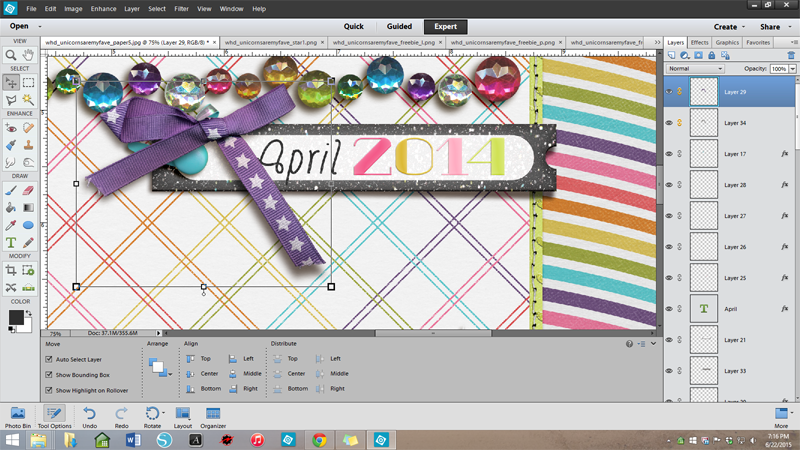
- Cut then Paste (Ctrl X, Ctrl V for me) will give you the shadow on its own layer above the element.
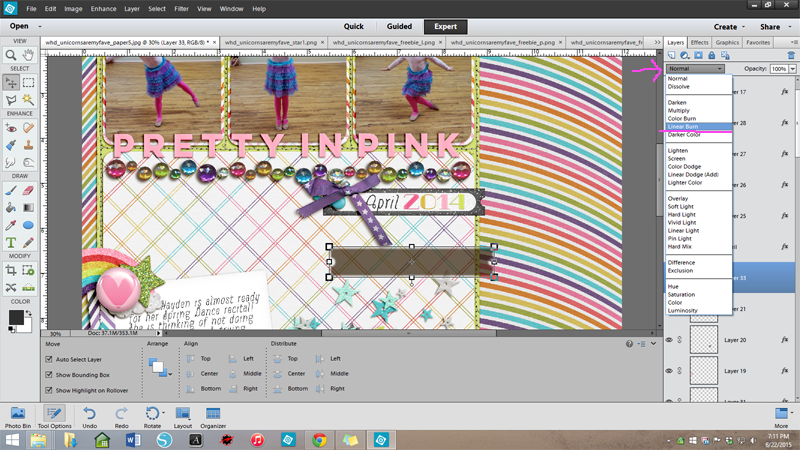
- I always change the blend mode to linear burn or multiply, depending on what colors/patterns are on the layers below.
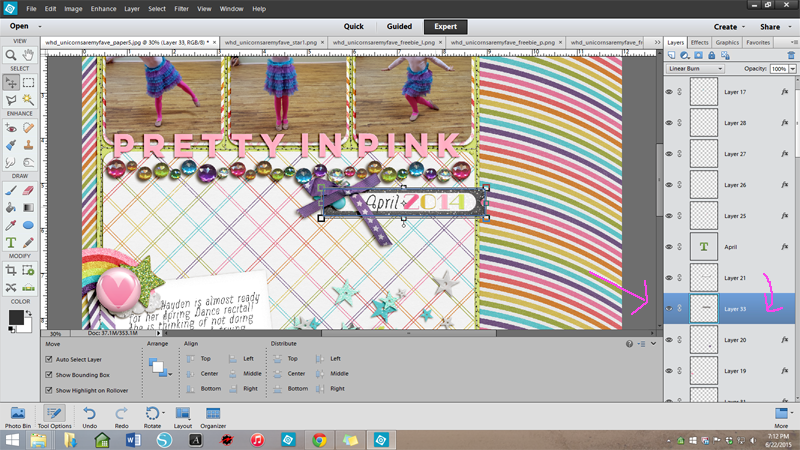
- Drag the shadow layer below the element in the layers panel then place about where you want it under the element.
- Here is where I ‘tweak’ my shadows- instead of ‘warping’ which can only be done in Photoshop. For this label, I didn’t have too much fiddling to do. I wanted the end to look like it was up slightly since the brad & bow were anchoring it on the other end. I just rotated the shadow slightly. For the purple bow, I wanted the tail to look like it was coming off the page further. With the shadow layer selected, R click on the corner box & select ‘skew’ (or sometimes distort, depending on the shape.) With this- the shadow will skew or distort in different directions. Sometimes it takes a little fiddling with it to get it just right, but practice & you’ll get fast! Sidenote- here is also where you can really use some other cool options in PSE- one that I use a lot on papers is under the Filters tab- then select ‘Wave’ or ‘Liquify’. Just keep playing around & you’ll find many ways to make your shadow more realistic!
Playing with the Bow shadow:
- Last but not least! Select the Element & the Shadow layers in the layers panel & group together (so they move together if you need to move them)
VOILA! If you’re not a good reader/screenshot follower- Karla has made a little video tutorial very similar over in The Digital Press Summer School classroom ~ HERE ~. The forum is a great place to ask questions & I’ll be checking in there often if you have any for me!
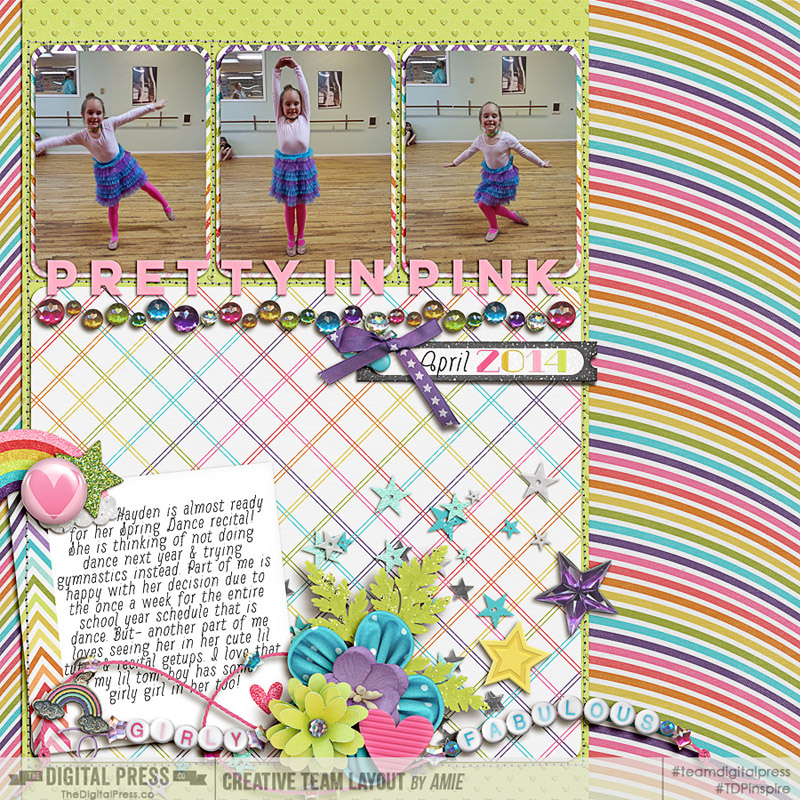
My completed layout using Unicorns are My Favorite kit by our newest designer: Wildheart Designs
 About the Author: Amie is a craft loving, dental hygienist in WA state who loves her husband, two kids (ages 7 & 4), English Bulldog, coffee, baking cupcakes, daffodils, glitter & sprinkles, reading a good book and lip gloss- not necessarily in that order.
great technique