Hello Everyone, and welcome to an edition of Tutorial Tuesday that might change the way you scrap forever! LOL! Today I’m going to show you a trick for using the “group layers” function in Photoshop to move/adjust an entire grouping of items on your page, all at one time.
I am a little bit indecisive as a person, and that is definitely true when I am scrapping. I might think I have the page pretty much how I want it, but then I tend to fiddle and want to move the little element cluster over a bit, and make it a bit bigger, or no, actually smaller maybe and so on. I might decide that I want to try moving the main focus/photo/group of the page all the way over to the left, or go from straight lines to all at an angle. Using “group layers” is a way to do all of those things without needing to move each item individually, or lock them together. When I learned this trick, it made scrapping so much faster for me, and allowed me to satisfy my indecisive curiosity, too!
Let me give you an example. I made the following page called “Tower Bridge,” about a trip my daughter and I made to London…
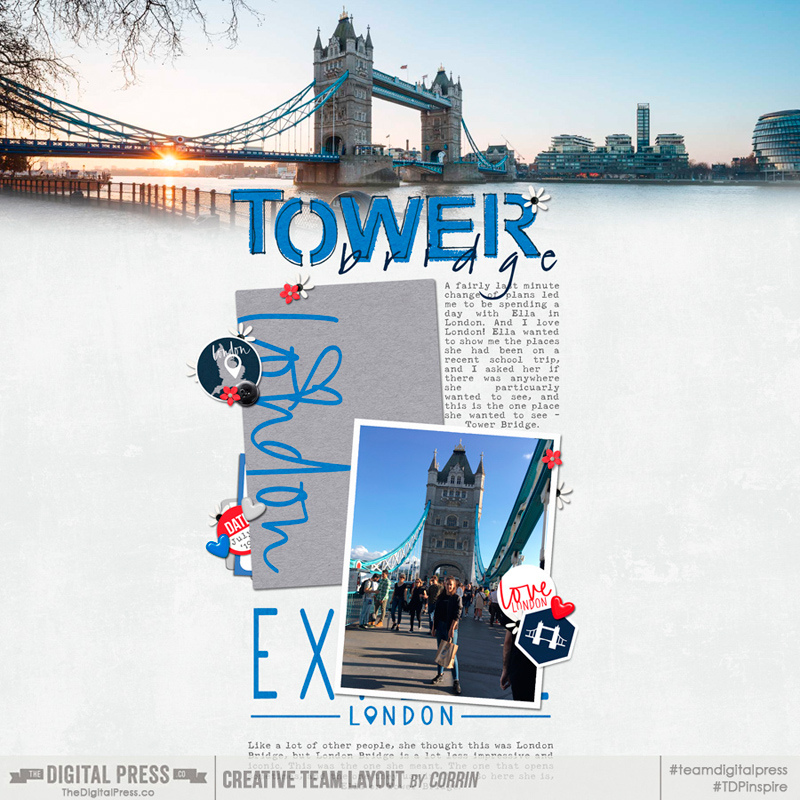
[Layout created using mainly Rachel Hodge – London Take 2 Set and London Take 2 Cards]
When scrapping this page, I knew that I wanted the photo of the bridge to go across the top, so I chose my background paper and created the photo effect I wanted. So far, so good!
Next, I knew I wanted to have a photo and a journal card, with my journaling written on the background paper (and not on the journal card — that is just the kind of contrary person I can sometimes be!).
Because I knew the basic idea of the layout I wanted to create, I started to place the journal card and photo with the word art, the stickers, and the flowers, etc… until I was happy that I had the elements pretty much where I wanted them. So far, this is how the page looked…
*NOTE* If you look at my layers panel in the image above, you can see that I tend to rename the layers as I go; it is easy to do, and I like being able to find the particular element I want from that whole list of elements! I select the layer, then press OPT and double click on the layer name, and it opens a box for me to rename that layer.
Meanwhile, I had built the main cluster in the middle of my page, but soon could see that I had too much space at the bottom. I wanted to move the main cluster down, but leave the wide background photo where it was at the top. This is when the “Group Layers” function is so handy!
All you need to do is…
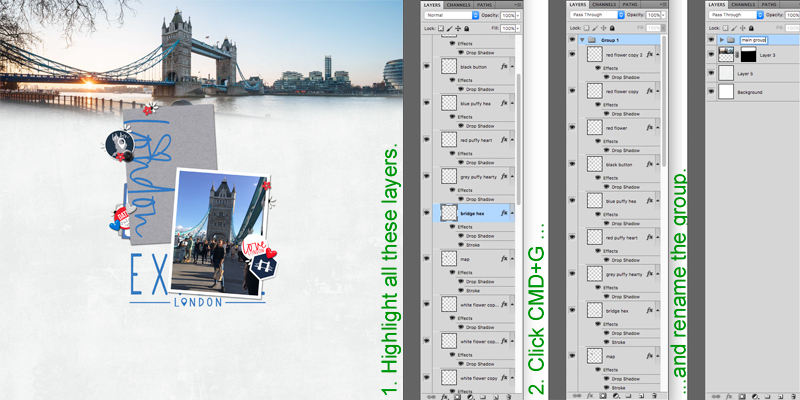
- Select/highlight the layers you want to put into a group (you need to hold down CTRL (PC) or COMMAND (Apple) and click on each layer you want to select, so that each layer is highlighted in blue).
- When the layers you want in your group are selected/highlighted, click CTRL+G (PC) or COMMAND+G (Apple) and it will put all of those layers into a group for you. I often rename the group at this point (for example I named this group “main group”). Now I can click on that group name, click COMMAND+T, and move the whole lot in one go. I moved it down a bit, so that I could have space for a title up at the top, and less space down at the bottom. If you click on the little triangle next to the group name, then you will be able to see all the layers in the group. Click on the little triangle again, and the list condenses into just the group name/file.
*A handy tip — if you “Group Layers” when you have only a few layers, it is faster… and any layers you add after you’ve already made that group are added into the group “folder” also, unless you move them out of the folder. You can even create a group before you have any layers to go in it.
So now that I’d moved everything in that group downward on my page… there was some space to add a title above the main cluster. This time I started a group called “TOWER title” before I opened any of the alphas because I knew I was going to use a couple of different alphas that I would then want to keep together, and that would mean a lot of layers to keep track of. I know I could have made the title and the merged the layers into a single layer, but as I mentioned, I am indecisive and I like to keep them separate until the last minute, so I still have options! Here is how it looked with the title…
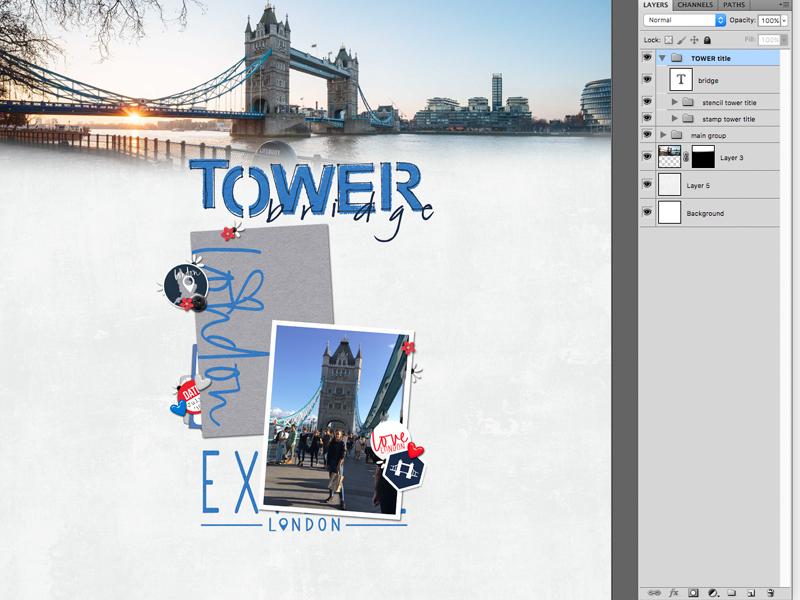
(I get “group happy” and actually I have a “stencil tower title” group and a “stamp tower title” group, and then the “bridge” layer separately, so I can fiddle with each of them independently)
At this point, all that was left to do was to add the journaling… and I found I had more space than I needed for that journaling. Therefore, I decided I wanted to make that main cluster and title a little bigger. It was sooooo handy to only need to select my “MAIN GROUP’ and “TOWER title” to adapt all of them to suit my needs!
There are all sorts of things you could play around with using the “Group Layers” function. For example, I could have decided to move the main cluster over to the left of the page (but with this particular page I wanted to create a bit of a subtle “T” using the wide photo at the top and then the block of other “stuff” as the vertical section of the letter T). I have also been known to duplicate the title or text box so I can flick between different fonts or different colors until I decided which I preferred. I’ve also been known to duplicate the main cluster to tilt it a bit for a quirky angle. Sometimes, if I have created a flower cluster, I have duplicated the cluster and then moved the duplicate cluster to another location on the page and then tweaked it a bit, but I’ve found it useful to have the main structure of cluster already done.
You can see the final result of my page up at the top of this post. The wide, bridge photo has never moved, while the main cluster of photo, journal card, word art and other elements, were all adjusted with a few simple clicks of the keyboard throughout my scrapping process.
I hope this might be an easy trick that you find useful… something that helps neaten up your process (and if you are like me, maybe it can speed up any decision making you tend to dither over)!
 About the Author Corrin is a member of the creative team here at The Digital Press. She is a fan of the Big Bang Theory and a lover of cozy pajamas or flip flops when the sun finally shines! She lives in the breezy South of England with her husband and 4 crazy kids, who regularly discover & plunder her secret chocolate stashes, and hopes that maybe this will be the year she reaches the bottom of the laundry pile!