Do you ever want to jazz up a multi-photo layout, and you’re just not sure how to do that? There are so many ways to add a lot of photos to one layout, but using the ‘spherize’ technique in your layout can make it fun and unique! I’ve used this technique before, and now I just can’t stay away from it. So, without further ado… I’d like to walk you through how to do this today.
STEP ONE
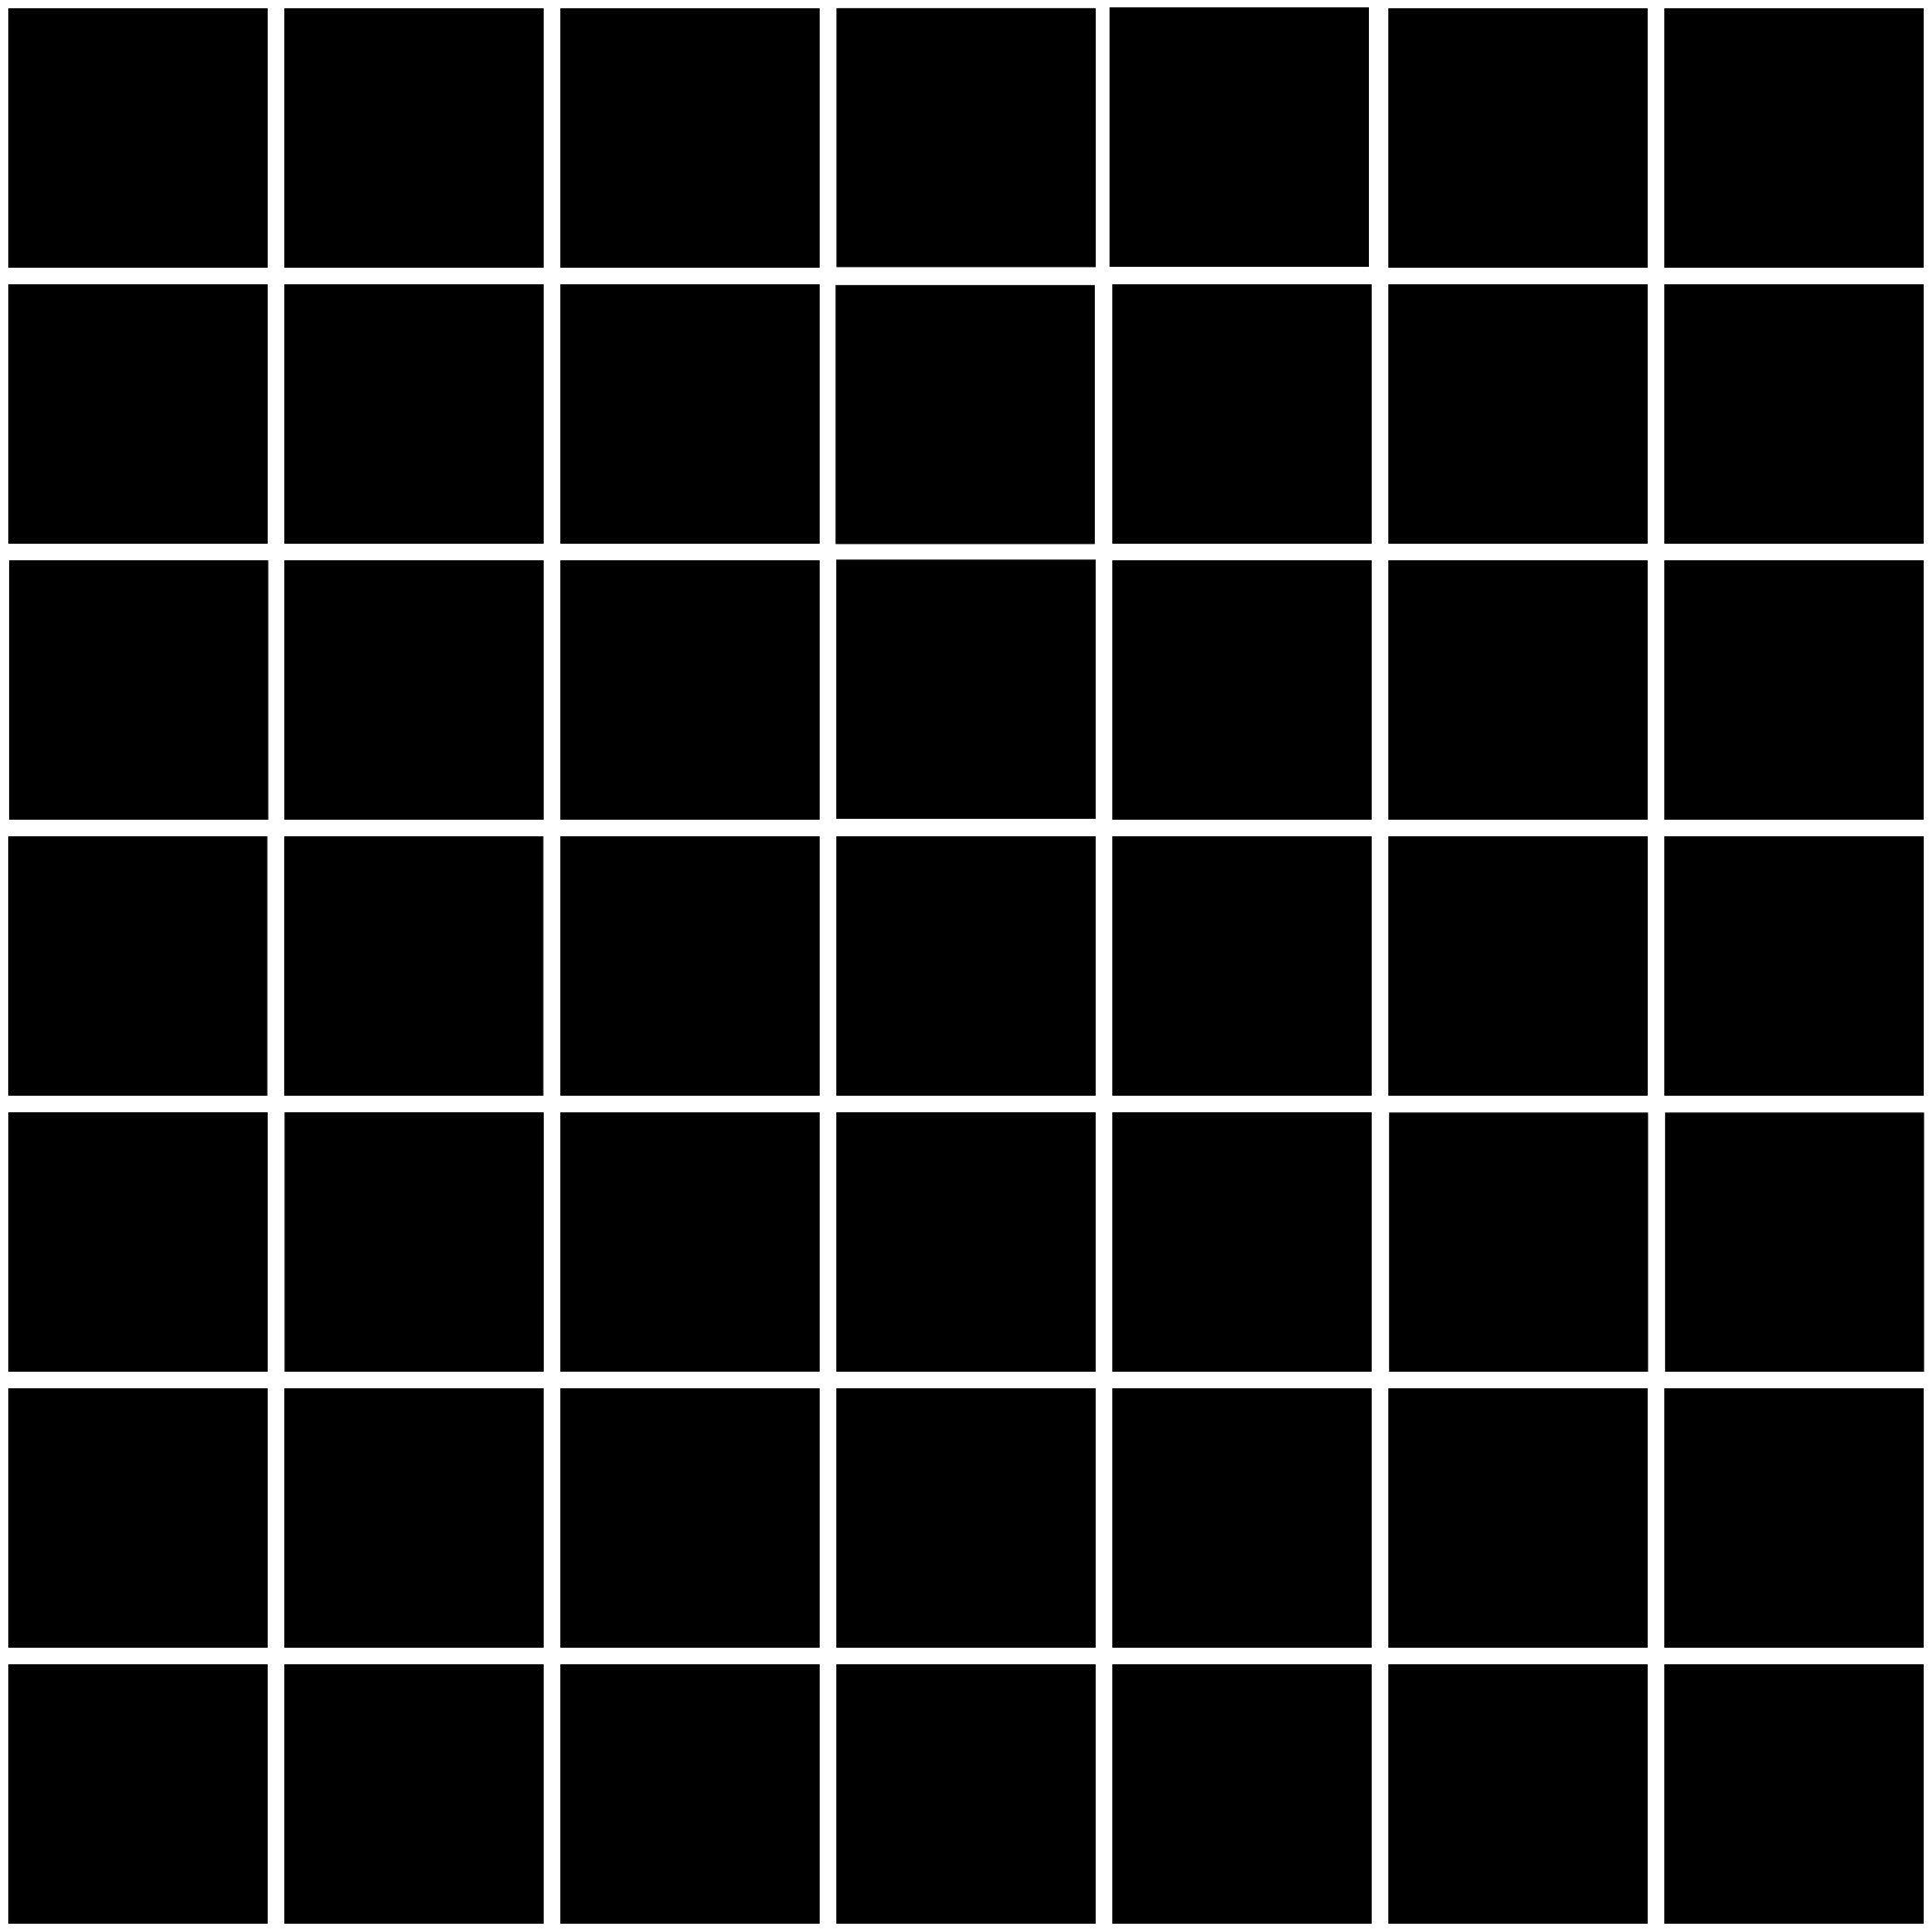
You will begin with a blank 7×7 canvas (2100×2100 pixels) at 300 dpi (want to use my grid template? you can DOWNLOAD IT HERE)…
Arrange your photos however you like, but make sure your favorites are in the center, because the photos in the corners and outer edges will be a bit distorted once you use ‘spherize’.
STEP TWO
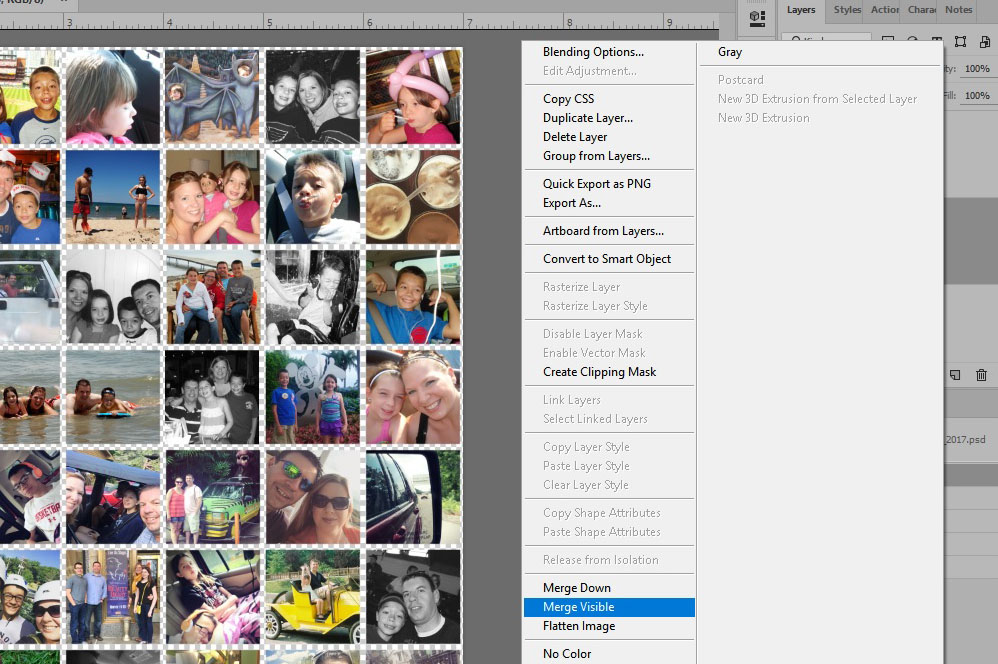
Once you have your photos arranged to your liking, in the layers palette you will right-click on any layer, and click merge visible.
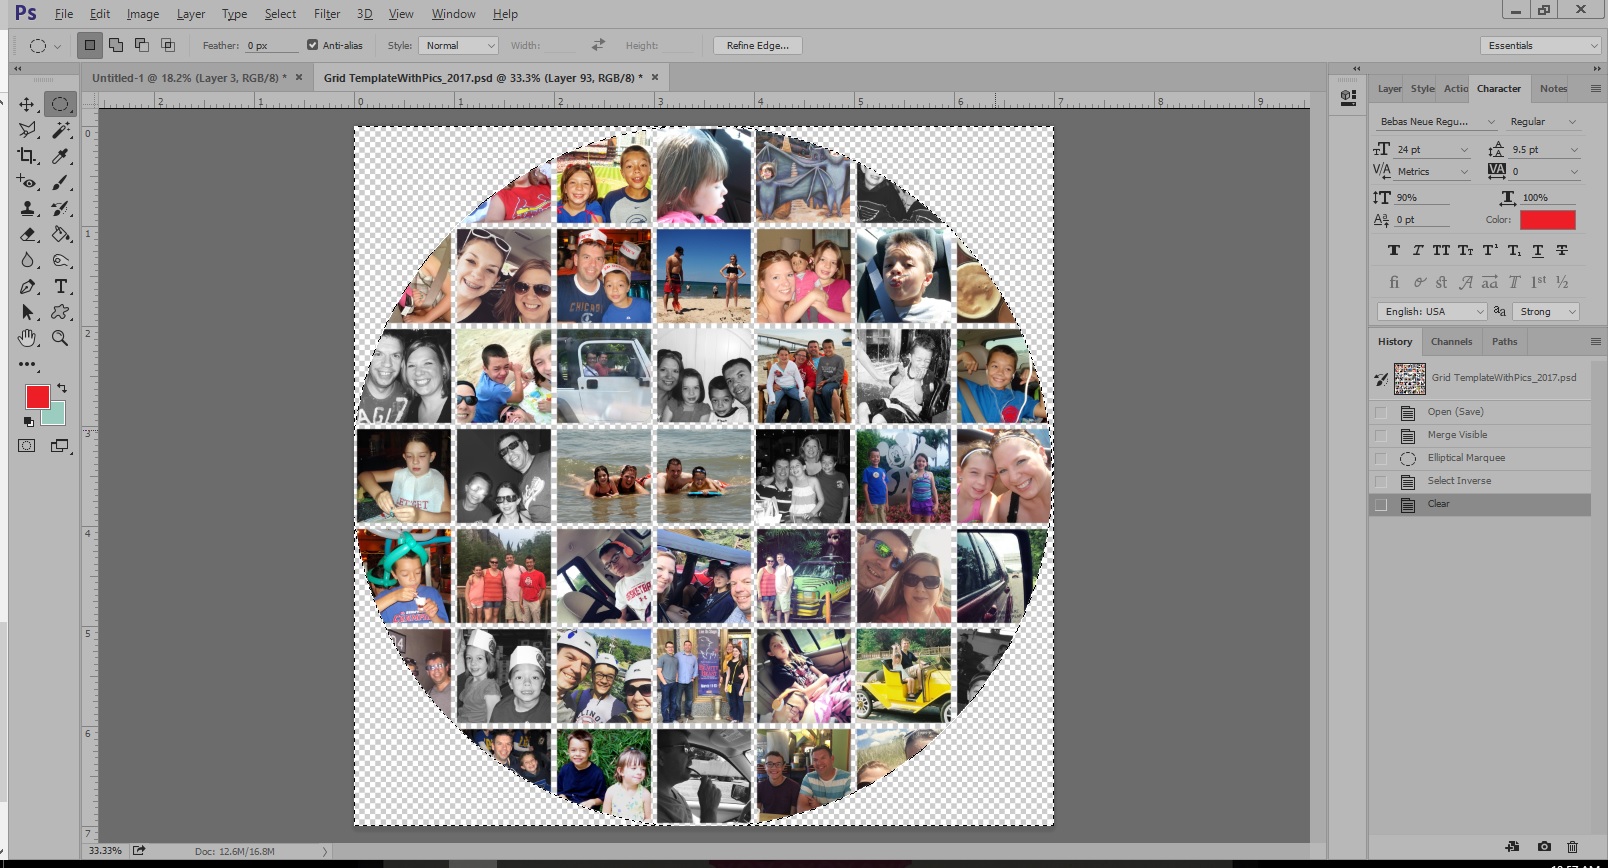
At this point, you will use the Elliptical Marquee Tool (see red text at the upper left of the following image; this is where you’ll find it. *NOTE* that you may need to right-click to find it, as it may be hidden under the Rectangle Marquee Tool) and drag your mouse from one corner of your canvas to the other to create a circle from edge to edge…
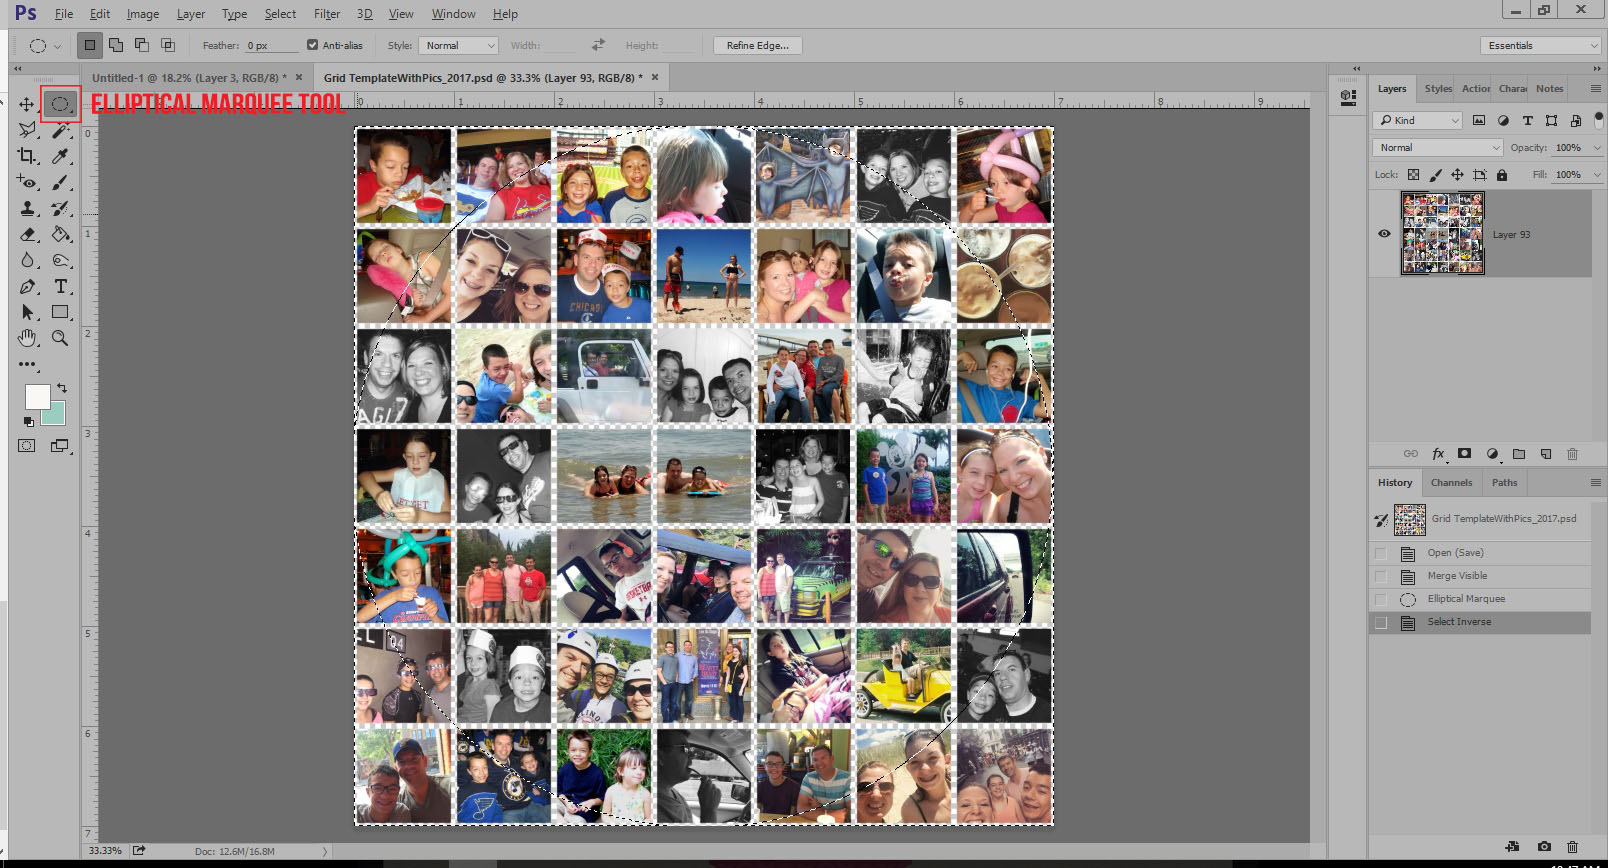
Once you have your circle drawn, Ctrl+Alt+I (all at once), OR use the “Select” drop-down, and select ‘Inverse’. It may be a little hard to tell in the above image, but you will have marching ants in the shape of a circle and around the entire 7×7 image once you do this.
STEP 3
Next, you will press “Delete.” At that point, your image should look like this…
Now you will want to de-select your image by clicking on “Select” (top tool bar) and then selecting “Deselect” (or Ctrl+D). You should no longer have the marching ants on your image.
STEP 4
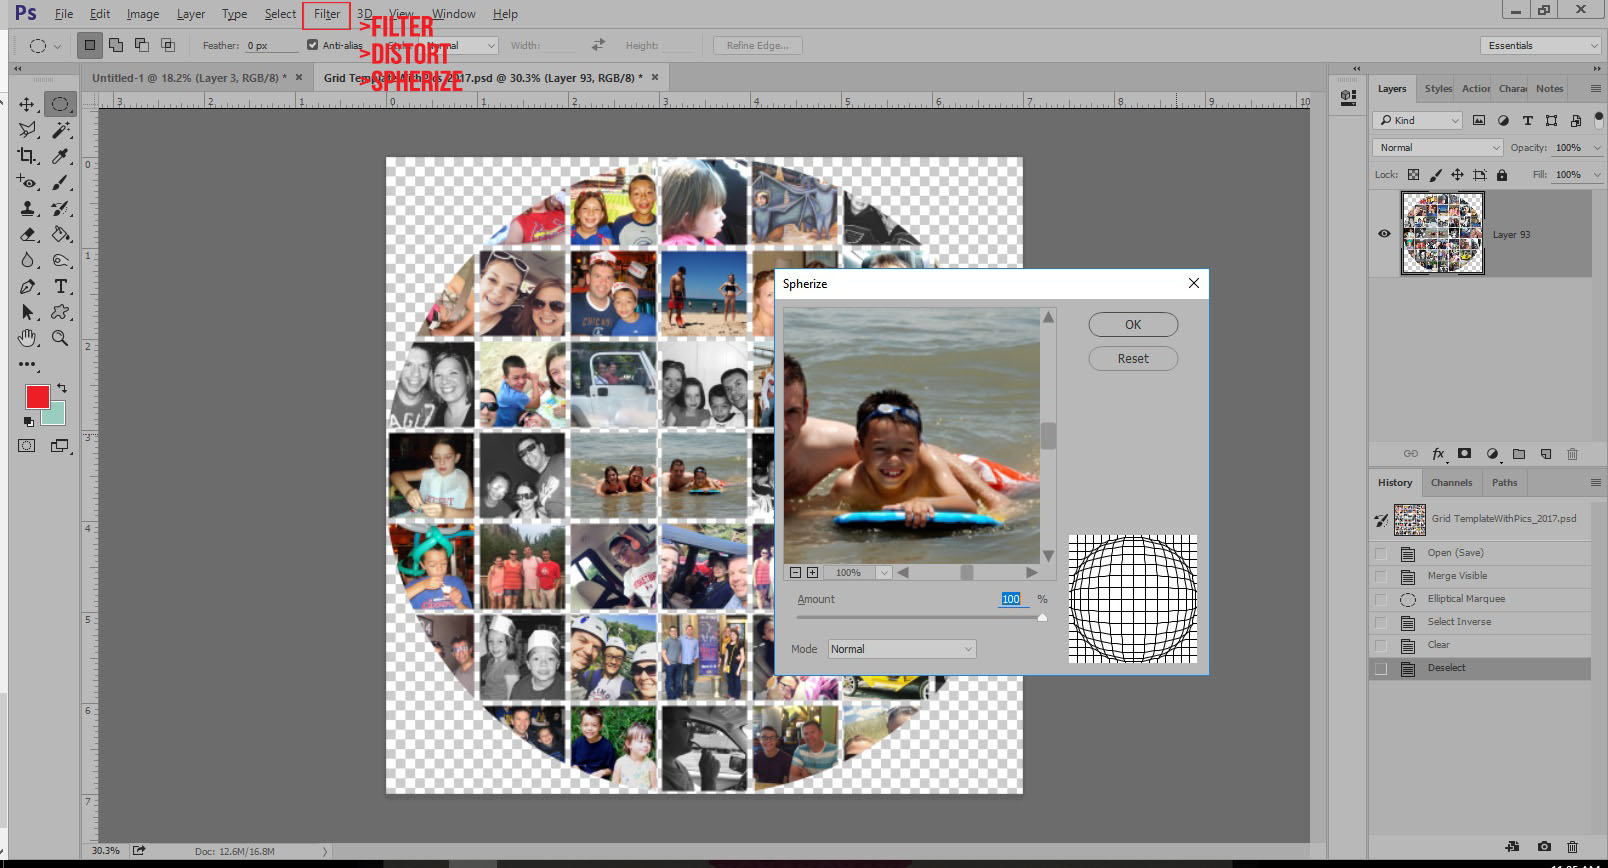
Now for the fun part! You will click on “Filter” (top tool bar), then “Distort,” then “Spherize.” The Spherize window will come up at this point; I opted for using 100 as the amount (see below)… but you can play around with the setting for your own. You may find another setting that works well for you…
After applying “Spherize,” here’s what your image should look like…
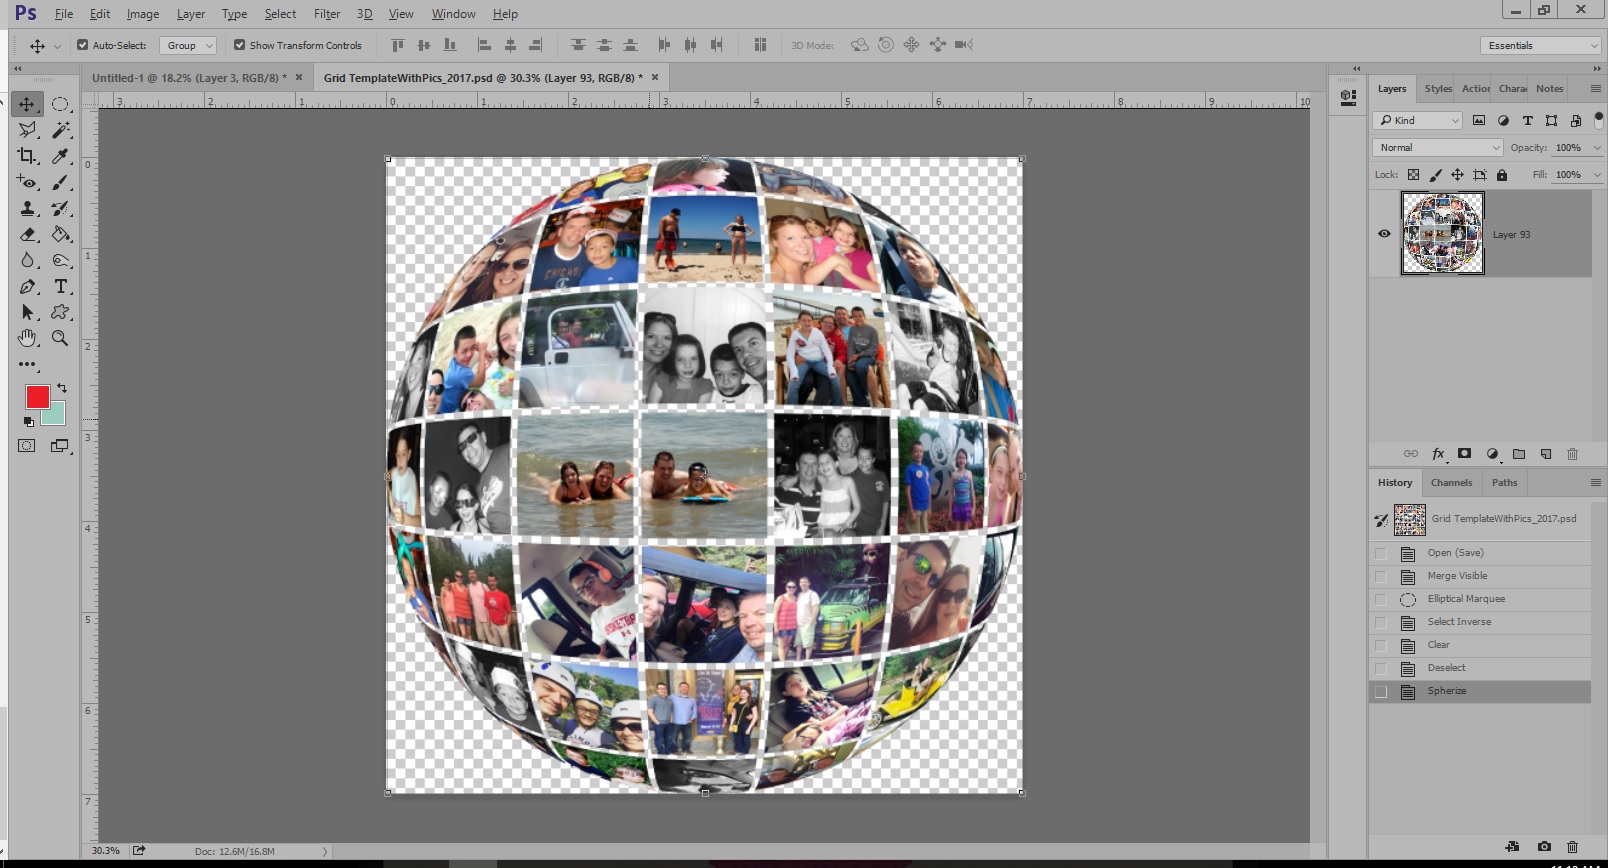
At this point, you can save your image as a PNG (File>Save As or Shift+Ctrl+S). To use the image in a layout or project, you’ll simply need to open your image and drag and drop it into a blank canvas. The possibilities for use are limitless!
Here’s a look at a layout that I created using my ‘Spherized’ image…
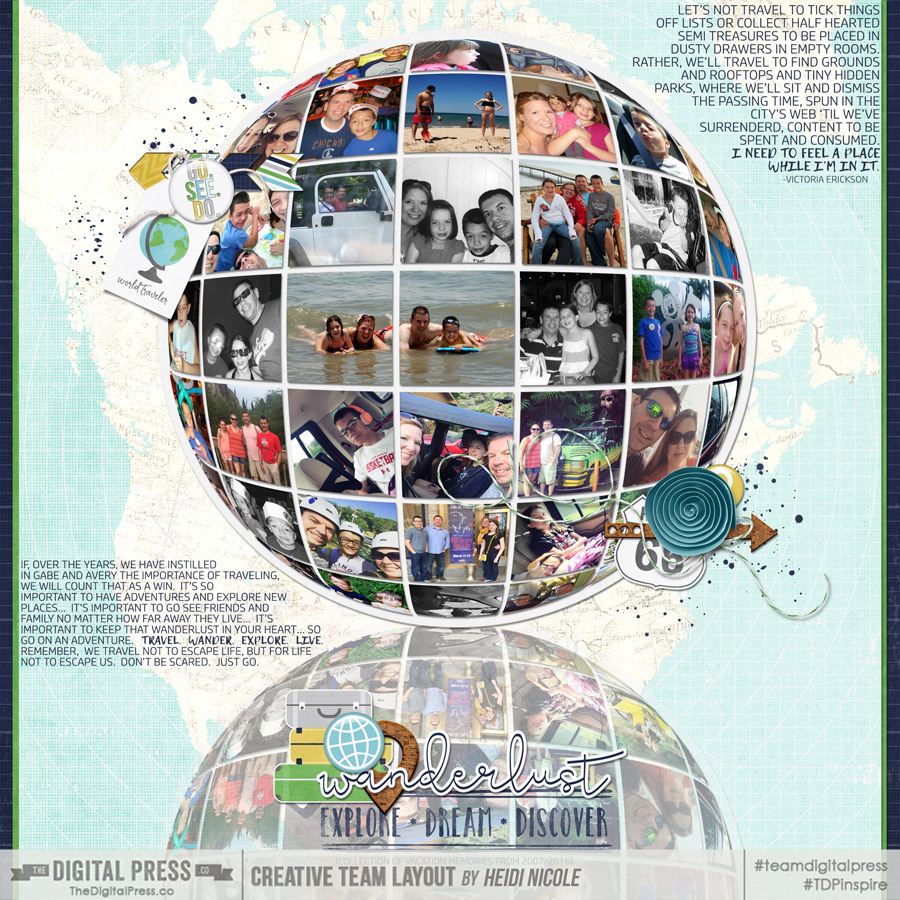
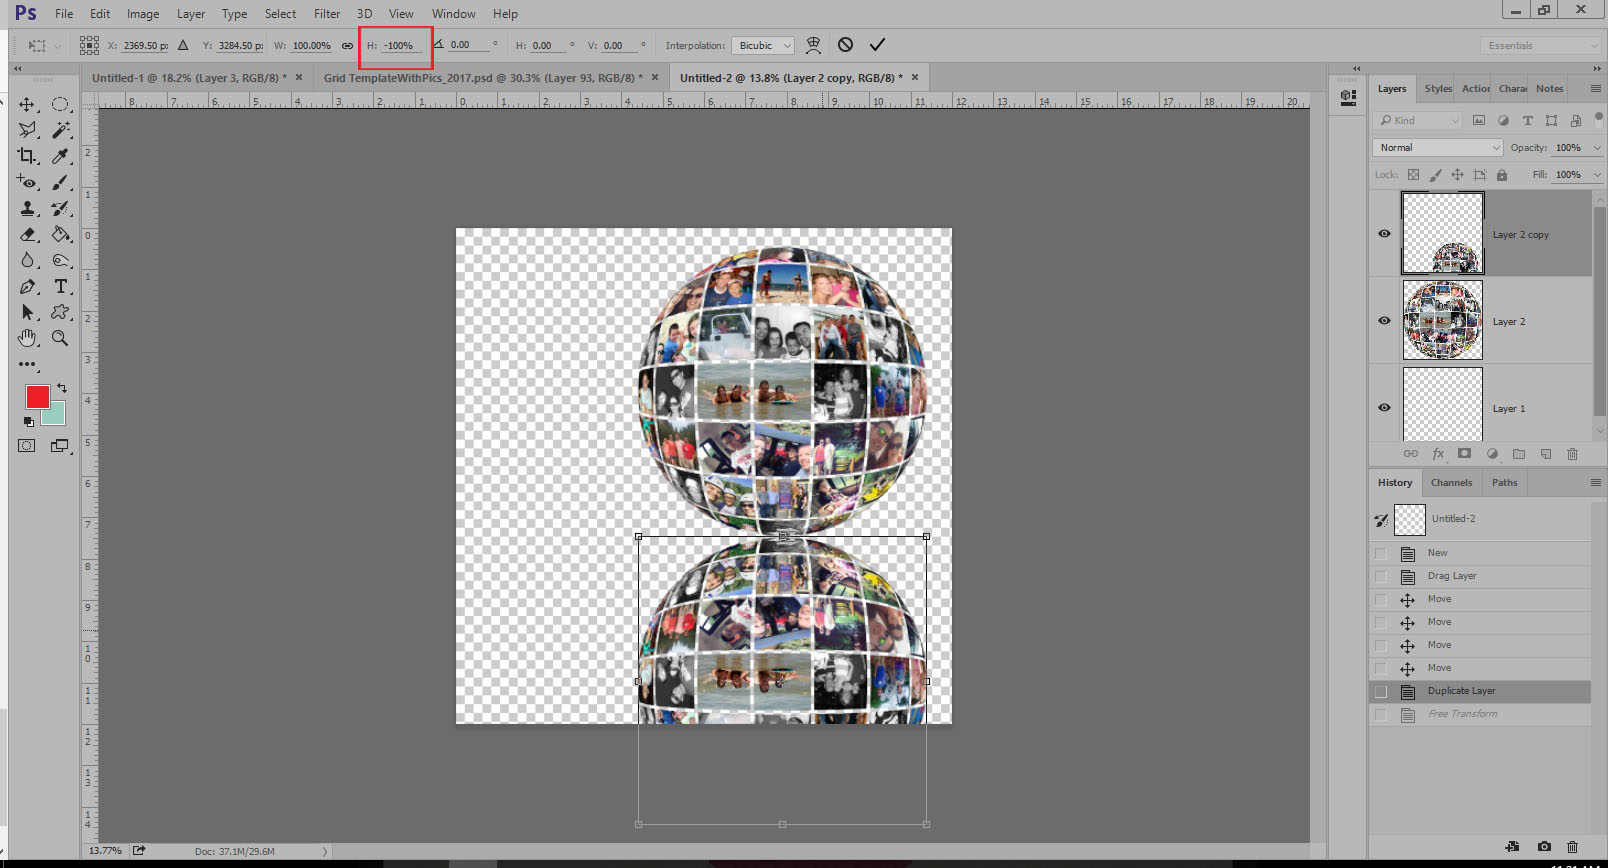
*BONUS TIP* To make the reflection, I simply duplicated the image, and made the height -100, as shown in the next image…
Then, I decreased the opacity of the duplicated layer, as shown below…

And there you go! That’s all there is to it… and you’ve successfully used a fun, new technique!
The fun really starts now… because you can use this technique to embellish to your heart’s content! It is such a fun way to display a collection or montage of photos that you love! It would also make the perfect front page for an album… or look fantastic printed on a canvas for your home… etc. So many fun possibilities!
![]() About the Author Heidi Nicole is happily married to an amazing man, a step mama to 2 wonderful kiddos, and mama to 3 sweet and sassy furbabies. She’s a radiation therapist by day and creator of pretty things by night (she’s pretty confident that she’s hit super hero status, but refuses to wear a cape.) She loves cats and huskies, coffee, audio books, FRIENDS reruns, St. Louis Blues hockey, cooking, baking, and traveling. Oh, and wine… she really likes wine. She lives a normal and happy life, and enjoys all the absolutely extraordinary people she gets to share it with on a daily basis!
About the Author Heidi Nicole is happily married to an amazing man, a step mama to 2 wonderful kiddos, and mama to 3 sweet and sassy furbabies. She’s a radiation therapist by day and creator of pretty things by night (she’s pretty confident that she’s hit super hero status, but refuses to wear a cape.) She loves cats and huskies, coffee, audio books, FRIENDS reruns, St. Louis Blues hockey, cooking, baking, and traveling. Oh, and wine… she really likes wine. She lives a normal and happy life, and enjoys all the absolutely extraordinary people she gets to share it with on a daily basis!
Woah, that is super awesome!!
that is just one of the coolest things I have seen! <3
This is seriously so cool Heidi!!! I will have to definitely try it!!! 🙂
Looks cool, but am I missing something? How do you get the checker board template with the spaces in between to start off the process?
Love this! Thank you!
Wow! This is amazing! Thank you for the tutorial.
What a fantastic technique. I’ll definitely be trying this one!
Wow, what a great technique and an awesome, easy-to-follow tutorial! Thank you so much for sharing this!
That is such a cool tutorial…thank you!
Nanascrapper – I’ll get a TIF of the grid template linked and you can grab it from here 🙂 [UPDATE: it’s linked up above in the post; click the grid image, or the “DOWNLOAD HERE” link in the text above it]
Thanks for all the love, everyone! <3
Thanks for the grid template Heidi!
I’m so going to try this one next. Thanks for the instructions and the grid.