I have a hunch that I’m not the only member of Apple’s demographic who was excited to get the new iPhone 7 just for the upgraded camera! Yes, I confess, it’s true.
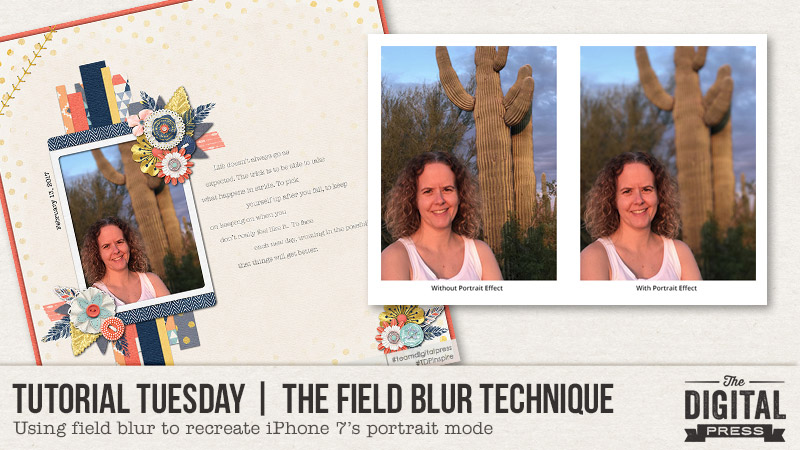
One of my favorite features of the new iPhone 7 camera is the Portrait Mode on the camera. In this mode, you set the focus to your subject and the background blurs out… as if you were taking the shot with a DSLR to control the depth of field. The resulting shot can be really dramatic and look quite professional — even for point-and-click phone camera photographers.
Here’s a look at the difference…

Because I loved this effect so much, I wondered (a) what could non-iPhone 7 users do to achieve the same result? …and (b) whether there was an easy method I could use in Photoshop to achieve this effect on older photos, for use on my scrapbook pages. Photoshop did not disappoint. I checked out the Field Blur filters and found that it is super easy (like, 2 minutes or less!) to create the same effect. Here’s how it’s done…
1. Open your photo in Photoshop (*NOTE* I’m using Photoshop CC 2017 for the following examples)
2. Choose Filter > Blur Gallery > Field Blur
3. You’ll wind up with a little pin graphic pointer which you can use to drop multiple pins in strategic places on your photo. Each pin drop tells Photoshop to blur that surround area to the level you specify using the adjustment ring (the circle around the center of the pin). To adjust any pin, click on the adjustment ring and drag your mouse around the wheel to the desired level. A setting of “0” means that no blurring will happen in that area.
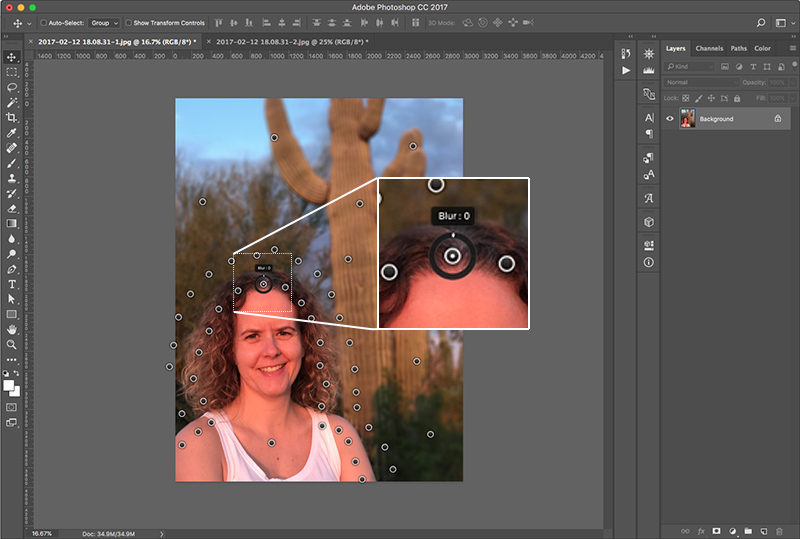
*NOTE* To get the look you want, you’ll have to experiment and place multiple pins. What I found to work best for me was to place a “row” of pins within the boundaries of the subject… but toward the outer edge, and then also place another “row” of pins just outside the boundaries of the subject. On the inner row, I set all of the blurs to “0” and on the ring (just outside the subject), I set all of those higher (I used “25”).

4. I also dropped a couple of other pins around the rest of the image (outside the subject) to ensure that the entire background was blurred. The beauty of this technique is that you can adjust the blur intensity on each pin, in case there are areas where you need to ease into a more intense blur over a span of the image. You can always move any one pin (or delete it) by clicking and dragging on the center of the pin.
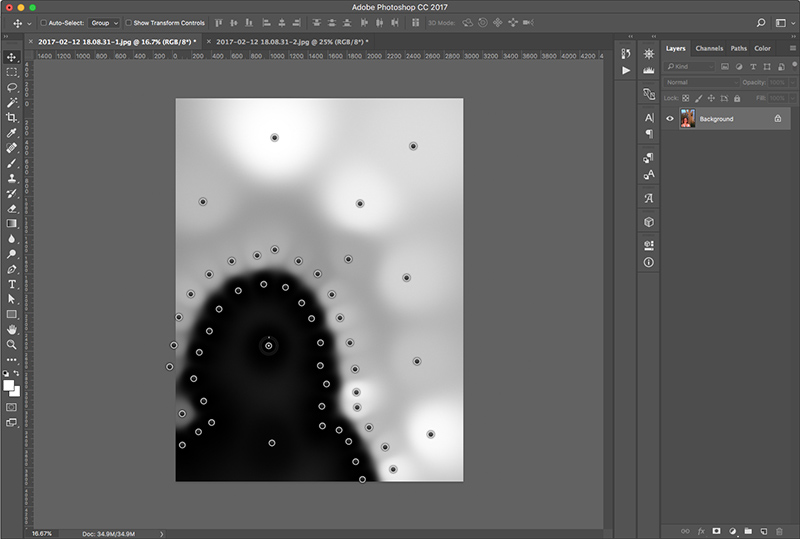
5. If you’re curious to see how the mask looks without the image, hold down “M” and you’ll be able to see the blur mask. Wherever you see white… that’s where blur is applied. Black areas are protected (no blur), and gray areas are areas of partial blur.
6. When you’re finished, click “OK” at the top of the filter window.
That’s all there is to it! It’s a technique that is super easy, once you get the hang of it!
Here’s a comparison of the photo straight from my iPhone 7 with Portrait Mode (left), and the one I doctored up in Photoshop (right)…
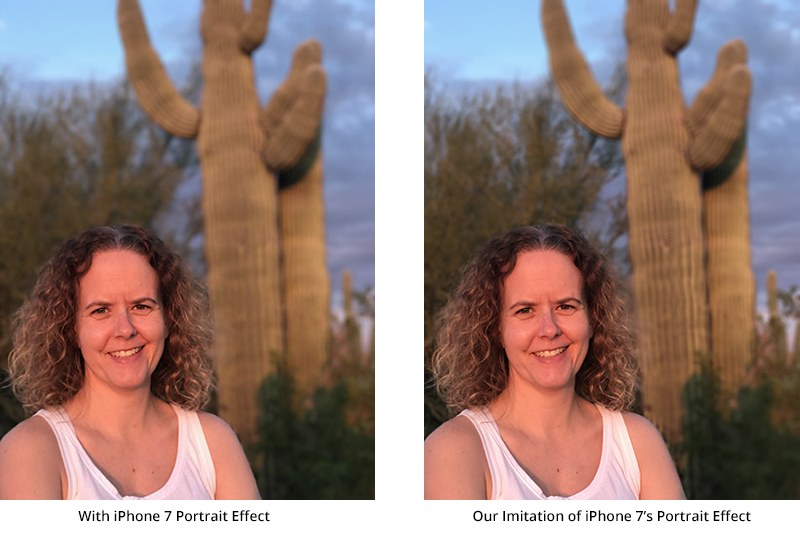
Pretty close, right?? The effect really makes your subject pop, and takes out any distracting background features.
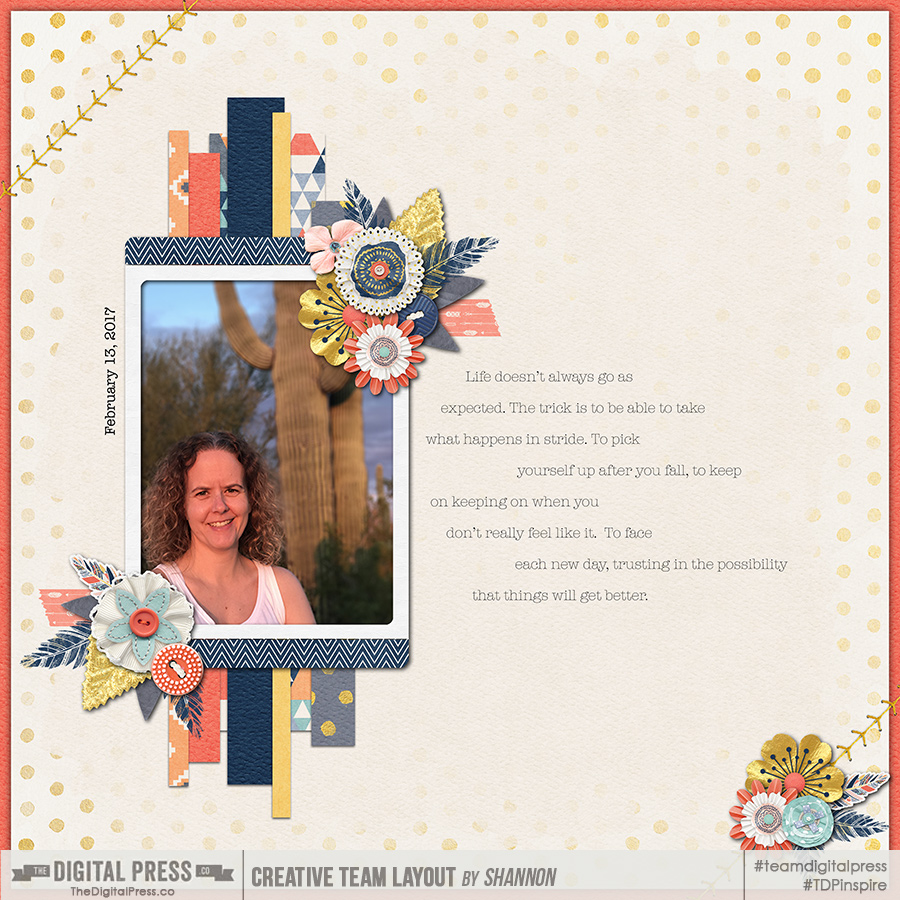
Here’s a layout that I created using my image, along with KimB Designs’ Be Brave Kit and a template from Stripped Down (Vol 1) Templates by Laura Passage…
 About the Author Shannon has been completely addicted to digiscrapping since she began in early 2016 (though she’s been a scrapper since 2000). Her early morning ritual of a few quiet hours of scrapping while sipping a chai tea is her favorite part of each day. She is also the owner of a web design company, and when she’s not at the computer designing websites or digiscrap layouts, she’s probably hiking one of the local mountains in her hometown of Phoenix, Arizona. She is an avid reader and loves to travel to foreign countries.
Wow! Thanks for the Photoshop tutorial. I don’t have an iPhone. And how I achieved a blurred background before was extracting my image, blurring the background with my image intact. But this would end up with sharper lines of blur versus non-blur, so I’d always have to mask out some of that sharpness to soften the lines a bit. I didn’t even realize that this filter existed. Gotta try it out! Thanks again.