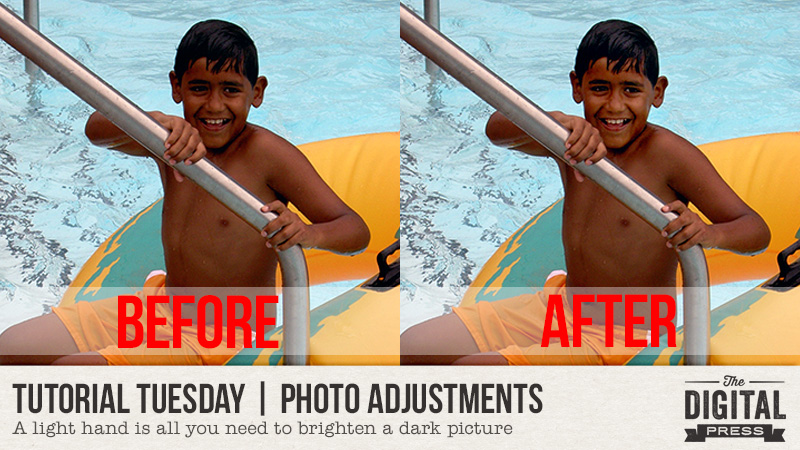
Have you ever taken a picture, thought it was great, and then realized that there are shadows across someone’s face? The moment has gone, and while you love the photo, you wish you could see the individual features, the eyes, nose, mouth, etc., more clearly. Well, with the wonders of photo editing software, and a light hand, you can bring shadowed features into the limelight again. Let me show you how.
Here’s a photo of my son from, wow, a long time ago, at a local water park. He was having such a great time going up and down the large slides with the inner tube. It was tough to get a photo (he was so quick!), so I took what I could get. However, the more I look at this, the more I’d love to see his face in better light. Yes, he has a good tan and is olive-skinned, but still …

I tried using Curves and Levels adjustments (I’m using Photoshop, and these can be found under the menu Image > Adjustments), but by increasing the mid-tones, it simply “blew out” the water, brightening what was already a lighter component of the picture – and the result looked unnatural.

I did, however, come up with a compromise that I really liked.
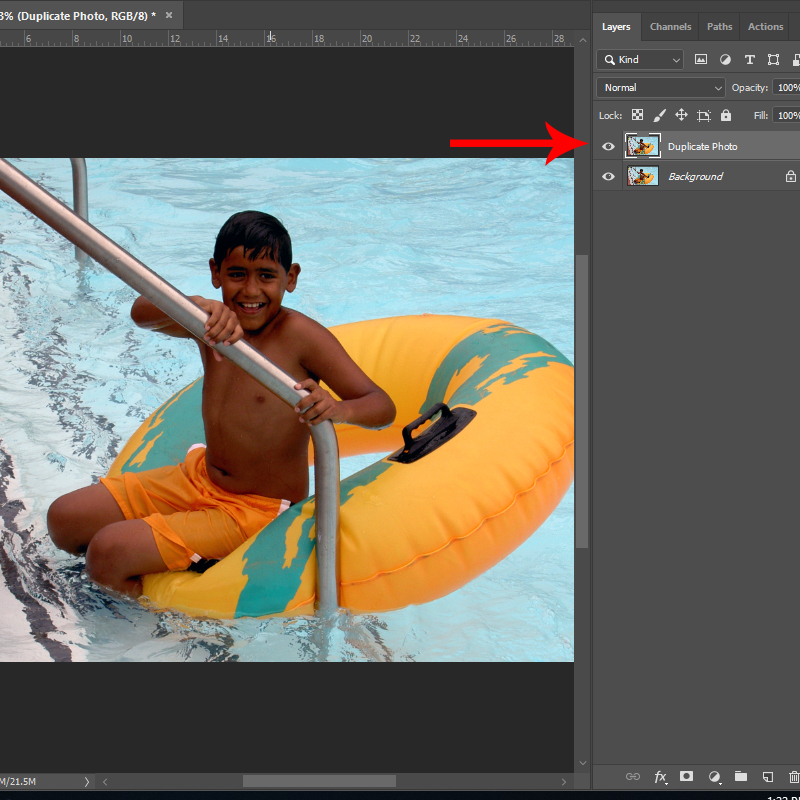
Step 1: Create a duplicate layer of your photo. (This is especially important as you will want to retain the integrity of the original picture.) You can do this quickly using short-cut keys Control-J, or using the menu option, Layer > Duplicate Layer.
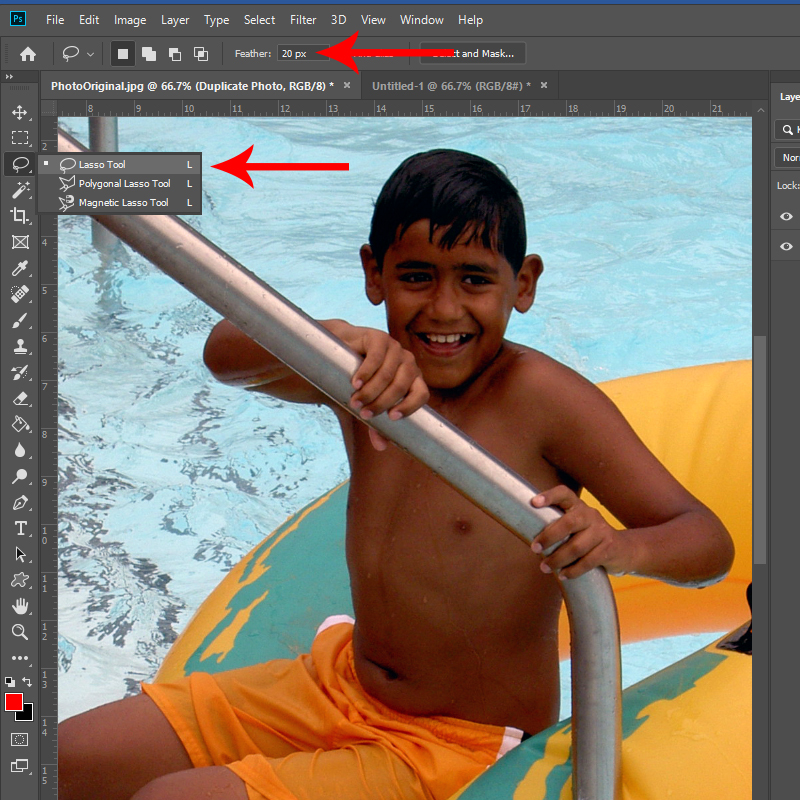
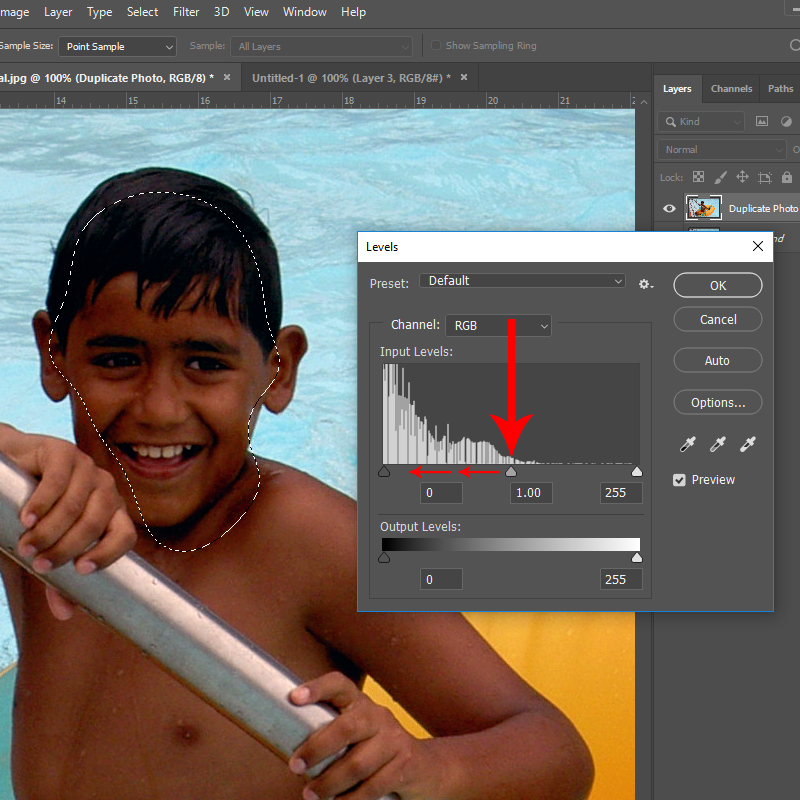
Step 2: With the duplicate layer active, select the Lasso Tool from your toolbox. Set a ‘feather’ of 20-25 pixels. You will want a soft edge on the lassoed selection to ensure it blends with the rest of the photo.
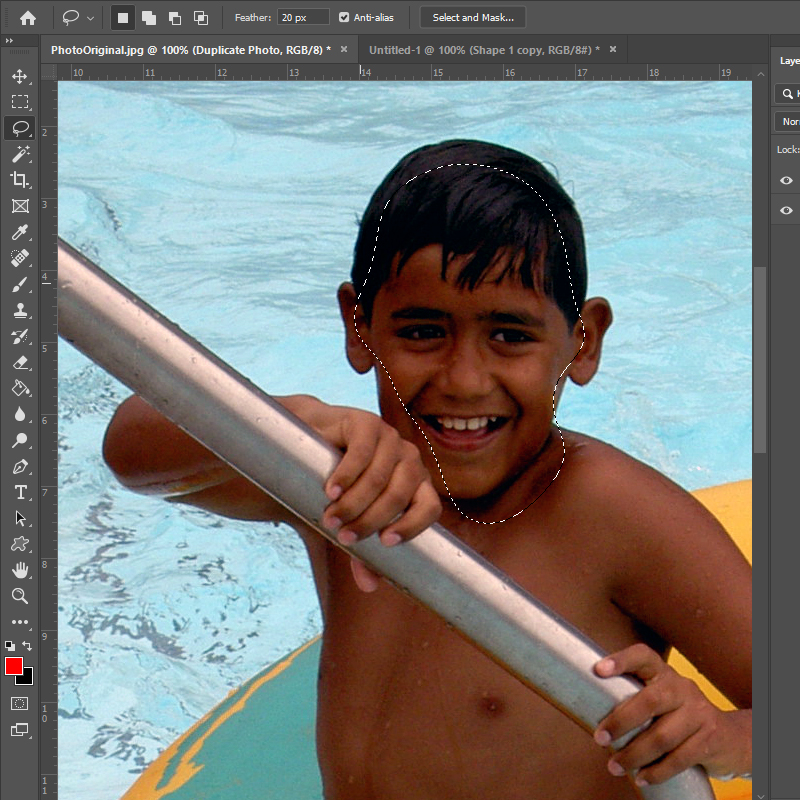
Step 3: Using the Lasso Tool, outline the section you’d like to lighten. You do not need to go right around the exact edge of the shape – remember you have a feathered edge. In fact, I’d recommend deliberately going inside the edge to allow for the feathering or ‘bleed’ to help blend the changed section with the original. It certainly does not need to be an exact science here.
Step 4: Open the Levels adjustments (Image > Adjustments > Levels) and slowly move the middle slider, the one that controls the mid-range levels to the left (left increases the light, right adds dark tones). A very light hand is all that’s needed. If you are too heavy-handed, the result will not look natural.
(The shortcut Control-D will remove your selection after you’ve applied the tonal adjustment.)
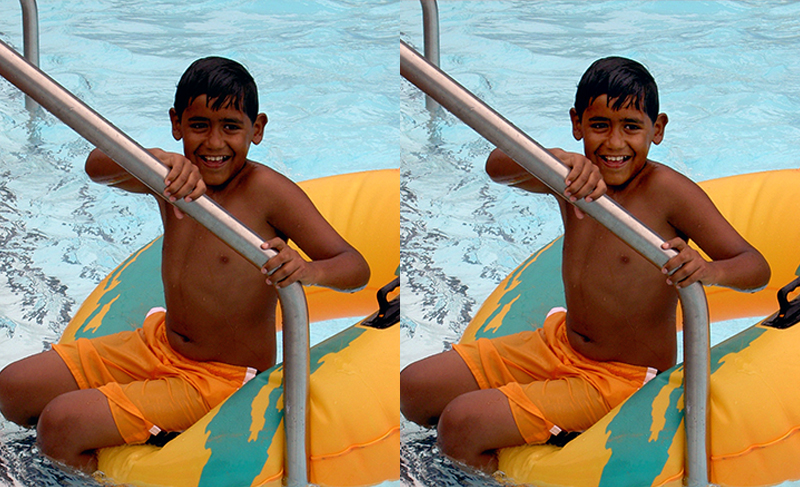
The resulting change is subtle, but that’s exactly what you want! Here’s my ‘corrected’ photo:

It’s might be hard to see the difference, but the facial features now stand out a little better. There are more highlights in my son’s hair, too, and overall, the face just looks brighter. Here’s a side-by-side for an easier comparison:
Have photos of loved ones wearing baseball caps that cast shadows? Maybe just bad lighting and, as the situation I found myself in, you’re just trying to get any picture that you can. In just a few minutes, you can salvage photos that you might otherwise skim over. But remember, a light hand is all that’s needed; it’s easy to go too far with this technique.

About the Author Kat Hansen is a creative team member here at The Digital Press. A HR Manager in the real estate industry by day, she loves the opportunity to spend a few hours each evening being creative. Vacation memories feature pretty heavily in Kat’s scrapbooking pages, as well as her health and fitness journey. Kat has quite the sense of humor (she “blames” her father for this), which she incorporates into her journaling and memory-keeping.
This is great! Thanks for the tip! Definitely need to try this.
thank you so much for sharing this tip! this will come in handy
Thank you SO much for this tip! Just yesterday I was able to try it on a photo of my husband and I with a landmark in the background. It was a grey, drizzly, day and the statue was faded looking, compared to the crisp images of my husband and I on the boat. I was able to go in, darken the statue enough to make it look “real” and not washed out, and it was perfect! This is a wonderful tool in my digital toolbox. I’m relatively new to digital scrapbooking and need all the tips I can get! Thanks!