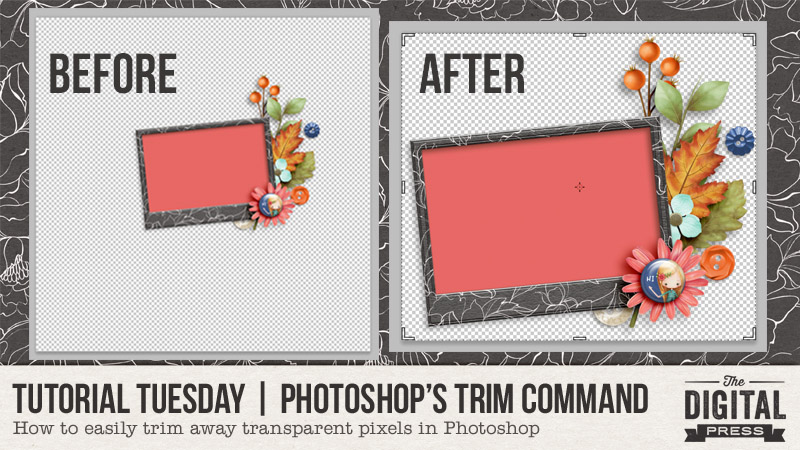
Welcome to another edition of our Tutorial Tuesday series here on The Digital Press blog! Today, I’m going to share some information about using the “Trim” command to easily remove transparent pixels in Photoshop. It’s one of those handy tools that I was thrilled to find, a while back… as it’s a super easy Photoshop command that packs a big punch!
Before we get started, I wanted to share a couple of examples of occasions when I like to use the “Trim” command:
- I’ve created an element cluster or title on a large 12×12 canvas. I’ve used it on my page and I want to save it for possible use on a future page.
- I’ve got a single element that resides on a much larger canvas than the element requires. When I look through my digi stash I’ve got some folders of elements that came saved on 12×12 canvases. I like to quickly Trim those elements so that I have a better view of it in my Mac’s “Finder” window.
Here’s how to use the Trim command…
1. As shown here, use the “Image” drop down menu, and choose > Trim…
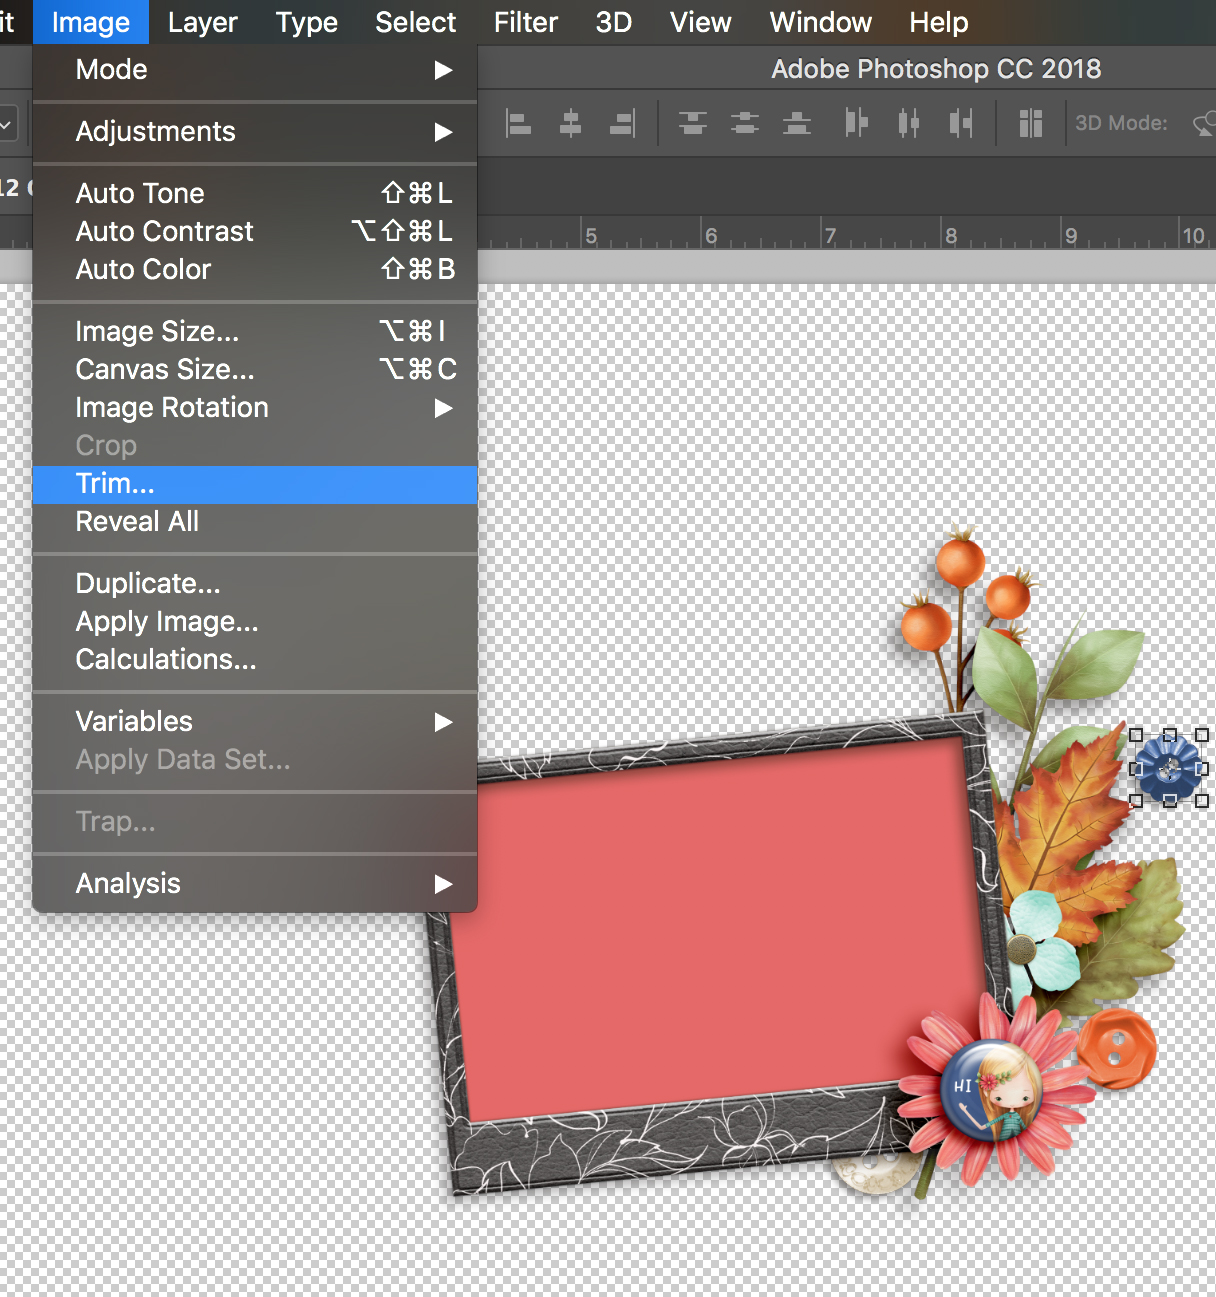
2. In the Trim dialog box, select the option “Transparent Pixels” as shown here…
![]()
This will help you achieve your goal of “shrinking” the image canvas by leaving behind an image containing all of the nontransparent pixels.
3. Select one or more areas of the image to trim away. Because I wanted to end up with the smallest canvas possible, you’ll see (in the screenshot ahove) that I selected them all — Top, Bottom, Left, and Right.
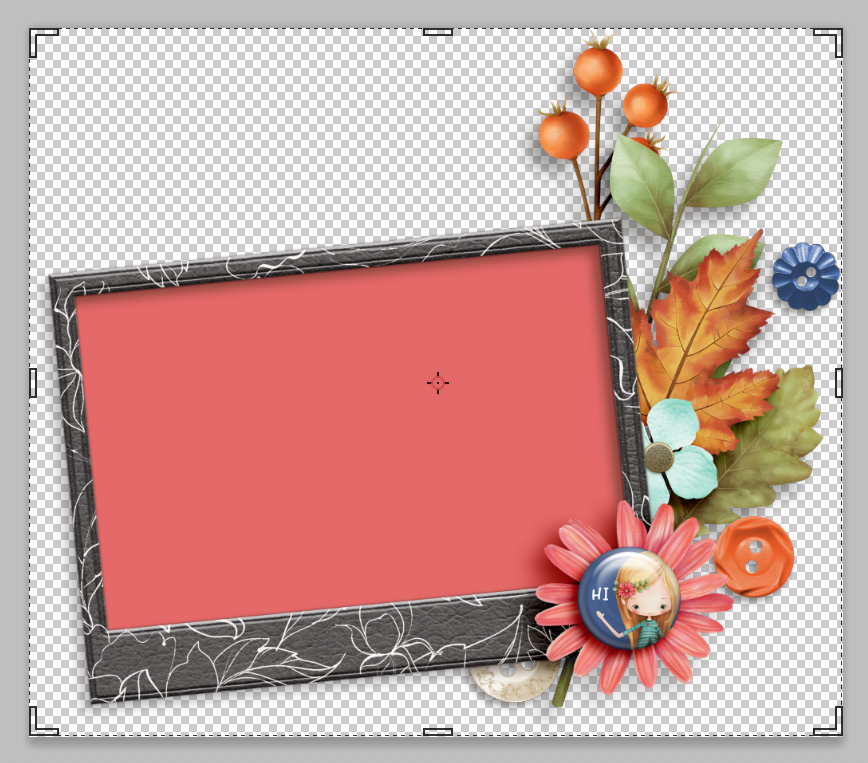
4. Click OK and you’re done! Yup. That’s it! This is what you’ll be left with…
Once you’ve finished trimming your image, don’t forget to save it. If you want to maintain the layers, save it as a PSD file — or if you want a flattened (one layer) copy, you can save it as a PNG file.
*NOTE* I created the element cluster I used for this tutorial’s example, shown above, using the September 2018 Make It Count element set by Anita Designs.
Another thing… as I mentioned above, I’ve found over the years that I’ve acquired a good number of different elements that are saved on large 12 x 12 canvases, but I prefer to store them on my hard drive without all of the unnecessary empty pixels (in large part because the thumbnail image my computer displays for me is much easier to see if the image is cropped nice and tight!). Therefore… I wrote myself a Photoshop action using the “Trim” command, with the addition of “save” and “close” commands. It saves me tons of time when cleaning up those folders & cropping down my image files.
If you are interested in learning how to write a Photoshop action for yourself… click HERE to read a tutorial I wrote here on The Digital Press blog about a year ago that explains the process of writing an action.
So that’s it! Such a simple, and yet useful, command to use when you’re working in Photoshop! If you have any questions, please feel free to post them here in the comments.
Until next time… happy scrapping!
 About the Author Barbara is a member of the creative team here at The Digital Press. She’s married, has two awesome kids (a 21 year old son and an 19 year old daughter) as well as an 11 year old adorable Soft Coated Wheaton Terrier pup. You’d think with all these ages posted here about her family she’d tell you her age but NOPE … not gonna happen! 😆