Welcome to another edition of Tutorial Tuesday here on The Digital Press blog! Today, I am going to talk to you about quickly creating actions in Photoshop — cutting down the time it takes to perform repetitive tasks, and leaving you more time to scrap! If having more time to scrap interests you, creating actions is a really simple answer. They are easy to create — and can be used for simple as well as complex tasks.
First off, you’ll want to create your own Action Set to house all of the bright and shiny new actions you are going to create once you fall in love with actions (and you will!). Creating your own Action Set will allow you to find your actions quickly.
How to Create Your Own Action Set
1. Start with a blank Photoshop canvas or open up a scrapbook page or photo.
It doesn’t matter what you start out with when you’re creating an Action Set. You just need something open.
2. Open the Action panel
Open the Action panel by clicking Window > Actions.
3. Click on the icon on the top right of the Actions panel. It looks like 4 lines atop each other.
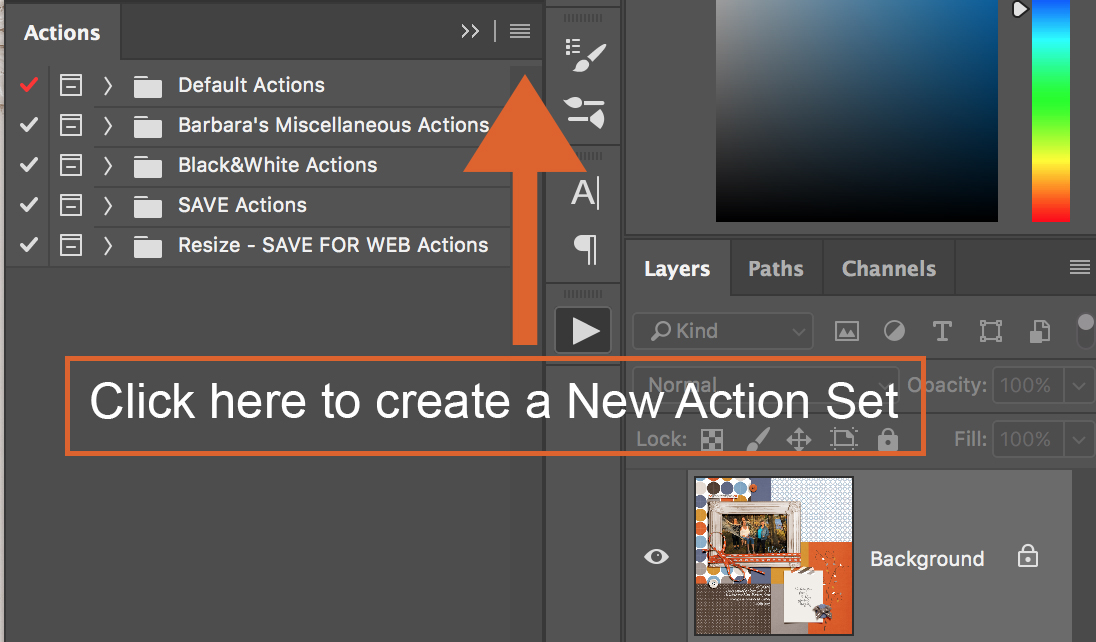
A pop-up window will appear. Choose “New Set.”

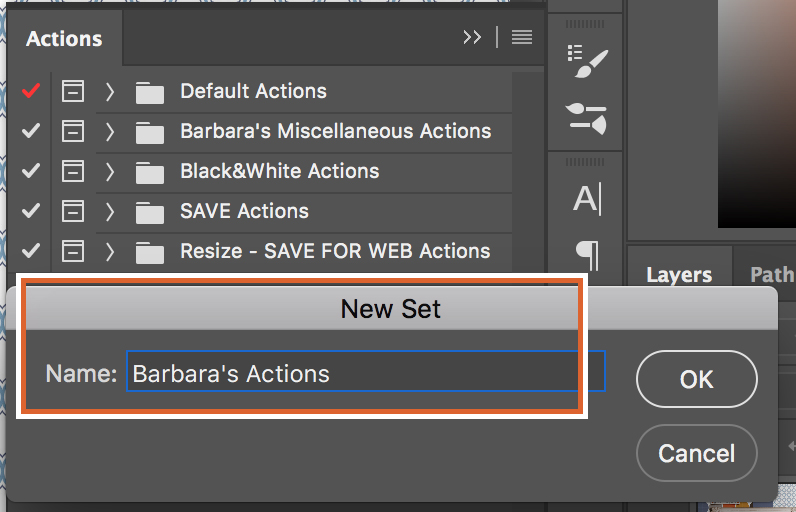
4. Name your Action Set
A dialog box will appear. Here you will type in the a name for your Action Set (your name perhaps?). Then click OK.
5. That’s it!
And now that you’ve got your action set created… let’s move on to actually creating an action or two…
How to Create an Action
1. Begin with a blank Photoshop window, a photo or a scrapbook page
What you start with is completely up to you and depends what you want your action to do.
TIP | Out of an abundance of caution, I make sure that whatever layout or photo I have open is a copy, or that I’ve saved it before I write my action so that I don’t inadvertently write over my original file.
2. Open the Actions panel
Open the Actions panel by clicking Window > Actions.
3. Now you are going to begin writing your Action
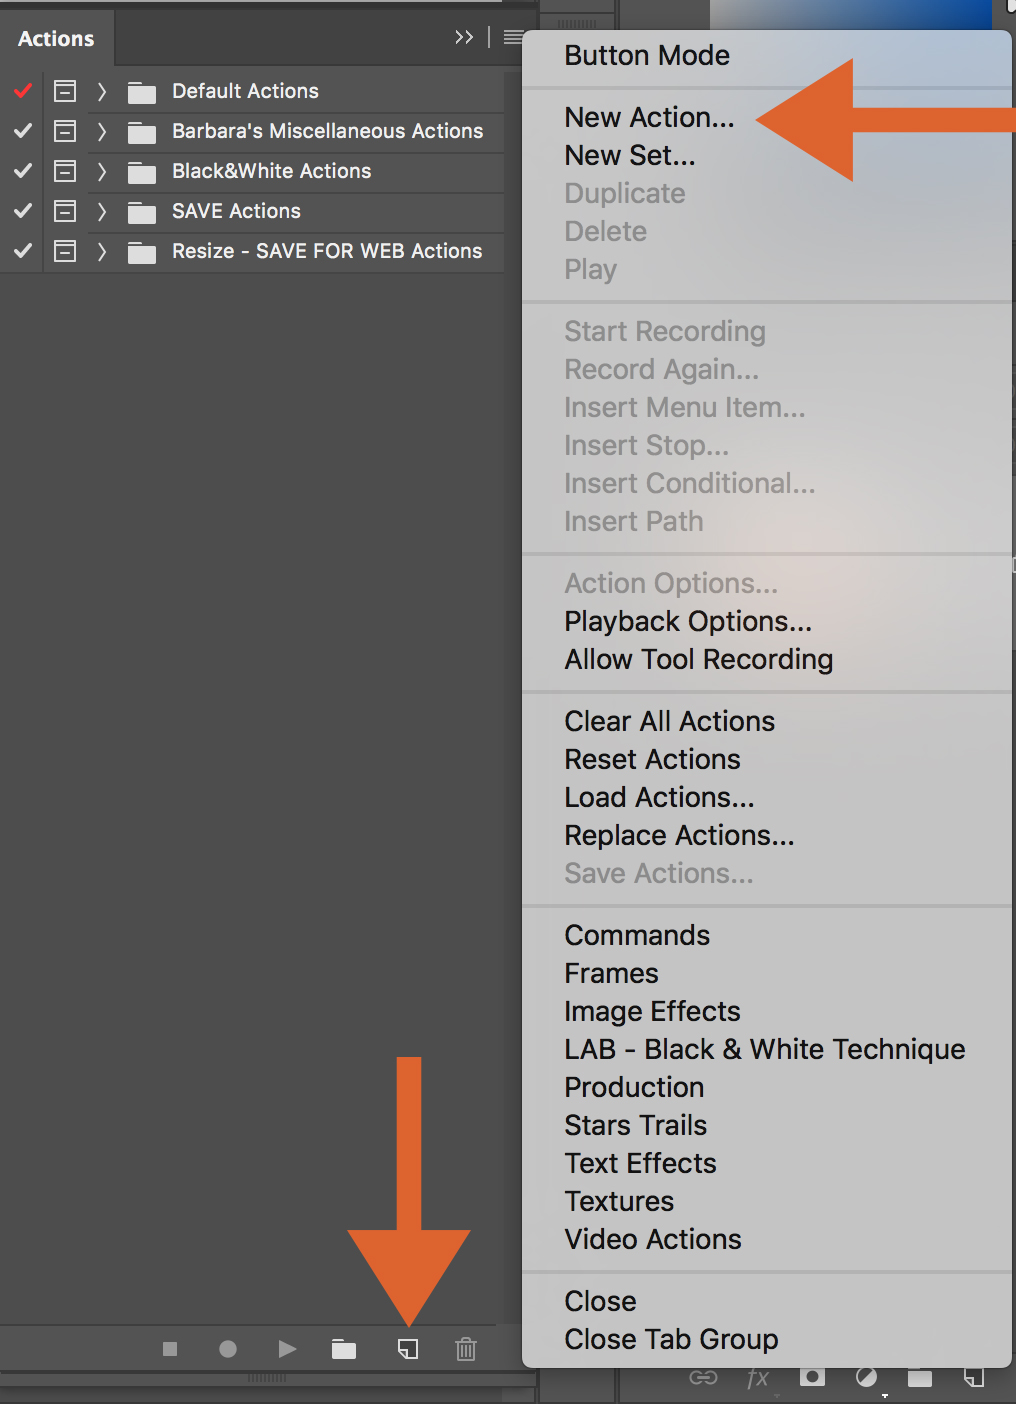
Click the Create New Action button on the bottom of the Actions panel (it looks like a piece of paper with a folded corner). An alternative is to choose New Action from the Actions panel menu.
3. You will now name your Action, choose where it’s going to be saved, and begin recording
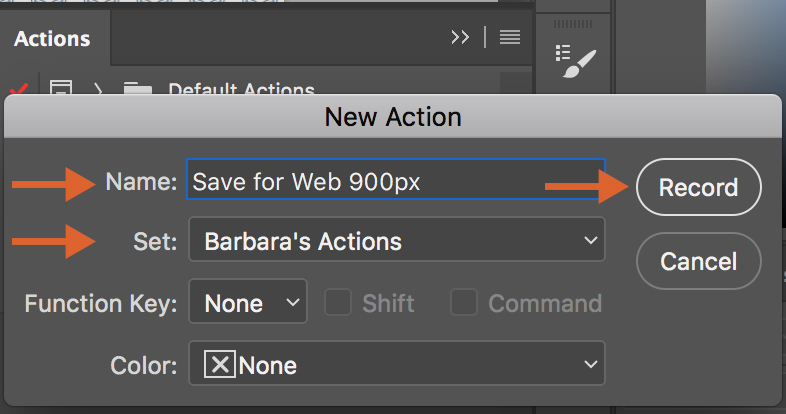
- The name I chose for my sample action was “Save for Web 900px” (the name you choose will obviously depend on the action you are going to create). Examples of actions you may want to write may be to “Save to JPG,” “Save to Web,” “Add guides to a layout,” “Change a photo to black and white,” “Warp a shadow,” “Frame a photo,” etc. You get it… the sky’s the limit!
- I placed my action in the Action Set I created above — “Barbara’s Actions.”
- NOTE: there are other options you can choose in this dialog box, but it’s ok to leave them at their defaults, which is what I do.
- Then, click Record to begin recording your action.
7. Now the fun (recording) begins!
Any steps you take from this point on will be recorded in the Actions panel. Perform all of the commands and operations you want your action to record.
FYI, if you look at the bottom of the Actions panel at this point you will see a Red Dot which indicates that you are recording an action.

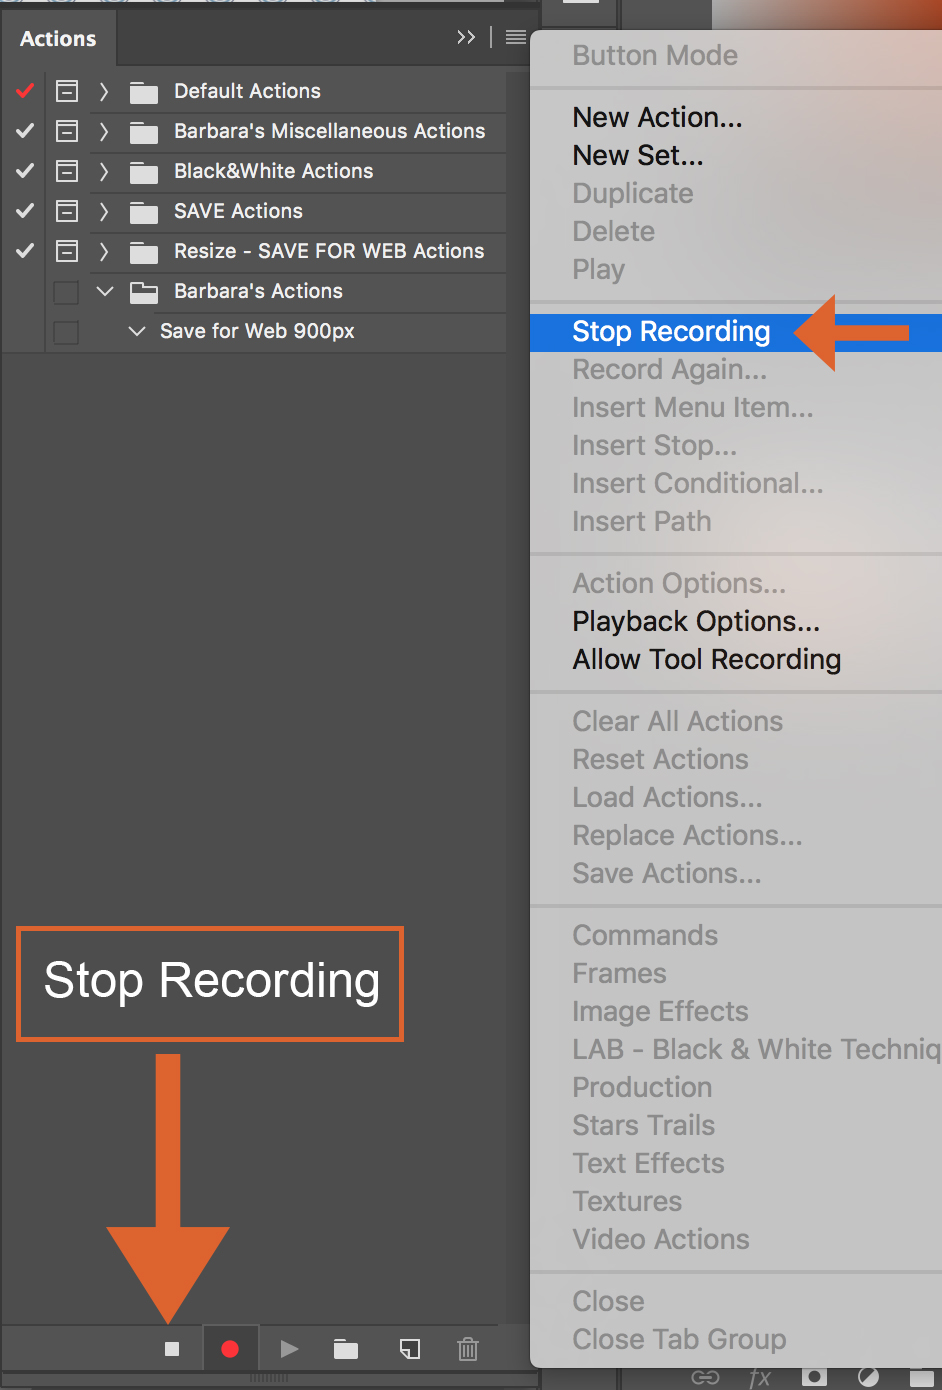
8. Stop Recording
When you’ve finished recording all the steps you want included in your action, you can either click the Stop Recording button at the bottom of the Actions panel (it looks like a filled in white square) OR you can choose Stop Recording from the Actions panel menu.
That’s it — the basic “how-to” of recording an action!
So as not to ignore the obvious, let’s go over the steps of how to play/use the action you just recorded!
Play the Action You’ve Just Recorded
1. Have a file open in Photoshop
2. Open the Actions panel.
The Action panel is opened by clicking Window > Actions.
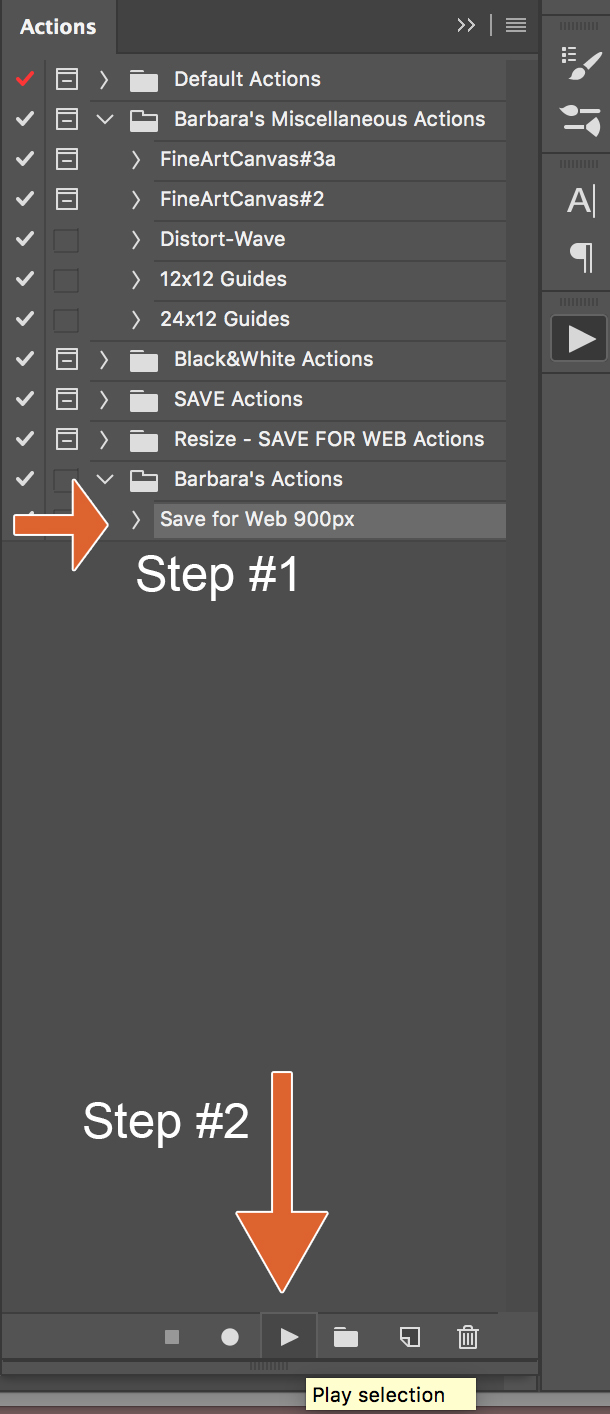
3. Navigate to the action you want to play and hit the PLAY SELECTION button.
The Play Selection button is the right pointing triangle button on the bottom of the Actions panel.
So, what do you think? Recording actions is not so difficult, right? It’s basically just the act of coming up with an idea for an action, naming it, clicking record when you’re ready to start recording, and stopping the recording when you’re done — just like you would on a tape recorder. [NOTE, I know, I said tape recorder. That’s because I’m old. LOL!]
Enjoy. They sky’s the limit … really! As always, if you have any questions, feel free to ask them here in the comments — or in The Digital Press forums — and I (or one of the many other scrappers in The Digital Press world) will be happy to help you out!
Happy early Thanksgiving everyone!
 About the Author: Barbara is a member of the creative team here at The Digital Press. She’s a mom to two adult “kids” (an almost 21 year old son and an 18 year old daughter). In her free time (since her kids are adults, like it or not she has plenty of free time) she loves to tell her family’s stories through digital scrapbooking, learn all she can about Photoshop and Lightroom, take photos, travel and hang out with her family. Life is good!