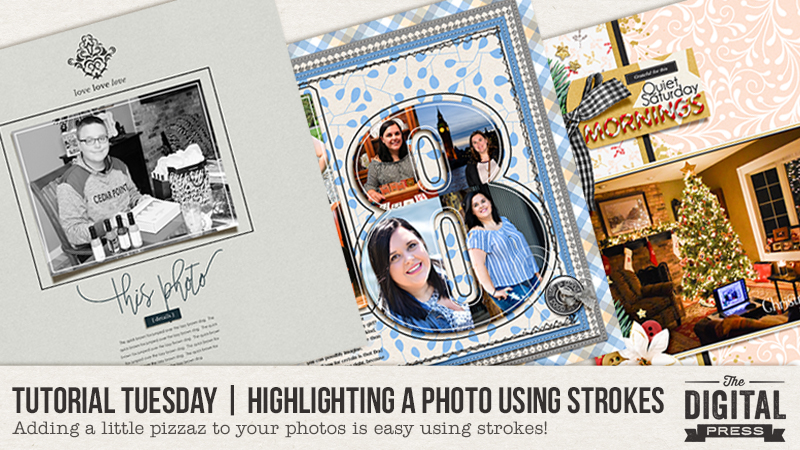
Have you ever been working on a scrapbook page, been framing up your photos and feel like your page is coming together and looking awesome, but you know, it needs just a little “something.” Perhaps you’re like me and you use the same framing technique over and over and sure, it works great, you love it, but for the page you’re working on you want a little different look. Personally, my go-to method of framing a photo is to apply a style to my photo mask (a textured white stroke). Again, I love the clean look, but sometimes I feel like a photo could use a little more “oomph.” When that happens oftentimes I’ll add a stroke either around the photo or inside the frame of the photo. It’s easy to do. Let me show you how.
First off, here’s a clean and simple page I scrapped this weekend using Fete papers, elements and stamps by Sahin Designs here at The Digital Press. I was happy with the page with the warped shadow and my standard white frame, but I felt that keeping it even more simple, by removing the white frame and adding a stroke around the photo as well as inside the photo would give the page a little more pizzaz. Let me tell you how I go about adding strokes to my pages.

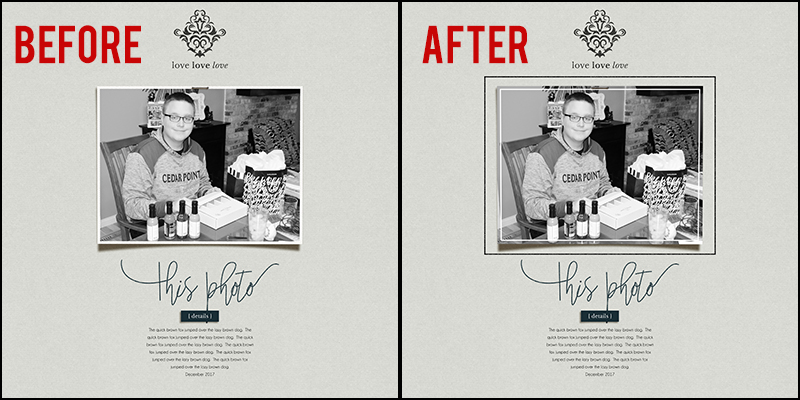
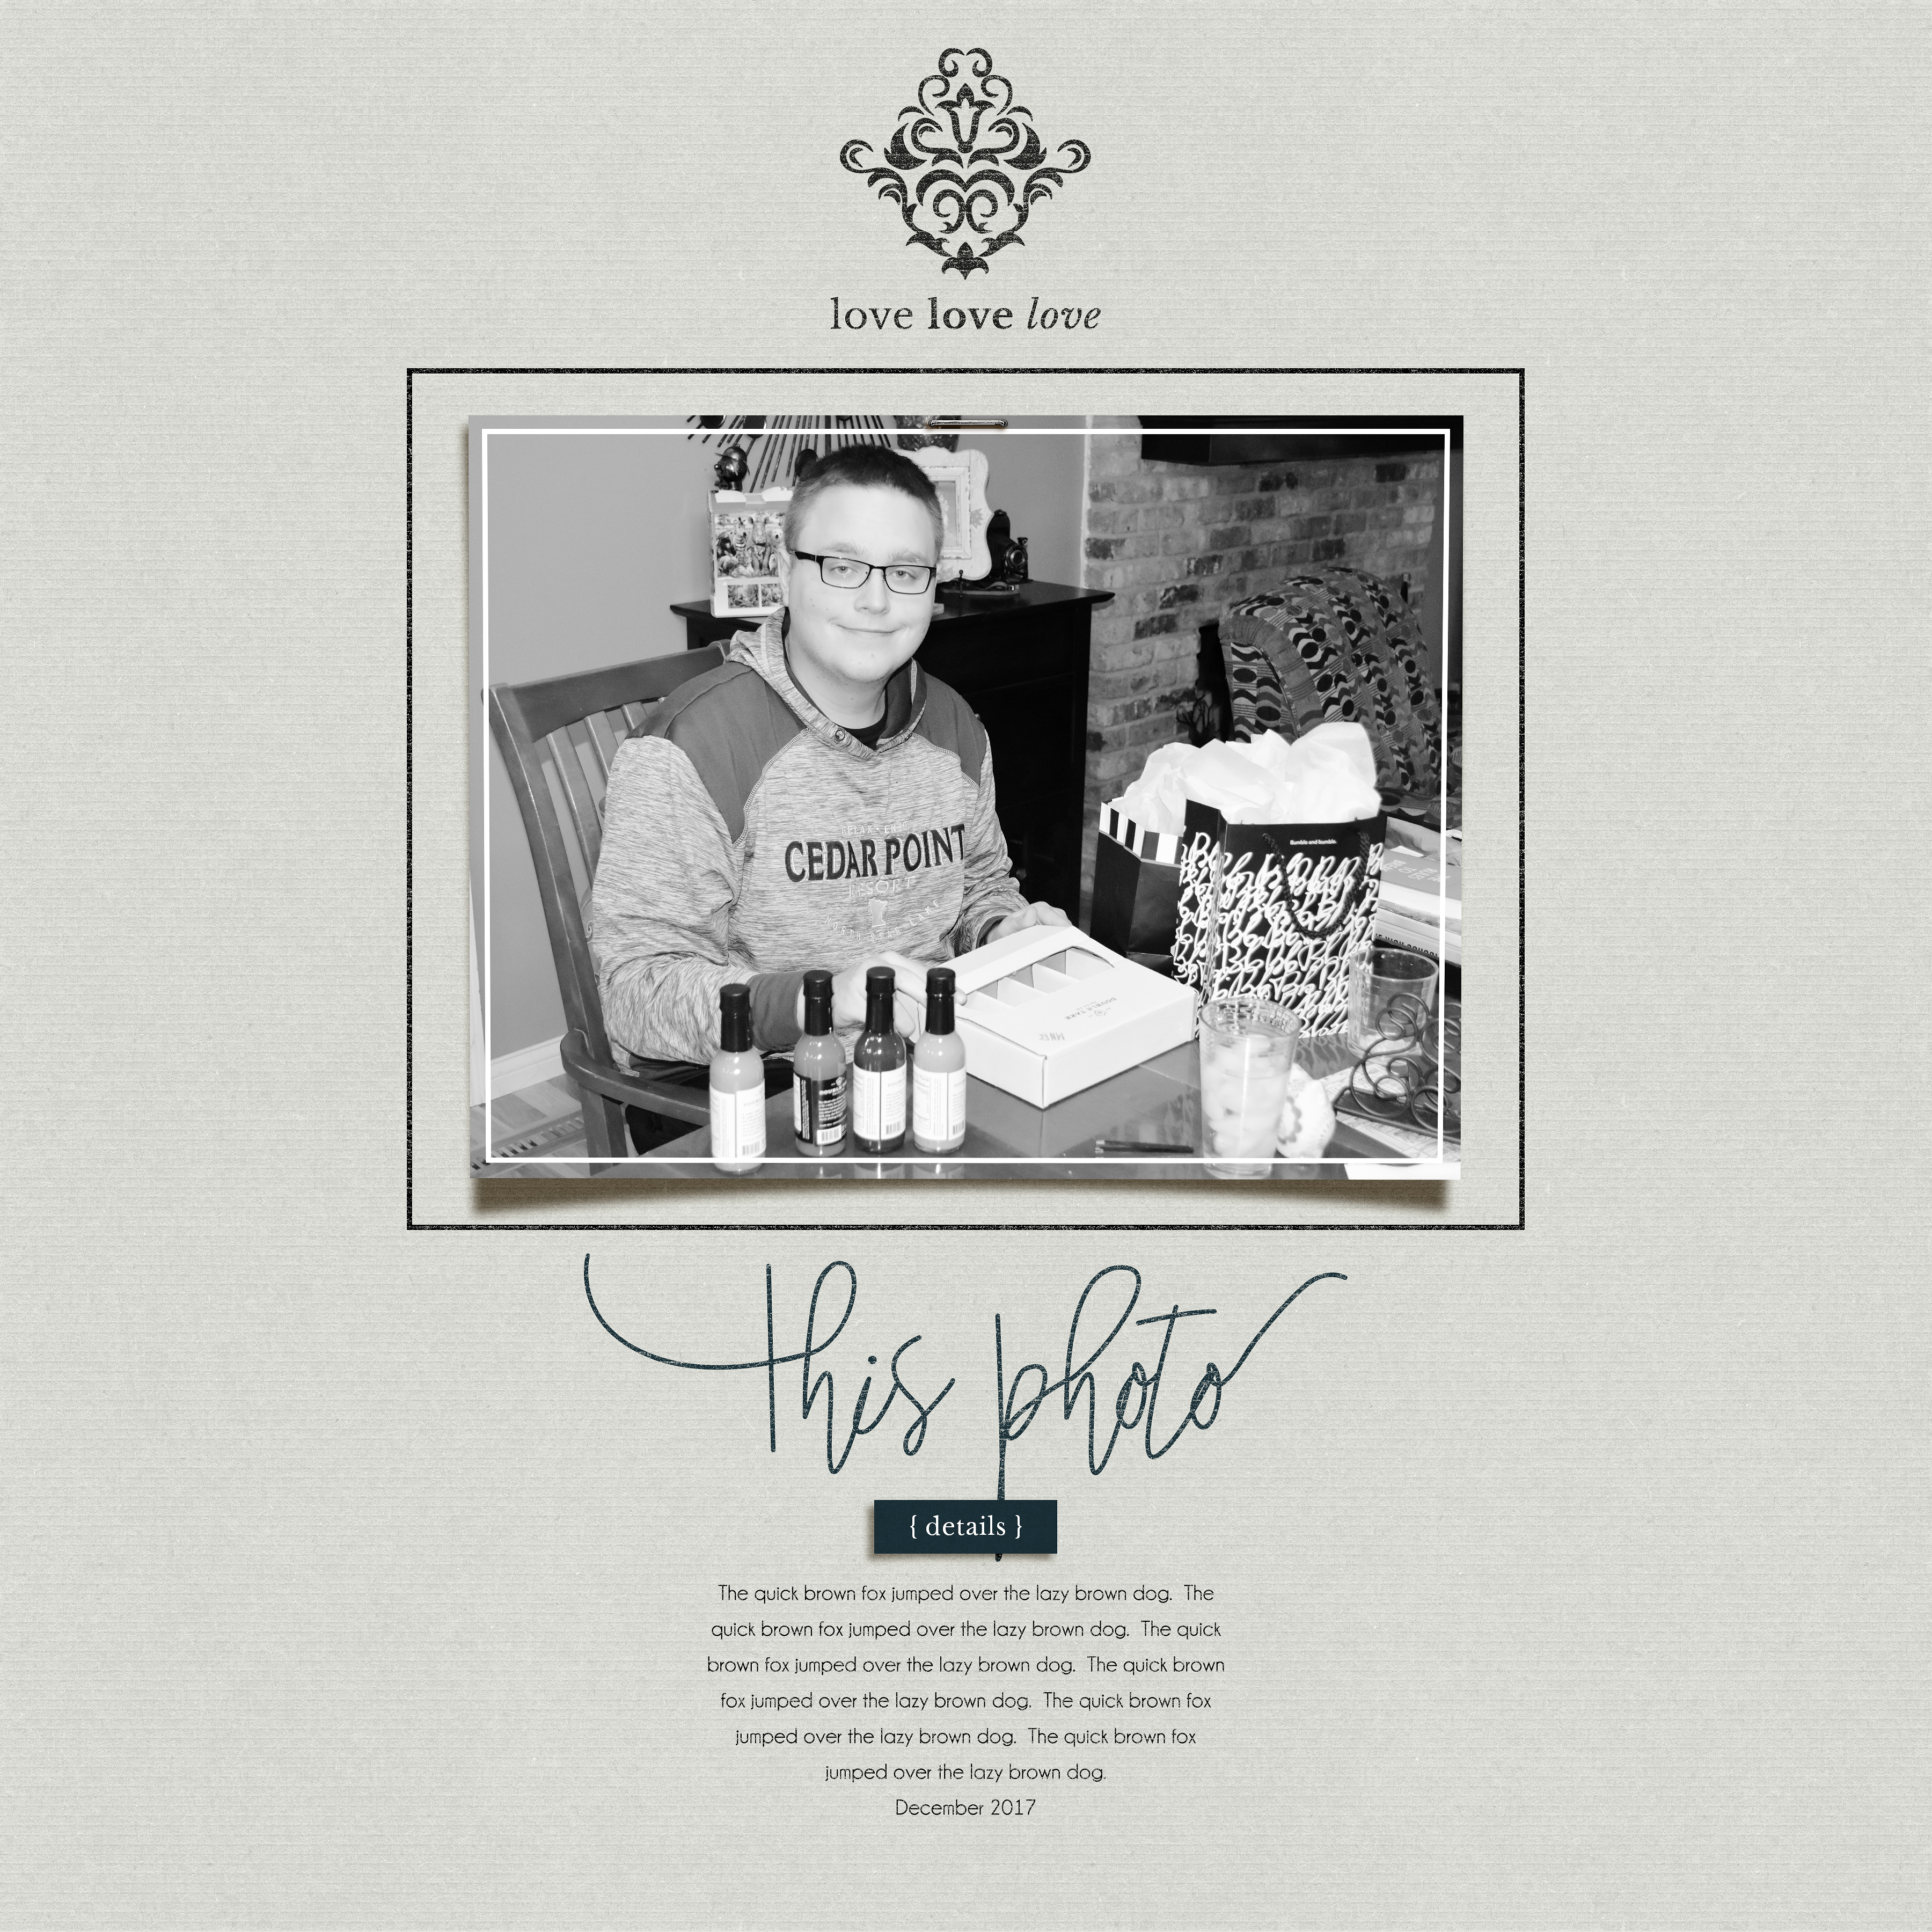
Here’s my side-by-side “Before” and “After” images:
HOW TO ADD A STROKED FRAME INSIDE A PHOTO
Before we begin, let me note that for my page example I first chose to delete the style that created the white textured frame. I wanted to just use the inset white stroke and the outside black stroke.
As you can see from my layers panel, I’ve got my photo clipped to a rectangular shape that I created with the marquee tool.
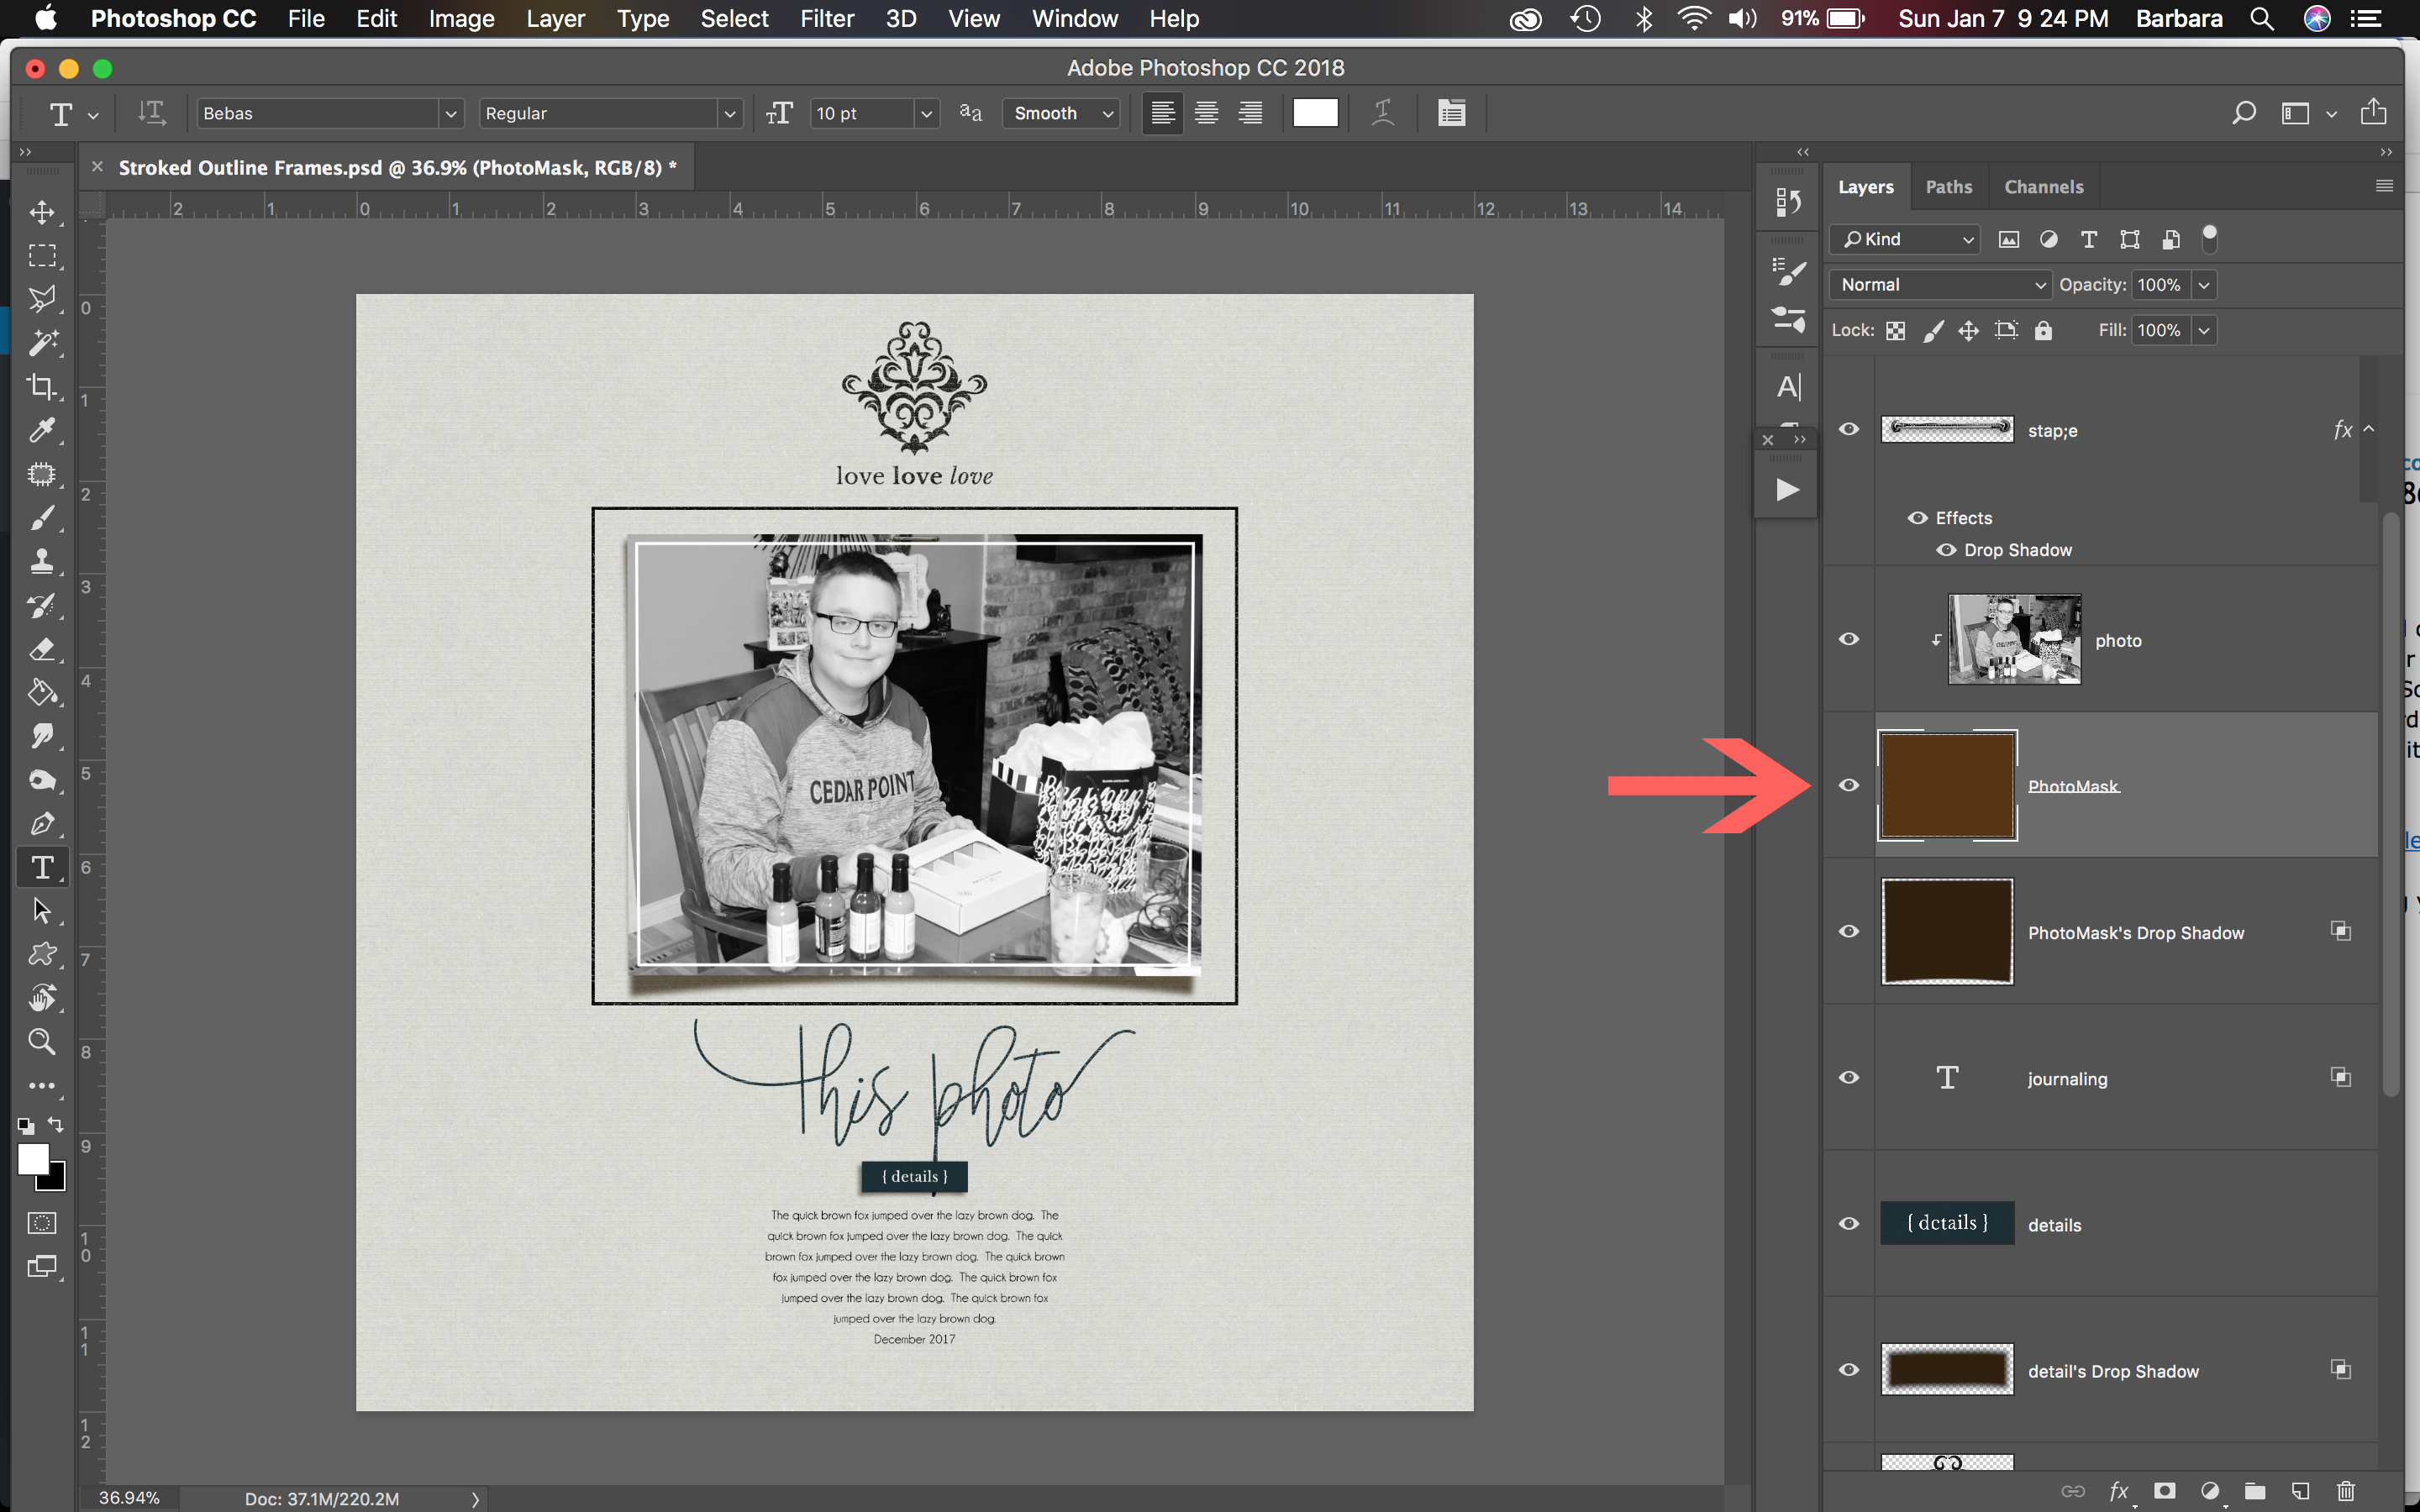
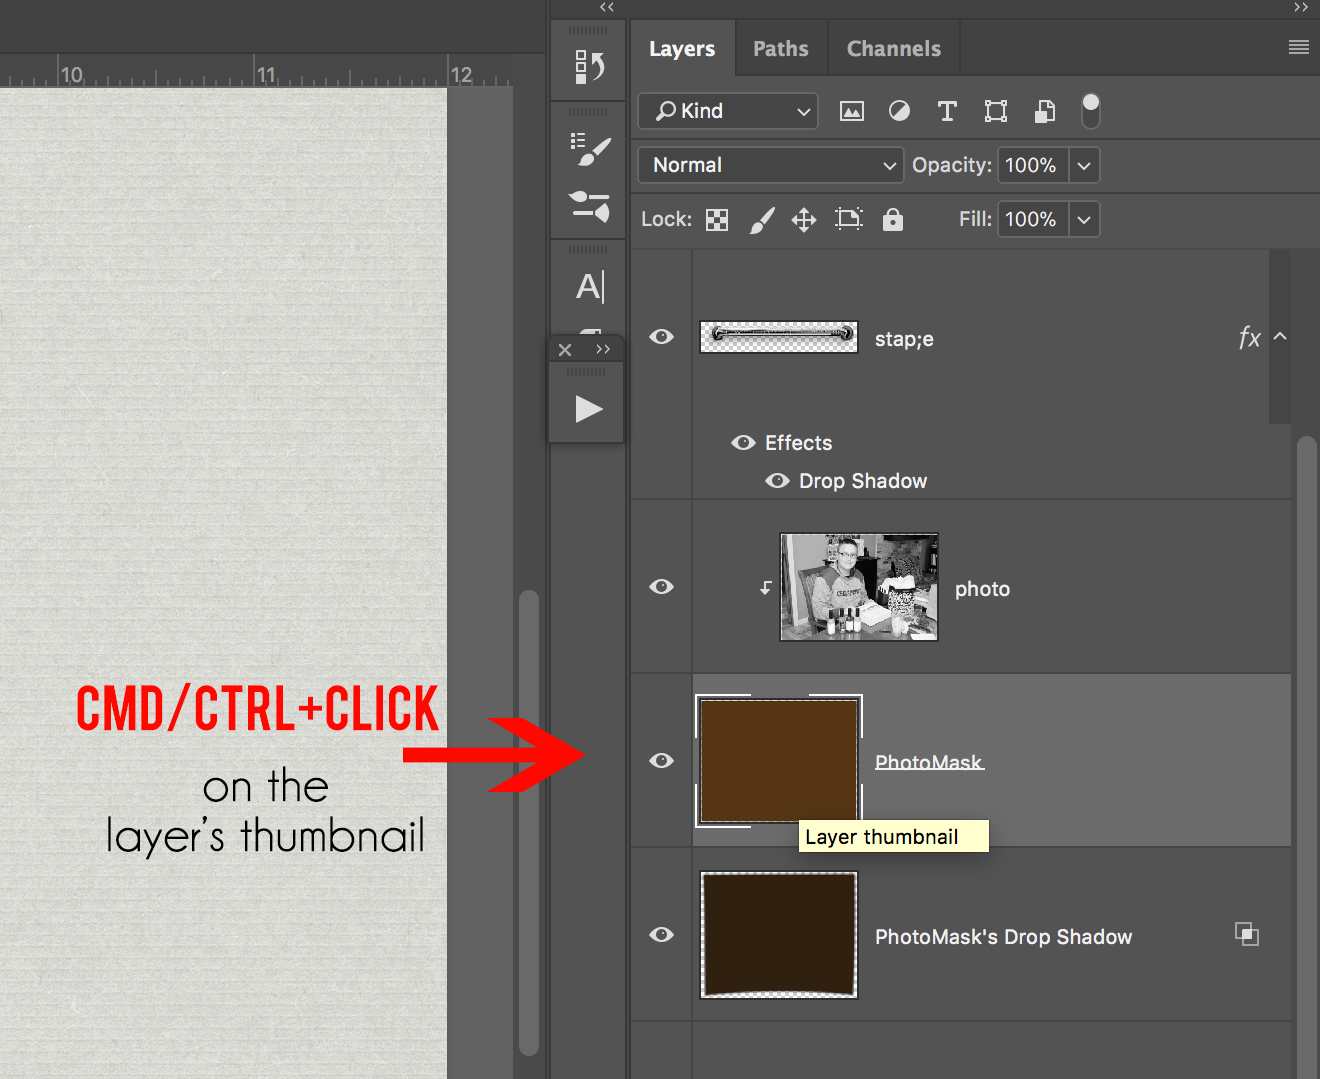
Step 1. Highlight the photo mask
CMD+Click (or CTRL+Click) on the thumbnail of the photo mask in the layers panel. Marching ants will appear around the photo mask.
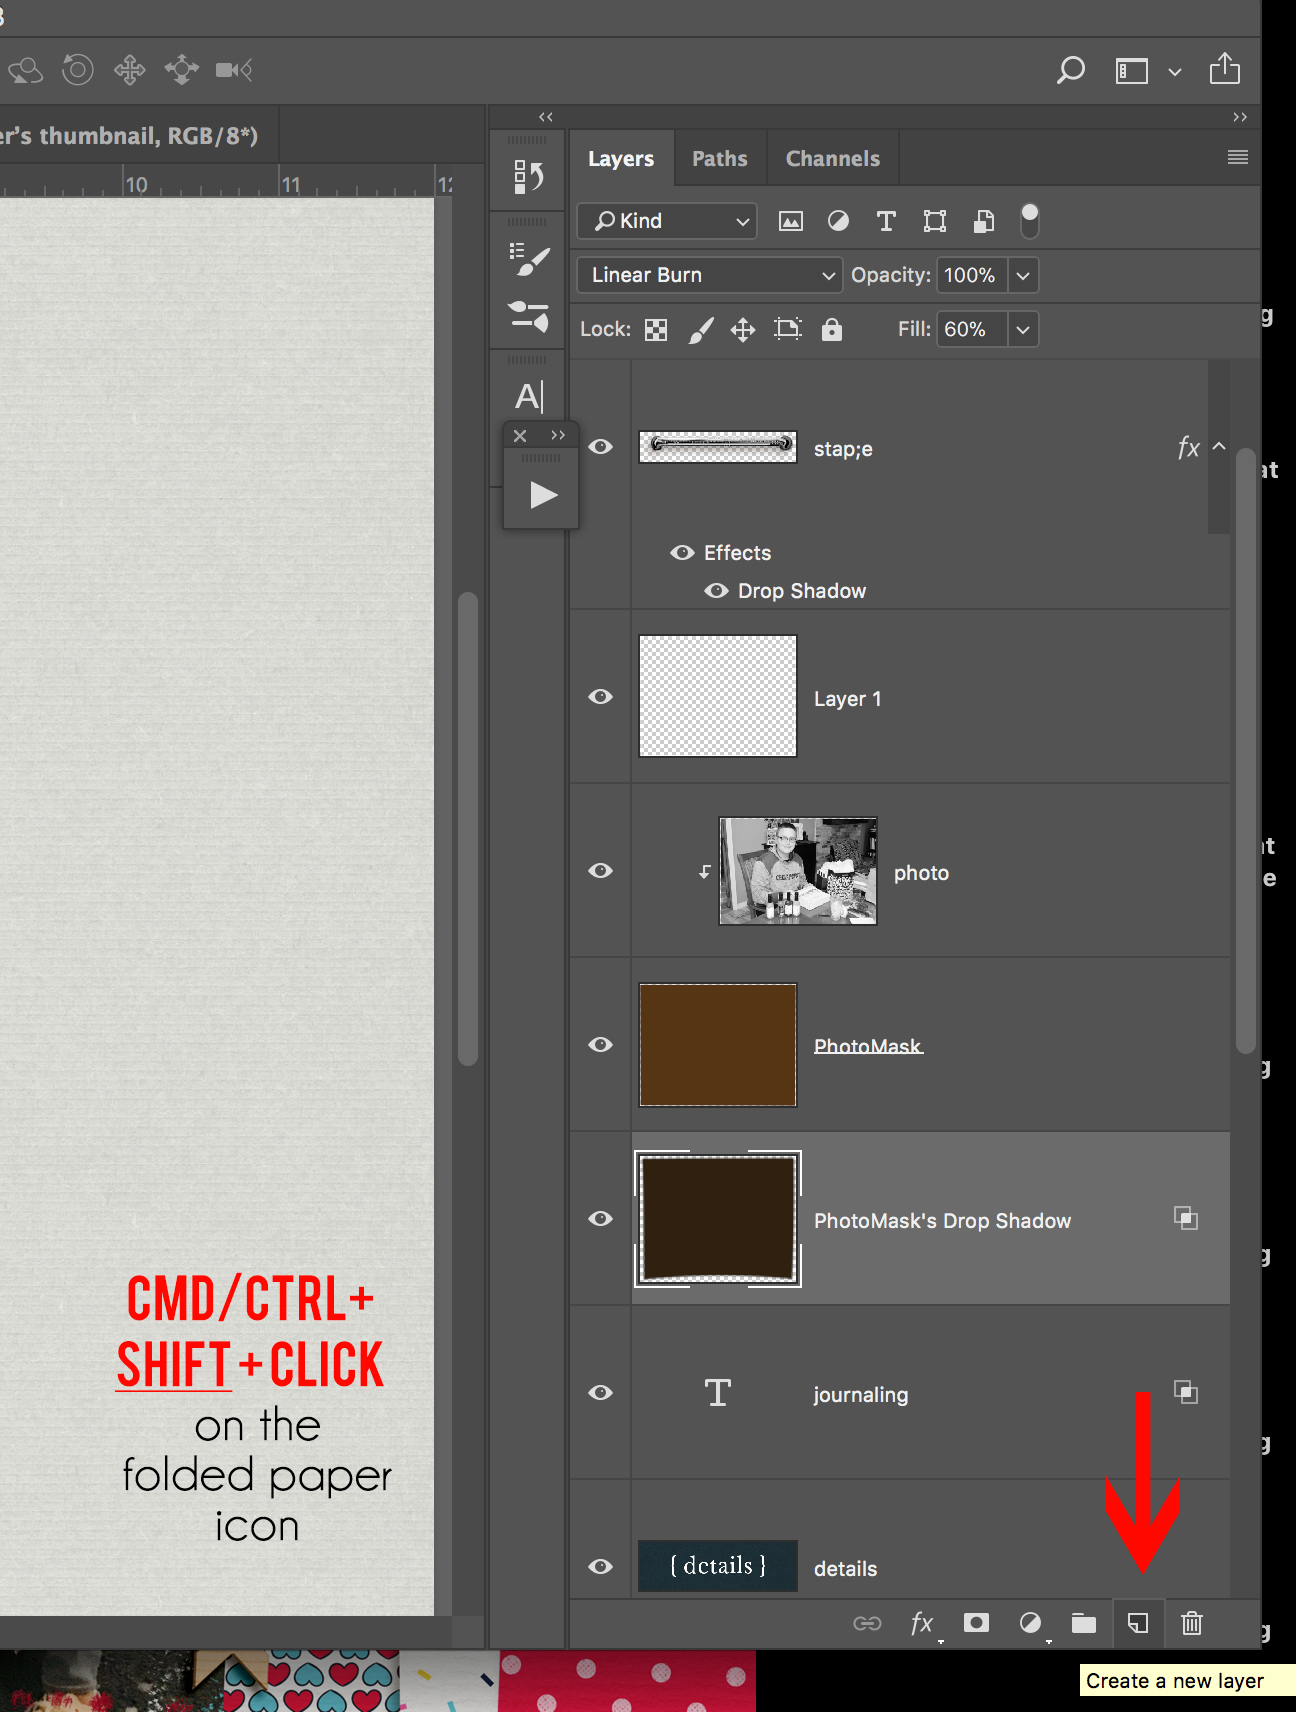
Step 2. Create a new blank layer ABOVE the photo in the layers panel
Click on the photo in the layers panel so that the photo layer is active and then create a new blank layer. Following are three different ways you can create a new blank layer:
(1) Click on the folded paper icon at the bottom of the layers panel, or
(2) Press CMD+SHIFT+N (or CTRL+SHIFT+N) and then click OK, or
(3) Press Layer > New > Layer > OK.
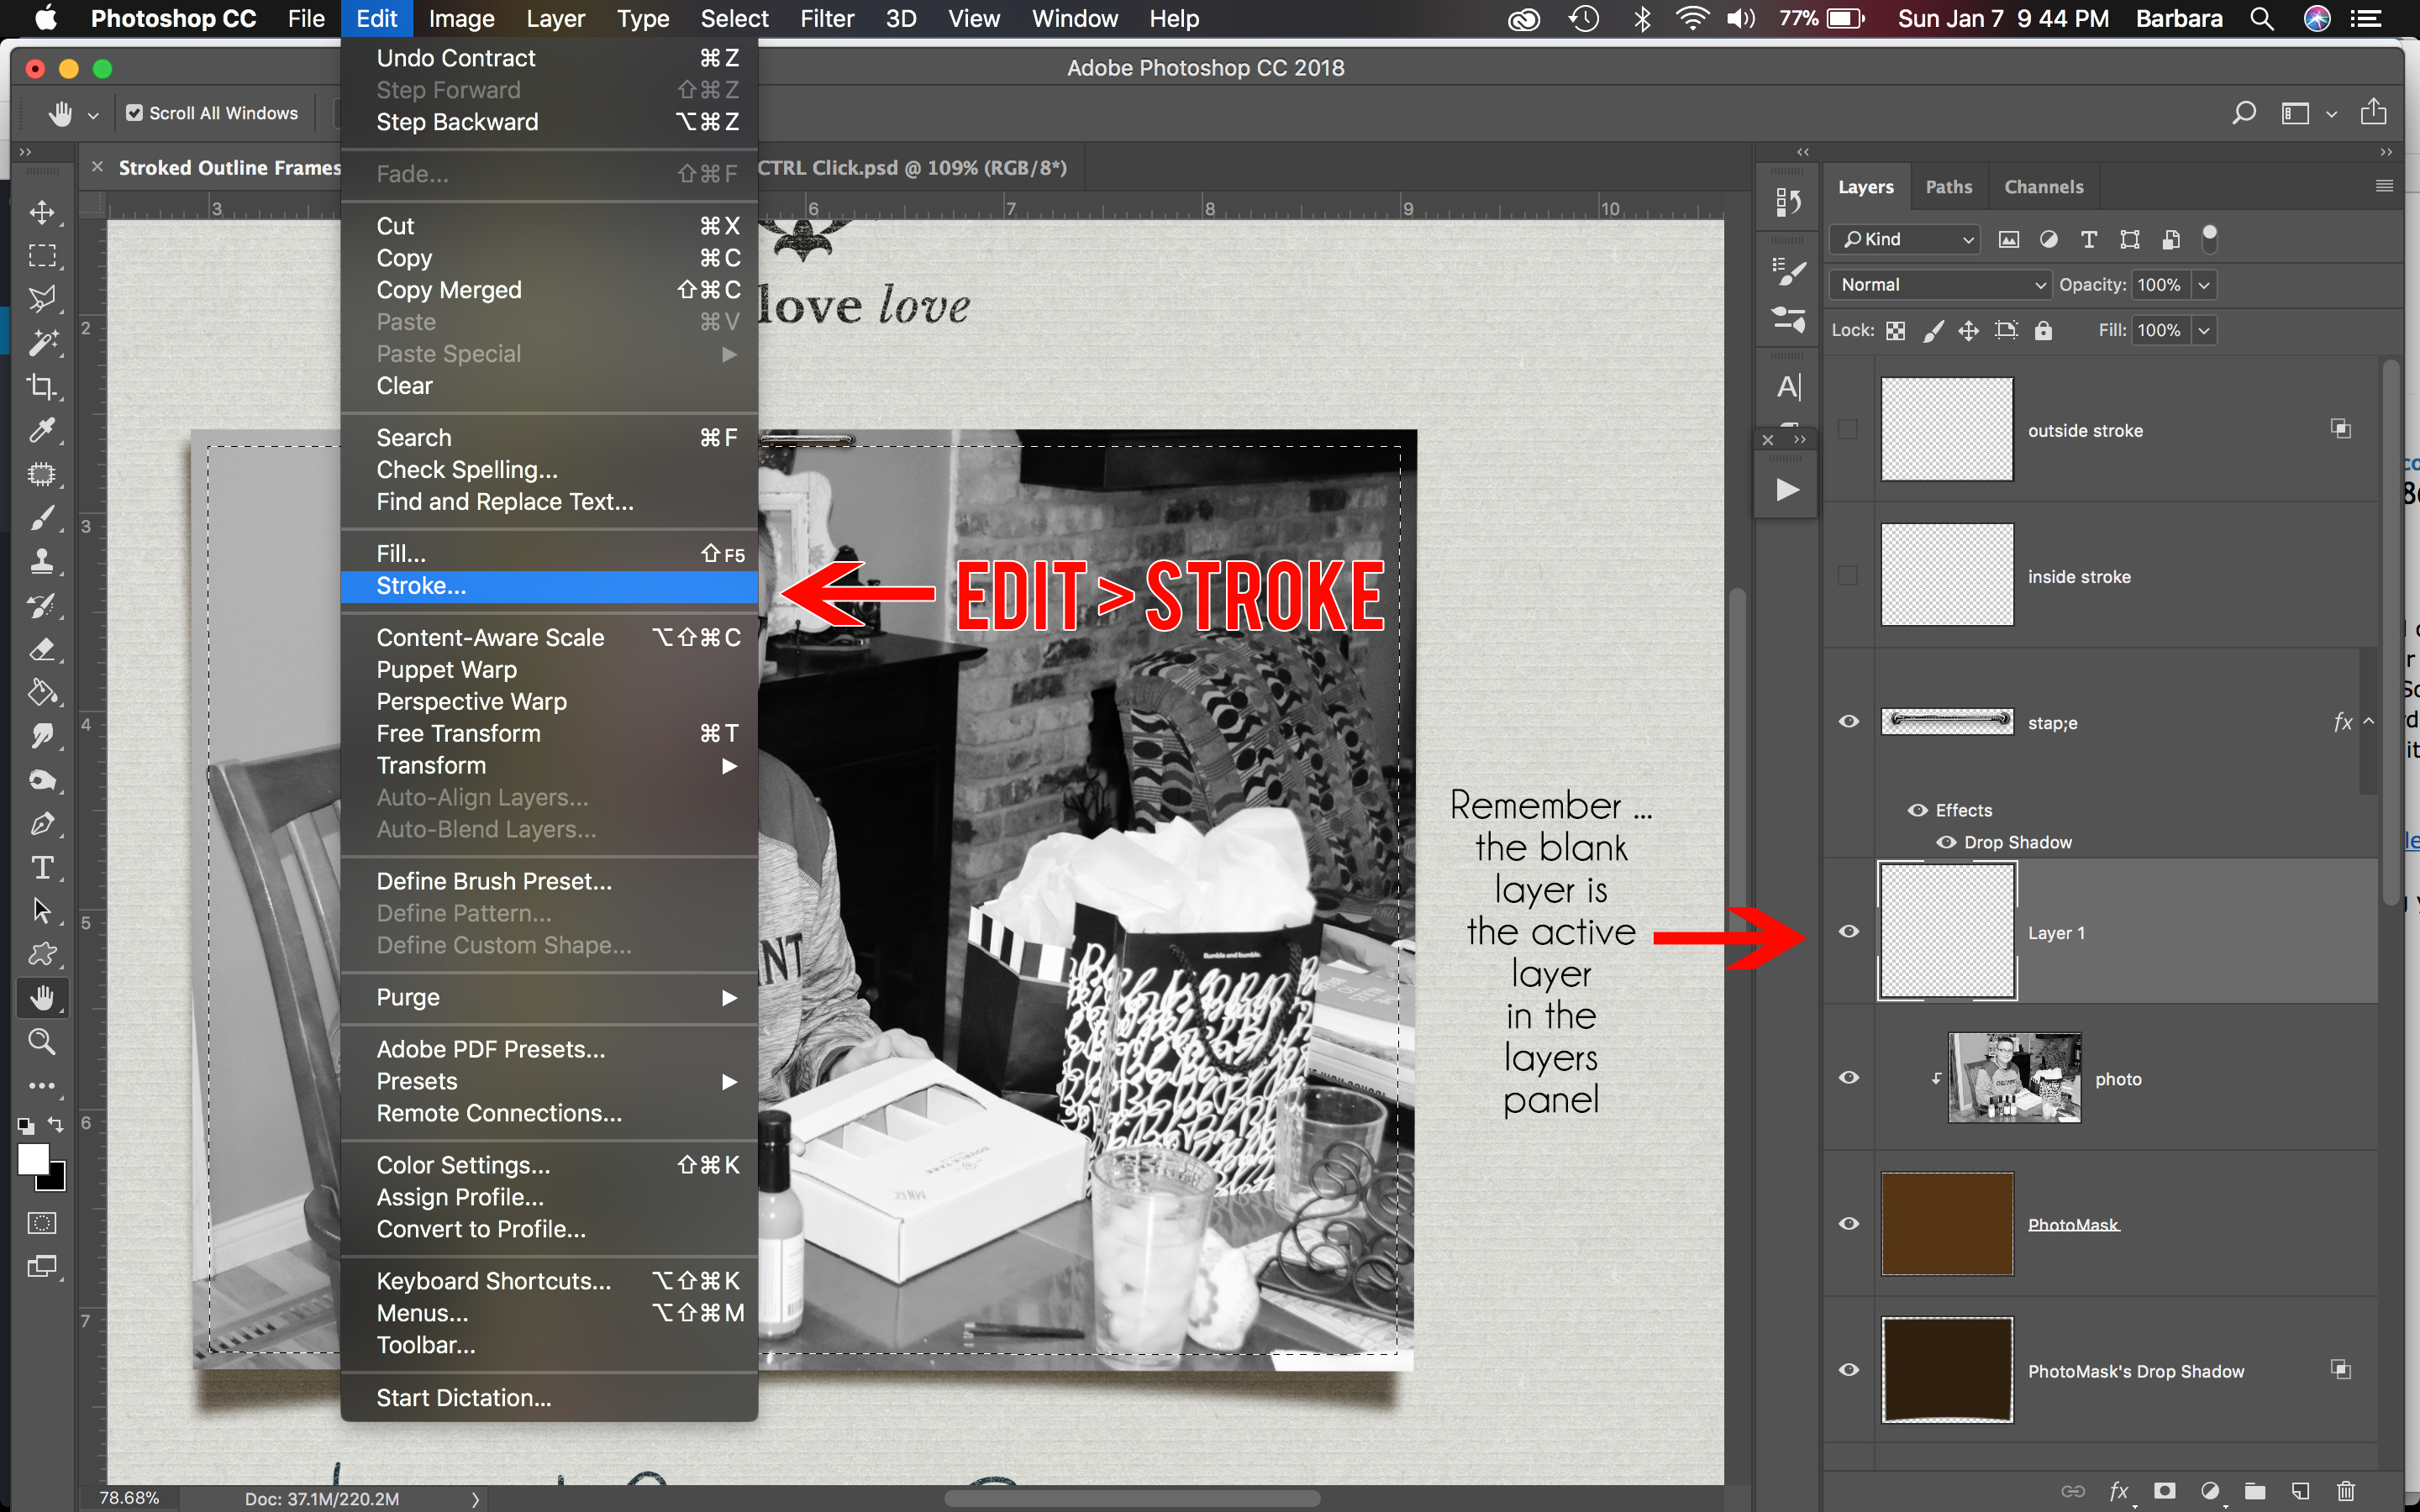
Step 3. Make sure the new blank layer is the active layer
You will want to apply the stroke to the BLANK layer you created in Step 2 (NOT directly on the photo), so make sure the new blank layer is the active layer in the layers panel. To do that simply click on the blank layer. You will be able to see that it’s the active layer because it will be highlighted in the layers panel.
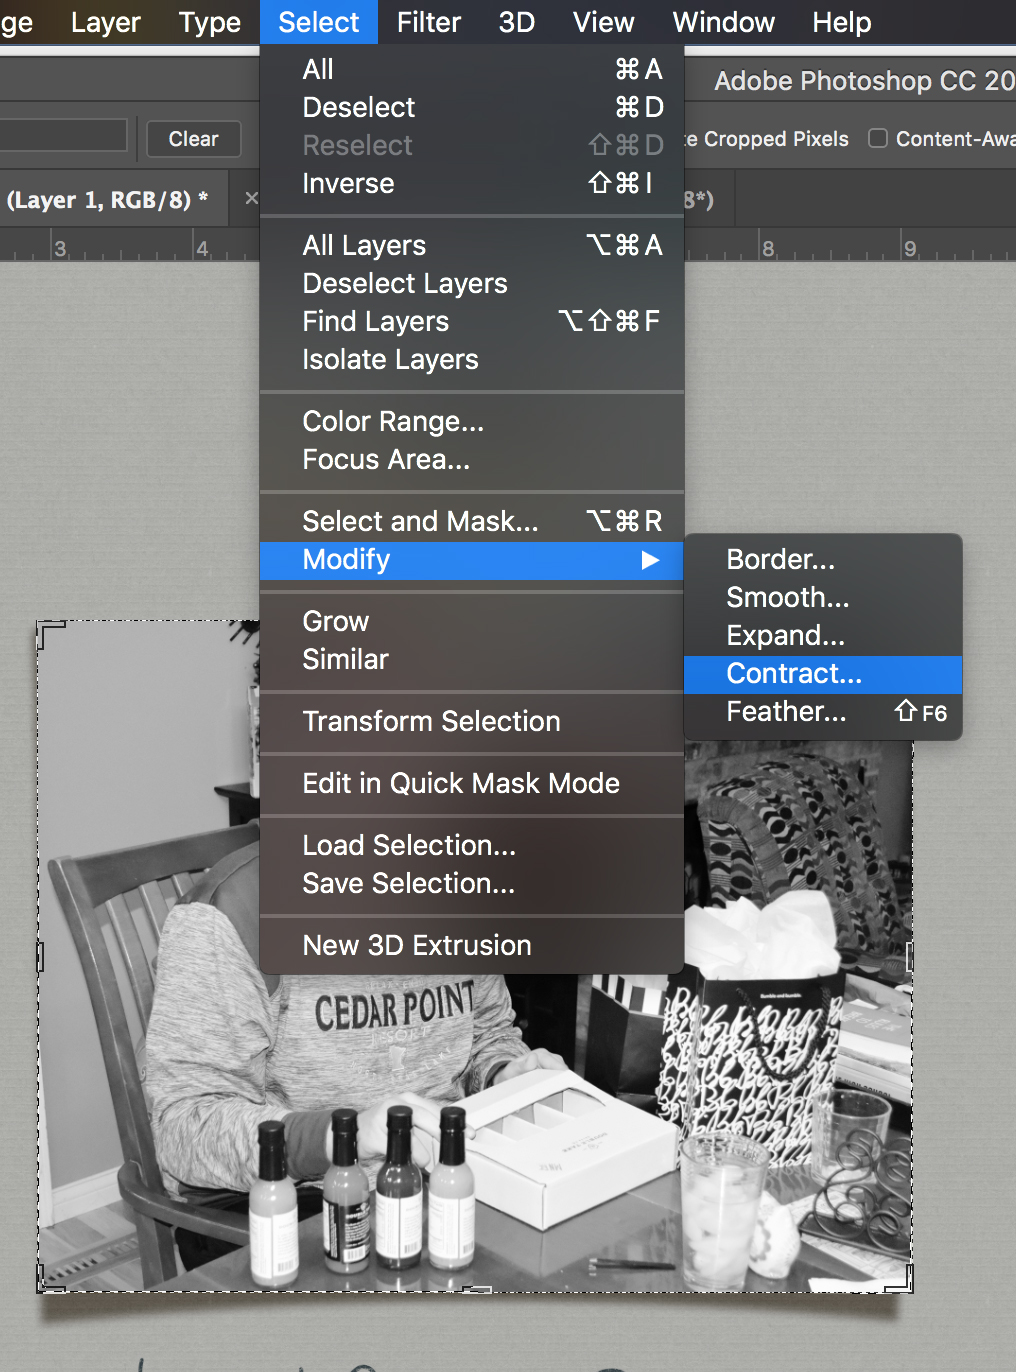
Step 4. Contract your selection
Press Select > Modify > Contract. At this point you will choose how much smaller you want your selection to be for the stroke you are creating. I chose to contract by 25 pixels. Choose your desired number of pixels and press OK. You will see that the size of the selection of the marching ants will have gotten smaller.
![]()
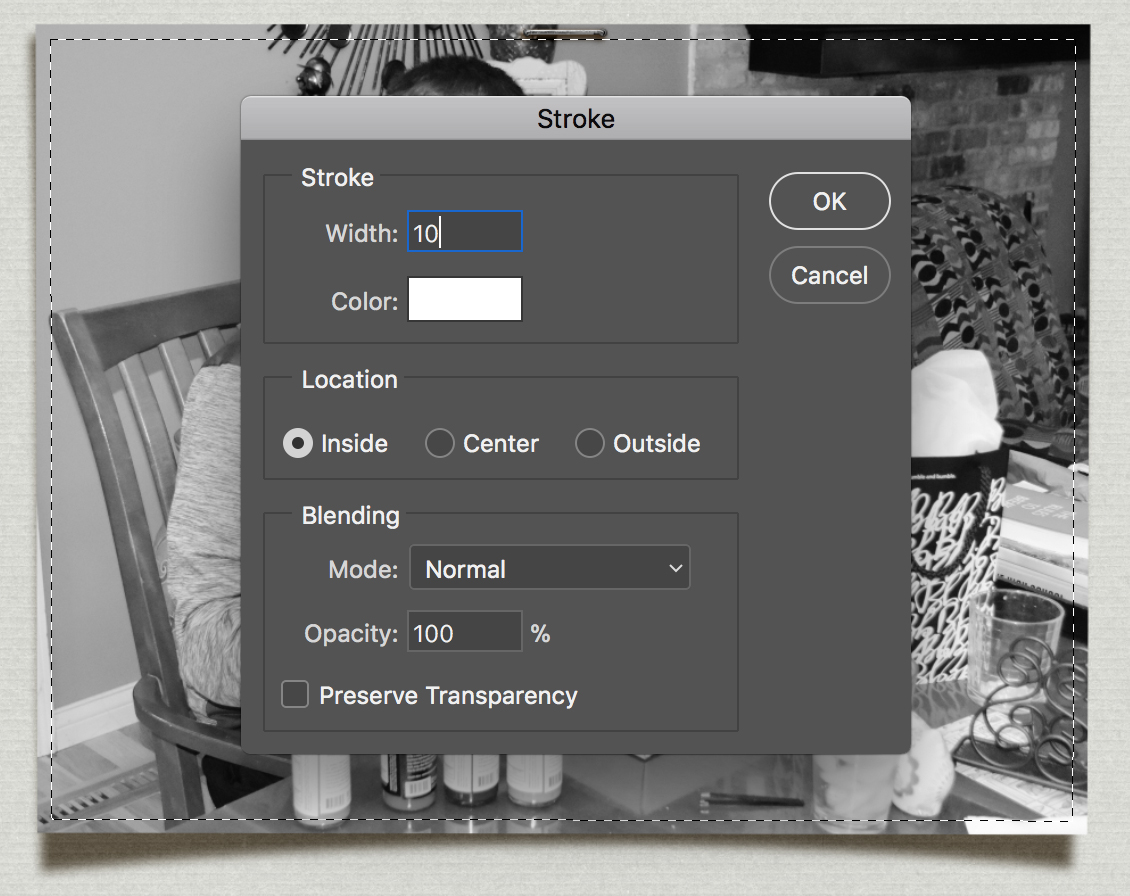
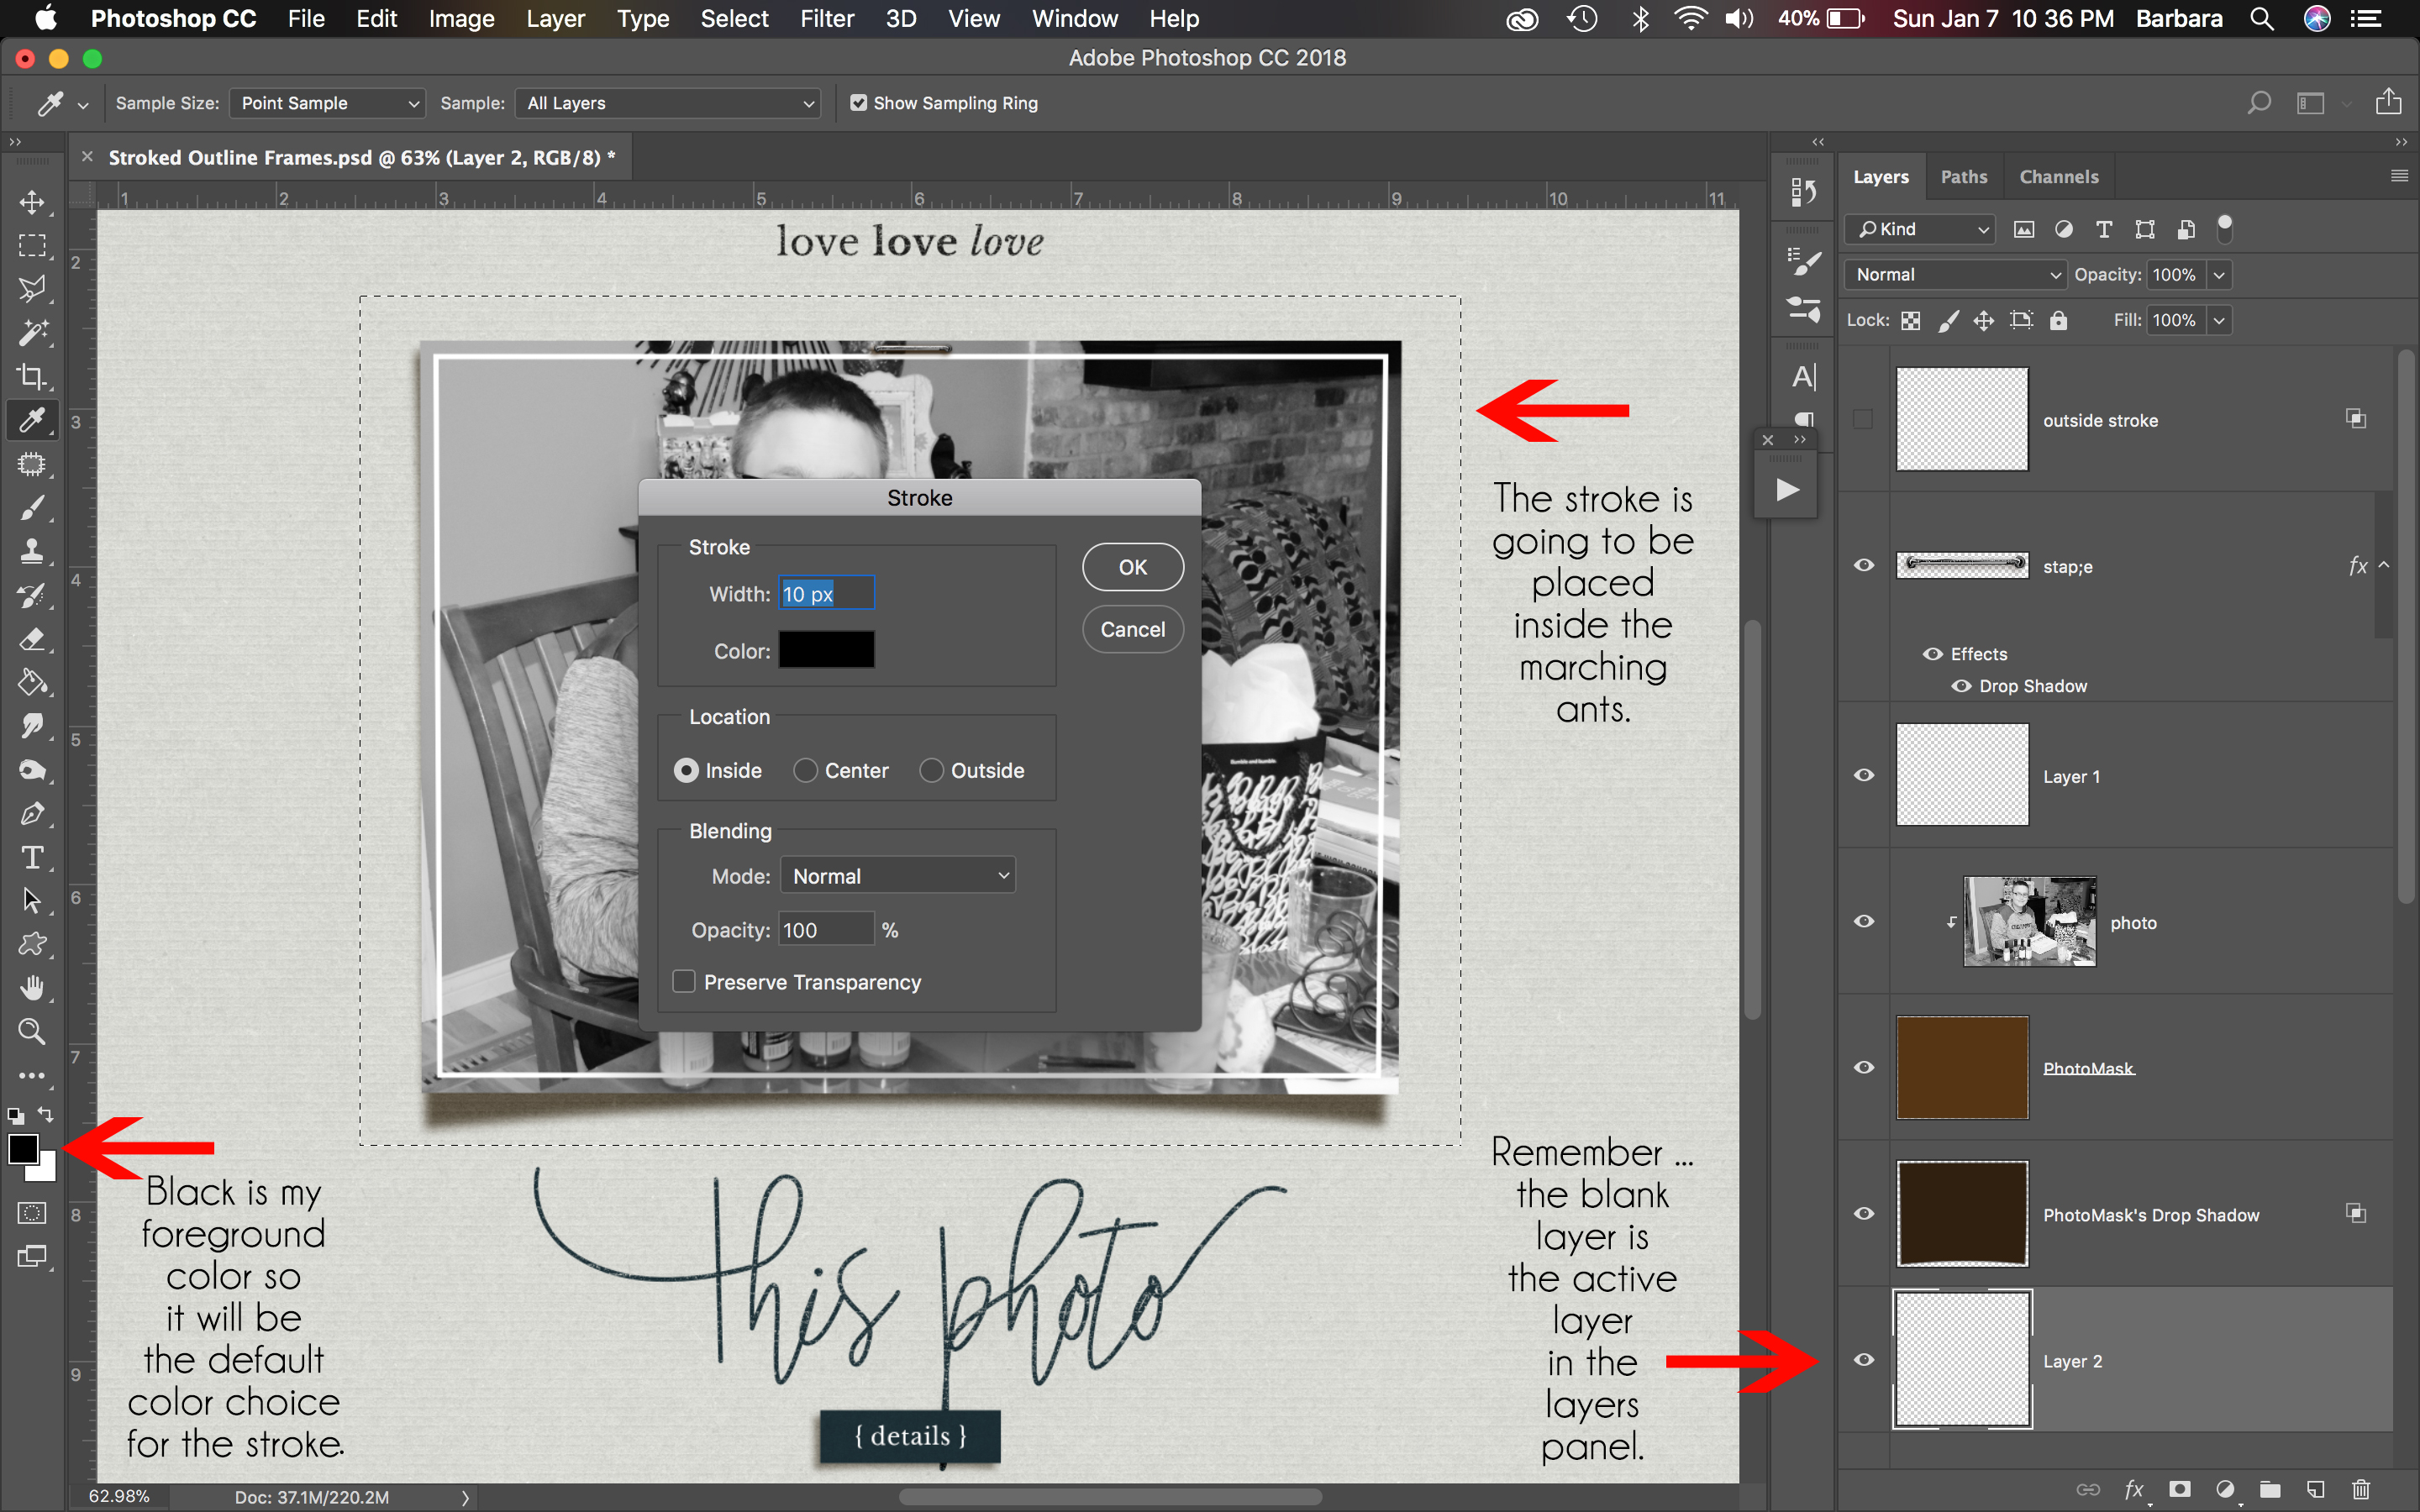
Step 5. Create the stroke
Press Edit > Stroke
A. At this point you will choose the size of the stroke you want to create. I chose 10 pixels. (I usually choose between 3 and 10 pixels.)
B. Choose the color of the stroke you want to create. It will default to the foreground color. If you want a color other than the foreground color click on the color box and choose a color using the color picker. I chose a white stroke for inset stroke over my photo.
C. Choose the location of the stroke you want to create. Your options are inside, center or outside. I chose “inside.” I find that if you choose “outside” that the edges won’t be as crisp and I like a crisp edge.
D. Click OK.
That’s it. You’ve created a simple white stroke over your photo. It adds a nice touch, don’t you think?

Now let’s talk about creating another stroke, this time around the outside of a photo.
HOW TO ADD A STROKED FRAME OUTSIDE A PHOTO
The steps to create a stroked frame outside a photo/shape is very similar to the steps above, with just a couple slight differences.
Step 1. Create a new blank layer BELOW the photo mask in the layers panel
Click on the photo mask in the layers panel to make sure the photo mask layer is active and then create a new blank layer. NOTE, in my case I had a warped shadow layer beneath my photo so I created a blank layer beneath that. Following are three different ways you can create a new blank layer BELOW your current layer:
(1) CMD+SHIFT+Click (or CTRL+SHIFT+Click) on the folded paper icon at the bottom of the layers panel (adding the SHIFT is what places the layer below the active layer), or
(2) Press CMD+SHIFT+N (or CTRL+SHIFT+N), click OK and then click and drag the newly created layer below the photo mask, or
(3) Press Layer > New > Layer > OK and then click and drag the newly created layer below the photo mask.
(NOTE, it really would be ok for your blank layer to be above as well, I just like to see it below as I’m moving about in the layers panel. Yup. Weird, but that’s the way it is. 😉
Step 2. Make sure the new blank layer is the active layer
You will want to apply the stroke to the BLANK layer you created in Step 1 (NOT directly on the photo layer), so make sure the new blank layer is the active layer in the layers panel. To do that simply click on the blank layer. You will be able to see that it’s the active layer because it will be highlighted in the layers panel.
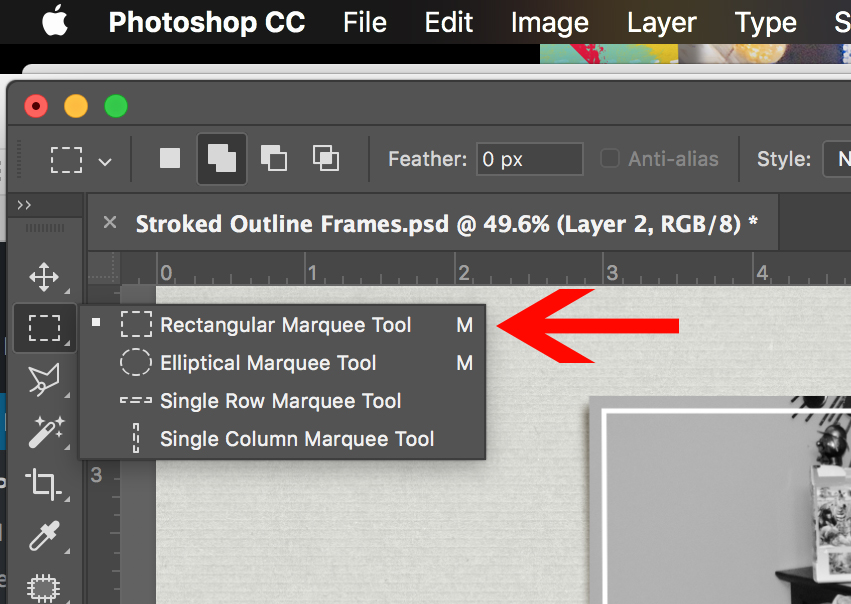
Step 3. Create a shape larger than your photo
Using the Rectangular Marquee Tool (Hotkey M) drag out a shape larger than your photo, keeping in mind you will be applying a stroke INSIDE that shape.
NOTE: Using a similar procedure to Step 4 above, but choosing Expand Your Selection will NOT work if you have a shape with sharp corners. Even though you may have sharp corners on your photo mask shape, the corners will be rounded when you expand the selection.
Step 4. Create the stroke
Press Edit > Stroke
A. At this point you will choose the size of the stroke you want to create. I chose 10 pixels. (I usually choose between 3 and 10 pixels.)
B. Choose the color of the stroke you want to create. It will default to the foreground color. If you want a color other than the foreground color, click on the color box and choose a color using the color picker. I chose a black stroke for the stroke outside my photo.
C. Choose the location of the stroke you want to create. Your options are inside, center or outside. I chose “inside.” I find that if you choose “outside” that the corners won’t be as crisp and I like a crisp corner.
D. Click OK.
That’s it. You’ve created a simple black stroke around the outside of your photo and along with the white stroke on top of the photo I think it adds a nice little extra punch, don’t you?
Here are some other ideas for adding a stroke for emphasis:
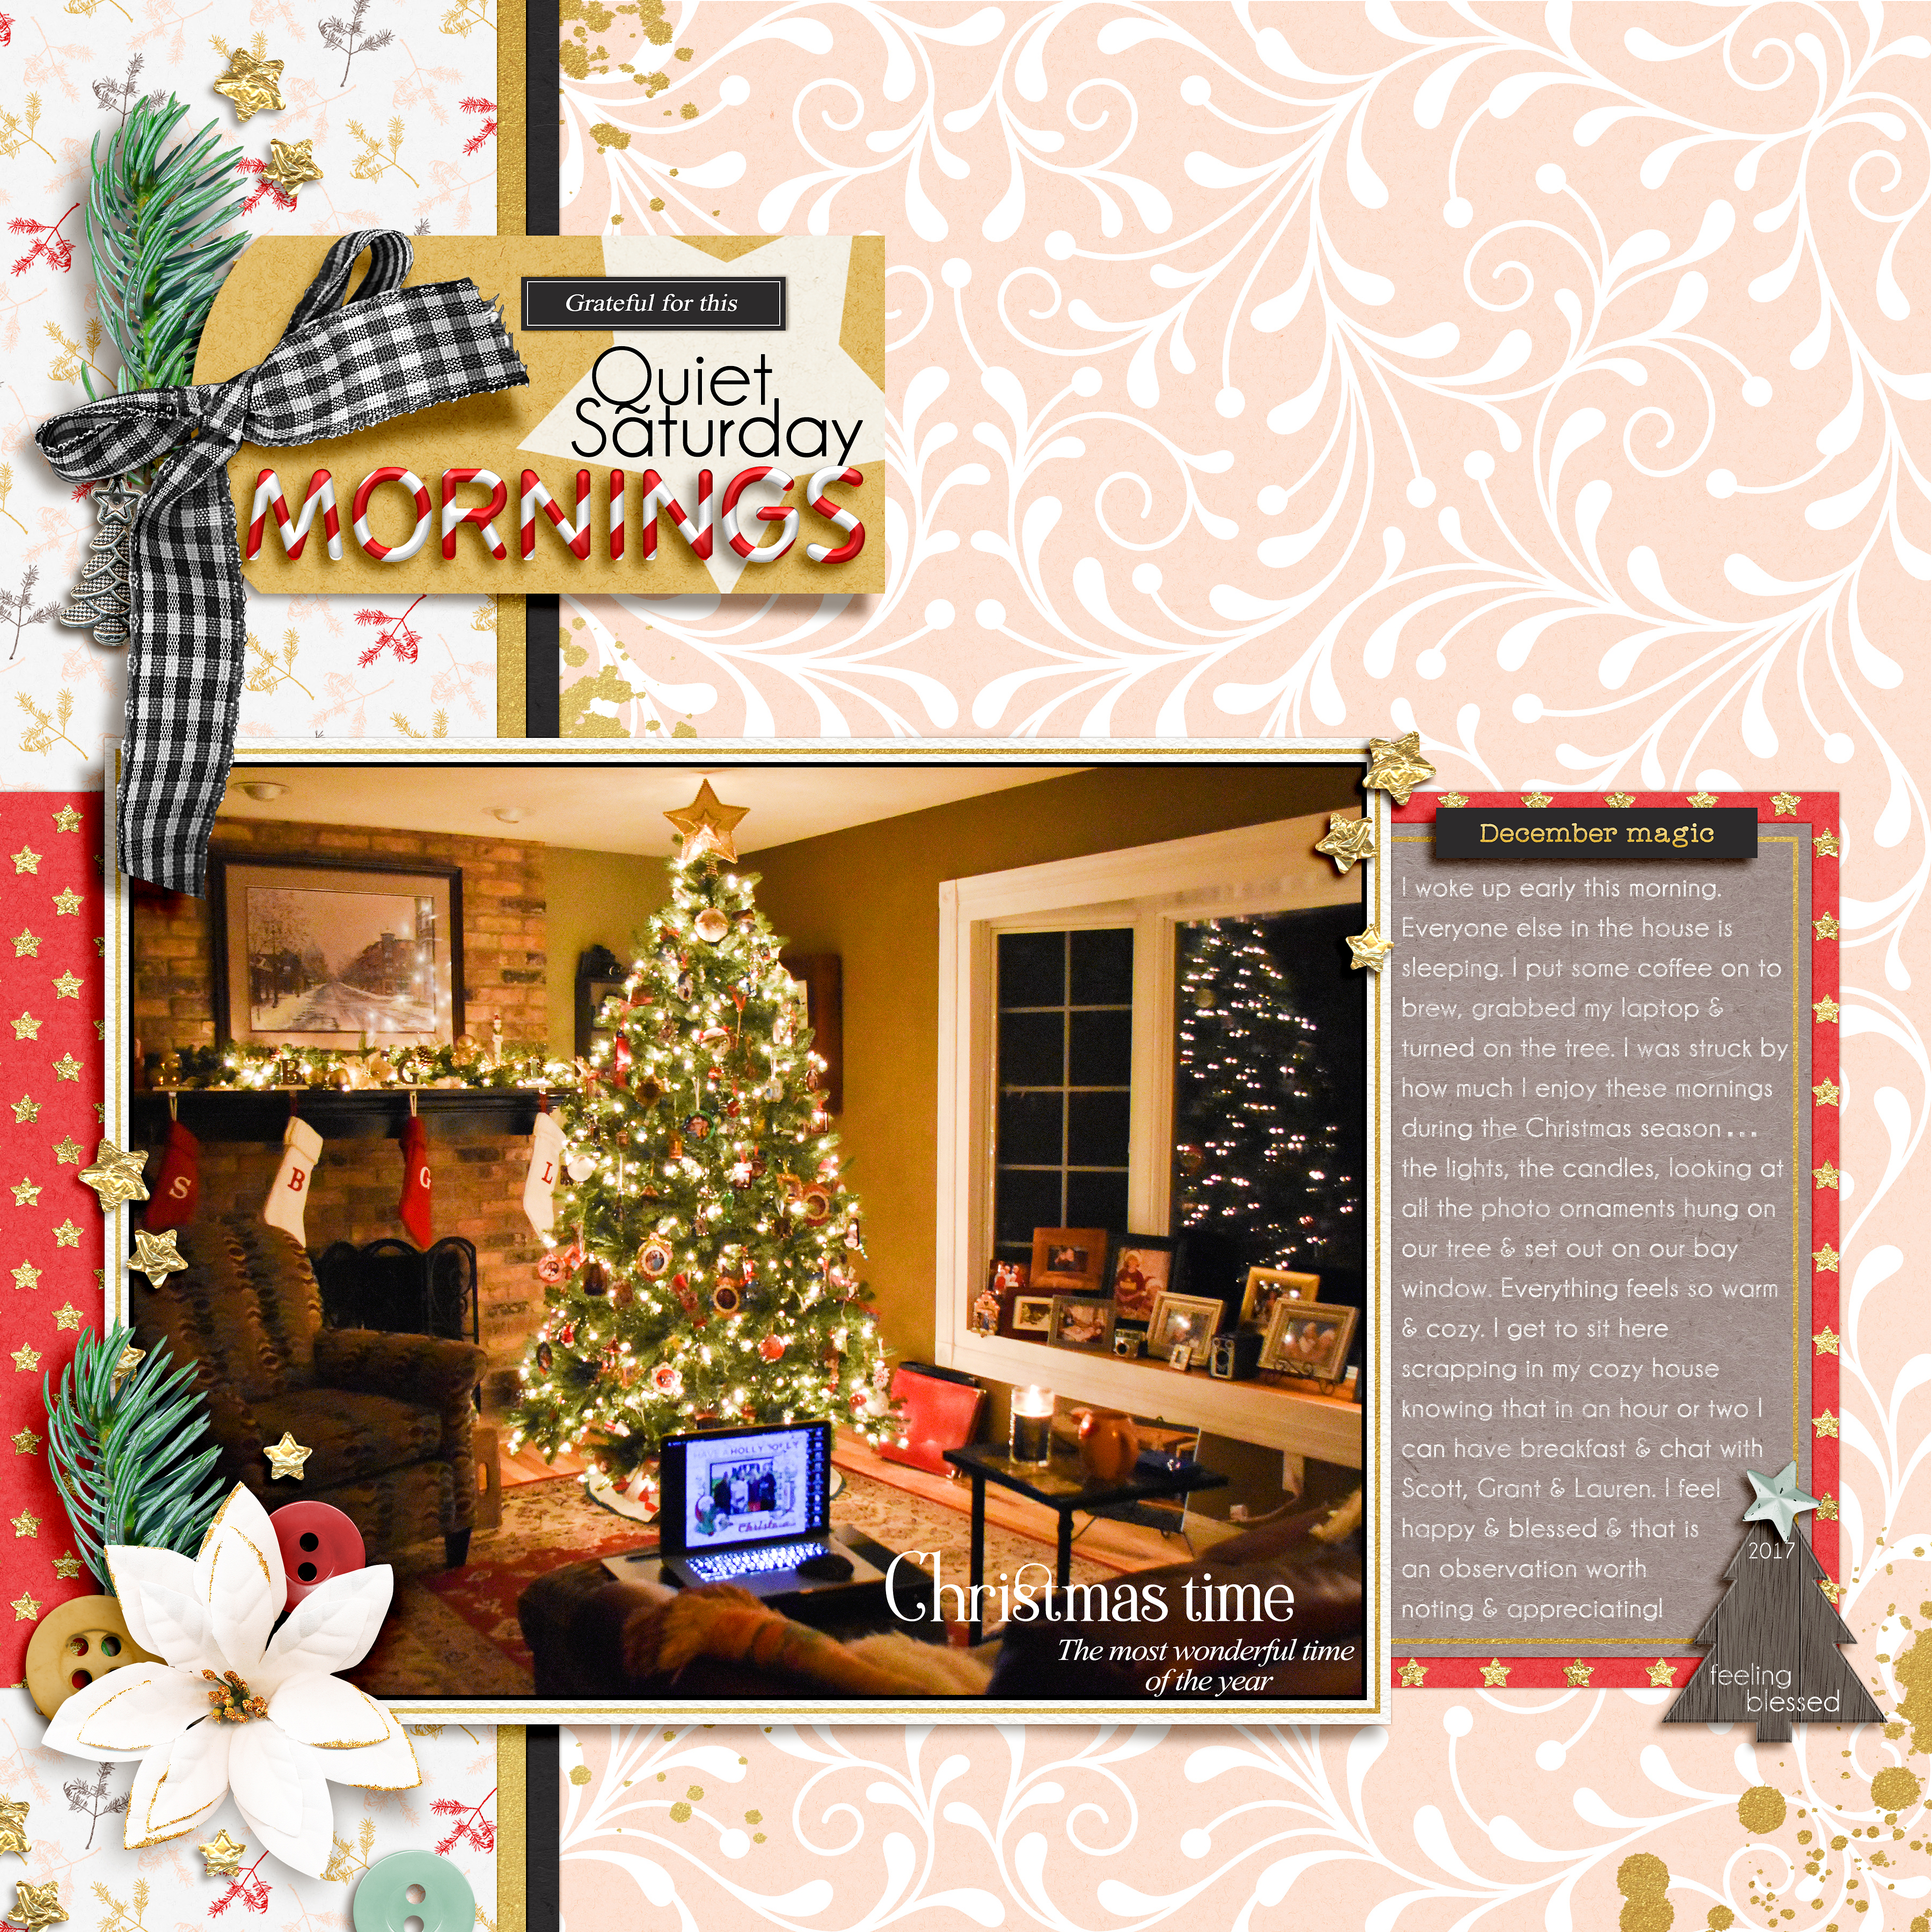
1. Add a black stroke immediately inside a framed photo. I like to do this on accent photos. On this page if you look closely you’ll notice I added a black stroke directly inside the white frame. Also, since I had a thicker frame, I contracted my selection just a little bit and added a gold stroke that showed up on top of my white frame.
2. When you add a stroke directly on top of the paper, as in my tutorial example, I like to play around with the blending modes so that the stroke interacts with the paper rather than floats on top of the paper.
3. Tilt your outside stroke to change things up a bit.
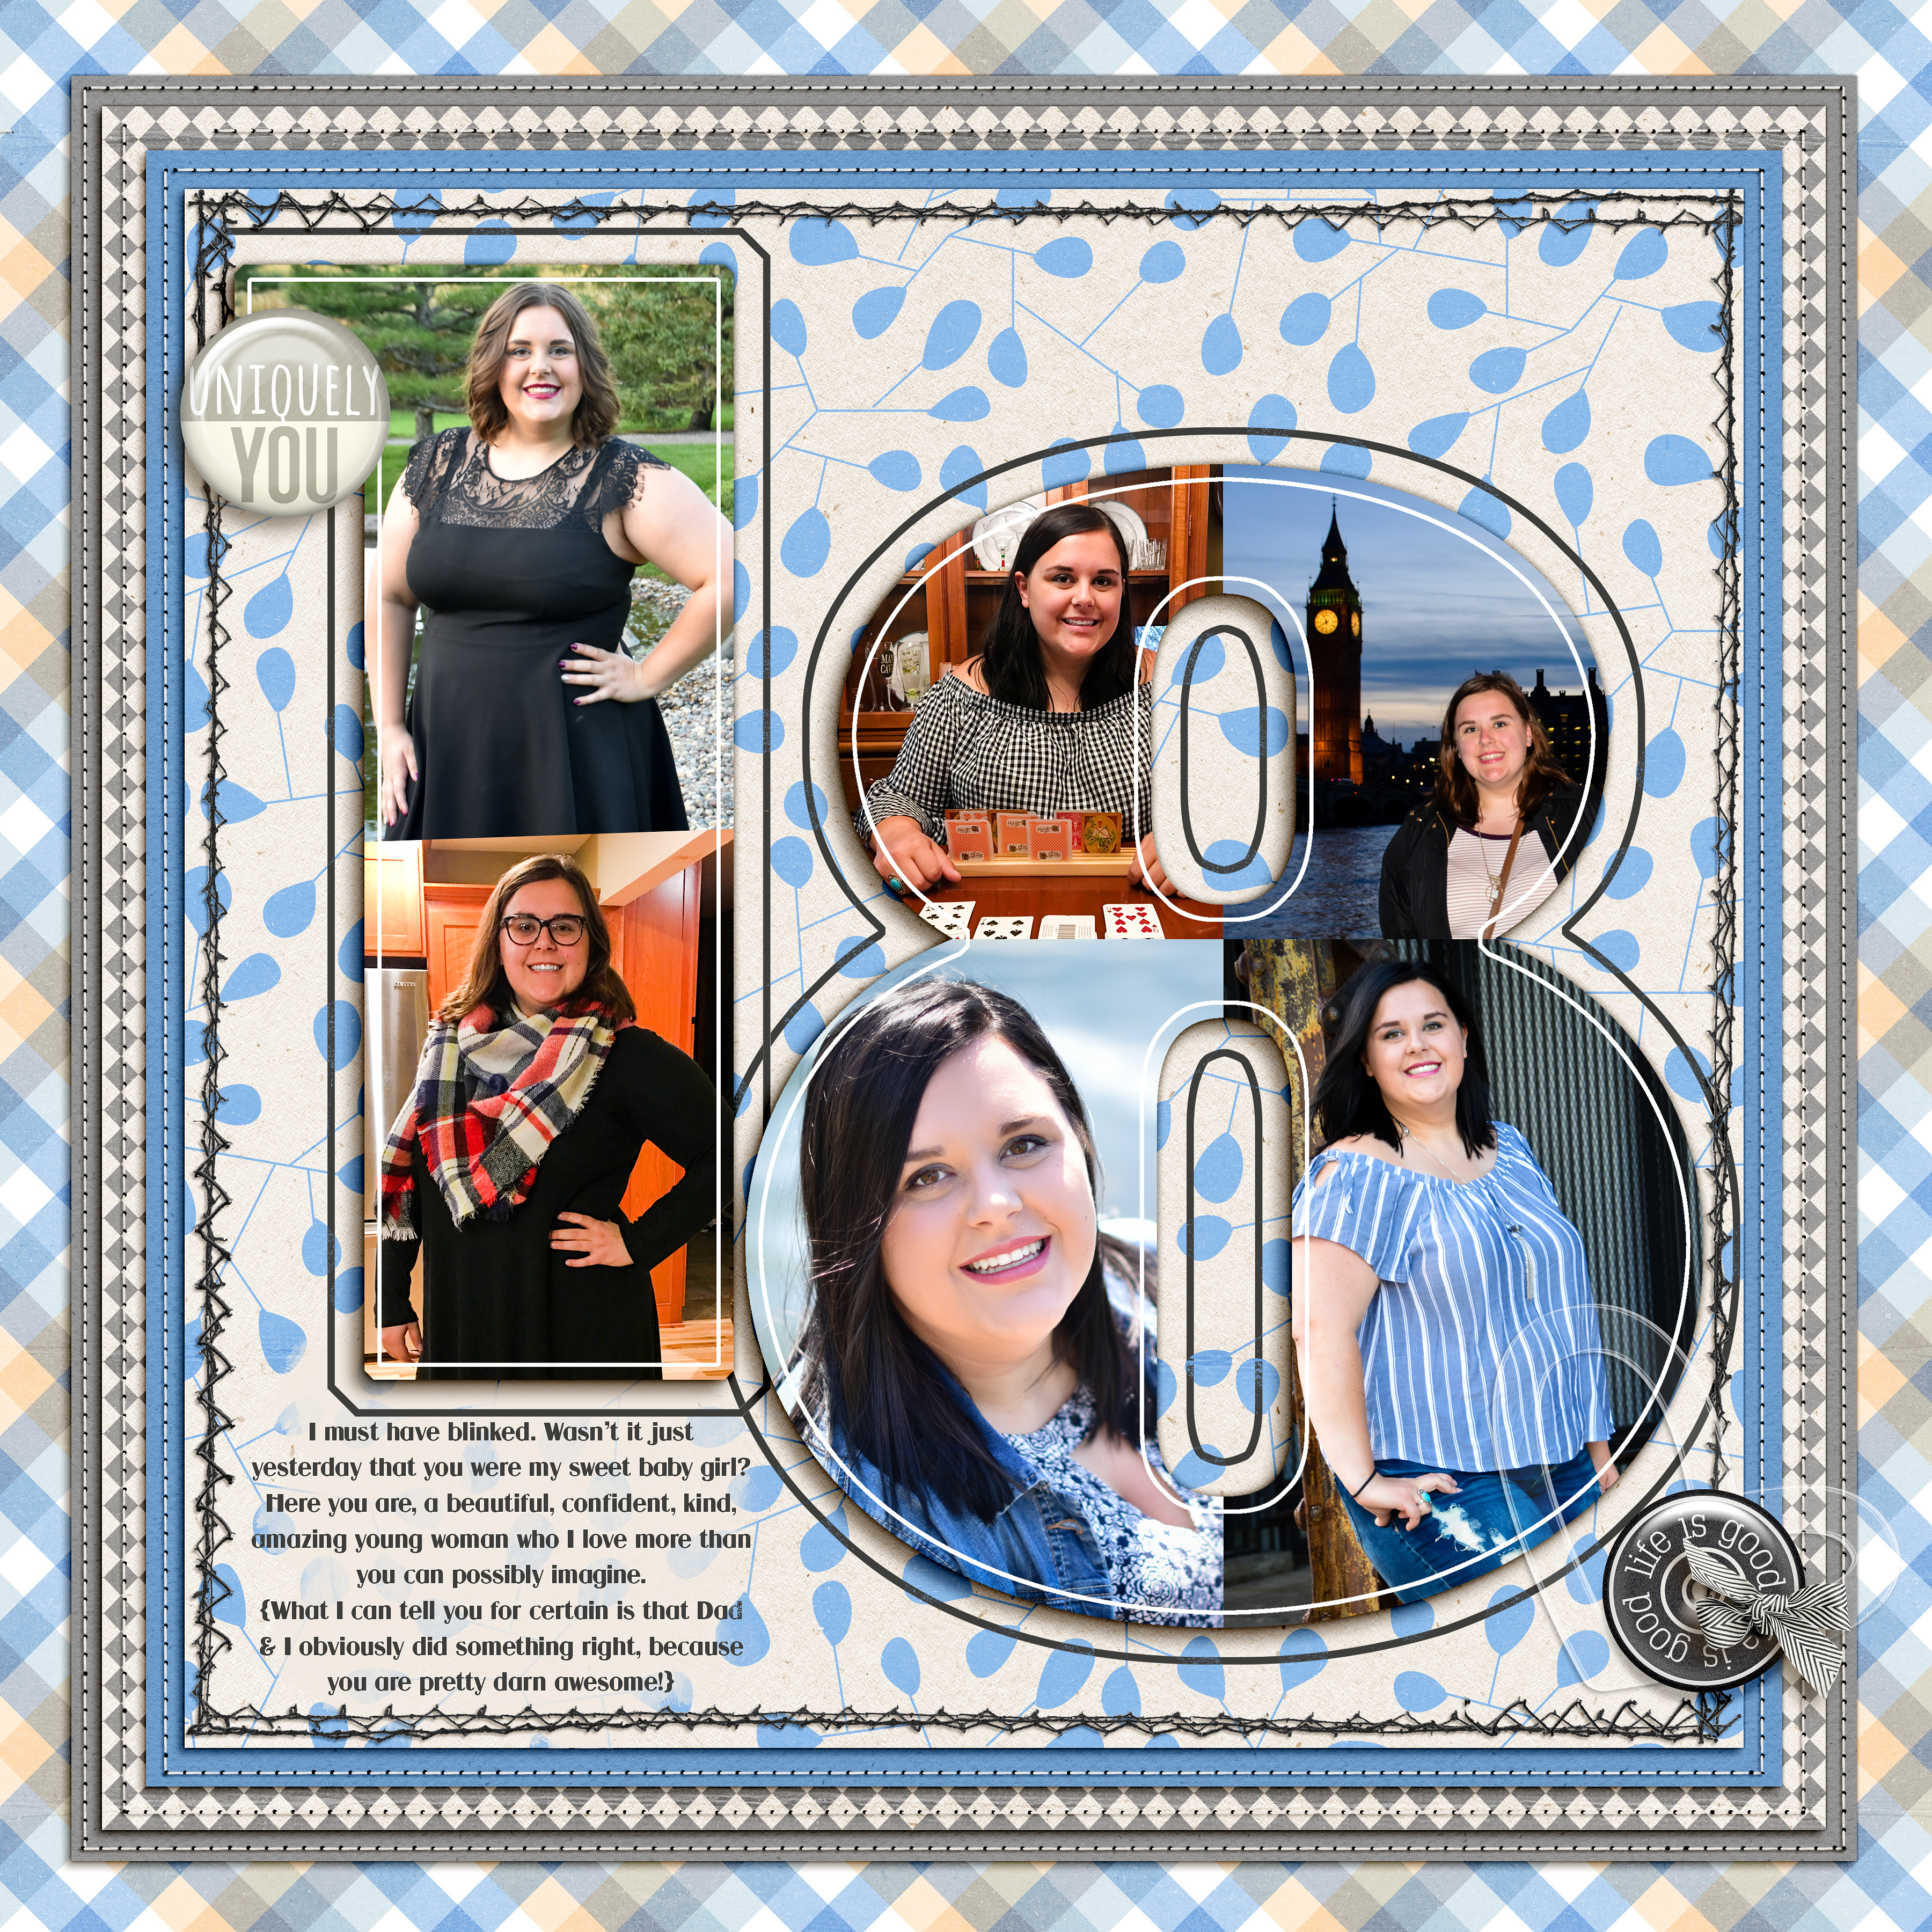
4. Create a stroke around a different shape. In this example I created a stroke inside AND outside the numbers I used to mask photos for a page celebrating my daughter’s birthday.
I just looked at my post and is it ever photo intensive! 🙂 As you can see, I’m a big fan of using simple strokes to add just a touch of pizzaz to my pages. I’ll look forward to perusing The Digital Press gallery to see how you use strokes on your pages!
Happy scrapping!
 About the Author: Barbara is a member of the creative team here at The Digital Press. She’s a mom to two adult “kids” (a 21 year old son and an 18 year old daughter). Seriously, when did that happen? She hasn’t gotten any older, really! In her free time (since her kids are adults, like it or not she has plenty of free time) she loves to tell her family’s stories through her scrapbook art, learn all she can about Photoshop and Lightroom, take photos, travel and hang out with her family. Life is good!