Hello, and welcome to another edition of our Tutorial Tuesday series here on The Digital Pres blog!
A little while back, we showed you a technique for writing text around the outside of a shape (like a circle, etc.) — and today, we thought it would be fun to follow that up by showing you how to write text inside (instead of around the perimeter of) any shape!
I imagine that most of the time when you add journaling to your page, it is in the shape of a rectangle or a square… but sometimes it can be fun to use something different. There are all sorts of shapes you can use… circles, hearts, arrows, and even letters or numbers!
For the purposes of this tutorial, I am using Photoshop CS5.1 — but the steps should be similar for other versions, as well.
First, I will show you how to use one of the default shapes that you will most likely have in Photoshop already.
In your toolbar, select the shape tool. When you first open up photoshop, this tool is usually displayed as a rectangle — but when you click and hold the rectangle some other options will also appear, including the “custom shape tool” (which looks to me like a splat of jelly! – see below). With your “custom shape tool” selected, you can then choose another shape. On my machine, the toolbar for this is at the top of my workspace, and looks like this…
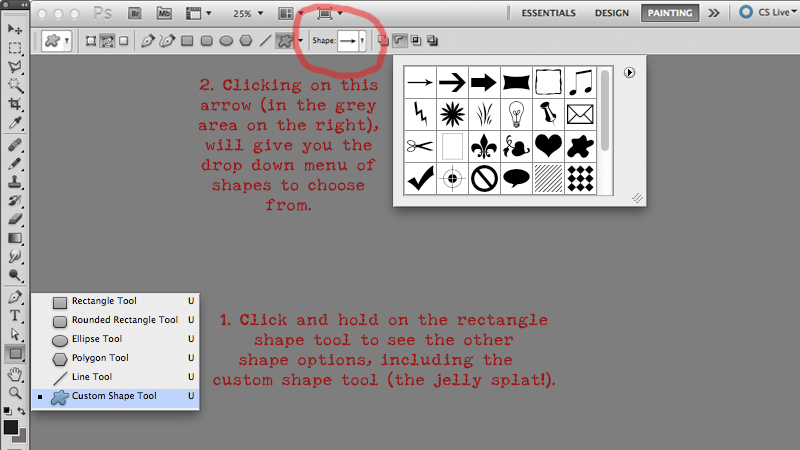
When I click on the arrow, a drop-down menu of standard shapes appears. I have chosen a heart (by clicking on the heart on that drop down menu), but you can choose any shape you like from that menu.
With the heart shape selected, I move my cursor onto my page, and then press SHIFT and hold down the LEFT button on my mouse, and drag it until I have the right size heart for my text/page.
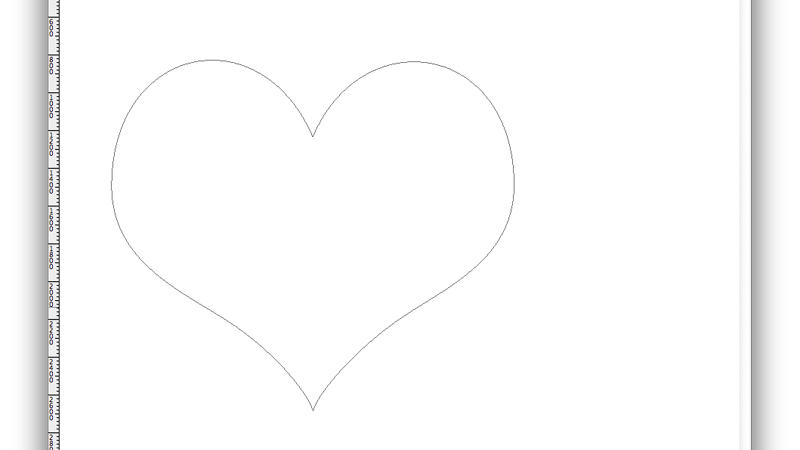
Once I have defined size and shape, I can go back to my toolbar and select the TEXT tool, and then click inside the new shape I have created. The cursor looks like an “I” with a dotted circle around it. That means I am ready to type, and my text will fill the shape of the heart, like this…

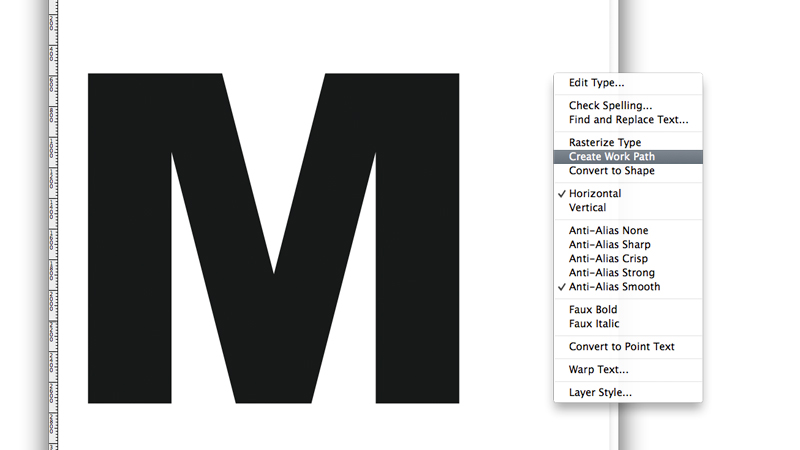
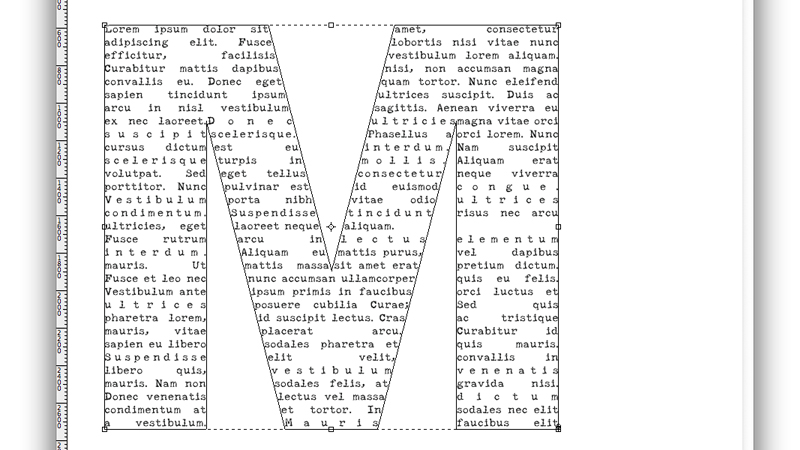
I decided to play around with this a little more, and decided to use a letter as the shape for my text (a giant M, for my son Matthew). To do this, I first used the TEXT tool to write a giant M on my page. I chose a chunky but simple font for my M, so that the shape wouldn’t be too fussy to fill with text.
So, with my giant letter M, and the type tool selected, I hovered over the letter and RIGHT clicked to choose the CREATE WORK PATH option from the pop-up menu.
Now, when I go over to the layer menu (on the right of my workspace), and click on the eye icon, so “hide” the text layer, I am left with just the outline of the M, rather than the solid black M. I can then put my cursor back into my M text box and the cursor looks like an I with a dotted circle around it, and I can then write my text inside the M shape box. Like this:
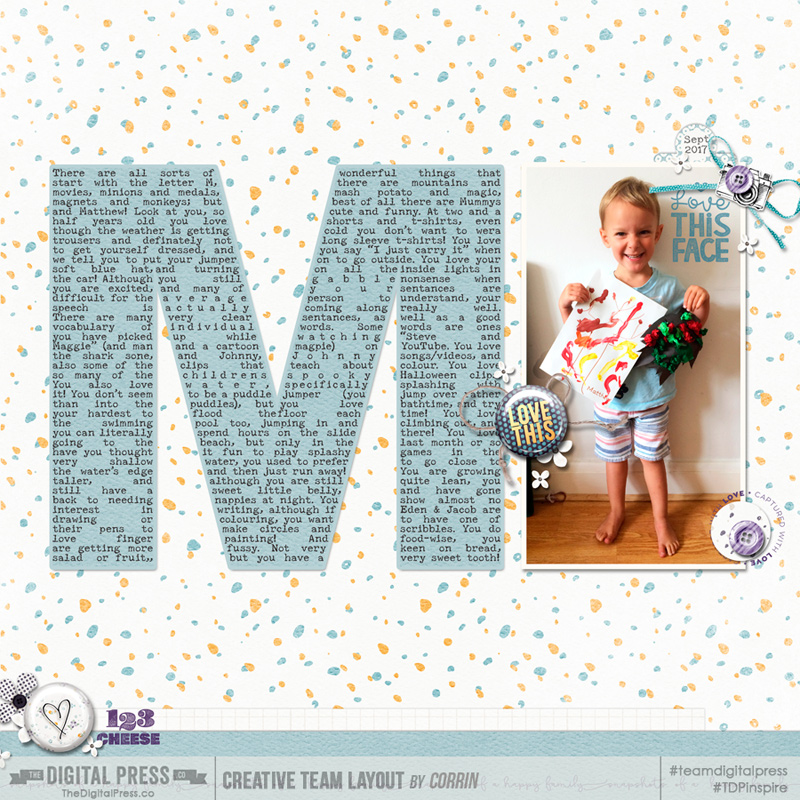
I filled my M with all the things that I want to remember about my son at this age, and here is how it looks on my completed page:
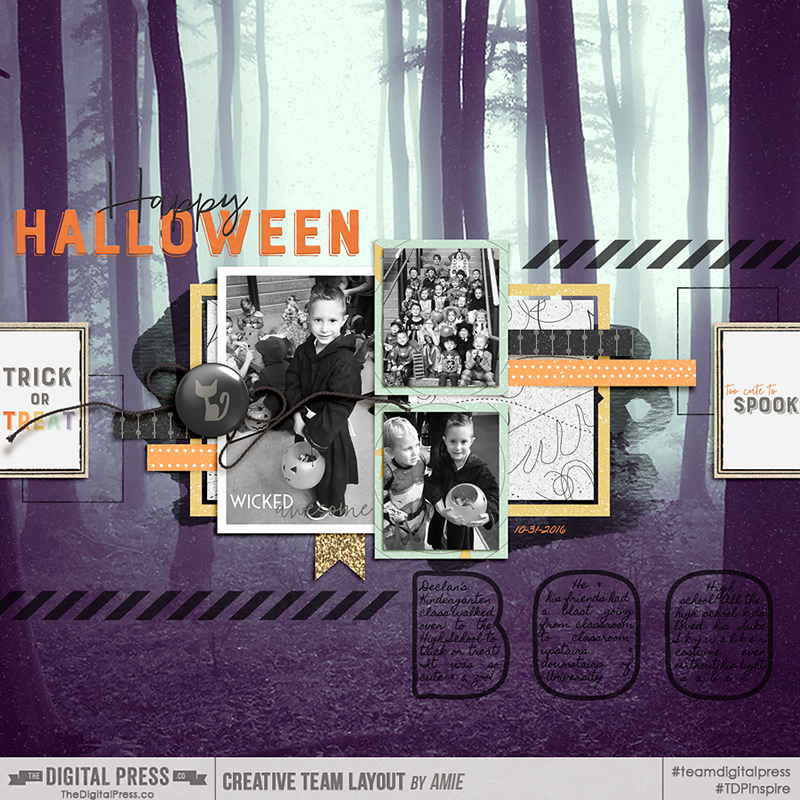
You can have all sorts of fun using different shapes, letters, numbers, and even words as text boxes. One of our creative team members, Amie, made a fun Halloween page using this technique and wrote her journaling inside the word “BOO” — such a cute idea!
I hope today’s tutorial might give you a new option for the formatting of your journaling — something fun and a little different!
 About the Author Corrin is a member of the creative team here at The Digital Press. She is a fan of the Big Bang Theory and a lover of cozy pajamas. She lives in the breezy South of England with her husband and 4 crazy kids, who regularly discover & plunder her secret chocolate stashes! She is still trying to get the house straight after moving nearly 3 years ago. Who knows… maybe this will be the year she reaches the bottom of the laundry pile!