Do you find yourself exporting your photos in Lightroom over and over with the same settings? If so, and you would like to save time by creating your very own custom presets… I’m here today to teach you how to do so!
Often, I find that I need to export a single layout in multiple different formats/sizes/etc. depending on which online gallery I’m going to be loading it into. For instance, here at The Digital Press, I size my layouts for the gallery at 900 x 900 pixels and up to 350kb in size. Because I do this with every layout I’m going to load at The Digital Press, I go through the same process over and over and over again. Thus, I have created an export preset to do just this with the touch of one button. Let me show you…
STEP 1
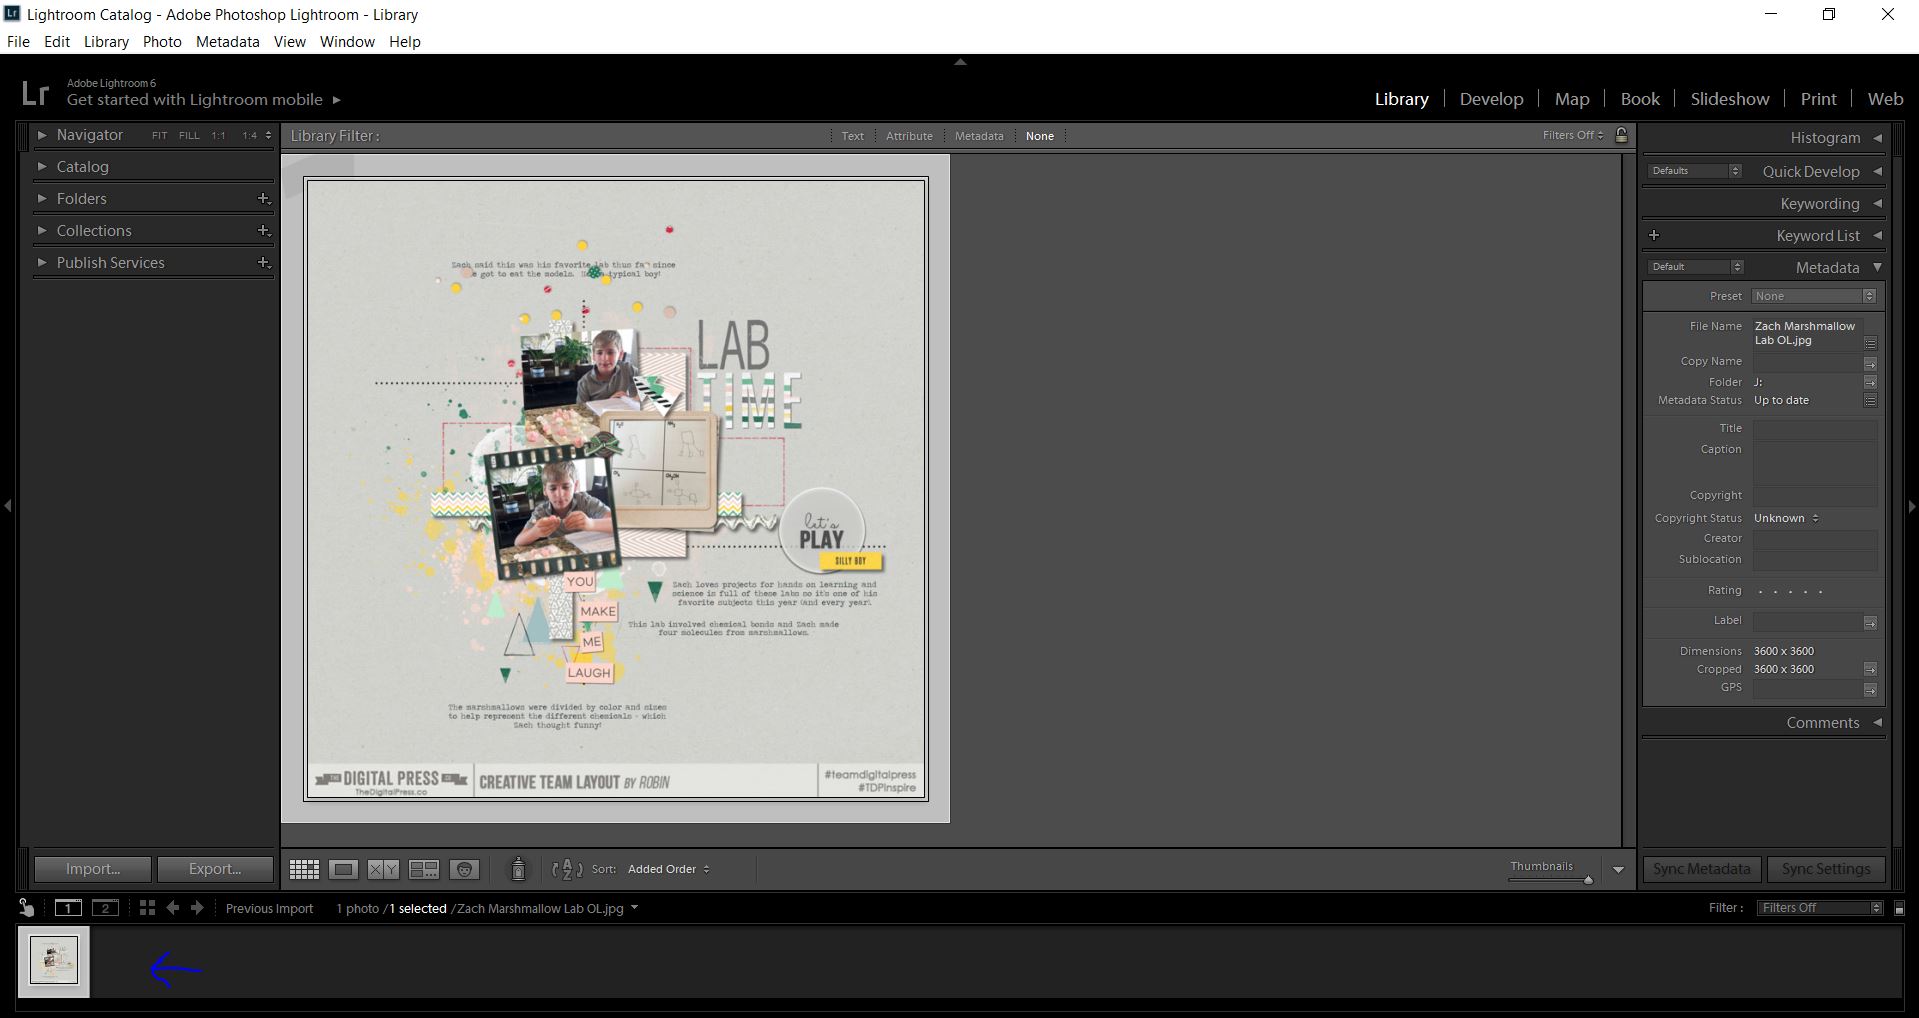
Import your layout (or photo) into Lightroom. If you don’t know how, don’t worry… we have another tutorial HERE that details the process of importing into Lightroom. Once you have imported your layout, you will want to select it for export (see blue arrow at lower left)…
STEP 2
Click on the export button on the bottom left side (again, see the blue arrow at lower left)…

STEP 3
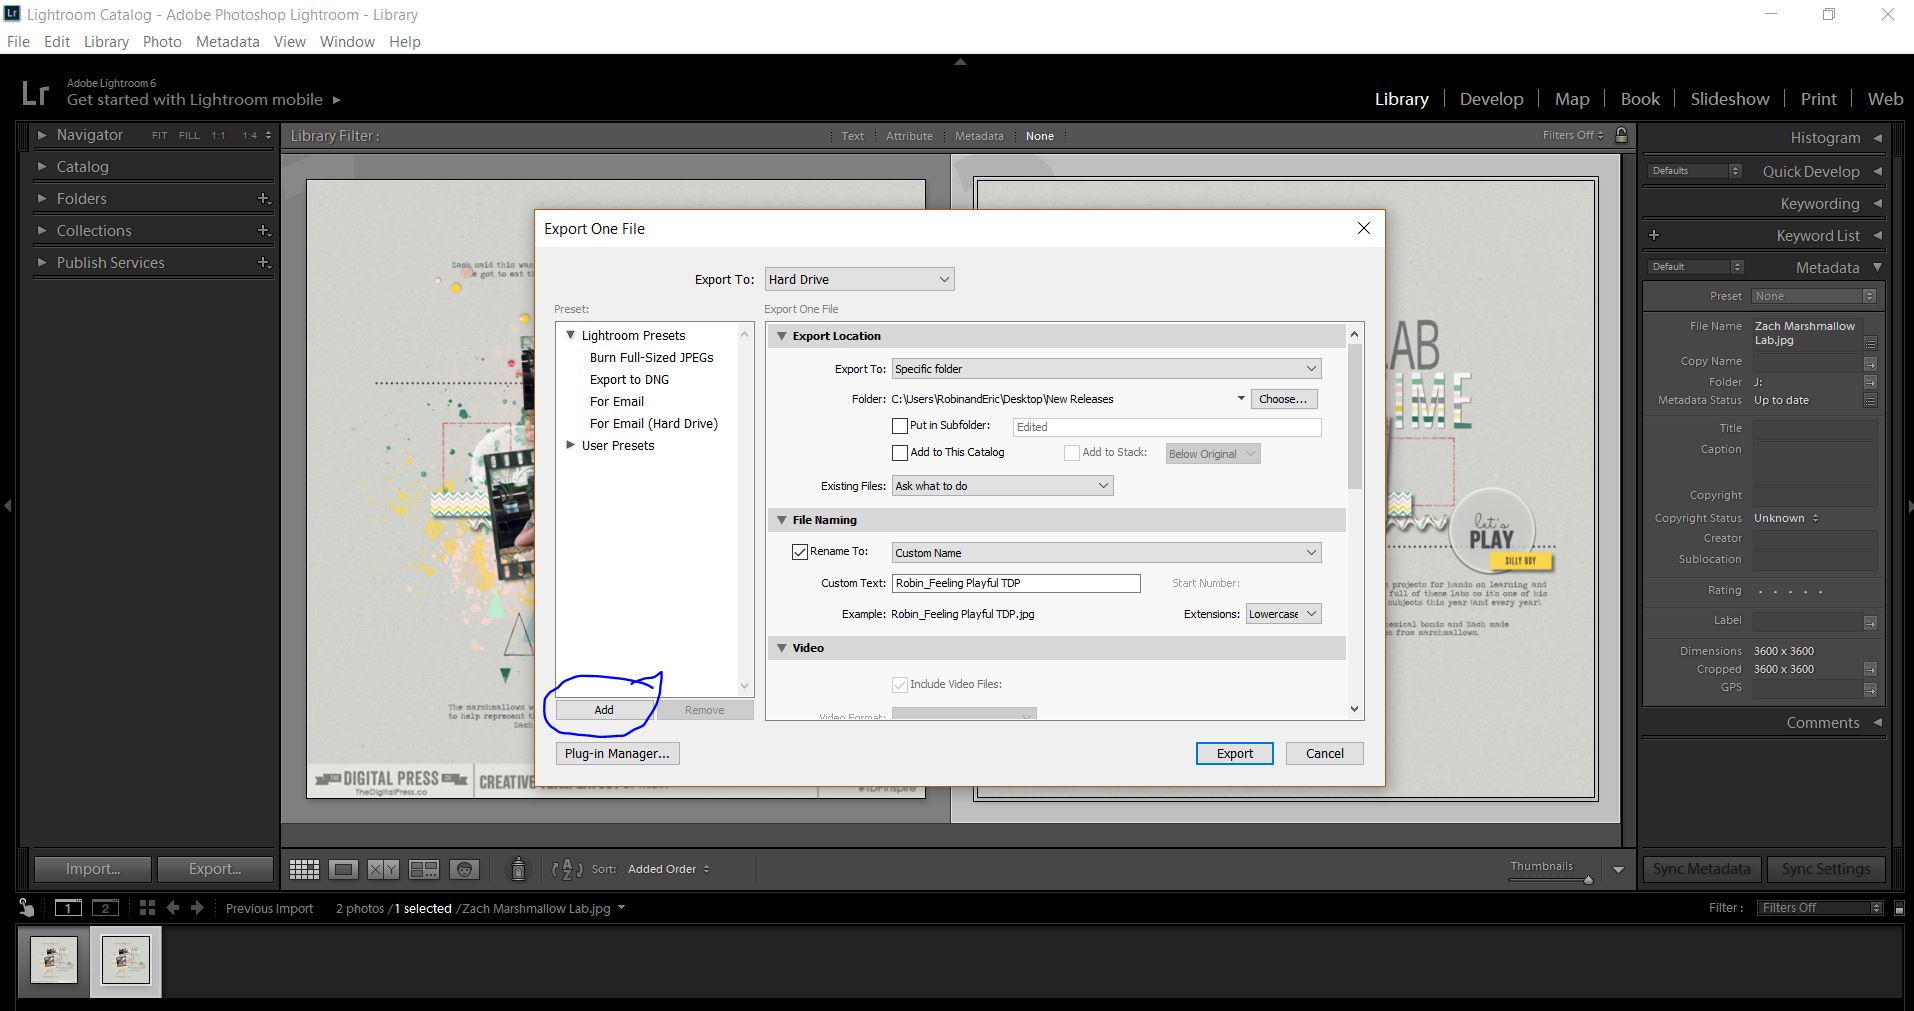
Next, click on the drop-down arrow and select the folder into which you wish to save your adjusted photos. You will have a choice between “Select Folder,” “Choose Later,” or “Same Folder As Original.” I have created a folder on my computer’s hard drive named “New Releases,” and each week when I save a new layout, it will always go to this specific folder. That way, it’s always easy to find when I start the process of posting my pages into various galleries.
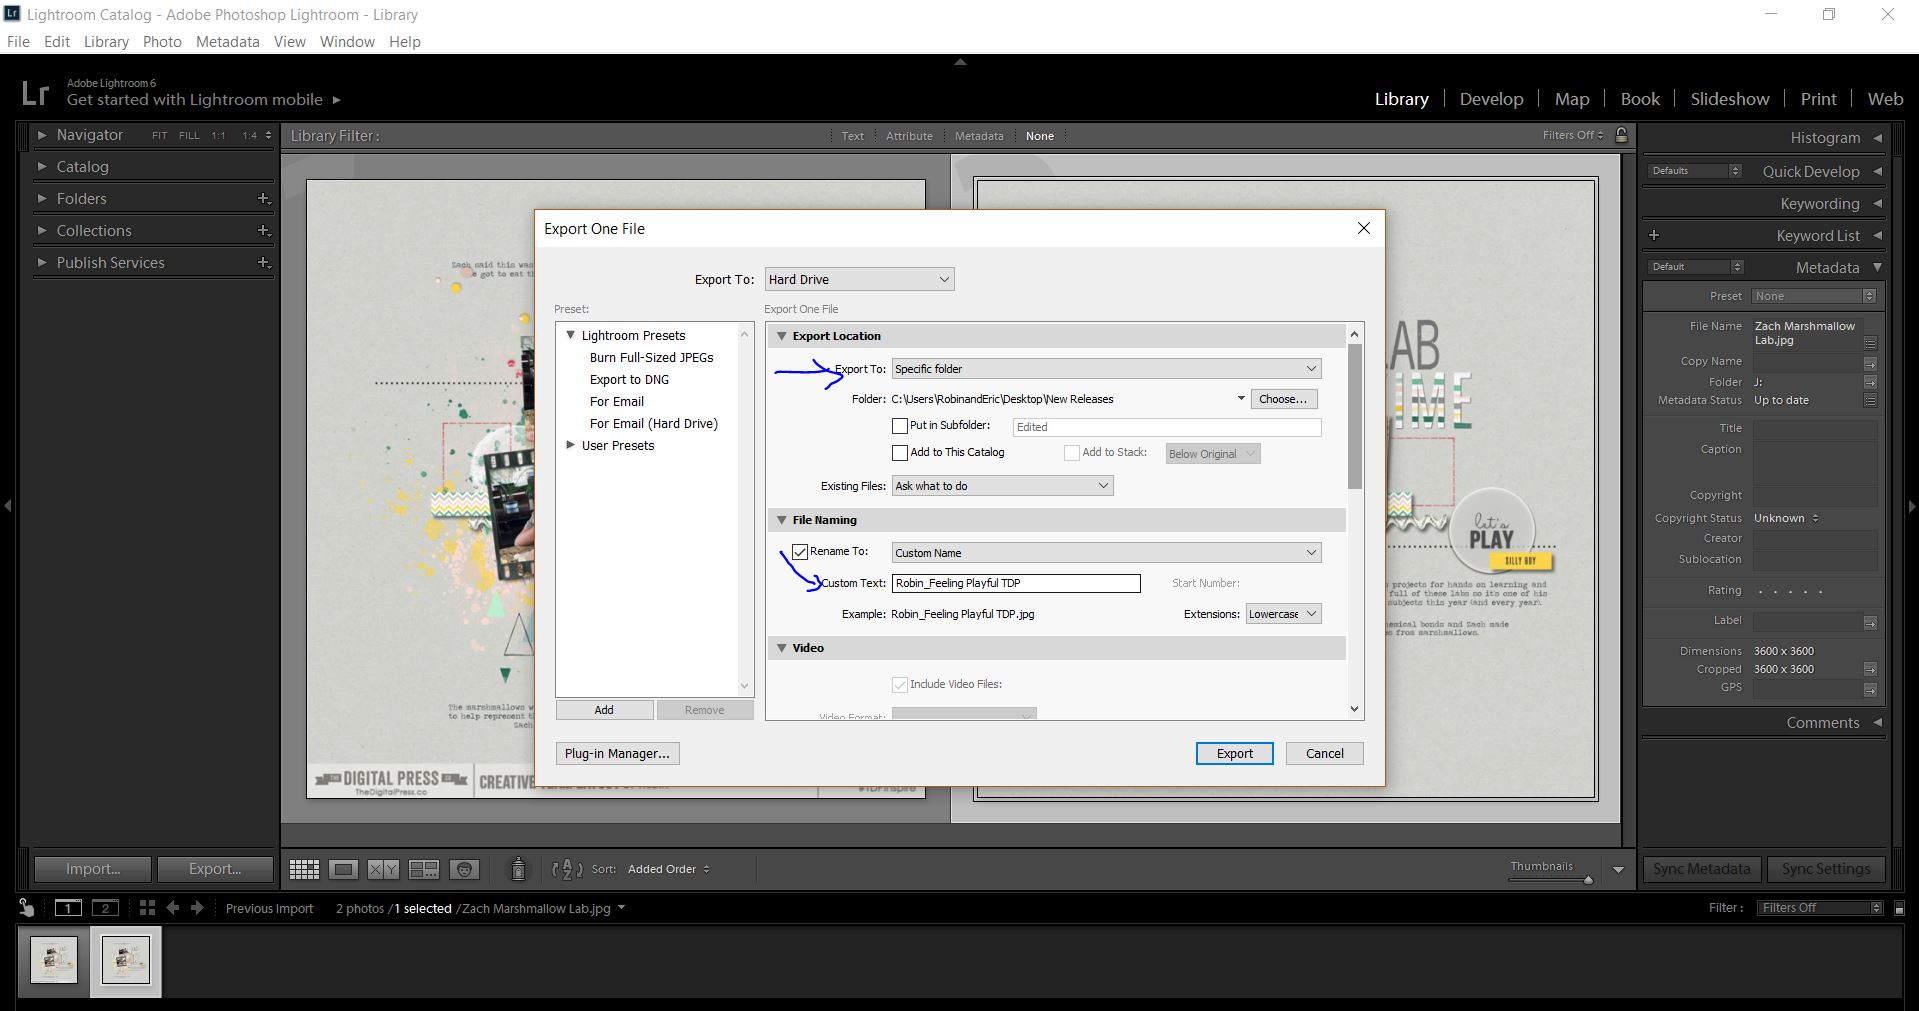
*NOTE* When I want to save pictures that I have edited, however, I use “Same Folder As Original” so all my photos stay together. The good news is that you can customize these choices and do what’s best for you!
Once you have specified where Lightroom should save your file, you will select “Custom Text” and rename it (feel free to skip this step, if you’d like). I always add a few letters after each of my titles to let me know which gallery I’ve created this layout for …which is why you see the “TDP” on the end of my name (see image above). Again, you can skip this step if it’s not relevant to you.
STEP 4
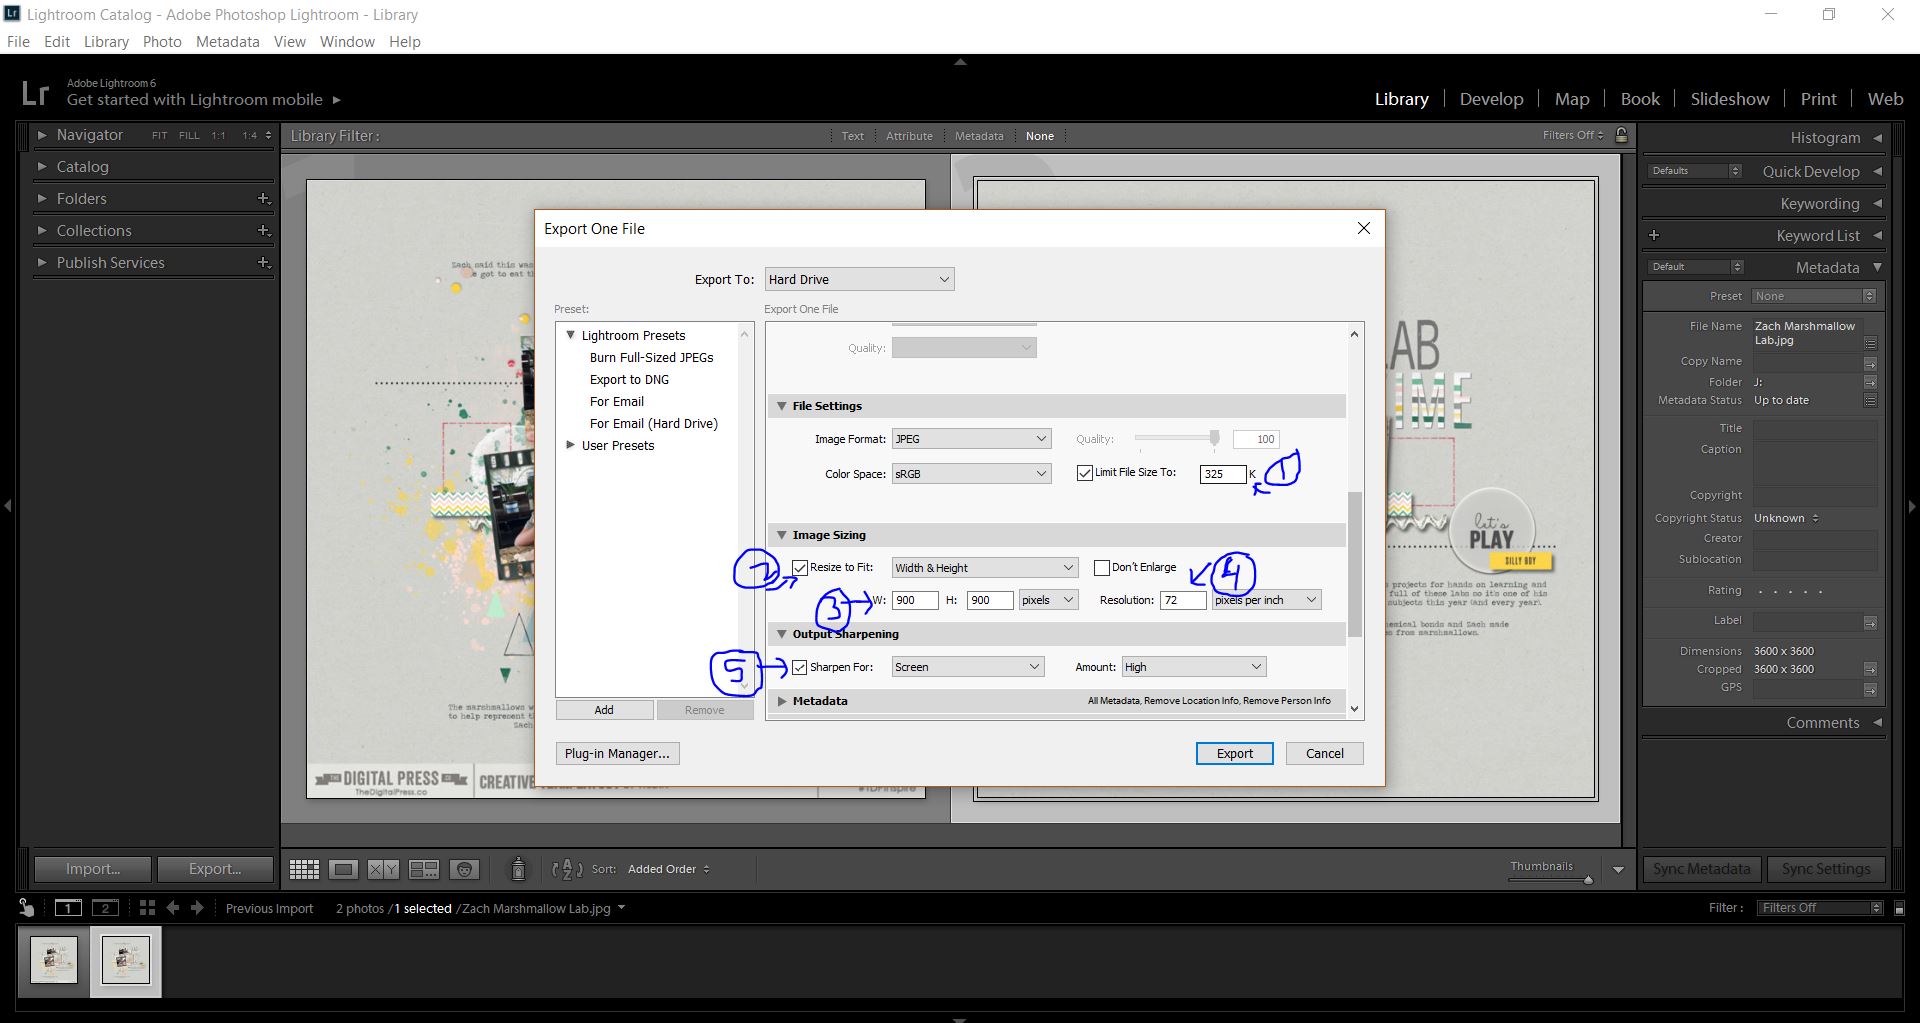
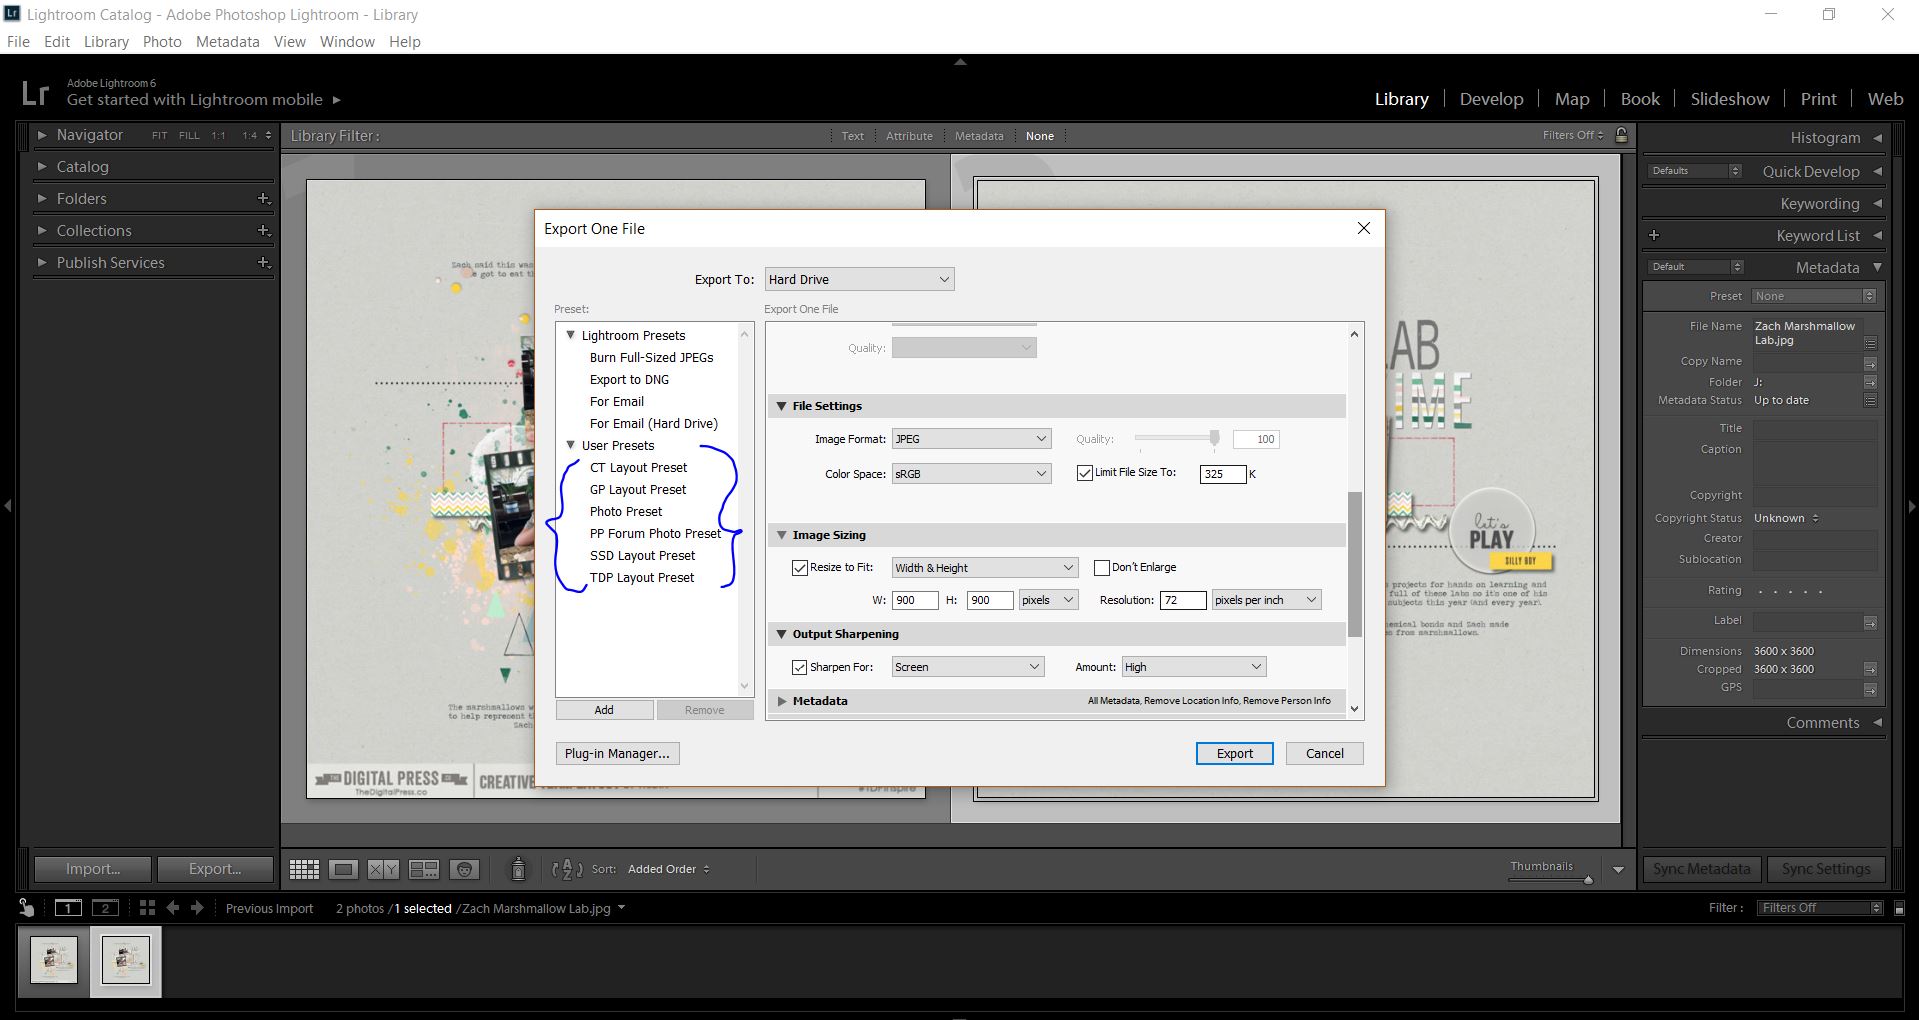
This is where you get into the details that save you time! Here’s a detailed look at my own preset (see the image, below, for the numerical references in blue)…
(1) First, I tell Lightroom to limit the file size to 325-350 for The Digital Press. All online sites/galleries tend to have different limitations, so I might choose some other file size/number in this step if my layout will be loaded somewhere else.
(2) Then, I resize the layout to fit m needs.
(3) Again, for The Digital Press, I use 900 x 900 pixels; this is where I enter those numbers.
(4) Here, I can select the resolution. For web-sized images, 72 dpi is perfect.
(5) Lastly, I add your sharpening here (if I haven’t already done this when saving my layout after scrapping).
Of course, you can feel free to change any of the above details to fit your own needs! 🙂
STEP 5
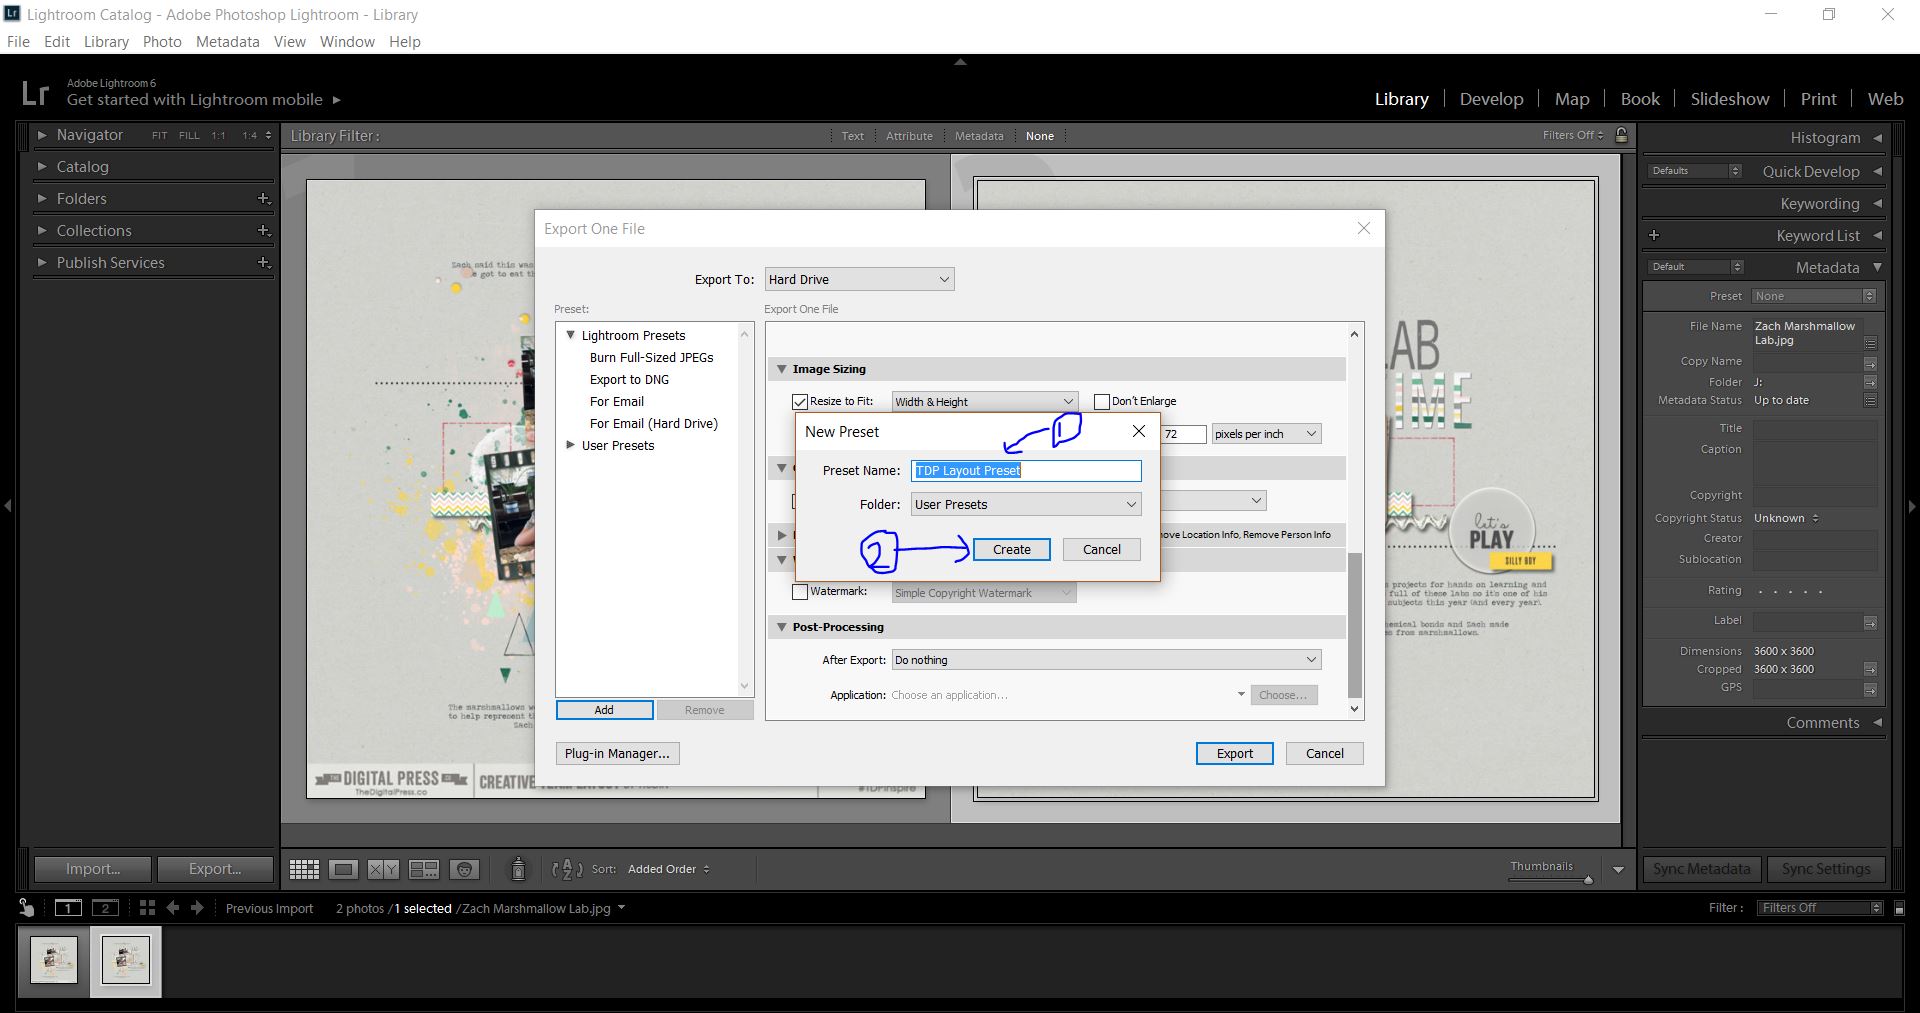
After you’ve set everything up the way you like it, you’ll click the “Add” button…
STEP 6
Finally, you’ll name your preset. Here, I’ve chosen to call it “TDP Layout Preset.” Brilliantly unique, I know. 😉 After you’ve typed in your new preset name, click the “Create” button…
STEP 7
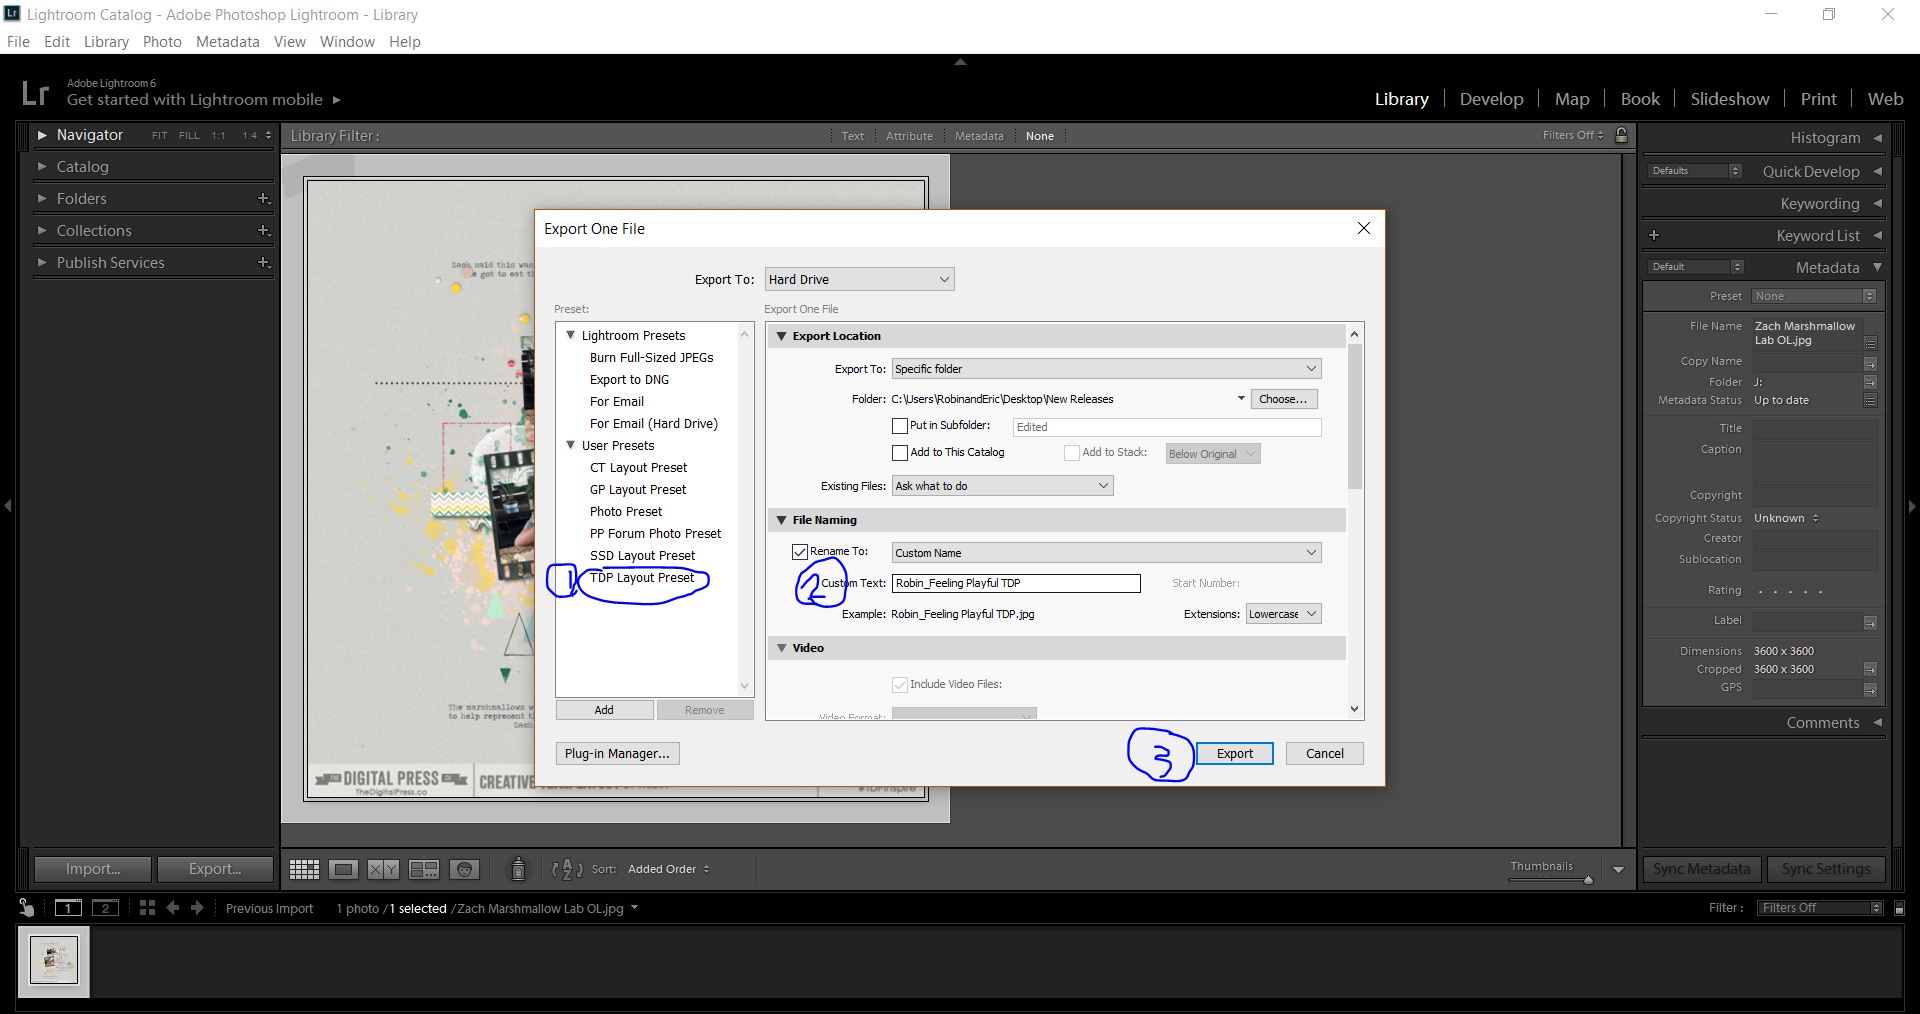
You should now be able to see your new preset under “User Presets” on the left side of your screen…
STEP 8
Now, whenever you need to use your preset… you’ll select it, rename your file (don’t worry, this won’t interfere with any of the other settings), and click the “Export” button…
That’s it! You’ve done it! You have successfully created a new preset in Lightroom, so that each and every time you want to save a photo or layout, it will be saved the same way without a lot of extra work.
As I mentioned earlier, I have created a preset for each of the galleries and blogs to which I post my layouts and photos… and it really makes my exporting workflow so much faster! Hopefully this tutorial is helpful in that way. If you have any questions, please don’t hesitate to reach out to me using the comments on this post, and ask away!

About the author Robin is a member of the creative team here at The Digital Press. A wife of 25 years and a mom of 4 crazy children (2 in college and 2 still at home), she says that her life occurs mostly in the car as she transports said crazy kids to their many, many homeschool activities. When not driving, Robin loves to make her family cringe by pulling out her camera again (and again, and again…).