
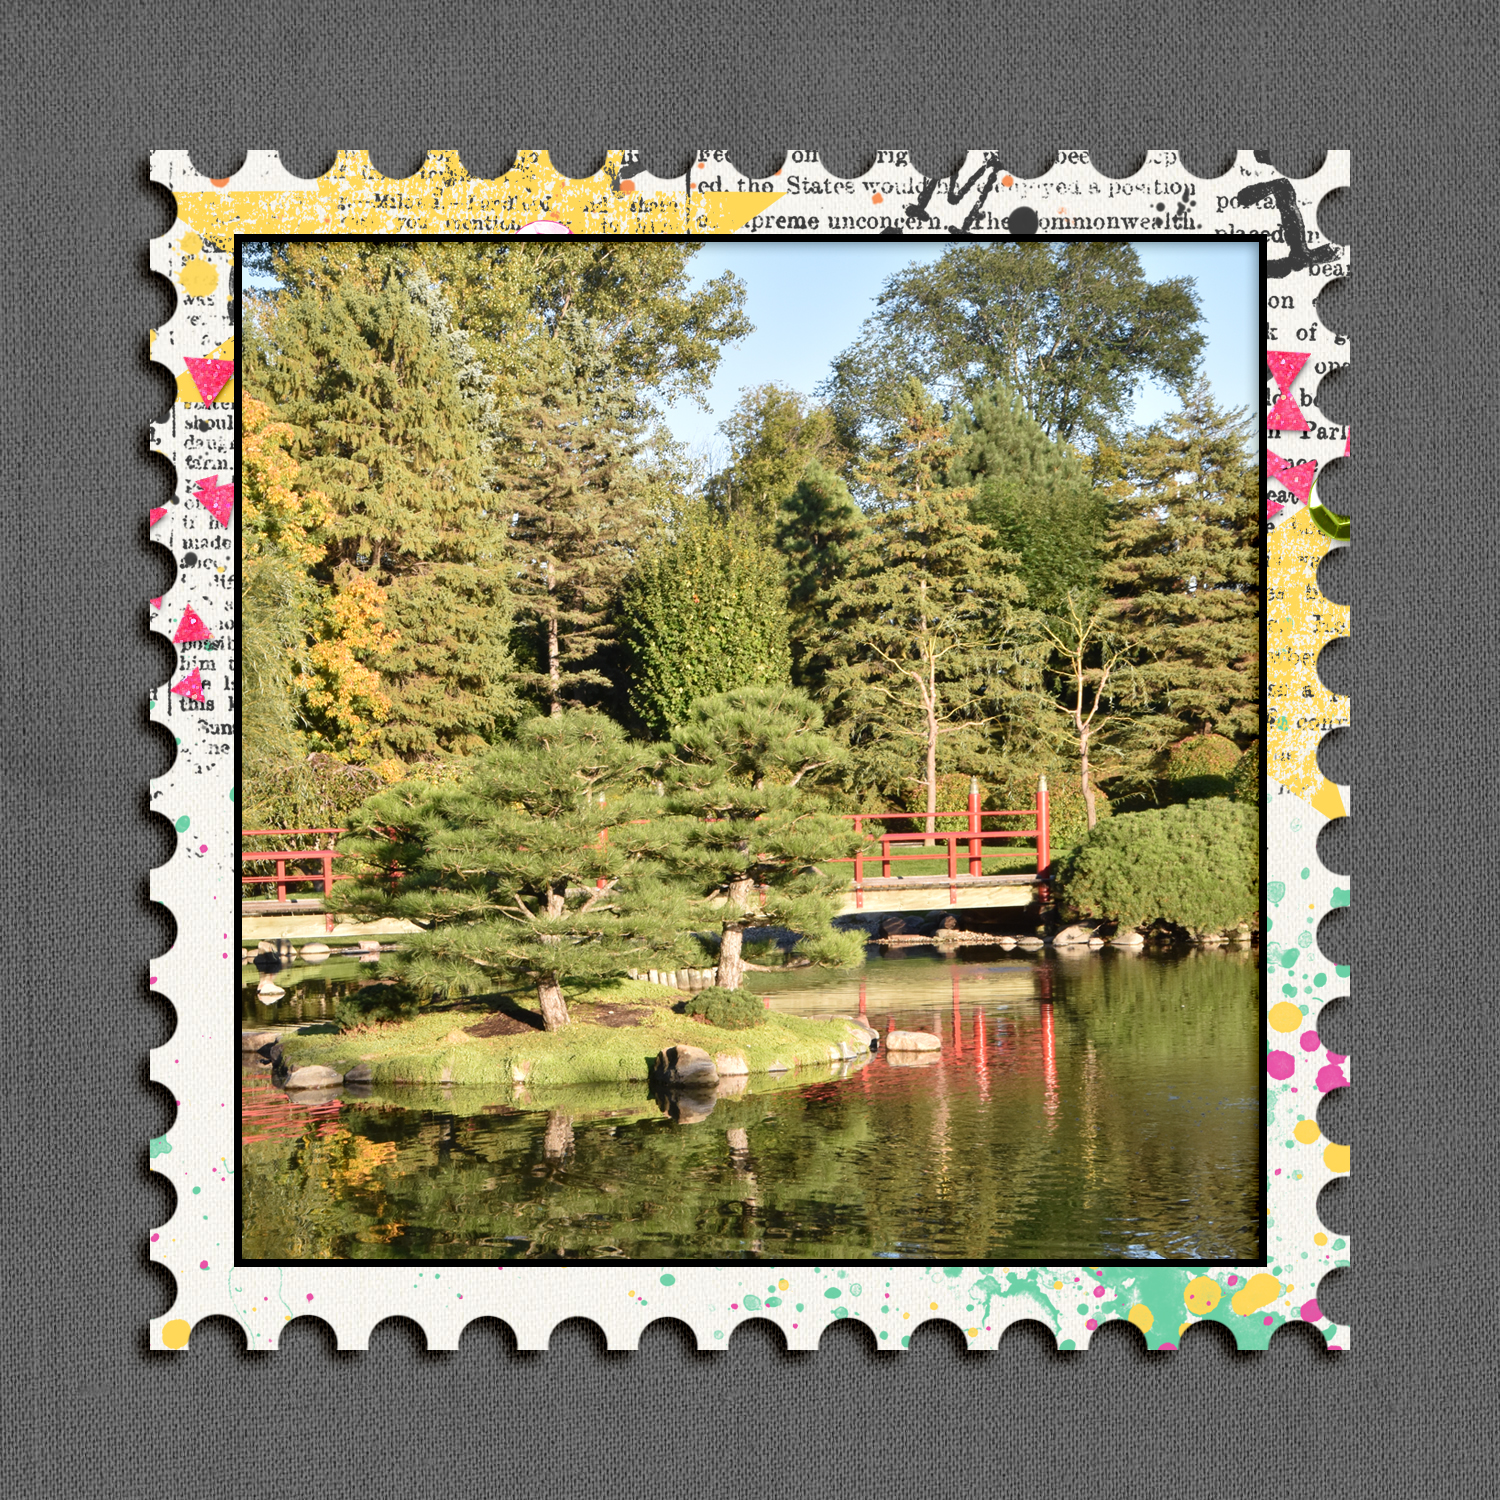
I love the look of postage stamps on a scrapbook page. They add a nice little touch of interest to a page. Papers look great when they’re clipped to postage stamp shapes, but what I really love is the look of photos inside a postage stamp frames. You can get some great postage stamp frames in digi kits, but you can also easily create them on your own in just a few quick steps while you’re scrapping a page. Let me show you how.
When I create a postage stamp frame I usually create it right on my page as I’m creating it, but for ease of instruction I’m going to show you on a blank canvas. My instructions are for Photoshop CS6 but you can use the same basic instructions in Photoshop Elements and other versions of Photoshop as well.
1. Create a blank 5″ x 5″ canvas.
I’m going to create a 4 inch x 4 inch frame so I’m going to create it on a 5″ x 5″ canvas. (Again, you can easily create your frame directly on your scrapbook page as well.) Here’s how to create a 5″x5″ canvas:
File > New > Width: 5 inches, Height: 5 inches, Resolution: 300 pixels/inch
2. Create a new blank layer.
You can create a new blank layer several different ways. You can click on the Create a New Layer icon in the layers panel (it looks like a folded piece of paper) OR you can select Layer > New > Layer OR you can press CMD+SHIFT+N and press OK.
3. Create the shape you want to turn into a postage stamp.
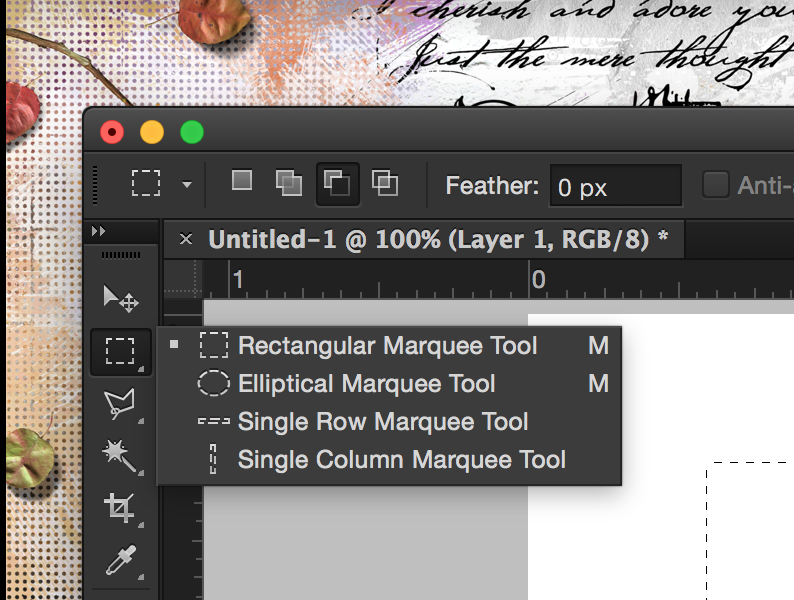
With the new layer active in the layers panel, use the Rectangular Marquee tool (hotkey M) and click and drag to create your shape. I’m going to create a square about 4″ x 4″, but you can create a rectangle as well. NOTE: If after you click and drag to create your shape you press the SHIFT key, you will get a perfect square.
4. Fill your shape with a color.
Since I’m working on a blank white canvas I’m going to fill my shape with a color. I like to fill my shape using the Paint Bucket tool (hotkey G). With the Paint Bucket tool active, simply click inside the marching ants of the shape you created in Step 3 and your shape will be filled with whatever color is in your foreground color picker.

5. Create the postage stamp edge.
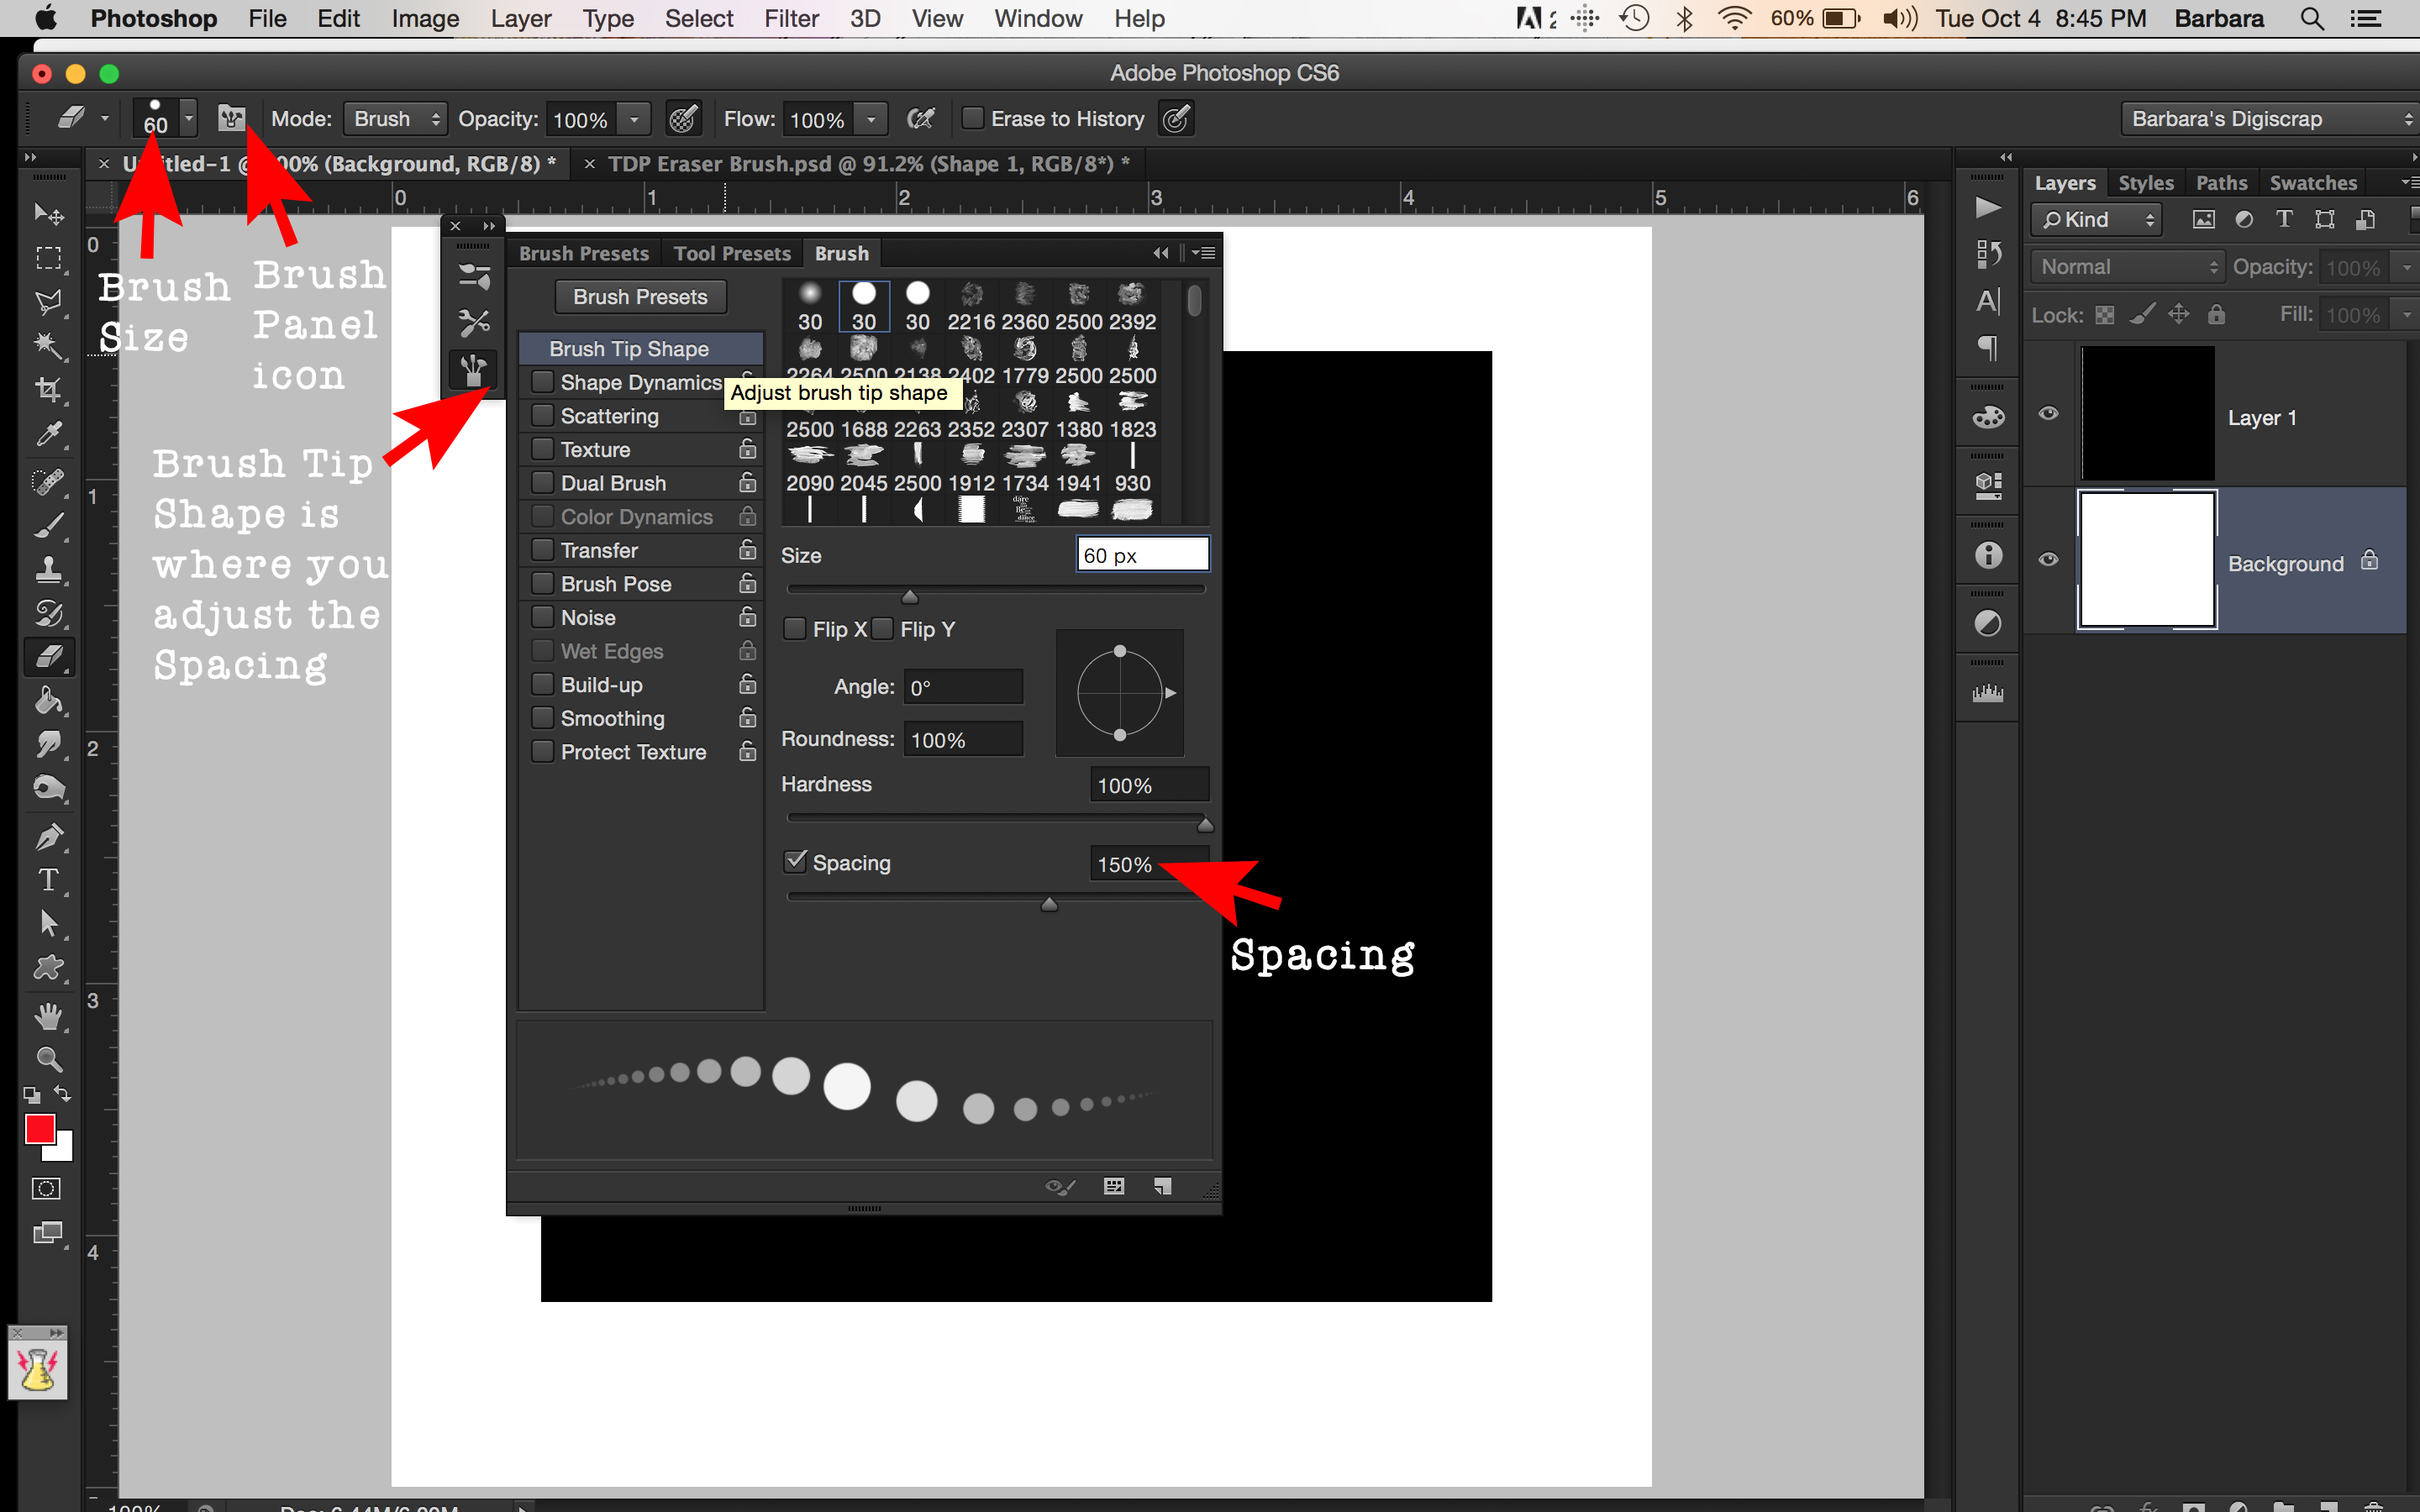
Now comes the fun part – creating the postage stamp edge. Using the Eraser tool (hotkey E), choose a hard round brush. (Do not use a soft round brush.) For my example I used a 60 pixel hard round brush. You will also need to adjust the spacing of the brush in order for this to work. Click on the Brush Panel icon (it’s next to the brush size and looks like a file folder with paint brushes). Adjust your spacing to about 150%. As you change the spacing you can see the effect it will have in the brush tool.
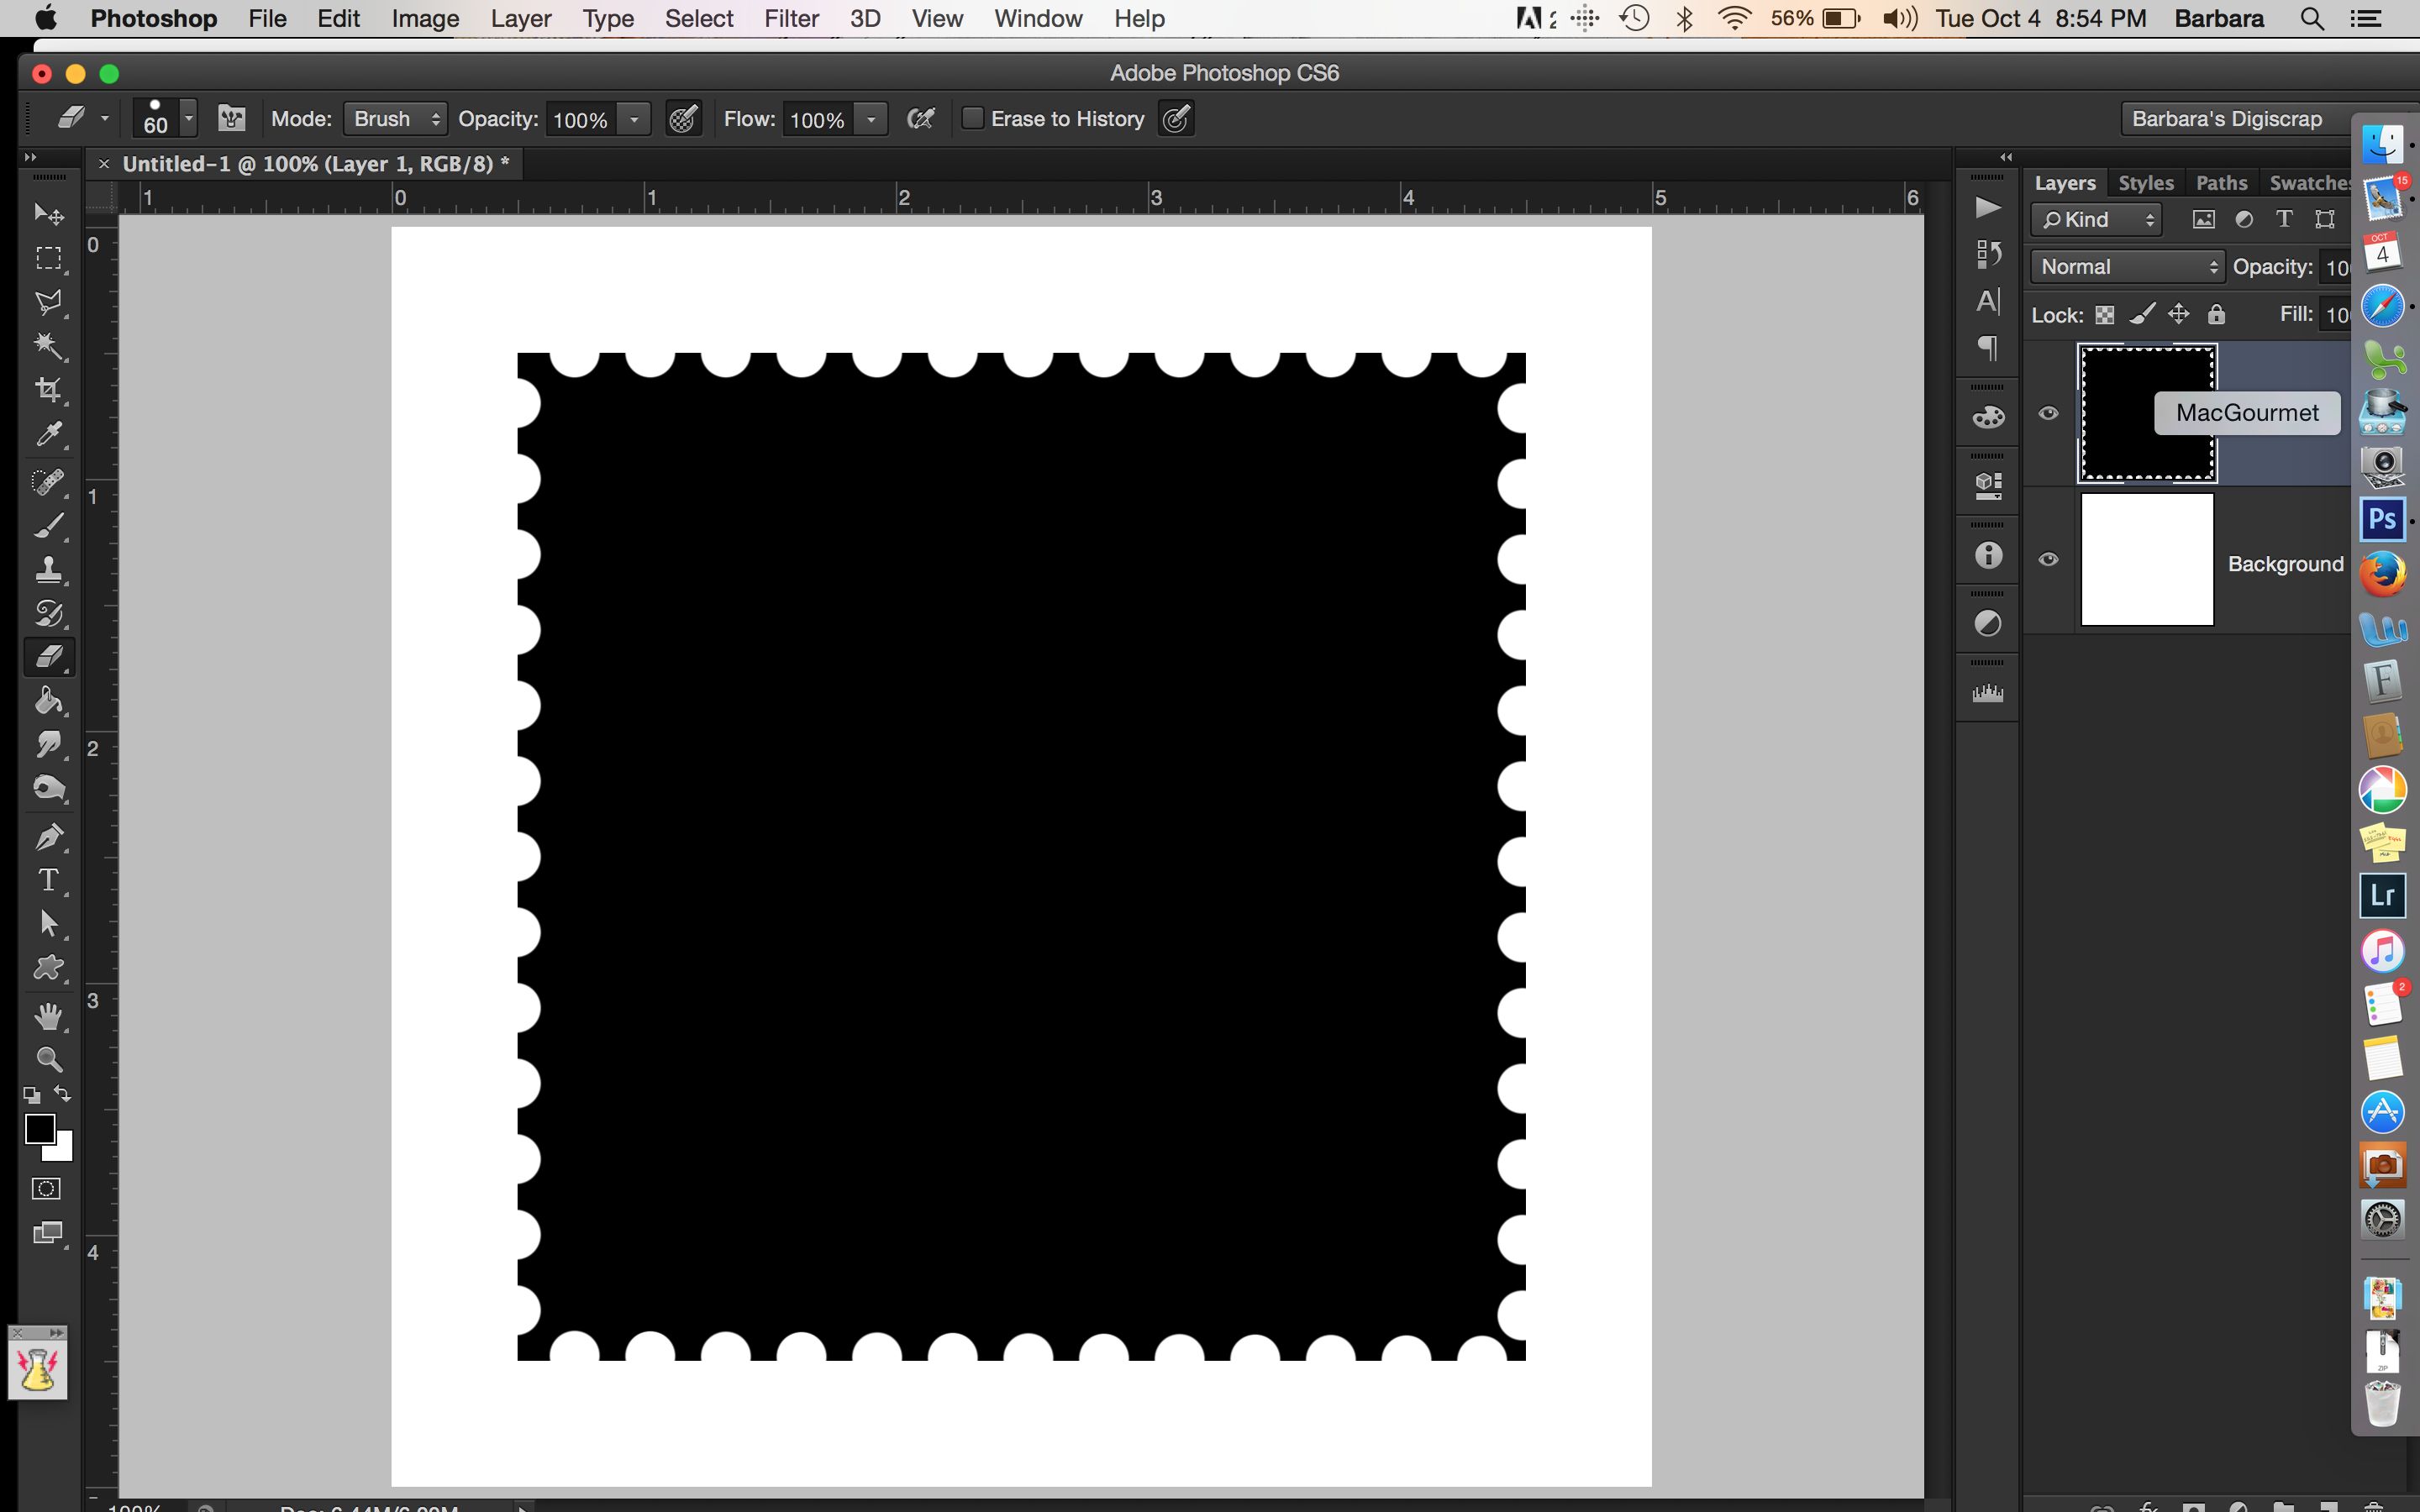
Now that you’ve set your Eraser Brush settings, line the center of your brush shape up with one of the corner edges of the square shape that is going to become the postage stamp. I like to center the dot of the Eraser Brush right on the edge of the shape. (NOTE, as long as your Caps Lock is OFF you should be able to see the outline of your brush shape.) I like to start at the left and work around the square.
While holding down the Shift key (which will keep the line straight), click at the start and then again at the end of the top edge of your shape. The Eraser Brush will have erased a straight line of circles from your shape giving you a postage stamp effect on the first side of your shape. Release the Shift key and your mouse and then do the same thing on the other sides of your shape. Continue until you’ve done the same to all four sides.
At this point you can mask a photo or a paper to this shape. You can also cut out the center and make it a frame.
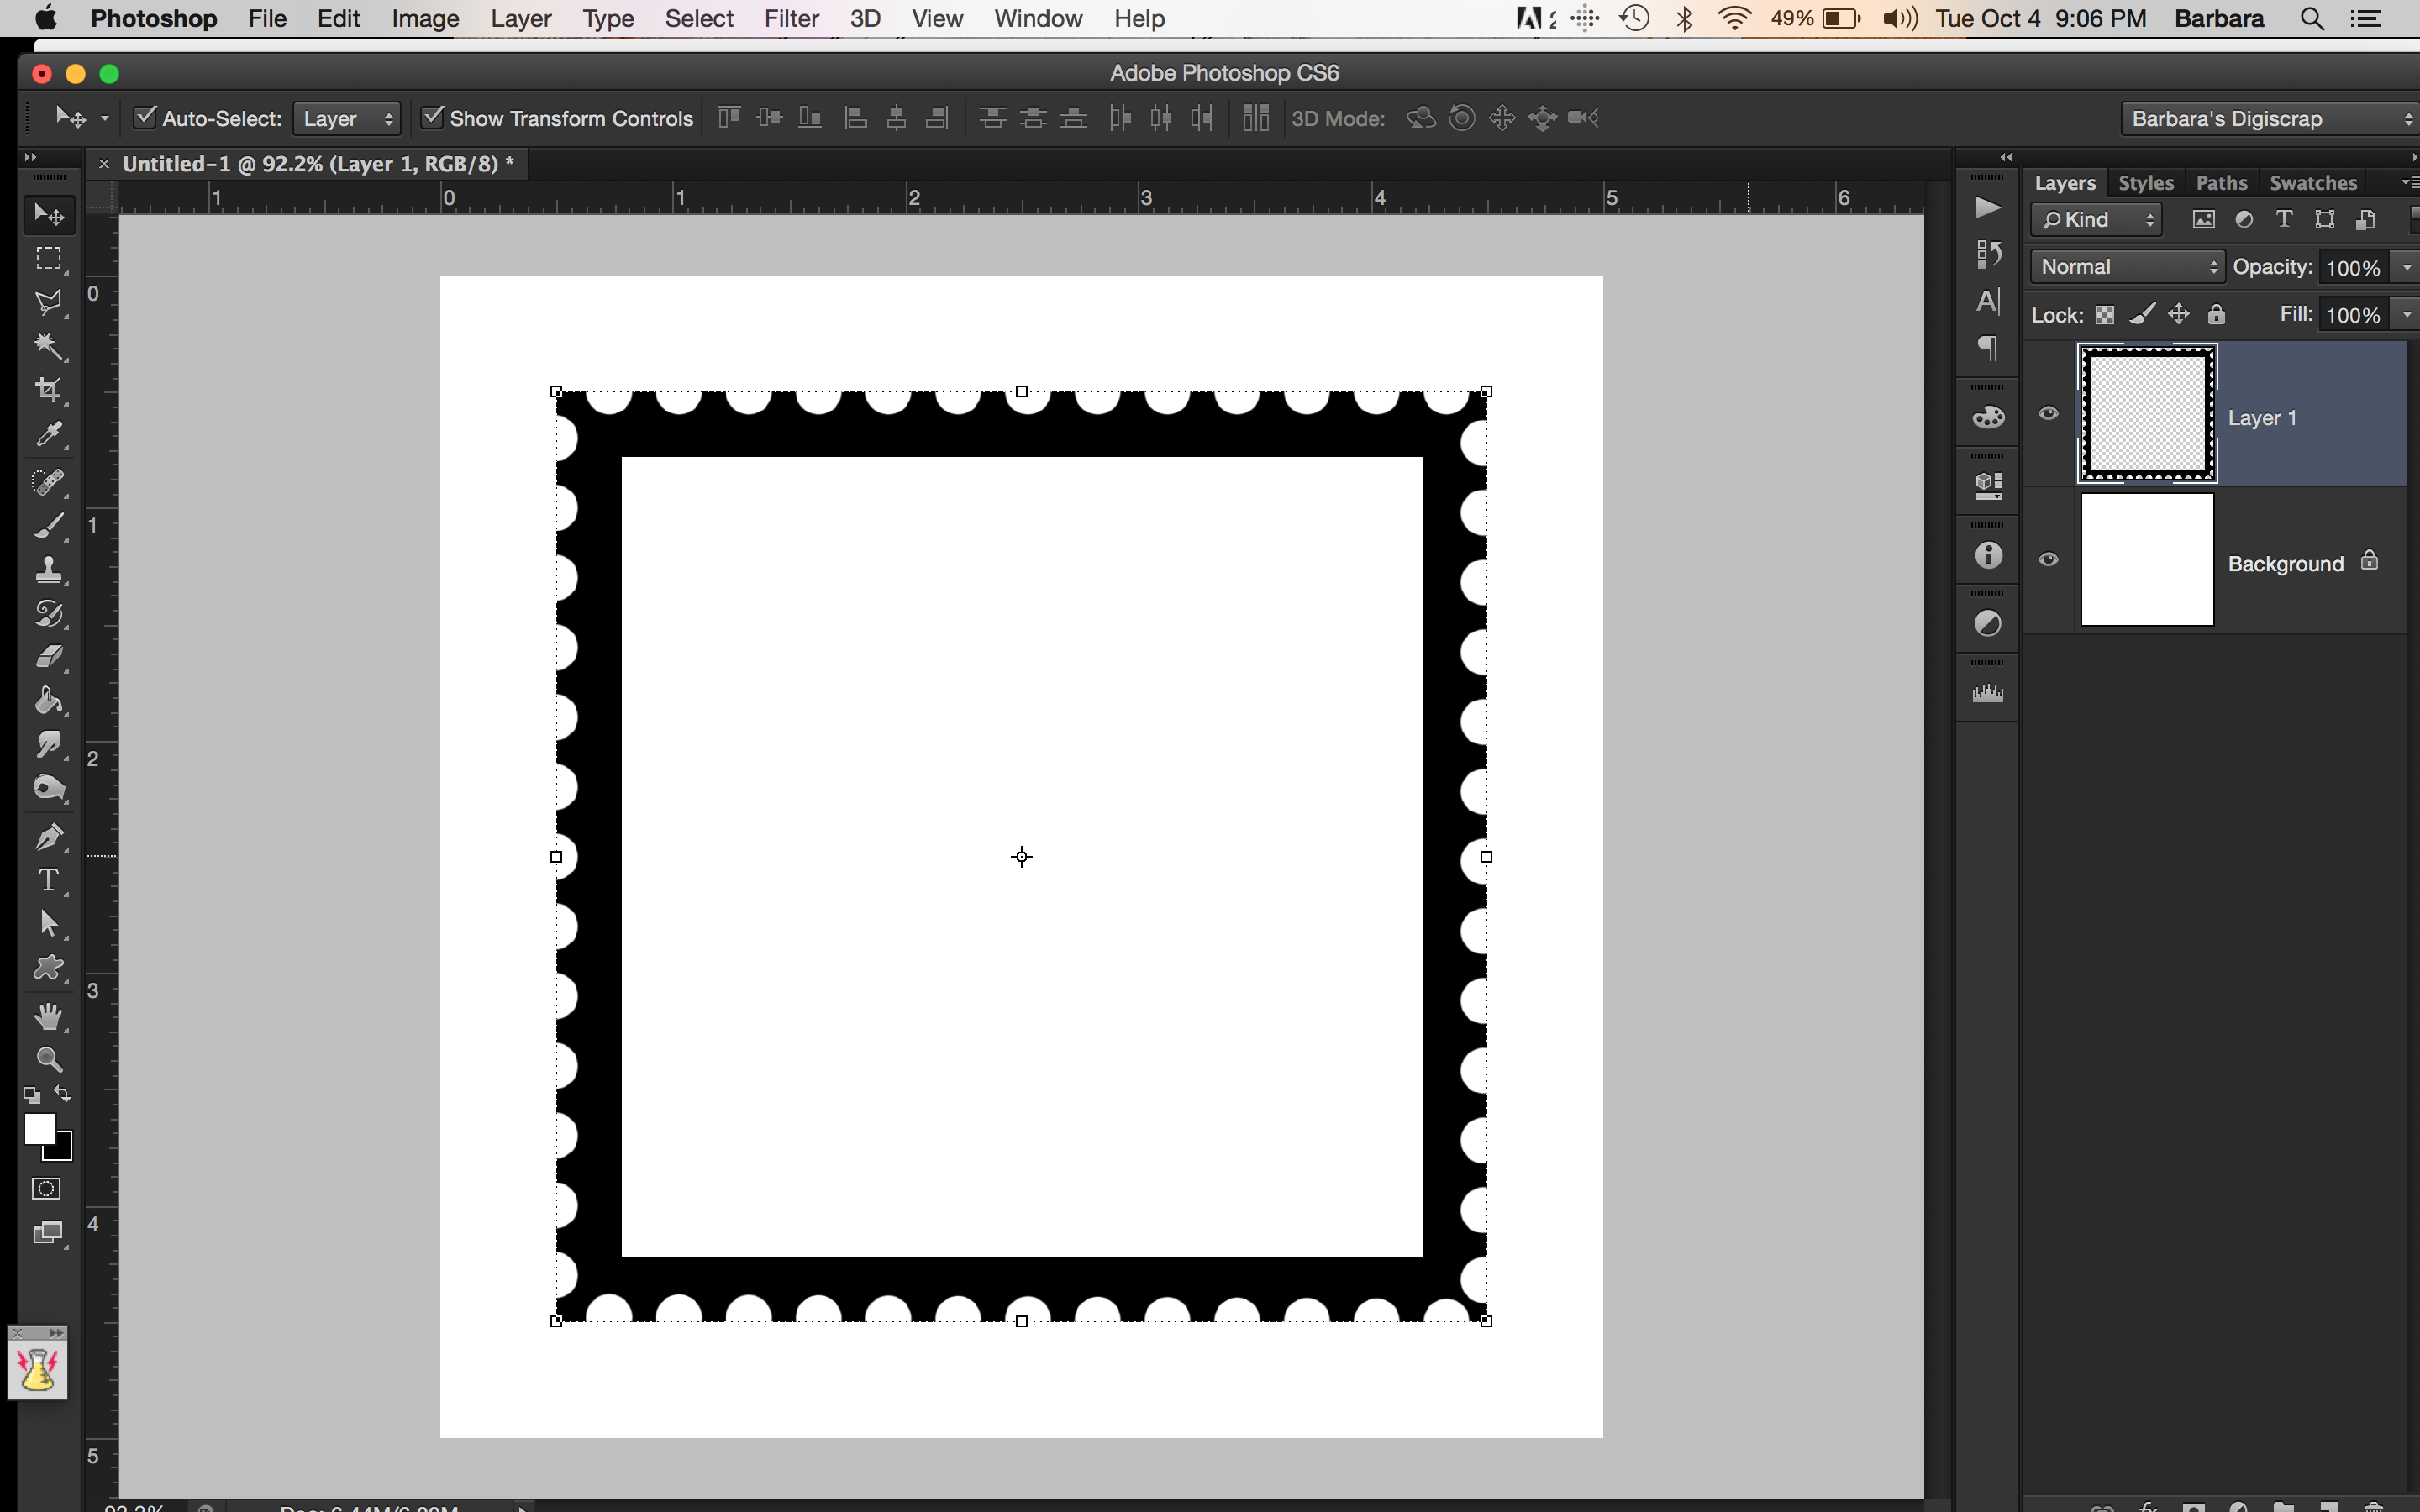
6. Create the frame.
To create the frame effect you will want to cut out the center of the postage stamp shape you just created. With the postage stamp shape layer active in the layer panel, simply use the Rectangular Marquee tool (hotkey M) and click and drag to create a square over your newly created shape. When you’re happy with the area you want to cut out, simply press the Delete key.
NOTE: If you do not want to erase away part of your postage stamp shape, you can also create a new layer above the postage stamp shape and, using the Rectangular Marquee tool, create a new shape layer ABOVE your postage stamp shape (be sure to use a contrasting color so you can see the shape you added) and you can clip your photo to the new shape.
7. Embellish your new Postage Stamp Frame!
Voila! You’re done! You’ve created a quick postage stamp frame. Now you can embellish the heck out of it. here are some ideas:
- Add a drop shadow to your frame
- Clip a textured paper to the frame
- Clip some paints, etc. to the frame
- The possibilities are endless!
NOTE: I used River Rose Designs’ Sunday Morning kit to embellish my frame.
So what do you think? Did you know that you could create a postage stamp frame on your scrapbook pages so quickly? Give these steps a try and please let us know if you’ve got any questions.
 About the Author | Barbara is a member of the creative team here at The Digital Press. She lives in Minnesota, is married and has two awesome kids (a 19 year old boy and a 17 year old girl) as well as an adorable 10 year old Soft Coated Wheaton Terrier. In her free time she loves to take photos and play around in Photoshop. Life is good!
WONDERFUL tutorial – Thank you so much.