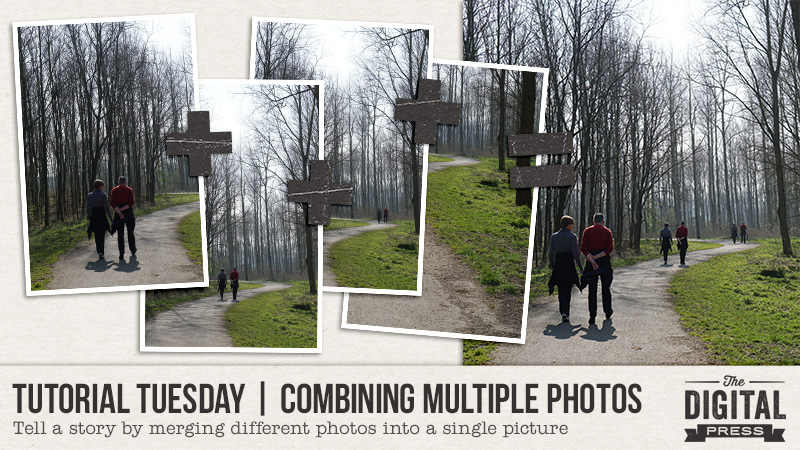
Hello everyone, and welcome to another edition of our Tutorial Tuesday series here on The Digital Press blog! Today I hope to inspire you to try out combining multiple photos to tell a more complete story with just a single picture.
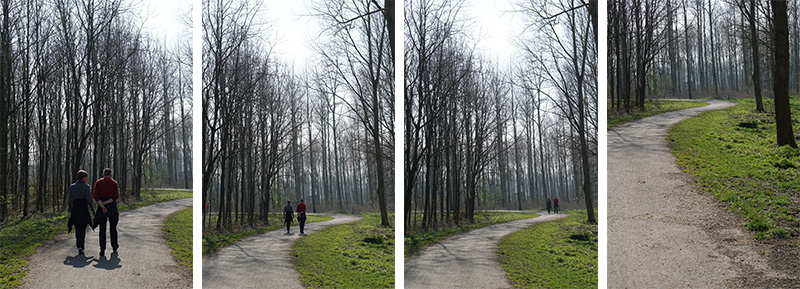
I always struggle a lot when it comes to choosing the one perfect photo to scrap into a page. I’m the type of photographer who is always running around with a camera around my neck, constantly trying to catch up with the people I’m with because of the many photographs I’m shooting. I often run a bit ahead and then stand still with my camera ready to photograph my loved ones as they walk towards me or as they are passing by. For this tutorial I had a couple of pictures that I took during a walk through the woods. Since they are quite similar (taken from the same position) and I couldn’t decide which one I liked the best, I thought it would create a fun effect to combine these photos to create one single picture that would show a more complete story of our walk.
A great way to start is to open one of the pictures in a photo-editing program like Photoshop. I’m using Photoshop CC for this tutorial. Once a new file is created you can quickly create a better overview before adding the other photos by enlarging the canvas using the cropping tool. Then you can easily drag and drop the other photos in the same file. By changing the opacity of the photos to around 50 percent you’ll be able to position them on top of each other in a way that they almost blend perfectly. When it comes to positioning the photos, aligning the surroundings of the subjects is more important than the borders of the photos.
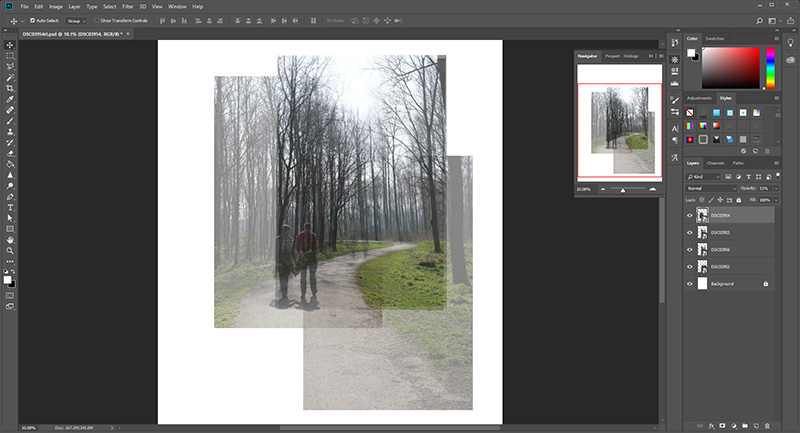
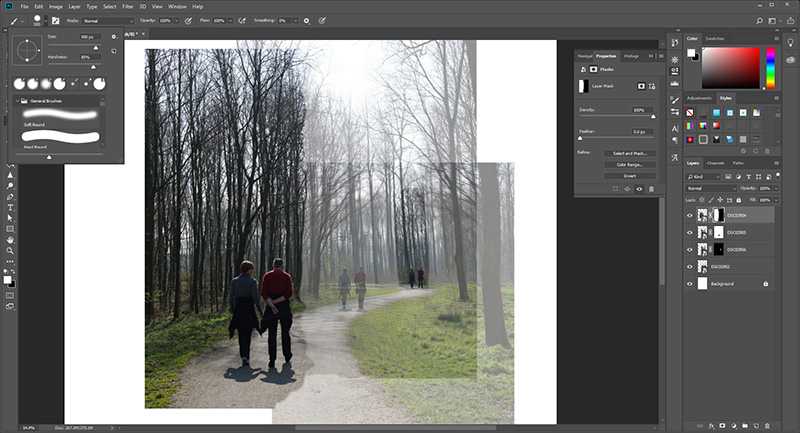
When you turn the opacity of the photos back to a 100 percent, you’ll might see that the borders of the different photos don’t align perfectly or are too harsh to look perfectly merged. We can improve this by erasing some of the edges and making it softer. It’s possible to do this with the eraser tool, but I always prefer using masks so the alterations aren’t permanently. You can add a vector mask to the selected layer by clicking on the mask icon in the layers window at the lower right of the screen.
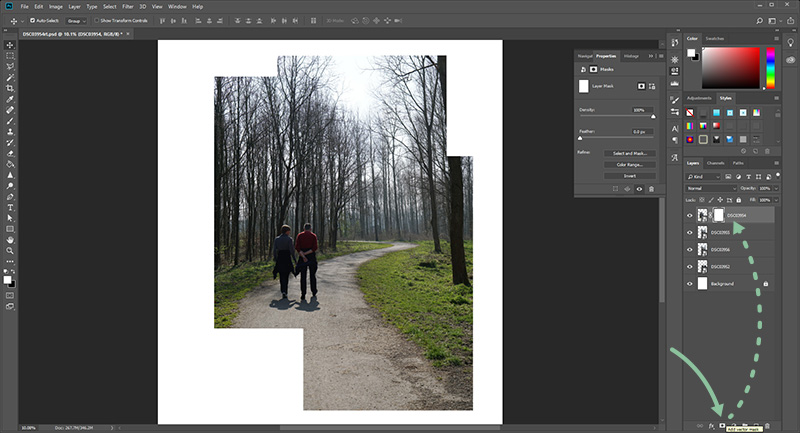
When the vector mask is added to the selected layer a white rectangle appears next to the image of the layer. By clicking on this rectangle, the vector mask is selected and now editable. A brush can be selected to start removing some parts of the photo. Make sure the foreground color is set to black, since everything that’s white in the vector mask remains visible and every part that is made black becomes invisible. I always prefer using a brush that has some softness so the blending border looks more natural, but not too much softness that it’s starting to look blurry. I would recommend setting the hardness of the brush on a number somewhere between 50 and 90 percent, depending on the sharpness of the photo and the alignment of the other photos underneath. With the black foreground color selected you can now start removing the outer parts of the photos to make their transitions invisible. By changing the transparency of the photos you’re not editing, you have better sight on what you’re doing. As you can see in the picture underneath I never remove bits in a straight line. By making the border irregular or following some distinct lines in the photo like a tree trunk, the overlapping border will become almost completely invisible.
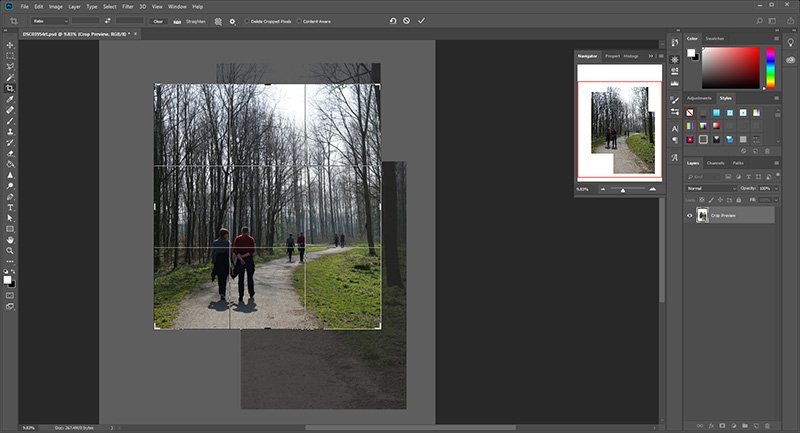
To make sure no stray pixels remain after erasing you can always apply a stroke in a distinct color on the layers to make the unwanted bits visible. When you’re happy with the gained result after erasing the borders and unnecessary overlapping parts of the different photos, you can determine how big the final picture is going to be. By using the cropping tool you can alter the canvas to the maximum complete width and height of the picture or make it a bit smaller if desired.
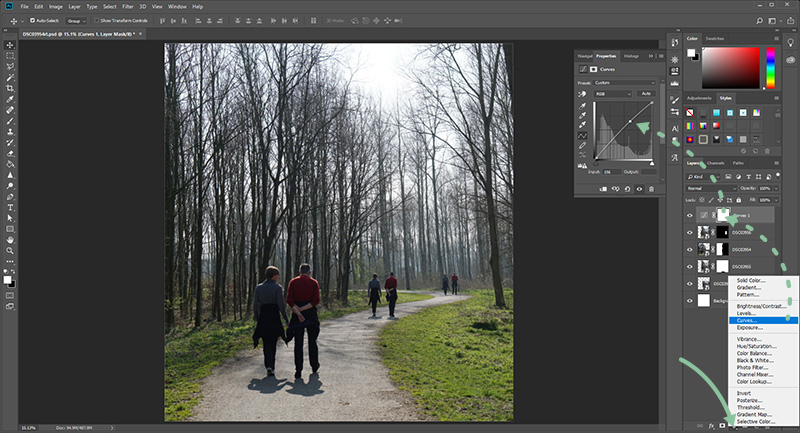
After the cropping is applied you’ll see the complete result of the combined picture you have created. To make the picture even more aesthetically pleasing you can now play around with levels, curves and saturation. Because I found that the pictures always turn out a bit darker when printed, I like to increase the curves layer a bit to lighten the picture and make it pop a bit more. You can easily do this by moving the point in the graph of the Curves Properties panel. By adding more points to this graph by simply clicking on it you are also able to increase or decrease the contrast of the picture.
Now the picture you have created is completely finished and ready to be scrapped into a beautiful layout! Because I liked the effect of the picture I combined so much I chose to use it as big as possible on my layout. For the layout I created with this picture I used several scrapbook kits from the July 2018 Special Edition section of The Digital Press website, which proved to be a perfect match. The finished layout I created can be seen underneath.
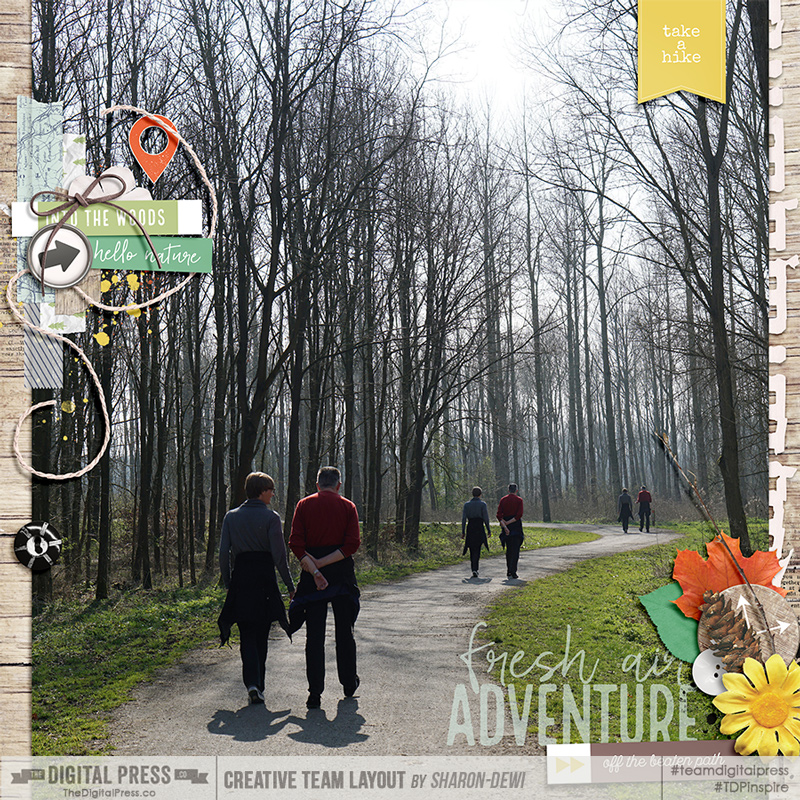
(credits: Into The Woods | Collection by Little Lamm & Co and Hooray, It’s Saturday! | Kit by Ninigoesdigi)
I hope I have inspired you to try out combining your own photos into one complete picture and I hope you’ll have a lot of fun with it!
![]() About the Author Sharon-Dewi is an industrial engineer with her own design company and a teacher at a technical university in the Netherlands who loves to spend every little bit of free time she gets capturing and documenting the special moments of her life and that of her loved ones by creating scrapbooks. She can often be seen running around with a camera in her hands and she is a big fan of anything Disney-related. One day she hopes to be able to permanently live at the happiest place on Earth!
About the Author Sharon-Dewi is an industrial engineer with her own design company and a teacher at a technical university in the Netherlands who loves to spend every little bit of free time she gets capturing and documenting the special moments of her life and that of her loved ones by creating scrapbooks. She can often be seen running around with a camera in her hands and she is a big fan of anything Disney-related. One day she hopes to be able to permanently live at the happiest place on Earth!