It’s Artsy Week in Summer School and I’m here to tempt you to put your art journaling hat on by using the Filter Gallery in Photoshop. Sure, we all know how to do a pencil drawing, but did you know you can do so much more and easily, too using the Filter Gallery? With Photoshop CC 2015, you can now apply multiple effects to one image. It’s 100% non-destructive, artsy heaven! I say this as an artsy non-art-journaler.
I’ve selected two photos to work with for this tutorial. One is a pretty decent photo of my hubby and son, if I don’t say so myself, and the other is a hot mess photo of my son as a toddler. Open a photo or two in Photoshop and play along with me.
First, we need to prepare our photos: I recommend deciding what size photo you’d like to use on your layout, so you won’t need to do any difficult re-sizing of the filters on your canvas. Once that’s done, you need to convert your photo for smart filters. If you don’t have PS CC 2015, yet, (and you so should), you will only be able to apply one filter to your image. To apply another filter, you will need to rasterize your image and start again.
In Photoshop CC 2015:
In the menu bar, click Filters> Convert for Smart Filters
All this means is that Photoshop is working magic so you can add more than one filter on your photo at a time.
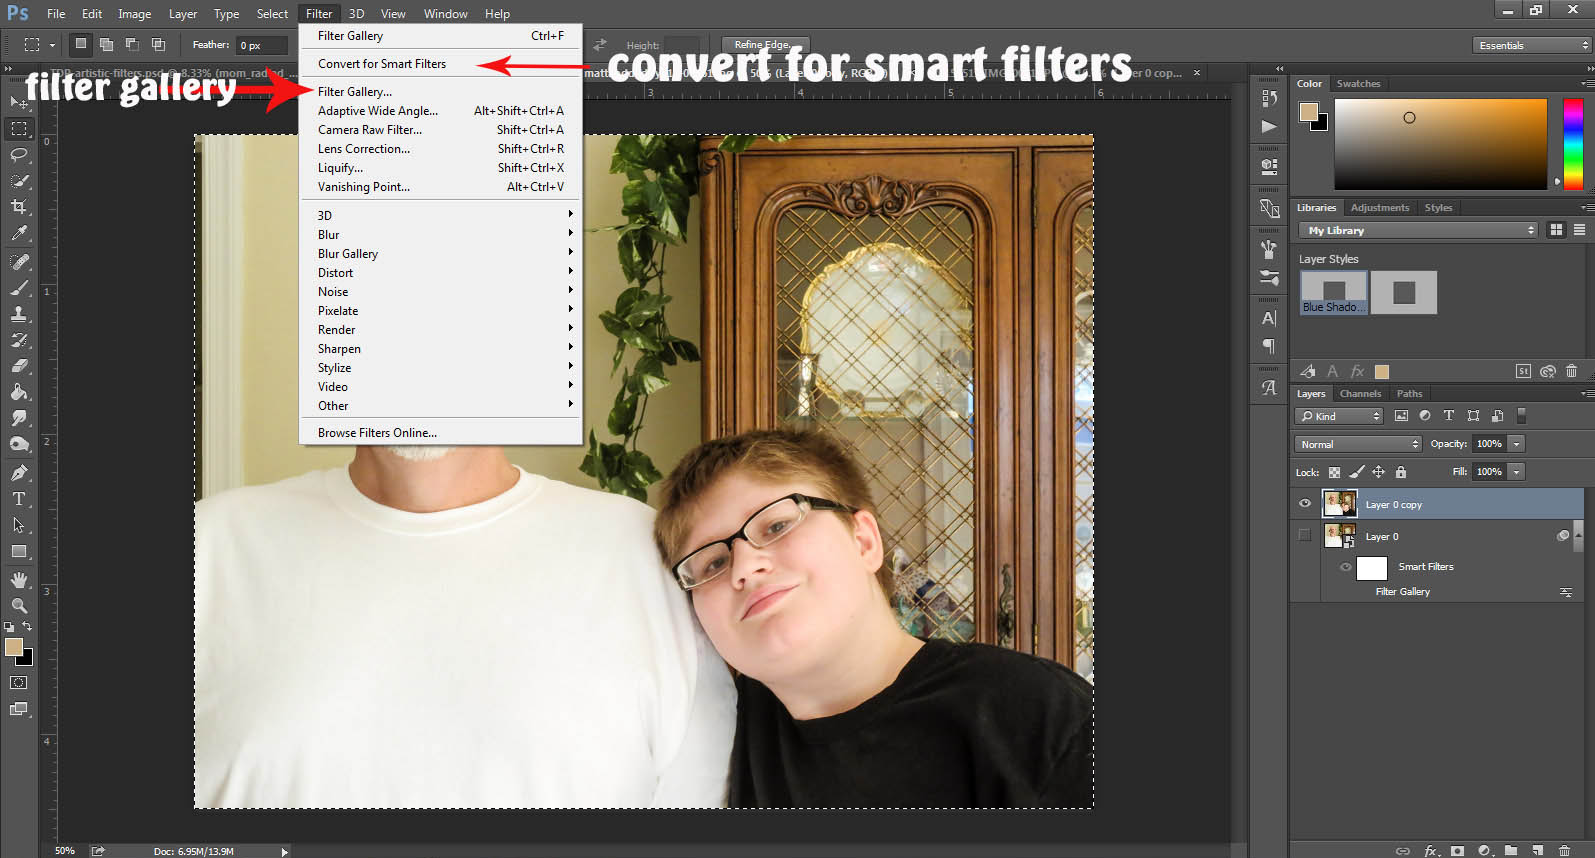
When the scary dialogue box appears, click “ok” (really, it’s okay)
One thing to note is that the color selected in the color palette will effect the filters. I recommend you start with the default colors picked (B&W) and explore the different filters before going a bit wild with colors. (and I do hope you get to that wild place!)
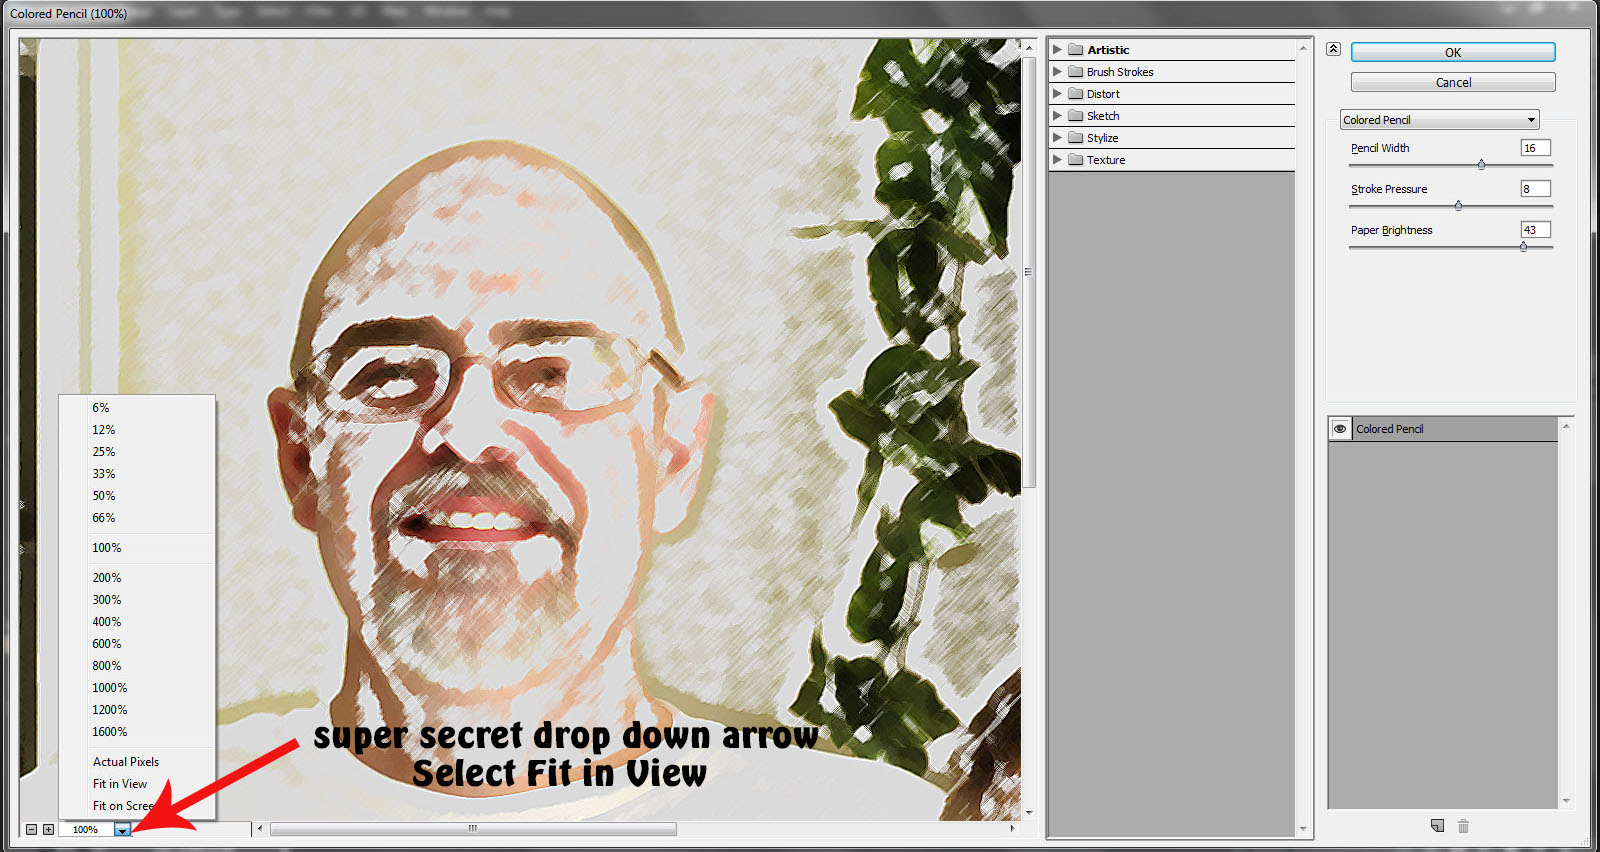
Now it’s time to open the Filter Gallery! Click Filters> Filter Gallery
To see your entire photo, in the bottom left-hand corner, click the drop down arrow. Select Fit in View.
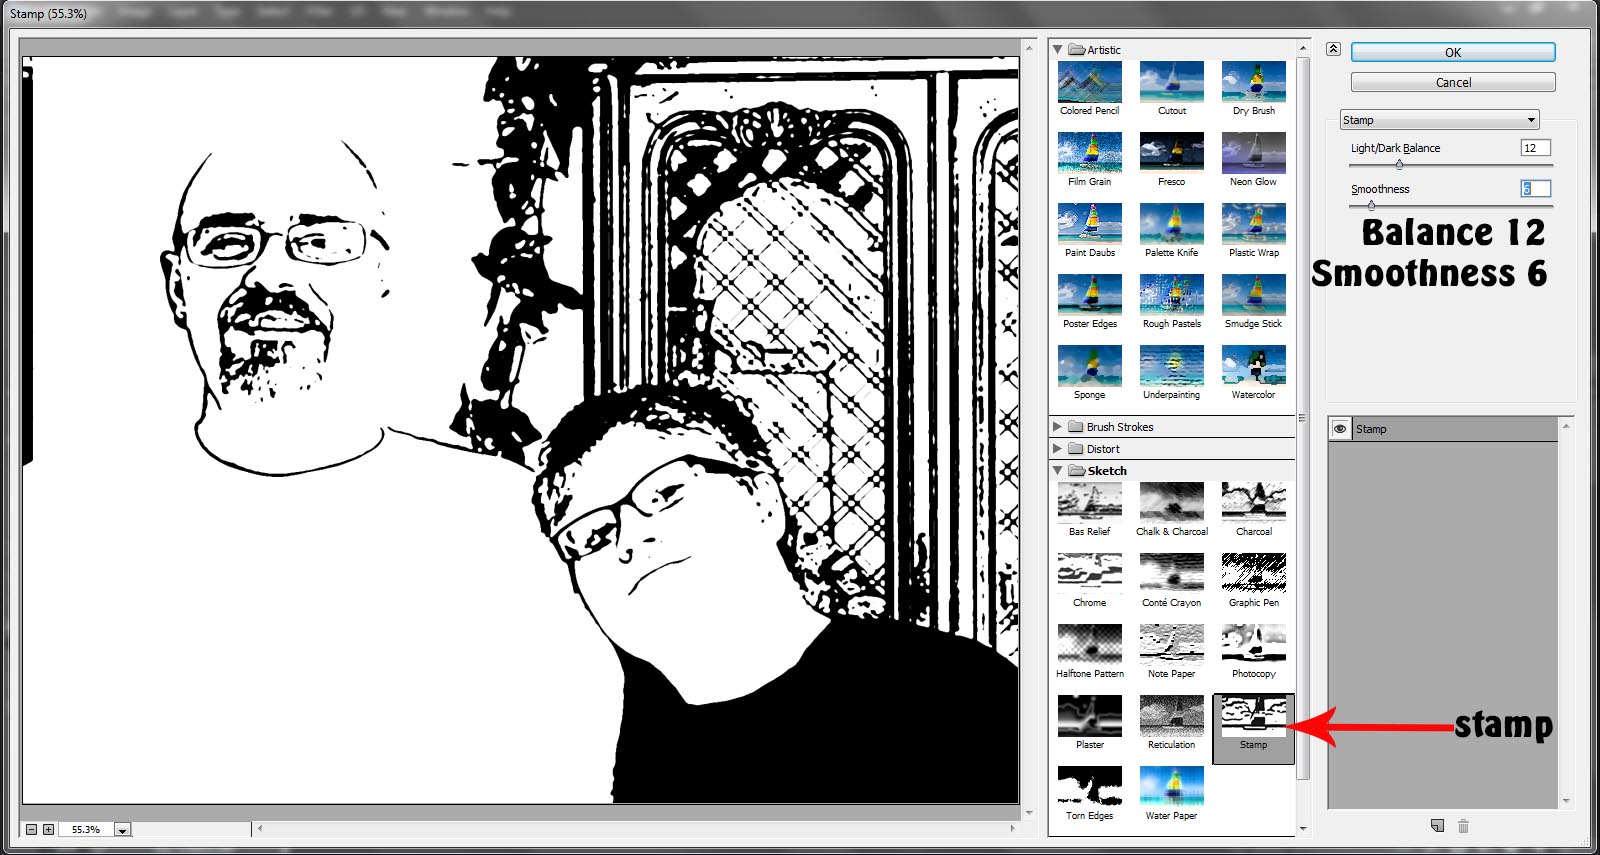
For this photo, I selected the Stamp option. I reduced the smoothness and the lightness until I have the fewest lines, but can still tell what I’m looking at. Start with these settings and adjust the sliders until you’re happy with your image:
- Light/Dark Balance: 12
- Smoothness: 6
The next photo I’ll be using is already prepared. It’s an old, damaged, sad photo that was scanned. I neglected to wipe off the dust… um, d’oh! It’s the perfect photo to use with the Artistic Filters.
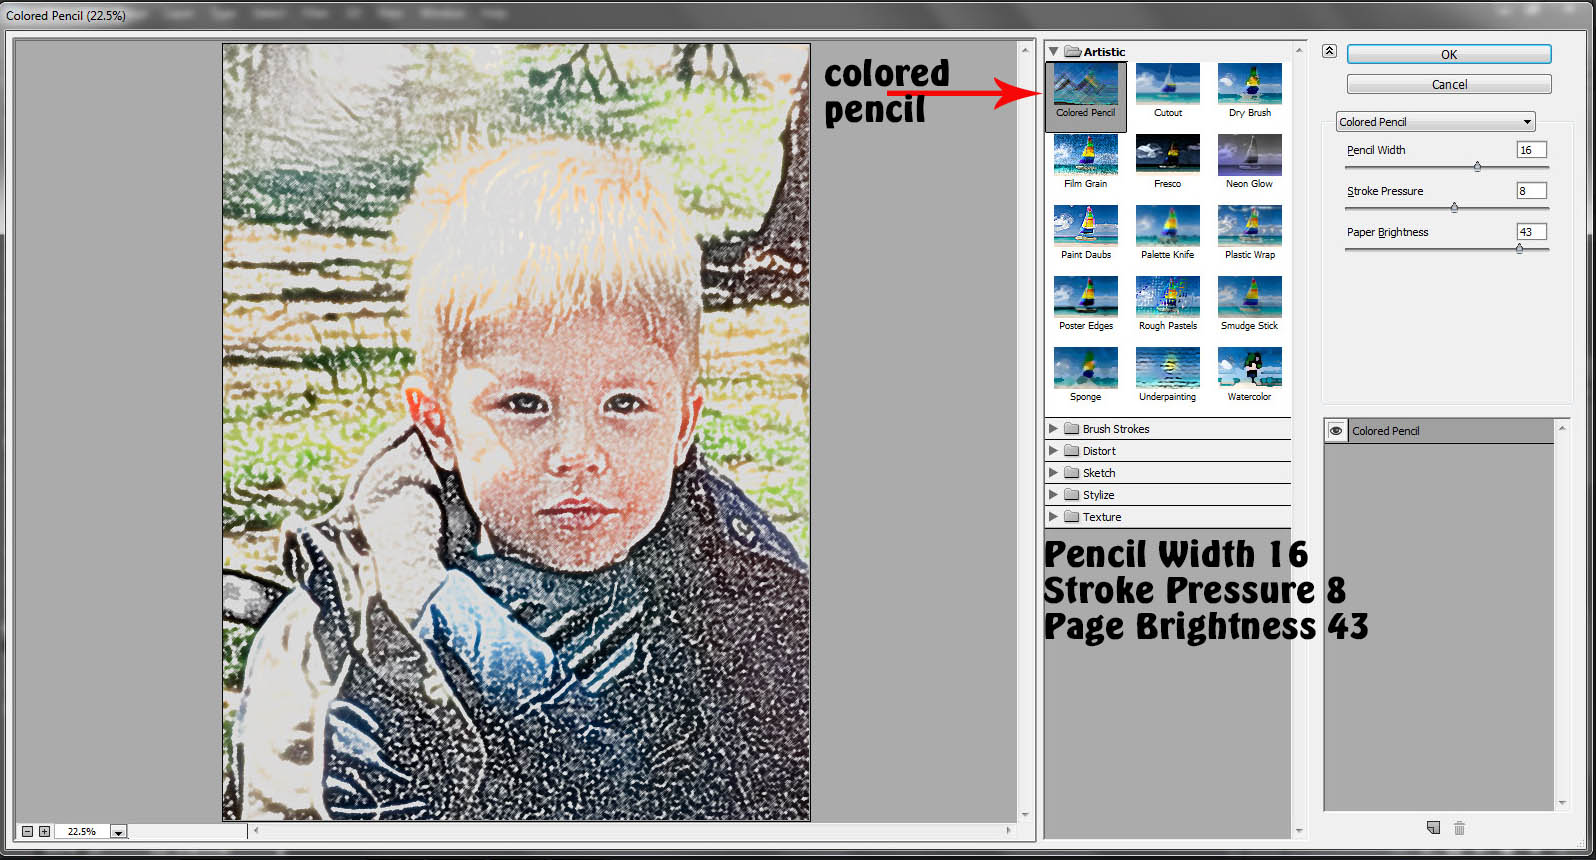
I started by using the Colored Pencil Filter. It doesn’t have be perfect because we’re going to add another filter on top of this one. What I want here is to really just bring out the eyes and lines of the face. I’m not worried about the background- I’ll take that out later. If you’re photo isn’t a person, the same still applies- bring out the lines that define the object. When you’re happy with your photo, click okay.
Start Here:
- Pencil Width: 16
- Stroke Pressure: 8
- Page Brightness: 43
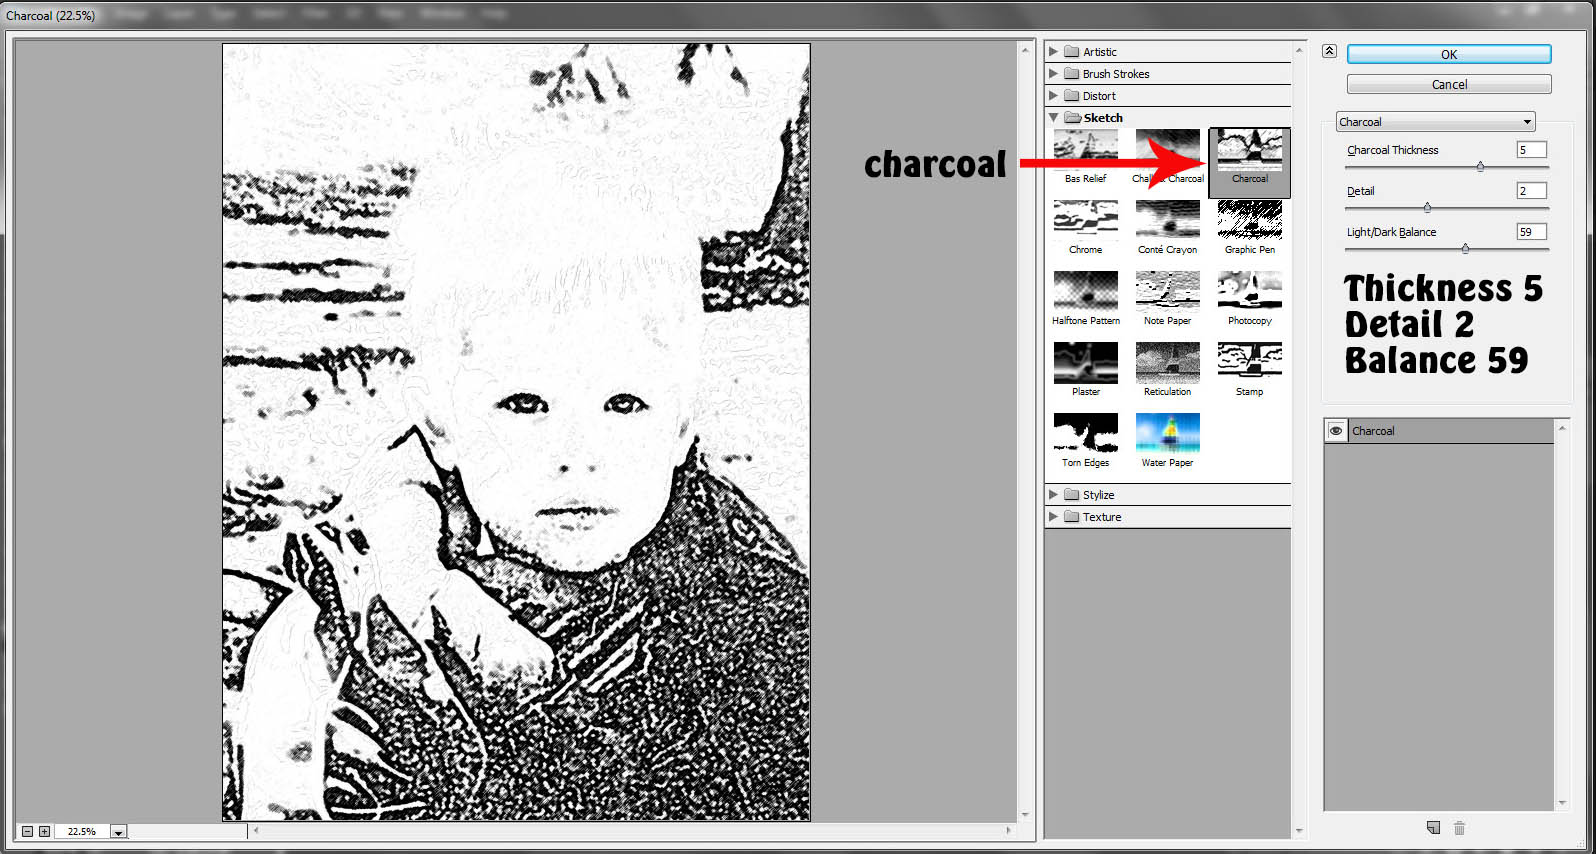
Go back into the Filter Gallery. This time, we’ll use a Sketch Filter, specifically, Charcoal. Again, we’re making sure the important lines are clearly defined…in an artsy way of course.
Start here:
- Charcoal Thickness: 5
- Detail: 2
- Light/Dark Balance: 59
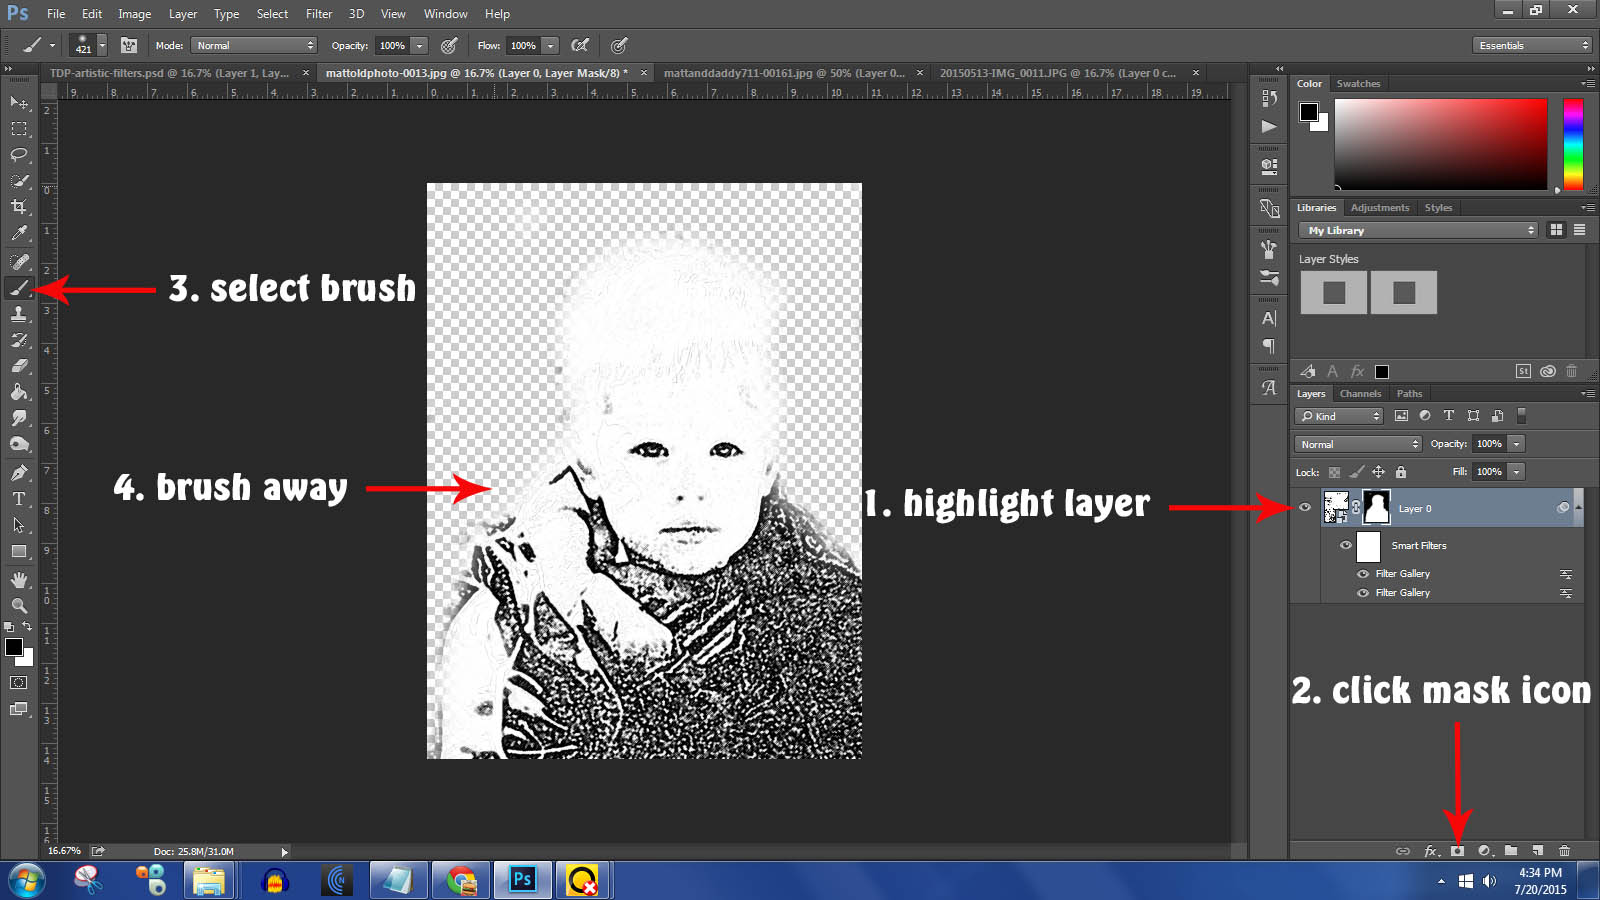
Click on your photo in the layers palette. Now click on Layer Mask icon. Select black as your color, use a round brush and brush out your background. You can select a different brush with a lighter opacity if you want to keep some of your background. If you brush out too much, don’t worry. Swap your color to white and brush over the area of the photo you erased. It’s magic!
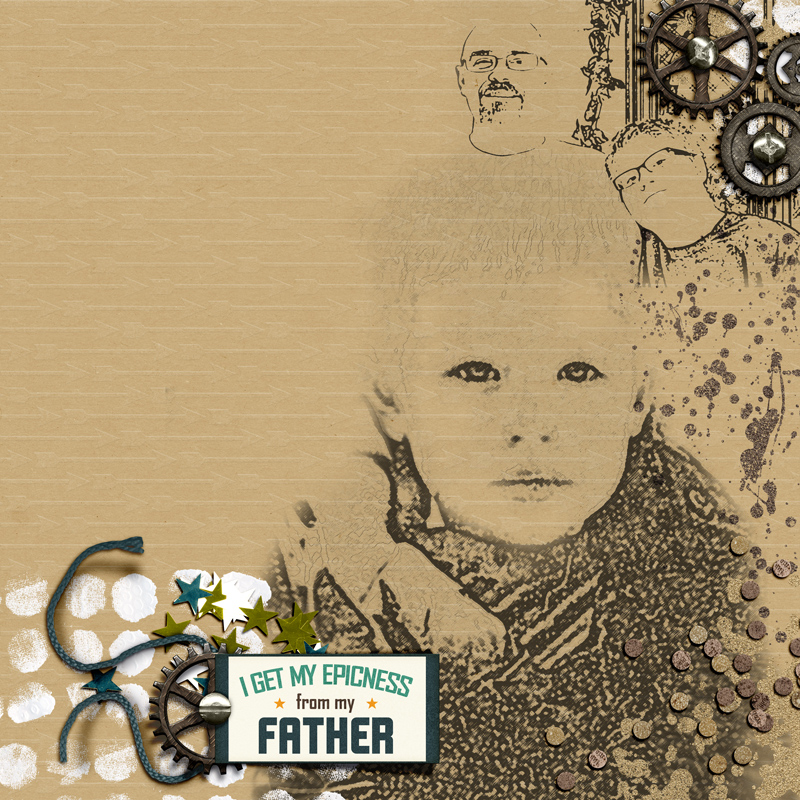
When your happy with your image, it’s time to drag onto to your layout. I’m using Real Life in Pockets: Rad Lab: Elements, Papers & Word Art by Mommyish and Just Jaimee. I’ve chosen an embossed kraft paper to show off my artsy photos. If you’d like your work of art to show the background paper, choose a blending mode like Multiply or Color Burn. Then, reduce the opacity so it blends into the paper.
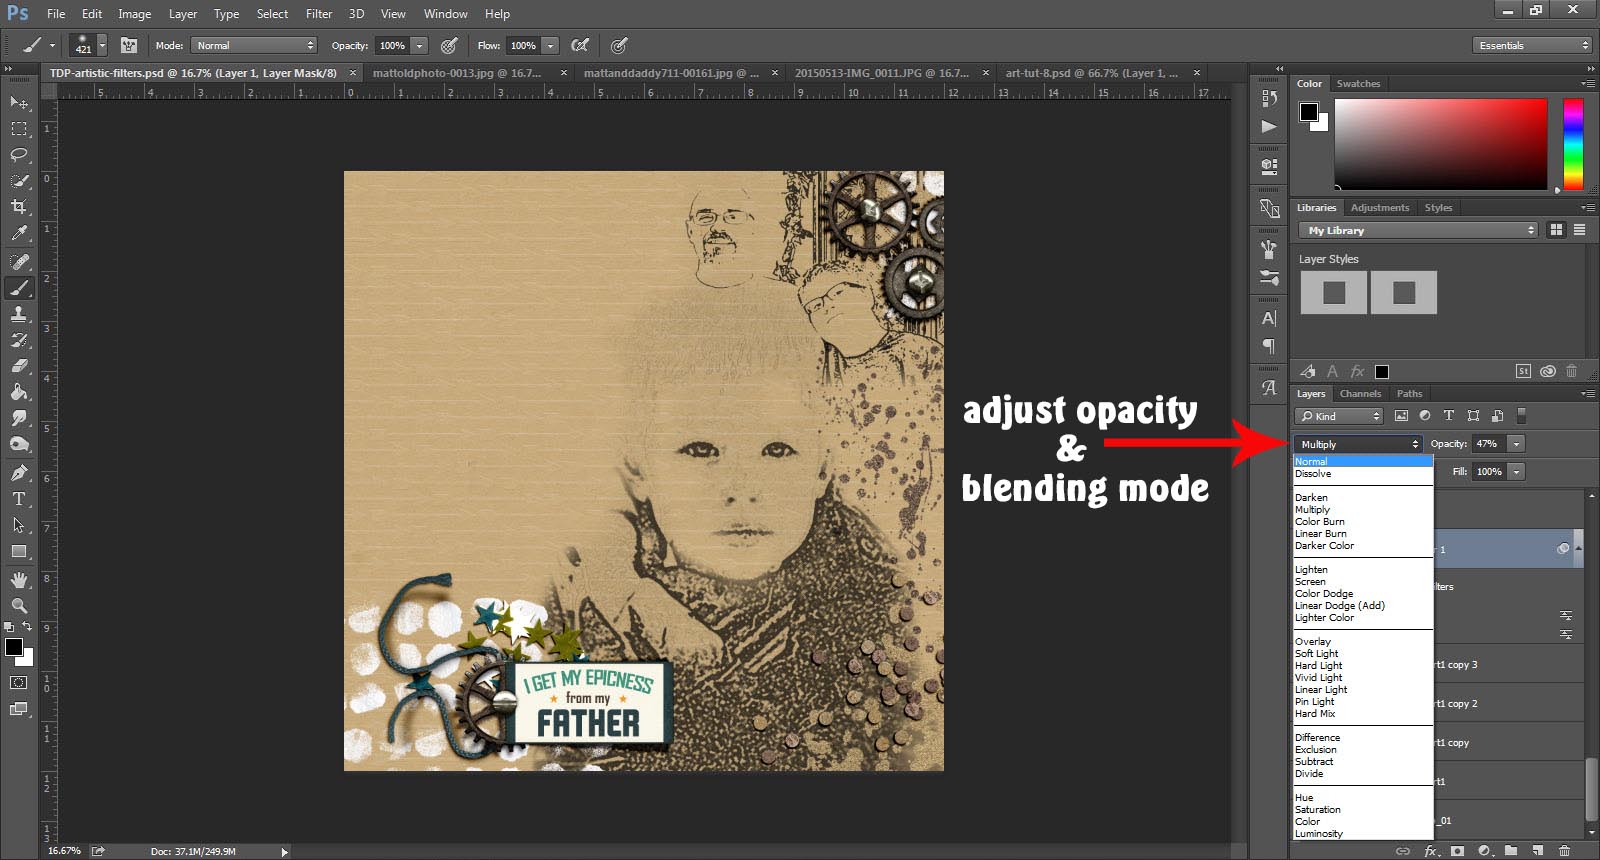
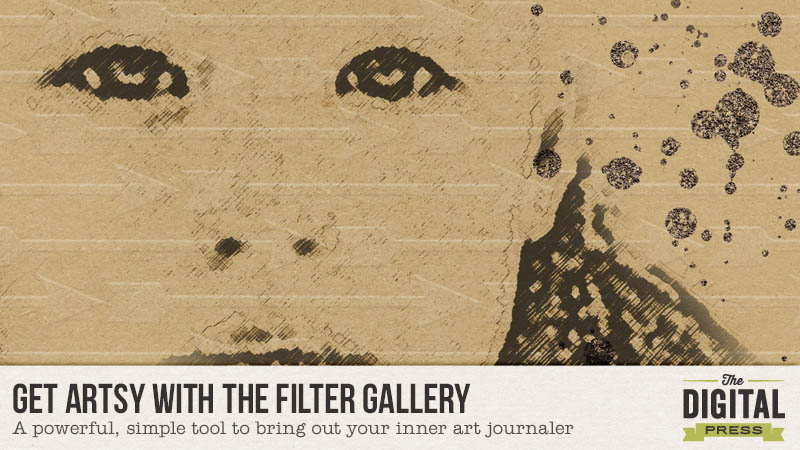
Here’s my finished product:
There you have it: a simple way to get artsy looks on your pages. Now, off to Summer School with you to learn more artsy techniques you can pair with this tutorial.
 About the Author: Carrie is a mom to an ASD teenager and wife to a Chiarian living in coastal Delaware. Currently, the producer and host of The Digiscrap Geek Podcast, Creative Team Lead for Just Jaimee, creative team member at The Digital Press & Get It Scrapped. Carrie’s other passions include genealogy and family history, beating your husbands and sons at Call of Duty, binge watching TV shows on Netflix, visiting the beach, reading, doting on her cats, making cards with digital products and front porch chats with her neighbors.
Thank you – I enjoy the tutorials; learning all the time something new ♥
thanks for the great tutorial!