Hello everyone. Hope you are all enjoying the sun and the fabulous summer school here at the Digital Press. I have been following all the lessons and there have been so many useful tips and tricks that I have noted down to try on!
In line with the Art Journaling week, I thought about sharing some techniques I use with masks. Now masks can seem a little intimidating at first but once you get the hang of them there is no better way to make certain adjustments to your images or layouts non-destructively. These are especially helpful when you might change your mind later, especially as I am prone to!!!
So the first technique is what I use to selectively apply adjustment layers to my photo. Take for example the one below. It was taken against a very bright background but my daughter’s face and body are a little dark. I especially want to bring out the little light rays filtering on to her face. So ideally I would like to brighten only her face a bit and not the whole picture. I use Photoshop Elements but these steps should be fairly simple to replicate in Photoshop as well.
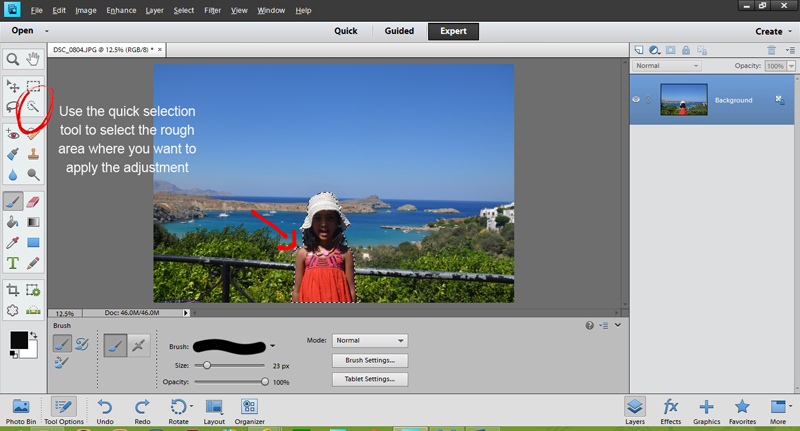
The first thing I do is use the quick selection tool to roughly select the portion to which I will apply the adjustment layer.
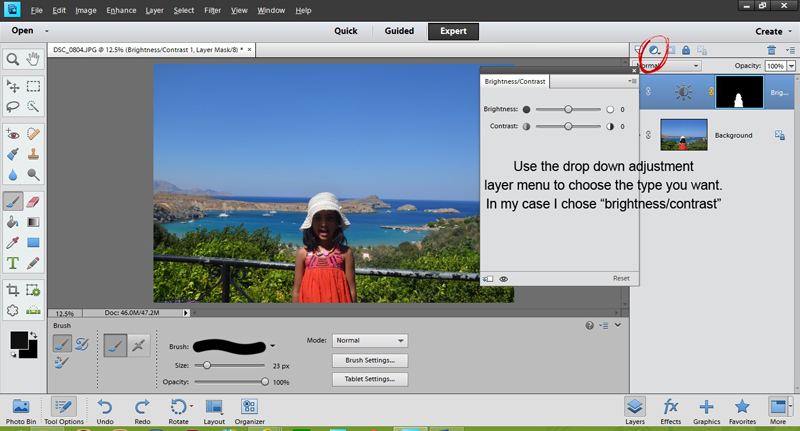
Next from the adjustment layer drop down list choose the adjustment you would like to apply. In my case I chose the “brightness and contrast” . You will see a layer mask appear with the selected portion in white and rest in black. That is the thumb rule when using masks – white reveals and black conceals. This also means any fine tuning we do on this layer will only apply to selected portion. Before doing this, however, you can also further refine the selection by using black or white brushes but make sure you have the right layer i.e. mask layer selected and not the background photo.
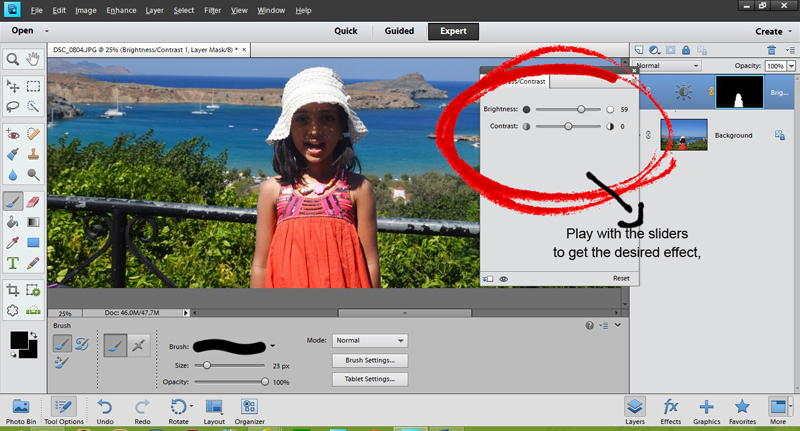
That is most of the work done! Now play with the brightness and contrast till you are satisfied and voila there is a little more light and colour on that face!
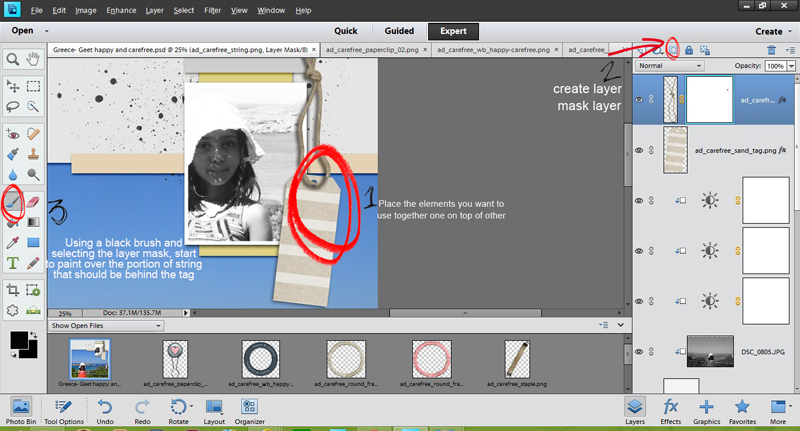
The second technique I want to share is for realistic element placement on the layout. For example if you are using a paper clip on a stack of papers or a thread looping through a bead or button or some such element. Now the idea is that certain portion of the clip or thread should be visible and others hidden. Using layer masks again helps us do that in a non-destructive and stress free way!
In the same layout, I have now added a tag and a closed loop string. What I want is for the string to loop through the little hole on the tag.
1. First place your elements one on top of the other.
2. Now select a layer mask to apply to the string layer
3. Use a black brush and start erasing portions of string that you want to hide. You may want to zoom in to do this step.
We are nearly there ! But there is still the erased string’s shadow left which is looking quite odd indeed. To edit this, simply place the string’s shadow on a separate layer and follow steps 2 and 3 again.
I added a few more rings to that string and here is the final layout.
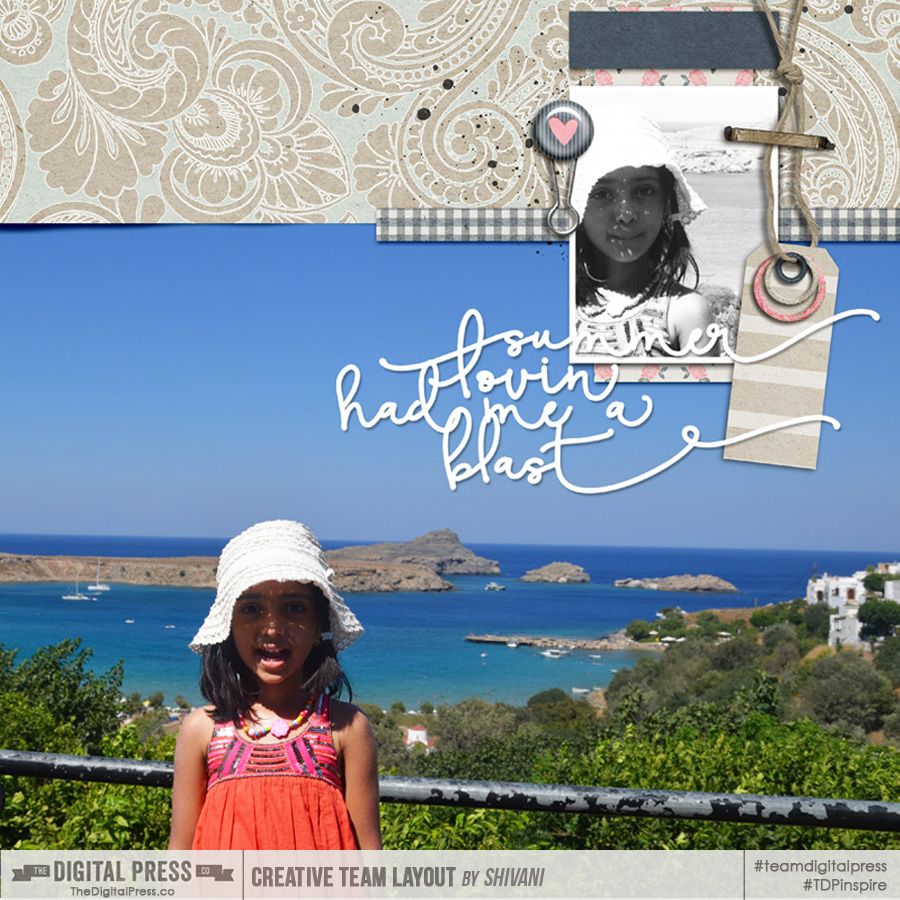
Hope you found these tips useful and I would love to see any layouts created using these techniques. So please do not hesitate to share or any other techniques you use to get the same effects.
![]()
About the author: Shivani Sohal is a donner of many alter-egos. A finance professional by day in busy London, she morphs into a seemingly normal mum of two in the evenings and weekends. She is constantly found with her fingers in too many pies and juggling the metaphorical balls. That is living on the edge for her; aided by the two ankle biters and a darling hubby who define the warm and mushy for her. She is ferociously dedicated to memory keeping – almost immune to any nay-sayers (or equally disruptive crying children or annoying house fires!!!);keeping her head down and forging ahead at all times.