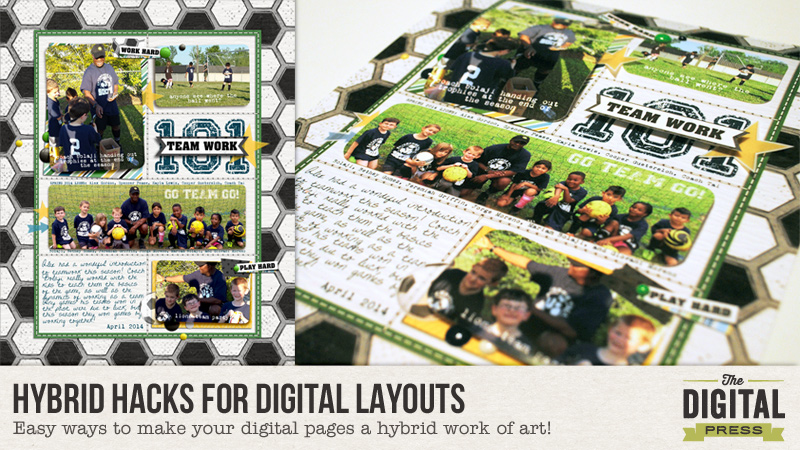
Hello and happy Saturday! Arielle here, getting all “hybrid~y” today, as I show some techniques for turning digital layouts into hybrid. Sometimes I think certain layouts are far too awesome to be stuck in an album – they should be featured on my walls or given as gifts. But I like to jazz them up a little before I stick them in a frame!
Today I will show you two hybrid layouts based on this all digital layout, and show you some of my fail-proof tips for adding just the perfect amount of pop!
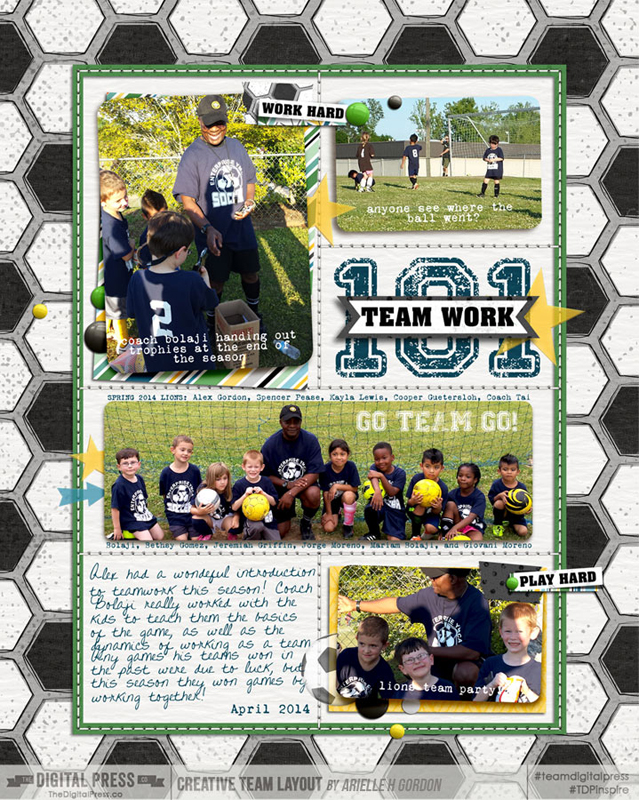
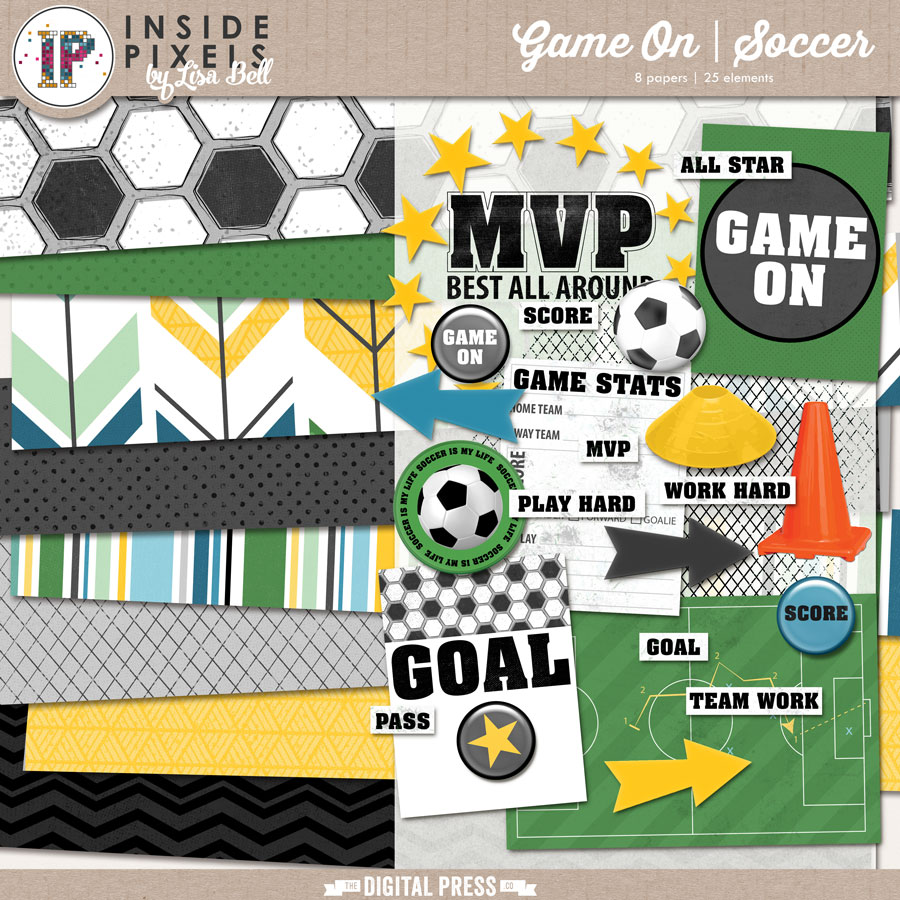
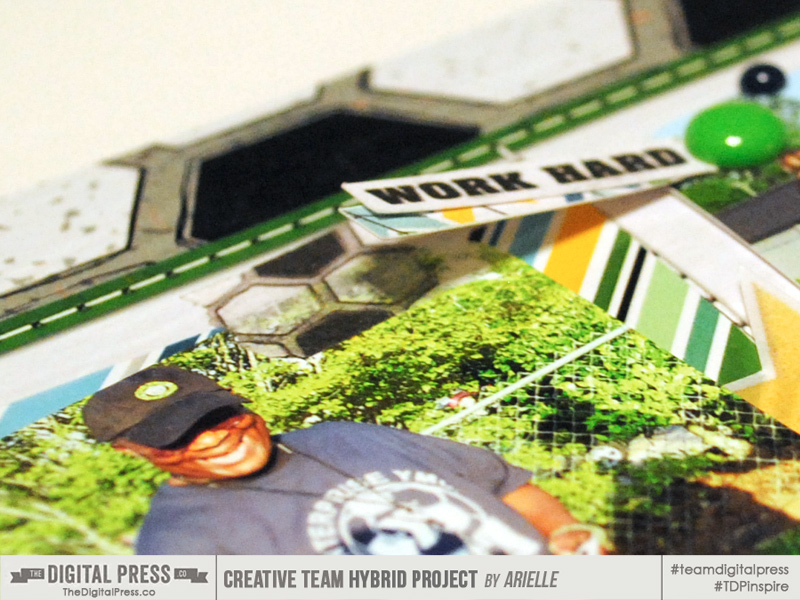
It’s great if you already have a layout you’d like to use, but if not, you can certainly start from scratch! Alex loved this layout so much, that I decided to “hybrid~ize” it for his room. I used the kit Game On by Inside Pixels by Lisa Bell. What a great soccer kit for boys! (She needs to do one for gals, doesn’t she? wink, wink!)
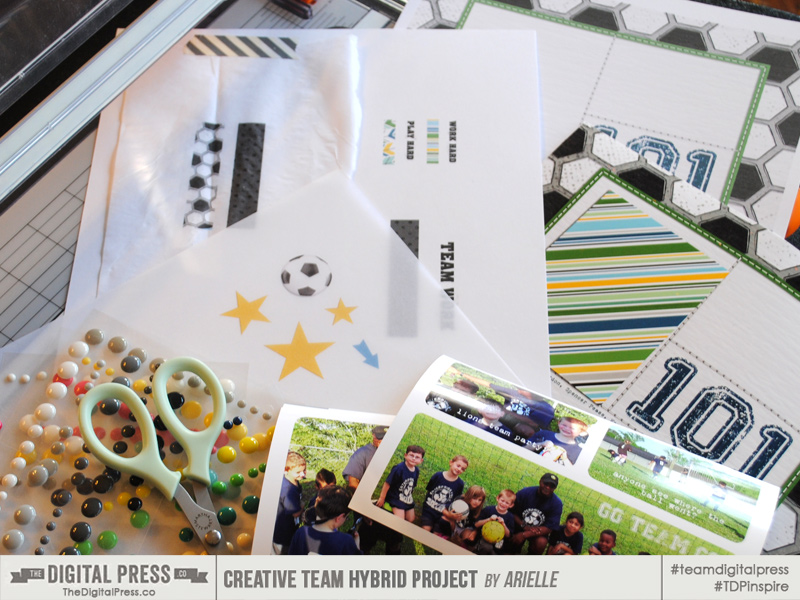
When you know what you’re using, gather your crafty supplies! I used:
- Thin cardstock
- Tissue , vellum, and other assorted papers
- Adhesives (I used a Xyron machine, ATG gun & dimensionals)
- Scissors and paper trimmer
- Other embellishments such as enamel dots or buttons.
- photos
- layout base
When I do a hybrid layout, I always start with creating the digital layout. That one’s for the albums. Then I decide what the base of my layout will be. Either printed on 8.5×11″ at home or on photo paper. I did one of each for this layout.
The pros for paper are:
- You can write, stamp, paint without destroying it
- You can print it at home
- Much cheaper
The pros for photo are:
- Colors are more vivid
- Is nice and glossy
- Lasts longer, perhaps?
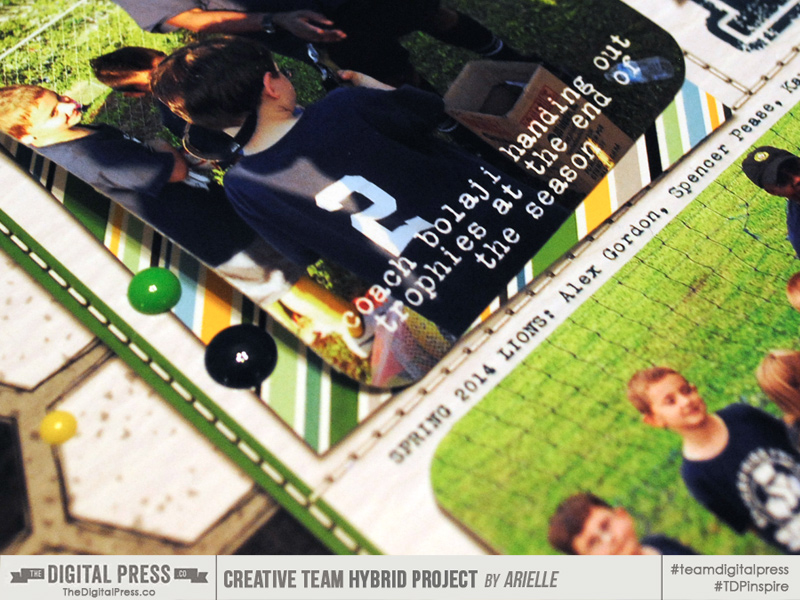
First up is the paper based layout. I decide before I print, what layers/elements I will leave, and what I will print separately and add on. For this, all the elements, photos and the two paper layers under the photos were removed (the text remained, along with the stitching and the frame and background soccer paper) from the digital layout before printing. Then everything was printed and adhered back on.
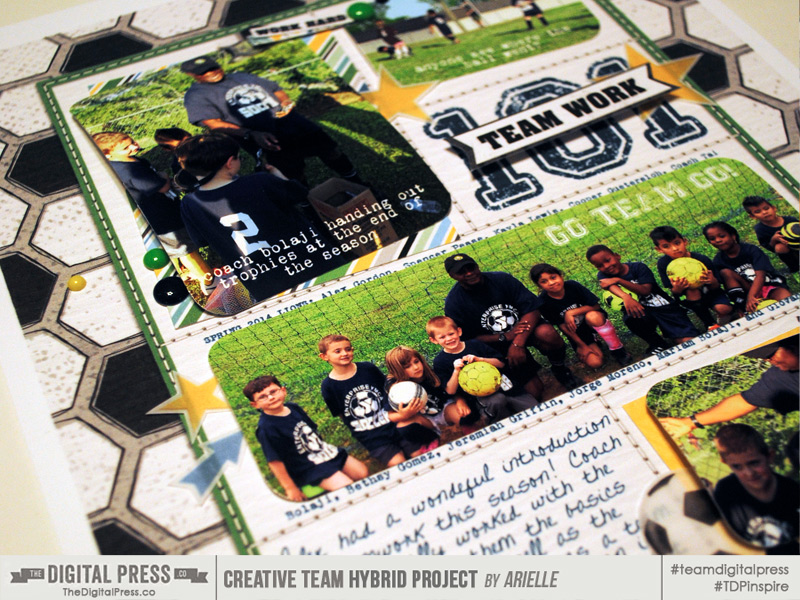
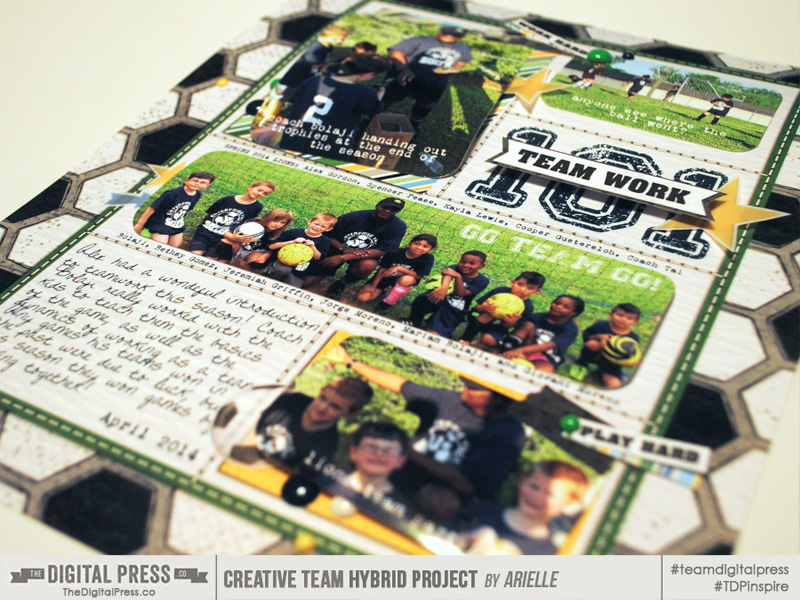
This one is an 8×10″ photo base. I printed this exactly the same, except I also left the two papers that are layered under the photos. (That way, I know those paper will match up, and save me a little time.) They are all shadowed, too. You can’t tell too much of a difference between the two layouts in these photos, but I love the look of the one with the photo base, the shadows really pop!
Now onto the fun stuff!
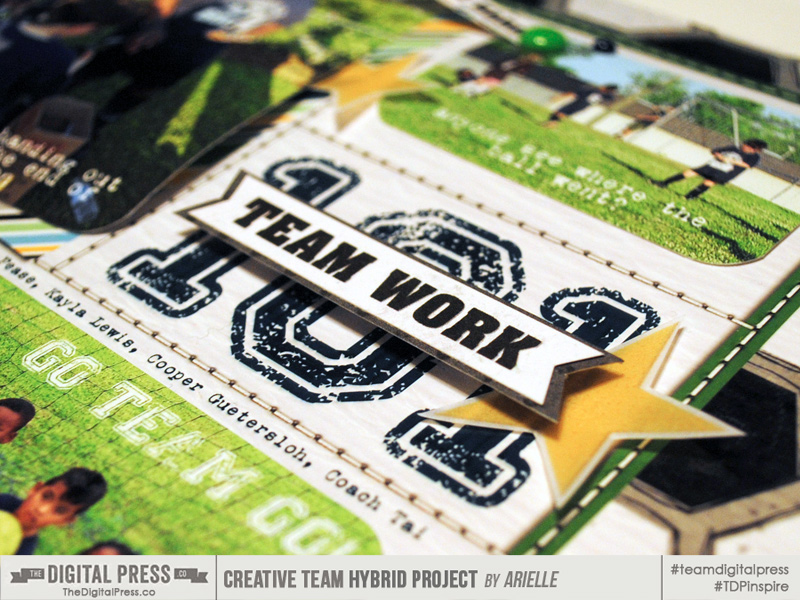
HACK ONE – POP IT UP!
Adding a little bit of height is a great way to jazz up your hybrid layout… it will also create more interesting shadows! You can use a thin dimensional – say 1/8″ or so, and it will still fit in a regular frame. But not much more than two additional layers above the base, otherwise it will get a squashed look. (Of course, if you’re putting it in a shadow box – go crazy with the layers!)
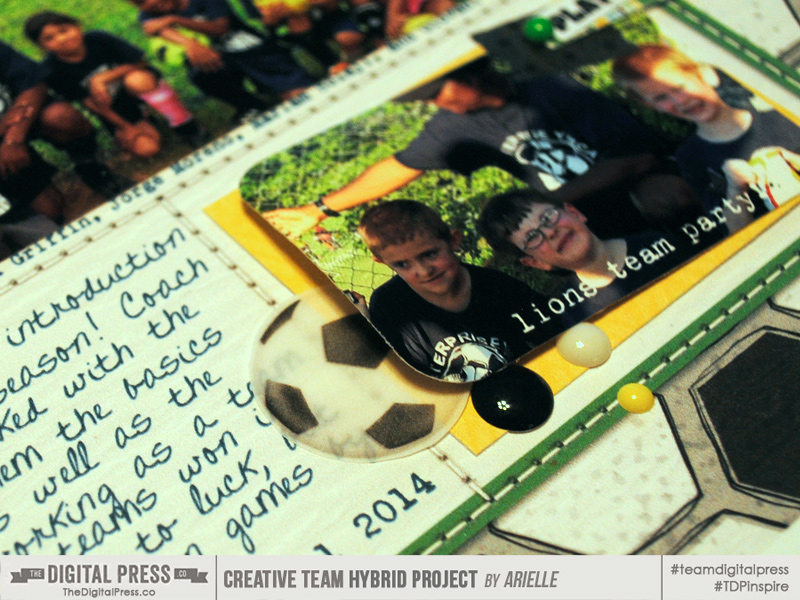
HACK TWO – PRINT ON VELLUM
You can easily add some pop by printing on vellum! It’s so fun to get a little peek of what’s underneath the vellum, it’s a classy little hack! (After I printed the vellum stars, arrow and soccer ball, I put a few of them in my palm, one at a time with the image up, and pressed into the middle of it a little, so it wouldn’t sit so flat on my layout.)
HACK THREE: PRINT ON TISSUE PAPER
Last month on the blog, I showed off a technique for making your own washi. (In this post) I made a couple small pieces and you can see one below. Yes, it may sound like a lot of trouble, but they do match the kit – LOL! I loved this soccer ball pattern! But you could always use any washi you have!
HACK FOUR: ADD EASY LITTLE DETAILS
I love adding buttons or enamel dots to hybrid layouts. Or paint, glitter and stiching. It’s fun to shake up the whole paper thing with some actual hardware ~ to me it creates a Trompe-l’œil effect. It’s interesting to see people trying to figure out what is real and what’s printed. (Text or overlays on photos is another great detail, too.)
Now it’s your turn! Want to try your hand at a hybrid layout? It can be as easy and as simple as you want it to be! Please come join us in The Digital Press’s forum for a fun challenge related to this tutorial! You can create an amazing item for yourself or someone you love AND earn points doing it! Points can later be cashed-in for discount coupons to the shop at the end of the month if you participate in the challenge system at The Digital Press!
 About the author Arielle H Gordon is a wife and mom of two crazy kiddos, ages 6 & 7. She moved around (a lot!) before returning to settle down in her hometown of Enterprise, Alabama, to marry her sweetheart and start her family. She is an avid crafter — digital, hybrid and otherwise! She LOVES Jesus, family time, camping, gardening, reading cozy mysteries, hot tea, popcorn, and anything on the BBC! This time of year, you’ll find her gardening, gearing up for summer and reading like it’s going out of style (while sipping sweet tea!)…
This is SUPER Arielle!!! I love all the extras. What type of sewing machine did you do the stitching with? Thanks so much for sharing!
Thank you! The stitches are all digital, Tanya! I find using digital stitches keeps them straighter – LOL!
Arielle this is SO great! I love what you did with my kit. I do need to make a girl one. Thanks for the suggestion. Love the vellum suggestion, I had never thought of that.
Fabulous layout! I love the colors and patterns you chose.