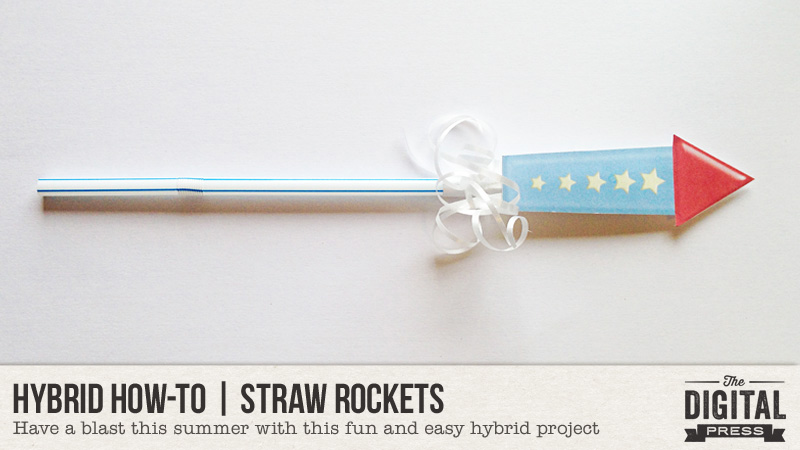
Are you ready for something fun and easy? I found this simple project on Pinterest, and knew it would be the perfect way for my littles to spend a summer afternoon.
Supplies Needed:
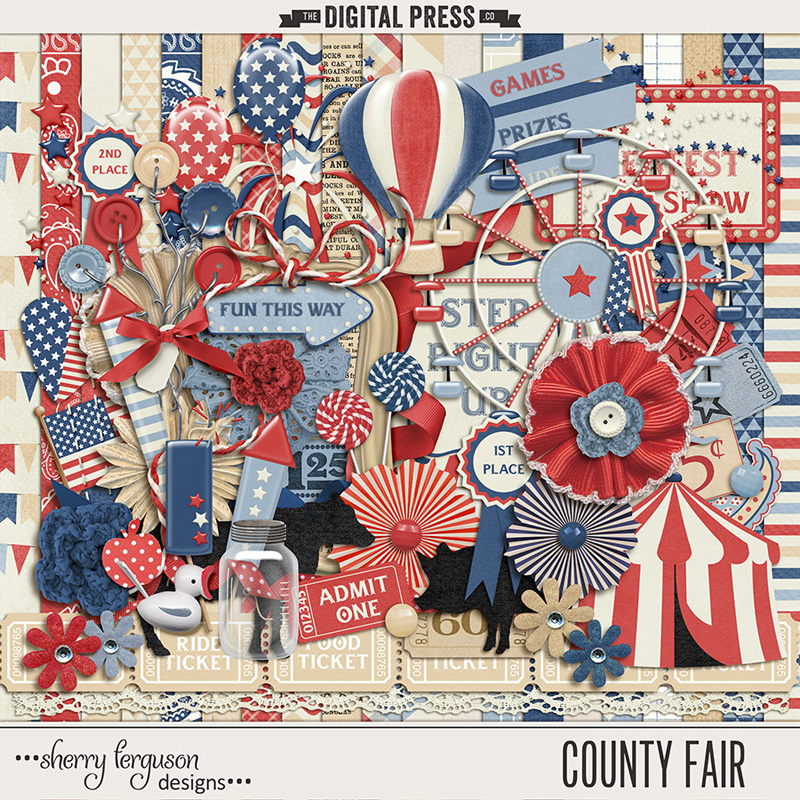
- Digital image of your choice (I used the rocket from County Fair, seen below)
- Cardstock
- Scissors
- Hot Glue
- Curling ribbon (optional)
- Straw
Directions:
- Print out the image you want and cut it out. Before printing, make sure the image is the size you want. It shouldn’t be too small; I actually ended up making the rocket from the kit a little bit bigger.
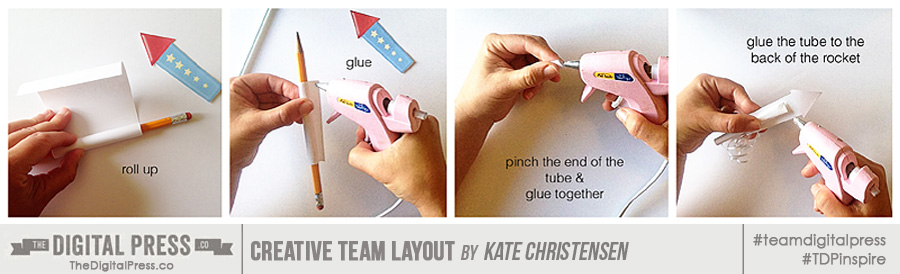
- Next, cut a rectangle of out of plain paper (I just used some scratch paper). It needs to be a little longer than your image.
- Roll the rectangle paper around a pencil and glue the edge together to form a tube. Pinch one end of the tube and glue together so that the end is sealed. At this point, I decided to glue some curling ribbon to the bottom of my rocket. Next, glue the tube to the back of the image.
And that’s it!
Now you can slide the tube over the top of the straw… and blow to make it fly. 🙂

About the Author Kate is on the hybrid team here at The Digital Press. She lives on the Utah/Colorado border with her husband, 5 kids, 10 chickens, and a dog named Gracie. She’s a city-born girl who found she’s really a country girl at heart. She can be found outside, barefoot, and probably in her garden.
Such a fun craft for little ones. I can just see these flying every where during the 4th of July celebration.
Another fun way to use one of my all time favorite kits by Sherry! Thanks for sharing this!