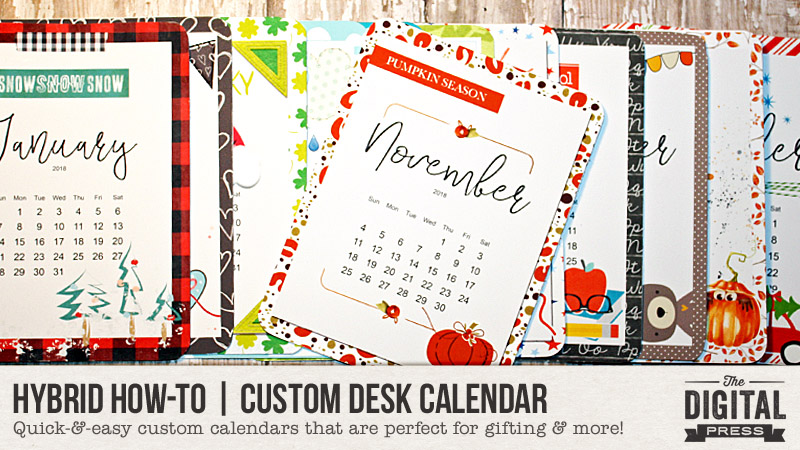
Hello everyone! It’s Tanya here, and I’m excited to share another Hybrid How-To post here on The Digital Press blog! Today I’m going to show you how to use digital scrapbooking supplies to create adorable desk calendars that are perfect for holiday gifting and more!
Every year since I’ve been hybrid crafting, I have wanted to create a cute desk calendar using digital kits. I’ve been at this for a while now, and so it’s been a long time coming… 😉
The minute I saw Dunia Designs’ new 2018 calendar cards in the shop, I told myself…“That’s it! The time is NOW!” It’s also the perfect time to get started on my Christmas gifts (can you guess what everyone is getting this year?!).
Supplies Needed:
- Digital kit(s) of your choice (the kits I used are shown in the image, below)
- Pre-designed calendar cards or pages (optional; you could also make your own while working… I used Dunia’s, linked above)
- Printer
- White cardstock (& solid coordinating colors for layering, if desired)
- Paper trimmer
- Corner punch
- Display for your calendar
Here’s a quick peek at the six kits that I chose to use for the first half of the year (based on the fact that I decided to pick a different kit for each month; something that corresponds with that month’s season/theme/holiday/etc.)…
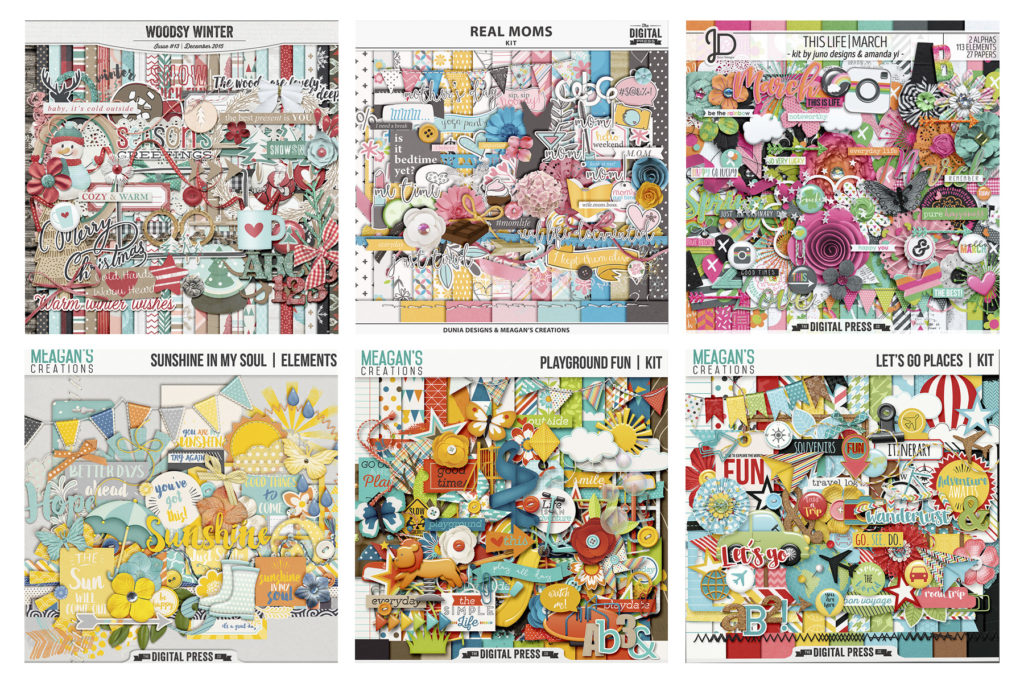
- January – Woodsy Winter
- February – Real Moms Kit by Dunia Designs & Meagan’s Creations
- March – This Life | March kit by Juno Designs
- April – Sunshine In My Soul | Elements by Meagan’s Creations
- May – Playground Fun | Kit by Meagan’s Creations
- June – Let’s Go Places | Kit by Meagan’s Creations
Additionally, here are the 6 kits I chose to use for the final half of the year…
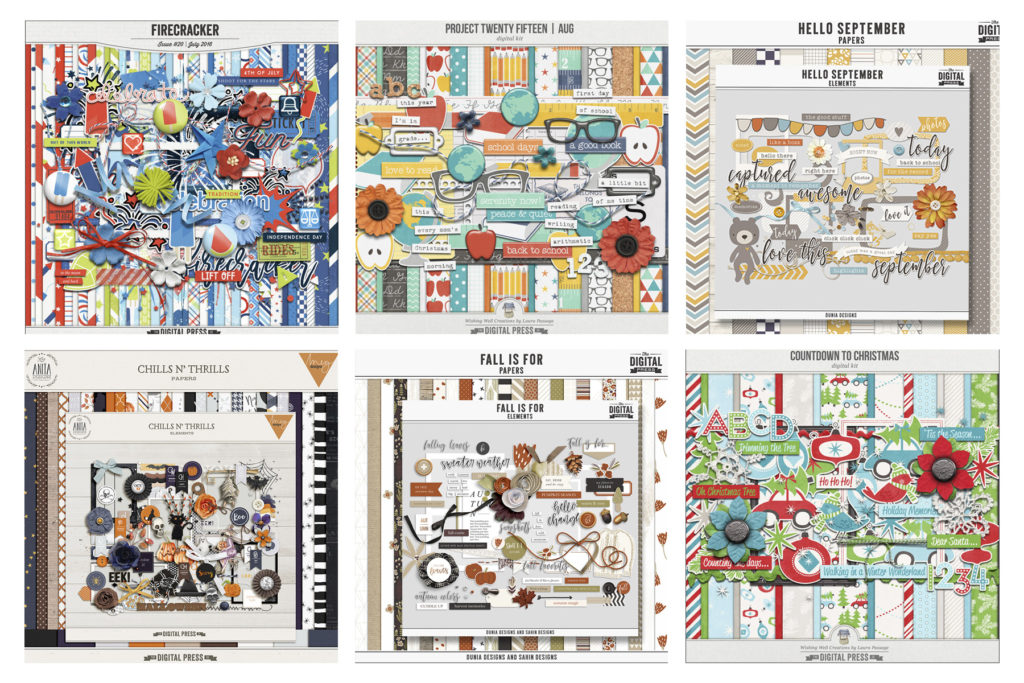
- July – Firecracker a Digital Press Collab
- August – Project Twenty Fifteen | Aug by Laura Passage
- September – Hello September Elements & Papers by Dunia Designs
- October – Chills N’ Thrills by Anita Designs and Meg Designs
- November – Fall is For Elements and Paper by Dunia Designs and Sahin Designs
- December – Countdown To Christmas Kit by Laura Passage
If you didn’t want to use a different product for each month (and/or you wanted to use fewer kits in total, etc.)… you could simply choose one overall theme and use that for your calendar (using just one kit… or one color scheme… etc.). That’s the fun thing — it’s all up to you, and there are no rules!
Next, after choosing the products to use, it was time for me to begin designing each of my cards. Here’s what the calendar cards looked like before I began embellishing them…

I used Silhouette Studio to create my cards, but you can you any photo editing software. There is some editing that you can do in other programs that I have not learned to master in Silhouette Studio (for instance, one of those things is shadowing; I’m getting better, but not quite there yet!)…
So, the first step is to drag the calendar and the elements from where you saved them on your computer into the workspace of your software (as shown below). I usually fill my workspace with several elements that I think I might like, that way I don’t have to go back and forth so much later. For the ones you don’t end up using… you can either move them off to the side or delete them…
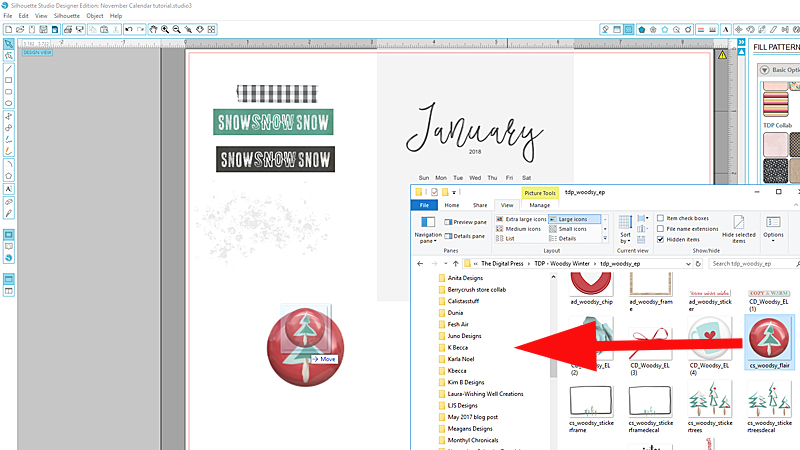
Once the elements were available on my workspace, I started dragging them onto each card and positioning them as desired…
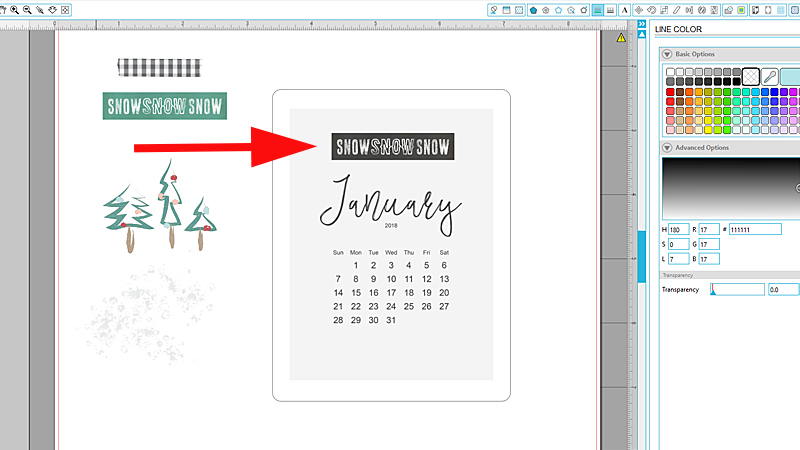
Next, I drew a rectangle around the calendar so as to create a border area. As I designed each card, I was able to add digital papers (as backgrounds/borders) to match each month…
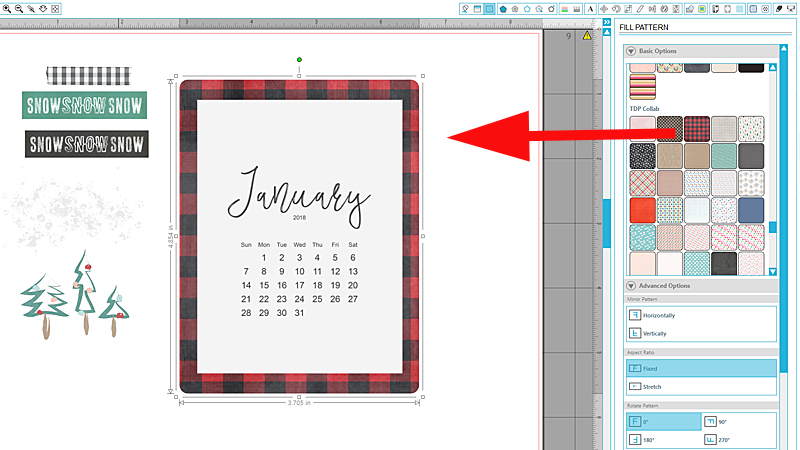
This next step may vary from software program to software program… but once I had all of my elements in place, I chose a background paper from the ‘fill paper’ menu in Silhouette…
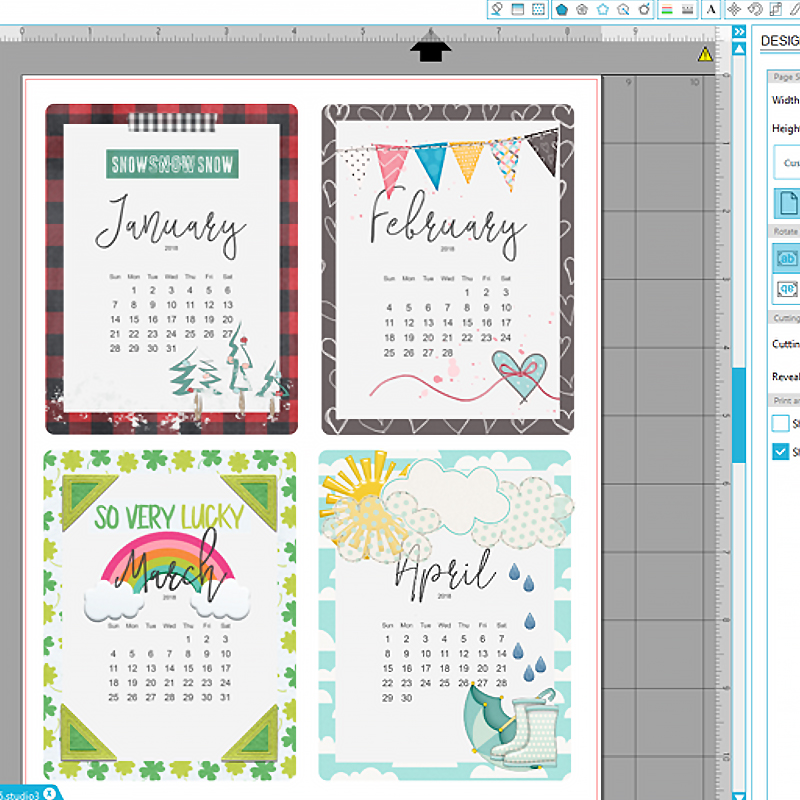
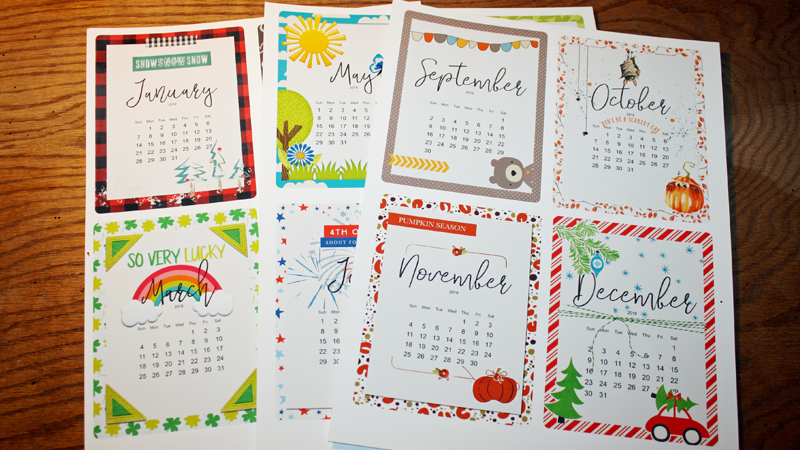
Here’s a look at all of my finished cards, after I was finished designing them in my software program…
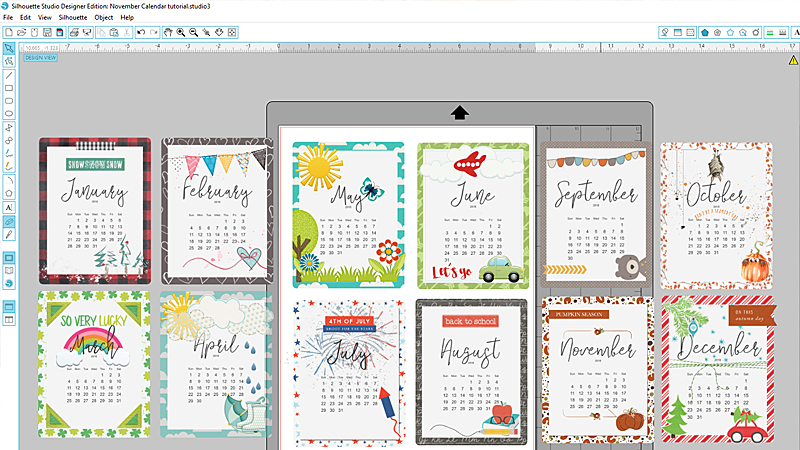
Aren’t these so fun?! I can’t wait to make more! 🙂
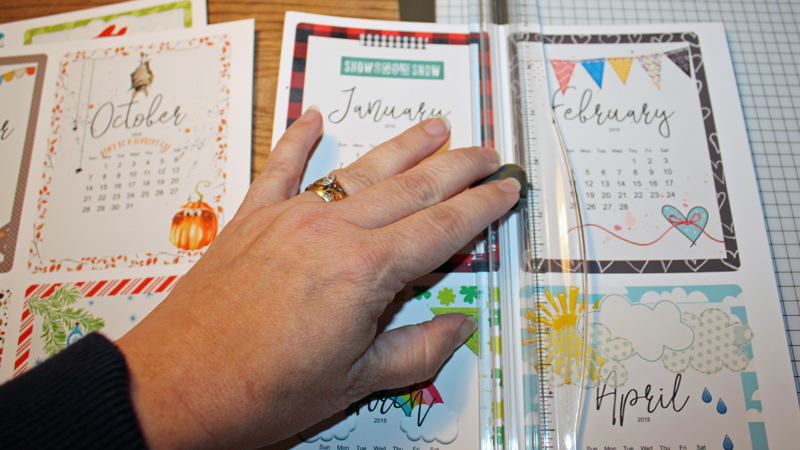
After I had finished designing all of the months/cards in my software, I was ready to print. I found that I was able to fit 4 cards/months to a page when printing…
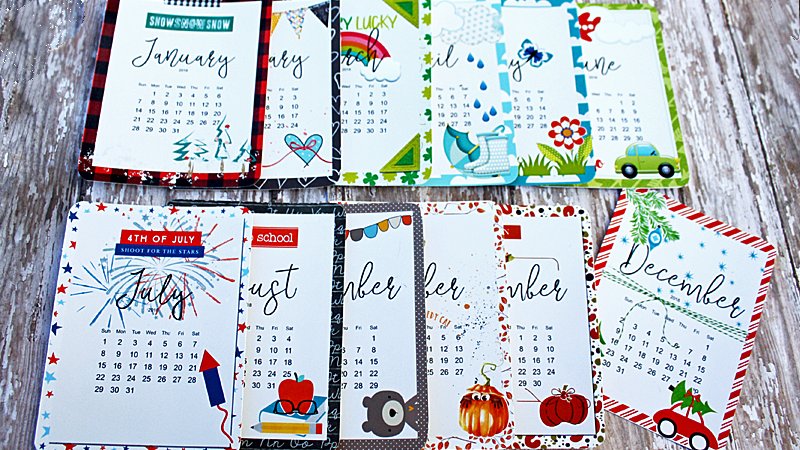
At that point, I used my paper trimmer and cut away the margins. I also used a corner rounder for the corners of the cards…
All cut out and ready to go…
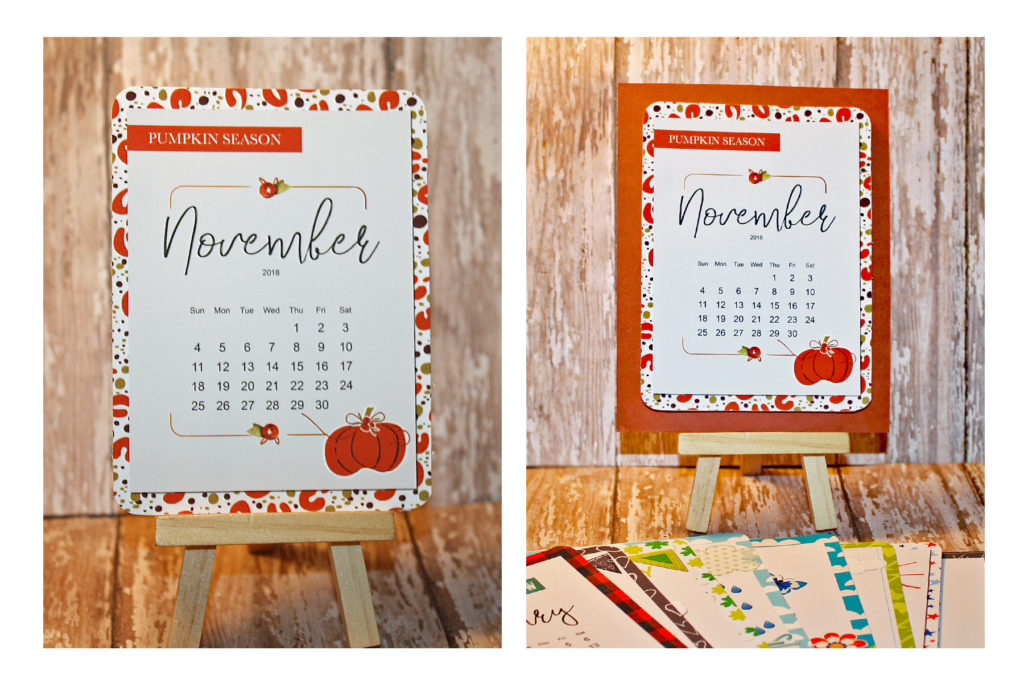
Here are a couple of ways to display the calendar (both are frames; I took the glass out of the black frame)…
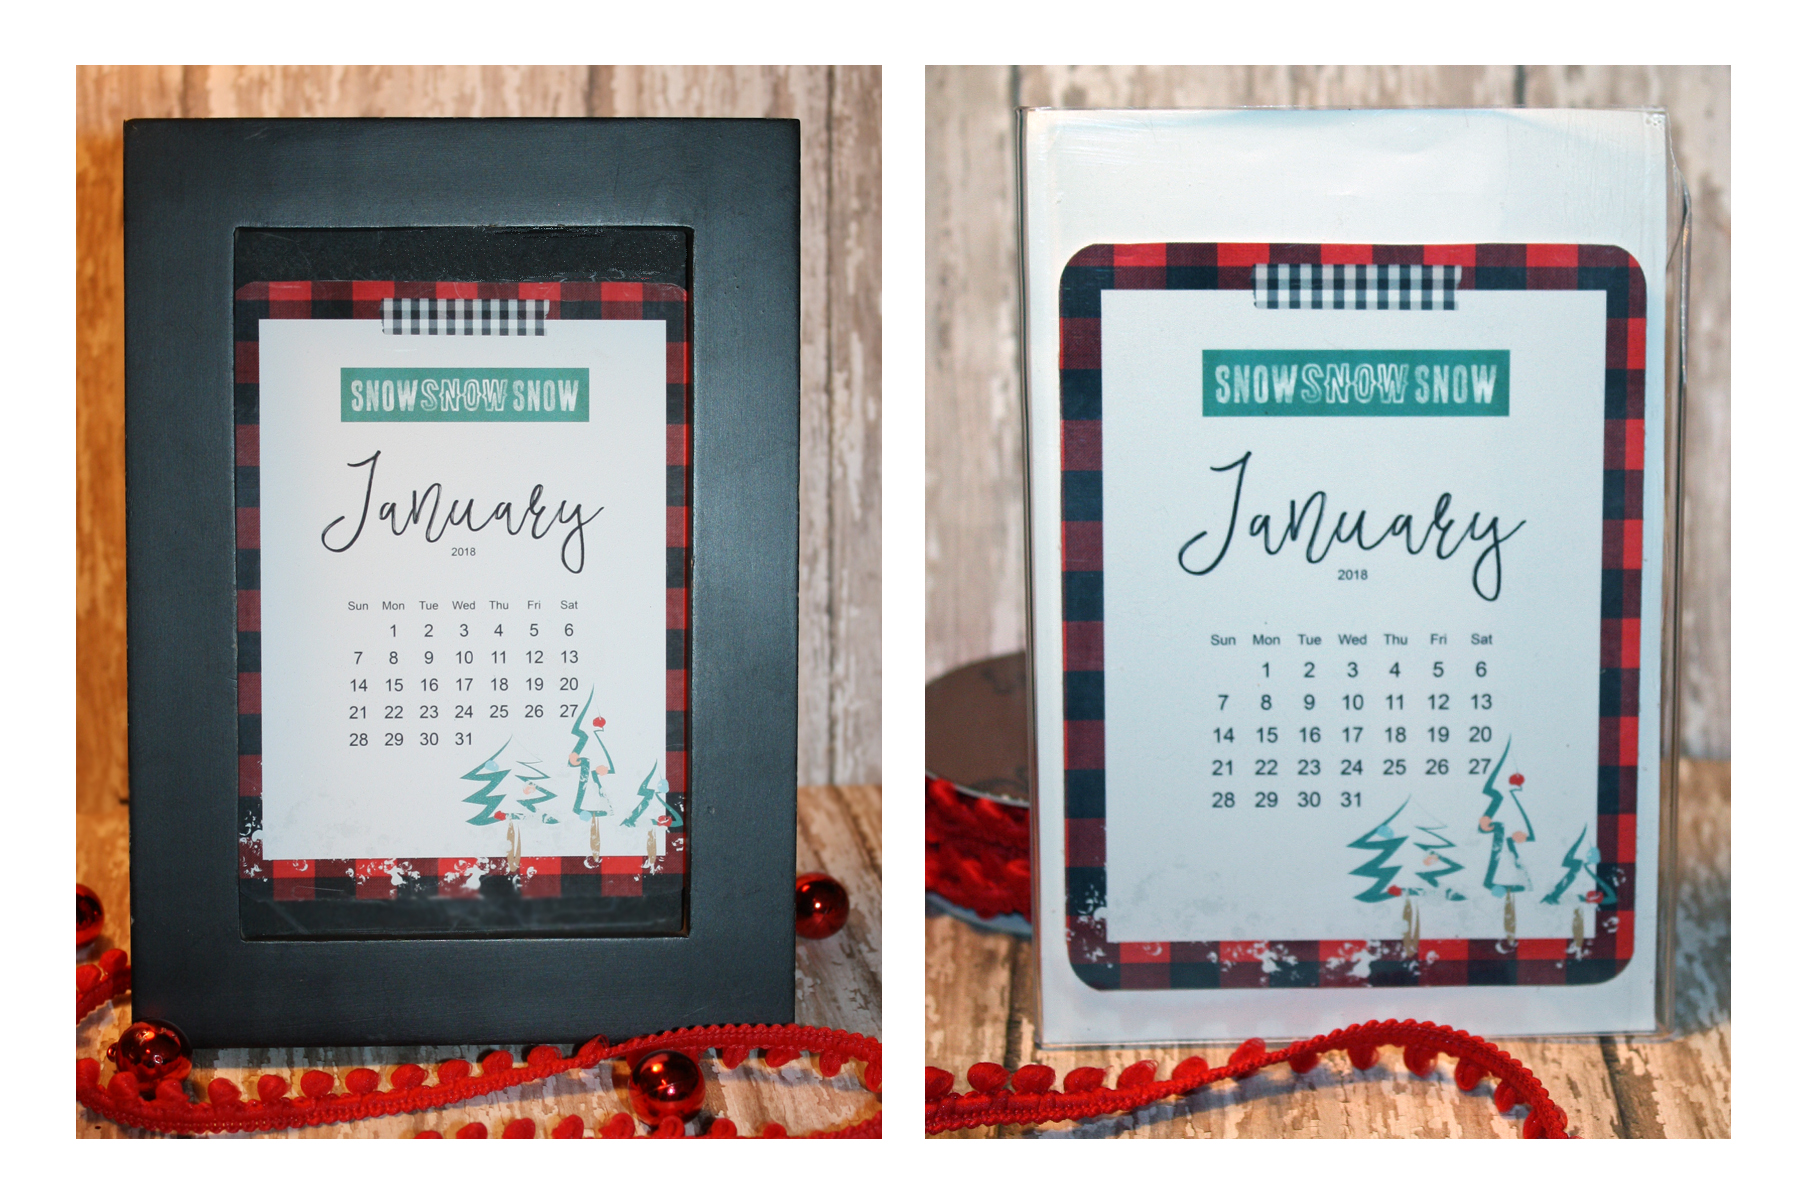
After framing the calendar cards, I decided that I might re-size some of my future batches to fit into a 4 x 6 frame (although, I should note that you should always be very careful about re-sizing things to make them bigger than intended.*
Another idea for displaying the calendar is to add a piece of coordinating cardstock paper as a backing to each card, as shown here…
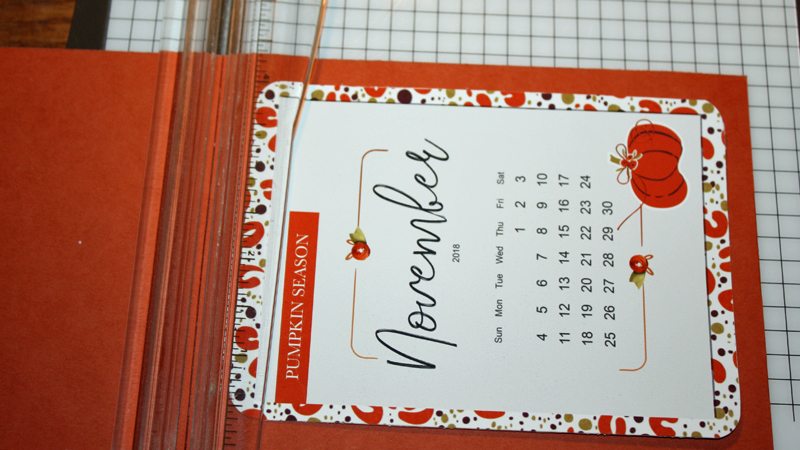
Here’s a look at the same card… one (left) without a cardstock mat behind it, and the other one (right) with a coordinating mat added. It also shows another cute way to display the calendar… a little easel that I found at WalMart in the craft aisle…
Anyway, isn’t this a cute (and quick/easy) project? I can’t wait to make more of these calendars for Christmas gifts! We will be starting a new weekend schedule where I work, and I think I may make each of my co-workers calendars that have the weekends they will be working circled. Oh, the possibilities… can’t wait to get started!
Meanwhile, I cannot believe it’s almost time for Thanksgiving. Happy & Blessed Thanksgiving to everyone. This is such a wonderful time of the year to reflect on how much we have to be grateful for.
I hope that you have enjoyed this edition of Hybrid How-To, and that you will give this a try and come up with one of your own calendars! Don’t forget to visit the CROSSWORD SECTION in The Digital Press forum, and jump into this month’s Hybrid Challenge if you are thinking of trying this project. You can earn points toward discounts & FREEBIES! I hope that you will join in!
*re-sizing digital images downward (to make smaller) is always AOK; re-sizing upward (to make bigger) should always be done carefully and is not usually advised, due to the effect on image quality; print quality can degrade; things can get blurry or pixelated; etc.

About the Author Tanya is a part of the hybrid team here at The Digital Press. She has been hybrid crafting for at least 14 years now, and loves creating and sharing those creations with others. Her all-time favorite tool is her Silhouette Cameo. She has been married for 28 years to her high school sweetheart, Richard and has two sons: Chris, 25 and Chance, 20. She also enjoys crocheting, photography and woodworking.