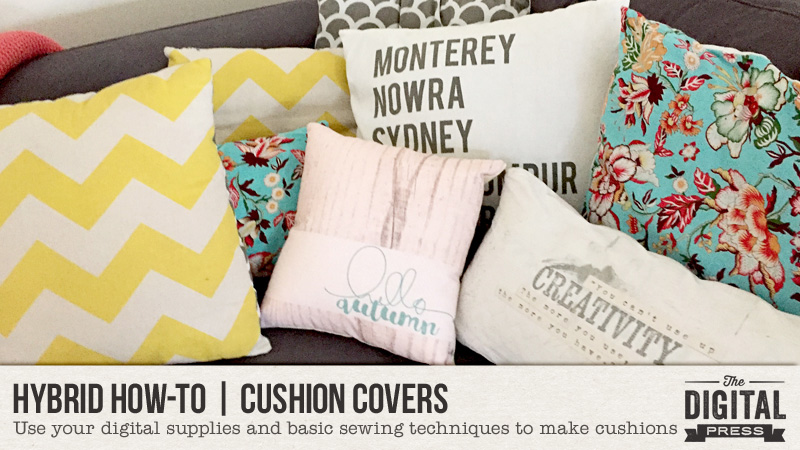
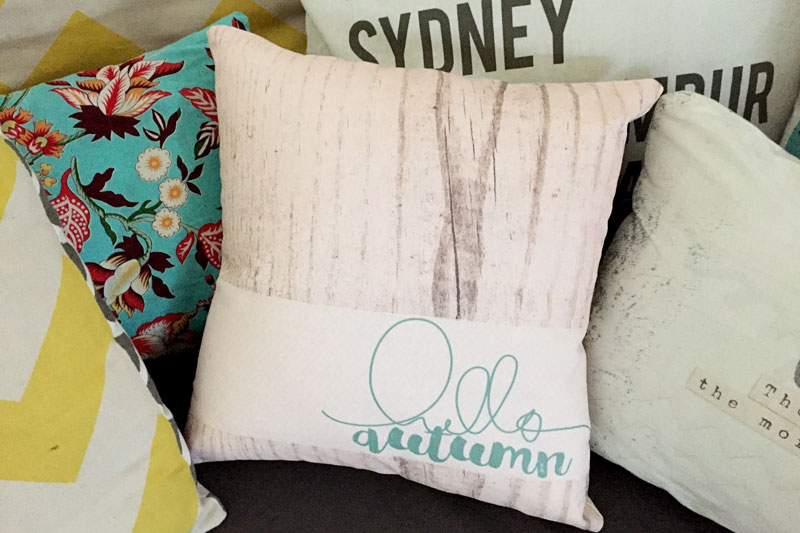
I know most of the world is coming into summer now, but where I live we have the most beautiful autumns and I wanted to make some decor to celebrate that.
I make a lot of my cushion covers; they are so easy to do. Today, I will show you how!
First, I design the cushion cover in Photoshop. My printer prints up to A3, so that’s the size of the page I start with. For this project, I used Grateful Papers by Little Lamm & Co. and Wondrous Stamp Sheet by Karla Noél.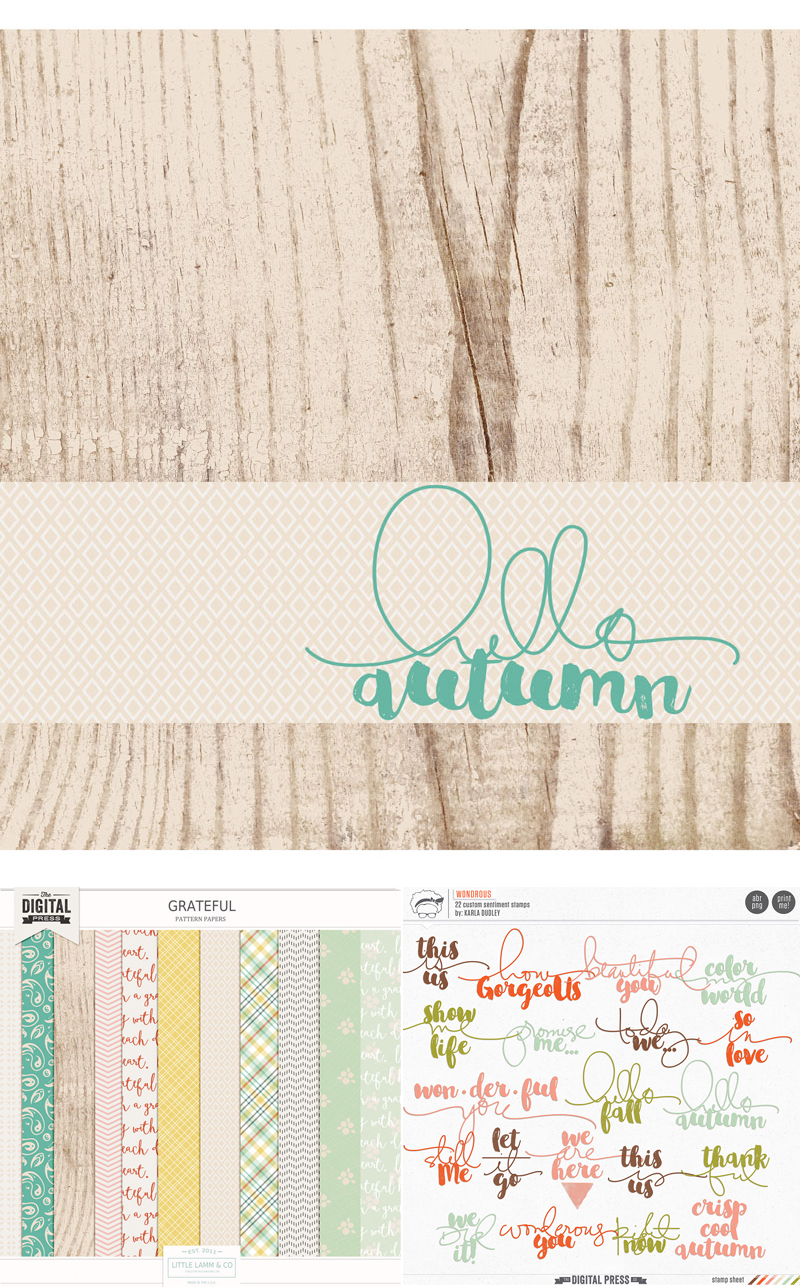
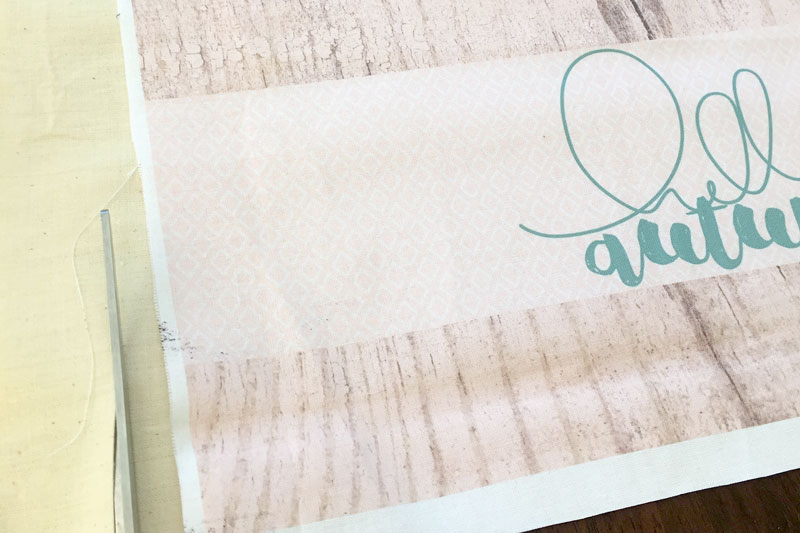
After creating the design, I cut fabric to A3 size. Make sure your fabric is ironed completely flat and stuck to the paper with double sided tape. The top edge should be stuck right to the edge of the paper. Print your design onto the fabric.
*NOTE* The ink will not be colorfast, so if it gets wet… it WILL run. You can use transfer paper if you want your design more colorfast, but I change mine around often, so its not a big deal for me. If mine gets wet, I just make a new one!
You will also need to cut a back for your cushion cover. I purchased a small cushion from IKEA that already had a pattern on it and wanted to make sure the pattern didn’t show through on the front, so I cut an extra piece of calico. Cut them slightly larger than your design to allow room for seams.
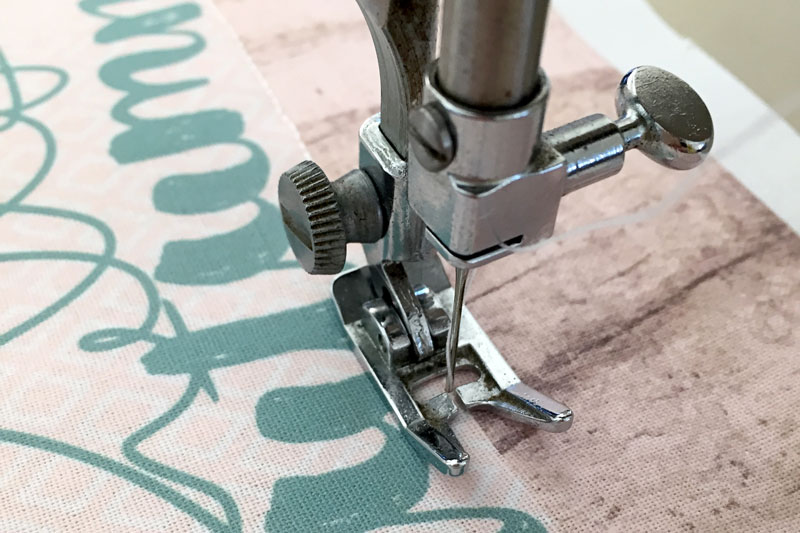
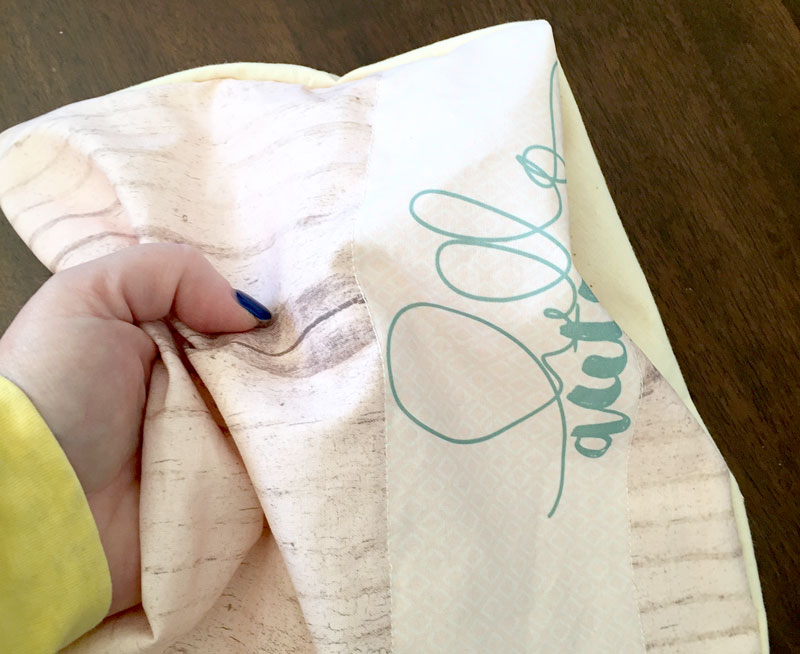
To make my cover look a bit more quilted I decided to sew where the different papers meet. Do this on the front so you can see where you need to sew.
When you are happy with your design, put the ‘right’ sides of your fabric together and sew around the edges, making sure you leave a large enough gap to put the cushion in.
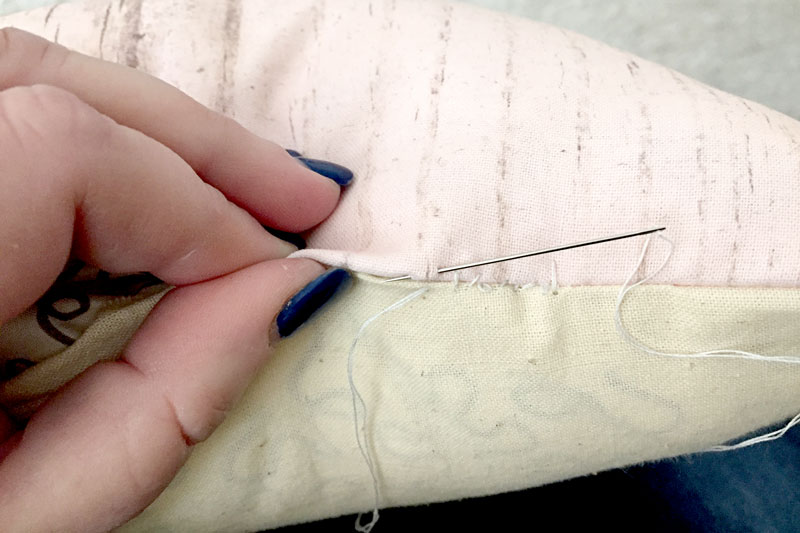
Turn your cover inside out, paying attention to the corners, stuff your cushion inside and hand stitch up the gap.
Voila!

About the Author Amanda found digital scrapbooking in 2006 as a paper scrapper who was frustrated with the limitations of paper scrapping products. She now loves to combine paper and digital products and techniques for her pages and projects. She is the wife of a Naval Officer and has two teenage children. She lives in Australia, and has also lived in the U.S and Malaysia and loves that she has had the opportunity to travel the world with her family.
Amanda, this project is simply amazing!! I did some treat bags one time using printable iron on paper, but I love that this project is bigger. Thanks for sharing!
love your cushions. What type of printer do you have? Can you print this on any type of printer?