
I often say that Photoshop is like our brain: we only use 10% of it. Well, “save for web” is probably one of those features that we don’t put to as good of a use as we should! It’s a simple tip… yet it can change the way you share your pages online!
As is often the case with Photoshop, there are several ways to get to the same end result… so I will simply share my own process (I use PS CS6), but keep in mind it’s definitely not the only process.
First, I always save 3 versions of the same file:
- My original layered file. I used to save it in .PSD format, but I’ve recently switched to .TIF format as they are non-proprietary (hence readable by software other than PS), smaller in file size, and can be previewed in my windows folders.
- The high definition .JPG file. This is the file that I use for printing (at 300dpi).
- The web version. This is a low-resolution .JPG file (72dpi), but it’s still nice and crisp.
When my layout is finished, I save the .TIF file first. Then I flatten it and save the high-resolution .JPG file. Then, I start my “save for web” process.
Here are my “save for web” steps
First, I go to Image>Image size or Alt+Ctl+I and change the resolution to 72 dpi (from the printing resolution of 300 dpi) for screen use, and I re-size the file. The file size/image size settings that I need are different from one gallery to another. The Digital Press gallery allows layouts from 600px to 900px in size (900px preferred), so when I re-size my layout I switch to 900px (because I scrap square layouts, I re-size my file to 900px x 900px). If your page isn’t square, just keep the proportions of your original but make sure the longest side is set to 900px.
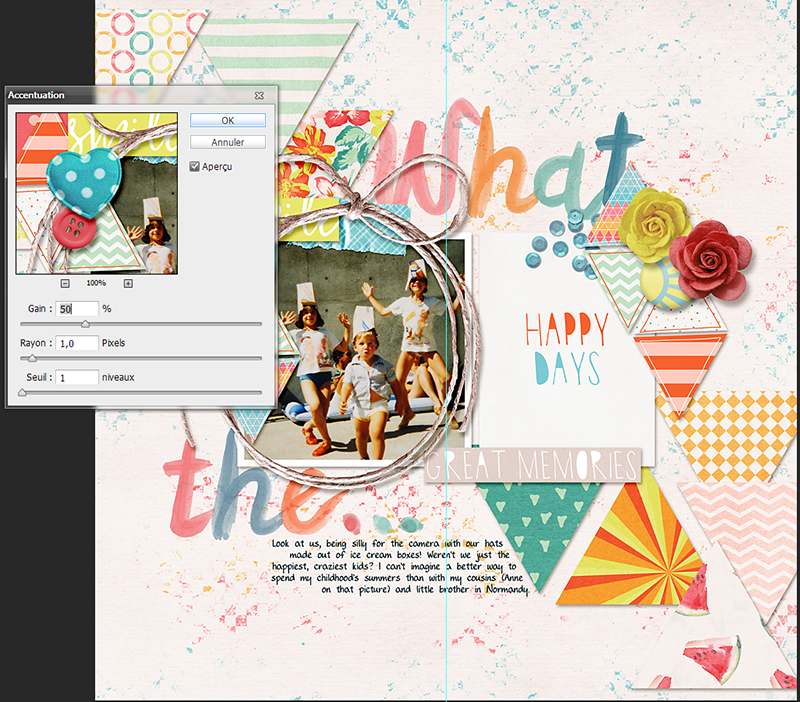
Next, to ensure that my layout looks fantastic when displayed online, my file often needs to be sharpened. Now is the time! Again, there are various ways to do it. I simply use Filter>Sharpen>Accentuation (you could also use Smart Sharpen or a Highpass filter). Here are my settings when I sharpen — but pick whatever suits your own taste and your page, using the preview window to help you…
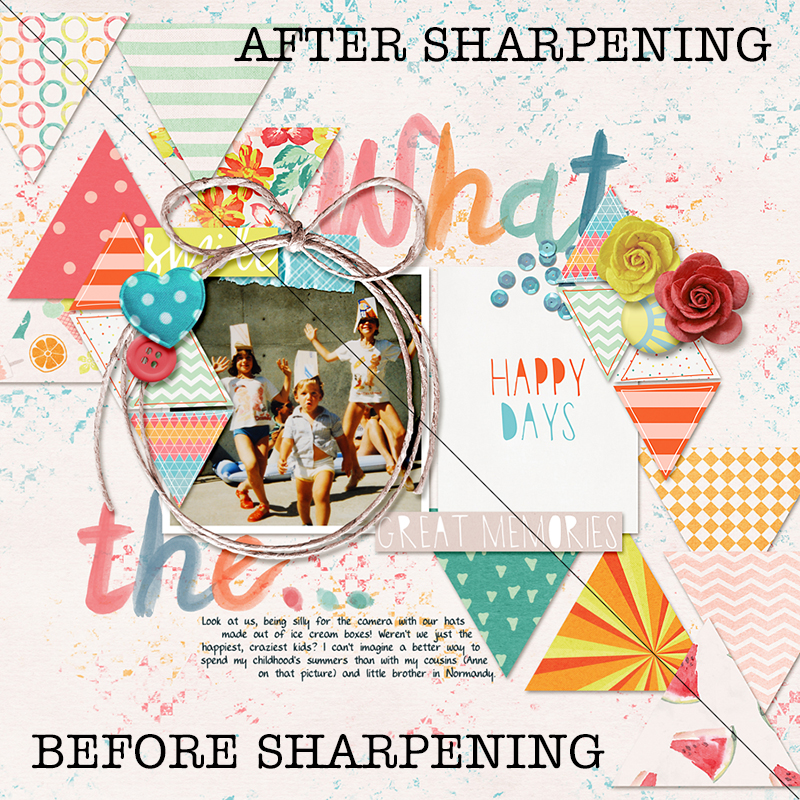
Here’s a small comparison of the before and after of my layout; it’s a subtle difference, but it gives my page a really nice oomph (you can really tell the difference if you look at the string frame… look how nice and sharp it is on the right side)!
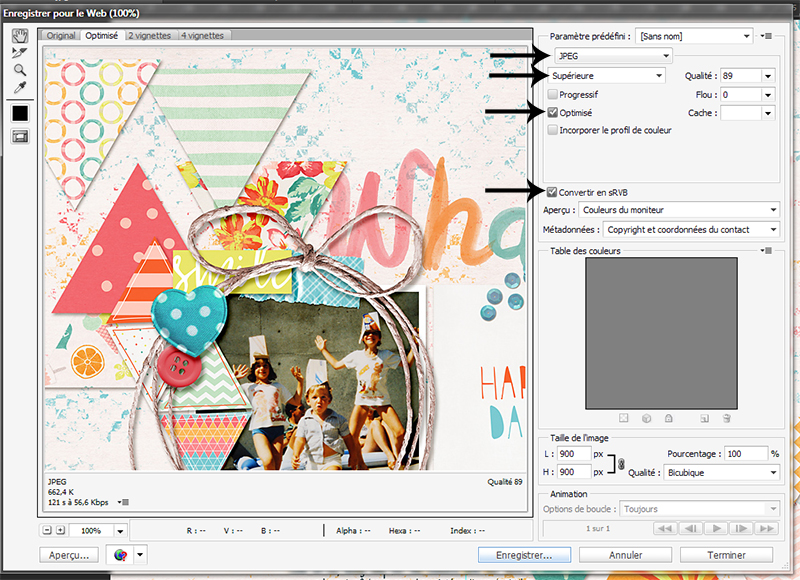
Next, I will save this web version using… wait for it… “save for web” (in the File menu)! Ha! The shortcut in my version of Photoshop is Ctrl+Alt+Caps+S. Then I use the following settings…
I make sure to set a file size limit using the “optimize for image size” option. Here’s where the menu is located, in the top right corner (click the little 3-lines/arrow icon at top right, and you’ll get the following drop-down menu)…
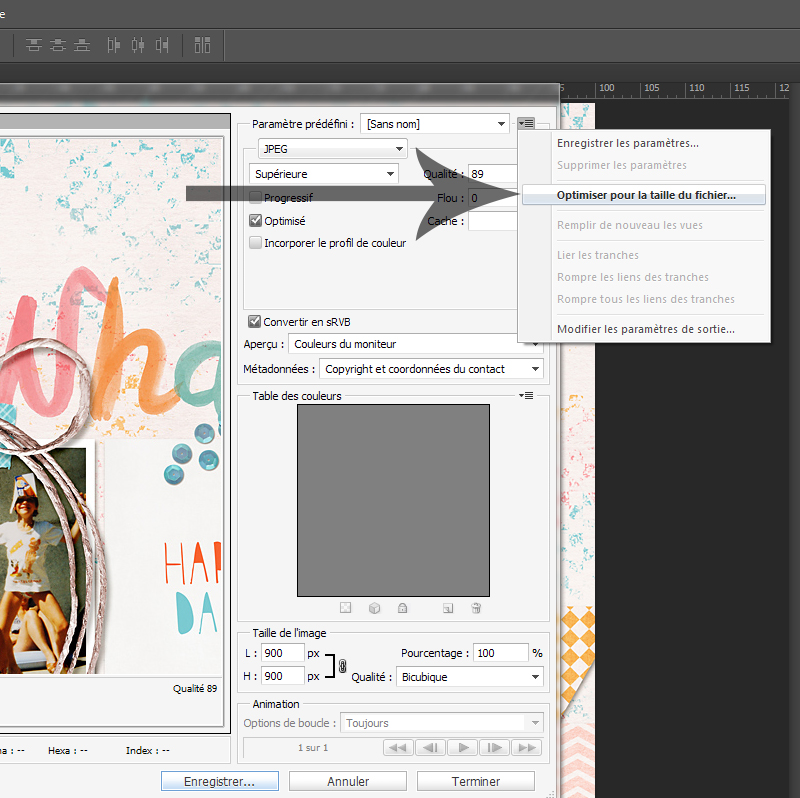
A pop-up window allows me to pick the maximum file size I wish to allow, which I choose according to the online gallery’s requirements/guidelines. In The Digital Press’s case, the max size allowed is 400kb — so I could increase the 350 you see in the following image to 400…
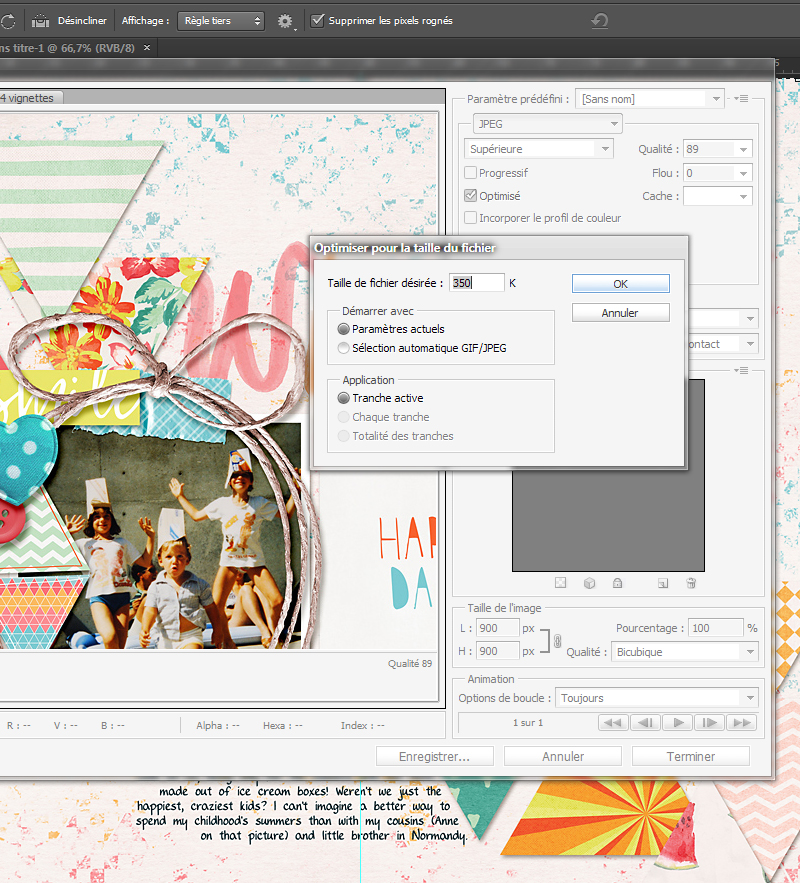
The quality level of the layout will automatically adjust to fit within this size limit you just set. Use the preview window to make sure it still looks good, then click “save”.
This tip is super simple, but it will help your layouts take up less space online (including helping you adhere to different gallery limits/requirements), while still looking nice, beautiful and sharp! You can even create an action to record the steps you end up using to do this… and make it even quicker/easier! I hope this info will help you out; don’t hesitate to ask if you have any questions!
In case you’re wondering the layout I used for the examples in this tutorial, above, was made using several items from the new June 2016 Special Edition that launched this past weekend!
 About the author Chloé is in charge of PR and communication for her small town by day, is a digiscrapper “by night,” and a photographer whenever the light is beautiful. She lives with her man and fur-babies in a small town of Alsace (in the northeast of France), where she loves to read, watch good TV shows (TWD being her absolute favorite), and just hang out with her friends — no matter if they are close by, online, or away in her Swiss hometown.