Category: Inspiration

3 ways to capture life’s details like a pro

3 ways to capture life's details like a pro

As a wedding photographer, you quickly learn the value and meaning that small details can have. Weddings are full of details that a couple and their families put a lot of themselves into: items that represent their love for each other and the way they live their lives. Capturing those items – from the invitations, to the flowers, to the rings – is an essential part of capturing what it feels like to be there on the day. In other words, some of those details are an intrinsic part of the memories that are created, and the memories that I as the photographer hope will be evoked one day when people look at the photos.

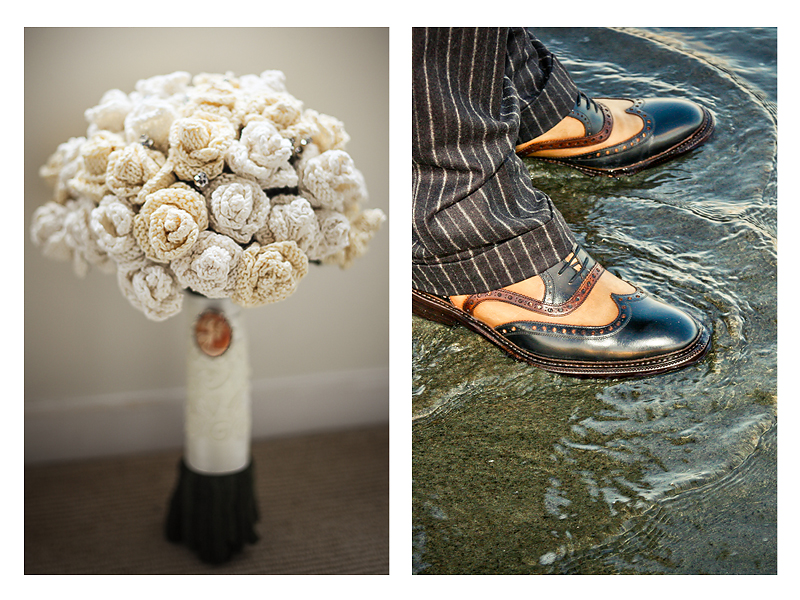
Some of my favourite detail photos, in addition to being part of the day, have a story to tell all on their own, like the bride who spent hours knitting her own flowers with her friends, or the groom who was so inspired by Boardwalk Empire that his shoes got almost as much attention on the day as his bride’s!

3 ways to capture life's details like a pro

Obviously, a wedding is a planned event, and a significant one. In our everyday lives, we’re less likely to encounter cute calligraphy and artfully arranged roses. But that’s not to say that there aren’t beautiful details to be captured that can enhance your storytelling and add another layer to what you scrapbook. Here are my top three tips on how to take some inspiration from the pro photographers and capture the details to enrich your memory-keeping, along with some favorite photo examples of how I’ve applied my wedding shooting style to my personal photos:

  1. Don’t go straight to the portrait
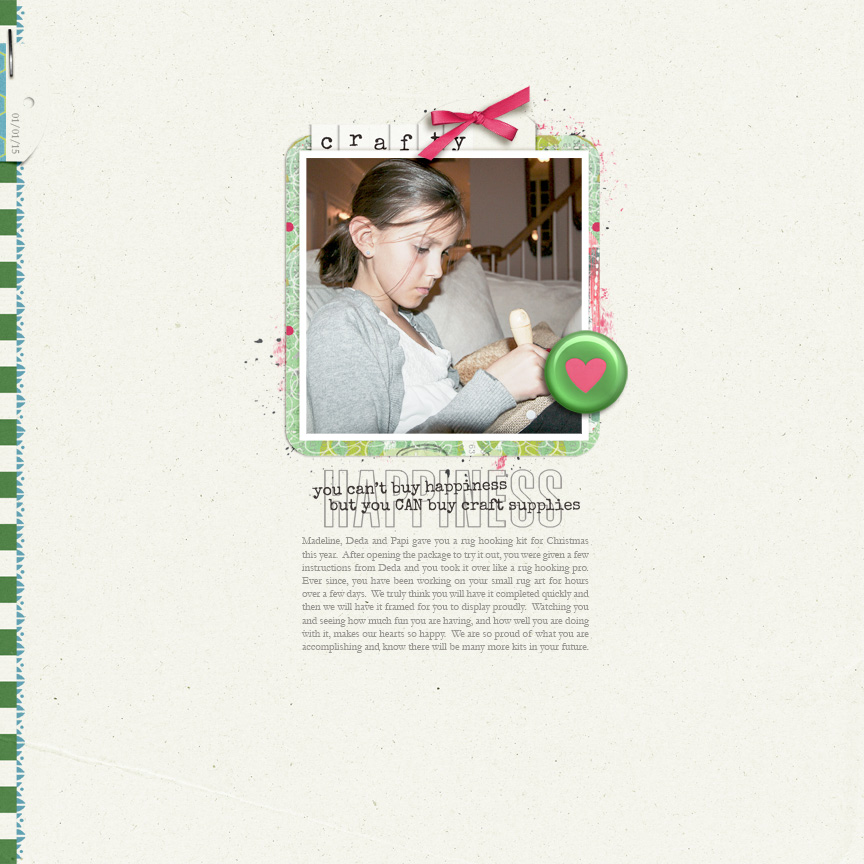
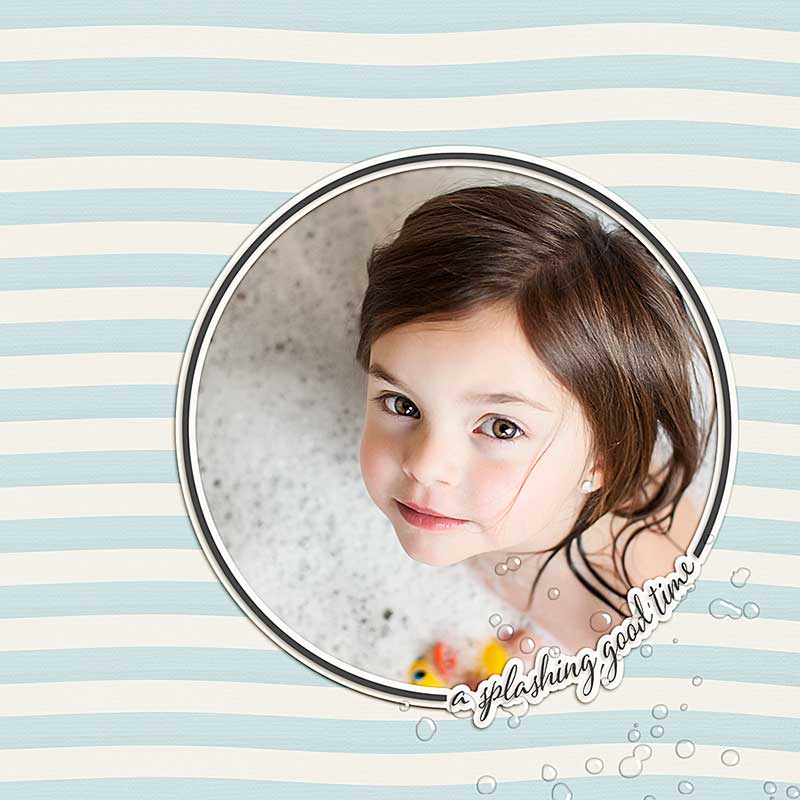
    It’s easy enough to do, especially when we’re standing behind the camera looking at friends and family. Part of us can’t help but want to see smiling faces: we want the ‘cheese!’ moment. But before you ask your kids or BFFs to pose nicely and grin for the camera, think about how you could capture a thing in the photo, not just the people.A classic example is a kid who’s drawing you the most gorgeous (obviously) picture. It might be tempting to ask them to hold it up and smile, but first try to take a moment and document their grip on the pen, the way they stick their tongue out when they concentrate, or the picture from above as they are drawing it.
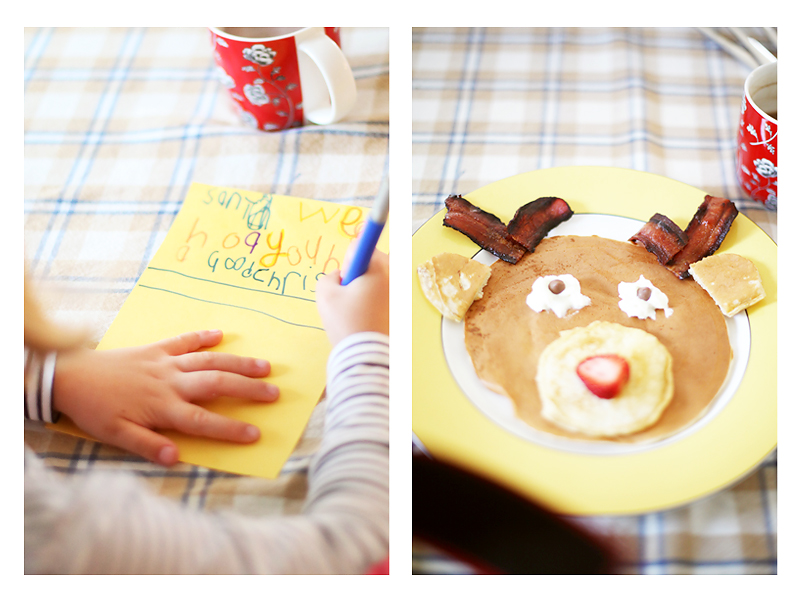
3 ways to capture life's details like a pro
  2. Fill the frame
    To really place the focus on the detail, set up your shot so that you get a whole photo of one thing. Play around with your aperture or try out macro mode to experiment with depth and field too, so that your image has one area of focus that really stands out against your background. Don’t be afraid to style a little – often a small collection of things is incredibly visually effective.
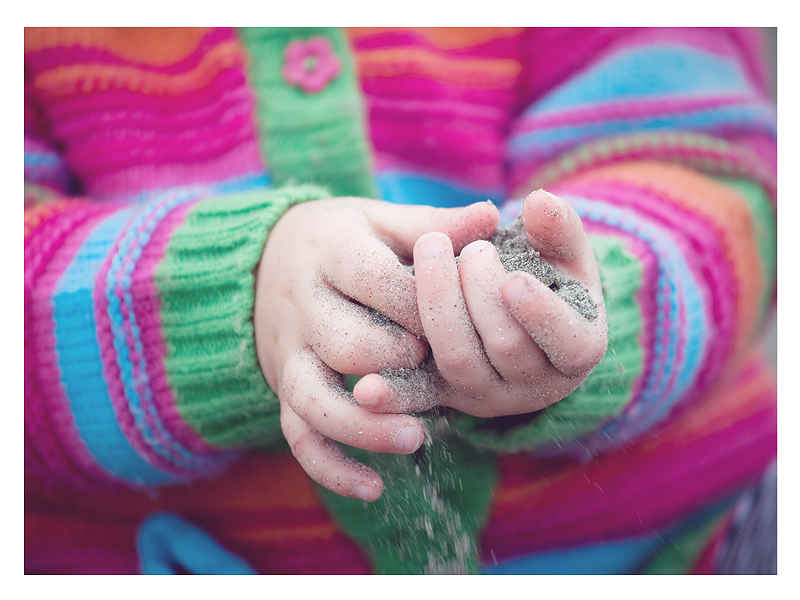
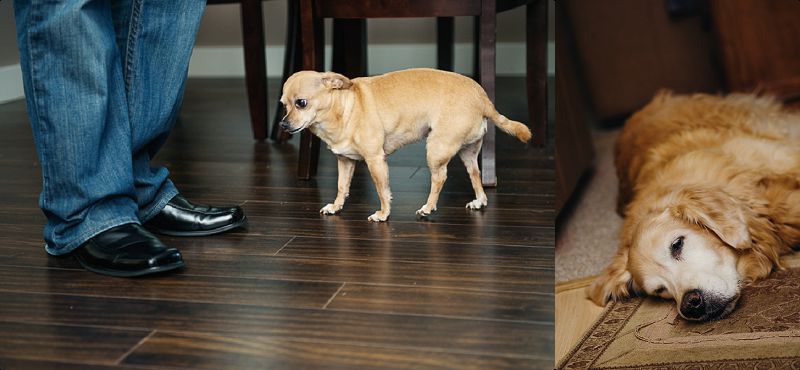
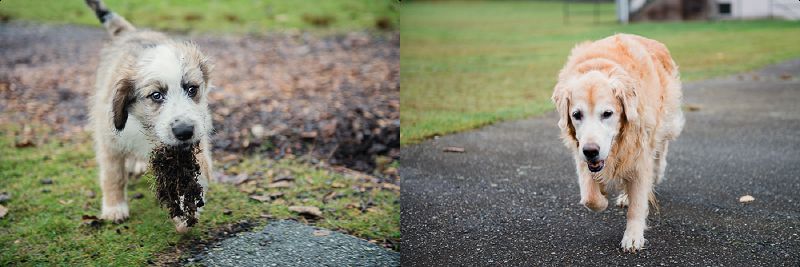
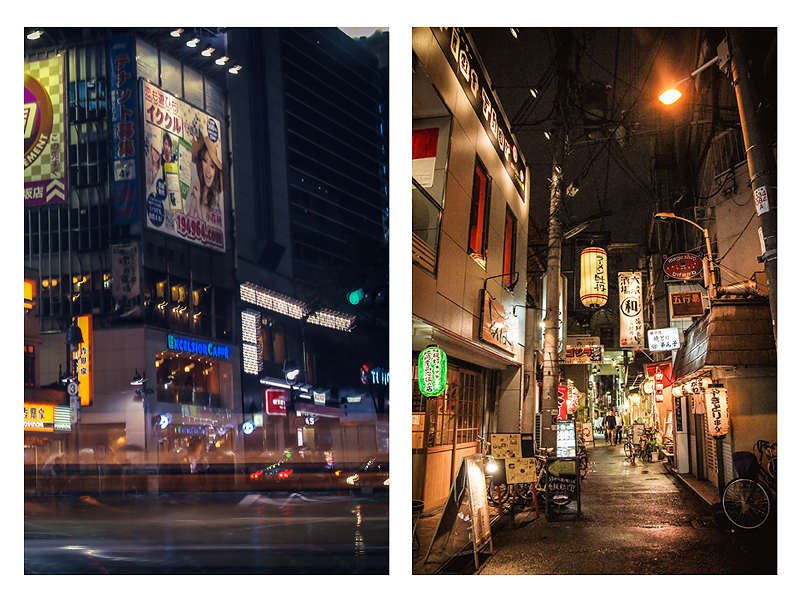
3 ways to capture life's details like a pro
  3. Capture the ‘where’
    I think most of us are pretty good at capturing and documenting who was there and what we did. Detail photos can enrich this story by showing you more about where you were. Capture what the light was like, the way you’d like to remember the colors, or any little features about the background or surroundings (think texture, style, design). Some great ideas include:

    • trees or flowers
    • the texture of a wall or door
    • a design feature of the building or room you were in
    • a non-traditional ‘scenic’ view (such as a normal street) that captures the feel of the city or town.

    3 ways to capture life's details like a pro

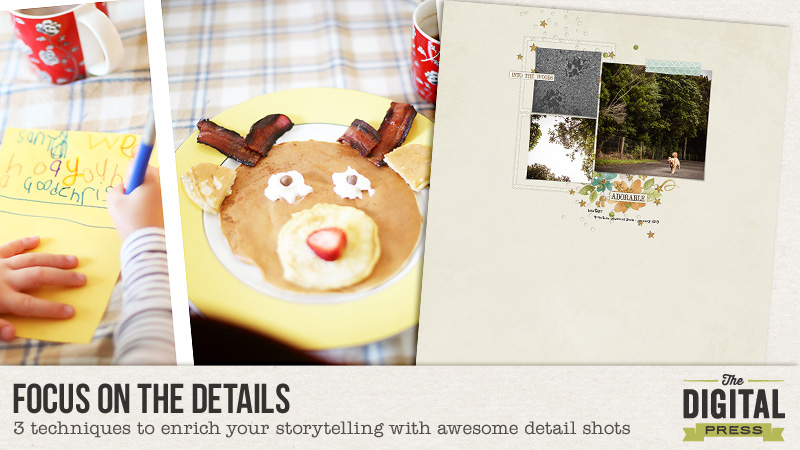
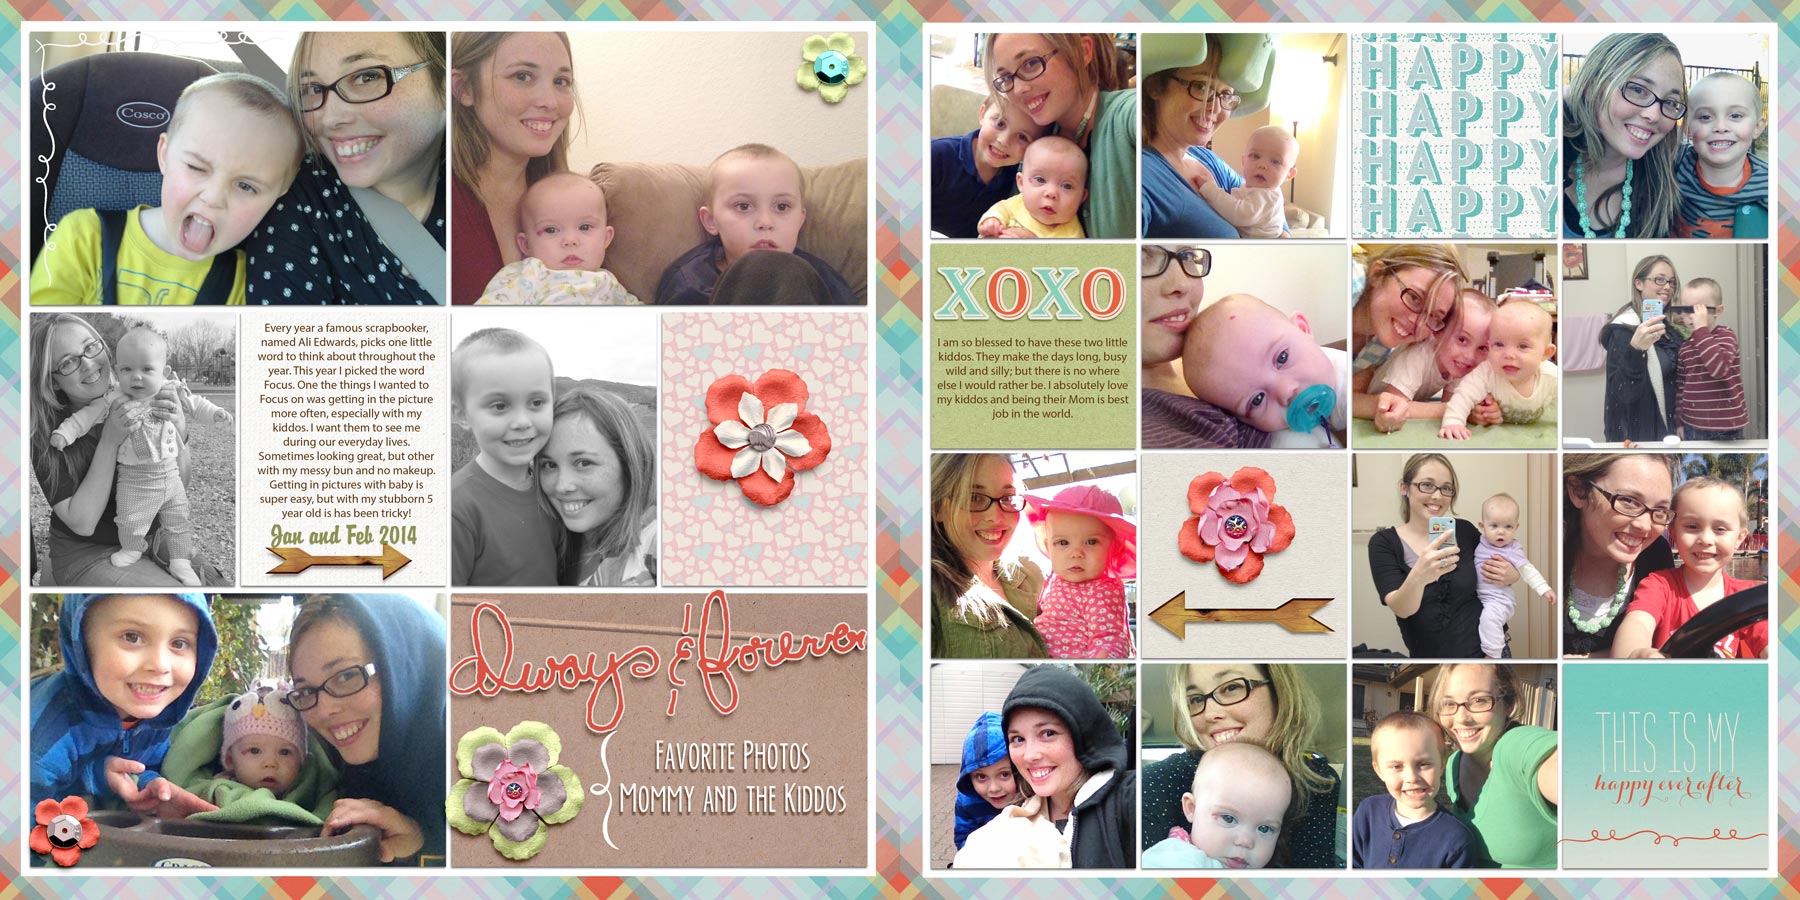
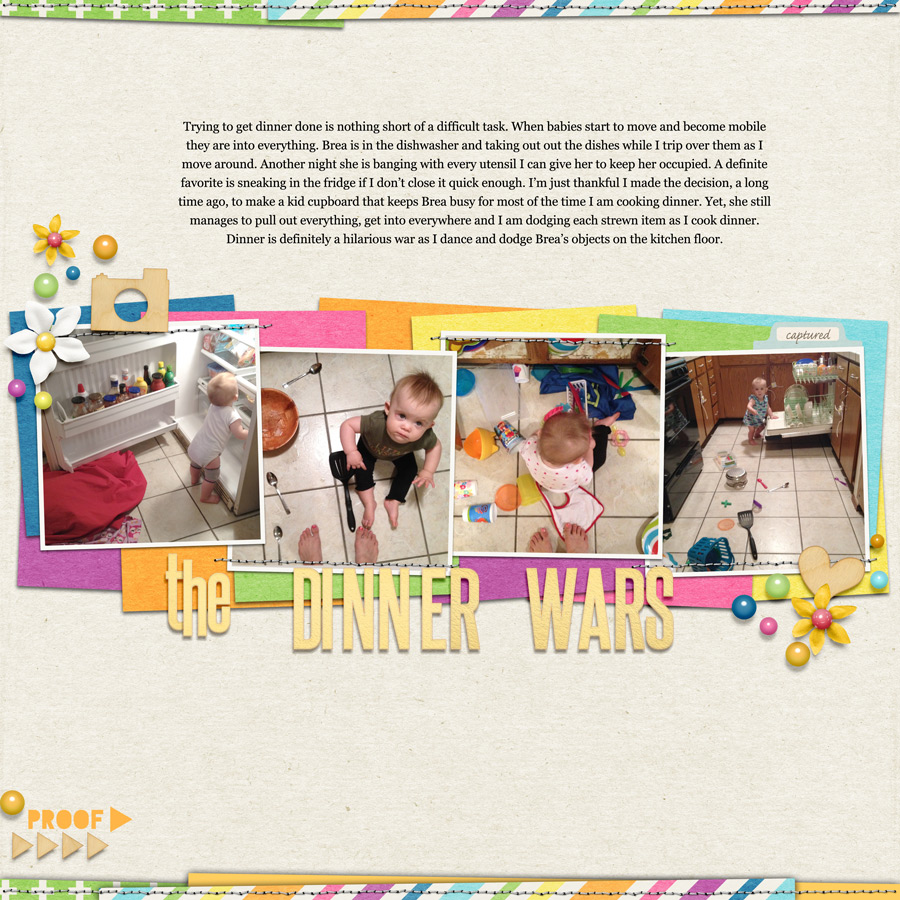
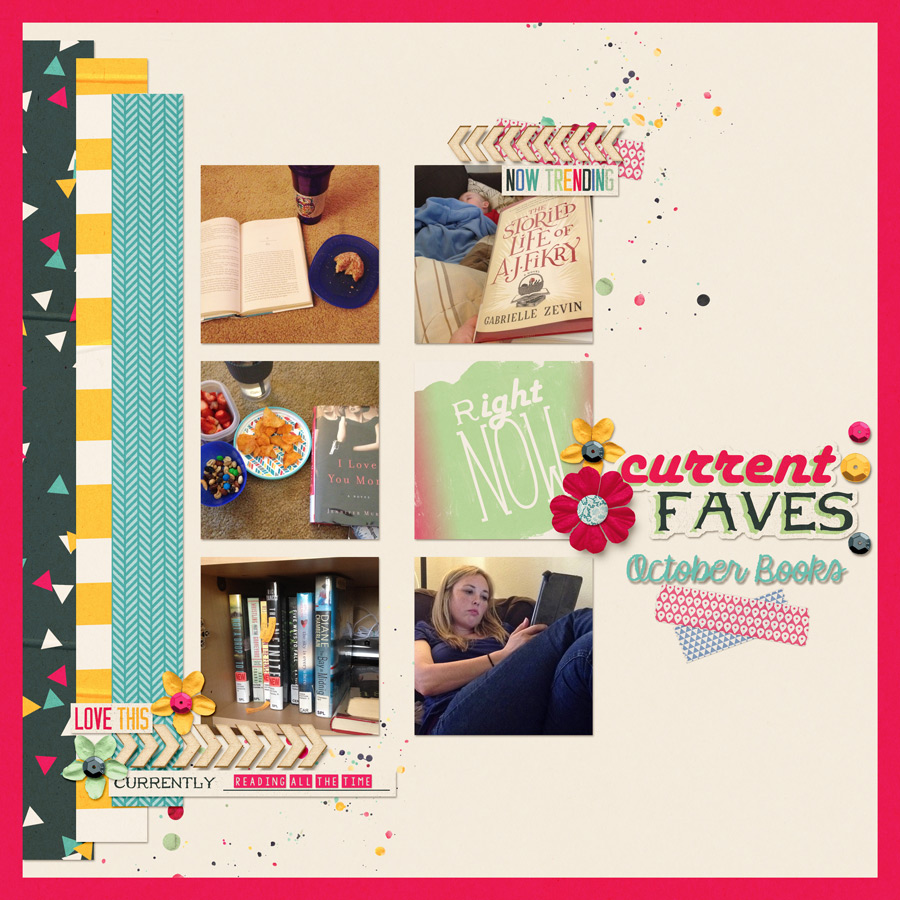
Struggling to imagine how this translates to your scrapbook pages? Here’s a recent layout example I prepared to illustrate how I use detail shots alongside more traditional portraits on a page. This type of photo also lends itself perfectly to pocket-style scrapbooking and 365/52 projects, because you may already be capturing little details like meals, new purchases, or favorite things.

Layout: Into The Woods by Kathryn Wilson
Using Woodland Winter Collection by Studio Flergs available 01/16 at The Digital Press

3 ways to capture life's details like a pro


So there you have it! For this January, we’re setting ourselves challenges that are all about focus over in the forum. Hopefully we’ve inspired you to focus on the details in your photos and memory-keeping, so we hope you’ll join in on our details challenge, which starts January 16.


KathrynAbout the author: Kathryn Wilson shares her 1920s New Zealand home with her husband, a wauzer, and a cavoodle. She is a photographer, and both a digital and hybrid pocket scrapbooker, who has lots of DIY projects she should probably be working on right now.

Grab that DSLR out of the closet and focus on your subject

Focus on your subject

The holidays are over, our schedules are a little less strenuous, and for many of us, it’s cold outside. It’s also a new year with new goals and new projects. That means it’s time to drag out that DSLR and work on our photography skills. Yep, even professionals strive to learn new things and brush up on basic skills, or even push new limits to our creativity. The subject of focus could take up the whole month of tutorials and challenges, but I’m going to keep it simple and add some links for more in-depth study.

Nail your focus

One of the first rules of photography is that the subject should be sharp. Most modern digital cameras offer a number of ways of achieving sharp images. Portrait photography often means using a wide aperture and longer focal lengths to create a shallow depth of field, throwing the background out of focus. This makes focusing more challenging than usual, as sharpness is captured across a very narrow plane, often of just an inch or two. Some basic tips include using a narrow aperture, using a faster shutter speed, and image stabilization with a tripod and a timer or shutter release to avoid camera shake.

Tips for Sharp photos

Getting Sharper images

Some more advanced tips are below:

  1. Focal points

Some photographers like to focus using the center focus point and then recompose, while others will set an off-center focus point. The important part is to choose just one focal point at a time. Most DSLRs are set to use all focal points at once and choose what to focus on. The camera is likely going to choose to focus on an area of highest contrast. Setting the AF point yourself gives you the maximum level of control over where your camera focuses, and it’s a good option for landscape, still life and portrait photography when you don’t have moving subjects. This way, you’ll prevent your camera from hunting around for what to focus on, or focusing where you don’t want it to.

For more information about focal points, check out these links:

Getting to know your camera’s focal points

Know your focusing system

  1. Where to focus

The eyes are the most vital element of a portrait, so it’s essential to record them sharply, particularly if you’re using a wide aperture. As I mentioned earlier, cameras like to focus on areas of high contrast. The best place to point your camera is at the edge between the iris and sclera of the subject’s eye. This is the area of highest contrast. Aiming at the corner of the eye is also used.

  1. Back button focus

Most DSLRs are set up so that half-pressing the shutter triggers the autofocus. Why entrust both focusing and shutter release to the same button, when a button for each can potentially give you greater control?  Many photographers prefer a custom function that triggers autofocus with a rear button positioned where your thumb usually rests  (see your camera manual to see how to set it up). It takes a little time to get used to it, but can give you greater control when focusing and composing your shot.

In addition to your camera’s manual, here are some links for more information about BBF:

Back button focusing

Focus accurately

Here is my example for a photo in which I nailed the focus on the eyes.  My daughter loves to take baths and play in the bubbles with her rubber ducky.

Grab that DSLR out of the closet and focus


Selective focus

One of the first steps toward taking more creative photos is learning how to control how much of your picture is in focus.

  1. What is Selective Focus?

Selective focus is when you focus on the specific part of a subject you want to highlight or emphasize, and let the rest fall into the blur of the background (or the foreground — you can be as creative as you like with selective focus). Selective focus is often used to draw attention to a subject or part of a subject to make it stand out in a busy settion. Other times, it’s used to evoke an emotion when viewing the subject in context of its blurred but recognizable surroundings.

  1. Bokeh

Bokeh is a word used a lot by photographers, but what the heck is it? In photography, bokeh is “the aesthetic quality of the blur produced in the out-of-focus parts of an image produced by a lens” or to put it bluntly, it’s the blur of the background

  1. Achieving selective focus

Larger apertures, f-stops like f/1.2 – f/2.8, let in more light, while smaller apertures like f/16 – f/22 let in less light.

The choice of aperture has much more impact on the look and feel of an image than brightness alone. Although small apertures let in less light, they offer a wider depth of field. Landscape and macro photographers routinely use small apertures to get more of the picture to appear as sharp, where as, portrait photographers tend to shoot at much wider apertures. Large apertures produce a narrower depth of field, producing a sharp subject between a blurred foreground and background. The closer you are to the foreground, and the more distance there is between the subject and the background, the more pronounced the effect.

In selective focus photography, the parts in focus and out of focus are equally important, but nothing about the technique is particularly difficult.

Here are some tips to remember:

  • Use a Large Aperture- Depending on your lens, your largest aperture may be 2.8 or even 3.5.
  • Choose a Longer Focal Length – If your lens won’t open wider than 3.5, use your longest lens or a zoom lens extended to the far end of its range. Longer focal lengths create a compression effect that throws the background out of focus.
  • Identify Useful Out of Focus Areas – The out of focus areas of your photo should be recognizable, not just blurry blobs in the frame, so think about your goal.
  • Pay attention to the Angle – The goal is to use an angle that causes the surrounding defocused elements to be farther away from the main subject, especially when you are limited by space.
  • Keep Composition in Mind – Put the subject in such a place that allows the viewer’s eye to wander off and still be able to enjoy the rest of the image.

Find more information and helpful tools about Depth of Field here:

F-stop chart

Selective focus

DOF master

DOF calculator

DOF tutorial

Here is my example photo where the rubber ducky is in focus, but my daughter is not.  Notice that you can still identify her in the background, but the focus is on her playing with the rubber ducky.

Grab that DSLR out of the closet and focus


January 14 challenge

The challenge is to make a LO that highlights a photo (making the photo take up 50% or more of the page) with either SHARP focus or selective focus/great bokeh. To complete this challenge, please complete a page and post it in a reply to this post.

Now, for the rules…

  1. Pages must be created using 100% TDP Products and loaded in the gallery no later than midnight EST on January 31, 2015.
  2. Please link your gallery listing in this thread: The Drawing Board: Challenges– JAN 14
  3. Link your comment in this thread in the monthly challenge tracker thread. You can find it here: January’s Tracking Thread
  4. Have fun!!!

splash-time


FarrahAbout the Author:  Farrah Jobling is a member of the Creative Team here at The Digital Press.  She lives in Denver with her amazing family, Mike, Nicholas (8), Claire (5) and Hope (7 mo puppy).  She works from home as a photographer and enjoys scrapping her personal photos.

Focus on the Story

Let’s face it… grabbing one awesome photo and the new, latest fun kit is the easiest way to get your scrap fix. I’ve done it and I’m sure you have as well. This year I am striving to change that. I want to delve deeper. Find more stories. I want to focus on finding stories in my photos. I want you to focus on this as well and be on the lookout for those photos that can lead you to tell a deeper story.

Yesterday, I was outside with my son and I remembered how as a toddler he would love to run free and I would take a photo of him running free. Well, I asked him to run free for me yesterday with every intention of telling this story. I went looking in my hard drive for running free photos and started with the one of him a toddler. To see the changes in 4 years is incredible and also made me a little teary. I almost have a 6 year old boy! And this is what I want you to get from focusing on stories- the emotional aspects.

Here is the layout using a new release coming this Friday from Anita Designs. The kit is called Timeless.

Time-Goes-Fast-SP

Another story finding approach I tend to use is compiling photos from a couple of months to tell a story. Like this two pager with photos of my kiddos and I between January and March of last year. I went through my monthly photos and picked out my favorite photos and created a wonderful story. Telling your story as a Mom AND getting in the photos with your child(ren) is something I consider priceless.

0-2014-AAU-Kiddos-Mom

Telling stories gives photos a deeper meaning then being just a photo. It can capture the blessings of the ordinary everyday life, the silliness of your child over the months, the fun hobbies you enjoy and an overall appreciation for the vast quantity of photos we all take.

0-2014-TWD--Everyday-Dinner

0-2014-AAU--Me-Books-Oct

Brother-Sister-Love-L

This year I want you to join me in Focusing on finding more stories to tell, journaling the story and printing the story. Be mindful of story opportunities in your life. And be sure to check out the Focus on the Story challenge.


SabrinaAbout the Author:  Sabrina Poole lives in a quaint house with her two lively children she calls Captain and Sunshine. When she’s not cleaning up their messes she can be found lost in a good book or creating another scrapbook page.

Digital design + Silhouette Cameo = True Love (and a Giveaway!!!)

Happy Saturday!  A huge hello to you!  Today marks the very first Hybrid post here on The Digital Press blog!  I am going to show you how to use those digital designs with your Silhouette Cameo to create a one of a kind home decor item perfect for gift giving to newlyweds or for keeping for yourself!

And…. I’m hosting a giveaway where one lucky reader will win this beautiful set of pillow cases simply by commenting on this post!  You can receive additional entries by sharing this post.  To get additional entries, comment again telling me where you shared this post!

Digital design + Silhouette Cameo = True Love (and a Giveaway!!!)

I have had this project on my “to do” list for months and, after seeing Kim Broedelet’s Forever: I DO word art in the shop, I knew it was PERFECT for what I had in mind.

Digital design + Silhouette Cameo = True Love (and a Giveaway!!!)

The word art is part of her Forever: I DO: Collection.

Here is what you are going to need to create your own pillow cases:

  • Pillow cases, pre-washed without laundry soap or fabric softener
  • Siser Easy Weed heat transfer vinyl
  • Silhouette Cameo
  • Silhouette Studio program
  • Bride and Groom stick figures from the Silhouette design store
  • heat press (or iron)

I just recently ventured into the heat transfer vinyl (HTV) world with my Silhouette.  It has been a learning process with lots of mistakes along the way!  Hopefully, I can help you avoid some of the same mistakes I’ve made!

First, make sure that any tshirt, sweatshirt, hoodie, pillowcase, etc. that you are working on is pre-washed.  This helps pre-shrink the item so that all your hard work (shhh… it’s not really HARD work) isn’t ruined with the first wash.

Also, I do not use any laundry soap or fabric softener when pre-washing items.  Fabric softener can cause the heat transfer vinyl not to adhere to your item.

After washing my pillow cases, I used my heat press to “iron” them so that they were wrinkle free.  I then measured my pillow cases so that I knew how large my design needed to be.  I decided that my designs needed to be around 9 inches tall.

In my Silhouette Studio program, I opened and resized the bride and groom stick figures.  Next, I needed to trace the word art that I chose for my pillow cases.  Unfortunately, the Cameo cannot “read” a png file and “cut” it.  You have to trace it.

Tracing things definitely takes practice, but since I am cutting images in vinyl, it’s forgiving if it’s not perfect.  YouTube has many videos on how to trace.

To trace Kim’s word art, I opened the two files that I chose – the “From this day forward” and “The Best is yet to come” png files.

Open the trace window – it’s the little icon in the top right corner of your program that looks like a little blue slice of bread. LOL

Click on the Select Trace Area button.  Click and drag a box over the image that you want to trace.

Digital design + Silhouette Cameo = True Love (and a Giveaway!!!)

For this particular image, I found that by unchecking the High Pass Filter, decreasing the scale to 1, and increasing the threshold to 100% gave me the best trace.  By “best trace”, I mean that it gives me the most detail and the sharpest edges on the small areas of the design – like the word “the”.

Digital design + Silhouette Cameo = True Love (and a Giveaway!!!)

The change of color to yellow is how the program “knows” what to trace.  Any areas left the original color won’t cut correctly.

Once I was happy with the trace, I hit the Trace button in the program.  By using this option, the program traces (puts red lines) around all the parts of the letters including the inside of the letters.  At this point, you can either move the original png file off the mat or delete it.  This leaves the red tracing lines that the program will use to cut the heat transfer vinyl.

Digital design + Silhouette Cameo = True Love (and a Giveaway!!!)

Copy and paste the word art onto the same mat as the bride and groom stick figures.  Resize the word art to your liking.

NOTE: At this point you can position and space the word art where you’d like it to be next to the stick figure which will leave you with pieces of wasted, possibly unusable pieces of HTV or you can position both images very close together so that they are cut with the least amount of wasted vinyl possible.

Once you are happy with the layout of your design, group all the different files together by clicking on one and then while holding down the shift button of your keyboard, click on the rest of the files.  Click on the “Group Selected Shapes” button in the lower left corner of the program.

Next, you will need to mirror the image.  This cuts the vinyl so that correct side of the vinyl adheres to the pillowcases.

TIP:  Much to my dismay, I’ve wasted several pieces of HTV because I did not remember to mirror my image before sending it to the Cameo for cutting.  I now have a post-it note taped to my cameo that says “Mirror the image for HTV!!”  Another tip I saw online somewhere is to use a sharpie to write “Mirror image for HTV” on the edge of the cutting mat.

Apply the HTV to your cutting mat SHINY side down.  The shiny side is very obvious.  The shiny clear piece is the transfer sheet for applying the HTV to your fabric.  Load your mat into your silhouette and send your design to be cut.

Weed your design.  This is the term used to describe the peeling of the excess pieces of the vinyl that are not part of your design.  This includes the insides of letters like a, e, o, etc.  Your design will be backwards on the clear transfer sheet.  Now we are ready to apply the HTV to the pillow cases.

Pre-heat your heating press or iron.  If using a heating press, follow the temperature recommendations for the brand/type of HTV you are using.  For my heat press, I use the setting of 305 degrees F.  My heat press has a digital display.  If using an iron, I use the hottest setting on the iron and lots of pressure when adhering the HTV.

You will need to “warm” the area where you are applying the vinyl.  This helps draw out any moisture that may be in the fabric as well as helps improve the transfer process.

Position the HTV on the pillow case and cover with the teflon sheet or a piece of lightweight, cotton fabric to protect the HTV.

Using the heat press, I did a press of 10 seconds using medium pressure, allowed the design to cool a bit before performing another press of 10 seconds.

TIP:  I recommend doing some trial ironing when using HTV and an iron.  Cut some small pieces of HTV and play around with the settings on the iron, the pressure, and the amount of time it takes for the HTV to adhere to your fabric.  I used one of my husband’s old white undershirt to practice with both the iron and the heating press.

Siser Easy Weed vinyl is designed so that you can remove the clear transfer sheet while the vinyl is hot or cold. I like to start to slowly remove the transfer sheet while it’s still warm.  While doing this, I check to make sure the vinyl is adhered to the fabric.  If it’s not, I replace the transfer sheet and press again (not usually necessary if using a heat press).

After removing the clear transfer sheet, I once again cover the pillow case with the teflon sheet (or lightweight piece of fabric) to protect the vinyl and press it again for another 10 second cycle.

I then let the fabric cool and turn the tshirt/sweatshirt/pillow case inside out and press again on the reverse side of the design.  This pulls the HTV further into the fibers of the fabric for an even better transfer.

Here are the pillow cases side by side.

Digital design + Silhouette Cameo = True Love (and a Giveaway!!!)

and again, the finished pillow cases on the pillows.

Digital design + Silhouette Cameo = True Love (and a Giveaway!!!)

I hope you enjoyed my project!  If you have any questions about my project, please don’t hesitate to ask!!!

And remember, if you’d like to be entered into the giveaway, comment on this post!  And don’t forget that you can receive additional entries by sharing this post.  To get credit for additional entries, comment again telling me where you shared this post!

I will stop taking entries on Friday, 1/16/2015 at 11:59pm EST.  I will announce the winner here on the blog on 1/17/2015.  Good Luck!!!


LuAnn   About the Author: LuAnn Spang is a member of the Hybrid Team at The Digital Press. She lives just outside of Pittsburgh, PA with her husband, 2 adult sons and a teenage daughter.  She manages to find time be creative as a way of relieving stress while working full time as a LPN in an assisted living facility and attending RN school part time.

What’s The Focus Of Your Photo?

tlpblogpin

Now that the holidays are over, I am back to taking photos of my everyday life, my family, my dog, my neighborhood and a few selfies here and there. Have you noticed that sometimes the “focus” of an image might be obvious but other times your eye wanders all over the image, not really knowing where to look? You often don’t have time to stage a photo but if you have a few seconds to set it up, some simple tips might help you to better frame your subject and make your “focus” clearer. These tips can be used with a DSLR, point and shoot camera, your I-pad or your camera phone, whatever type of camera you have.

1.  Look at the background, are there any distractions that detract from your main subject? Is there a lot of clutter, especially around your subject? If so, try moving yourself, whether up or down, or to each side, to diminish that clutter out of the camera frame and then take your shot. Sometimes moving yourself and the camera just a few inches makes all the difference in what the camera will capture. Try standing on your tiptoes, get up onto a stool or chair, or get low, squat down, hold your camera lower and point upwards. Changing that perspective can make a world of difference in what image you capture. In these two images, I shot indoors, in cluttered rooms, so I came down to their level and shot across at them, thus eliminating a lot of the clutter of the furniture.

What's The Focus Of Your Photo?
2. If there is something in the foreground that I can use as a “leading line” to help bring focus to my subject, I will use it. A fence, a row of trees or a sidewalk are all great “leading lines”.

What's The Focus Of Your Photo?
3. If there is no getting around the cluttered background, then just try some tight framing, so the background distraction is minimized. Be careful not to come in too close because you might want to crop or print at different ratios so you will want to give yourself a bit of leeway for that. For these two images, I came in close enough that there is no mistaking what my “focus” is but leaves a bit of the background that isn’t distracting enough to worry about.

What's The Focus Of Your Photo?


When  your background is not uncluttered, try to remember to take a look at what is around the subject’s head, looking for some clean space. Watch out for anything that might be right behind your subject’s head. I’m sure we’ve all taken those photos where it looks like an antenna is coming out of someone’s head (the tree branch in the background).  The more your eye sees through the viewfinder or LCD and can correct before snapping that pic, the less you need to do in post-processing. Of course, the most important thing is to capture that moment, take the photo, but of second importance is to capture the best photo you can, preserving that memory forever. I hope these tips are helpful. Have fun and enjoy taking photos!

The Digital Press now has monthly challenges for you to participate in! Come on over and play along! Among the challenges this month is one called “What’s The Focus Of Your Photo?” which you will nail if you’ve read this blog article.  So, go have fun! Here’s the link:

What’s The Focus Of Your Photo Challenge at The Digital Press


ABOUT THE AUTHOR:

Rae

Rae Clevett is part of the Creative Team at The Digital Press. She lives on the west coast of BC with her hubby and labradoodle, Taz. As a photographer and avid digital scrapbooker, most days she is either behind the camera or scrapping some of her personal photos. There is usually a cup of coffee on her desk and some chocolate treats, as she is a chocolate addict. Her laptop sits next to her computer so she can watch tv or movies as she scraps or edits photos. Taz usually lies on the floor beside her, playing with his toys. It’s a pretty sweet set-up, comfy and casual.

Focus on Journaling

Welcome to the kick-off of our monthly challenges!  Each month we will create a series of blog posts and challenges that correspond with one word.  This month, we chose FOCUS.  Focus could mean a myriad of things and we cannot wait to have you join us on our journey to discover how we can be focused in our scrapbooking.  You can read more about the thought behind the word here: Find Your Focus This January

For more information on our challenge system, please read more in our forum: Everything You Need to Know about Challenges

Now on to our first challenge…

Not to sound cliché, but some say that a picture says a thousand words. Perhaps. But for many of us, we create scrapbook pages as a form of memory keeping. As our family historians, we have set ourselves up to record the who, what, when, where, why and how of our lives. To pass on our life, in the moment, to our children and grandchildren. I know that I love it when my kids look through an album and not only look at the pretties on the page, but read them as well. Sometimes it sparks a memory which leads to some wonderful conversations. I love those moments!

Early on, right after discovering digital scrapbooking, I made many pages with a picture, paper, and elements and called it a day. Sure, it looked great to me, but looking back on those pages, I wish I would have jotted down, at a minimum, what was occurring in the picture(s).

I created the page below several years ago.  While the word art could speak for itself, I have found that when people look through my album, they tend to ask why my husband and I were so dressed up.  If I had added one simple line of journaling, then this would have been recorded and people would not need to ask.

Now don’t get me wrong, I to this day will scrap a page with no journaling because there are instances where I don’t feel like it is needed. That the picture(s) used do convey what I wanted, or a piece of word art speaks for me. Early on I rarely included journaling or put much thought into it – this is one of my scrapping regrets.

Why didn’t I journal? Good question. I suppose my own insecurities got the best of me as I felt like no one wanted to read what I had to say – I was wrong. Maybe it was because I felt like the picture was enough and looking back I realize that it wasn’t. Perhaps it was because I was not aware that I needed to journal. I do now in most cases.

Journaling does not have to be a long drawn out paragraph of deep, immense feelings and detail. It could simply be a one sentence statement of what is occurring, your thoughts/feelings, or simply who is in the picture. I tend to ask myself will I know the answers to who, what, when, where, why and how of the page looking back at it in 10 years?

Here are a few recent pages of mine where the journaling included the answer to these questions.  Reading the journaling, the viewer should easily be able to see what happened and the memory I wanted to capture.  Pages are linked for credits.

2015-01-01_crafty

Christmas Spectacular


Christmas Spectacular

So why this discussion on journaling? I thought it would be great challenge to kick us off on our month of FOCUS. Let’s focus on the journaling. Your challenge, should you choose to accept it, is located here, on the forums: Focus on Journaling Challenge

We cannot wait to see what you come up with!


About the Author: Rachel Alles is on the Creative Team here at The Digital Press.  She is fortunate to share her life with her loving husband, Doug, and two blessings: Madeline and Maxwell.  The three of them are her main source of inspiration for her pocket and traditional style pages.  When she’s not scrapping, she enjoys anything Disney related, learning more about photography (and attempting to turn the dial off Auto) and dabbling in home decor projects.