Live in Harmony

harmonyheader

Welcome to November, a fun-filled month at The Digital Press! (Wait, it’s November already???)  This month, our one little word is HARMONY.

Could this word be more perfect for this month?  In the U.S., this is certainly a very busy month as it kickstarts the Holiday season.  On top of that, we have DSD AND most importantly, The Digital Press turns 1!!!  Can you believe that we are already approaching our first birthday!?  Seriously – time flies when you’re having fun.  With all of that excitement, we feel that finding harmony is all the more important.

Harmony doesn’t have to only mean finding peace due to holidays – although this would be nice.  It could also mean finding harmony, balance, peace with your family, relationships, designs, etc.  The list could go on and on.

Here is some inspiration I found on Pinterest:

One Little Word - Harmony

Sources (1, 2, 3, 4, 5, 6, 7, 8)

As you can see, the word Harmony can evoke lots of inspiration for your own memory keeping.  I myself cannot wait to implement it this month for my own projects (and life).

Each month, we like to encourage you to step out of the box at times with our challenges. Below are the list of upcoming challenges for the month that focus on Harmony. For more information about our challenge system please read this post in our forums.

Here is a handy image you can save to your computer, featuring our lineup for November (made by the ever-talented Alina from the TDP creative team, using the brand new store collab One (in honor of our first birthday) that you can purchase for only $4 for the first 4 days of the month!

Live in Harmony - Challenges

Please keep checking back on the blog for more information about all of the fun we have planned this month – it will be a great one!


About the Author: Rachel Alles is on the Creative Team here at The Digital Press.  She is fortunate to share her life with her loving husband, Doug, and two blessings: Madeline and Maxwell.  The three of them are her main source of inspiration for her pocket and traditional style pages.  When she’s not scrapping, she enjoys anything Disney related, learning more about photography (and attempting to turn the dial off Auto) and dabbling in home decor projects.

Savor Your Delicious Memories

Savor Your Delicious MemoriesWhat is it about food that brings back so many memories? When I think about special moments from my life, so many of them are tied to cooking or eating. Those precious moments are perfect to document in your scrapbooks. While your family might not be able to taste that special recipe again, they will always remember the way they felt in that moment. Baking a special cookie recipe with my grandmother, taking my boys out for their first ice cream cone, and pulling my first Thanksgiving turkey out of the oven are just a few on the memories I have that are tied to food. I can remember my feelings so easily in those moments because all my senses were working at the same time.

Savor Your Delicious Memories

One of my favorite food traditions is our Friday night pizza. I make homemade pizza dough and then my boys and my husband make and bake the pizzas. It’s a little thing, but is a tradition that is so special to our family. I hope that when my boys are grown with families of their own, that they will carry on the same kinds of traditions with their own children.

Savor Your Delicious Memories

Scrapbooking is also a great way to save the special recipes passed down through your family. I have a few recipes written in my grandmother’s handwriting that I have turned into layouts that will become family recipe books to share with my loved ones. Looking over those recipes transports me right back to her kitchen as a little girl, helping her roll out snickerdoodles or make lasagne.

This month, I want to encourage you to savor your delicious memories by scrapbooking a favorite memory tied to food. I am hosting a challenge over on the forums at The Digital Press and would love for you to come play along. All you have to do is scrap about a favorite recipe, food tradition, or simply a layout about food. I can’t wait to see all the delicious layouts you come up with!

Savor Your Delicious Memories

KatieAbout the Author: Katie is a member of the Creative Team here at The Digital Press. She lives in Central Florida with her husband and their four sweet but crazy boys. When she’s not dodging Nerf bullets or trying to dig out from under the never ending pile of laundry, she enjoys photography, cooking, going to Disney World with her family, and, of course, digital scrapbooking.

Putting It All Together for Pocket Scrapping

PuttingTogether


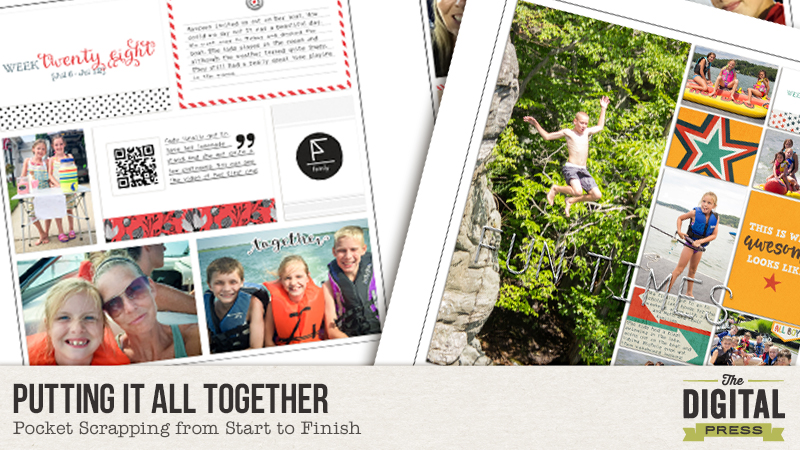
So up until this point, I have written blog posts about taking daily/weekly photos, jotting memories using various apps, and uploading and organizing your photos with keywords. Today I’d like to talk about using Smart Collections in Lightroom to organize your photos for weekly pages and putting it all together.


At the beginning of the year, in preparation for my weekly documentation of our lives, I set up Smart Collections in Lightroom, which are photo collections based on a set of rules that you define. Photos that meet those criteria you establish are automatically added to that collection. Let’s get started.


Setting Up A Collection Set

The first thing I did was set up a Collection Set called Project Life 2015. A Collection Set is container that houses Collections. Fittingly, it’s icon looks like a photo filing box.


1


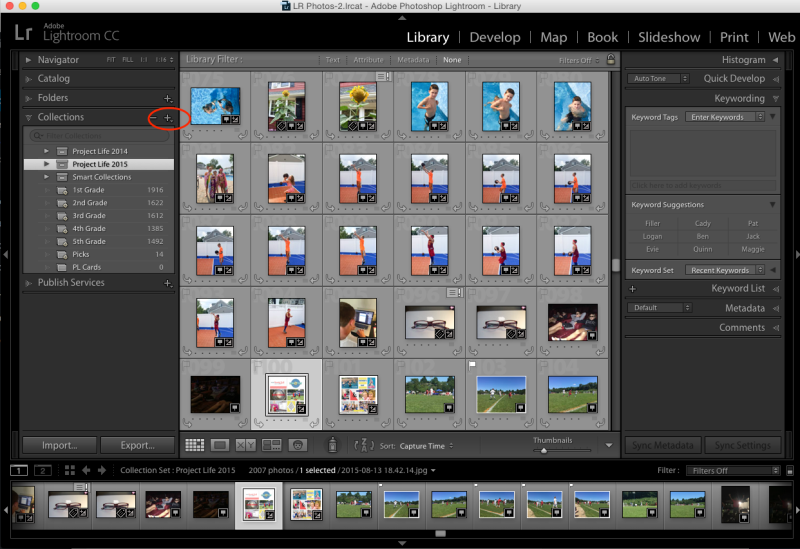
Click on the + symbol on the Collections panel and choose Create Collection Set. Name your collection set and click Create.


2


Setting Up a Smart Collection

Next, I set up my first Smart Collection. Click on the name of your Collection Set so that it is highlighted and then click on the same + symbol you clicked on before. This time scroll down to Create Smart Collection. The following dialog box will pop up:


3


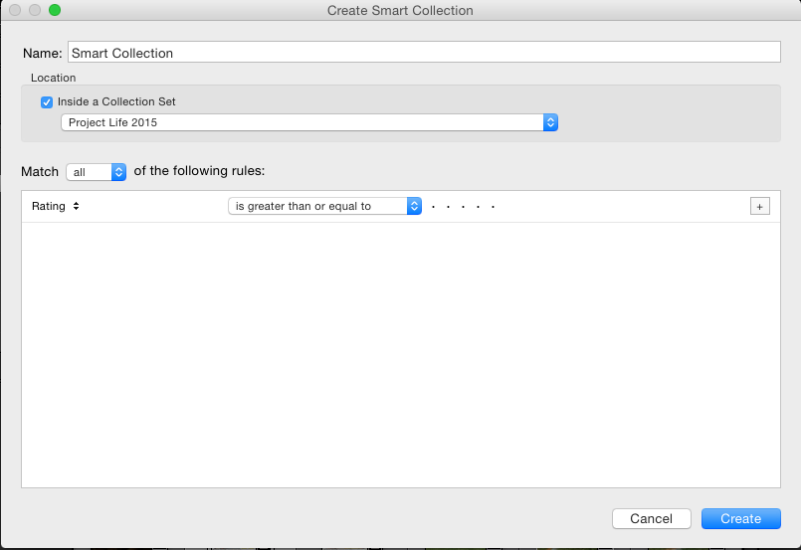
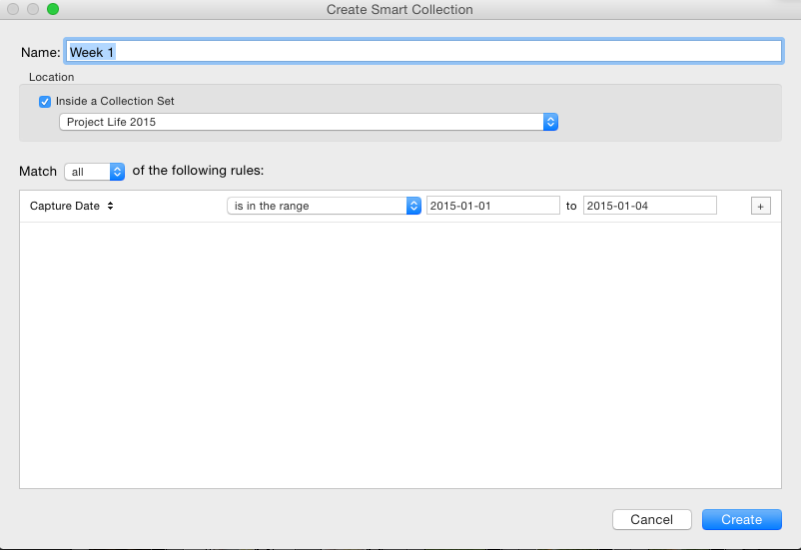
The first thing you need to do is create a name for your Smart Collection. I called mine Week 1.


Next, make sure you check off to have it located inside the Collection Set you just created. In my case, I located this Smart Collection inside the Collection Set called Project Life 2015.


Next, you need to establish the rules it will follow when deciding which photos to include in your Smart Collection. I told it to match ALL of the rules (of which there is only one in my case). That rule was that the Capture Date  be during the first week of January. To do this, click where it says Rating. It will bring up a drop down menu. Scroll down to Date and then select Capture Date from the fly out menu. Then click where it says, “is” and change it to, “is in the range.” Next, input your dates.


4


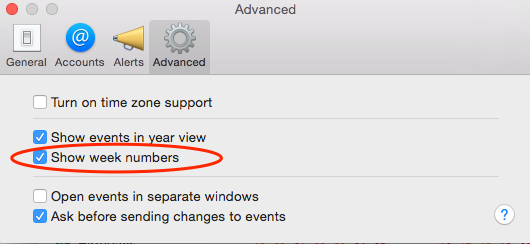
Mac User Tip: In Calendar, under preferences, you can set your calendar up to start the week on any day of your choosing. I set mine up to start on a Monday.


5


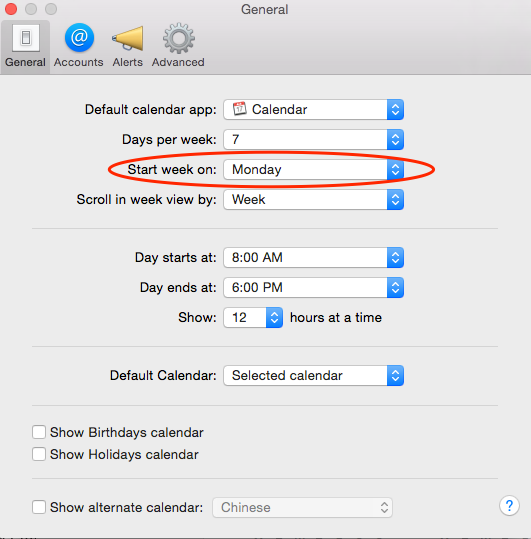
In addition, under the Advanced tab, you can check off to show week numbers. Perfect for weekly documenting!


6


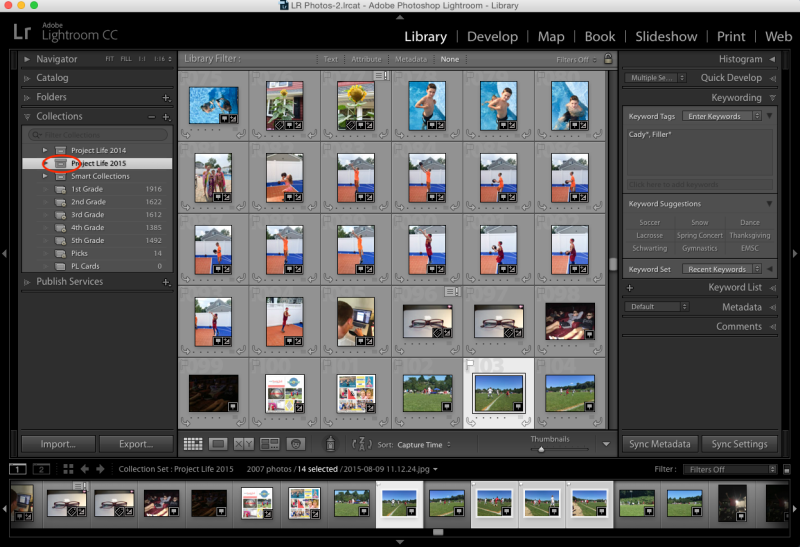
The last Smart Collection I set up is called, “Weekly Picks.” My rules are to filter out Flagged Photos. You will see why in the next section.


Simple Steps for Pocket Scrapping: Flagging Photos

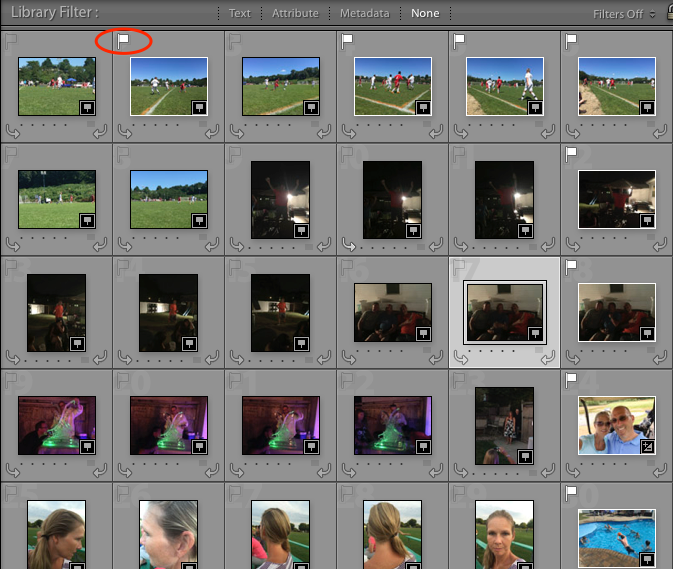
When I am ready to sit down and scrap a weekly spread, I open up Lightroom and click on the weekly folder of photos that I am up to. I scroll through the photos and flag the photos that I would like to use by pressing  “P” on the keyboard to “Pick” the photos I like. A small white flag will appear above your flagged photos.


LR_Photos-2_lrcat_-_Adobe_Photoshop_Lightroom_-_Library


Once I flag all the photos I like, I go to my “Weekly Picks” folder and look through the photos I picked. I take a look at the number of photos I have chosen and decide whether I have too many, too little, or just right. If I think I have too many, I whittle them down a little bit more by pressing “U” on the keyboard to “Unpick” some photos. If I don’t have enough, I do a search for “Filler” photos. These are photos that can be used in any given week.


During my uploading process, I try to identify photos that are not time specific — meaning they really could be used in any weekly spread because the specific week they were taken in is not relevant. For example, this past week, my photos to choose from were pretty light, so I searched for some filler photos and found a photo of my daughter drinking milk. She drinks several cups of milk every day, so it really didn’t matter what week the photo ended up in. What mattered was that somewhere I told the story of her continued love for milk during this stage in her life.


Exporting Photos

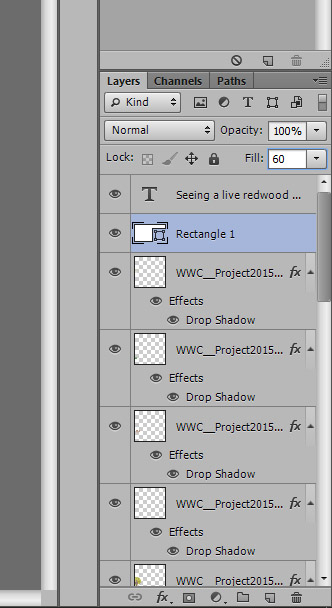
The next step I take is to export the photos to Photoshop. In Lightroom, select all the photos you have flagged and right click on one of the photos. Scroll down to Edit In>Open as Layers in Photoshop.


Fullscreen_10_25_15__10_06_PM


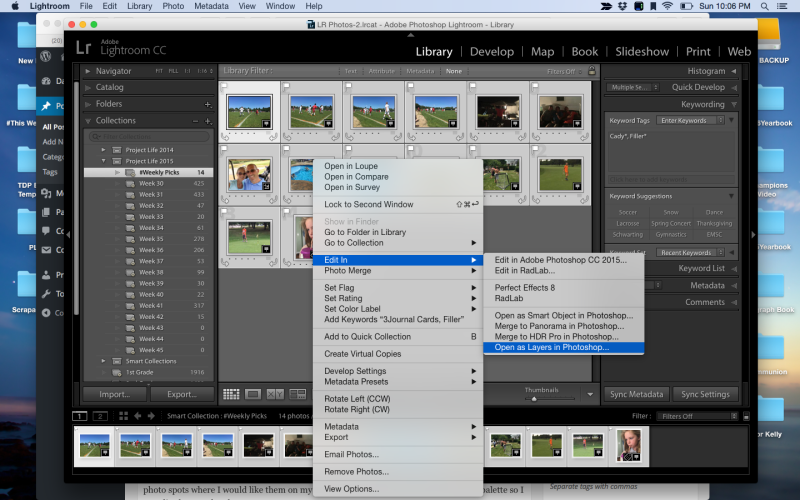
This will open a new document in Photoshop with all of the photos in that one document on separate layers. All of the layers will be highlighted. Using the move tool, I click and drag all the layers over onto the template I am using. I then move the layers around on my template to  the photo spots where I would like them on my template. Then I do the same in my layers palette so I can clip them to the photo spots.


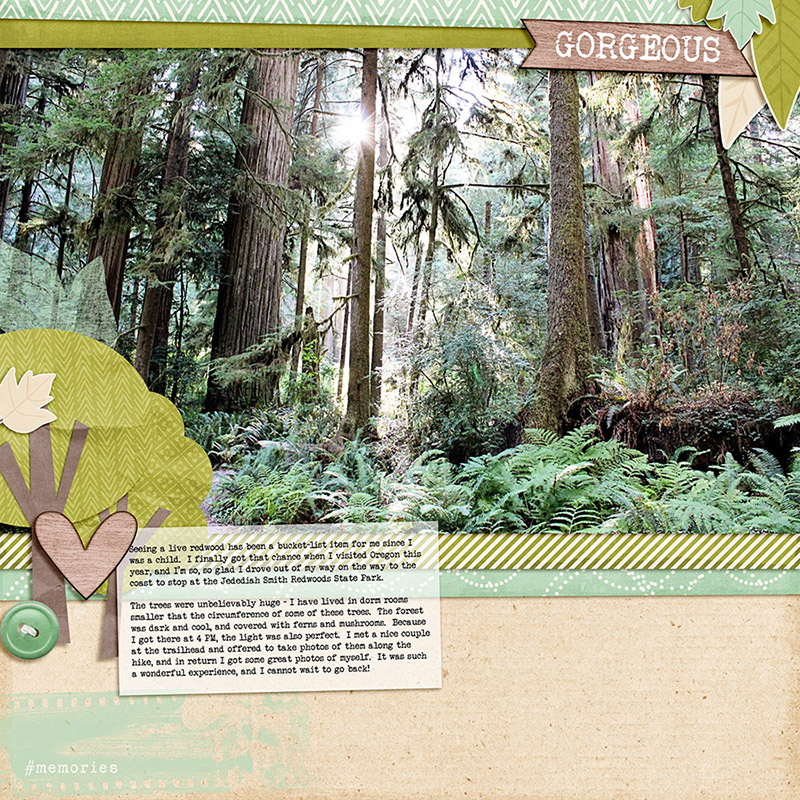
Adding Journal Cards and Embellishments

The next step is to add my Weekly Calendar Card and Journal Cards. Then I add any other embellishments. (Though, honestly, I keep my layouts pretty simple. It’s all about the documenting for me.)


Saving

The final step is to save my layout. I save a .PSD version and a full resolution .JPG version. The .PSD version is in case I need to make any changes and the .JPG version is for printing. I also have to save web versions for uploading to galleries, but once they are uploaded, I delete these versions.


And that’s all there is to it. By following these steps week in and week out, it has really sped up my process and that’s what I need to do in order to keep up with such an ambitious project. Hopefully these tips will help you in your process or inspire you to give it a shot next year. I can say with certainty, my kids LOVE seeing their lives documented with such detail.


Happy scrapping!


Jen Flaherty

About the Author: Jen is a member of the Pocket Team at The Digital Press. Having scrapped digitally for many years, she has come to embrace the simplicity of Pocket Scrapping since it fits more easily into her busy lifestyle of shuttling her three children from field to field. When she is not on the computer, you will find her working out or really doing anything else she can besides cooking, cleaning and doing laundry.

Savor The Outdoor Beauty Of Fall

savortheoutdoorbeauty-blogheader

This is my favorite time of the year, as the temperatures cool, the air feels crisp and clean, the birds are plentiful at our suet feeder, and the leaves start to change color. What a wonderful time of the year it is to get outdoors, go for a walk and even better, bring your camera to take some photos of the local scenery.  I will often park my car on the side of the road when passing a particular eye-catching view and snap a pic of it with my phone or my small mirrorless camera which I often keep in my purse.  For the photo in this layout, I knew the quality of the photo wouldn’t be exceptional but the memory it evokes is what I was after.  This was in Northern BC, while driving by on a tour bus.  I snapped this shot through the window.

seasonschange_aktrip copy-800

Fall is such a sensory experience, with the smells, the taste, and the visual impact of the changing environment. Take a photo as you stroll through your neightborhood or visit a local park. Just get outdoors and experience the changing season. Fall makes me think of hot chocolate, orange, yellow and red colors, pumpkin spice latte’s, morning fog, swirling leaves in the wind, and one of the best things, for me, is that it becomes sweater weather! I love to wear my sweaters (I have a lot LOL)! In fact, I think I need to get a photo of myself outside, wearing one of my sweaters, with the fall colors around me. I’m glad I have a selfie stick. I think I’ll do this later today and then create a page about my love of sweaters.

For the photo of this layout, I was at the corner of our street, walking up the walkway to the bridge. (I’m lucky enough to live across from a river.)

naturewalks copy-800

Fall might look and feel different for you, depending on what region you live in. Why not scrap a layout about what fall is like in your neighborhood, sharing what you see in your neck of the woods.

Head on over to the challenge forum and check out this months’ challenges including my challenge!  Hope you participate and I look forward to to seeing what fall looks like in your neighborhood.


Rae
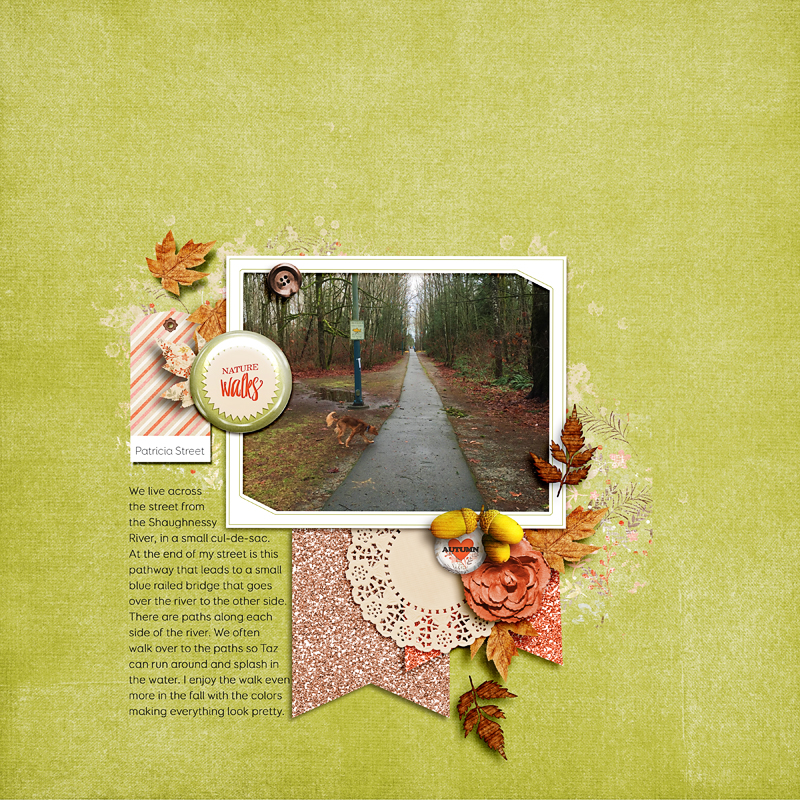
Rae is part of the design team at The Digital Press and has been a scrapbooker and photographer for many years, living on the west coast, with her hubby and labradoodle, Taz. She’s addicted to chocolate, TV shows and books!

Simple Trick for Digital Vellum

Simple Trick for Digital Vellum

When I scrapbooked on paper, I often used vellum as an accent or as the paper for my journaling.  The look is easy to achieve digitally!

I like to type out my journaling for the page first.

Simple Trick for Digital Vellum

Using the Shape tool, draw a white box behind your journaling.

Simple Trick for Digital Vellum


Simple Trick for Digital Vellum

Change the fill of the shape layer until it looks right to you – I usually use between 50 and 60 percent fill.

Simple Trick for Digital Vellum

Using the shape tool allows you to put a drop shadow on the journaling block without having the shadow make the digital vellum look darker – so throw on the drop shadow of your choice, position your text and vellum on your layout, and you are done!

Simple Trick for Digital Vellum

Happy scrapping!  🙂

Supplies Used: Project Twenty Fifteen | October Collection by Laura Passage


ProfileAbout the Author:  Kacy is a member of The Digital Press Creative Team.  She’s an Environmental Engineer living in Arizona with a cranky, pudgy, but insanely cute calico kitty.  She enjoys scrapbooking, crocheting, dancing awkwardly to electronic dance music, Grumpy Cat, cupcakes, Stephen King books, and men in kilts.

Printouts & Paper Punches

Printouts & Paper Punches


Today I want to share with you one of my favorite ways to use digital stamps on a hybrid or paper layout using paper punches from your stash.


It is much more likely that I will use my digital stamps on a hybrid layout when they are already printed and ready to use. Yes, with pre-printed items you lose a bit of flexibility, but do you know the good news about digital stamps? You can always print them again if you need a different size to fit your project! Of course it rarely ever happens that I actually have to print it again, even though it is always good to know that I COULD.


Printouts & Paper Punches


This time I want to show you how not only to get your digital stamps printed, but I also want to encourage you to use you paper punches. For this I add all stamps I like from one set on one A4 (or letter size) page and shrink down all elements at once to either two or one inch, because I know this is the size that will fit most of my punches. I could go ahead and measure them correctly. This takes more time than I want to spent on preparing my prints, so I just see how far I get with this first try. Don’t worry too much about which stamp will fit to which punch and which sizes are needed. If you really have a stamp that’s not fitting like you want, remember that you can always print it again. And most often you will be able to make it work without reprinting.


Printouts & Paper Punches


I like to print in black & grey or if I have a special layout or kit in mind, I might also print some in matching colors. The black ones will be printed twice – one is left black and the other one is to add foil to later on.


Printouts & Paper Punches


Now comes the fun part: matching your punches to your stamps. There are no rules – just see what looks best for you. If you print multiple times you can also experiment with using different punches with the same stamp.


Printouts & Paper Punches


I would love to see your creations as well, please share yours in our gallery and take part in the corresponding challenge in the forum!


Anika About the Author:  Anika is part of the hybrid team here at thedigitalpress.com. She loves to travel and use the photos her boyfriend takes (thanks for that!) to scrapbook. Digital, paper and hybrid. When she is not scrapping, she is most likely playing a computer game or in a city searching for a geocache.