Accomplishment: Every Accomplishment Begins with the Decision to Try

My middle daughter just started gymnastics. This is a pretty big deal for several reasons. Our older daughter has no interest in team sports. While she is quite active at school in basketball, gymnastics, soccer, etc., she has no interest in partaking in something where other people watch her. I do have to give her some credit because she did do a trial class and was interested enough for us to sign her up. But when it came down to it, she decided she didn’t want to do it after all. So it was kind of a big deal for my middle daughter to join gymnastics without the support of her big sister. And you know what?? She loves it!

We are hopeful something will come along that will spark an interest for our oldest, but for now we are celebrating the bravery and courage of our middle and trying to teach the importance of just trying.

Materials Used: You Can Do Anything Kit – River Rose and Inside Pixels Collab and Duo 06 | Love Me Like You Do Template – La Belle Vie

Now, I invite you to come over to the forum to join us in this week’s challenge! You can earn points toward monthly discounts in the shop if you participate (and you’ll get a page done for your album… win-win!).

.


Krista


About the Author  Krista Lund is a mom of 3, married to her high school sweetheart and living in the San Francisco Bay Area. Some of her favorite things are brownies, chips ‘n’ dip, taking pictures, and documenting her family’s story.

Tutorial Tuesday | Lengthen Your Elements

Lengthen Your Elements

Are you ready for another tutorial from me?? I am a scrapper who always resizes the elements and from time to time that means that the element that I resized isn’t big enough to be visible on my layout. I’m really not sure how to describe it so I’ll just start with my tutorial and hope it will make sense to you.

I’m pretty much finished with my layout but I want to add a ribbon so I am opening the ribbon and it is way too big.

Lengthen Your Elements

It just isn’t in proportion with the rest of the elements so I need to resize the ribbon until I am happy with the size of it.

Lengthen Your Elements

Now that it’s the right size I am going to rotate the ribbon and put it in the right place.

Lengthen Your Elements

It’s in the right place but it’s too small and it doesn’t pop out on the top, as I would like. There are two ways you can make the ribbon pop out on top. You can duplicate the layer and move it to the top and you’re done. I’d rather avoid duplicating layers if I meant to use the element just one time. Flowers, I duplicate all the time (as you can see) but to lengthen my ribbon….I use this method:

Select the rectangular marquee tool:

Lengthen Your Elements

Make sure the layer of the element you want to lengthen is selected…

Lengthen Your Elements

Now select the part of the ribbon you want to move/lengthen…

Lengthen Your Elements

I select a large area so I’m sure I’ve selected the entire ribbon. Now hold down the ctrl-button (CMD on Mac) on your keyboard and tap on the arrow of your keypad on your keyboard. 🙂

Lengthen Your Elements

As you can see, the marching ants are now around the ribbon and you can move your ribbon in place with the arrow keys from your keyboard.

Lengthen Your Elements

When the ribbon is in place….click ctrl-d (CMD-D) and there you go. You’ve lengthened the ribbon and now it also shows on the top.

Lengthen Your Elements

Now just add a shadow and you can continue with your layout. For me, this ribbon was the last element that needed to be added to my layout to be done. Here’s the finished layout….

Lengthen Your Elements

I hope you’ve learned something new and you’ll be able to use this when you’re scrapping.

Have a great day !!!


bianckaAbout the Author  Biancka is a creative team member here at The Digital Press. She is a stay-at-home mom (SAHM), a wife to Edwin, and mom to Jasper. She lives in the east of The Netherlands (about 30 minutes from the German border). She is addicted to scrapping, but also enjoys baking, reading books (mostly thrillers), watching her favorite TV shows, and photography.

Accomplish More | Bullet Journaling & Pretty Pages

Accomplish More - Bullet Journaling & Pretty Pages


We all need more time in life to do the things we really want to do, and not all of us are stellar at organizing our time.

Enter the recent “planner craze” that is sweeping the planet. I’m sure you’ve all seen zillions of pretty planners all over the internet.

I love the idea of all of the pretty planners that are out there along with subscriptions, clubs, and Facebook groups. In fact, The Digital Press has a wonderful array of planning supplies in the store here. Among them, you’ll find such gems as Miss Tiina’s great annual line of planner supplies… Mari Koegelenberg’s gorgeous planner-specific goodies… Hat of Bunny’s planner printables… Laura Passage’s scrapping planner products… and more!

I’ve bought planners, downloaded some others, and played around with a lot of different planning ideas. Unfortunately, so far none of them have worked well for me. And then… I stumbled across the idea of a bullet journal. To me, a dated planner just doesn’t fit my needs because I don’t have that many things going on in a given month that I need to track. For me, it is all about lists and keeping ideas & projects from falling through the cracks.

The basic idea of the bullet journal is to keep a small notebook in which you can maintain a regular stream of tasks and lists. You can find out more about bullet journaling at the bullet journal site, and there are literally thousands of links on Pinterest. But it is a generally simple method of using an index — “collections” — that are sort of over-arching categories… and then “rapid-logging” your ideas/thoughts — which is where the bullets come into play. Under categories you create your logs, lists, charts, graphs or other items. Then, as a final step, you simply migrate those tasks into action by moving them to a calendar. To me, it is a far simpler method of tracking and planning. You don’t spend so much time on the planner itself — and instead, spend more on completing the tasks themselves. I don’t end up migrating because I keep things pretty simple, and that is how it works for me.

There are a lot of people who are hard-core serious about their bullet journals (or bujo) and some dedicate hours upon hours to their journals, hand-drawing lots of fancy dividers, headers, sketches and everything else you can imagine. People use fountain pens or other fancy writing instruments, do calligraphy or other elaborate writing, etc. I love that idea, but have no time or patience to do something like that.

In terms of the more elaborate style of bullet journaling… here is a sample page spread from Kara at Boho Berry (someone I follow who is also a fellow bullet journaler)…

Accomplish More - Bullet Journaling & Pretty Pages
I love this. But at the same time, for myself, I feel that if I spent that much time “planning,” I wouldn’t have time for the actual “doing.”

But I do find that I want pretty pages like these (which our very own TDP team member Amanda created in a previous blog post).

Recently, it dawned on me that I can just use regular ol’ digital scrap supplies and create my own “pretty” bullet lists with those. Pretty and practical all at once. I am not as detailed or prettified as I could be, but it is a quick and easy page that gets me doing instead of planning. And if I want to get wild and crazy, I can shift it slightly, print it out and paste it into my physical bullet journal. If not, I can keep it on my desktop, send it to Evernote, or put it onto my phone.


See… easy peasy. A simple way to get my to-do list done — and add some color and fun while I’m at it. I used the pie chart as my version of the “Level 10 Life” (but because I’m not currently working or dealing with much in the way of finances, I left those out and added some of my own). I can track and see what needs adjusting and where I should put more emphasis week to week. I can accomplish more, but still give a little bit of style and prettiness. Win-win!

How do you plan out your week? Do you worry about making it “pretty” or just stick to functional? I invite you to come join us in TDP’s forum for this week’s challenge related to this post!


me

About the Author  Kimberlee is a lover not a fighter; a stay-at-home gran, a poet, and a lifelong learner. She grooves on saturated colors, Tuesday dance parties, optimism, glitter and sunshine. She colors outside the lines.  She is a dreamer. She is a collector of moments.  She is all about the story.  Kimberlee completed her MFA in Creative Writing and recently finished her M.Ed. in Instructional Design but still can’t figure out what she wants to be when she ‘grows up.’

Tutorial Tuesday | Accomplish Albums Faster

Do you every feel like working on an album is an endless endeavor? Do you ever think to yourself “How can I get more pages done in the same amount of time?”  Using double page spreads is a great way to accomplish your goal!  Even though I usually upload single layouts (LOs) at a time to make them easier for viewing online, I always end up making double spread layouts.  I prefer the double spread for a single event/theme.  I know there are some who agree with me and I know many disagree; either way, it’s ok.  Sometimes you might want to throw in a double spread, even if most of your LOs are single pages.

Here are some tips for using double spread layouts

  1. Make it simple – Start out with a double sizes base, (i.e.: 24×12).  You might be thinking “Wow…that’s a lot of space,” but, a double spread doesn’t have to be intimidating, and it doesn’t have to be 2 separate full layouts.  By spreading out, you can include larger photos/elements, more journaling, or even some white space.  Templates are a great place to start.  Many designers offer 24×12 sized templates, or 12×12 sized template sets that coordinate well.  Many project life templates/ layout styles are double spread as well.
  1. Make it cohesive – My double page spreads are almost always made using the same kit and photos from the same event/day.  On occasion, I will mix it up, but only if the final spread is cohesive.  I might use black and white photos on both sides, to keep a similar mood, or maybe even the same kit, but with photos from different events.
  1. Make it big – Another of my favorite ways to make a double page spread is to use BIG photos.  If there is a photo from a set that I am in love with, then I won’t hesitate to have that photo take up at a whole 12×12 side.  I might even use a 24 inch wide panorama photo spanning the entire spread.
  1. Make it to the end – It’s important to keep your end goal in mind.  Whether your goal is a year, or a certain number of pages, or some other “album-defining” moment.  Try not to over think it, and when you’re ready, go ahead…push that print button!

Here are a couple of examples of my own double spread LOs:


Here are some links to check out to get started on double spreads:

TEMPLATES HERE

GALLERY INSPIRATION


Farrah


About the Author  Farrah Jobling is a member of the creative team here at The Digital Press. She lives in Denver with her amazing family — Mike, Nicholas (9), Claire (6), Hope (1.5 yr old puppy) & Kringle (3 mo old bunny). She works from home as a photographer and enjoys scrapping her personal photos.

How to Create Cards Using Pocket Cards

How to Create Cards Using Pocket Cards

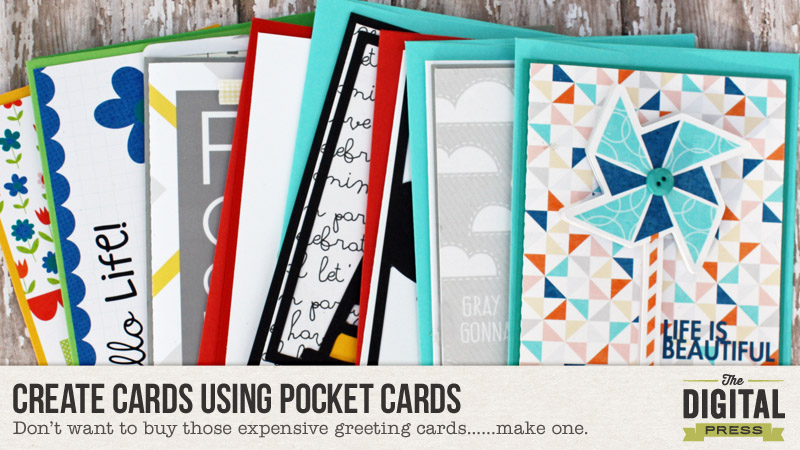
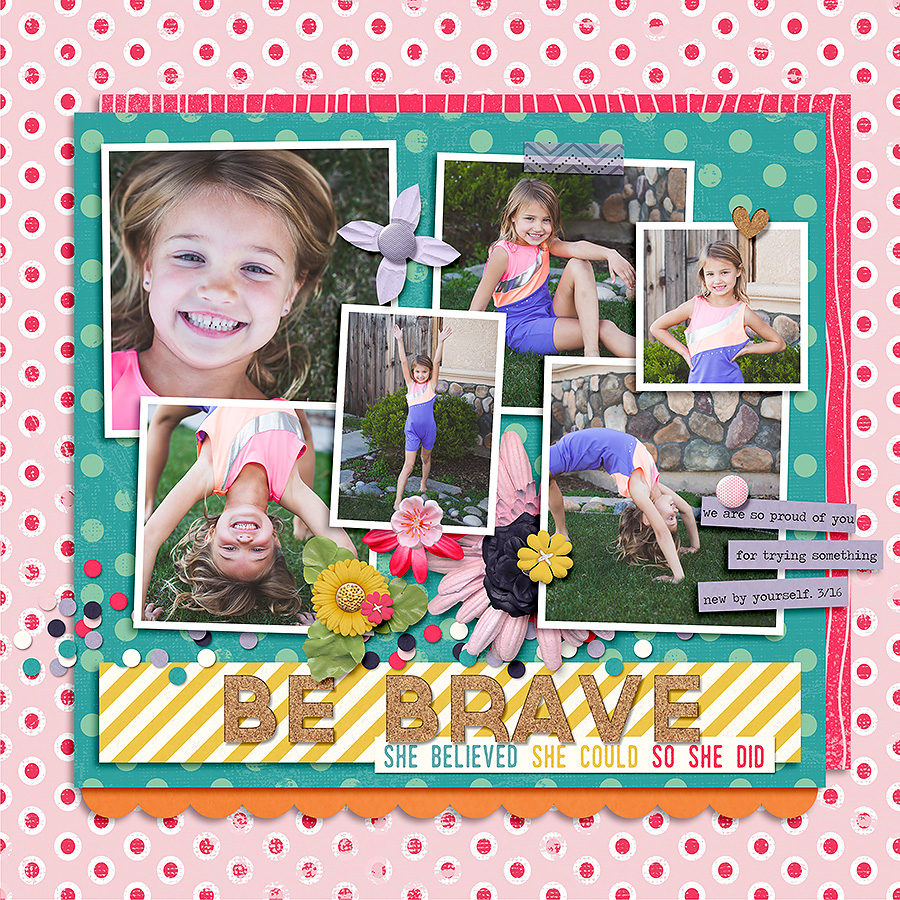
Are you ever in that situation where you are running out the door and suddenly remember you forgot to get a birthday card for the party your child is going to?  Or a “Thank You” card for a gift someone gave you, maybe even just a “cheering up” card?   I don’t know about you, but cards are VERY expensive and I hate buying them.  So, I want to show you how to make greeting cards to build up your stash so that you will always have one on hand.  No more excuses for not giving someone a card.

If you are crafter you probably already have most of the items on hand.  Even if you are mostly a scrapper, you still probably have the basics.  Most digital kits these days will either come with a few pocket cards or have a pocket card edition to the kit.  I love pocket cards because they are so versatile.  Since I’m an hybrid gal, I immediately see them as cards.  I love giving people homemade cards even if it’s just to brighten their day.

Here is what you will need:

  • Digital pocket cards
  • White cardstock
  • Colored cardstock
  • double sided tape
  • glue pen
  • embellishments
  • Pop dots

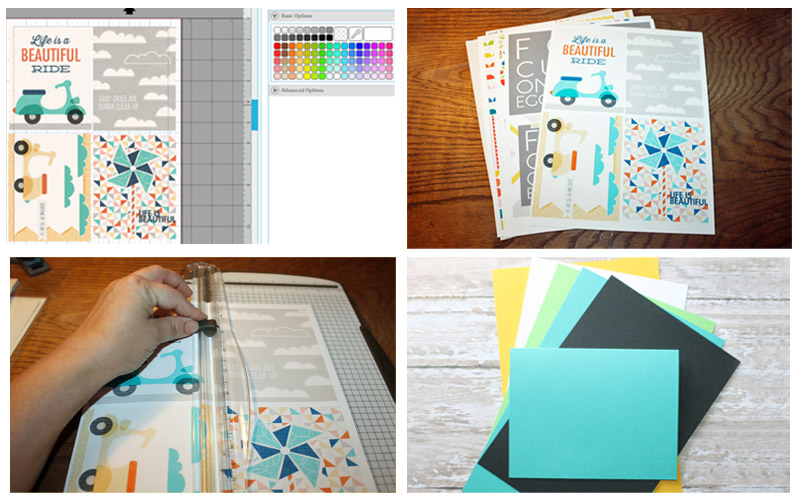
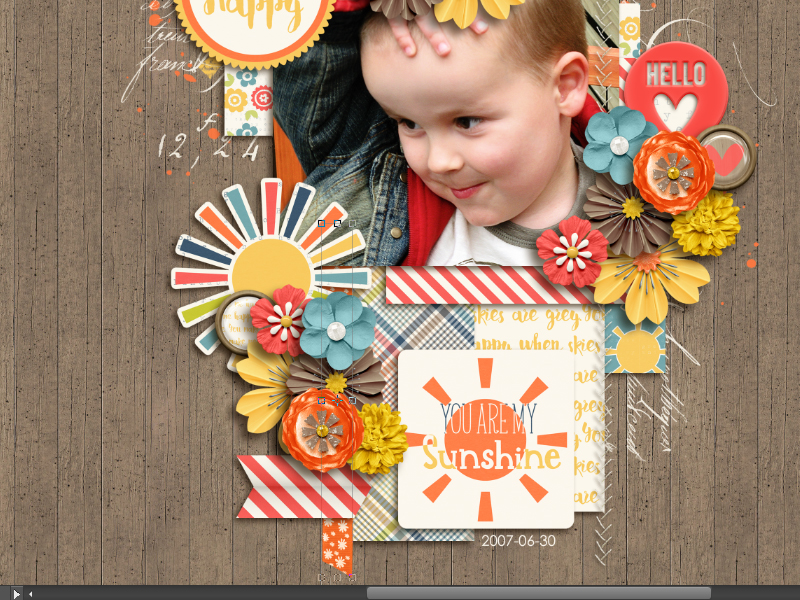
Here are the pocket cards I used for this project, but any of them will work.  You probably already own several.  There is definitely one out there for EVERY occasion.

How to Create Cards Using Pocket Cards

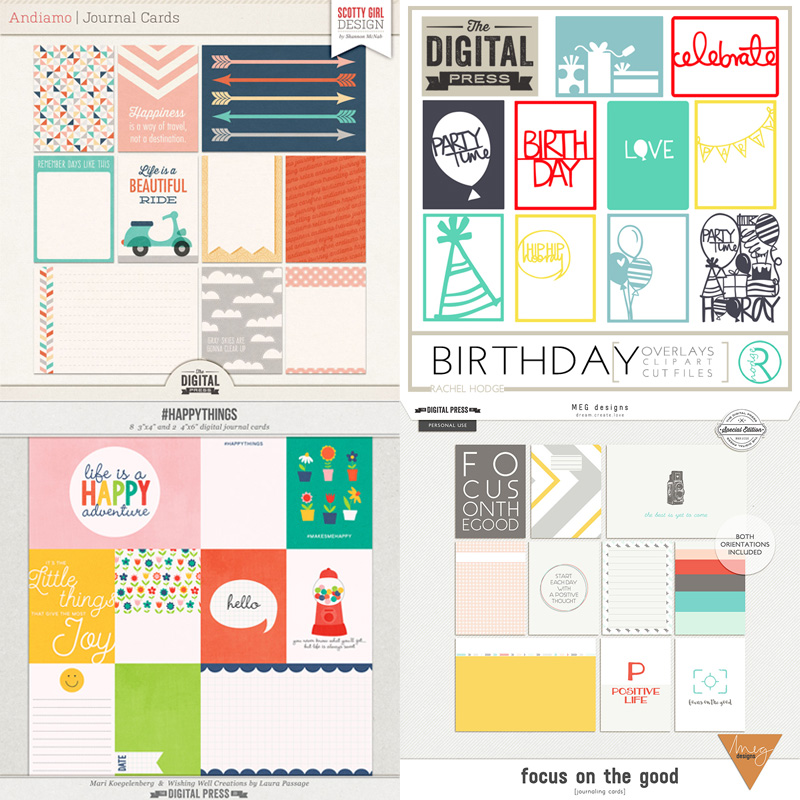
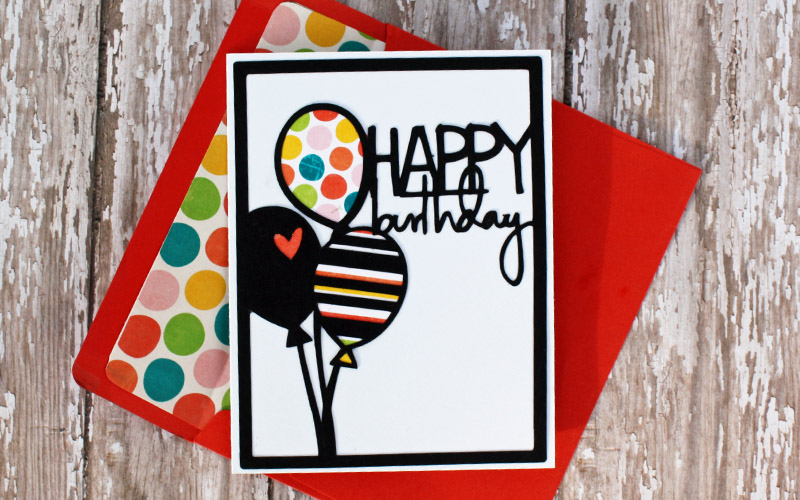
Andiamo Journal Cards, Birthday Card Set, #Happythings Journal Cards,
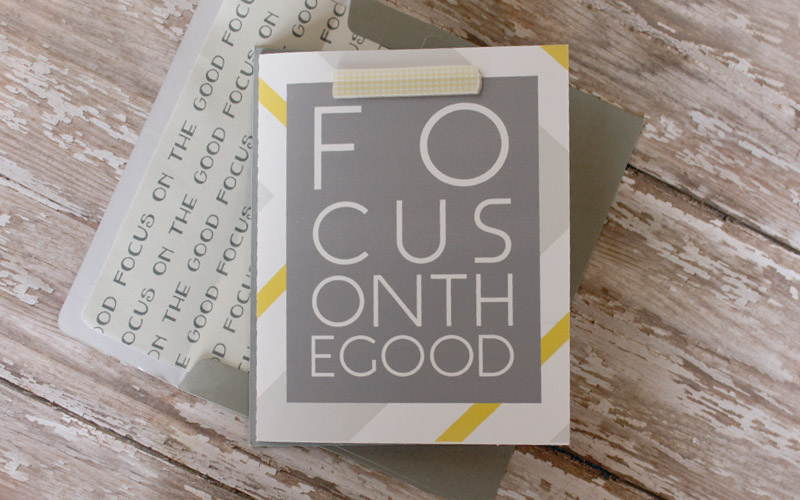
Focus On the Good Journaling Cards

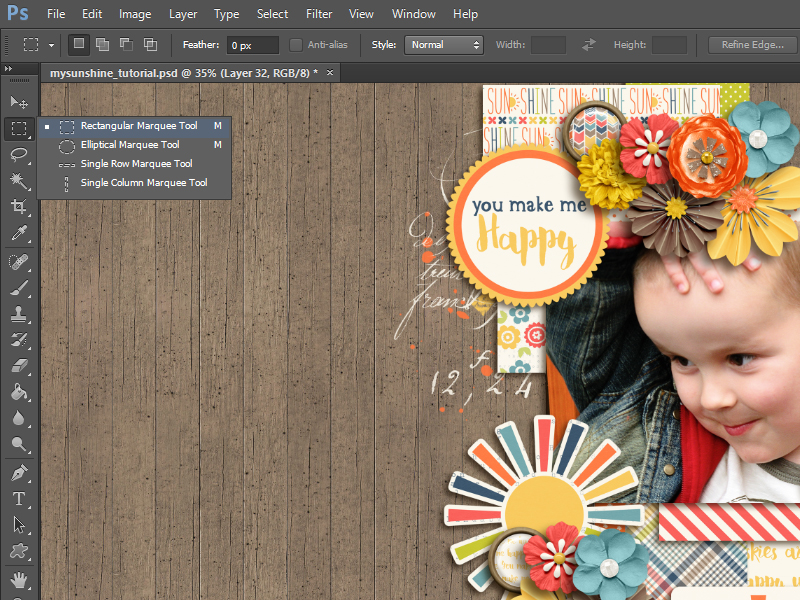
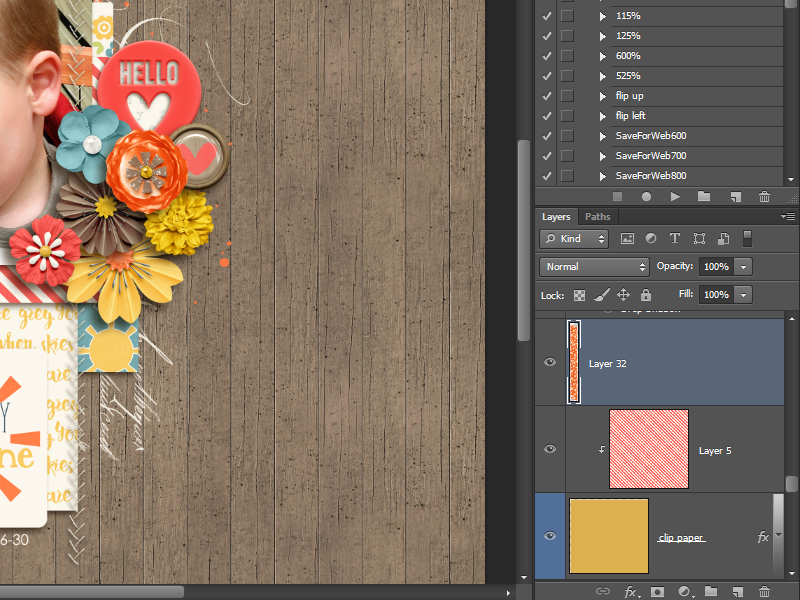
You can use any photo editing program you have to create these cards.  You do not have to have a cutting machine, however, I did use mine because I’m a little obsessed with it.   You can be as simple or as fancy as you would like.  I did a little of both.

How to Create Cards Using Pocket Cards

Some pocket cards are fine without adding anything to them.  Some just need a saying or an additional element. I like dimension so I usually cut out extra elements.

For some of my cards, I started out by drawing out a 5″ x 8″ triangle.  At the 4″ mark, I drew a dashed line – this is if you are going to use a cutting machine, if not, just use the ruler in your editing program and open and place your pocket card at the 4″ mark.   Two cards fit to a page.  That is it… print the card, cut with your paper trimmer and fold.  It really is that simple.   If you want it to be a little fancier, add some cute elements from the coordinating kit……go one step farther and add a piece of coordinating cardstock to the back.

How to Create Cards Using Pocket Cards

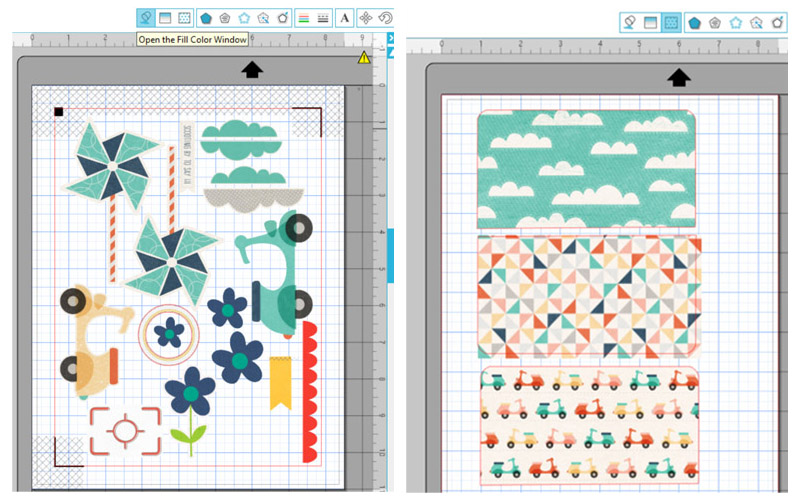
For that extra little touch, I added several elements to a page to do quite a few cards.   I did a print and cut with my Silhouette, but a pair of scissors will work just as good….I’m just not that great with them.   I also love to add matching inserts for the envelopes.


How to Create Cards Using Pocket Cards

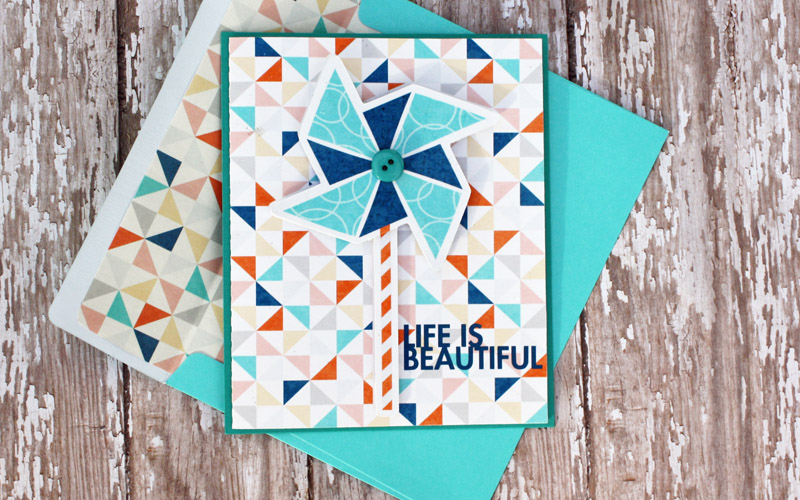
I took the same card above and added the extra elements I cut out with pop dots.  I also added a piece of cardstock to the back and a button to finish off. Cute, isn’t it?!

How to Create Cards Using Pocket Cards

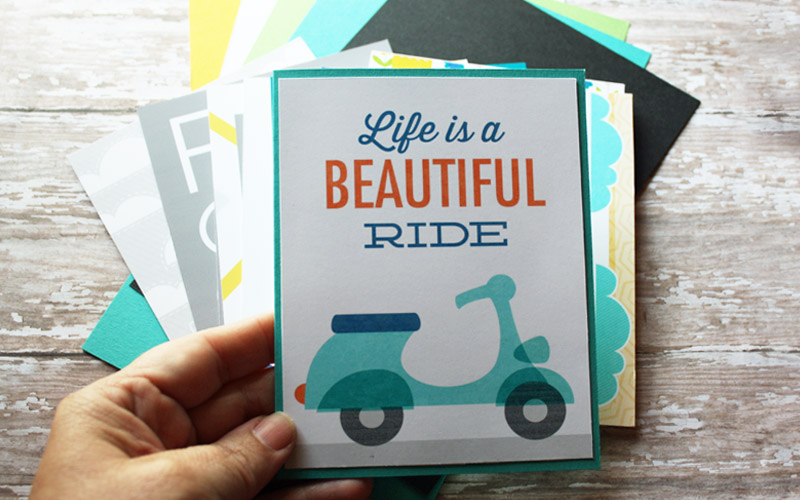
Another way is to just cut several pocket cards for the fronts of the cards.  You can get four pocket cards to a page.  After cutting with your paper trimmer add to a piece folded cardstock with double sided tape or your adhesive of choice.  Again, keep it simple or fancy it up a little.

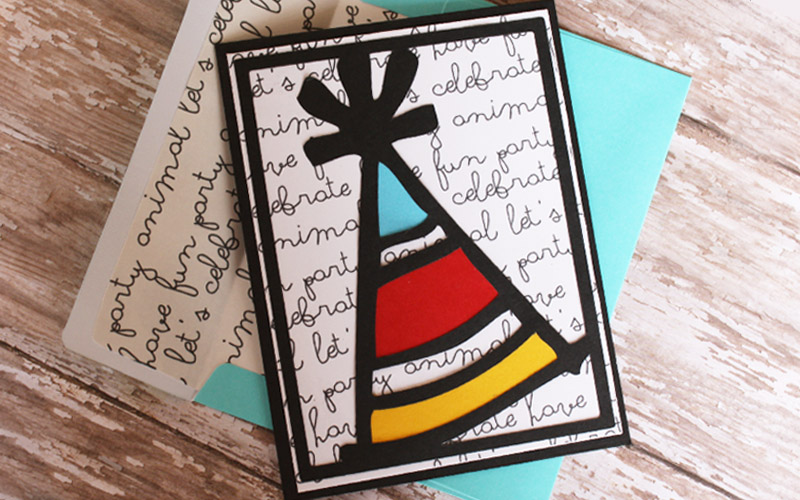
Here is a front added to a piece of folded cardstock.  It is fine just the way it is, but of course I had to take up a notch.

How to Create Cards Using Pocket Cards

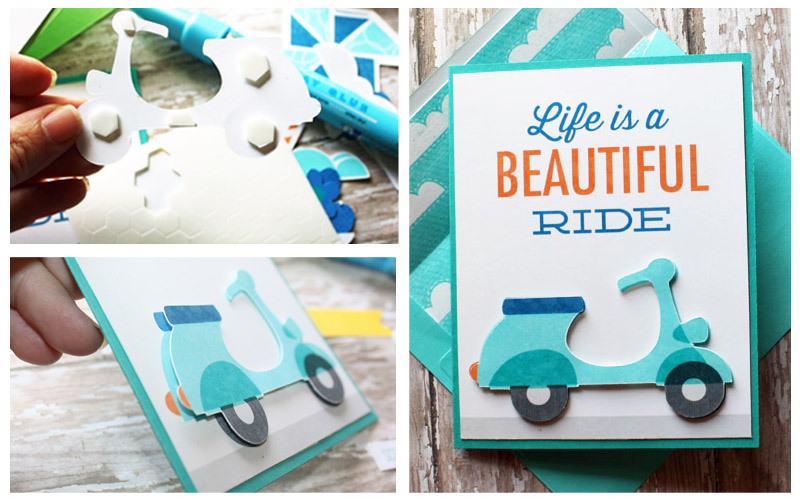
Here is the same card with another scooter cut out and added to the top with pop dots.  It adds an extra little touch.

How to Create Cards Using Pocket CardsHere I cut the card and added a piece of grey cardstock, cut out the washi tape and added with pop dots.

How to Create Cards Using Pocket Cards

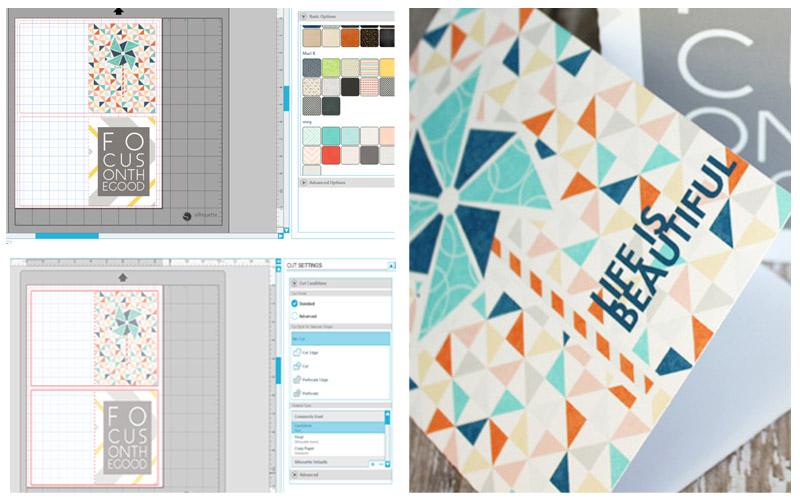
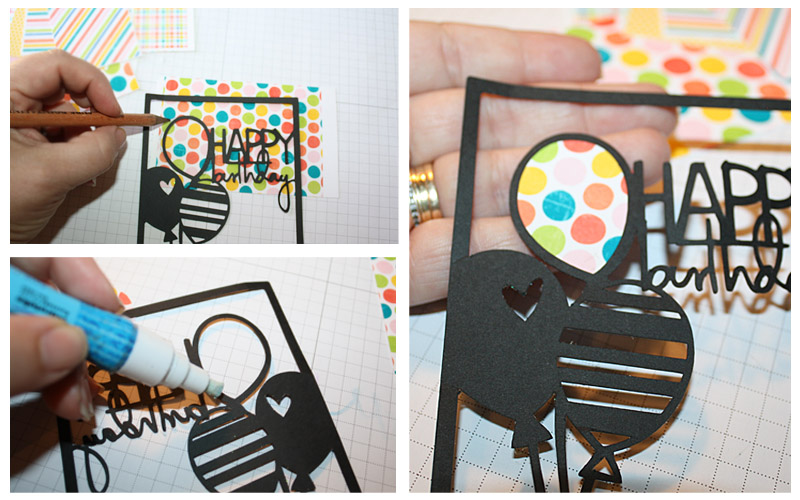
This card is done a little different than the others.  You do have to have a cutting machine to get the same affect.  I’m sure that you could do something similar in your photo editing program.

CREATE CARDS USING POCKET CARDS

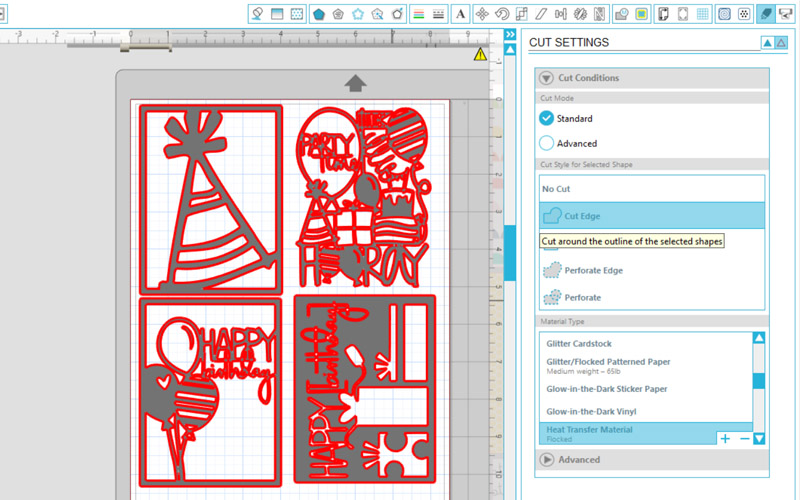
First, open the cutting files in the program that your cutting machine uses.  I have a Silhouette Cameo, the program I am using is Silhouette Studio Designer Edition.

How to Create Cards Using Pocket Cards

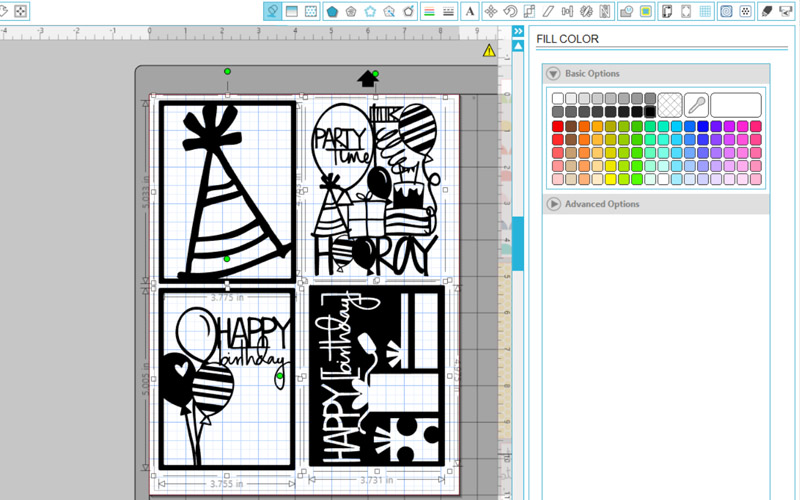
Next, make sure that your cutting lines are turned on and choose cardstock material type.  Now add cardstock to your mat and send through your machine.  It did take me a couple of times to get a clean cut.  I had to change my mat and slow down my cutting speed.

How to Create Cards Using Pocket Cards

This is a good card to use up some of those scraps that you have on hand.   I just took a piece and traced the balloon with a pencil.  Cut to the inside of your trace marks and glue down with a glue pen.  Add to the top of your card base and your done.

How to Create Cards Using Pocket CardsI really like how this one turned out.  I used cardstock scraps that I had on hand.

How to Create Cards Using Pocket Cards


How to Create Cards Using Pocket Cards

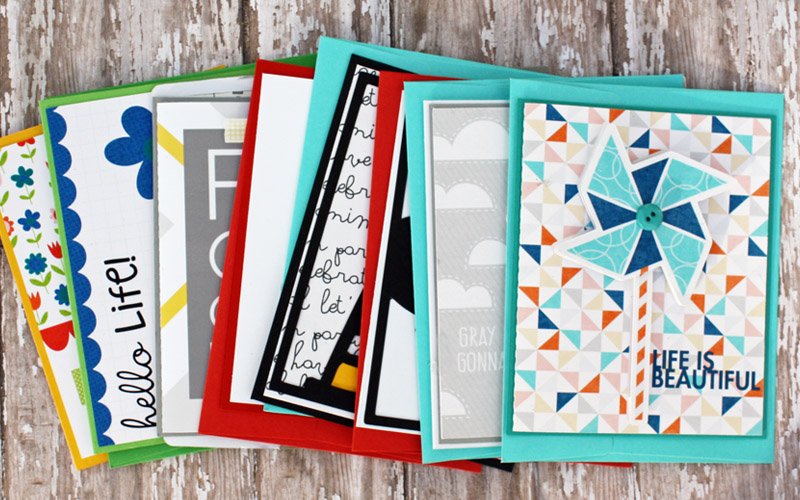
I hope this tutorial has inspired you! If you’d like to give it a try, please join me in the forum and have fun creating some cards.  You can earn points toward this month’s challenges!  I can’t wait to see your creations.


TanyaAbout the Author  Tanya is a part of the hybrid team here at The Digital Press. She has been hybrid crafting for at least 12 years now, and loves creating and sharing those creations with others. Her all-time favorite tool is her Silhouette Cameo. She has been married for 26 years and has two sons: Chris, 24 and Chance, 20. She also enjoys crocheting, photography and woodworking.
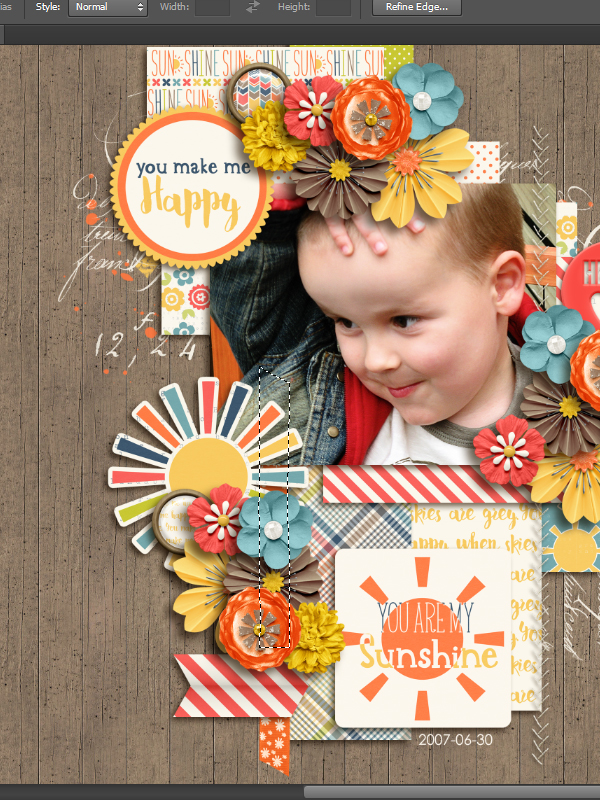
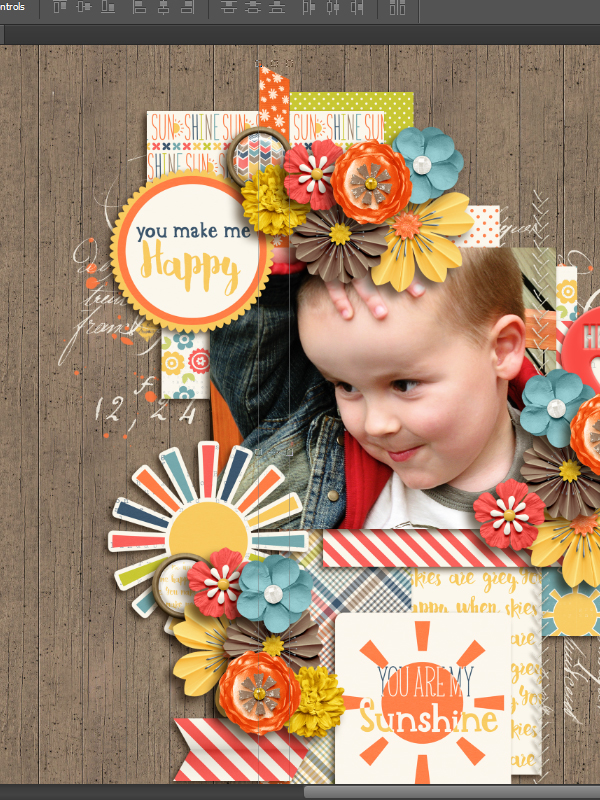
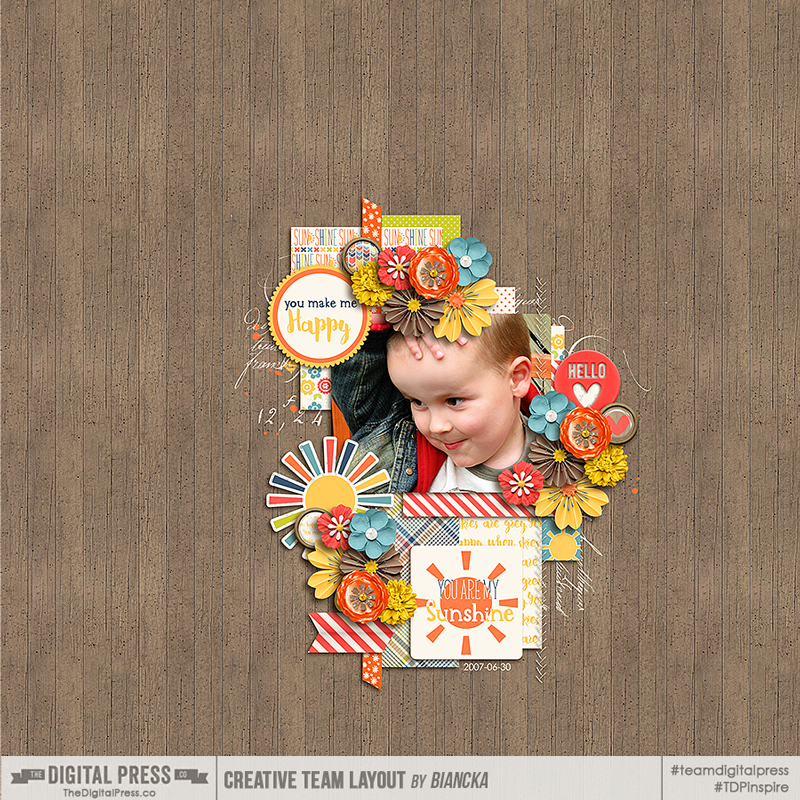
We Did It!

We Did It!

Life is full of all sorts of wishes and worries… goals and “getting there”s… and hopefully a good smattering of “I DID IT!” too. It feels great to accomplish something!

Big accomplishments feel fantastic, obviously… but sometimes the small wins in life feel pretty good, too. Something that might be a small thing to one person can be a huge accomplishment to another.

I have a daughter who is a worrier (she gets it from me!). Recently, she worried about a bicycle training course at school, and the closer it got, the more she worried. Therefore, when the course was complete and she had passed her test, it was a very big deal to her (and therefore, it was a big deal to me, also!).

I chose to document her accomplishment in order to help remember, in the future, how it felt…

We Did It!

[ credits: KimB – Free Spirited Kit ]

This week, we’ve got a challenge waiting for you in the forum that is related to this idea of documenting your accomplishments.

I can’t wait to see what you are proud of… so come on over to the forum and join me! 🙂


CorrinAbout the Author  Corrin is on the creative team here at The Digital Press, and is a fan of the Big Bang Theory and a lover of cozy pajamas. She lives in the currently wet & chilly South of England with her husband and 4 crazy kids, who regularly discover & plunder her secret chocolate stashes! She is still trying to get the house straight after moving 2 years ago. Who knows… maybe this will be the year she reaches the bottom of the laundry pile!