Feature Friday | Rachel Hodge

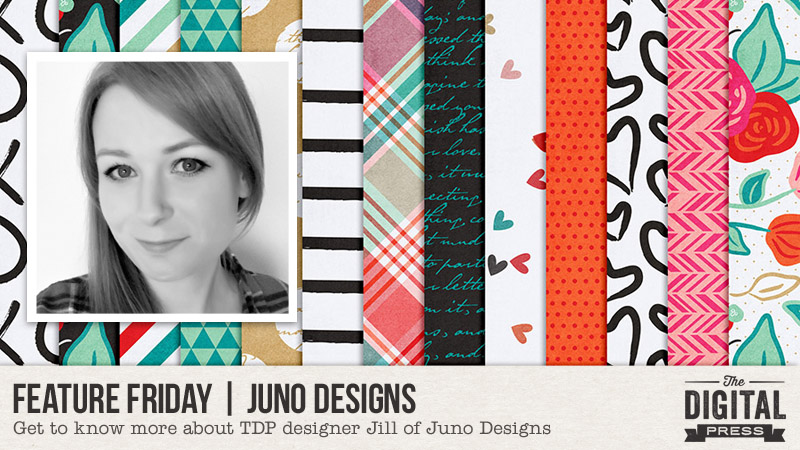
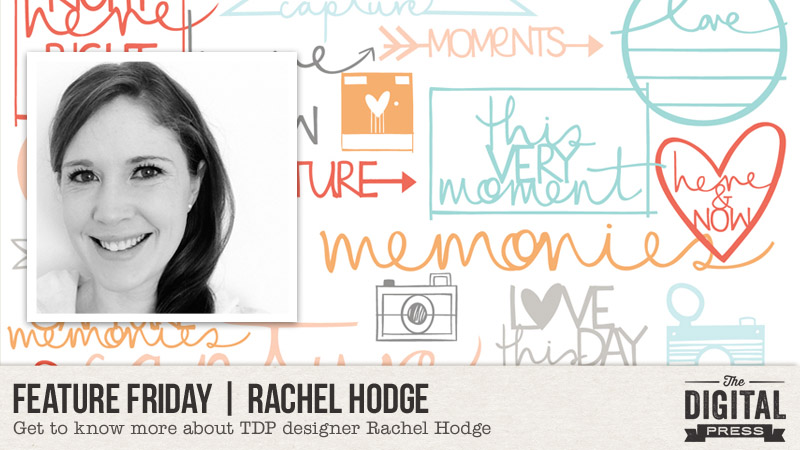
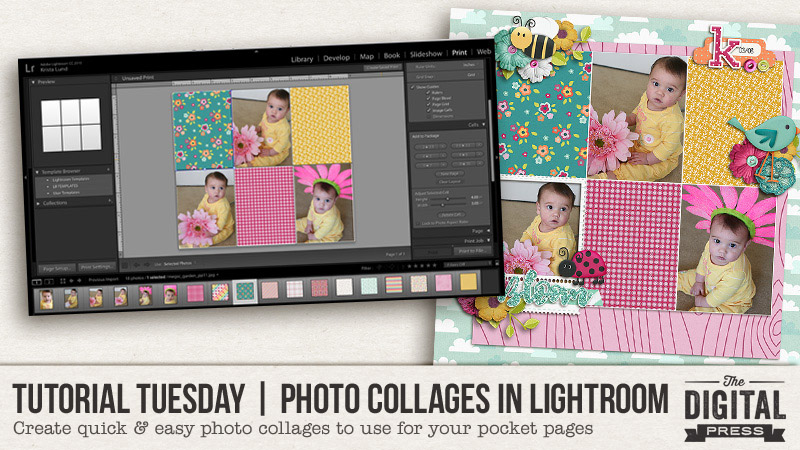
Yay! Once again, it is Friday! That means it is time for a new Feature Friday post here on the TDP blog, and today we are featuring Rachel Hodge!

Rachel lives in Australia with her husband and 4 kids, and aside from family, her loves are… photographing the everyday, scrapbooking, finding hints and ideas that make her say “that’s clever!”, home decor, and holiday planning! It sounds like a busy life, and yet Rachel still finds some time to design the gorgeous assortment of digital stamps and cut files that we all adore!

This is Rachel’s second designer feature here on TDP’s blog (you can find her first feature article from August 2016 HERE)… and whereas last year we used our feature series to help you get to know some fun trivia about your favorite designers — this year, we’re going to use our designer feature series to give you a little peek into our designers’ creative spaces and more insight into their creative processes.

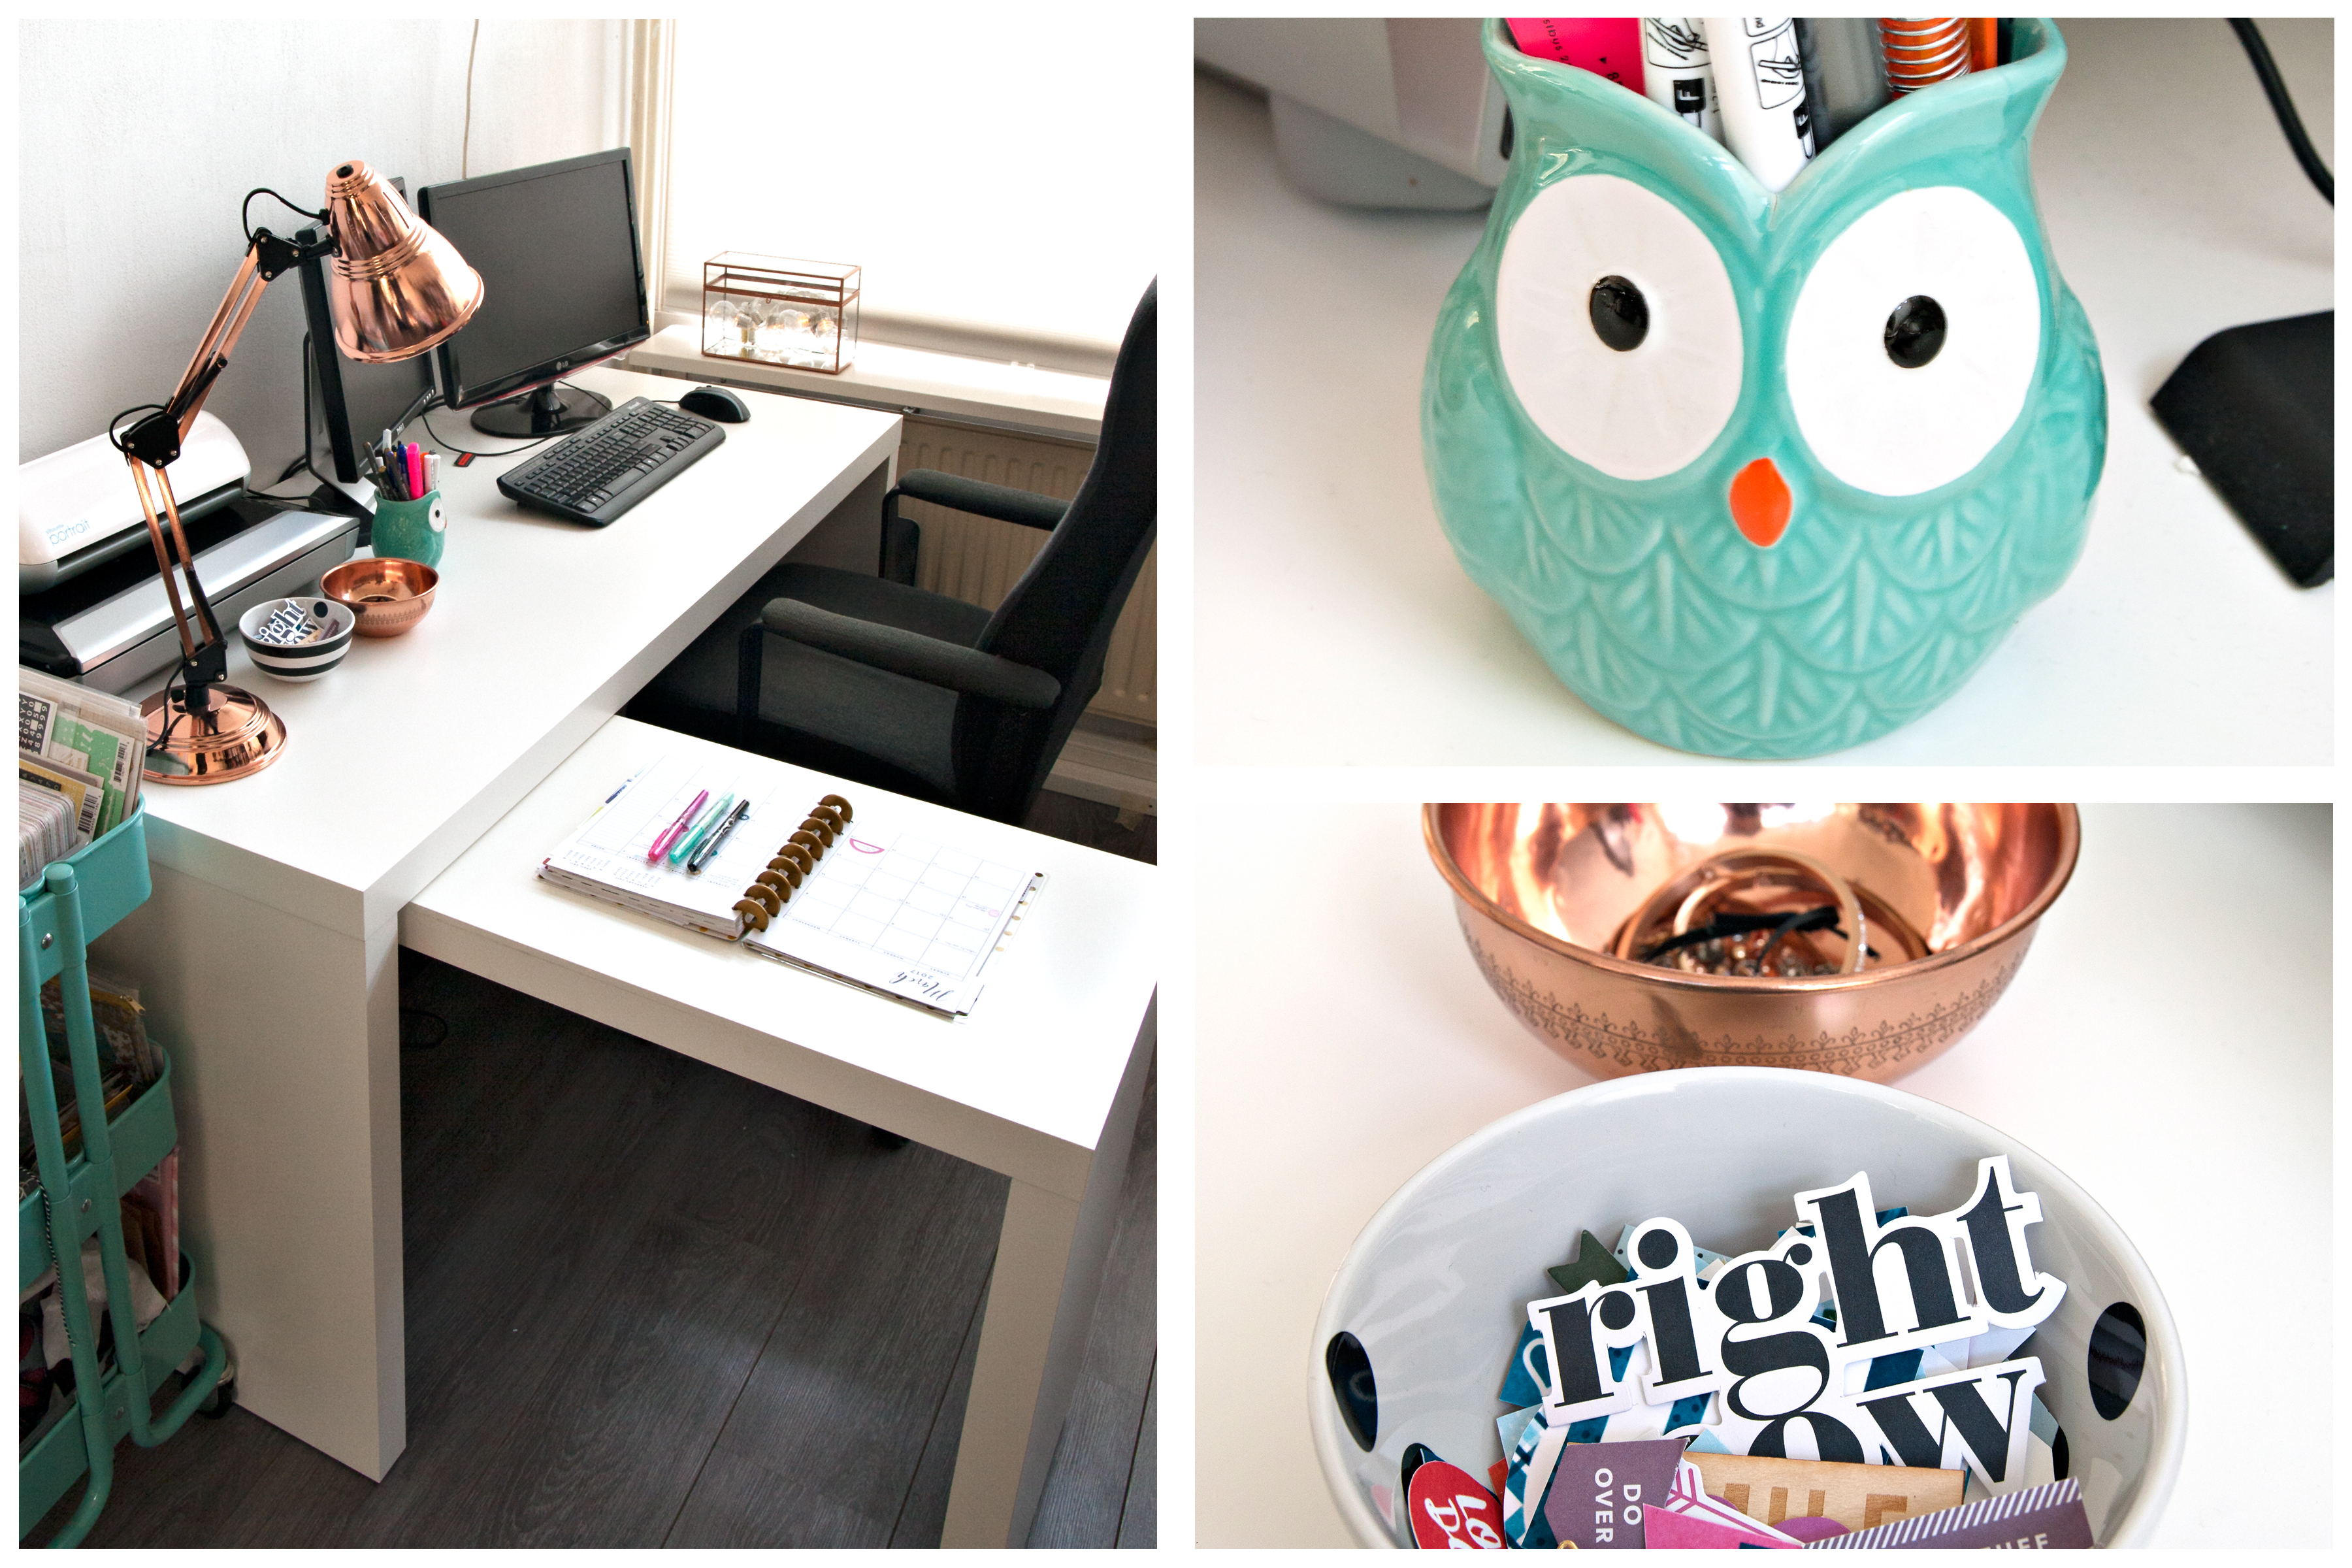
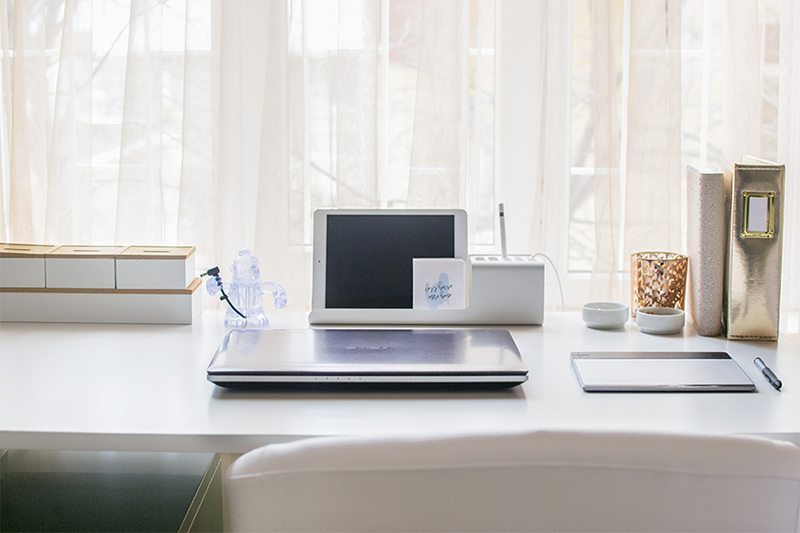
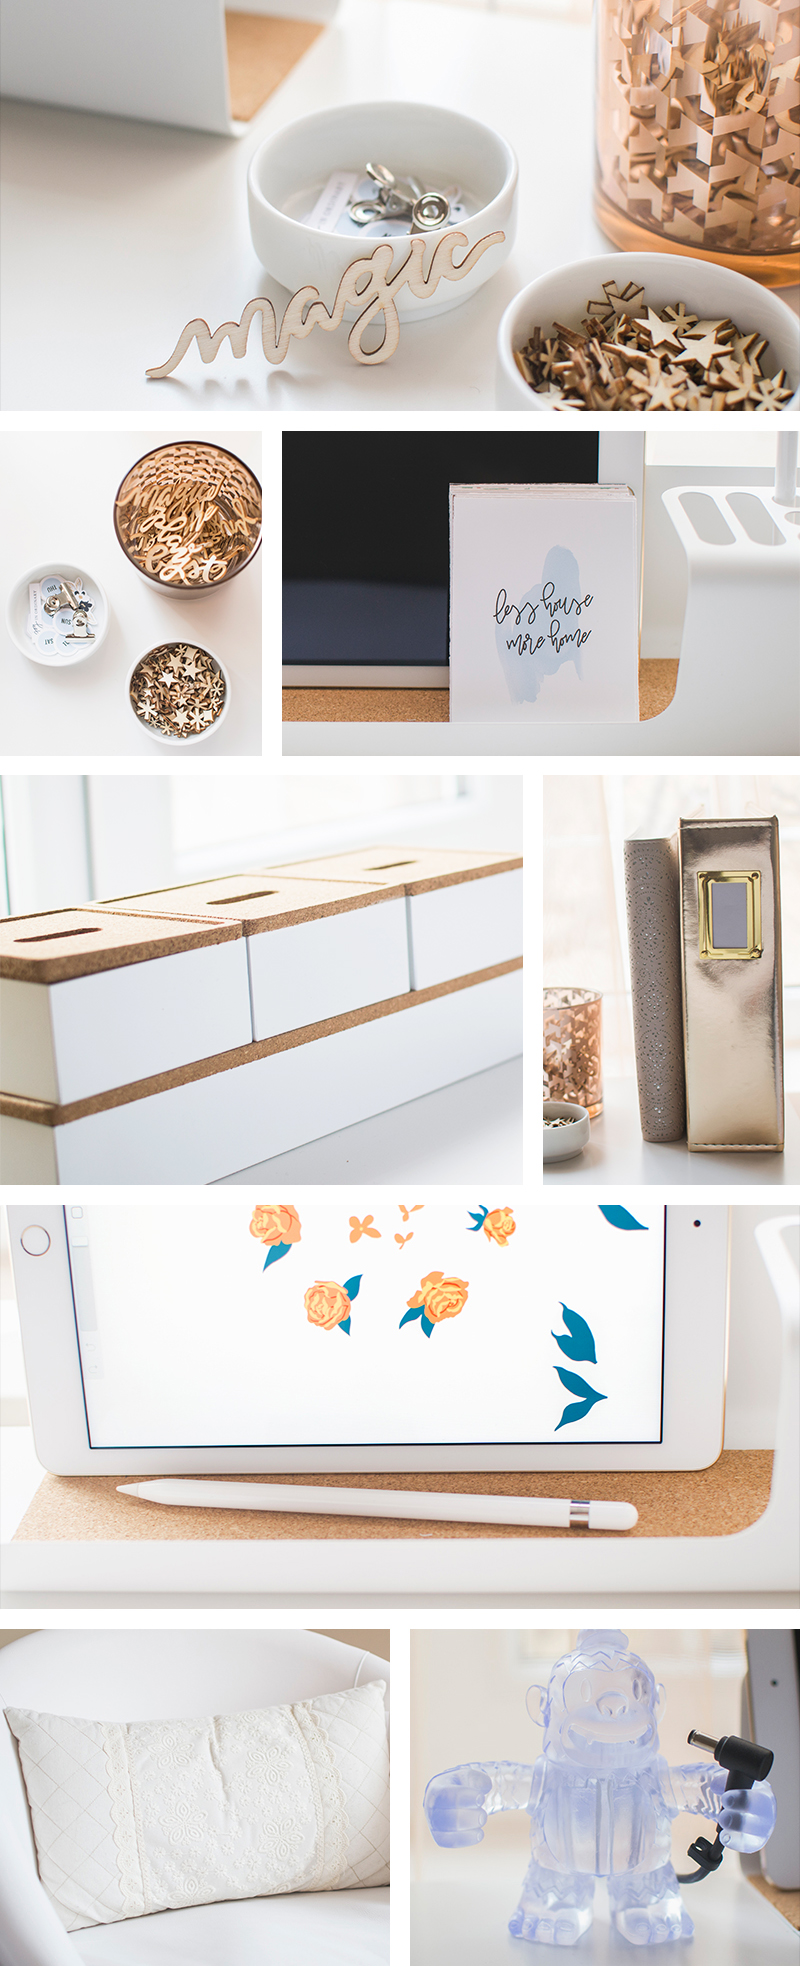
We asked Rachel to show us a peek of her creative space, and maybe tell us a little about her creative process. As such, here’s a quick look at the space in which Rachel gets creative…

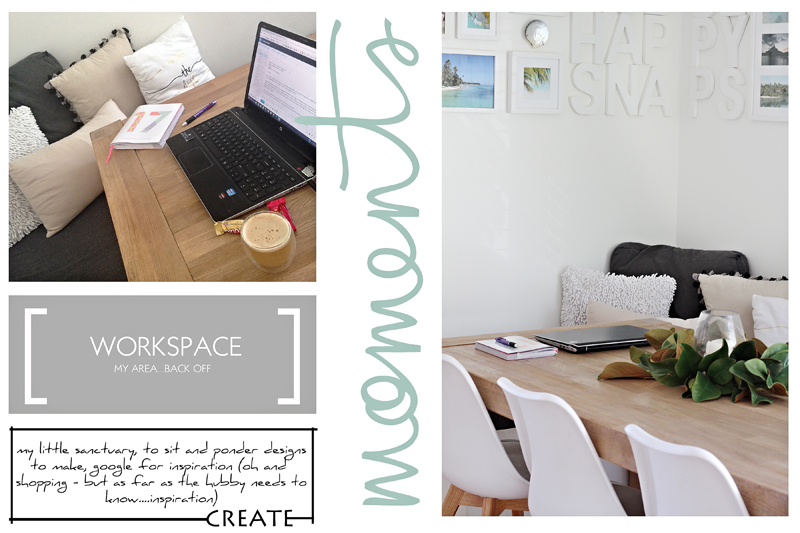
Of her workspace, Rachel says, “OK, my desk space is pretty much (well, actually it’s not “pretty much” — it IS!) my dining table! I like to plonk myself at one end and sit down with my diary & my coffee and just design away!”

It definitely sounds like a practical place to work, for a stay-at-home mum with small children. And just look at that “HAPPY SNAPS” wall art, too! Love it! 🙂

We also asked Rachel to give us a Top 5 list that is representative of her at this point in her life, and she chose to share these 5 Things That Are “Me” Right Now

  1. My Lightbox — which displays the current events in our household. Right now, it’s set to “the everyday chaos” …because a house of 6 is pretty much that! Between school, kinder, playgroup, groceries, cleaning, trainings, sports on the weekend, drum lessons, cooking dinner, and scrolling on Instagram — chaos sums it all up perfectly!
  2. Chocolate — I think I may have said this before, but I seriously CANNOT STRESS IT ENOUGH… chocolate for me is not a “need” but a “NECESSITY,” people! A NECESSITY!
  3. Instagram — I’m loving Instagram at the moment! It’s where I seem to be getting a lot of inspiration… for not only craft related things, but also for everything from home decor, to food, to holiday destinations (oh yeah!).
  4. Coffee — If the family is to function, and survive, and make it to the next day… then I need my coffee!
  5. My iPad — I love getting to the end of the day, when the kids are in bed (I don’t care if they aren’t asleep as long as they are QUIET AND IN THEIR BED)… I fluff up the pillows and sit on the couch with my iPad, watching my shows/movies/anything with Chris Hemsworth in it… 🙂

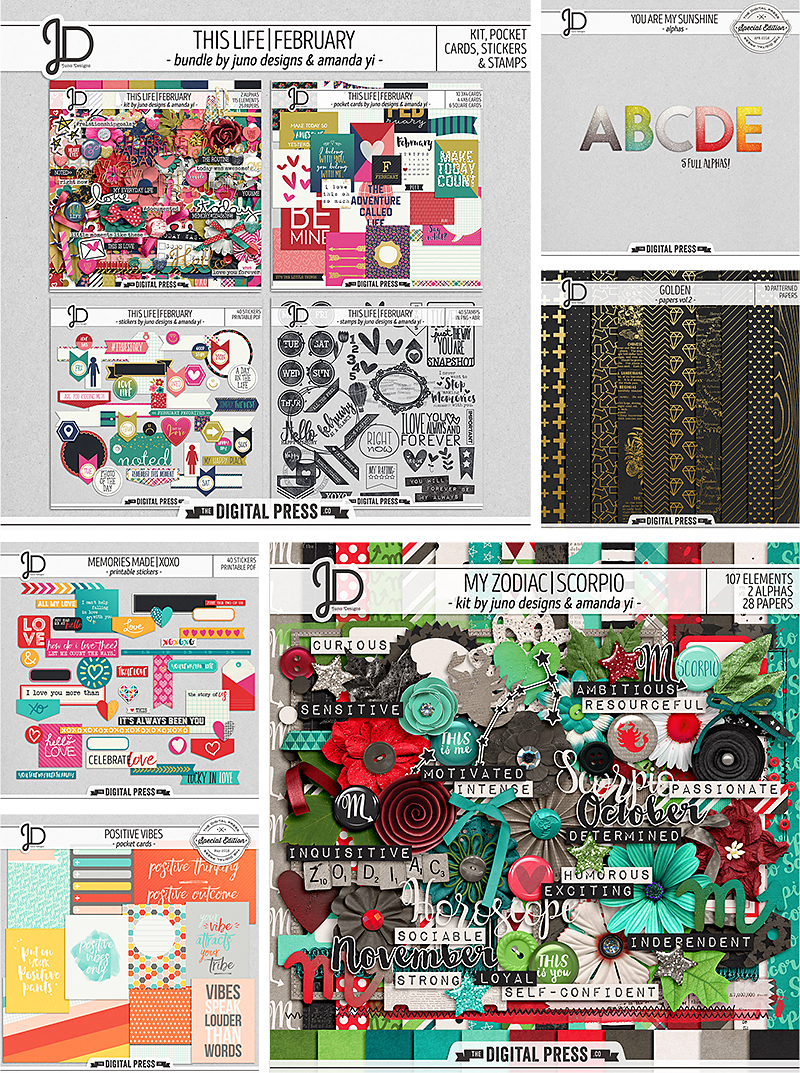
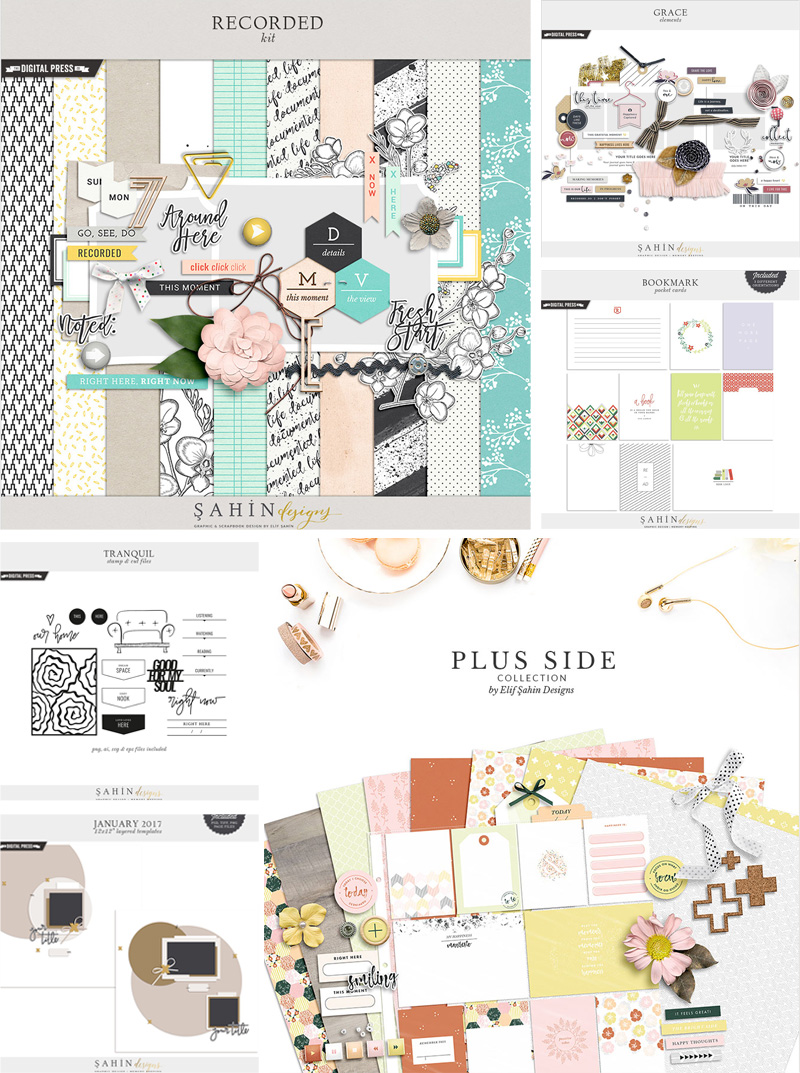
Oh, I think many of us can relate to the chaos and the chocolate! And maybe one day Rachel will make a cutting file of Chris Hemsworth… but until then, here’s a peek at some of the other fun and fabulous creations that you will find in her store at The Digital Press

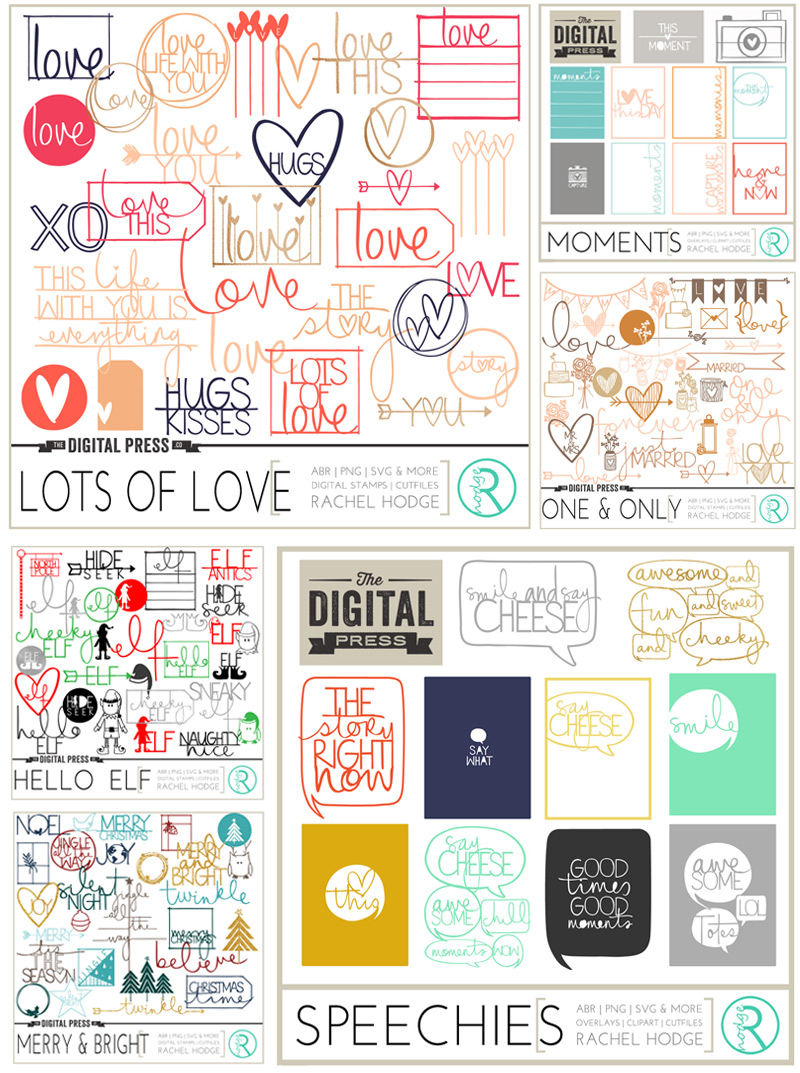
Aren’t her products fun?! I love Rachel’s designs! They are so versatile, and she has something for just about every occasion.

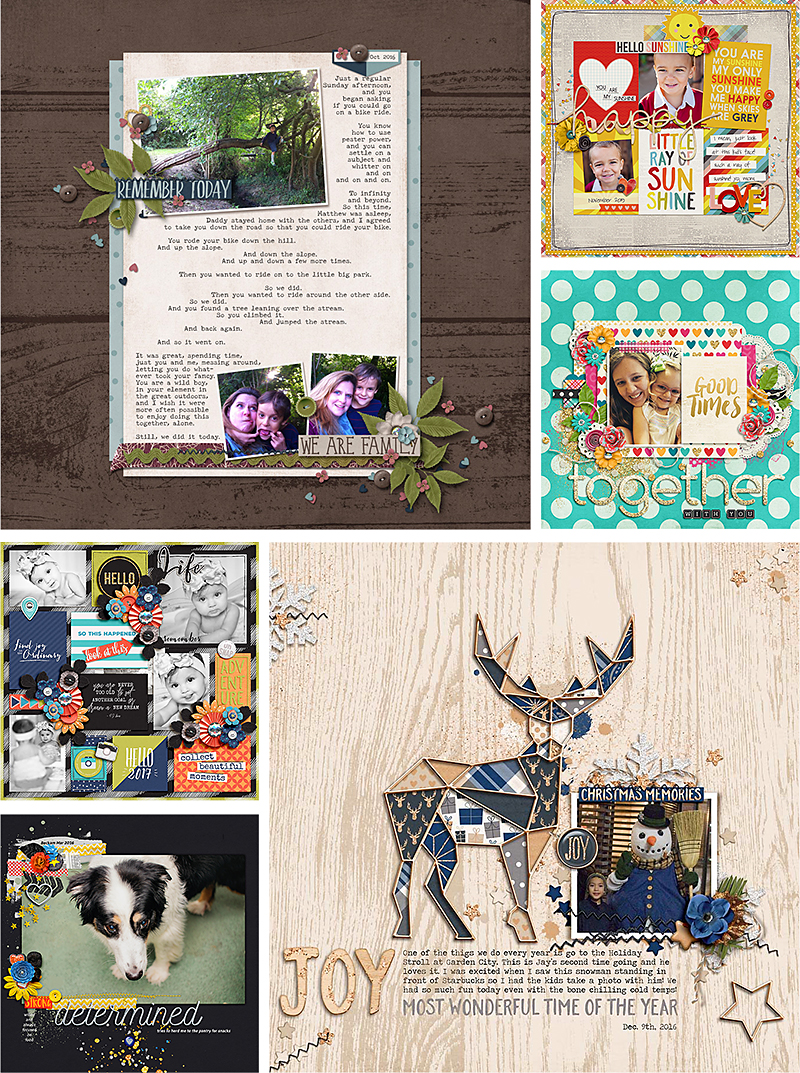
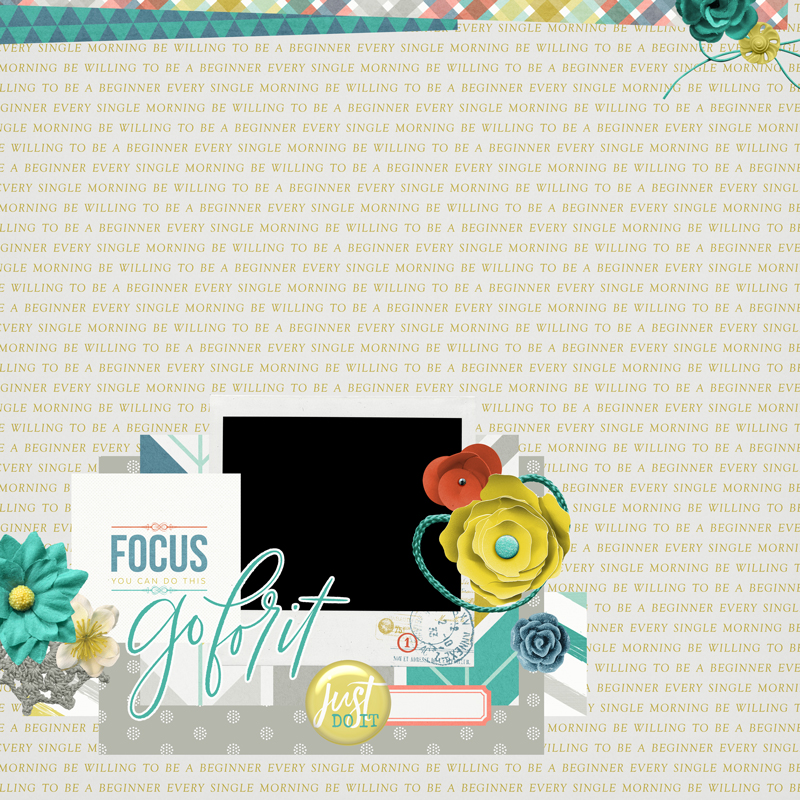
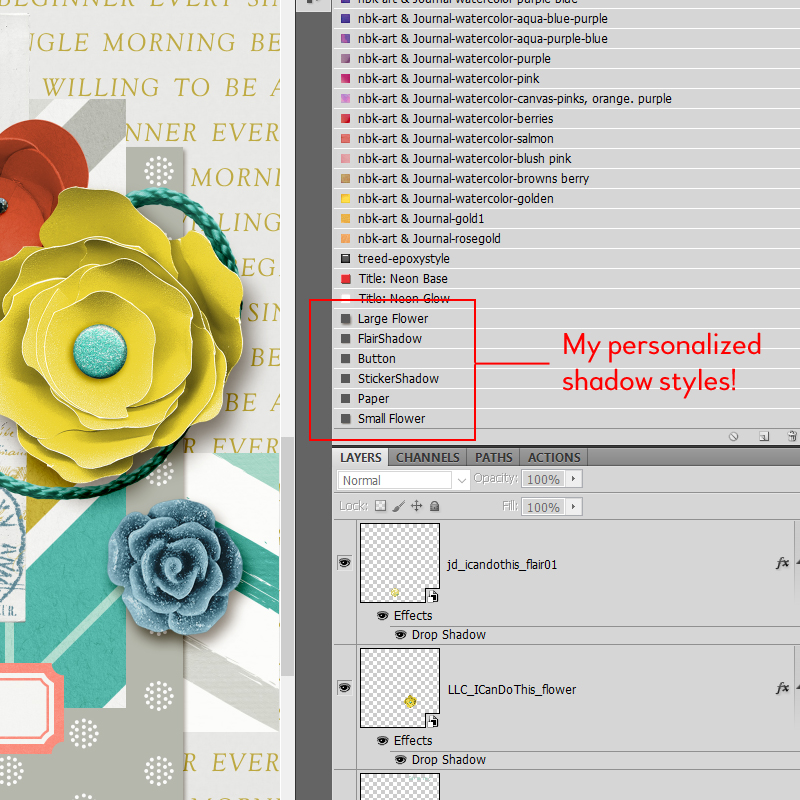
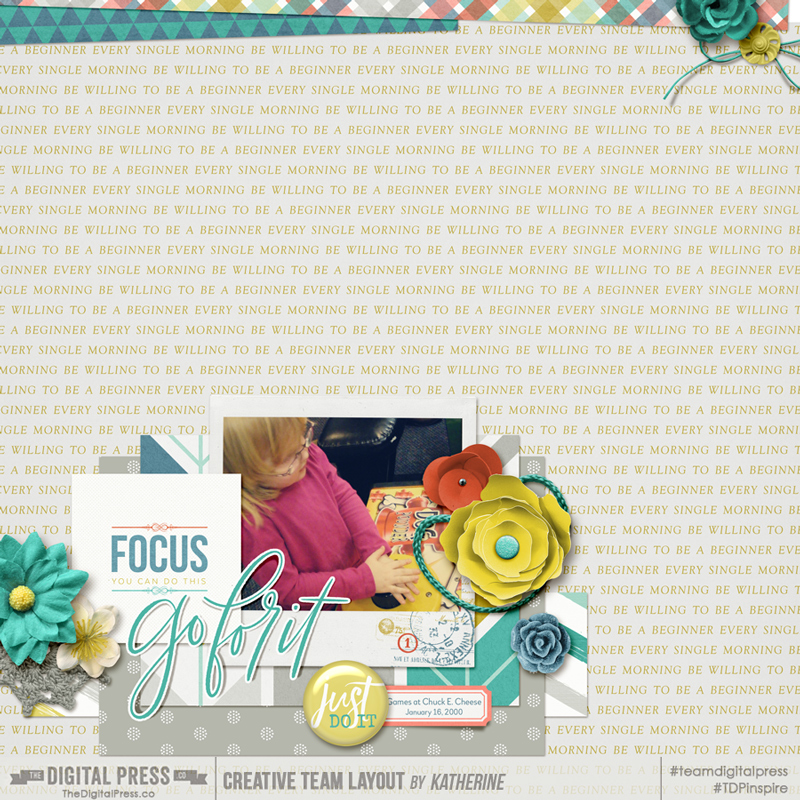
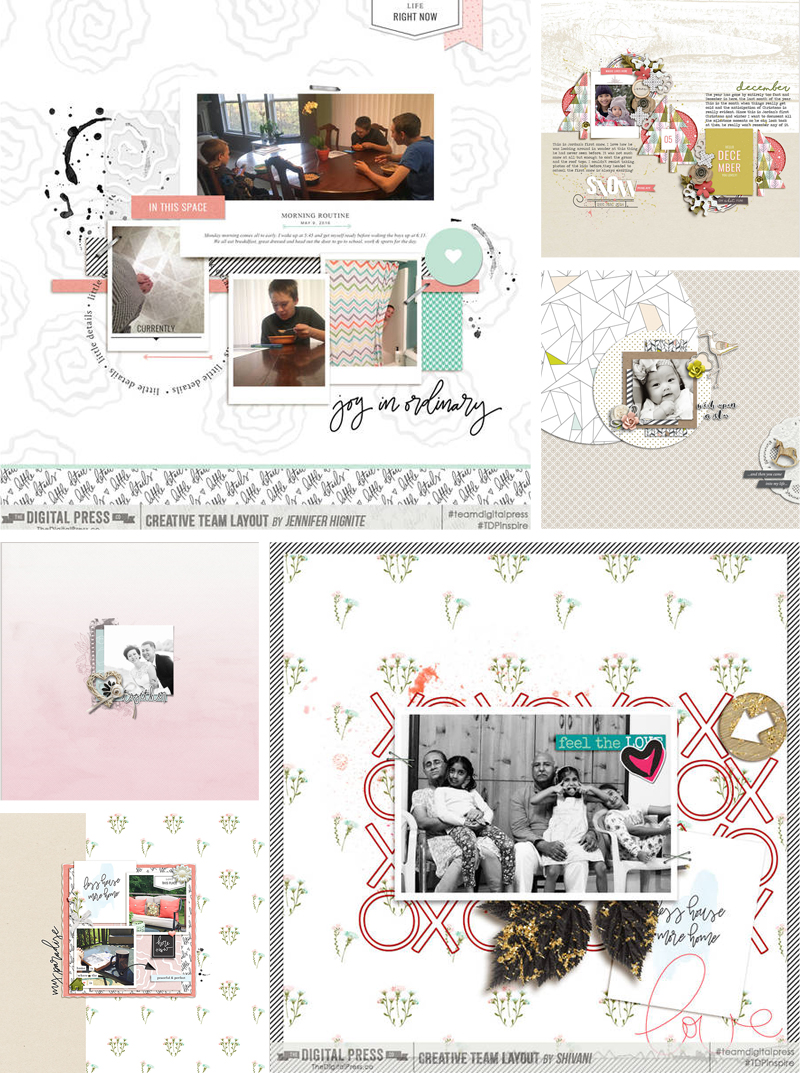
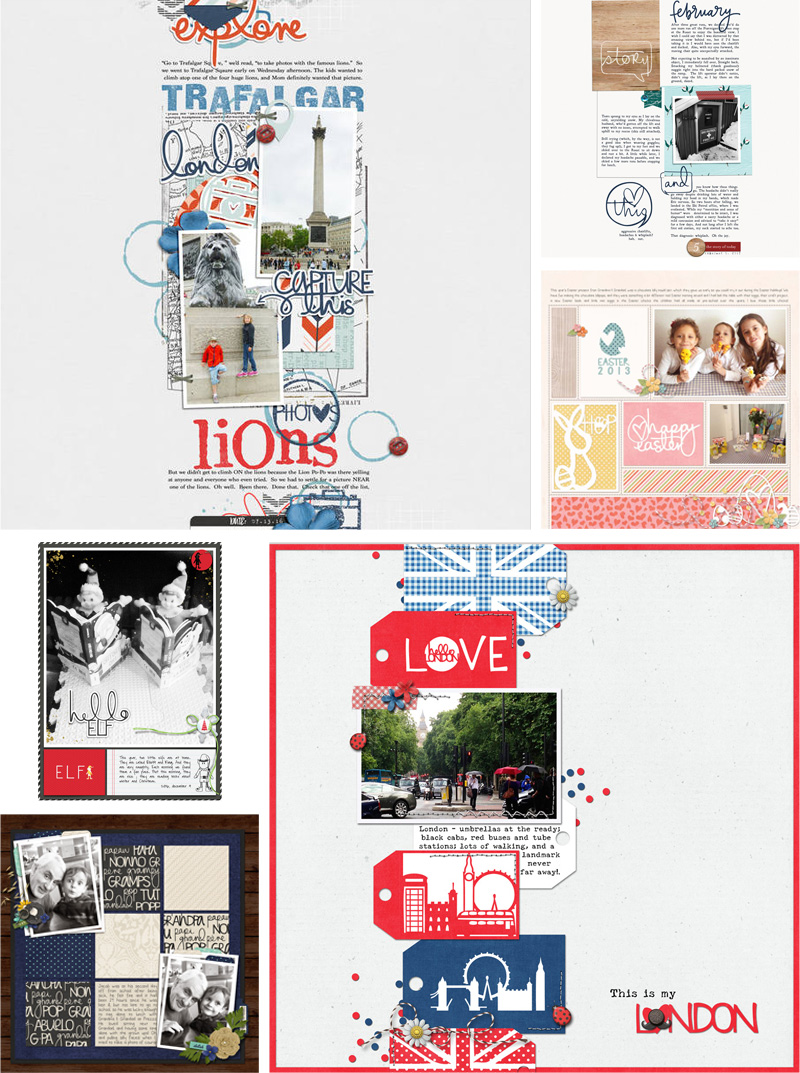
Here are some crafty projects that were made using Rachel’s creations (you can see her designs on the following layouts as stamps, stickers, word art, titles, journal/filler cards, illustration elements, and more… even repeated to make wordy papers, at lower-left… so many fun options!)…

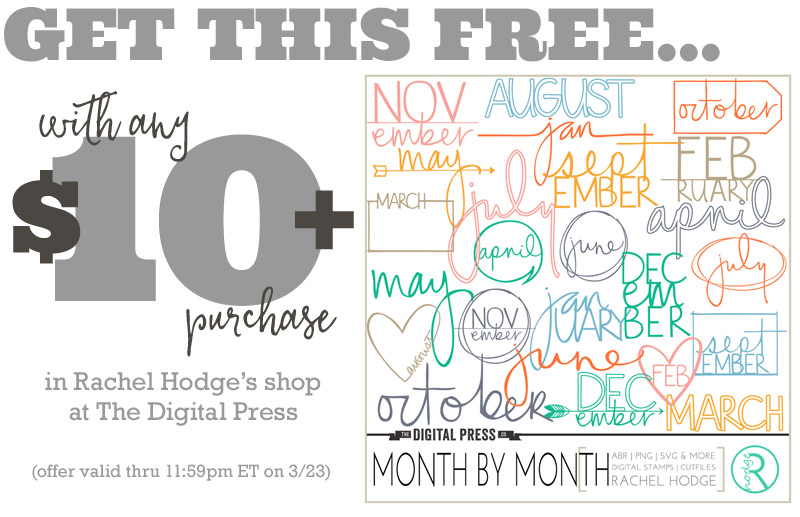
I hope you have enjoyed seeing her workspace, as well as finding out a little more about her creative process. To celebrate her feature week, her entire shop at The Digital Press will be 30% OFF all week long (sale ends at 11:59pm ET on Thursday 3/23)… so if you’ve got any of her products on your TDP wish-list, now’s a great time to clear them off!

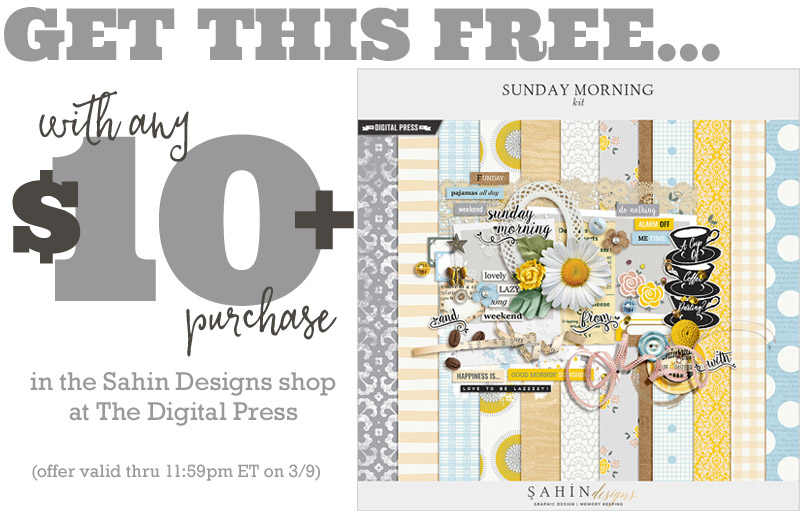
Additionally, Rachel has a special Free-With-Purchase offer for everyone this week! Don’t miss out on this opportunity to stock up on your favorite products from Rachel Hodge , and you can snag her brand-new “Month by Month” Set for FREE with any $10+ purchase in her shop — this week only!


CorrinAbout the Author  Corrin is on the creative team here at The Digital Press. She is a fan of the Big Bang Theory and a lover of cozy pajamas. She lives in the breezy South of England with her husband and 4 crazy kids, who regularly discover & plunder her secret chocolate stashes! She is still trying to get the house straight after moving 3 years ago. Who knows… maybe this will be the year she reaches the bottom of the laundry pile!

Tutorial Tuesday | Quick & Easy Photo Collage in Lightroom

I love creating pocket pages, and I just recently discovered that I could quickly and easily create photo collages in Lightroom to use on my layouts. It’s a fantastic time-saver, and I’m here today to show you how to do it, too!

First, I collect all the papers and photos that I want to use in my collage, and place them in a single folder on my computer’s desktop.

Next, I import all these files into Lightroom. For my example, I chose to only use patterned paper… but you could use journal cards, too!

Next, I went to the Print Panel. You can see that I have a bunch of pre-made templates (the best thing is that I found them free on the web, but you can also create your own)! These templates can be edited to fit your needs or you can create your own!

In the Print Job drop-down area, input the dimensions you like. In this example, I chose 9″ x 8″ for my size. In the Print To field, make sure it says JPEG file and that the file resolution is set to 300ppi.

In the Cells drop-down area, I edited one of the sizes in the Add to Package area to 4″ x 3″ (the size of most journaling cards).

Then I added six 4″ x 3″ boxes to my photo collage by continually clicking on the 4″ x 3″…

Next, I added the photos and paper I wanted to use simply by clicking and dragging the photos and paper onto the collage…

And finally, here is a look at my finished photo collage.

I clicked on Print to File in the lower right hand corner and saved my collage…

Then, I opened up my collage image in Photoshop to complete my Pocket Page with some embellishments/etc…

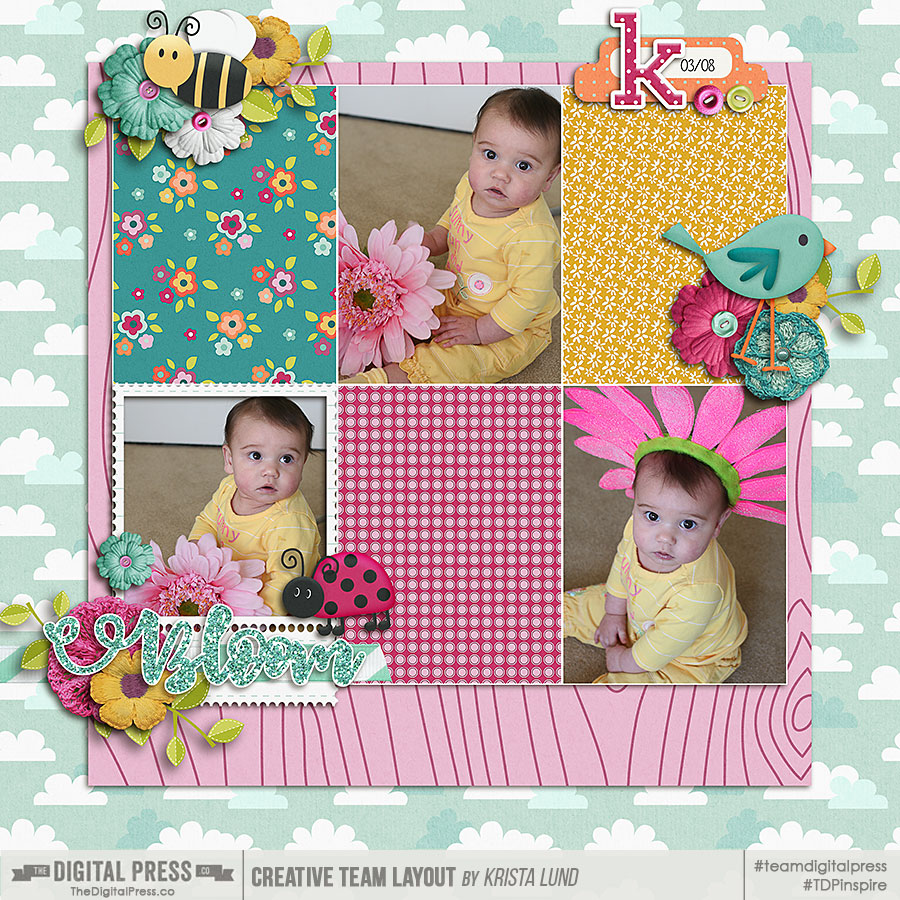
[ products used –My Garden elements, papers, and extra papers by Meagan’s Creations ]

And that’s it! It’s so simple… and such a great time-saver. 🙂


Krista


About the Author  Krista Lund is a mom of 3, married to her high school sweetheart and living in the San Francisco Bay Area. Some of her favorite things are brownies, chips ‘n’ dip, taking pictures, and documenting her family’s story.

Feature Friday | Juno Designs

Hello, everyone, and welcome to another edition of our Feature Friday series here on The Digital Press blog!

This week, I’m very happy to be highlighting the amazingly talented Jill of Juno Designs. This is Jill’s second feature here on the blog (you can find her first feature from September 2016 HERE)… and whereas last year we used our feature series to help you get to know some fun trivia about your favorite designers — this year, we’re going to use our designer feature series to give you a little peek into our designers’ creative spaces and more insight into their creative processes.

Jill lives in the Netherlands with her boyfriend and their 2 pet rabbits. About her job as a designer, she says, “I feel very lucky to spend my time doing what I love
most. If I’m not designing, I like to work on my Project Life album or the occasional 12×12 layout. I also enjoy being outside, going for walks, or geocaching if the weather allows it. But since it rains more often than not here in Holland, I love watching Netflix and reading, as well.”

Here’s a look at Jill’s creative space, where she works her design magic:…

Here’s what she says about her workspace: “At the moment, my workspace isn’t anything special. I recently moved in with my boyfriend and we don’t have a spare room for my office yet, so I have a desk in the corner of the living room. We are planning to move house in the near future, so I’m keeping my fingers crossed for extra space. But I like my little corner of the room. I love my cute little pen holder and I always have a few bowls filled with labels, die cuts and wood veneers on my desk. I feel like it helps keep me inspired and reminds me to keep up with my Project Life album as well (which can be a problem sometimes LOL).”

What a beautiful space! And did you see that adorable owl pen holder? Could it be any cuter?

We asked Jill to provide us with a Top 5 List that is representative of her at this point in her life… and she chose to share 5 things she currently loves.

Jill’s Top 5 “Things I Currently Love”…

  1. Project Life. I fell off the wagon last year, but I’m determined to finish an album for this year.
  2. Binge-watching Netflix. My boyfriend and I are currently watching Breaking Bad.
  3. Anything Copper and/or Rose Gold. Jewelry or homeware… I want it all! LOL
  4. Tea. I drink a lot of tea, and mint tea is my favorite.
  5. Books. I’ve always loved books. Buying, collecting, and reading them.

I don’t know about you, but I can sooooo relate to her choices (especially #2 and #5)!

Jill has an amazing, realistic, and paper-like design style. She uses bright colors, gold, and glitter like nobody else… and even though her kits are often themed, they are super versatile and can be used for any type of page!

Here are just a few of my favorite products from the Juno Designs shop at The Digital Press…

As mentioned above, Juno Designs’ kits are super versatile and allow users to create anything they can imagine — from minimalistic layouts to pages that are full of clustery awesomeness; from traditional 12×12 pages to pocket pages; and more!

Here, you can see just a teeny tiny sampling of layouts (in many styles!) that have been created with Jill’s products…

I hope you enjoyed learning a little bit more about Jill’s workspace, her creative process, and also discovering her amazing products! And as if all of this fun info wasn’t enough… the entire Juno Designs shop will be 30% OFF throughout her feature week (the sale ends at 11:59pm ET on Thursday 3/16), including her newest releases!

Additionally, Jill has a special Free-With-Purchase offer for everyone this week! Don’t miss out on this opportunity to stock up on your favorite wish-listed products from Jill… and you can also snag her “Lucky In Love” Kit for FREE with any $10+ purchase in her shop — this week only!


ChloéAbout the author  Chloé is in charge of PR and communication for her small town by day, is a digiscrapper “by night,” and a photographer whenever the light is beautiful. She lives with her man and fur-babies in a small town of Alsace (in the northeast of France), where she loves to read, watch good TV shows (TWD being her absolute favorite), and just hang out with her friends — no matter if they are close by, online, or away in her Swiss hometown. She recently became quite obsessed with Bullet Journaling, Miracle Morning and Zero Waste.

Tutorial Tuesday | Creating Your Own Shadow Styles

Today I’m here to help teach you how to create your own shadow styles, save them to your computer, and use them again in the future. Such a time saver!

As we develop our scrapbooking craft, the tips and techniques we learn along the way help us to work faster — and processes get easier. That’s the goal, right?  When we’re itching to create, we don’t want anything standing in our way — not laundry, cooking, grocery shopping, work, or a commute. Nothing. We want to scrap. Period. 🙂 Anything we can do to speed up the process of creating, especially when the mojo is flowing, is welcomed!

With that in mind, I wanted to show you a quick and easy way to add shadows to your layouts — and also save those shadow styles for repeated use in the future. It’s easier than you might think!

When I was first exploring digital scrapbooking, shadows (and the process of shadowing things in Photoshop/etc.) used to scare me. Let’s be honest… it’s a little intimidating for a beginner! Some designers here at The Digital Press offer shadow styles for sale in the shop… with the idea being that you can install the styles on your computer, and then with a few simple clicks of the mouse, voila! Instant shadows! Super time-saver.

For myself, now that I am almost 15 years down the digital road… I find that I’ve developed my own “shadowing style” over time — it is personal to me, based on my own preferences about how things should look. The trouble is… it often takes a lot of time to customize shadows over and over. For instance — I might find myself applying a particular shadow depth for some items, a specific shade of brown (instead of the default black), a certain blending mode, and even specific changes to the opacity of the shadows. On a good week, I can scrap five pages or more… but that’s a lot of added shadow work! So the idea of being able to quickly click-and-apply my own shadow styles was very appealing.

To take a look at how this works… let’s start with an unshadowed version of a page I created for this month’s scraplift challenge (I’ve deliberately left my shadowing off this copy of the page so I can walk you through the quick steps for creating — and using — your own, personalized shadow styles)…

As you can see, with regard to what needs to be shadowed — I’ve got some large flowers and some small flowers, a piece of flair, some papers, some thick and thin string elements, and even a small crotchet piece. Each item needs its own shadow, and based on my preferences… each of these items would be treated a little differently.

Let’s take a look at the large yellow flower and start there.

Click on the “fx” button at the bottom of your Layers Palette and select Drop Shadow …or use the menus and go to Layer > Layer Style > Drop Shadow. Either one will give you a pop-up menu in which to create your shadow. As you can see, I like a large, feathered shadow for my  larger flowers (or similarly-sized elements). Oh, and in case you’d like to know, my “brown” color is #30200E.

See the difference on the yellow flower (lower-right corner) now?

Once you have the foundation of your shadow set, instead of hitting that “OK” button… click “New Style” instead. Give the style a name you’ll easily remember, and now click “OK.” How easy was that?! You’ve just created your own, personalized shadow style! Repeat this step for each of the different design elements.

But how do you actually use these styles once you’ve created them?

If you don’t see the Styles palette in your workspace, go to Windows > Styles. When this panel first opens, you might see something like this – but don’t panic! (and please don’t judge, haha! …I have a lot of styles in Photoshop!)…

You’re probably wondering how on earth are you supposed to find the styles that you just created for yourself? I’ll give you two tips that will help:

  1. You can change the “view” for the palette to something that’s much more manageable. In the upper right-hand corner of the Style box, there’s a drop-down menu button — click on that. I like “Small List” or “Large List” as my preferred viewing format as it gives me both the display icon and the text label, like Large Flower.
  2. As you create or add styles, they will be at the bottom of your list; they append each time. Scroll down.

To apply your new styles, click on the element layer to make it active, and then click on the appropriate style. See? Two clicks of the mouse and you are done! You can even select multiple layers by holding down the Shift key and then apply a single style to them all at once (which is very handy when you’ve got a lot of paper layers, or if your scrapbooking style includes a lot of clustering).

Remember the non-shadowed page that I started with (see above)? By using my own custom styles, I was able to shadow the entire layout in a matter of just minutes — seriously, minutes! (even with further customizing a shadow or two)…

[ Credits: I Can Do This | March 2017 Collaboration kit from the designers at The Digital Press ]


If you’re in a time-crunch, or you just find yourself repeating the same steps over and over again while shadowing your scrapbook pages… creating your own personalize styles might just be the short-cut you are looking for! Easy to create. Easy to use. What more could you ask for? 🙂


KatAbout the Author  Kat Hansen is a creative team member here at The Digital Press. A Director of Human Resources by day, she loves the opportunity to spend a few hours each evening being creative. Vacation memories feature pretty heavily in Kat’s scrapbooking pages, as do her son and “daughter” (of the four-legged furry kind). Kat has quite the sense of humor (she “blames” her father for this), which she incorporates into her journaling and memory-keeping.

Hybrid How-To | Create A Robot Party Favor

Hello everyone! It’s Tanya here for this week’s Hybrid How-To… to show you how to make a fun and easy robot party favor! 🙂

The minute I saw this adorable new Automated | Kit by Laura Passage, I knew I had to do something with it. My friends ask me all the time, “why do you make all these wonderful things and you don’t even have small children?” Want to know why?! It’s because I looooove hybrid crafting and sharing those craft ideas with you. I always hope that it will inspire you to take a shot at hybrid crafting and create something fun.

I don’t think Robot party favors were Laura’s original idea for the kit, but that is one on the reasons I love hybrid crafting… there can be soooo many uses for a single kit!

I used my Silhouette Cameo for this project… mainly because I’m spoiled by it! There are other ways to achieve the same results, however, and you don’t need a cutting machine in order to do this project.

To begin, you will need to separate the pieces of each robot so that you will be able to cut each different piece of the “puzzle.” To do this, open the element you want to use and copy it a couple of times (I do this just in case I need to go back to the original for any reason). Next go to trace, uncheck the high pass filter and then select trace and detach. As you move the threshold slider to the right, you can see the parts that will detach (highlighted yellow in the image, below). I will do this a couple of times, each time moving the slider to highlight more of the image to detach.

In this next image, you can see the other part of the image that will detach…

To get the rectangle (shown below, circled), I simply picked the rectangle tool and drew it out to the size I needed…

Next, you can see how I organized all my pieces on the mat (this is also how I will set up my scrap pieces of card stock when I actually cut with my machine)

Don’t forget to turn on the cut lines, as shown here…

For the base piece, I opened the trace image box and chose the trace outline box

The neat thing about using card stock (as opposed to printing and cutting using digital papers/patterns) is that you can use up all your old paper scraps. As you can see, below, I actually chose the colors that were in the kit… but you can use any color scraps you have on hand. You can see here that I was able to put five different colors on the mat at the same time… and boy, is this a time saver! (also, if you scroll up, 2 images above, you can see how the paper scraps in this next image match the layout of images I created in the software).

Here’s a look at all of the pieces, once I removed the excess cardstock…

As you can see in the next image, I actually had to re-cut a few pieces because my calculations were off. Oops! (not that I really calculated anything; I eyeballed it!)…

And finally, once you have all of the separate parts cut out… you will simply group them together to put into a cellophane bag (for the end-users to be able to assemble and create their own robots!)…

Here are the tags I created to tie to the gift bags…

And that’s it! A ready-made party favor to send with your guests, so they can go home and assemble their own robots. So much fun!

I hope that you have enjoyed today’s Hybrid How-To here on The Digital Press’s blog. Now it’s your turn to create something fun (with or without a cutting machine)! If you would like to earn points toward TDP’s monthly challenge system, visit the corresponding monthly Hybrid Challenge in the forum’s CROSSWORD SECTION (you’ll find it stickied up near the top during March 2017). We’d love to see your creations!


Tanya

About the Author  Tanya is a part of the hybrid team here at The Digital Press. She has been hybrid crafting for at least 14 years now, and loves creating and sharing those creations with others. Her all-time favorite tool is her Silhouette Cameo. She has been married for 28 years to her high school sweetheart, Richard and has two sons: Chris, 25 and Chance, 20. She also enjoys crocheting, photography and woodworking

Feature Friday | Sahin Designs

It’s Friday, and time for another Feature Friday post. I am so excited to bring you more about Elif of Sahin Designs! Elif is a 25-year old graphic designer from Turkey, and this is her second feature at TDP (you can find her first feature from July 2016 HERE)… and whereas last year we used our feature series to help you get to know some fun trivia about your favorite designers — this year, we’re using our designer feature series to give you a little peek into our designers’ creative spaces, and more insight into their creative processes.

Here is a peek at Elif’s super clean, simple, and modern creative space…

About her space, Elif says, “I love having small dishes on my desk to put my wood chips and excess label prints in. They remind me that I should take a break from the work and do some crafting! And let’s be honest, they are also very cute to look at (can’t resist wood)! I also love that I turned my desk to a white space. It really keeps me focused on what I am working on, and white brightens my soul. And I can’t do without my little “office-assistant”…the blue chimp (which was a gift from Mailchimp) adds that childish joy to my working space and indeed helps me out with a very important job: holding the charger cable. You can’t imagine how important that job is!”

We also asked Elif to share a Top 5 list with us that is representative of herself and her life right now… and she gave us a list of her Top 5 Current Favorite Things

  1. Organization“I can’t stress enough the importance of organization in my life. I am a multi-focused person that I love to work on handful of things. The negative side of having different interests all at the same time is not having the time to fully complete one of these works. And it’s a real challenge for me to keep focused and get the job done! On top of my design life I have an MS degree to complete, which makes everything complicated. So organization is the key to do all these things together and trying to improve my organization skills is my number one priority at this time.”
  2. Breaking the habits — “When you love your job, there is no force on earth that can keep you from doing it! I love my job and I’m a workaholic. Can you blame me? Designing was my dream job, but I know it has to have limits. So breaking the bad habits — like over-working myself — is one of the things I am working on. In this breaking-the-bad-habits list there is also drinking water, exercising regularly, and giving myself some “me” time.”
  3. White-Gold“My latest and greatest favorite color combination of all time!”
  4. Illustration & Calligraphy“These are the things I try to develop my skills about at the moment, and I am crazy about both.”
  5. Family“This year was a tough one for my family; health problems, unexpected events, promises and future plans… all made us closer and united more than ever before and I am grateful for the improved relations & connections in the family.”


Overall, Elif defines herself as a graphic designer because has interests in every aspect of design, not solely scrapbooking. Her design style is minimal and modern with a tiny touch of eclecticism. She believes that quality of a finished product is more important than the quantity, and when she designs scrapbook goodies she sticks to the basics and focuses on how each collection could be used to make an outstanding scrapbook layout. Her products are versatile and easily lend themselves to digital layouts or hybrid projects, and she is especially adept at putting together interesting color palettes.

Here are some of my favorite products by Sahin Designs (it was hard to choose just a few!)…

And here is a look at just a few stunning pages that use Elif’s gorgeous products…

I hope you’ve enjoyed learning more about Elif Sahin. To celebrate her week as our Featured Designer at the digital press, the entire Sahin Designs store will be 30% OFF all week long (the sale will end at 11:59 ET on Thursday 3/9).

Additionally, Elif has a special Free-with-Purchase offer for everyone this week! Don’t miss out on this opportunity to stock up on your favorite products from Sahin Designs… and you can snag her gorgeous “Sunday Morning” Kit for FREE with any $10+ purchase — this week only!


Headshots Hartford0828-Edit

About the Author  Celeste has been married to her college sweetheart, Terry, for 20 years. They have  two teenage boys, Adam and Sam. They keep her busy chauffeuring them to and from clubs, scouts, band practices, and other activities. Celeste works full-time in the Insurance industry, and her days are filled with numbers… so she fills her evenings with patterned paper and design! Celeste is a self-proclaimed “crazy cat lady.” She lives with two male brown tabbys, Milo & Gibby, and a gorgeous, long-haired calico named Girlie. In her spare time, she reads on average 50 novels a year and watches far too much junk on television.

Save

Save

Save

Save

Save

Save

Save

Save

Save